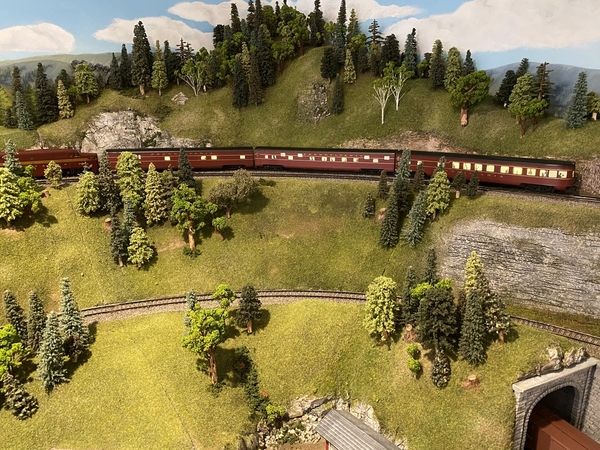
Picked these up at the S Spree in Washington, PA yesterday. Destined to be D&H. Now I need to find the running gear, probably from an AM RS3 or FA. Let the search begin.
Replies sorted oldest to newest
Nice...who made these?
Mark in (wet) Oregon
Nice...who made these?
I'm guessing American Hi Rail although each unit has a set of brass details like Omnicon offered.
Rich
Rich,
I saw them on Alan Evens' table and too a LONG, hard look at them but decided I don't need another project! I'm 99% sure they're American Hirail, but I didn't take them out of the boxes to make sure. They're usually marked inside the shells. I'm glad they found a good home, though. As to the running gear, if you can't find any good used AM Baldwin units, just call them. I have bought complete drive trains from them and have never regretted it. Four of my projects use their products, including my latest, an AA set of DL-109s, also from American Hirail.
Keep us all in the loop, OK?
Jerry,
Looked inside both shells and there is no manufacturer identification. They did come with a modified AM chassis and a bag of brass detail parts, horns, wipers, etc. Your suggestion about contacting AM sounds like a good idea. Guess I was lucky you didn't need any more projects! In addition to the Shark project I still need to complete my Smokey Mountain Models 44 tonner in hi-rail. I also got a great deal on these at York.....
I'd been searching for a set of the AM smoothside passenger cars for a project and that was my original reason for attending the Spree as it is just under a 4hr drive each way for me but I figured that show would have a better chance of them appearing. Finding 2 sets at York for a great price was a surprise, as they usually don't appear there. I plan on painting a set in C&NW colors and the other is still up in the air. Waiting for parts to arrive to build lighting boards as per instructions by GunRunner John. Guess I'll be busy for awhile.
Rich
Attachments
Nice...who made these?
Just spoke to Alan Evans who sold the Sharks to me. He said the kits were made by Milepost 169.
Rich
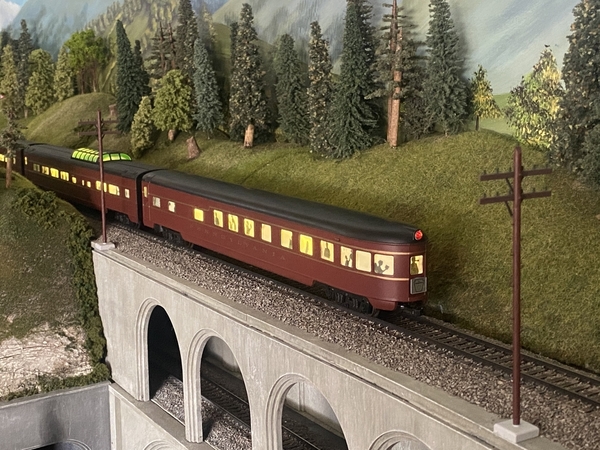
I purchased a set of those PRR lightweight 80' passenger cars about 6 months ago. Since I was not planning to add a detailed interior I just used new LED light strips from American Models. They look good on the layout and supposedly operate on 27"R curves. I have 30"R minimum curves but they look much better on the 36"R curves. I pulled them together by shortening the coupler arms and added diaphragms from the AM Budd cars.
Attachments
I purchased a set of those PRR lightweight 80' passenger cars about 6 months ago. Since I was not planning to add a detailed interior I just used new LED light strips from American Models. They look good on the layout and supposedly operate on 27"R curves. I have 30"R minimum curves but they look much better on the 36"R curves. I pulled them together by shortening the coupler arms and added diaphragms from the AM Budd cars.
Tom
Looks good!
Rich
Thanks for the comments. I am looking forward to seeing these in C&NW livery.
Here are two more pictures. One is three of the cars behind an AM PA/PA set on a 34”R curve. The other is the tail after addition of a red lens, PRR Drumhead and a scale coupler. They would look better with interiors but that was a much bigger project than I was willing to take on.
Attachments
Hi to all. Any information on how to contact maker of these shark nose shells. I would love to have a pair. Thanks
@AmFlyer posted:I purchased a set of those PRR lightweight 80' passenger cars about 6 months ago. Since I was not planning to add a detailed interior I just used new LED light strips from American Models. They look good on the layout and supposedly operate on 27"R curves. I have 30"R minimum curves but they look much better on the 36"R curves. I pulled them together by shortening the coupler arms and added diaphragms from the AM Budd cars.
Hi Tom,
Curious about your coupler shortening and min radius. I have the same cars and I use body mounted Kadee #5s. The cars will track my 33” radius, but they don’t like it -- meaning sometimes they don’t. I haven’t really explored what is happening and the last time I ran them was before my turnout business… like 2004, so I don’t remember any of the details. I’m guessing you shortened the talgo (truck mounted) couplers. With the Budd diaphragms in place, I am surprised they don’t cause a problem on your smaller radii. Looks really great and is something I might do some day.
Tom Stoltz
in Maine
Hi Tom. When I got the scale length lightweights they looked terrible on the track with the large gaps. On those early AM cars a separate coupler arm is just glued to a blind arm that is part of the truck. It was easy to break the glue joint. Testing how much I could shorten the gap it looked like somewhere between 3/16" and 1/4" for each coupler would work. I proceeded to modify the cars and all worked on my 30" minimum radius curves but they still lacked something. After comparing the ends of the Budd cars and the lightweights I ordered the diaphragms from AM. The mounting tabs and pins were ground off, then painted and glued the diaphragms to the car ends. They were a perfect fit.
To keep them working on 30" curves I still use the truck mounted knuckle couplers but on the much shorter arms. The bulky coupler is now hidden under the car ends and is not visible when the train is running. below is a downward looking picture showing how little of the KC projects past the car end.
This mod worked out so well I did similar modifications to all my AM heavyweights as well, not including the diaphragms.
I played around briefly with using scale couplers on the AM 80' heavyweights coupled to the standard 70' heavyweights. The cars would couple on a 30"R curve but would not go through the straight to curve transition. If I carefully formed a 20" long easement with flex track they would work. I am staying with the KC's.
Attachments
Finally got the AM lightweights painted in C&NW. Before paint application I made up 10 of Gunrunner John's constant lighting adjustable PCBs to power up LED strip lights. (thanks for the help John) I also installed red LEDs on the observation cars.
Weights were added for better tracking. Used 5 of the units for the Pennsy lightweights and the rest for C&NW.
Although not prototypical, (C&NW never had a standard Vista and usually removed the lower skirts in lightweights) I tried to match numbering and markings as best as possible. I think it makes a pretty good looking passenger setup. On to another project!
Rich
Attachments
That paint job looks great.
Finally! I just completed the Baldwin shark project. Not as easy as I had hoped and along with the usual distractions, kind of stretched out the completion. To start, the chassis supplied with the kits were AM FP7's which turned out to be the right overall size but the front truck location was off. Over time I had picked up 2 AM FA's for the trucks in preparation to be used in the FP chassis and lo and behold they were a perfect fit. The paint and striping was kind of intricate and wound up being a combination of decals and paint. Decals were a combo of various D&H schemes from Des Plaines Hobbies. Paint was another story as I dislike acrylics, my usual Floquil is no more, so I wound up using Tru color which doesn't seem to jam my airbrush as much as acrylics. I'm satisfied with the job and on th the next project!
Rich
Attachments
The work was worth it, Rich! It's nice to see a distinctive diesel that is unusual in S scale and in a beautiful paint scheme, too.
Terry O'Kelly
Looks good!
This is the 2nd set of Sharks that I have purchased. The set I have in Milwaukee Road colors is a different manufacturer shell than the set in D&H colors. The MR set is a more refined casting with some molded in handrails and a smoother overall finish. The D&H Milepost 169 shells are a resin casting with a rougher finish and less finite detail. The added details were brass casting included in the kit. I never knew that there were more than one manufacturer of RF16 shells in plastic/resin.
Rich
Completion of 2 more projects! Alway liked the Western Maryland paint scheme especially the so called "circus scheme". I picked up an AM FA and went to work. Decals were not easy as most WM decals available are for the Fireball scheme. Found a few "S" size decals and along with some "O" and "HO" and was able to coddle together some of each to fit.
Adding the yellow handrails highlighted the colorful scheme. While I was at it I concocted some flatcar loads after seeing an article in the NASG Dispatch. I had a few junker pikemaster flatcars, replaced the trucks with Lionel sets off the cylindrical hoppers and painted one. The other was from a broken searchlight car. I used bottlecaps glued together from soft drink bottles with a nail to represent a shaft of a generator or electric motor. I modified a piece of basswood to act as a cradle for shipment. Not exactly prototypical but good enough for Govt work.
Now on to fix this which has the intermittent running problem.
Rich
Attachments
You do very good work!
Regarding the flat cars, I see you installed the Lionel 6-49081 70 ton roller bearing trucks. I am in the process of converting most of the Lionel S gauge cars on my layout to these trucks. They work far better than the factory trucks plus the cars couple much closer together. As an example, the gap between boxcars with factory trucks is 14/16" (7/8"). With the replacement trucks the gap is only 9/16". Both the appearance and operation are improved.
Good luck with the ES44Ac. If you have not already done so, take a look at the fix for the SD70ACe power pickup on tuveson.com. I believe the latest run of ES44Ac's share the same design.
Tom,
Thanks.
This lists as a 2020, one of the last group. Just finished some work on it and yet to test it. Had a no smoke fan condition but looked like smoke being generated. Had this problem with one before and turned out to be a bad plug connection to the fan/heater assembly. A little dielectric grease on the pins and that one came to life. Tested the fan on this one and ran good so hopefully the grease trick will work. Since this is the latest version of the ES44, I found there are NO springs in the axle assemblies. Strictly friction. The setup is similar to AM square bearing diesels. A little of OX-Guard antioxidant in the bearing pocket and retainer flanges will hopefully restore conductivity.
Rich
I hope it works, that is a straightforward fix.
Tom,
Well, that didn't work. The antioxidant doesn't appear to have helped. Upon further review it appears the stoppage is due to the gapping of the 2 non traction equipped axles. Traction tires/axles are on the innermost position on both of the trucks adjacent to the fuel tank. The engine stalls or loses sound on the gap between the diversion point on the inside of the straight/turn rail and the entrance to that point on American Models switches. There is no problem on my other ES44's or SD70's that have the same wheel setup. The only thing different is their axles are sprung. To the naked eye, the wheels are right on the edge of making the gap. Direction is immaterial. I switched the traction axle to the middle on the front truck and it ran perfectly thru the switch and stalled when the rear truck hit the spot. The rear truck is a different story as the traction axle has a plastic collar around the axle shaft that prevents it from fitting in the middle slot. Can't see any reason for the difference. According to Lionel's parts site all of the SD70's and ES44's use the same trucks and the front and rear are different numbers. Individual wheelsets are not available. I'll probably wait for the 50% off sale as the trucks are $60 ea.
The smoke unit volume wasn't set so I changed it to medium and tuned on the smoke option. Fan ok and the volume of air blown by the fan was toasty but no smoke. I'm thinking the batting is burned and needs replacement.
Rich
I do not have any engines with that truck to experiment on. Ox Gard is not a lubricant, so while it is conductive it is designed to stick in place to prevent moisture and air contact with the conductors under it. Works great on track pins, the brass contacts under 720A turnouts, 690 track clips etc.
If you really want to to experiment with conductive lubricating grease, the MG Chemicals silver infused grease is what is needed. It is very expensive but only the tiniest amount is used, It spreads around and coats all the surfaces it contacts. It is possible to cause a short in 2 rail trucks if too much is used, trust me, I did it.
Attachments
Tom,
Thanks for the info. I'm thinking the wheel spacing is the reason for the stalling. I'm noticing small arcing marks on the wheel surfaces. I just need to solve the problem of the rear truck switch. It may come to replacing the traction axle with a normal wheelset when I can obtain one. Since none of my older ES44's have the same problem, the only difference is the lack of springs. I removed the bottom cover from an older ES44 to check for the plastic collar on the rear truck (same setup) and there is a noticeable difference reinstalling the bottom cover as it seems the wheel sets need to be pushed down by the cover in order to run the screws all the way down.
Rich
Update. At the suggestion of Carl Tuveson, I applied a straight edge across the 3 wheelsets on the rear truck and the middle set was about .50mm low compared to the outside sets. He suggested shimming the low axle to correct the problem. I made a few shims from some .42mm brass stock as that was the only size close that I had. Problem solved. I tried the shimming the front truck also but experienced stalling/loss of sound on a straightaway. Went back to the swapped wheelsets on the front truck and no stalling. There appears to be a slight belly on the straight section. I'm guessing I need a slightly thicker shim to correct the problem.
Rich
My reaction is how could Lionel approve manufacture of trucks that are .5mm off. Doubt the design was for center wheels that do not touch the track.
It all started with the SD 70's, middle axle NEVER touched the track
Bob G.
Well I took apart the smoke unit and the batting looks normal and wet and the resistor unburnt and normal. I tried adjusting the smoke level with the Cab2 controller per the TMCC instructions (aux1, aux2, 9, m, aux2) to no avail. The included booklet only lists commands for TMCC, not Legacy. All I get is a running fan pushing warm air and no smoke. Unlike the older Legacy engines with the included module, the later engines do not display symbols on the Cab2. Any ideas besides sending it back to Lionel?
Rich
Something is not right if you have programmed the engine into the Cab 2 but no symbols show up on the screen. When I get a new Legacy engine I put the switch in Program mode, set the engine number, then slide the switch back to Run. To program the specific engine characteristics into the Legacy system I just run it over a Sensor Track to put in all the data. For newer engines, such as my Legacy Berkshires, it can be done automatically without a Sensor Track. After setting the new engine ID number, select that number on the Cab2, press the Startup button and all the engine data should self populate. The correct Icons should then show on the Cab 2 keys. The Cab2 needs to be programmed for the correct Legacy engine prior to diagnosing the smoke unit. However, the fan should not be running when the smoke unit is turned off.
Tom,
The fan is not running when the switch is set to no smoke. None of my SD70/ES44's came with the module that used to accompany Legacy engines. All 4 were programmed per the instructions included in the booklet. None of the engines display any icons after start up, 0 thru 9 only. 42521 SD70 EL heritage yr 2012, 42544 ES44 Conrail yr 2013/14, 48175 SD70 D&RGW yr 2012/13, 2021091 ES44 NS yr 2020. If I recall correctly, some my older Legacy steam/diesels that came with modules display the icons. I need to find the correct command to modulate the smoke output without the icons.
Rich
Rich, I have a couple of those engines. When I select one on the Cab2 all the correct options are displayed. Is Legacy entered as the operating mode? If not the icons will not be correct for a legacy engine.
Tom,
Never saw this option in any programing or instructions. Where does it appear?
Rich
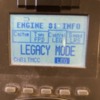
Here are pictures of my Cab2 with an ES44AC, engine 81, selected. The first picture shows the operating screens, the second is after one push of the INFO button. The remaining pictures are screens accessesd with pushes of the SCROLL button. The choices that can be selected are along the bottom line. Selected are Flyer Pullmor Diesel, Legacy, Legacy RS. Push the CTC button to return to the operating screens.
The Sensor Track enters all this data for me so I have not used these screens in a long time.
Attachments
Pleased to be able to help, Rich. I like that L&N RS3. The paint scheme is attractive and it is not common on S gauge layouts.
Tom,
I'm going to do another L&N scheme when I get another RS3. They had a BAR blue scheme with a yellow band and yellow lettering on a few units. Looks pretty colorful.
Rich


