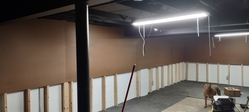
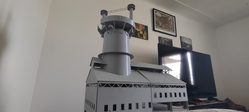
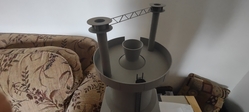
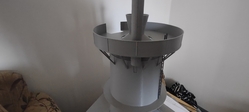
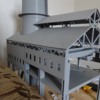
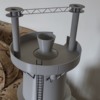
The masonite is mostly up. I went crooked somewhere and had to go back and redo some. That helped but I ended up with a giant gap toward the one end. Very strange haha But I ran out of gas and called it a night. I'll deal with it tomorrow or when I work on things next.

I drove the screw heads in below the surface so I can fill it in with drywall putty and sand it nice and smooth. I hope that works!

IMG_20220108_202641208IMG_20220108_202706093

Arlo was not impressed with the progress. He wanted to go outside because I had lost track of time and we were an hour overdue haha no accidents were had. But he will not sit next to me on the couch

Attachments

Images (2)
  • IMG_20220108_202641208
  • IMG_20220108_202706093

Bill, good progress on the backdrop walls.  Arlo sure looks like a dog, but his personality this evening sounds more like that of a cat.   And by the way, please don't let him read this, he might be insulted.

We used to have a dog with a similar personality.  He would pout and not even look at us for a few hours if his dinner was more than a little late, even after being fed.  I love dogs.

Last edited by SteveH

He's the first dog I ever had and I wasn't expecting him to have such strong opinions! @SteveH And I didn't know dogs could keep time so close and tell the difference between a the crinkling of bags that have treats compared to just a bag of tortilla chips. They're something else!

Does anybody know what surface murals are best painted on? I have decided that I do want to run my open hearth into the wall and have a mural painted to make it look like it keeps going. It would be on the wall in the second pic where the masonite isn't hung yet. Should I hang the masonite or is plywood the right move here?

I don't actually know how the younger me arrived at the name "Norgeville" @Scotie. I'm using it now since I couldn't come up with anything else but I have been kicking around changing the name to Newport. Newport was a small village between Struthers and Lowellville. It was bought and up bulldozed to become what would be the P&LE humpyard (I think the Gateway yard). This would have happened in the 1880s or so I think. I never knew the place existed until I was skimming an 1874 atlas. Pretty cool! Since my model railroad is based on an alternative fictional history, it might make sense to name it after a town that existed but it somewhat mythical.

Bill, it can also lay flat and cover the corner. You can adjust the angle accordingly. In the long run it will help to enhance the depth perception.

That's the plan. I would prefer to cut down the 90 degree corner if at all possible. I'll try it once I get enough track to layout a circle.

Like we used to say, " I needed to come back in to work, so I could get some rest!"

@Scotie I knew Norge rang a bell!  We went to Williamsburg for our honeymoon long, long ago.  Then I was laid off 4 months after we were married, and we moved from Pennsylvania to Virginia.  I worked for the power company and travelled around the state a lot.  Now we have been back in Pennsylvania for over 25 years.  Where did the time go???  They have that Norge station really looking great!!

No major update. I decided to change the name to Newport Railroad from Norgeville Railroad. Here's the story:

The village of Newport existed where the former P&LE Tower stands today at the Gateway Yard. The village was bought up and razed for industrial expansion sometime in the late 1800s I think. I know it's in the 1874 atlas of the area but I don't know the exact date. Newport is referenced in the 1874/1875 publication by the Mahoning Valley Historical society where they gathered the oldest residents of the area at the time and interviewed them. So I can't imagine it existed long beyond that. I picked Norgeville as a kid for whatever unknown reason. And while it was cool to link back to my past, I really like the idea of an alternate timeline where the village of Newport survived. It would still be a very tiny place today. Probably no more than 1000 people at most. But it's dominance in the railroading industry would be born out of access to the Mahoning Valley block coal that could be used in a blast furnace without being converted into coke first. The Mahoning Coal Railroad made its profit on this coal for many years until deposits were exhausted.

So there's the new rough history of the Newport Railroad! I'll polish it up as research continues.

The layout is moving along. I filled my gaps in the masonite and just need to sand them. I'm waiting to see if I get sick. I've been exposed to covid almost weekly since Christmas and have dodged it every time. This time, it's the guy that sits 15 feet away from me at work. This is the 18th. I was with him the 14th. I have no symptoms. We'll see what goes. I'm vaccinated and drink a small bit of my daily serving of grains or fruits every night.

I also decided to put a siding on the last corner of the layout. This would be on the lower level. I'll post a track plan when I get a draft together. Trains operating in tight quarters is very exciting to me so I think this will be a very interesting place on the layout. I'll be making use of building flats here because I won't have full use of the table. I'm leaving part of it open so I can crawl behind it in case something needs accessed further back. This will make more sense when I post the track plan.

The 2-10-10-2 came in. What a beast! I thought it was going to be a warranty claim at first because of binding in the drivers but it smoothed itself out. I do have a headlight that won't come on but I'm not concerned about it. This is my first command controlled locomotive I ever bought new and I'm impressed! I can't wait to put some weight behind it and pull some long coal drags. It's going to look awesome coming through a yard.

Yes @Mark Boyce It's now part of Struthers I think. The lines between Struthers, Lowellville, Campbell, Coitsville, and Poland Township are very complicated because Struthers was Poland Township, then purchased as a homestead, then lost, reabsorbed by Poland Township, then purchased again by the same family (Struthers), before becoming a city called Struthers. Pesky complicated pioneers doing things the complicated way! haha

The location is roughly the flat across from 3404 New Castle Rd, Lowellville, OH 44436 (Bogey's Banquet Center). The P&LE building is across the street from the center and then the flat is just east of the building where the yard was. I believe a friend told me it was Joseph Butler himself that purchased and razed the land because he had interests in P&LE. I haven't read that for myself yet but I have an original copy of his memoir. Let's hope it's in there!

The historical research you have done adds an extra dimension to the overall project. As you continue to prepare the area, you can further ponder the story line. Perhaps you can add an ancestor who started out tending the furnaces and worked his way up to plant superintendent. Not to be outdone by his brother who worked in the rail shops and became the chief mechanical officer.

Bill, I found the tower on Google Maps satellite view.  I was through there once, but it was getting dark.  Actually, I was on Rt 616.  Our older daughter went to Malone U. in Canton, and I used to drive Rt 224 through Poland.  I forget why I had veered off 224 on the return trip home to Butler.  I took 616 to 422 and over to the New Castle bypass that way.  I remember the road winding down, which had to be to the river and railroad crossing.

Anyway, I agree with Jay, that you can develop quite a history as you go along.  Yes, there is a lot that happened in Poland Township.

Last edited by Mark Boyce

@Tranquil Hollow RR I was thinking it would be cool to come up with characters. Maybe one of the characters got into a fist fight at the bar with Joseph Butler over razing Newport and the character won so Newport lived on! Haha I don't know. It definitely adds a cool element. It'll fun to embellish the tale when people visit. I love story telling and tall tales are always the best!

@Mark Boyce that would definitely be the scenic route haha but you liked passed my parents house on the way through. I drive 616 to 422 everyday for work now! Small world haha but yeah, the roads are all twisty when you get down to the river there.

Maybe I'll even do The Story of Newport one year for National Novel Writing Month one year. That's in November.

Progress has been slow. But we'll jump right in.

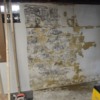
Somebody didn't paint the wall far enough out to finish the masonite for the backdrop. The original home owner put something on the walls to stop a water problem. I found an empty bottle of automotive bondo up in the ceiling rafter so I'm not sure if that's what I'm dealing with. Regardless, it didn't work. And it was coming off in patches. I scraped and wire brushed till I got all the loose stuff off. I only went over to the mint colored cabinets for the time being:

IMG_20220226_171325835


Then it's one or two coats Aqualock and one or two coats latex paint:

IMG_20220227_124830607

This is what I used in the other photos in this thread. It's held up so far. I also installed a huge french drain system in the backyard and have plans to put a sump pump in the basement. I will lose at the end of the day if it rains hard enough here. But currently my drains, paint, added swales/grading has handled a foot of water in the yard without anything coming in here. So I think we'll make it.

I also got 12 of my Akron, Canton, Youngstown MTH hoppers in. I'm one step closer to running coal drags now. Research continues on the village on the real village on Newport here so I can write a fictional backstory for my mode railroad. I also found out Solidworks has an affordable CAD program. That's installing as we speak. I have 5 years worth of CAD work done when I could get access to Solidworks or Unigraphics NX. This would let me actually work on CAD consistently! I could make faster progress on buildings and projects by 3D printing them.

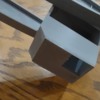
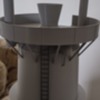
One of those projects includes an overhead crane with play value. I have a design in mind but needed a motor to move them. Then I found out good old Tamiya makes small gear box that can be geared massively. They have tiny 3V motors. @A. Wells was kind enough to send me a link to a fancy little motor controller and @G3750 had already helped me think out how the cranes should be controlled a while ago. I don't have any cranes to run yet but the gear boxes I bought and assembled have phenomenal torque and very low speeds after testing the the controllers. They will look funny mounted to the cranes but I think being able to carry lids, ladles, supplies, etc around my buildings will be completely worth the unrealistic gear boxes. It's going to be like a next level prize grabber machines but you don't win anything and you don't need any quarters I'm hoping to build operator's pulpits powered by Arduinos to run the cranes.

I also decided to go with the open benchwork style. It'll make it easier to access tracks that are in tunnels and such. I only have to put my backdrop up and the benchwork will start.

So let's hope my life stays somewhat uneventful here for a little bit so I can keep plugging away!

EDIT: I got the Solidworks for Makers program up and running. The 3D printer will be working over time once I get everything modelled!

I also attached a photo and video of the gearbox

IMG_20220227_144708797

Attachments

Images (3)
  • IMG_20220226_171325835
  • IMG_20220227_124830607
  • IMG_20220227_144708797
Videos (1)
VID_20220227_144546036
Last edited by BillYo414

Thanks @Mark Boyce. It wasn't a huge job but what a difference. I'm almost glad I made the mistake in where I painted because it forced me to get this done. The moisture seems better these days in the basement. It's a bit soggy outside though! I assume it's the same by you.

I'm excited about the fleet! That will be the longest train I ever operated when I get to that point.

Full steam ahead on the 3D printing though. I'm excited to share the model once I get it all printed and assembled.

Well I printed the crane for the cast house on my blast furnaces. I think this will be the smallest crane so I started with this one. I have to figure out how to fit three gearboxes on it so it moves in all three directions.

IMG_20220302_205610255-2IMG_20220302_205617068-2IMG_20220302_205623519-2IMG_20220302_205630139-2

It's based on an old 15 ton crane from the 1920s. I think it was a Morgan but I'm not sure. Anyway, the aim of the crane in the cast house at the Newport Iron Works is to remove the lid from the torpedo cars in inclement weather and to hoist supplies from the track below. You'll see that in pictures when those parts are assembled in the model.

I'm not sure if floor doors were common on cranes but it's going to have to work for this model I suspect. I'll change it if I can though. I would like to add some details to the cab eventually but for now, I have to figure out how to get crane rails nice and aligned so it doesn't come off the tracks. I'm considering using some rail from HO track but I'm open to other options if I think it'll help the wheels stay on better. Reaching the model is going to be tough without crawling under the layout so it has to stay on the rails.

I need to get the rest of the blast furnace printed/assembled so I can see how I'm going to put the rails on. I also need to print the trolley for the hoist.

The last coat of paint will go on the wall this weekend so I can finish putting the masonite up. Then I can order the backdrop and we are (hopefully) one step from starting benchwork

Attachments

Images (4)
  • IMG_20220302_205610255-2
  • IMG_20220302_205617068-2
  • IMG_20220302_205623519-2
  • IMG_20220302_205630139-2

Thanks Mark! I designed the crane mostly from memory as far as shape and everything and I'm pretty happy with how it came out. The original crane was all riveted construction but I didn't want to add those rivets on the print and I'm not sure if I'll add them at all because I think the crane won't be visible enough to make it worth it. I also need to figure out the block and hook. I except it won't be scale because I think a scale sized hook would be too hard to actually use. We'll see though. I might build a wooden frame for the crane to run on so I can test it easily.

I can't wait to post the blast furnace and cast house. There's a lot more parts to print though. Maybe this weekend. I also have a project to print plus I need to print the hangers for a 4" flex tube for venting the smoke. My printer is going to be working overtime haha

Excellent job on the crane. Looking forward to seeing it in action.

BTW what is Aqualock. I have a few spots in my traincave walls that seep at times. I've used moisture barrier paints that helped but still see a tad bit in a couple spots.


Edit: I figured out what Aqualock is. Just had to search differently. lol

Last edited by RJ Shier

@RJ Shier I'm not sure Aqualock is that different from Drylock. I do remember reading the can and deciding it was better for my application. I also did a coat or two of latex paint over the Aqualock. If that water comes through, then the water must have been destined for my basement haha


@Tranquil Hollow RR thank you. I'm excited to finally post some more interesting stuff!

Bill, In order to not reinvent the wheel, @Trainman2001 Myles made an excellent block and hook for his detailed engine house a couple of years ago.  He described it in his Continuing Saga  thread.  I'm hoping Myles can direct you to the right page of the discussion or at least the time frame.  100 pages in his aptly named topic is a lot to search through.  I'll do some searching myself if he doesn't get on.

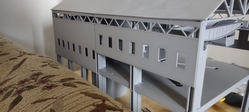
Here are some photos of the blast furnace I plan to use on the layout. There will be three on the layout if Anyrail is correct on fitting everything. All the parts are 3D printed except the ladder. More info after the pics!

IMG_20220305_110236171_HDRIMG_20220305_110244181_HDRIMG_20220305_110248576IMG_20220305_110254635IMG_20220305_110303504_HDRIMG_20220305_110312658_HDRIMG_20220305_110319788_HDRIMG_20220305_110406358IMG_20220305_110417741IMG_20220305_110420749

There's a long way to go but this is the result of years of studying photos, looking at the original blueprints from blast furnaces in Youngstown, and reading a great paper on "merchant iron furnaces". I didn't know that before mass produced steel became a thing, blast furnaces existed to make iron that was then further processed. These were apparently called "merchant iron furnaces" and they existed by themselves. It seems to me like this was 1850ish-1905ish but hopefully someone will correct me if I'm wrong.

This blast furnace is based on two furnaces in Struthers and Lowellville (Anna and Mary, respectively) that were rebuilt/built around 1900. The real ones were roughly 90 feet tall so it's within reach for us O-scalers. My furnace is close to scale. I had to shorten it a bit so it wasn't up against the ceiling. I'm very happy with how it came out. The model is loosely glued together here. The windows and opening on the wall at the top are stolen from an 1880s Republic furnace in Youngstown. I wanted to open the interior up so you could see the crane move and I found a picture with that opening toward the top of the wall. So I went with it haha I actually like how it came out.

I've been figuring out a skip hoist. I have rough sketches of the stoves and air cleaners too. The big benefit of modelling an older furnace is that it's smaller and has a lot less equipment so I won't have to worry about much beyond that. The downcomers have proved to be difficult but we'll get it. So that's going to be the blast furnaces the railroad will serve. The blast furnaces will actually sit with the cranes facing away from you. I don't have the wall on so we could see inside but there is a wall that goes on the casting floor side (away from the furnace). I'm not going to explain much more because it's just a lot to explain. In short, we'll see the skip hoist animation and high line coal/ore unloading at the cost of seeing the crane side of the furnace.

I'm headed back to the basement to finish putting up masonite so I can keep working toward starting benchwork.

Attachments

Images (10)
  • IMG_20220305_110236171_HDR
  • IMG_20220305_110244181_HDR
  • IMG_20220305_110248576
  • IMG_20220305_110254635
  • IMG_20220305_110303504_HDR
  • IMG_20220305_110312658_HDR
  • IMG_20220305_110319788_HDR
  • IMG_20220305_110406358
  • IMG_20220305_110417741
  • IMG_20220305_110420749

@RSJB18 I think Aqualock/drylock are excellent tools the in the defense of water getting in the basement. And thank you! I hope it moves one day haha

@luvindemtrains Thank you! If you need a shorter furnace, just go back in further in time haha they get smaller and smaller until they're made of stone. A lot of the extra equipment that takes up so much real estate was developed in the 1900s. The extra stuff made for a better blast furnace but is difficult as heck to model accurately. So I compromised haha

Well the fume system works. I bought a Fantech as @RSJB18 suggested on page 5. I was nervous as heck to drill through my siding but it worked just fine. I hooked it up before I started spray painting. Constantly spraying 35' of duct gave it some work to do. The smell is there but it's only in the basement. You can't smell anything upstairs. I also fired up the test layout to see if it would pull the smoke and it did. The smoke drifted over to the nearest uptake. I will need to dampen the uptake nearest the fan though. The pulling isn't so strong at the farthest uptake. The noise isn't too bad either. It faded into the background when I started two trains up at once.

That leaves the matter of 18" worth of masonite and a backdrop to hang. Then it's benchwork time.

Add Reply

Post
The Track Planning and Layout Design Forum is sponsored by

AN OGR FORUM CHARTER SPONSOR

OGR Publishing, Inc., 1310 Eastside Centre Ct, Suite 6, Mountain Home, AR 72653
800-980-OGRR (6477)
www.ogaugerr.com

×
×
×
×
Link copied to your clipboard.
×
×