Good morning all,

I am shortly commencing construction of a 24' x 14' O 3 Rail Scale layout using structural pine. I would be interested in communicating with any other forum members who live in Australia, regarding what  structural pine timber sizes they have used. There is a lot of good and useful information in Linn Westcott's Building Model Railroad Benchwork book, however all examples of construction are using dressed / planed pine which is far more expensive here in Australia. than Structural Pine which will do the same job.

Regards,

Alan Ford

Original Post

Replies sorted oldest to newest

I'm not in Australia so won't be up to speed on lumber specifics there.  For the typical layout which does not heavy loads, the strength of dressed or structural (rough) lumber would be close between similar sizes.   The benefit of using dressed lumber comes in the eveness and consistency of the material being used.

If you have the equipment and time to re work the structural lumber you could do that to straighten or resurface the material.    Structural lumber may also have its place (table legs?) where  uniform thickness would not be as critical.

Sheet goods can be cut down to create "L" girders to use for table framing too.

Andrew

@AFrame posted:


...Sheet goods can be cut down to create "L" girders to use for table framing too...

^^That's an excellent alternative.

I'm not in Australia either, so don't know the local materials, but here in the States the lumber situation is not what it was a few years ago either. Finding materials that are up to the standards in Linn Westcott's book can be challenging and pricey.  Here are a few thoughts that should apply regardless:

Moisture content is important - you don't want the framework to bend or sag with the passage of time. Moisture standards for framing lumber can vary. Be sure to allow any wood you use to acclimate indoors for several weeks before building anything.

Use the best materials you can, even if it means spending more money. Benchwork is a one-time cost - if you cut corners, you'll curse yourself forever. And the cost of lumber pales in comparison to what is spent on engines and rolling stock. Swallow hard and pay for good stuff.

You might be able to find some materials by dumpster diving at residential construction sites. You aren't likely to find full pieces, but longer offcuts can be useful.

Best of luck finding the materials and building your benchwork.

Thank you  for your reply,

Our treated structural pine here is different to rough sawn timber, it is accurately machined to metric sizes for constructing frames for house and building construction.  It has rounded corners and a lined finish similar to what you would get if you run a comb over mud or pastry. I think this is to add strength to the timber. What I would like to know is the sizes of timber/lumber you have used during O gauge layout construction, and I then can convert these dimensions to the closest metric size in structural pine. In Lynn Westcott's book, no mention of scale is made, so  I would expect that thicker lumber sizes would be required for the heavier O Gauge trains.

  I would be interested to know the sizes you and other O Modelers have used for : 

1. Girders

2. Girder Flanges for L Girder construction.

3. Joists

4. Legs

5. Leg Braces

On the subject of Cleats for attaching plywood sheets to the joists, are home made cleats a better option than readily available small Angle Brackets?

All replies appreciated,

Regards,

Alan Ford

@Alan Ford posted:

Thank you  for your reply,

Our treated structural pine here is different to rough sawn timber, it is accurately machined to metric sizes for constructing frames for house and building construction.  It has rounded corners and a lined finish similar to what you would get if you run a comb over mud or pastry. I think this is to add strength to the timber. What I would like to know is the sizes of timber/lumber you have used during O gauge layout construction, and I then can convert these dimensions to the closest metric size in structural pine. In Lynn Westcott's book, no mention of scale is made, so  I would expect that thicker lumber sizes would be required for the heavier O Gauge trains.

  I would be interested to know the sizes you and other O Modelers have used for :

1. Girders

Nominal 1x4, actual 3/4" x 3-1/2"

2. Girder Flanges for L Girder construction.

Nominal 1x2, actual 3/4" x 1-1/2" to 1-5/8"

3. Joists

Nominal 1x4, actual 3/4" x 3-1/2"

4. Legs

Nominal 1x4 (actual 3/4" x 3-1/2"), nominal 2x2 (actual 1-1/2" or 1-5/8")

5. Leg Braces

Nominal 1x2, actual 3/4" x 1-1/2" to 1-5/8"

On the subject of Cleats for attaching plywood sheets to the joists, are home made cleats a better option than readily available small Angle Brackets?

I screwed the plywood into the girders. Where sheets meet at a girder, I rip a piece of 1x (3/4" actual) about an inch wide and sister it to the girder for the entire length.

All replies appreciated,

Regards,

Alan Ford

What I've done is listed above.  Plenty strong.  Hope it helps.

Edit:  As a general rule, where US nominal measurements such as 1x4, 2x4, etc. are used, the actual dimension is about 1/4" to 1/2" less than the nominal value.  Plywood dimensions are generally fairly close to actual.  Makes perfect sense to me. 

Also, with L-girder, the exact size of the lumber isn't critical - anything that's close will suffice, as long as you are consistent with what you use.

Last edited by Mallard4468

What you refer to as structural we call framing lumber.  Where you mention "treated" are you referring to chemical treatment to prevent rot and bug damage.  Typically used outdoors or in contact with concrete.   I know some products are heat treated to gain some of those characteristics.

If so, I would recommend against using chemically treated  lumber indoors.   

Thanks for your reply Andrew,

Structural Pine = Framing Lumber, makes sense. Some of my fellow modelers here have also advised against treated pine for possible toxicity reasons, although reading local literature the treatment method is no longer a health issue. I believe Arsenic was used in the past. Untreated structural Pine is available from Timber suppliers, it is Kiln dried Radiata Pine, I will follow that path.


Regards,


Alan Ford

@Alan Ford posted:

Good morning all,

I am shortly commencing construction of a 24' x 14' O 3 Rail Scale layout using structural pine. I would be interested in communicating with any other forum members who live in Australia, regarding what  structural pine timber sizes they have used. There is a lot of good and useful information in Linn Westcott's Building Model Railroad Benchwork book, however all examples of construction are using dressed / planed pine which is far more expensive here in Australia. than Structural Pine which will do the same job.

Regards,

Alan Ford

G’day Alan,

I’m contemplating a similar sized layout here in Kings Langley NSW and have been looking at the same issues.

Where are you located? Given that there aren’t too many of us 3 railers in Oz, it would be good to compare notes.

Regards

Ray Gilmore

Afternoon Alan (and Ray):

Great to hear from some fellow 3 rail "O" gaugers here in Australia.

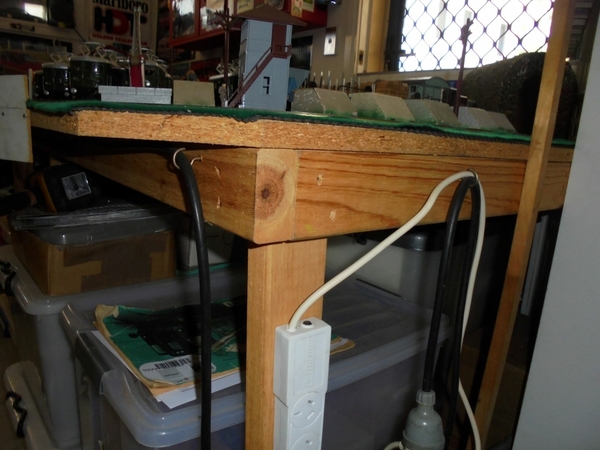
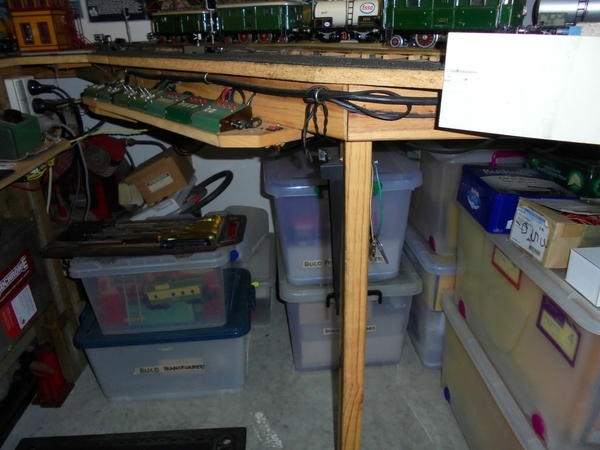
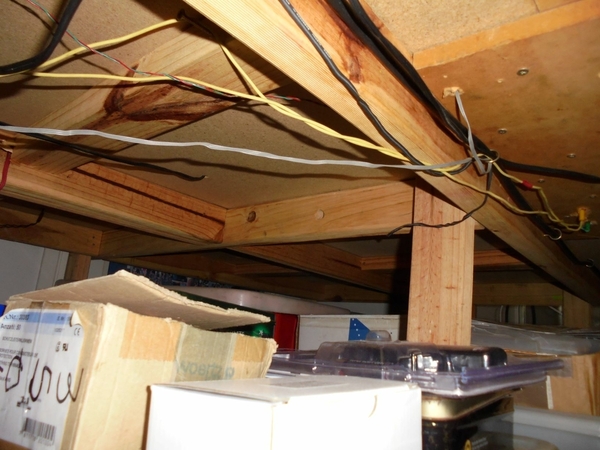
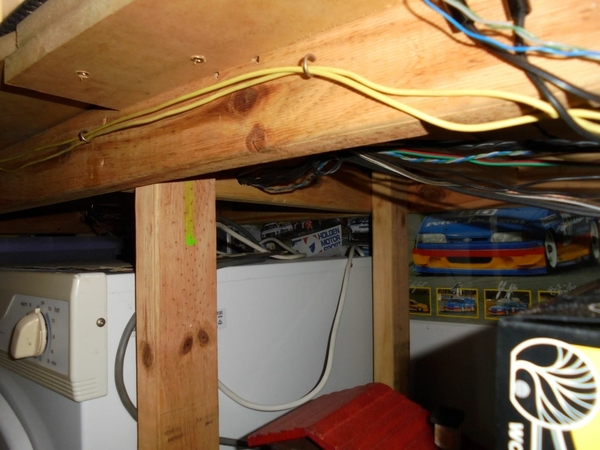
I built my benchwork using 70 x 35 framing pine you get at Bunnings (for the Americans.....it's just like a Home Depot store). I used it for the legs, fascia bearers, and the intermediate joists/trimmers.

Installed on-edge, it is quite strong, and as long as your spans don't exceed 900mm (3ft) it will support all the train weight you will ever put on it. Trust me, I have one area that is a freight holding yard, with multiple track stacked end-for-end with engines and freight cars.

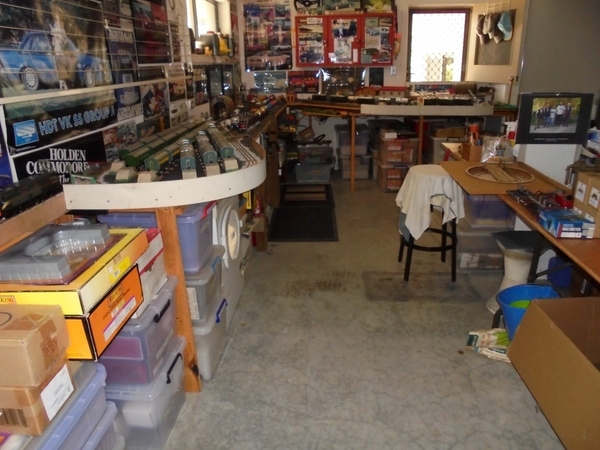
I have an "L" shaped layout that I added to my old original workshop bench, toward the rear of my third car garage. I installed new 19mm thick particleboard over the top of the old workbench (I don't need to do anymore work on it anymore), and built the new pine timber framework at each end to match the height of the old workbench.

Being a QC (qualified carpenter) I already had my 75mm framing gun, and I used it to put the timber framework together. I then screwed the particleboard top down to the frame, and added extra "noggins" where sheets joined, to fully support them.

Come the cooler winter months I intend to completely dismantle the existing layout and re-build it much larger, and with longer straights and bigger curves to accommodate some of the huge MTH steam loco's I have acquired over the past year. I sold the race car that occupied the space in the 3rd garage last year, so I now have complete freedom on the size and shape of the new layout. My wife just rolls her eyes, and goes back into the house.

Anyway, I have included some photos of the existing benchwork for you to get an idea of how I put the framework together.

Peter (Buco Australia) on the fabulous Gold Coast in sunny Queensland, Australia.

DSC02245DSC02246DSC02247DSC02248DSC02249DSC02251DSC02252DSC02253DSC02255 

Attachments

Images (9)
  • DSC02245
  • DSC02246
  • DSC02247
  • DSC02248
  • DSC02249
  • DSC02251
  • DSC02252
  • DSC02253
  • DSC02255

Add Reply

Post
The Track Planning and Layout Design Forum is sponsored by

AN OGR FORUM CHARTER SPONSOR

OGR Publishing, Inc., 1310 Eastside Centre Ct, Suite 6, Mountain Home, AR 72653
800-980-OGRR (6477)
www.ogaugerr.com

×
×
×
×
Link copied to your clipboard.
×
×