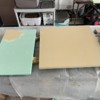
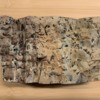
I am in the process of developing some fairly large gypsum based features.  My goal is not a museum grade highly detailed product but rather a thespian grade of suggested significant land forms, 3' - 4' tall mountains and a dozen tunnels.

Looking for suggesting colors to use implying  "this is a mountain...now go look at the trains."  I have no interest in making a career out of this but I do not think I can get away with a long nap roller.

Anyone out there doing "casual dress Friday" mountains?  Photos?

PS:  I read in seveeral places where scenery people say to use "putty" to fill in the seams of layered Styrofoam hills.  Exactly what type of putty?

Thank you, Tom Thorpe

Original Post

Replies sorted oldest to newest

I'ved used both "vinyl" joint compound and non-expanding great foam spray to fill seams and gaps in the styrofoam with good results.

I also like using the WS plaster cloth sheets as a final "covering" before applying paint, but they can be expensive - 8" X 15 feet for about $23.00. I've also used a "paper-maiche" like product to fill gaps and seams, if you like to get your hands dirty.

For paint, I stick with the cheap acrylics from Michael's in darker colors - brown, espresso, black, dark grey, terra cotta, dark green, etc. I thin them out to a "watery" viscosity and then drizzle the colors down the mountain with a cheap paint brush until I get the desired effect.

Depending on the scene, I might also sprinkle some WS fine green and/or yellow turf while the paint is still wet.

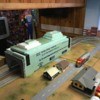
TUNNEL 2TUNNEL 3TUNNEL 4TUNNEL 7

Attachments

Images (4)
  • TUNNEL 2
  • TUNNEL 3
  • TUNNEL 4
  • TUNNEL 7
Last edited by Richie C.

Thanks Richie, For plaster casting wrapping I have been getting boxes of ten Navaris 8" X about 13' rolls of plaster wrap.

The box of ten is about $26.?? on the "Amazing" site which includes shipping.  Comes out to about $2.70 per roll.

I am cutting it into 6" X 6" patches, dipping it quickly in  paint tray of water then placing it over my highly undulating lath surfaces .

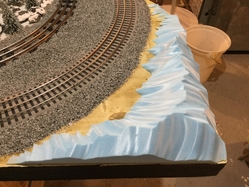
Along with this there will be Strucolight for tooth on the shear surfaces for rock faces.  A few views of a work in process:IMG_0282BeforeIMG_0370AfterIMG_0279BeforeIMG_0366After

IMG_036824" escarpment into the 8' wide valley.

However,  I do have a blind eye for how to plan colors.  Thank you Richie for the suggestions.

Attachments

Images (6)
  • IMG_0282
  • IMG_0370
  • IMG_0279
  • IMG_0366
  • IMG_0367
  • IMG_0368
Last edited by Tom Tee

Tom,

Thanks for sharing your foray into scenery, I'll be watching your progress and hoping it will rub off on me. I can build many things but when it comes to anything remotely artistic both sides of my brain shut down.

I like the undulating look you're creating and that is something I've had in mind for my own layout. I'm looking into using Fusion Fiber since it seems to be a fast application and can be mixed with paint. I like the idea of the plaster cloth for a base layer.  Was there much mess with the plaster cloth?

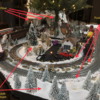
I’ve used fusion fiber, great product.  @John H turned me on to it.  I used it for more detail work than Larger landscape area coverage.  Also used sculpted foam covered with plaster cloth, then painted with WS flex paste to cover holes inherent in plaster cloth.  So many options out there.  I hope some of our great scenery guys will weight in.  @chris a has a nice idea using painted quilt batting for larger area coverage.  Here are some photos in no particular order of an now defunct xmas layout.  Click for larger images.

E773821E-FD8F-40F5-8E52-F0813A327C74 FFA6E579-5196-4C58-94C4-9F98B13B7C2C B20EB98A-DE48-43DF-9C7C-6D1717EB61FE 358D5C19-7229-42F4-B475-79269F8F5AF0 0DECB289-7EDF-4BE2-BF60-C91787E3D097 554618FD-AFB8-4A7B-8725-CB40C32E52A9

Attachments

Images (6)
  • E773821E-FD8F-40F5-8E52-F0813A327C74
  • FFA6E579-5196-4C58-94C4-9F98B13B7C2C
  • 0DECB289-7EDF-4BE2-BF60-C91787E3D097
  • 358D5C19-7229-42F4-B475-79269F8F5AF0
  • B20EB98A-DE48-43DF-9C7C-6D1717EB61FE
  • 554618FD-AFB8-4A7B-8725-CB40C32E52A9
Last edited by TedW

  Was there much mess with the plaster cloth?

Hummm...I have heard stories...but wonder just how real they were.

The amount of mess is along the line of how well you prepare and what your desk tells the world how you work.

My experience says a couple of things.  6" square patches work best with me.  Long pieces can be tricky.   Use a drop cloth.  Tape protect the track work.  Use a flat tray to moisten the plaster impregnated gauze.  Have a clean bucket of water to clean your hands periodically.  Have a clean rag available. Keep the project near the work place on the layout at on a card table with a large piece of cardboard on top of the card table.  Pre cut open some of the plaster rolls.  When you wife is not looking, use you spouses sharp sewing scissors to cut the plaster cloth.  They will clean up nicely but do a good clean up job.  That species is well known for spotting a violation.

Hold the two far corners of the patch to lay it away from you into the water quickly, then smoothly keeping tension between your fingers lift it out and place the patch on your base frame work much like hanging towels on a cloths line.  If the patch drifts loose in the tray or you inadvertently loose it from one hand and get it nasty folded, just junk the patch and place it where you need a scenery snot ball.  When I am in a run of placing a dozen patches I just move on.

At this point I am using two layers of plaster cloth installed at the same time before the first layer drys.

After placing you may find an edge or corner does not want to lay smoothly on the contour.  Just lightly run a finger over the offending spot and it will conform to the terrain.  This may sound weird at first but file the sharp edges of your finger nails and check for any hang nails or cut cuticles.  They can catch on the plaster cloth and pick it up, move it around and make a mess.

This is my first time using lath for a scenery base.  I have used a lot of lath professionally where I shot it with washer nails over a primed basement masonry wall for a concrete topping coat and for Stucco coating of foundations.

My scenery lath is held in place with 11/16" washer head metal lath  screws.  Where the lath is fastened to the Homasote/plywood deck I used 1" washer head screws.  Boxes of 100 screws at HD.  27" X 8' lath also at HD.

As posted elsewhere the undulations were formed by walking the lath back and forth over a pile of 10" - 12" rocks with old shoes.

There were a couple of desired after thought changes to the shape so I just cut out some scrap lath shape, formed it as I wanted then hot glued it in place.  Covered well with the cloth.

I normally would have gone straight to structolight for my scenery base but I need to do a first-for-me and that is fabricating  three long lift out panels to access two fully covered long branch lines.  I figured working with  this medium in the easily accessed front area will set me up for the tricky hard to reach scenery lift outs.

Last edited by Tom Tee

It's called metal lath. For what it's worth, when Fusion Fiber dries, it is a whole lot lighter than plaster. I use drywall mesh tape to cover edges of layered foam, and then apply the fiber. It has its own glue, so static grass and ground cover can be added when it is wet. If colored with acrylic paint, it can be re-wetted to add more ground cover without adding glue. Just mist with wet water. I have many posts on it in Scenery and Structures.

Last edited by John H

Hi Tom,

Since your original question was about painting mountains I thought I’d throw in my .02-cents.  My layout is small. Approx. 3’ X 9’. I’m using 1” foam over 1/2” plywood.  I went to Home Depot and found the cans of paint that were not mixed correctly. Luckily, they had a gallon of Masonry and Concrete latex paint in a “sand” color for $9. I painted my foam panels using a throw away foam brush. It worked well and didn’t take long at all.
3EAFD30B-0FE7-43EA-B41B-769BC0A1AF2C
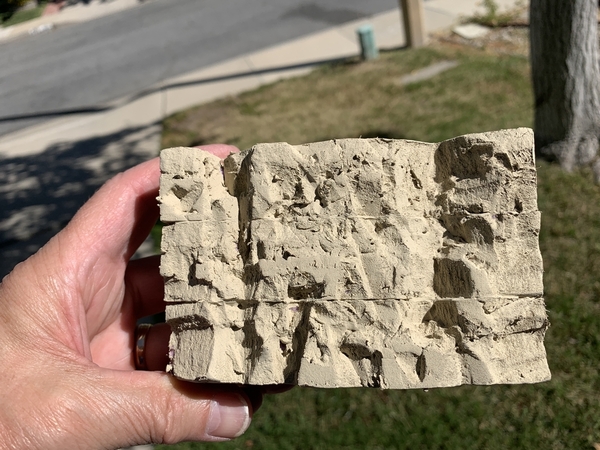
I planned on building a mountain out of foam on one end of the layout.  I wanted a rough craggy look so I glued three pieces of foam together and went at it with a box cutter and painted it with the same paint.
1E892E68-DDDD-4E0F-90AB-E8199DA85484
It looked great in the sun but was washed out inside. Searching the forum I found several recommendations.  First I tried a wash of India ink and alcohol. It looked dirty. Then I tried repainting it with black acrylic paint and another coat of the sand colored paint. That produced some interesting results. A light coat  of the lighter paint brought out the highlights. A heavier coat emphasized the cracks and crevices. That was close to the look I was after but still too “mono”. Back to the forum.  Turns out I needed to add more color. Went to Michael’s and picked up three small bottles of acrylic paints; Burnt Umber, Burnt Sienna, and Raw Sienna. Straight out of the bottle the colors were too strong. Back to the forum. I had to dilute them and create a wash.  I ended up with using a 10:1 ratio water to paint.
FAFAEE45-F7F9-483D-B5E8-8AEB20AEDB6B
Left to right, Burnt Umber (brown), Burnt Sienna (red), and Raw Sienna (yellow).  Kinda busy so I’m leaning towards just using the red and yellow washes. Just for fun, I tried the same approach but using a grey primer instead of the sand color.
8BB8E593-19DC-4EEE-A37F-7CC7C4D1794C
Now I need to figure out where I can build another mountain because I really like the way that piece turned out.  

Since your layout is more rolling hills than craggy mountain you may not need the black coat to bring out the crevices.  Maybe a green or father tan would work better for you.  I plan on gluing on some ground foam as ground cover but only here and there.

I guess the take away from all this is make a small sample or pick a small area and just start painting.  If it doesn’t look right, you can always paint over it.  For “putty” I plan to use light weight spackle.  Good luck on your mountain adventure.

John

Attachments

Images (4)
  • 3EAFD30B-0FE7-43EA-B41B-769BC0A1AF2C
  • 1E892E68-DDDD-4E0F-90AB-E8199DA85484
  • FAFAEE45-F7F9-483D-B5E8-8AEB20AEDB6B
  • 8BB8E593-19DC-4EEE-A37F-7CC7C4D1794C

Not chicken wire but rather  masonry lathe.

I find the hobby shop vendor / supplier take the casting plaster wrap which cost me $2.70 per  6" X 13' roll on Amazon then double, triple or quadruple the price.  My local hobby shop sells it for $15.00 per roll.  I prefer our home town small owner shops over the big box stores  but that is just too much of a spread.

You got me!  I slipped into California Speak. The Central Coast is the coastline roughly between Santa Barbara and Monterey. Here’s a photo that I took a few years ago.

You’ve seen it on TV. A lot of car companies have shot commercials using the bridge. Actually, that would be a great scene for you to model somewhere along your layout.

John

Attachments

Images (1)
  • mceclip0

John,

Still plowing forward when the joints are happy.

Working through two 50 pound bags of Structo-lite, 50 rolls of 6" plaster wraps, several panels of masonry lath and a few band-aids.  Plus a couple dozen spray cans of expanding foam.

I did try mixing Rit Dye sand stone  fabric dye and chocolate brown fabric dye in with the Structo-lite, interesting results.  The chocolate brown actually turned out some sort of off purple when dry??  The sand stone is fine, just need to watch the mixing ratios.

The dye additive will be a OK stand in until the job is ready for paint.

@Tom Tee posted:

John,

Still plowing forward when the joints are happy.

Working through two 50 pound bags of Structo-lite, 50 rolls of 6" plaster wraps, several panels of masonry lath and a few band-aids.  Plus a couple dozen spray cans of expanding foam.

I did try mixing Rit Dye sand stone  fabric dye and chocolate brown fabric dye in with the Structo-lite, interesting results.  The chocolate brown actually turned out some sort of off purple when dry??  The sand stone is fine, just need to watch the mixing ratios.

The dye additive will be a OK stand in until the job is ready for paint.

I use a Indoor latex flat primer tinted tan , over that i use various  acrylic earth tone pains  either as a stain or dry brushed. for a base cover I sift dried local dirt  applied with mat medium

I use lightweight joint compound over Styrofoam . the Styrofoam is glued in place with Great Stuff.

No need to worry about surface variations or detailed topography. After the LWJC is mostly set spray paint over LWJC  with light not dark ground colors.  Top with grass and stone material. It will attach due to the paint and LWJC. or spray on water-glue and add more grass and stones.

I tried premixed joint compound to make a concrete road rail crossing. The stuff even at 1/4 inch thick takes a long time to dry (rusted some of my rails) and cracked pretty bad. It was fixable but I would not use it for anything other than drywall repair again. That said it might be ok if the 30 or 45 minute powdered stuff was used, as it sets chemically not by drying.

If I am not doing rock, my go to is cotton batting usually over foam. Coat the foam with white glue and press the batting into the foam. Let dry overnight or 24 hours then paint with the earth color of your choice.  It sucks up a lot of paint - cheap mixed gallons from Walmart work great. As it sets drop in the ground foam as it will stick to the paint.

I've tried sculpting rock like @CA John but I am not pleased with my carving skills - just does not look right. His sandstone looks great! Next is to use rubber rock molds to get the texture I am looking for.  I can get the rock colors decent using washes. The colors umbers and siennas are good rock colors, but include black washes. Lots of modelers seem to use diluted india ink. Black acrylics (diluted into thin washes) seem to work fine for me. Try dry brushing exposed edges with white to further make the rocks pop. 

I've also painted mortar mix and tile grout over foam, screen and brown paper.  I can get a thin shell that takes washes really well. Bad thing is it really does not like to stick to foam especially if its thin and will flake off it hit or rubbed. I mix it so I can paint it on the surfaces with cheap brushes - kind of like a batter consistency up to tooth paste.

jeff

The strength of joint compound is in it's ability to be a good feather finished skim coating.  It is not for thick applications

There are different gypsum products for different circumstances.    

Constructing extensive terrain I certainly do not want to be involved with a panorama of crack patching.  I am just looking to cover some tracks and walls then move on.

My next issue is tunnel portals.  After setting 34 portals in place I still need two more single track portals.  I prefer the Scenic Express double thick Pennsy stone portals but they seem to be out of production. 

Lots of tunnels provide parking space for staging trains out of sight.   Although after a day or so I can forget where they are hidden sometimes.

I prefer the foam portals because it is so easy to custom fit them.

(rusted some of my rails) well LTJC is water-based!

So I 3D print approaches to the track height ( and drive ways) THEN  painted concrete or black.

3D printing lets me make custom approaches for multiple "angled or curved" roads and tracks.

3D printing allows perfect feathering down to "0"  thickness.


approaches

Attachments

Images (1)
  • approaches
Last edited by AlanRail

@Tom Tee   I bought several of the foam portals from John Atherton a while back when he had Atherton Scenics operating out of eBay. It looks like he closed shop.  They were a polyurethane foam and could be shaped (curved)  if heated to about 250F --  at least I did that to his walls.

However  look at https://www.sceneryexpress.com...stems/products/1076/  they seem to carry similar items and the thick ones show as in stock.  jeff

Last edited by ScoutingDad

Add Reply

Post

OGR Publishing, Inc., 1310 Eastside Centre Ct, Suite 6, Mountain Home, AR 72653
800-980-OGRR (6477)
www.ogaugerr.com

×
×
×
×
Link copied to your clipboard.
×
×