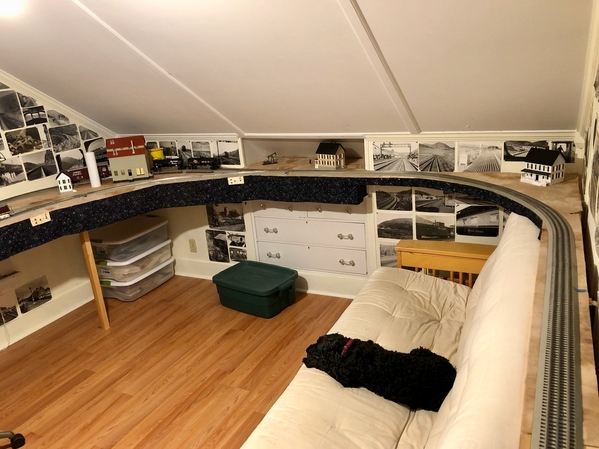
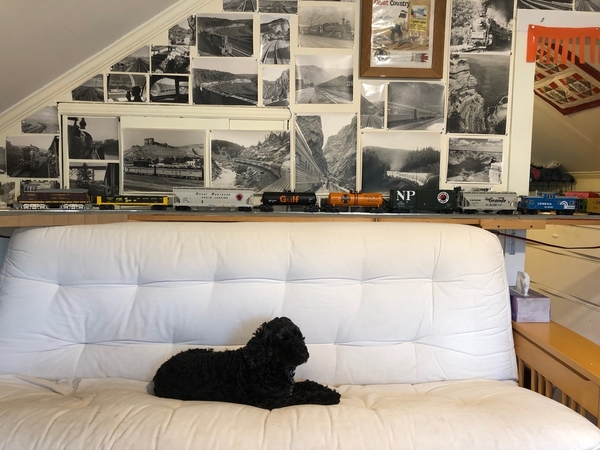
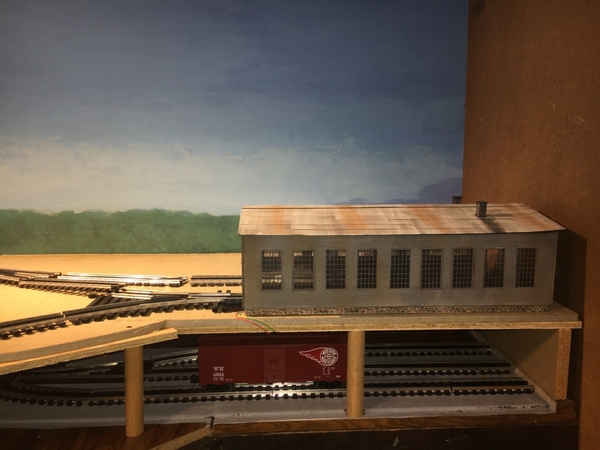
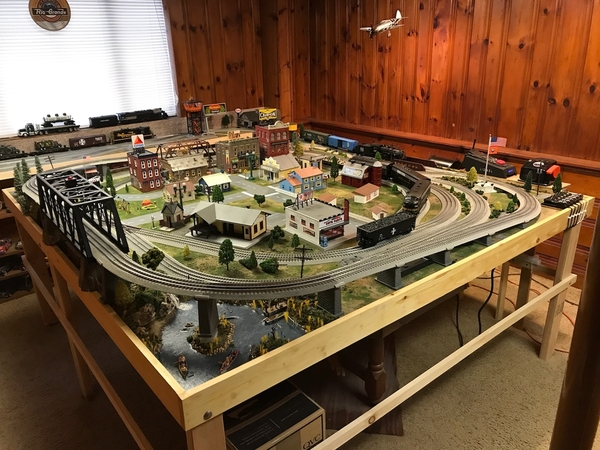
Greetings everyone, 2021 will be the year of my 1st perm layout (finally).  I will be converting my home office space into my layout room, it's not a big room, so I have some restrictions.  I do prefer the around the room shelf look

I'm leaning towards Atlas O track.  My equipment is Traditional size, no scale equipment.

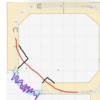
Below is what I came up with so far (meh). I'm using RailModelerPro (new to this software).

The aqua colored curve on the bottom left will be a removable bridge ( so I can get in the room) and the purple rectangle at the bottom is the closet with bi-fold doors.  I can make the layout two feet wide all around if it will help.

My biggest issue is the area on the right, I would like a train platform area for the mainline and the yard for the accessories, and an area to park a spare loco or two.

Please let me know if ya have any questions, any/all help/advice is greatly appreciated


Attachments

Images (2)
  • mceclip0
  • mceclip1
Original Post

Replies sorted oldest to newest

What are your curve radii? It looks like you've got enough straight across each side to make them wider.

I just finished laying track on my dad's layout. 6 months ago we swore we would never own any equipment that would require 72 inch diameter. It wasn't in our price range for those kinds of locos.

Then, just a few days from completing all the track and after 6 months of work, we find ourselves with an awesome MTH Premier S1 steamer and no track to run it on.

My only advice would be: If you can, use bigger curves. You can still use smaller curves connecting the back passing siding and maximize the straight run there.

Good luck! Looks like fun!

Yes that is the problem with a small room and larger diameter curves.  My room is 11x11 and I went with 054 curves to run scale equipment.  Your traditional sized equipment should work fine on 045.  I do not have experience with Atlas O track, but I think it looks great.  Some folks say their switches are more troublesome than Ross, but I have nothing to compare to my Ross.  I don't have experience with RailModelerPro either.  Your space looks like it is about 10x10.  I fit a twice around over and under in an 11x8 space in my room.  You may want to consider that for a longer run.  I did squeeze in three short yard tracks on the lower level underneath the wye and enginehouse in the upper right.

Capture 2020-12-08

Attachments

Images (1)
  • Capture 2020-12-08

How permanent? In the territory of a-boy-can-dream I'd be thinking about taking a Sawzall to that closet. Either remove the whole thing or at least cut a hole in the North wall and the West wall and run track through the closet. Also, the room door could be removed in a couple minutes simplifying the bridge. At the least the bifold closet doors could be similarly removed in a couple minutes (without permanent change or harm).

I definitely prefer an around-the-walls track-plan, especially in a small room. My train room is 11'8" X 12'8":

         IMG_1400


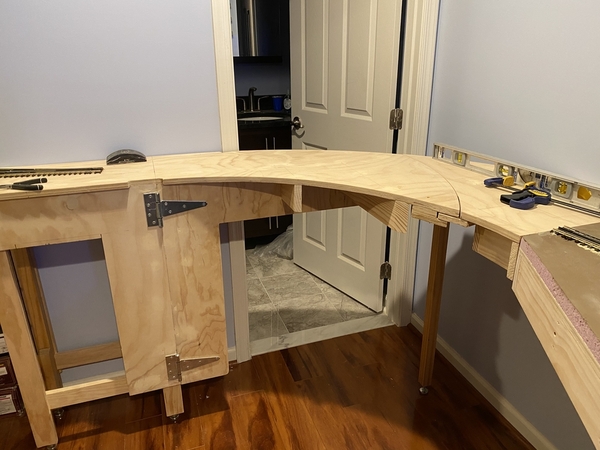
The bridge across the doorway was greatly simplified by losing the door :

         IMG_1385

A 1X6 pine board makes a simple lift-out bridge:

         IMG_1593

Track along the North wall is on a 1X6 pine board:

         IMG_0730 [1)

Industrial sidings take advantage of otherwise unused corner space. The East End:

        IMG_1314

The West End:

        IMG_1313 [1)

Attachments

Images (6)
  • IMG_1400
  • IMG_1385
  • IMG_0730 (1)
  • IMG_1314
  • IMG_1313 (1)
  • IMG_1593

@geysergazer, nice layout!.   Ya, unfortunately, I can't remove the door as this will double as my office and I need the privacy,  and removing the closet isn't in the cards either.  

@Mark Boyce, nice design.   is this layout completed or in construction?   If it's up and running, could you post a few pics?

After reviewing the suggestions so far and looking at some other layout plans I made some modifications.   The Circle in the middle of the room is my desk ( just me and my laptop) and I added a Roundtable on the bottom right-hand side.

So, given my constraints, I think I hit most of my wants:

Mountain with tunnel

Small switching yard for accessories

Bridge

Roundtable to turn locos around

Decent size


If anyone has any thoughts or suggestions please let me know


Thanks!

Attachments

Images (1)
  • mceclip0
Last edited by Casey_Jones

Larry, the layout is under construction.  All the benchwork, track, and I'm half done with final track wiring.  I can do better than post photographs.  Take a look at my Blackwater Canyon Line topic, there are 44 pages now, but this link takes you back to Page 26 - January 26, 2020 which is where I start to build this plan, Plan D.  If you want to see the concept for all 4 plans, you can go back to page 1.  (This will defiantly cure insomnia!) 

Here are a few photographs of where it stands now.

2020-11-04 10.06.302020-10-30 19.40.052020-10-21 18.23.542020-10-18 18.22.142020-08-27 12.30.582020-07-07 19.24.24

Attachments

Images (6)
  • 2020-11-04 10.06.30
  • 2020-10-30 19.40.05
  • 2020-10-21 18.23.54
  • 2020-10-18 18.22.14
  • 2020-08-27 12.30.58
  • 2020-07-07 19.24.24

The curved bridge, how will you support this?  I might think about making the bridge straight so it could be supported off only the layout peninsulas and not need another leg.. For the bridge to be straight the curves would need to be started much sooner, but switches could be there to allow small sidings for accessories. I would recommend an under truss bridge to eliminate over swing issues with engines and cars.  Below are pictures of what i am referring to from my old 10x12 layout showing the concept.  It might give you some ideas (both pictures are the showing the same bridges.  I think the idea of the turn table sounds like fun, but looks like there are already clearance issues with it.20B9D369-F5F8-4291-B12F-DE4AC992911084AFC98D-C831-4858-B927-9493712A36A5BDE85150-55E5-4B94-8E38-C7DF9B9BEC3C

Attachments

Images (3)
  • 20B9D369-F5F8-4291-B12F-DE4AC9929110
  • 84AFC98D-C831-4858-B927-9493712A36A5
  • BDE85150-55E5-4B94-8E38-C7DF9B9BEC3C

Mark,

I was thinking off pull outs.  Both of my bridges were pull outs and were easily put off to the side else where in the small room when working on stuff or not running trains, with out the need for another support.   If I was in smaller space again, I would take the same approach.

I originally just had boards as pull outs and finally got to scratch build both the solid truss and open truss bridges.  When starting my new layout, I could not find a spot for the bridges, but still kept both or them as I could not bring my self to throw them out.

My comments:

  • What accessories do you want to have as you won't be able to fit many in your yard area as you have it designed?
  • Put the bridge on a straight section and build a canyon below track level (so the height of the bridge is at the table top)
  • Where you have the bridge placed keep everything at track level and just build a hinged or lift-out section
  • You have no yard lead for switching and the turntable is jammed in with no room for supporting structures.
  • I suggest something along these lines (O45 mainline with O45/O36 switches/curves in the yard area):

  • Go 2' wide on as many sides as you can fit as it will add depth to your scenic elements around the layout

Most importantly, come to terms that with limited space you will not be able to fit everything you would like.  Take some time to determine what YOU want with your layout and then built it.

Good luck!

-Greg

Attachments

Images (1)
  • mceclip0
Last edited by Greg Houser

The curved bridge, how will you support this?  I might think about making the bridge straight so it could be supported off only the layout peninsulas and not need another leg.. For the bridge to be straight the curves would need to be started much sooner, but switches could be there to allow small sidings for accessories. I would recommend an under truss bridge to eliminate over swing issues with engines and cars.  Below are pictures of what i am referring to from my old 10x12 layout showing the concept.  It might give you some ideas (both pictures are the showing the same bridges.  I think the idea of the turn table sounds like fun, but looks like there are already clearance issues with it.20B9D369-F5F8-4291-B12F-DE4AC992911084AFC98D-C831-4858-B927-9493712A36A5BDE85150-55E5-4B94-8E38-C7DF9B9BEC3C

You don’t need extra legs, you build it like a gate. A lot of reinforcement is needed to stop it from sagging or pulling on the hinges. The interface has to be curved about the hinge axis so it opens without binding. A lot of geometry needs to be done to do it right, but there are ways to make it happen.
8F319ABD-0AC5-49F7-8386-CE67F01B504F

I wouldn’t straighten that out, as it eats the interior space. I assume this is being set up so a desk is underneath the layout, meaning all the space you can get is necessary.

Attachments

Images (1)
  • 8F319ABD-0AC5-49F7-8386-CE67F01B504F
Last edited by Boilermaker1

Larry, working within your constraints I'd use an O36 curve in the tunnel because you can't see it anyway. My curves and switches are all O72 except for the curve under the mountain which is O36.

Regarding the closet, if you wouldn't mind the appearance the bifold doors could be removed without affecting functionality. Having done that a single track would fit on a 1X6 shelf against and across the closet opening, again without affecting functionality of the closet. As well as increasing the total length of track on the layout this would give you more space in the middle for office-type  activities.

The PER is my first model railroad and as such I've been learning-by-doing. One element with serendipity is the curved tunnel-under-a-mountain and I highly recommend it. The train entering the tunnel in one direction and exiting in another turns out to be aesthetically pleasing and it never grow old.

I have learned that for me the backstory is an important element. That is, the model comes alive because it has purpose, the movement of goods&commodities to-and-from customers and the outside World. A cogent backstory, very basic-(even schematic)-scenery&structures and close-to-scale locomotives&equipment allow my mind to suspend disbelief and the trains and what they are doing become in an important sense real.

This is just me working with my gained knowledge: In your space I would definitely have the tunnel in the Northwest corner, a hinge-up bridge in the Southwest corner and a single track on a 1X6 across the South side in front of the open closet. I would have just two [long] stub sidings, one across the North wall and the other along the East wall. There would be customer car-spots the length of each siding and most of the operating activity would be (as it is on the PER) sorting&drilling of cars to serve the various customers. Whereas on the PER the Interchange fiddle-track (where outgoing trains are broken-down and incoming trains are assembled) is in an adjoining room, in your space I'd just do the hand-fiddling on the track in front of the closet, perhaps with one closet shelf reserved for cars from-and-to the outside World.

Oh, and I would definitely have my favorite accessory working hard during many operating sessions, the Lionel 282 Portal Gantry Crane:

        IMG_1498

I have added transverse movement to this venerable specimen.  Actually loading "scrap" steel and having it whisked away into the outside World certainly adds to the fun and suspension-of-disbelief.

Attachments

Images (1)
  • IMG_1498

Larry I've seen several recommendations to remove doors to give you some more space.  If removing is not an option for whatever reason you could always replace them with accordion style doors.  Growing up in a small apartment in the Bronx that's what we did to maximize space and eliminate the sing of regular doors.  They slide on tracks like the bi-fold except the panels are much smaller, 3"?, therefore do not stick out much past the door frame.

Larry, you have gotten some very good advice and suggestions here. I wanted to add my two cents.

Up above in this thread, you posted this diagram:

As the text in the image shows, this one will severely restrict what you can do in the industry area. You can't switch cars without fouling (blocking) the main line. You also cannot get to all the sidings because of the mix of facing and trailing point switches.

  • A POINT OF CONTINUING EDUCATION:
    If the switch you are moving over goes from one track to two, that is a FACING POINT switch.
    If the switch you are moving over goes from two tracks to one, that is a TRAILING POINT switch.


Greg Houser posted this modification of your diagram.

This is an excellent change for several reasons:

  1. You have a switching lead. This means that one operator could be fiddling around switching cars in the sidings while another operator runs a train around the main line. They will not interfere with one another.
  2. All the switches are FACING POINT switches (they go from one track to two). This means that a crew working the sidings can access every siding without having to run around anything.
  3. You have a passing siding. That blue highlighted track can be used to pass two trains on the main or to store a short train. If the train is short enough, you would still be able to access the four accessories you show on this diagram while the train is parked on the siding.

I applaud your plan to build around the room instead of on a table in the middle. That is a great decision. You can get a lot more action in a small space this way.

Best of luck with your new layout!

Attachments

Images (2)
  • mceclip0
  • mceclip2
Last edited by Rich Melvin

Afternoon everyone, THANK YOU for the education/advice and CREATIVE  IDEAS, they are greatly appreciated.

I did make as many of the suggested recommendations as possible ( see below) they do make sense to me.

Yes, I need to accept my limitations, I live in the land of no basements (Fl) and can't do this in the spare bay in the garage (not temp comntrolled and high humidity)  sigh...but hey, it is what it is.  Running the trains on a small layout when I feel like it beats the carpet central.

I'm fan Post War equipment, all of my rolling stock is either orig PW or PW Celebration.   So I'm not looking to be detailed.  If anything I would like for it to look like a page in a late 1950s catalog.  

Closet and Door:   I agree, it would be great if it wasn't there, but taking a saws-all to it, no.  Taking the room door off, no, I need to close the door for privacy.  Cutting a hole on the wall to run a section of track through it.. no.   I could just remove the doors, put them in the garage for safekeeping so I could expand the layout a foot or so.   But I will use the closet for train storage, I want the room to look finished and the second you walk in the door the tracks would be hitting you, so I'll live with the issue. (pile of LGB & USA Trains going to Ebay to help fund this adventure in the corner)

Here is the updated plan, I did build in 036 in the yard which did save some space. I do plan to keep the curved bridge/section near the door.  It will either be a swing gate (thanks for the idea!) or a pull out.  The corner Mountain may need to go, we will see.


Attachments

Images (2)
  • mceclip0
  • mceclip1

Larry, I understand about not wanting to 'tear up' the room for an extra foot of layout.  I passed on suggestions to go through the wall myself.  Nice rendition of Greg's and Rich's suggestions.  I have been using a lift out to enter my layout operating area, and while it has drawbacks, (I have to keep a space to set it) it works.  I'm gathering materials to change that to a lift up (2 bridges separated by over 6 vertical inches) with the plans and bill of materials provided by another Forum member.  As you build, you will always find someone to help you over the rough spots.

@Mark Boyce posted:

Larry, I understand about not wanting to 'tear up' the room for an extra foot of layout. 

My way of thinking is different, but each time it was for more than a foot. To expand The WVRR over the years I:

*Gutted a basement closet for two loops

*Tore down an entire basement bedroom wall and doorway to expand into the playroom.

*Cut two holes in a wall for tunnels into my workshop.

*Tore 1/2 of another closet down (From 5 x 8 feet to 2 x 8 feet) for another expansion.

AND, I'm still married, even after these actions.

Agreed, Mark. Our previous house we were careful not to do anything that would require patching-up in order to sell. It was bad enough spending the $$$ to comply with no-french-drains-into-sanitary-sewer. This place is our last move. Built in '52 and with a history of "do-it-yourselfers" (there is a Marble 100-jet shower from Cole Porter's house in the basement) we're not too worried about the need for some patches&paint in order for our Daughter to unload the place when we have passed on.

You do not want your access to the center of the layout on the curve. it will shift and droop over time. The easy  answer is to move the access to the straight track in front of the closet. no curves to cause problems with the access bridge.

You are designing a flat layout. you can move track around until it works for you. after the layout is built and running for a time, then you can decide if you want to modify the room for more train space.

This is a small layout probably run by one person and one train at a time. Yard lead is not that important. the flat layout will let you add a yard lead if wanted later.

I'm with GRJ, you really should see about putting in a second loop. It is something that is possible in decent sized small room layouts. Where my design I'm working on is supposed to be 126"x98", very tight around the room layout. I have a few things to tinker with still before I can be sure my design will work, most notably clearing said room and checking to see how much room the opened(which would remain open) door will take up. I could remove the door off the hinges, but that will have to be decided after all other options are weighed.

Given your space constraints; entrance door opening; closet and doors; a complicated bridge opening to the center of the track and wasted space in the center, you may want to think about a smaller O-36  (7' X 7' plus a small yard with 3 sidings) walk-around layout with two loops such as this one.

It has a good amount of action, water feature, switching capabilities, elevated track, bridge, basic transformer and command control.

Just my $0.02

EMPTY TRACKOLD LAYOUT

Attachments

Images (2)
  • EMPTY TRACK
  • OLD LAYOUT
Last edited by Richie C.

Thank you for the suggestions, I'll take a wack at putting another loop in to see how it looks and feels.   I do prefer the around the room vs a table in the middle (especially because the space is limited), this way I can reach everything, I don't have to overbuild it because I need to walk on it, and I also feel like I'm "in" the layout, ie trains are running around me, feels like they are going somewhere vs standing over a small table and looking down on it running in a circle, makes it easier to develop scenes & situations, even if they are small ones.

Ok, I removed the desk (it will reside under the train table) and I tried adding a second loop.   The issue I ran into was maintaining a 30" reach so I could access everything (first image) So I changed it a little (image 2 ) to maintain a 30" reach while keeping the main idea of the design (I believe) Am I missing anything?


Attachments

Images (1)
  • mceclip2

Casey Jones,

I know this has been said over and over on this thread

Not sure what part of the planning and building process you are at but I would recommend avoiding  O-45 curves. I used O-45 on my layout I built about 8 years ago, and I wish I made O-54 the minimum (O 72 ideal). It just looks better, and if you are committed to remaining in this hobby with a permanent layout, there are just too many great pieces that require O-54 or O-72.

Maybe some outside the box thinking,... can you change any part of the room configuration to accommodate the curves and preserve the straight sections? Can you turn the closet doors into siding doors?

Ok, I tried 054 outer loop, with 045 inner and 036 yard (pic 1). I do like this one, but see the benefits of the larger curves

Then O54 outer, 045 inner, and 045 Yard (pic 2)

My usable space is 8x10,  I did try  054 curves on loops and 045 in yard, Pic 3

I didn't even bother with 072

Still open to any suggestions or design changes.   Any issues with the switches connecting the two loops?

Thank you to everyone

Larry


Attachments

Images (3)
  • mceclip0
  • mceclip1
  • mceclip2
Last edited by Casey_Jones

I'll echo JohnnieWalker's comment praising the number of ideas. Also, thank you Rich Melvin for that piece of "continuing education" on the switches and the passing siding.

The "around the room" idea isn't something I have really considered, but seeing what you've put together here gives me a lot appreciation for how well it can work, and in a small room no less! Thank you for sharing.

Last edited by 0-Gauge CJ

Add Reply

Post
The Track Planning and Layout Design Forum is sponsored by

AN OGR FORUM CHARTER SPONSOR

OGR Publishing, Inc., 1310 Eastside Centre Ct, Suite 6, Mountain Home, AR 72653
800-980-OGRR (6477)
www.ogaugerr.com

×
×
×
×
Link copied to your clipboard.
×
×