I like GRJ's suggestion. You can share one 2-cent diode per controller or pair of LEDs.

By using a diode (vs. a bridge rectifier) you drive the LED half as often. One can go thru the tedious equations but as it turns out, driving the LED with a bridge at 14V be similar brightness as with just a diode at 18V. Then you don't have to fuss with adding/modifying a resistor.
If going with the bridge-per-LED approach, you should add or swap in a different resistor if operating at 18V. I believe most 12V pre-wired LEDs have something like a 470 ohm resistor under the heat-shrink. Probably easier to add an external resistor than messing with the existing one. I'd suggest a 220 ohm, 1/4 Watt which is a common easy-to-find value. Note that you can "share" one resistor between the two LEDs by placing the resistor where the diode is in the above photo. The bridges would then be to the right.
As for your switch lantern, presumably this is the bayonet style bulb. In which case I think it quite difficult to install an LED with supporting components if constrained by the bayonet socket. There have been many threads on plug-and-play LED bulb replacements - for example here's one where you apparently participated! So I presume the issue is one of cost as those LED bulbs run $2-3 or more? Anyway, if can work out the mounting logistics you need to deal with the beam-angle of the LED. The switch lanterns project light side ways or horizontally whereas a single LED bulb with rounded lens shoots a narrow conical beam upwards or vertically. Look for so-called "flat top" or "wide angle" LEDs where the rounded lens has been modified to spread the beam. You can actually grind/sand the plastic rounded lens yourself if desperate.

The current generation of plug-and-play LED replacement bulbs have multiple LEDs facing every which way to better mimic the "isotropic" omni-directional output of an incandescent. But I don't know if these are available for switch lanterns that support the O-gauge AC voltage range.

Again, if you have too much time on your hands and like the smell of solder fumes, you can roll your own side-ways aiming LED replacement as I've described here. This has 4 LEDs re-purposed from those 12V LED strips aiming side ways out each switch lantern lens so less than 25 cents in parts.

Since you are using the fixed-voltage plug option, yet another idea is to power the switches with DC voltage. I seem to recall threads where it was confirmed that DC works fine - this could simplify some of the AC-DC issues with using LEDs.


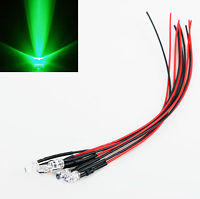 I won these for $3.99 for 100 including shipping.


