Thanks all!
I several follow on questions about homemade oven/bulbs/heat and baking time. My homemade oven is 24L x 12W x 20H' lined with 3/4 inch foil backed styrene insulation and using two 75 W bulbs. From cold start to 10 minutes heat is 155 degrees; 10 to 20 minutes heat rises to 225 degrees; 20 to 30 minutes gets to 240 and then 30 to 40 minutes to 250 degrees. I allow oven 10 minutes preheat time ( about 10 minutes). I spray a piece and hang in the oven. I spray additional pieces and hang as well. I bake everything for 40 minutes; unplug oven and allow pieces to cool. Enamel paint (using Hennings train enamel) is baked hard, BUT lacks the luster of the other pieces I see on this thread. Am I baking to long? To hot?
@J Cummings posted:I several follow on questions about homemade oven/bulbs/heat and baking time. My homemade oven is 24L x 12W x 20H' lined with 3/4 inch foil backed styrene insulation and using two 75 W bulbs. From cold start to 10 minutes heat is 155 degrees; 10 to 20 minutes heat rises to 225 degrees; 20 to 30 minutes gets to 240 and then 30 to 40 minutes to 250 degrees. I allow oven 10 minutes preheat time ( about 10 minutes). I spray a piece and hang in the oven. I spray additional pieces and hang as well. I bake everything for 40 minutes; unplug oven and allow pieces to cool. Enamel paint (using Hennings train enamel) is baked hard, BUT lacks the luster of the other pieces I see on this thread. Am I baking to long? To hot?
It might just be the humidity and temperature during spraying and not the baking process. The warmer it is, the faster the paint dries which reduced the sheen. Same thing happens when it's humid outside. Another thing is the primer, how smooth is it? Did you sand it before top coating? If not, that might reduce the sheen as well.
@J Cummings posted:I several follow on questions about homemade oven/bulbs/heat and baking time. My homemade oven is 24L x 12W x 20H' lined with 3/4 inch foil backed styrene insulation and using two 75 W bulbs. From cold start to 10 minutes heat is 155 degrees; 10 to 20 minutes heat rises to 225 degrees; 20 to 30 minutes gets to 240 and then 30 to 40 minutes to 250 degrees. I allow oven 10 minutes preheat time ( about 10 minutes). I spray a piece and hang in the oven. I spray additional pieces and hang as well. I bake everything for 40 minutes; unplug oven and allow pieces to cool. Enamel paint (using Hennings train enamel) is baked hard, BUT lacks the luster of the other pieces I see on this thread. Am I baking to long? To hot?
Check with Harry on which colors are glossy and which are satin. He formulates some of the colors to give that 50 year old look to the paint for restorations, so it appears as the original colors might appear today. So it's not you most likely
Jim
I believe Harry said at one time the colors that match prewar are glossy and the colors that match postwar are semigloss. I have not used his paint on prewar, only postwar. All my prewar was done with Charles Woods Train Enamel which is high gloss. I have never baked it but covered it right after spraying to avoid dust.
Pete
Thanks for the quick responses. I use Harry's paints and some of Charles's as well. I try to pay attention to the gloss vs. high gloss vs. satin as well. The humidity and temperature are of concern as I live in the South and we have recently experienced multiple 90 degree days with heat index in the low 100s. I run a dehumidifier 7 x 24 and AC when I paint in the garage. If I am going to bake a piece at say 200 degrees as soon as it is sprayed, the outside temperature shouldn't matter. Humidity might. But, I am thinking heat is the problem AND I am over baking. I am going to test inside oven temperature using only one 75 watt bulb and try another piece to two.
There was a mention to sand the primer coat. I have never done that. I have at times lightly sanded/steel wooled before adding another coat of paint.
Thanks to all who responded. Hoping your thoughts and ideas will bring a little shine to my cars....
It is possible an issue of how you are painting the item. Does the item have a gloss/luster before you bake it?
It has that wet paint look. So, yes, I would consider it to have a gloss/luster.
I have had good results with Testors spray paint from hobby shops with lots of color choices
Charlie
@J Cummings posted:It has that wet paint look. So, yes, I would consider it to have a gloss/luster.
Sounds like it is a problem with baking. Try not baking a piece and see how it turns out.
I personally don't bake anything and get good results.
I let new spray paint jobs dry in the hot southern summer sun for several hours.
Charlie
Thanks for all the input thus far. Lots if new ideas! I have painted numerous items with mostly good results. However, I had to pay too much attention to humidity and temperature to some extent. I want a process that allows me to paint rain or shine so to speak. I firmly believe the temperature was to high. Based on the realism that I melted holes in my oven behind the 75w bulbs. I tested two 40w bulbs with high temp around 175. I have an #10 shell to paint that will be my next test. I let everyone know the results.
@J Cummings posted:Thanks for all the input thus far. Lots if new ideas! I have painted numerous items with mostly good results. However, I had to pay too much attention to humidity and temperature to some extent. I want a process that allows me to paint rain or shine so to speak. I firmly believe the temperature was to high. Based on the realism that I melted holes in my oven behind the 75w bulbs. I tested two 40w bulbs with high temp around 175. I have an #10 shell to paint that will be my next test. I let everyone know the results.
The reopening of this topic is very timely for me. I'm restoring a Red Comet that I expect to have ready to run at the NETCA train meet on 9/27. I have a new can of TrainEnamels light red, two light sockets and a lot of foam sheets and plywood and about to build an oven.
I've got a bunch of questions on how to get the best results.
First, how important is it to bake the enamel ? Is there a difference in appearance, or is it mainly for durability ?
I've soaked the engine and tender bodies in TSP and used a lot of elbow grease to clean them. There are still streaks of the old paint that won't come of with vigorous scrubbing. How critical is it to have the metal perfectly clean ? Will streaks along the edges show through the new paint ? I have a friend who has offered me the use of his sand blast booth.
Supposing that I build the oven, are there critical temperatures ? What is the minimum and how hot is too hot ?
Jcummings, can you post a few photos of your oven? Any comments on what you would do or not do with a new oven ?
And thanks to all who respond for making this forum such a great place to learn about working on old trains.
Malcolm Laughlin
Restoring and painting old trains is addictive. I got addicted many years ago and always look to improve on what I do. I think all who are contributing to this discussion and others who are following would agree. I will responded to Malcom's post as best I can.
Although you want to have the Red Comet ready for a meet on 9/27 you may be overly optimistic, but go for it!
Baking is in the eye of the beholder. I have many very nice looking restorations that were not baked. But, I felt limited to when I was able to paint. Heat and humidity major concerns here in the South. I personally think there is a difference when you bake the enamel, that is why I'm here today.
Prepping is CRITICAL to the end results. Little specs of old paint will show as will dings and dents. Minor dings and dents are characteristics of the piece being restored, and I can live with that. I would address major dings/dents. Blasting booths are SUPER! However, I would not recommend using sand as the blasting medium. I use 80 grit glass beads that do a fantastic job. After blasting I wash the piece in warm soapy water to remove any dust, etc. I then place it in an old toaster oven using low heat with door open to thoroughly dry the piece. I prime as quickly as possible once piece is dry. IMPORTANT to remember is DO NOT touch piece with bare hands after washing it. Use latex gloves while it is wet and then cotton gloves after it is dry. Body oil from handling will mess up a paint job.
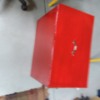
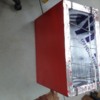
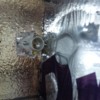
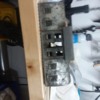
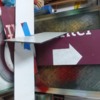
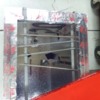
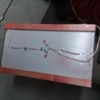
Yes, there are critical temperatures. If you build an oven, you need to experiment as to how high temperatures will get in your oven. I am in that process now. In my oven two 75 watt bulbs were to hot AND to close to the oven wall. I will attach some pictures. Three of actual oven and two showing that oven got way to hot.
Recommend you go to Henning's website and print the section on restoring old tin plate. It covers many of the aspects of the restoration process.
Attachments
Smooth is more important than removal of every speck of old paint. Some might be acting as filler in a low spot. You are looking at an extra coat or so of primer or color depending on the color contrasts. Primer is better as it is less likely to react to the old paint, and should seal it from topcoat reaction. Old paint is generally a risk in that way, but sometimes worth the gamble to try vs fighting the old stuff to the last atom.
Primer should be fine sanded or scotch padded, same as any other coat of paint, especially hard primers or those with any gloss when dry (epoxy & etching normally). Even clear gets fine sanded for a topcoat. It gives micro scratches for a bite when set. (sanding dust in clear will haze or turn white.. always damp dust with the solvent and rag then flash off wetness before you shoot)
I finished what I consider my oven experiment. I found that if you know your paint/s and have a good process you can achieve your desired results. The big plus I find with baking is that I can complete a paint process in a single day regardless of the outside conditions. I took three pieces - standard gauge frame from a #10 and two #10 shells. I was able to clean/prep, prime and paint in a single day - really about 5 hours, with a piece dry enough to handle with cotton gloves. The pieces will need to cure for more days and that is fine because I have no real plans for them at this time. I have included pictures.
I learned paint from a rattle/spray can takes less time to dry, but may need more coats. Non-spray cans of paint (from Hennings for example) that need reduced to work with a spray gun will go on heavier and require more drying time, although not days. Additional time will depend on how hot your oven gets. For now, I will stick with the two 40W bulbs and plan to dry for 1 to 1.5 hours.
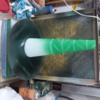
Also, included are some pictures of my paint 'booth'...lol. I set objects to paint on round disks I cut out many years ago. Most of the time I use blocks/tongue depressors to lift piece somewhat. The disk sets on an old plastic lazy susan - I turn the disk as I paint vs. trying to hold pieces. I am better able to control painting distance etc. I have an old box fan behind everything with a furnace filter in front of it. This keeps over spray down. Fan runs at medium speed for most jobs, and one day I will probably fix a filter behind the fan as well. The front filter is held in place when fan runs. The picture included shows how I hold towers for painting their exteriors. The cone is attached to the disk with three long wood screws.
That's all I can think of for now. Have fun keeping those old trains running.
One last thing - using an oven allows me to use Harry Henning's process to paint the inside first, bake it, cool it and then paint outside.
Attachments
Thanks JC, you're method is really cool, and I will be adapting some of what you say.
This is just a quick note off the top of my head, will post something more thoughtful later in the day.
I have a few detail questions about your oven. I'm I correct that it works by handing things from the top so all you have to do is put a cover on it ? I had been thinking of a wood box with a lining and a side door, bu if stuff to be dried hands from the top, the door problem goes away.
How thick is your foam ? Is it just a foam box, or do you have something around the outside - not clear from your photos. I have several square yards of flat foam of varying thickness, so I can build a box pretty quickly. What do you use to hold it together at the corners ? Is the bottom also foam ? I'd think the light sockets would need wood for mounting.
Back to this later with more questions, comments and photos of my Red Comet locomotive, tender and passenger car kits.
Some questions were raised about construction of my oven. First, most anything would work for an oven. One thread mentioned using a cardboard box lined with aluminum foil. Another spoke of a wooden box. So bottom line is use materials that are available. I used old realtor signs that were lying in my neighbor's backyard (he said I could), 1" x 1.5" furring strips, 4' x 8' x 3/4" foil faced foam sheeting, 2 low profile electrical sockets, 9' extension cord, machine screws and bolts, wood screws, three handles, foil tape used by A/C to seal duct work. Pictures provided.
To secure the sockets I created studs up through the bottom of the oven. I then pushed the bottom piece of foil faced foam sheeting down over the studs. The electrical sockets were then positioned over the studs after the electrical wiring was completed. See picture. ATTENTION: I would consider the foil facing on the sheeting as a conductor. Ensure it does not come in contact with any of the wiring. CAUTION: when locating the spot for the socket/s ensure you allow ample space between the actual bulb and side of the oven.
The realtor signs are about 1/4" thick with a thin metal membrane. They were extremely easy to cut with my saber saw using a metal blade. Furring strips were attached to the edges of the sides; the sides were then connected together with additional wood screws forming the box structure. The foil faced sheeting was cut and inserted; the individual pieces held each other in place. Where I had too much slop on the inside corners, I used the foil backed tape.
I cut the top larger than needed so it would set over the top opening of the oven.
I bent some flat metal to serve as rails(2) inside the box; and some 1/4" square rod for the cross members from which the hangers would be placed. You could use something else you had on hand.
Wiring was done using the 9' extension cord cutting off the receptacle end and some wire connectors. If you aren't comfortable doing the wiring get some assistance.
Before painting something always 'test' hang it in the oven. This will ensure you are using a good hanger that doesn't allow the piece to drag the bottom or swing over and hit the side.
After all I did constructing my oven, I might just try the cardboard box with heavy duty aluminum foil next go-round.
Attachments
@J Cummings posted:Restoring and painting old trains is addictive. I got addicted many years ago and always look to improve on what I do. I think all who are contributing to this discussion and others who are following would agree. I will responded to Malcom's post as best I can.
Although you want to have the Red Comet ready for a meet on 9/27 you may be overly optimistic, but go for it!
Baking is in the eye of the beholder. I have many very nice looking restorations that were not baked. But, I felt limited to when I was able to paint. Heat and humidity major concerns here in the South. I personally
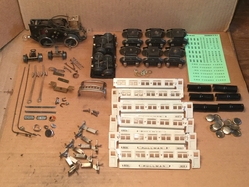
In regard to my being optimistic about the time to restore my Red Comet. Actually a lot of the work is already done. I've reduced the whole train to kit form and am done with shining up most of the detail pieces and repainted the trucks. The most time consuming part of the task was wire brushing the wheels and axles which were in pretty bad shape with lots of rust.
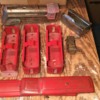
To show you what I mean by "kit", here are two photos. The first shows the bodies ready for sand blasting. I've got a friend with a blaster who even has grit fine enough to use on plastic. Then it's painting, baking and assembly.
This takes me back to the time 70 years ago when I began building HO from kits. Those early kits had about the same number of parts.
I've been able to do this project with only original parts with one exception. The bracket for the tender coupling under the locomotive cab was missing so I had to make it. Fortunately there are enough photos around that I could get very close on the dimensions. I was able to preserve all of the clips for truck mounting. Of course the lettering is repro - dry transfers from Art Warnick.
And now back to painting questions
Attachments
@J Cummings posted:Some questions were raised about construction of my oven. First, most anything would work for an oven. One thread mentioned using a cardboard box lined with aluminum foil. Another spoke of a wooden box. So bottom line is use materials that are available. I used old realtor signs that were lying in my neighbor's backyard (he said I could), 1" x 1.5" furring strips, 4' x 8' x 3/4" foil faced foam sheeting, 2 low profile electrical sockets, 9' extension cord, machine screws and bolts, wood screws, three handles, foil tape used by A/C to seal duct work. Pictures provided.
To secure the sockets I created studs up through the bottom of the oven. I then pushed the bottom piece of foil faced foam sheeting down over the studs. The electrical sockets were then positioned over the studs after the electrical wiring was completed. See picture. ATTENTION: I would consider the foil facing on the sheeting as a conductor. Ensure it does not come in contact with any of the wiring. CAUTION: when locating the spot for the socket/s ensure you allow ample space between the actual bulb and side of the oven.
The realtor signs are about 1/4" thick with a thin metal membrane. They were extremely easy to cut with my saber saw using a metal blade. Furring strips were attached to the edges of the sides; the sides were then connected together with additional wood screws forming the box structure. The foil faced sheeting was cut and inserted; the individual pieces held each other in place. Where I had too much slop on the inside corners, I used the foil backed tape.
I cut the top larger than needed so it would set over the top opening of the oven.
I bent some flat metal to serve as rails(2) inside the box; and some 1/4" square rod for the cross members from which the hangers would be placed. You could use something else you had on hand.
Wiring was done using the 9' extension cord cutting off the receptacle end and some wire connectors. If you aren't comfortable doing the wiring get some assistance.
Before painting something always 'test' hang it in the oven. This will ensure you are using a good hanger that doesn't allow the piece to drag the bottom or swing over and hit the side.
After all I did constructing my oven, I might just try the cardboard box with heavy duty aluminum foil next go-round.
After all my questions about building an oven and seeing JC's notes, I'm ready to build - but I may not have to.
Amazingly, my wife's reaction to an oven in the basement was why not do it in the kitchen. She's more concerned about my having another electrical device in the basement to forget to turn off than she is about the paint fumes.
As for paint fumes, I'd like some advice on how bad is that likely to be ?
What is the usual baking time, and what is the ideal temperature range ?
Should I leave the oven door ajar to avoid a buildup of fumes to burst out when I open the door ? I need to avoid getting fumes into the rest of our house. I do have a door that opens from the kitchen to an outside porch and can set up several fans to get good air flow. The kitchen has large windows.
looking at with
@mlaughlinnyc posted:After all my questions about building an oven and seeing JC's notes, I'm ready to build - but I may not have to.
Amazingly, my wife's reaction to an oven in the basement was why not do it in the kitchen. She's more concerned about my having another electrical device in the basement to forget to turn off than she is about the paint fumes.
One other really important question. Do I actually need to bake the paint ? What is the downside ? What do I lose by not baking ?
One more question. Look closely at the kit photo and you can see three pairs of name and number plates that need some cleanup work. What can anyone tell me about how best to do that ?
You may not need to bake. I found that baking allowed me to shorten the cycles between primer and coats of paint - I did not have to wait days for pieces to dry.
If you do decide to bake, there are several entries in this forum discussion that talk to time, temperature, fumes, etc. If you do decide to bake in the wife's oven, I recommend having the telephone of the local florist handy...lol
To polish name and number boards I use 600 grit wet/dry sandpaper. Keep the paper wet AND stretched flat over a level surface. I use a piece of wood 2 x 4. Place the brass under the tip of a finger (usually the tabs help hold it) and then gently apply pressure as you go back and forth. I keep checking to ensure the piece is polishing smoothly and evenly - lots of the old boards/plates have some damage that keeps them from cleaning/polishing evenly. Adjust pressure etc. as you work the piece. For final polishing I use either Brasso or Wenol(?sp). Either does a good job. I use a micro towel to buff - they work great!
Lastly, I made an adjustment to my oven by moving the light sockets further from the walls and going to 60W bulbs. When baking I keep a a 1" opening on the top so as not to build up to much heat. These changes are working for me.
For polishing brass name plates etc., I use three 0 or four 0 steel wool. You can polish to a bright shine very quickly. When happy w/ the result, use a red or black magic marker to re-fill the numbers or lettering, let dry, and then "lightly" polish again w/ the steel wool. You may have to repeat to get 100% . Testors "gloss coat' will seal the finish and color w/ a light spray.
As regards the gloss on our "COLLECTOR COLOR" paints, The pre-war colors were mfg. for a NOT " high gloss" look, and not "satin" either. I prefer to call it a 50-60 years old finish on a piece that was taken great care of. Several years ago, a Lionel standard gauge train collection was auctioned off at one of the major auction houses. It contained over 100 pieces that I had restored 42 years earlier. I attended the auction out of curiosity, as the collection was being advertised as mint original items. I had informed the auction house that 99% of the items had been restored by me. Nevertheless, the trains all sold at substancially higher prices then expected. My point being that w/ time, the nickel & brass trim etc. will attain the same kind of patina as an original. Just do a good job on your restorations, and paint.
I had commented earlier that I sprayed the inside of the body and roofs first, then the outside last. I just wanted to add that I never had a problem w/ over spray having to be removed first.
As far as primer goes, I am no expert, but only used primer when the roof or body had been repaired. this was to give extra adhesion to the repaired surface for the paint, and 100% even color thru out.
As for removing paint, I use a SEARS sand blaster unit w/ ceramic nozzle, and aluminum oxide for the media. I built my own sand blasting cabinet, and it will hold a state car body. My compressor provides 90# pressure , and my SEARS shop vac sucks out the dust so I can still see when the item is clean. Next I wash the body in the sink w/ liquid soap & water, & a 2" paint brush. Rinse off w/ hot water, blow dry, and do NOT handle w/o gloves. Right or wrong, this is how I did restorations. Last but not least, I use Art Warwick's dry transfer lettering available from J & A Hobbies. Harry ![]()
Thanks to Harry and JC on the ideas for polishing. I'll try them all on some pieces that I have on other items that I'm not really restoring. Then I'll have a good idea of what my own results are likely to be with the Red comet pieces.
Harry's comments bring up another interesting way to look at this subject. We're talking about trying to give something like the original appearance to a train that was painted 85 years ago. How can anyone actually know whether my finished train does or does not look like the original ? You would need a set that had been stored under perfect climate conditions for 85 years - may be hard to find. And then you would have to know that there had been no aging from natural chemical change in that time period.
When I've finished the Red Comet and had a few months of showing it off to local NETCA folks it will go on eBay, the description will reflect what I've just said, and I don't expect any problem in selling it. I believe the market prefers candor to perfection.
Back to the Red Comet and paint baking. I got it sand blasted today by a TCA colleague who restores his own postwar stuff for his layout.
Now I have the perfect setting for a controlled experiment in baking. From two 603 Pullmans and the 604 observation, I have three identical roofs. I'll put an identifying code on the bottom of each so I can have a blind test.
First I will use my TrainEnamels primer on two of them. I'll let them dry in my outdoor oven (aka garage) for which forecast temperatures for a few days are 75 - 95.
Then I will spray paint all three with 517/817 light red. I'll dry one of the primed roofs in the kitchen oven (wife already has the flowers and knows more are coming). The other two will dry in the basement (about 75 degrees) with the dehumidifier turned on.
After a few days, I'll see what differences I can notice, then look at the ID codes. I'll let you all know the results then.


