
Over the weekend  you've been to a train show and turned someone else's junk into treasure; or you've fixed a problem with your layout and now you're trains are running flawlessly like a Swiss watch.

Now is your chance to share with the World what happened this past weekend (or recently) that you are excited about related to our hobby.

If this Post goes well, maybe every Monday will be Resurrection Monday.

I will start us off by sharing what I am excited about that happened this past weekend. Arnold

Original Post

Replies sorted oldest to newest

For 20 years, since the time I built my layout, my trains have slowed down as I run them on the far left side of my layout as I face it sitting at my transformer.

I know the basics of providing feeder wires to provide power at every few track sections. 

I thought my problem was related to the fact that I have 4 crossing gates activated by insulated rails where 2 reverse loops are. The crossing gates draw their power from a ZW that powers my accessories, not from an MTH Z 4000 that powers my 2 main lines.

Here's a video showing how the train slows down at this spot on my layout:

Last night, my train doctor came over and solved this 20 year old layout problem in 5 minutes. All he did was connect 2 lock-ons, and wires between them, at 2 points near where the mainline power drops off. 

I will post another video later this morning showing the improvement in the performance of the train at this location. Arnold

Attachments

Videos (1)
20181105_200422

Above shows the problem (voltage drop), below is the solution (feeder wires), and the video below shows the result:

20181119_072052

20181119_072102

I can't believe I could not figure out how to solve this problem for 20 years. I feel like an idiot.

My confusion had to do with the fact that I thought my crossing gates caused the power shortage to the track, and that was irrational. The gates are powered from a separate transformer from the one powering the track.

My train doctor logically solved the problem step by step in a few minutes. First, he had me turn off the power to the crossing gates and ran the train. No difference. Still had same power shortage.

Then, he placed the lock-ons and 2 short feeder wires, first where the power was still strong, and next where the power was starting to weaken on the track sections with the insulated rail. Problem solved.

Then, we ran the train again with the power supplied to the crossing gates. They worked fine and the train still ran well without slowing down.

So today is Resurrection Monday for my layout.

We would all love to hear of any Ressurrection stories you may like to share. Since we are just starting this thread, don't limit your story to something that happened this weekend; feel free to share any such story whenever it happened. Arnold

Attachments

Images (2)
  • 20181119_072052
  • 20181119_072102
Videos (1)
20181119_072645

I have been posting on the "Buy anything cool lately" thread about my experiences resurrecting the American Flyer 312 I bought at a train show on Nov. 4, so I won't bother repeating all that here.  But I can report on my current progress.

With the reverse unit installed in the tender, I have turned my attention to my least-favorite part of restoration: painting.  I put a coat of Krylon Flat Black on the tender, though it's actually more like Semigloss than flat.  Then I tried to put a "Pennsylvania" dry transfer on it before sealing the whole thing with clear flat finish.  Unfortunately, it seems that my PRR transfer sheet -- which is pretty old -- has dried out, because the lettering won't stick to the tender at all.  I'm going to have to send for some new transfers.  And yes, I know I could use decals, but I don't like decals and have always used dry transfers in the past and that's what I prefer, so I'm going to stick with them (no pun intended).

The locomotive boiler shell itself doesn't need repainting, except for a couple of tiny spots near the rear of the cab that can easily be touched up with a fine brush.  So the only remaining painting to do is the PRR keystone on the boiler front.  My eyes aren't what they used to be, so I've been doing it with a jeweler's loupe.  I finished the red background last night, and will probably do the yellow edging tonight, if I have time.

When the Flyer shoulder screw arrives from The Train Tender, I'll attach the NOS trailing truck that I got from eBay last week to the locomotive frame.  Then I'll wire in the LED headlight and put it all back together (I've already cleaned and polished the rods and valve gear).

Meantime, I'll be ordering some MV lenses for the marker lights on locomotive and tender.

I'm waiting till I get the locomotive reassembled to take any more photos, but here are a couple I took in the early stages of restoration.  This is the tender, just after I installed the reverse unit (the previous owner had ripped the original unit out):

Flyer1

I know the wiring looks pretty sloppy, but I wanted to be sure everything was long enough to reach the locomotive when I put the tender shell back on.

This is the rest of the 312, sitting on a DVD shelf in my basement, waiting for attention.  At this point, I hadn't yet done anything to it, though you can see the new trailing truck sitting just behind the cab:

Flyer2

If this thread survives that long, I'll post updates to this project here.

Attachments

Images (2)
  • Flyer1
  • Flyer2

Arnold - thanks for posting. Good topic. When I got into O Gauge, my dad bought me portable voltmeter. Were you ever able to measure the voltage at the point where you had the power drop? 

I had all kinds of similar problems with my first layout. I was such a newbie and didn't know how to wire power-hungry, track-side accessories to separate transformers. I remember trains coming to a crawl when the Automatic Gateman would pop out because I had wired to track power.  Much better with my new layout.

Last edited by raising4daughters

What is particulatly impressive are the before and after photos.

Very good idea when you obtain a junk train to take photos of it. Then, after you fix, restore and resurrect it, to take additional photos.

The same can be done taking before and after photos when any problem with a layout gets resolved, or any improvement to a layout occurs.

You can then attach the photos to your posts on this Resurrection Monday thread explaining exactly what you have done.

Great work, my fellow train miracle workers!

Arnold

Last edited by Arnold D. Cribari
Arnold D. Cribari posted:

What is particulatly impressive are the before and after photos.

Very good idea when you obtain a junk train to take photos of it. Then, after you fix, restore and resurrect it, to take additional photos.

The same can be done taking before and after photos when any problem with a layout gets resolved, or any improvement to a layout occurs.

You can then attach the photos to your posts on this Resurrection Monday thread explaining exactly what you have done.

Great work, my fellow miracle workers!

Arnold

Thank you for creating this post.
There is a lot to learn from people posting the before and after photos as someone may be working on the same train or layout problem. 

Hi Kids, this is one of the resurrections that I recently did. A few weeks ago I purchased three pw 6460 Bucyrus cranes. Two were in real nice condition, but the third had the plastic screw sleeves w/ the holes that hold the cab on the frame were stripped and broken.

Here's what I did to resurrect this Bucyrus crane.

Material: tube of Krazy glue.  #3 phillips head screws 1" lg. (not sure screw size, but I know they're smaller then #4).   drill bit #48, .076 .

Pic 1: filled broken sleeves w/ stripped screw holes w/ Krazy glue. Let set over night to completely set up.

Pic 2: drilled new holes using #48, .076 drill bit. Cleaning drill bit off after drilling each hole.

Pic 3: slow and easily thread new screws (#3 phillips head) approx. 1/4" - 3/8" into the newly drilled holes. Estimate the excess amount to cut off of the screw to keep it at the total length you need. Re-thread screws back into the hole to make sure you have the proper length. 

Pic 4: Set cab on frame and thread screws into new holes til snugged.


Bucyrus repairs [2) crp


Bucyrus repairs [4) crpBucyrus repairs [8) crpBucyrus repairs [9) crpBucyrus repairs [12) crp

Attachments

Images (6)
  • Bucyrus repairs (1) crp
  • Bucyrus repairs (4) crp
  • Bucyrus repairs (8) crp
  • Bucyrus repairs (9) crp
  • Bucyrus repairs (12) crp
  • Bucyrus repairs (2) crp

This crane tender has been knocking about my workbench for literally years with no trucks or chimney and with a hole in the roof.  Fabricated a replacement chimney from Plastruct tubing,  filled in the hole with Squadron Green,  pulled a couple staple end trucks from my truck box and painted the repair areas black to simulate a hot tar repair!  

GEDC1294

Mitch 

Attachments

Images (1)
  • GEDC1294
franktrain posted:

Picked up this B&M 6464 shell for a $1.00 at a train show and did a patch roof repair and used parts laying around parts bin. 6464 boxcars run great. 


Still need to get door rails


Frank, it looks as though you cut a piece from a (junk, I presume) donor car to replace the damaged section of the B&M's roof.  Could you give us some details about how you're going to color-match the new section?  I'm always open to advice, since painting is my least favorite part of any restoration project.

--John

Balshis posted 

Frank, it looks as though you cut a piece from a (junk, I presume) donor car to replace the damaged section of the B&M's roof.  Could you give us some details about how you're going to color-match the new section?  I'm always open to advice, since painting is my least favorite part of any restoration project.

Actually, I'd leave the patch and mismatched doors as-is.  Like with my crane tender,  it adds character to the car. 

Mitch 

Here is my little resurrection project I am about to start. I picked these up from the forum’s for sale section. These are Marx 3/16 scale tin passenger cars that need a little TLC. I originally thought I was going to replace the Marx trucks with Lionel, but after seeing how these cars sit nice and low on these trucks, I will just make a transition car with a knuckle coupler on one end and a Marx coupler on the other.  

C43987BC-4872-4AF9-BF90-70ACD2706575CDFB42C5-2B71-40F2-ADBA-AC6094782674934CEAD2-20A8-4195-B070-0C5A03E5905D

A9A76693-F55D-48E0-A7BD-3AD38162F278

Given that they are all in pretty rough shape, I decided I wanted to paint them as the Norfolk and Western ‘Powhatan Arrow’ ... in case I ever come across a NW J that isn’t cost prohibitive. Goal is to disassemble the cars, remove the rust, reattach or recreate the window silhouettes, paint, decal, and reassemble. I had to order some new wheel axles yesterday as well. 

Attachments

Images (4)
  • C43987BC-4872-4AF9-BF90-70ACD2706575
  • CDFB42C5-2B71-40F2-ADBA-AC6094782674
  • 934CEAD2-20A8-4195-B070-0C5A03E5905D
  • A9A76693-F55D-48E0-A7BD-3AD38162F278
JD2035RR posted:

Here is my little resurrection project I am about to start. I picked these up from the forum’s for sale section. These are Marx 3/16 scale tin passenger cars that need a little TLC. I originally thought I was going to replace the Marx trucks with Lionel, but after seeing how these cars sit nice and low on these trucks, I will just make a transition car with a knuckle coupler on one end and a Marx coupler on the other.  Given that they are all in pretty rough shape, I decided I wanted to paint them as the Norfolk and Western ‘Powhatan Arrow’ ... in case I ever come across a NW J that isn’t cost prohibitive. Goal is to disassemble the cars, remove the rust, reattach or recreate the window silhouettes, paint, decal, and reassemble. I had to order some new wheel axles yesterday as well. 

Looks like a fun project, keep up updated on your progress

M. Mitchell Marmel posted:
Balshis posted 

Frank, it looks as though you cut a piece from a (junk, I presume) donor car to replace the damaged section of the B&M's roof.  Could you give us some details about how you're going to color-match the new section?  I'm always open to advice, since painting is my least favorite part of any restoration project.

Actually, I'd leave the patch and mismatched doors as-is.  Like with my crane tender,  it adds character to the car. 

Mitch 

Yes I have left the car as is and do not intend to paint.

The patch is made from a adhesive backed soft metal that I had laying around for years. I only have a small piece left. I like the way it looks.

IMG_8142IMG_8144

Mitch, I did the same thing with the same caboose except I did not install a smoke stack. I liked the box beaten weathered look.

IMG_8140IMG_8141

Attachments

Images (4)
  • IMG_8142
  • IMG_8144
  • IMG_8140
  • IMG_8141
JD2035RR posted:

Here is my little resurrection project I am about to start. I picked these up from the forum’s for sale section. These are Marx 3/16 scale tin passenger cars that need a little TLC. I originally thought I was going to replace the Marx trucks with Lionel, but after seeing how these cars sit nice and low on these trucks, I will just make a transition car with a knuckle coupler on one end and a Marx coupler on the other.  

JD2035RR

I have some of these passenger cars(need to verify) If your interested maybe we can make a deal. Contact me with my email.

IMG_7006


Attachments

Images (1)
  • IMG_7006
Arnold D. Cribari posted:

Above shows the problem (voltage drop), below is the solution (feeder wires), and the video below shows the result:

20181119_072052

20181119_072102

I can't believe I could not figure out how to solve this problem for 20 years. I feel like an idiot.

My confusion had to do with the fact that I thought my crossing gates caused the power shortage to the track, and that was irrational. The gates are powered from a separate transformer from the one powering the track.

My train doctor logically solved the problem step by step in a few minutes. First, he had me turn off the power to the crossing gates and ran the train. No difference. Still had same power shortage.

Then, he placed the lock-ons and 2 short feeder wires, first where the power was still strong, and next where the power was starting to weaken on the track sections with the insulated rail. Problem solved.

Then, we ran the train again with the power supplied to the crossing gates. They worked fine and the train still ran well without slowing down.

So today is Resurrection Monday for my layout.

We would all love to hear of any Ressurrection stories you may like to share. Since we are just starting this thread, don't limit your story to something that happened this weekend; feel free to share any such story whenever it happened. Arnold

The train still appears to slow as it moves around the reversing loop.  If you can reach it try a lockon prior to the switch that starts the loop to a point on the loop track where it comes back to the switch.

Look at the light on your caboose. Coming into the loop the light is bright.  As it gets to the end of the loop it is dimmer.  As soon as it is back on the switch it is bright again.

Last edited by Bill DeBrooke

Bought an AA set of 2343 F3s several years ago. Powered unit had a beat up shell but moved, dummy A had no shell. Got the pair for $50. Cleaned/tuned up the powered unit and got it running great. Repainted the frames, truck sides, and pilot shields, and pilots silver. Picked up a pair of new in box Conventional Classics replacement shells, a Santa Fe Railsounds II F3 B unit, and another early 90's Sants Fe F3 B unit. The ABBA F3 set hauls the El Capitan on my layout. 

20181021_115735

Attachments

Images (1)
  • 20181021_115735

Last week I had a UCS track malfunction. Press uncouple and it would cycle the e-unit. Checked controller and track section no obvious shorts. Finally Sunday night looked at the controller very carefully, upside down with cord toward me, contacts on right side on on top were just touching. Separated them slightly and that fixed it! I'm no expert, but I have been repairing trains as well as other things long enough to know it is usually something simple. Hope this might help someone.

Chris 

Bill DeBrooke posted:
Arnold D. Cribari posted:

Above shows the problem (voltage drop), below is the solution (feeder wires), and the video below shows the result:

20181119_072052

20181119_072102

I can't believe I could not figure out how to solve this problem for 20 years. I feel like an idiot.

My confusion had to do with the fact that I thought my crossing gates caused the power shortage to the track, and that was irrational. The gates are powered from a separate transformer from the one powering the track.

My train doctor logically solved the problem step by step in a few minutes. First, he had me turn off the power to the crossing gates and ran the train. No difference. Still had same power shortage.

Then, he placed the lock-ons and 2 short feeder wires, first where the power was still strong, and next where the power was starting to weaken on the track sections with the insulated rail. Problem solved.

Then, we ran the train again with the power supplied to the crossing gates. They worked fine and the train still ran well without slowing down.

Arnold

The train still appears to slow as it moves around the reversing loop.  If you can reach it try a lockon prior to the switch that starts the loop to a point on the loop track where it comes back to the switch.

Look at the light on your caboose. Coming into the loop the light is bright.  As it gets to the end of the loop it is dimmer.  As soon as it is back on the switch it is bright again.

Thanks Bill.  I also noticed the train still slowed down a little, and I agree that repositioning the lock-ons might eliminate that.  However, the train is going through a reverse loop and through town, and I want the train to slow down a little, not a lot. Arnold

Update on my Flyer 312 resurrection:

I installed the LED headlight in the locomotive last night.  After that, it was time to reassemble it, and I painstakingly fit the chassis to the boiler shell and applied the side rods and valve gear.  And if I do say so myself, it looked great.

Then a sudden doubt hit me.  I knew the wiring to the tender was royally screwed up by the previous owner, all of which I had corrected.  What if the locomotive's wiring had been tampered with, as well?  I connected the tender (whose shell is still being repainted), plugged in the tether and applied track power, and...

Nothing.  The e-unit clicks and turns, but the locomotive shows no signs of life.

Duhhh...  Why didn't I think to check the locomotive functionality with the now-correctly-wired tender before I reassembled it?  We live and learn, I guess.  Next step is to disassemble the locomotive again and check its wiring against my 312 wiring diagram, so it's done right.  When that's done, and I've reassembled it once more, I'll post more photos. 

In the 3rd reply on this thread, there is a video showing a  Postwar steamer slowing down a little as it approaches the switch on the far side of the layout near the wall.

Now take a look at the video below showing a LionChief Plus steamer approaching the same switch:

This demonstrates one of the big advantages of modern, technologically advanced trains. The slight voltage drop near that switch slows down the Postwar train; but the modern LC+ train is not affected by that voltage drop at all. 

Arnold


Attachments

Videos (1)
20181121_101024
Arnold D. Cribari posted:
Bill DeBrooke posted:
Arnold D. Cribari posted:

Above shows the problem (voltage drop), below is the solution (feeder wires), and the video below shows the result:

20181119_072052

20181119_072102

I can't believe I could not figure out how to solve this problem for 20 years. I feel like an idiot.

My confusion had to do with the fact that I thought my crossing gates caused the power shortage to the track, and that was irrational. The gates are powered from a separate transformer from the one powering the track.

My train doctor logically solved the problem step by step in a few minutes. First, he had me turn off the power to the crossing gates and ran the train. No difference. Still had same power shortage.

Then, he placed the lock-ons and 2 short feeder wires, first where the power was still strong, and next where the power was starting to weaken on the track sections with the insulated rail. Problem solved.

Then, we ran the train again with the power supplied to the crossing gates. They worked fine and the train still ran well without slowing down.

Arnold

The train still appears to slow as it moves around the reversing loop.  If you can reach it try a lockon prior to the switch that starts the loop to a point on the loop track where it comes back to the switch.

Look at the light on your caboose. Coming into the loop the light is bright.  As it gets to the end of the loop it is dimmer.  As soon as it is back on the switch it is bright again.

Thanks Bill.  I also noticed the train still slowed down a little, and I agree that repositioning the lock-ons might eliminate that.  However, the train is going through a reverse loop and through town, and I want the train to slow down a little, not a lot. Arnold

There is a side issue that may or may not be important.  The fact that the voltage drops indicates a bad connection.  Generally speaking, if you have a bad connection you also have heat building up at that point.  Apparently it is not enough of a problem that your downtown is going to burn down like Paradise, Ca. but it may be worth the effort to identify the poor connection point.

Arnold D. Cribari posted:

In the 3rd reply on this thread, there is a video showing a  Postwar steamer slowing down a little as it approaches the switch on the far side of the layout near the wall.

Now take a look at the video below showing a LionChief Plus steamer approaching the same switch:

This demonstrates one of the big advantages of modern, technologically advanced trains. The slight voltage drop near that switch slows down the Postwar train; but the modern LC+ train is not affected by that voltage drop at all. 

Arnold


Hi Arnold, First, I like watching your vids of your layout.

Looks like your electrical problem was solved, but, looking at the first vid where your problem was solved and the engine slightly slows up a little at the switch. Is that a pw 736 (2-8-4) engine ? If it is, I think the slowing up right at the switch may be do to that tight track radius at the switch causing the drive wheel flanges (1st and 4th) on the engine to slightly bind on the track.  


Thanks again to Bill & Trussman. You both know things about electricity and electrical connections that I don't know.

It's a minor miracle that my trains run at all. My wiring is my own creation. Instead of making 2 bus wires (one power and the other ground) underneath my train tables and then dropping feeder wires from every few feet of track to the bus wires,  I had all of the feeder wires come all the way back to copper strips just in front of the MTH Z4000 transformer and I soldered all the feeder wires to the appropriate copper strips. I also ran 2 short wires from the transformer and soldered them to the appropriate copper strip.

I'm not sure if my mess of wires causes the voltage drops. However, after spending several hours this afternoon adjusting my wiring, I decided to keep the layout "as is" through the holiday season, and then in January I will completely re-wire my layout using the proper bus wire/feeder wire technique.

Arnold

Arnold D. Cribari posted:

Thanks again to Bill & Trussman. You both know things about electricity and electrical connections that I don't know.

It's a minor miracle that my trains run at all. My wiring is my own creation. Instead of making 2 bus wires (one power and the other ground) underneath my train tables and then dropping feeder wires from every few feet of track to the bus wires,  I had all of the feeder wires come all the way back to copper strips just in front of the MTH Z4000 transformer and I soldered all the feeder wires to the appropriate copper strips. I also ran 2 short wires from the transformer and soldered them to the appropriate copper strip.

I'm not sure if my mess of wires causes the voltage drops. However, after spending several hours this afternoon adjusting my wiring, I decided to keep the layout "as is" through the holiday season, and then in January I will completely re-wire my layout using the proper bus wire/feeder wire technique.

Arnold

If you are going to the effort use #14 copper wire or better.  Depending on the size wire you used there is nothing wrong with the way it is currently wired.

Actually, the only train in my collection that needed "resurrection" was my Lionel standard gauge #42.  When I got it, it was in beautiful original condition on the outside, but all the wires were cut on the inside.  I had no idea how it was wired.  I brought it to Nassau Hobby and his repair guy there figured out the wiring schematic and re-wired the loco.  Best $100.00 i ever spent.42

Attachments

Images (1)
  • 42

Continuing with the resurrection saga of my Flyer 312:

As I knew I'd have to, I disassembled the locomotive, to find out why it wouldn't turn over, even though the tender-mounted reverse unit was operating.  Sure enough, although I had the wires arranged correctly, the previous owner (whom I have now mentally dubbed "Apefinger") had left the world's ugliest solder joint on the tether-to-field-coil wire.  And then, just to complete his artistic triumph, he inexpertly covered it up with adhesive tape, in a big, sticky wad. 

I unwound the gob of adhesive tape (getting ancient goo all over my fingers in the process), and discovered the fine field-coil wire had broken off at the enormous blob of solder.  I removed the pound and a half of old solder and replaced Apefingers' tether wire with a length of modern wire, securing the joint with a bit of heat-shrink tubing.

But, as I soon discovered, there was another problem as well.  The e-unit was turning over correctly, but the locomotive still didn't move.  On closer inspection, I discovered that the e-unit's lower two contact fingers were slightly loose, bent and out of alignment.  They looked as though they were making contact with the drum, but they weren't.

I removed the plastic plate holding the fingers, lightly polished the contacts with crocus cloth and carefully bent them back into proper shape.  Then I put a small drop of super glue at the base of each, to hold them in proper alignment, and put the plate back on the e-unit.

Success!  With transformer power applied, the e-unit turned over and the locomotive went through its forward/reverse cycle!  It was getting late by then, so I reassembled the K5, put a bit of touchup paint on it here and there and called it a night.

Still working on painting the tender shell, and I have to order a set of PRR dry transfers from Clover House after the holiday.  Also need to get some MV lenses for the marker lights.  When that's done, I will turn to fabricating a new drawbar.

 Meanwhile, I'll try to get a photo of the rejuvenated locomotive later on today.  Hope everyone is enjoying their Thanksgiving!

Arnold D. Cribari posted:

Balshis, is Apefinger a member of this Forum?


If he is, I hope his ears are burning.

As promised, here's a quick shot of the reassembled locomotive.  I know it's none too clear, but it was hand-held in available light.  When the whole thing is done, I'll post a better image:

Restored 312-1-21

One thing that has struck me as I've begun working on this locomotive is what a nice model of the real thing it is.  Proportions are good, faithfully capturing the oversized boiler of the real K5.  Detail isn't bad, either.  AC Gilbert was right when they claimed their locomotives were more realistic than their contemporary competition.  The only thing that isn't what it ought to be is the size of the drivers, which I think are too small (I didn't bother measuring them to be certain).

Attachments

Images (1)
  • Restored 312-1-2

Posted this before but it may be interesting to some new members.

My Lionel 158, the before pictures are below.

The 158 had one original dummy headlight and the just the base from the other dummy headlight. Replaced both dummy headlights with originals (hard to find) as reproductions are not the same as they have a shallow draw on the headlight dome part (very noticeable).

The contact assembly was missing one roller. Replaced the contact assembly with new unassembled one (one that had to be riveted together). The reason for this is that I like to use the Lionel badge from the original contact assembly (just looks better especially after you clean the badge). Just a note, I do not like to solder the wire to the contact assembly rivet facing the motor, as a intermittent condition could develop over time between the rivet and the contact plate. What I do is open a hole (that is all ready there) on the fiber plate part of the contact assembly (before I rivet the assembly together). Then I tin the contact plate where the hole would be with solder, making sure that it is completely flat/smooth and will not interfere with the assembly. Once assembled and riveted together I solder a wire to that hole point and install it in the frame.

One wheel had a large chunk out of it and the axles were a bit worn, bearings were still good. Replaced the one broken wheel with a repro and painted all the wheels the same color red, then installed new axles.

Cleaned motor and completely rewired it with a super flex wire (silicone jaclet with about 120 strands per wire fot 22 AWG). During assembly motor was oiled/greased and runs good.

Stripped all the paint from the frame and shell.  Had to bang out some dents and straighten out the frame and ends of the roof. Primed it and painted the frame and shell black. If you notice, you will not see any painted highlights around the window or on the handrails. From my research, the Lionel factory did not apply any paint to these areas with the black engine.

Replaced both couplers and rivets with new/repro’s. Then I rubber stamped the loco in gold (like the original).

I use two fillister screws backed up with a small nylon washer to hold the shell to the frame. The reason for the nylon washer is not to have the screw mess up the paint when tightened.

These are easy prewar loco’s to work with. They will also sharpen up your rebuild skills and when research/hunting for parts you will find a lot of other stuff to use or go to with other projects.


Attachments

Images (1)
  • mceclip0

This should more likely be considered a rejuvenation of a late 1930s 80N  semaphore.  I bought this last year but only recently worked on it and installed on the layout.

Rewired...tweeked and lubed the linkage and we are back in business. 

No need to hide the wires...they look like scale electrical cables.    FendermainIMG_2054IMG_2053

Attachments

Images (2)
  • IMG_2054
  • IMG_2053
Fendermain posted:

This should more likely be considered a rejuvenation of a late 1930s 80N  semaphore.  I bought this last year but only recently worked on it and installed on the layout.

Rewired...tweeked and lubed the linkage and we are back in business. 

No need to hide the wires...they look like scale electrical cables.    FendermainIMG_2054IMG_2053

Looks great. Pl;us your layout looks like fun. How did you make the road ramps on the track?

I did a project on some prewar trains for a coworker. We were talking about trains and he said he had some from when he was a kid but were rusty and junk. I told him I look at them and see what I could do. Turn out it was a 252 freight set. Here's some photos of what I did.

IMG_6480IMG_6491

Repainted frame and cleaned brass

IMG_6581

Somebody used and emory file and made a bracket to hold down brush plate. Must have lost the proper screws

IMG_6541

some strange brushes, that one with the copper strands would have torn up the plates

IMG_6545

Installed proper screws for brush plate and new brushes 

IMG_6554

Of course new wheels I could not find solid ones

IMG_6556

Also new brass gearsIMG_6583

IMG_6575

Attachments

Images (9)
  • IMG_6480
  • IMG_6491
  • IMG_6581
  • IMG_6541
  • IMG_6545
  • IMG_6554
  • IMG_6556
  • IMG_6575
  • IMG_6583
Videos (1)
IMG_6607
franktrain posted:

I did a project on some prewar trains for a coworker. We were talking about trains and he said he had some from when he was a kid but were rusty and junk. I told him I look at them and see what I could do. Turn out it was a 252 freight set. Here's some photos of what I did.

IMG_6480Repainted frame and cleaned brass


Somebody used and emory file and made a bracket to hold down brush plate. Must have lost the proper screws


some strange brushes, that one with the copper strands would have torn up the plates


Installed proper screws for brush plate and new brushes 


Of course new wheels I could not find solid ones


Also new brass gears


Nice Job, was your co-worker happy?

RonH posted:


Cleaned motor and completely rewired it with a super flex wire (silicone jacket with about 120 strands per wire fot 22 AWG). During assembly motor was oiled/greased and runs good.


Ron, what can you tell us about this "super flex" wire?  I'm not familiar with anything like that, but it sounds like something I could really use.

--John

The train layout that my father built for me for Christmas of 1960 was in terrible shape.  After 10 years in a barn in Temecula, it had rodent damage and had been the target of thieves who stole all of the trains and accessories from it (not to mention a great many other trains.

I brought it to Alhambra about two years ago.  Over I two to three month period, I removed the track, bleached the would to remove the rodent stains, painted the board, cleaned/replaced track, extended it by 4 feet, installed wide radius track (modified by Rich Riley), replaced about 90% of the wiring, replaced the missing stolen accessories, installed DCS and TMCC, and got everything working again.

I still need to do a bit more painting and touch up, but I have been running trains pretty much constantly since late spring of last year.


Before and after photos below.


After video:  https://youtu.be/OZFnWJfPvnA


Attachments

Images (3)
  • 20170310_171130
  • 20170310_171215
  • 20170607_134443
Last edited by RAK
Balshis posted:
RonH posted:


Cleaned motor and completely rewired it with a super flex wire (silicone jacket with about 120 strands per wire fot 22 AWG). During assembly motor was oiled/greased and runs good.


Ron, what can you tell us about this "super flex" wire?  I'm not familiar with anything like that, but it sounds like something I could really use.

--John

Just looked this up on nasty bay, just search with this. "5 Meters 28/30/24/26/22 AWG Flexible Silicone Wire Super Soft RC Cable UL". I think I used 22 AWG and picked it up at a Model RC show. (you may want to ask for the jacket diameter as some is used for RC batteries with a large diameter jacket.

I use only black on my engines and combine it with heat shrink and screw terminal when needed (do not like to screw bare wire down). I know it is not a Lionel standard on prewar, but I think it is better than originals. So with this my bringing back old prewar engines and car back to life is not a restoration but a rebuild.

With this I will order some for myself

Just ordered two 5 meter lengths of 22 AWG Flex wire.


Last edited by RonH
M. Mitchell Marmel posted:

As a side note,  I use repro Lionel wire from The Train Tender.  He offers black soft jacketed wire:  

SW-22

black super flex wire #22 gauge/ft

0.30


SW-24

black flex wire #24 gauge/ft

0.30

http://www.ttender.com/partslist.html

 How many strands on the 22 AWG? Does it have a silicon jacket? Just curious as the price would be good if it is the same type that I use. I just emailed train tender asking for this information


Sorry to get off topic, just responding to a question, I will get back to Resurrection Monday. 

Last edited by RonH
M. Mitchell Marmel posted:

Ron:  Jeff Kane at the Train Tender should have the information you need.   He's an excellent source for parts and extremely helpful.  

Mitch 

Contacted Jeff today and the wire he has seems to be the same as I have been using. He has  a large spool for a good price and it will be enough for many rebuilds. Thank you all for pointing me to Jeff Kane

RonH posted:
franktrain posted:

I did a project on some prewar trains for a coworker. We were talking about trains and he said he had some from when he was a kid but were rusty and junk. I told him I look at them and see what I could do. Turn out it was a 252 freight set. Here's some photos of what I did.

IMG_6480


Nice Job, was your co-worker happy?

Yes he was very happy and it will go to his grandson. There also was a 229 set and transformer that I cleaned up also. I put it all together for him in an old wooden crate.

I had a great time with this project. 

fullsizeoutput_a94fullsizeoutput_a91fullsizeoutput_a93

fullsizeoutput_a92

fullsizeoutput_a8f

IMG_6858

Attachments

Images (6)
  • fullsizeoutput_a94
  • fullsizeoutput_a91
  • fullsizeoutput_a93
  • fullsizeoutput_a8f
  • IMG_6858
  • fullsizeoutput_a92
Last edited by franktrain
Balshis posted:

I have been posting on the "Buy anything cool lately" thread about my experiences resurrecting the American Flyer 312 I bought at a train show on Nov. 4, so I won't bother repeating all that here.  But I can report on my current progress.

With the reverse unit installed in the tender, I have turned my attention to my least-favorite part of restoration: painting.  I put a coat of Krylon Flat Black on the tender, though it's actually more like Semigloss than flat.  Then I tried to put a "Pennsylvania" dry transfer on it before sealing the whole thing with clear flat finish.  Unfortunately, it seems that my PRR transfer sheet -- which is pretty old -- has dried out, because the lettering won't stick to the tender at all.  I'm going to have to send for some new transfers.  And yes, I know I could use decals, but I don't like decals and have always used dry transfers in the past and that's what I prefer, so I'm going to stick with them (no pun intended).

The locomotive boiler shell itself doesn't need repainting, except for a couple of tiny spots near the rear of the cab that can easily be touched up with a fine brush.  So the only remaining painting to do is the PRR keystone on the boiler front.  My eyes aren't what they used to be, so I've been doing it with a jeweler's loupe.  I finished the red background last night, and will probably do the yellow edging tonight, if I have time.

When the Flyer shoulder screw arrives from The Train Tender, I'll attach the NOS trailing truck that I got from eBay last week to the locomotive frame.  Then I'll wire in the LED headlight and put it all back together (I've already cleaned and polished the rods and valve gear).

Meantime, I'll be ordering some MV lenses for the marker lights on locomotive and tender.

I'm waiting till I get the locomotive reassembled to take any more photos, but here are a couple I took in the early stages of restoration.  This is the tender, just after I installed the reverse unit (the previous owner had ripped the original unit out):

Flyer1

I know the wiring looks pretty sloppy, but I wanted to be sure everything was long enough to reach the locomotive when I put the tender shell back on.

This is the rest of the 312, sitting on a DVD shelf in my basement, waiting for attention.  At this point, I hadn't yet done anything to it, though you can see the new trailing truck sitting just behind the cab:

Flyer2

If this thread survives that long, I'll post updates to this project here.

I just finished one of these up last week for a friend here at work. He didn't want me to removed the years of dirt and crud. Just wanted to get it running so his dad can see it still runs before he passes. Smoke box was disgusting, Someone just kept adding smoke fluid in the hopes of getting it to smoke. Cleaned all that up, replaced some parts, a newer e-unit, so now it chuffs and smokes like a new one.

Last edited by Jayhawk500
franktrain posted:
RonH posted:
franktrain posted:

I did a project on some prewar trains for a coworker. We were talking about trains and he said he had some from when he was a kid but were rusty and junk. I told him I look at them and see what I could do. Turn out it was a 252 freight set. Here's some photos of what I did.

IMG_6480


Nice Job, was your co-worker happy?

Yes he was very happy and it will go to his grandson. There also was a 229 set and transformer that I cleaned up also. I put it all together for him in an old wooden crate.

I had a great time with this project. 

fullsizeoutput_a94fullsizeoutput_a91fullsizeoutput_a93

fullsizeoutput_a92

fullsizeoutput_a8f

IMG_6858

I really like the wood box that you put the set into for him. It really gives the set a greater sense of quality and importance (not that it needed anymore than it already has by itself). It conveys the message that it is an heirloom and should be handled with respect. It’s also neat and clean and begs to be pulled out and played with. Great job!

It's been a busy week for me, but I did manage to squeeze in some time for my ongoing Flyer 312 K5 restoration.  First, I made a new drawbar for the tender.  Apologies that you can't really see it in this photo, but I put three holes in it, for attaching the tender at different degrees of closeness to the locomotive.  The furthest one (which is what's being shown here) is to allow the use of Flyer 20" curves.  The other two are for use on layouts with shallower ruling curves -- or for display, of course.

P1050557-2

The other step was to open up the tender-truck sideframes.

P1050561-2

These are Flyer plastic trucks, of course.  Although, I have, in my time, done the same thing to Lionel cast-metal postwar AAR trucks,  American Flyer metal truck sideframes are so thick that opening them up would have been a major task.

I know some might object to this step, and I understand that.  But in my opinion, it greatly improves the look of an already-excellent locomotive/tender set.  Rather like adding the trailing truck to the locomotive.

As an aside, as I've been working on this project, I've been more and more impressed at the quality of workmanship that Gilbert put into their postwar trains, both in design and execution.

Attachments

Images (2)
  • P1050557-2
  • P1050561-2

Finally, after just a little over a month, I can now post the completion of my American Flyer 312 restoration project:

P1050567-2

Having already finished up the locomotive, it was the tender that required the most restoration work, both cosmetic and mechanical.  Over the past couple of days, I applied Clover House dry transfer lettering, then sealed the PRR banner with Krylon Matte Finish (with which I'm pretty happy, I might add).  After two coats of the Krylon had dried, I put red jewels in the tender marker lights, using black silicone caulking to hold them in place.  I'd have used MV lenses, but after searching everywhere, I couldn't find any red ones available in the right size.

Next, I replaced the tender ladder extension with a repro from The Train Tender.  The original had been broken off by Apefinger long ago, but installing the new one wasn't difficult.

After that, it was time to finish up with the handrails.  Apefinger had let them develop rust, of course, so I went over all of them with fine sandpaper, followed by crocus cloth, to polish them up.  The final step was to shine and protect them with Simi-Chrome metal polish.

I know they're not scale thickness, but they look fine -- with the possible exception of the rearmost railings.  To my eye, the overscale diameter of them really sticks out.  Maybe at some future time I'll replace them with smaller-diameter brass railings; we'll see.

Once the tender shell was ready to go, it was time to screw it back on its frame.  And here, Apefinger still had one final desecration to throw at me.  Of the four self-tapping screws that hold frame to shell, only one was actually functional.  Another was too small and would not tighten, and the remaining two were broken off altogether.  I was able to back one of the broken ones out, but the other one will remain there, alas.  I found proper screws in my parts box to fill the other holes, and the tender was in one piece again, with a working reverse unit:

P1050568-2

That done, it was time to finish up the final touch on the locomotive.  Though I couldn't track down the correct MV red lenses, I was able to secure four green ones for the class lights.  Again, I used black silicone caulking to mount them to the upper fixtures and the ones on the pilot beam:

P1050570-2

You can't see the marker on the far side, but trust me, it's there.  If anyone's still curious about the details, I painted the keystone using a couple of toothpicks, a jeweler's loupe and a lot of patience.  The bell is NOS from eBay, polished with Simi-Chrome (I can't recommend that stuff highly enough; I've been using it for years).

ProTip: hand-held camera for an available-light closeup shot isn't exactly ideal, I know.


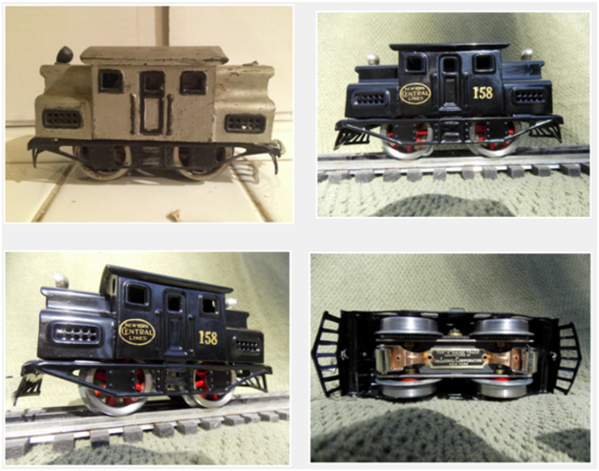
Summary:  and so, the very dirty, dingy and much-mucked-with American Flyer K5 that I brought home from a train show on November 4th is now a nice 1/64 model that runs and looks very good indeed. 

Was it worth all the time, work and expense I put into it?  It was for me.  I enjoy doing restorations, and I've always meant to get a Flyer K5 to go with the RDG 302 and NYC 322 that I restored some years ago.  Along with pride of ownership, I now have pride of workmanship, which is important to me.  And I hope that this real-time series of postings will encourage someone else to rescue another forlorn locomotive from oblivion.

For the future:

-- I will be mounting some track on a display board, and when I'm done, the K5 will finally leave my DVD shelf and take up residence on it when it's not actually running.  It'll stand between its brothers, the 302 and 322. 

--I already mentioned the possibility that I could replace the rear handrails with something thinner. 

--And I have a sneaking suspicion that the wires I used for the tender/locomotive tether may be a bit too stiff for heavy layout use.  I've already ordered some more-flexible silicone wire, in case replacement becomes necessary. 

--I'd like to make the builder's plates on the boiler sides a proper bronze color, and I've bought a bottle of metallic paint for the purpose.  But I won't get to that until I pick up a fine-point artist's brush. 

--And of course, there are still some spots on the locomotive that need a bit of black touch-up paint (the pilot is one of them).

Thanks, Arnold, for starting this thread.  I hope some of you have enjoyed this little saga.  I had fun writing it.

--John, 12/8/2018

Attachments

Images (3)
  • P1050567-2: AF 312 and tender
  • P1050568-2: 312 tender view
  • P1050570-2: 312 nose view

I'm not sure tuning an accessory qualifies as a resurrection, but here goes.

The operating forklift can be as big a crowd pleaser as any of the classic postwar accessories. Lately, mine grabs, but does not hold, the piece of wood. It drops the wood before it turns and dumps it.

I spent the last hour trying to figure out the puzzle. There is a spring that might have something to do with it.

Shortly, I will make a video and post it.

Any suggestions on how to get the forklift to hold the wood until it properly turns and dumps it would be most welcome.

Arnold D. Cribari posted:

As I was in the process of making this video of the operating forklift, I made 2 final adjustments. I made the track sit a little deeper in the track holder, I made the accessory as level as possible from back to front, and I slowed down the speed. Take a look:

I fixed it! Hooray!

Super!!  It is indeed satisfying to keep these wonderful creations humming along.

Fendermain

Arnold D. Cribari posted:

As I was in the process of making this video of the operating forklift, I made 2 final adjustments. I made the track sit a little deeper in the track holder, I made the accessory as level as possible from back to front, and I slowed down the speed. Take a look:


I fixed it! Hooray!

Good job  I've never seen one of these in action before.

Since returning from the Westchester Toy and Train Show, where I did my usually scrounging, I've been busy removing bad wires in the 2 passenger cars I bought, soldering new wires in place, and cleaning and lubricating.

Very satisfied with the outcome, and will post pictures tomorrow. Love those classic semi scale passenger cars with the names of cities/towns in NJ. They look so good behind the LC+ Jersey Central Pacific. Arnold

I would call this more of an exorcism rather than resurrection.  Last week my MTH PS2 260E began acting wildly when powered on the track...high speed lurching then a slow resumption...then repeat.  It must be possessed.

I checked the usual...clean wheels and track...has a new BCR2..adequate steady power ...proper lube. 

I use PW transformers so I got my Z1000 floor layout power hooked up to the track and sent a speed control off code...smooth operation then.  Ahhh...I cleaned the speed sensor...no change.

Checked with the MTH board...the expert said I was looking in the right area.

Most of you who know me know I am a pre/post war guy.  This is all new.

I looked at the sensor and it was a tilted up a bit. I tried to move it..no go. I then wedged a small piece of clear plastic behind the mount (see pic). This forced the sensor closer to the flywheel with a better angle. I hope it holds.IMG_2100

BACK IN BUSINESS.  It works like new.

In summation...deductive reasoning...forbearance and just plain luck prevailed.  I feel better now.

Fendermain

Attachments

Images (1)
  • IMG_2100
Last edited by Fendermain
Fendermain posted:

I would call this more of an exorcism rather than resurrection.  Last week my MTH PS2 260E began acting wildly when powered on the track...high speed lurching then a slow resumption...then repeat.  It must be possessed.

I checked the usual...clean wheels and track...has a new BCR2..adequate steady power ...proper lube. 

I use PW transformers so I got my Z1000 floor layout power hooked up to the track and sent a speed control off code...smooth operation then.  Ahhh...I cleaned the speed sensor...no change.

Checked with the MTH board...the expert said I was looking in the right area.

Most of you who know me know I am a pre/post war guy.  This is all new.

I looked at the sensor and it was a tilted up a bit. I tried to move it..no go. I then wedged a small piece of clear plastic behind the mount (see pic). This forced the sensor closer to the flywheel with a better angle. I hope it holds.IMG_2100

BACK IN BUSINESS.  It works like new.

In summation...deductive reasoning...forbearance and just plain luck.  I feel better now.

Fendermain

Yes!  That's the kind of improvisation that model railroad craftsmanship rewards.  Good thinking, Fendermain.

Here's another small resurrection.

Bought 2 scuffed up classic Postwar semi-scale NJ passenger cars (Newark and Elizabeth) at the Sunday train show. Besides cleaning them with Ivory soap, warm water and a soft tooth brush, and lubricating the wheels (only I drop of light oil on the axle on each side of wheel), one of them was missing the passenger silhouettes and had wire with insulation peeling off.  I know such bad wire can cause shorts.

I inserted silhouettes from another duplicate and beat up Hillside observation car and replaced the defective wire for the lights, which is a relatively easy soldering job.

Then I got ambitious and replaced old wires with brittle insulation on a couple of other passenger cars I already had. This was good soldering practice for me.

Here's a short video of 6 of these passenger cars, including Newark and Elizabeth, being pulled by LC+ Jersey Central Pacific steamer, which I think is the perfect engine for these cars with the names of NJ cities and towns.

One more thing, there was a lot of rust on the inside of one of these cars, a little rust in the other, so I sprayed the inside with WD40 and used another old tooth brush and small pieces of paper towels to remove some of the rust. Does WD40 help control such rust?

Next time, I will take before and after pictures.

Also, it occurred to me that I could replace the light bulbs with LEDs. I think Dan mentioned he has done that for some of his train related equipment. Is that a good idea? How does that impact the value? I've never sold any train related item, and probably never will, but my kids will someday sell most of it, probably on E Bay after I'm gone. Nothing I have is mint, and everything is run a lot. For me, it's been purely "an investment in happiness." Arnold

Attachments

Videos (1)
20181211_075634

Nice work, great revitalization process, good addition with the silver NJ passenger fleet  Arnold. Thanks for sharing the video.

The value of a train is proportional to the happiness it makes. In dollars and cents it depends on what it means to the next owner. In well loved or run PW I have always thought that the LEDs are more stable, perhaps brighter with less voltage.  Perhaps a power voltage saving cooler bulb and longer life may be worth it for other reasons. However, the initial cost should be investigated.  My brain perceives the LED light to be cold rather than vintage incandescent warm. I personally like the traditional bulb.

I am of the belief that the interchangeability of bulbs does not impact the value unless you have that $4000+ mint NH Lionel  EP 5 museum piece ! Lol.

Arnold D. Cribari posted:

Here's another small resurrection.

Bought 2 scuffed up classic Postwar semi-scale NJ passenger cars (Newark and Elizabeth) at the Sunday train show. Besides cleaning them with Ivory soap, warm water and a soft tooth brush, and lubricating the wheels (only I drop of light oil on the axle on each side of wheel), one of them was missing the passenger silhouettes and had wire with insulation peeling off.  I know such bad wire can cause shorts.

I inserted silhouettes from another duplicate and beat up Hillside observation car and replaced the defective wire for the lights, which is a relatively easy soldering job.

Then I got ambitious and replaced old wires with brittle insulation on a couple of other passenger cars I already had. This was good soldering practice for me.

Here's a short video of 6 of these passenger cars, including Newark and Elizabeth, being pulled by LC+ Jersey Central Pacific steamer, which I think is the perfect engine for these cars with the names of NJ cities and towns.

One more thing, there was a lot of rust on the inside of one of these cars, a little rust in the other, so I sprayed the inside with WD40 and used another old tooth brush and small pieces of paper towels to remove some of the rust. Does WD40 help control such rust?

Next time, I will take before and after pictures.

Also, it occurred to me that I could replace the light bulbs with LEDs. I think Dan mentioned he has done that for some of his train related equipment. Is that a good idea? How does that impact the value? I've never sold any train related item, and probably never will, but my kids will someday sell most of it, probably on E Bay after I'm gone. Nothing I have is mint, and everything is run a lot. For me, it's been purely "an investment in happiness." Arnold

Nicely done Arnold.

I'm kinda partial to the 027 2400 series passenger cars. I just got done soldering new wires for the lights on four of them.

Bought a Lionel 2321 FM Lacawanna from ebay at a good price and I knew it had battery damage but I took a chance. Otherwise it looked solid.

IMG_4922

When I got it I started the cleanup and opened the top and found the corroded battery but the motors had original tape to hold the wire in place this meant the engine was probably never serviced from 1954.

IMG_4929IMG_4930

Yuck!

IMG_4931

Next step was to get rid of that battery, not an easy task.

IMG_4933IMG_4936IMG_4938

Now that the battery is removed I gave the armatures and axles a little oil and clean the wheels and pickup rollers. Heres a video of the first power.

** Video to be posted


Then did some more cleanup of battery holder area and e-unit. Did not mess with the horn yet.

IMG_4966

IMG_4968IMG_4969IMG_4970

Also cleaned and lubed pinion gears and armatures and brushes this 2321 is ready for duty for another 60 years.

IMG_4972

Now I have my Thunderbird set.


Attachments

Images (12)
  • IMG_4922
  • IMG_4929
  • IMG_4930
  • IMG_4931
  • IMG_4933
  • IMG_4936
  • IMG_4938
  • IMG_4966
  • IMG_4968
  • IMG_4969
  • IMG_4970
  • IMG_4972
Videos (1)
IMG_8226
Last edited by franktrain
Arnold D. Cribari posted:

As I was in the process of making this video of the operating forklift, I made 2 final adjustments. I made the track sit a little deeper in the track holder, I made the accessory as level as possible from back to front, and I slowed down the speed. Take a look:

I fixed it! Hooray!

Nice job Arnold.  My forklift loader works well, but the forklift driver must have had too much coffee that day.....LOL  At 1:01 into the video, the forklift appears.

https://youtu.be/KSRahRI7OWY

franktrain posted:

Bought a Lionel 2321 FM Lackawanna from ebay at a good price and I knew it had battery damage but I took a chance. Otherwise it looked solid.

When I got it I started the cleanup and opened the top and found the corroded battery but the motors had original tape to hold the wire in place this meant the engine was probably never serviced from 1954.

Yuck!

Next step was to get rid of that battery, not an easy task.

Now that the battery is removed I gave the armatures and axles a little oil and clean the wheels and pickup rollers. Heres a video of the first power.

** Video to be posted

Then did some more cleanup of battery holder area and e-unit. Did not mess with the horn yet.


Nice work on cleaning up that ugly battery damage.  I only have one PW diesel, and a mess like that is the reason I always take the battery out when I won't be running it for a while.  Enjoy your FM -- you've earned it!

--John

Franktrain was kind enough to work out a deal with me for some additional Marx 234/234/236 stream line passenger cars for my Norfolk and Western Powhatan Arrow project which I hope to get back to soon.

Only ‘problem’ now is that I have 2 observation cars. BUT I also have been wanting a trolley...and I have a spare motor with a 2position e unit. Soooo....Long story short, the worse of the two observation cars will get the motor transplant.  It will also allow me to experiment with the paint/taping so I get it right for the Powhatan arrow cars  

A9FB2EEE-0F68-48B1-92A7-862B39A7DAB8

CE21A3C5-5012-4872-A3EE-ECBC89191F74

CE4DDFB1-3CE6-45DC-AEBB-4678F3C18D69


A3C80A52-AE98-4A6C-AD1C-763198A4FC29

Can anything be done with the passenger paper inserts? Can they be cleaned? Do they sell replacements or do I need to remake them in some fashion?

Attachments

Images (4)
  • A9FB2EEE-0F68-48B1-92A7-862B39A7DAB8
  • CE21A3C5-5012-4872-A3EE-ECBC89191F74
  • CE4DDFB1-3CE6-45DC-AEBB-4678F3C18D69
  • A3C80A52-AE98-4A6C-AD1C-763198A4FC29
Last edited by JD2035RR
JD2035RR posted:

Franktrain was kind enough to work out a deal with me for some additional Marx 234/234/236 stream line passenger cars for my Norfolk and Southern Powhatan Arrow project which I hope to get back to soon.

Only ‘problem’ now is that I have 2 observation cars. BUT I also have been wanting a trolley...and I have a spare motor with a 2position e unit. Soooo....Long story short, the worse of the two observation cars will get the motor transplant.  It will also allow me to experiment with the paint/taping so I get it right for the Powhatan arrow cars  

A9FB2EEE-0F68-48B1-92A7-862B39A7DAB8

CE21A3C5-5012-4872-A3EE-ECBC89191F74

CE4DDFB1-3CE6-45DC-AEBB-4678F3C18D69


A3C80A52-AE98-4A6C-AD1C-763198A4FC29

Can anything be done with the passenger paper inserts? Can they be cleaned? Do they sell replacements or do I need to remake them in some fashion?

JD,  I havdn't the faintest idea how to help or advise you, but I greatly admire you and others who have the skills and willingness to take on such a challenging rusty resurrection project. Arnold

JD2035RR posted:

Franktrain was kind enough to work out a deal with me for some additional Marx 234/234/236 stream line passenger cars for my Norfolk and Southern Powhatan Arrow project which I hope to get back to soon.

Only ‘problem’ now is that I have 2 observation cars. BUT I also have been wanting a trolley...and I have a spare motor with a 2position e unit. Soooo....Long story short, the worse of the two observation cars will get the motor transplant.  It will also allow me to experiment with the paint/taping so I get it right for the Powhatan arrow cars  

I recommend keeping the truck at the tapered end,  and mounting the motor at the blunt end,  a'la what Marx did with the F3,  

Can anything be done with the passenger paper inserts? Can they be cleaned? Do they sell replacements or do I need to remake them in some fashion?

I think Olsen Toys might have repros;  consult them.  

Good luck and keep us posted! 

Mitch

M. Mitchell Marmel posted:
JD2035RR posted:

Franktrain was kind enough to work out a deal with me for some additional Marx 234/234/236 stream line passenger cars for my Norfolk and Southern Powhatan Arrow project which I hope to get back to soon.

Only ‘problem’ now is that I have 2 observation cars. BUT I also have been wanting a trolley...and I have a spare motor with a 2position e unit. Soooo....Long story short, the worse of the two observation cars will get the motor transplant.  It will also allow me to experiment with the paint/taping so I get it right for the Powhatan arrow cars  

I recommend keeping the truck at the tapered end,  and mounting the motor at the blunt end,  a'la what Marx did with the F3,  

Can anything be done with the passenger paper inserts? Can they be cleaned? Do they sell replacements or do I need to remake them in some fashion?

I think Olsen Toys might have repros;  consult them.  

Good luck and keep us posted! 

Mitch

Thanks, Mitch!  I may also need to source a pantograph or at the very least a trolley pole...


Regarding motor placement, I also thought it would be an issue to place it in the center as it would not be able to negotiate any curve.  I thought I would just stick the motor on one end, and keep the truck on the rounded end.  However, I think it would still be an issue because the motor has zero room for any kind of swivel movement.  The Marx F3s used a truck that allowed some swivel, seen below.  I don't think a static motor on one end while maintaining the standard truck on the other end will work.

My solution to all of this is to go back to placing the motor in the center, remove the stock trucks from the frame, then re-attach the stock trucks to a short piece of tin that allows the pivot point to be nearer to the motor in the center.  This way it acts more like steamer with a lead and trailing truck that articulate, rather than just pivot and it should negotiate 031 curves.  

373907FB-FA69-46AE-819D-F3BB33B94408 

Attachments

Images (2)
  • mceclip0
  • 373907FB-FA69-46AE-819D-F3BB33B94408
Last edited by JD2035RR

41241306-AAC5-4872-AC0A-7B2D2D5A38C9Marx 236 to Trolley Project:

I cut out the bottom of the observation car chassis to insert the motor. Still need to sand and paint but it’s on its way. I also ordered the repro passenger insert. 

To run the trolley with the 2 position e unit, I will isolate the center rail in a few places, wired back to a button that observers can push to get the trolley to the next point. 

Attachments

Images (1)
  • 41241306-AAC5-4872-AC0A-7B2D2D5A38C9
Videos (1)
D6A6EA8C-EB66-49DF-AA6D-BD61424D755C

As stated on another thread, I am in process of re-positioning a turn out and siding, in order to eliminate a voltage drop on a main line of my layout. It's a lot of work, but very gratifying because trains are as already running much better.

Will post photos tonight or tomorrow. Arnold

PS: you folks that are train doctors are the best. Love to hear about all your successes.

 Thanks PRR, I reworked the photos.

Not so much a resurrection as a reincarnation.  I plan to put a something in it (maybe keep the newly painted cement containers with washers on top for the 282 crane) and run with a Pennsylvania Power and Light Shay.  Decals ended up looking old which was good!

AFTER                                                                                                                                     Before

100_58576162


Attachments

Images (2)
  • 100_5857
  • 6162
Last edited by hokie71

Found this under a dealer table and was not familiar with this model transformer(TW)  it was labeled 175 watts so for $5 I took a chance.

fullsizeoutput_d44

First thing I did was open it up and found someone cut a few of the wires, not a good sign! Got my Greenberg manual out and did some research. This may be one transformer that may not be resurrected. At 60 watts and some strange operation I think it will go back under table for someone else that may need parts.

IMG_8251

I may try putting the wiring back together and put a cheap cord on it just to see if it works.

eIMG_8250fullsizeoutput_d48


Attachments

Images (4)
  • fullsizeoutput_d44
  • IMG_8251
  • fullsizeoutput_d48
  • IMG_8250

Marx 236 to Trolley Project

First pic is what the rusty cars looked like after evaporust. Removed all of the rust and most of the lithograph. Forgot to take a picture of the trolley at this stage.  2nd picture is base coat on the trolley.  3rd pic is the paint scheme I willbe attempting to mimic.

572A5CE4-14A6-4196-BDE6-E033D2D1A5BC


0948BA65-3312-464A-BE53-21AAA4935582


03779583-89CD-4529-8359-029C31794A0A


Attachments

Images (3)
  • 572A5CE4-14A6-4196-BDE6-E033D2D1A5BC
  • 0948BA65-3312-464A-BE53-21AAA4935582
  • 03779583-89CD-4529-8359-029C31794A0A
JD2035RR posted:

Marx 236 to Trolley Project

First pic is what the rusty cars looked like after evaporust. Removed all of the rust and most of the lithograph. Forgot to take a picture of the trolley at this stage.  2nd picture is base coat on the trolley.  3rd pic is the paint scheme I willbe attempting to mimic.

572A5CE4-14A6-4196-BDE6-E033D2D1A5BC


0948BA65-3312-464A-BE53-21AAA4935582


03779583-89CD-4529-8359-029C31794A0A


Looks like your well on your way, JD, to a beautiful resurrection. We all look forward to seeing the final outcome. Arnold

Arnold D. Cribari posted:
JD2035RR posted:

And the evaporust bath:

DFBEB6B4-B375-4C83-A94E-6927A5ADA582


This looks like very powerful stuff. Is it important to use evaporust in a well ventilated area and away from the oil burner or furnace? I would think so. 
Any other precautions that you recommend  to avoid some potential disaster when using it?
Where does one buy evaporust? Arnold
 

Amazingly enough, it’s very safe,  stable, and environmentally friendly. I was amazed at what it did to the rust and any oils - including the litho paint. I bought mine from amazon, but I think some auto parts stores carry it. Here’s the description:

A438D487-1AEA-44F1-BBA1-A78C5212CF1E


Attachments

Images (1)
  • A438D487-1AEA-44F1-BBA1-A78C5212CF1E

Regarding JD's successful use of Evaporust, which I had never heard of before, It occurred to me it might be useful to remove rust from tubular track and especially track pins.

I did a search and saw that this subject has been discussed on this Forum before. Rusty track pins will cause voltage drops, so I do my best to replace them, but being a pack rat I usually save the rusty pins if they are not too far gone. 

I plan on getting Evaporust and try it out on my rusty pins and track. Will do a Google search to find out where to buy it. 

I am hoping that the Big E has stuff like Evaporust, bright boys, smoke pellets, bayonette bulbs, spray glue, O Scale trees in large volume, scenery materials, and other stuff that train nuts like me need periodically. LOL, Arnold

I'm not exactly a train doctor, but my latest repair was on a modern Madison car from the 2008 GG1 #2124W set. It started shorting when going over 022 switches. Luckily, just the ground clip came off. There are two light holders on the frame bottom. These holders have two twist tabs, that lock it to the frame. The lights are interconnected to reduce flickering. They are grounded by a c clip to the truck stud. When I replaced a bulb and twisted it back in the wire wrapped around the socket and pulled the c clip off. It's good to get an easy repair once in a while!

Chris

Arnold, there probably won't be evapordust but if you take your time and look, you will go home nearly anything you need (or not need!). The better living center, the Largest  hall is on your right opposite the live stationary steam engine. . It's an odd shaped building but you can plan out a path by using the map that is given to you when you enter. I circle places I have been and how to revisit tables by the number and letter location. This is a multigage show so, you will find parts people scattered Throughout. 

Tons of merchandise and interesting layouts make for a grand time.


caa posted:

I'm not exactly a train doctor, but my latest repair was on a modern Madison car from the 2008 GG1 #2124W set. It started shorting when going over 022 switches. Luckily, just the ground clip came off. There are two light holders on the frame bottom. These holders have two twist tabs, that lock it to the frame. The lights are interconnected to reduce flickering. They are grounded by a c clip to the truck stud. When I replaced a bulb and twisted it back in the wire wrapped around the socket and pulled the c clip off. It's good to get an easy repair once in a while!

Chris

Chris, sounds like a good diagnosis and treatment to me.  Good work, train doctor!

*bump* a good title for me as I refer to this MTH Standard Gauge train Engine as being BACK FROM THE DEAD... and just in time for Halloween! My Gold Millenium version of the AF President’s Special had been boxed and out of action for years. Finally after moving, and sitting In its box for two years here, it was time to build the Layout this train set would live in. The layout was built, but the engine was a no- go. This early Summer 2020 I had a MTH repair guy that came over to our home to see it. He immediately identified that it needed a new board and It needed a new chip. I got the engine back in late September 2020. This video is of the first time it was run on this layout- not just the other three cars being pretty posers on a not-yet live track.  

Attachments

Videos (1)
trim.CA4F74D6-FD40-4E34-9ACD-CBC3258E2912

Add Reply

Post

OGR Publishing, Inc., 1310 Eastside Centre Ct, Suite 6, Mountain Home, AR 72653
800-980-OGRR (6477)
www.ogaugerr.com

×
×
×
×
Link copied to your clipboard.
×
×