
I am seeking some advice for the newbie, me... I bought some rock molds but what I am trying to determine is what is the best support for these rocks. I want to make a rock cliff on one side of my second elevation, but what is the best backing? Should I use cardboard or foam? what should I use to glue them on? Anyone have any sample work they can share of their own rock-mold work?
Original Post

Replies sorted oldest to newest

I used 2" styrofoam, to build the base for my mountain wall. I stacked the styrofoam to the height I wanted, glueing each layer together. I used a caulking tube type of adhesive, which is specifically manufactured for use with styrofoam. Some adhesives will apparently attack a styrofoam, so make sure you get a type that is marked as "safe" to use with styrofoam, if you go this route.

Anyway, once I glued all the 2" sections together, I "carved" the styrofoam to give it a more rock like appearance and filled in the seams with joint compound to create the backdrop of the "Mountain wall". I then painted the whole thing a medium grey, and I used the same adhesive to glue on my rock faces, that I had made using the rock moulds & hydrocal plaster. Once the glue had set, I painted the rock castings using the various colour washes, then finally a black wash, and sprayed the whole thing with sealer, and that was it.

Once in place, I added the groundcover, trees, and other landscaping materials. To be honest, this was my first attempt at any kind of mountain building, and I'm quite happy the way it turned out. Not like the real pro's, but good enough for me.

I hope this helps

REV


I used plaster cloth held in place with pins once it the way you want it (Yes dry)

I spray it with a spray bottle it will set in place. once it's dry I spray the mountian with Valspar textured paint in Manhattan Mist (Looks like granite)

Once thats dry I hot glue the rocks at random and in the areas where they come together I use the plaster with the fiber mixed in (I forget what they call it)
To blend them
The granite color of the paint will give you a nice base just like painting your table top green.
This is my N scale layout but you get the idea.

David


You can see the base color showing thru in several places and I sprinkle real dirt on top of the rocks because thats the way it is in the real world.
Then I use a combination of green and burnt grass letting some of the dirt show thru.

David
Yes it is.......I originally had the track make the turn inside the room, but soon realized the radius of the track making the turn really limited the space I had for a town area, so I had barely finished laying the track and decided to punch through the wall and have the loop on the other side.

This also gave me the opportunity to have my yard lead track entry outside the main room, which gave me a lot more yard track area to make up trains and not be interfering with the mainline.

The inside track you see coming through the right side tunnel is actually my yard lead, which acturlly starts at a switch just outside the left side tunnel.

Before going through the wall


After


Still have a lot of finishing work to do, it's a little farther along since these shots were taken, but not much. I have to get my "you know what" in gear.

REV
Rev, thanks for sharing the additional pics. The pass through the wall is great and looking at the before-picture it was definitely necessary. It adds a fantastic dimension to the layout.

We're also using FasTrac so I know how much space it takes up, especially in turns. We spent well over 8 months designing and redesigning the layout of the track after we built the table. We just were not happy with the amount of open space for a town, which I want, and the train yard my husband wants. In the end we settle on a 3 layer plan. First level will the a small yard and some industrial buildings. 2nd level will be an elevated subway line. And the 3rd level will be the town. Level 1 track is down and I am working on landscaping and ballasting. It will be awhile before I get to the town.

I noticed on the left side of your table that you have what looks like a descending slope? Do you have another level under the table? I've been considering doing that for extra storage. Wanna share any pics? Big Grin
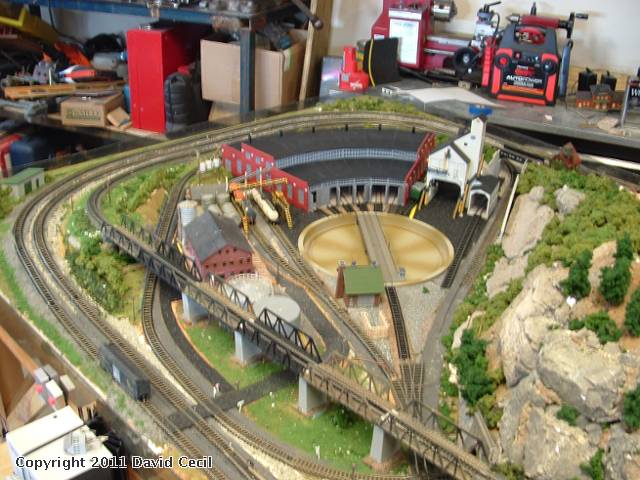
I don't actually have a lower level under the town & yard area, it's really just a loop that runs along the front of the benchwork, then I have a switch that will either let the train run a full loop at the lower level, or I can run it up the rear slope to the upper level. While on the lower loop, I have another switch which will divert the train off the lower loop, back up the trestle grade, thereby being the reversing loop for that level.

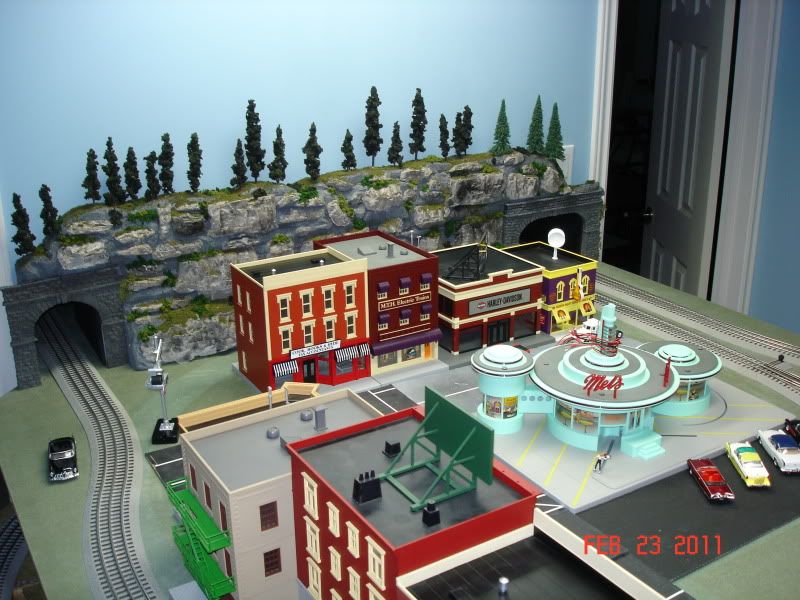
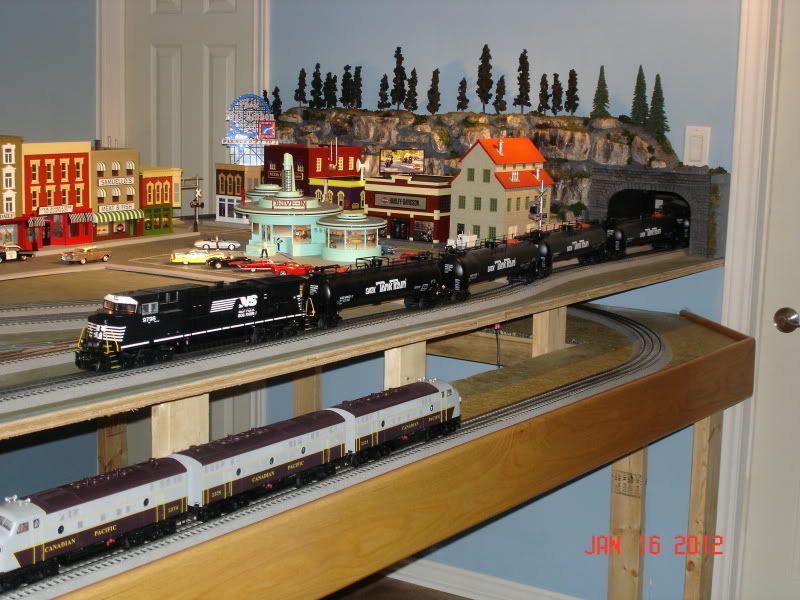
You are very right on the question of space for the town area, a town area needs a lot of buildings to look good. I have 16 buildings in mine now, and I'm planning a Park in the space accross from the main street, in front of Mel's Diner, which is a pretty fair sized area. Without that loop outside the wall, I probably would only have been able to fit in 5 or 6, and probably no space for any park.

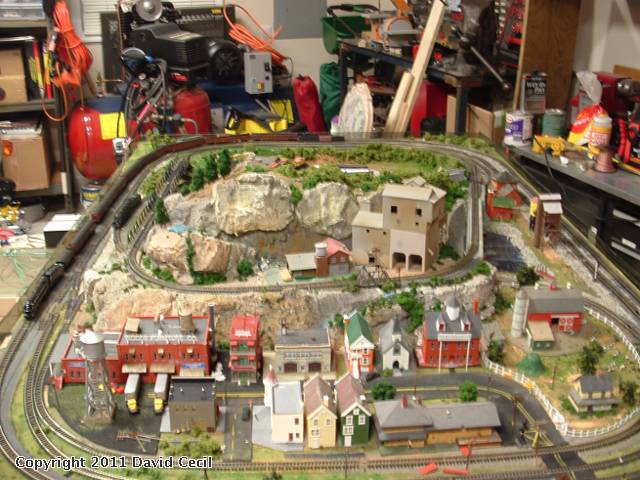
This pic shows the level run at the front side, which leads to the backside grade, or a switch which will leave the train on the lower level


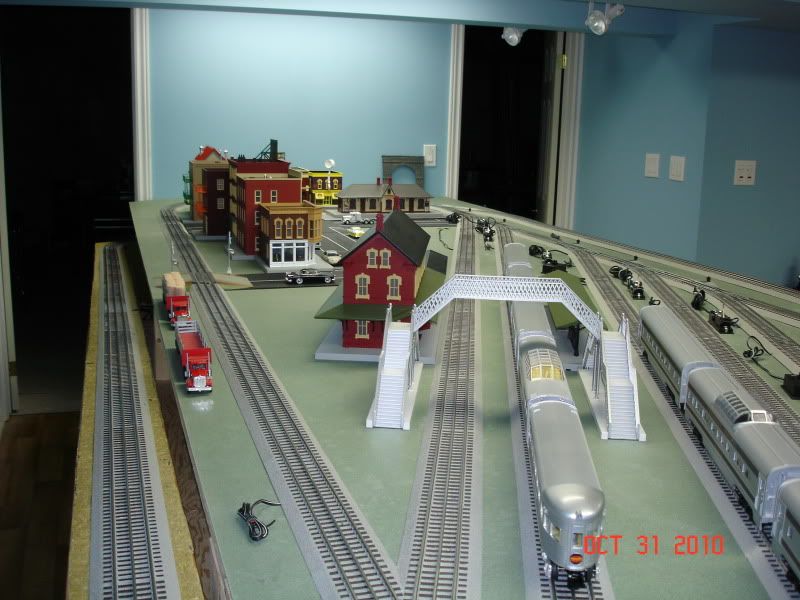
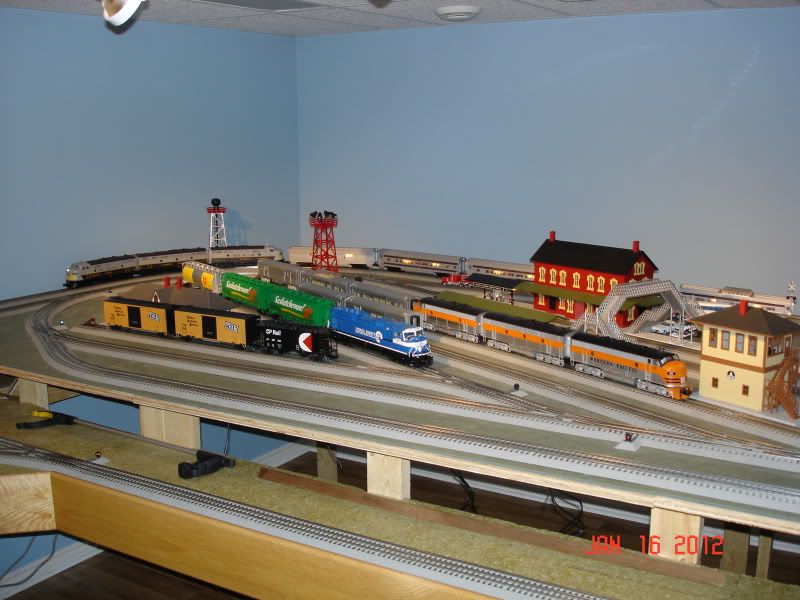
This shows a pic of my "yard" (opposite end from the town) The diagonal track running past the MTH station is the "reversing" loop for the upper level. You can see my CP F3 Passenger train just rounding the bend in the background. It's just coming off the rear grade track.


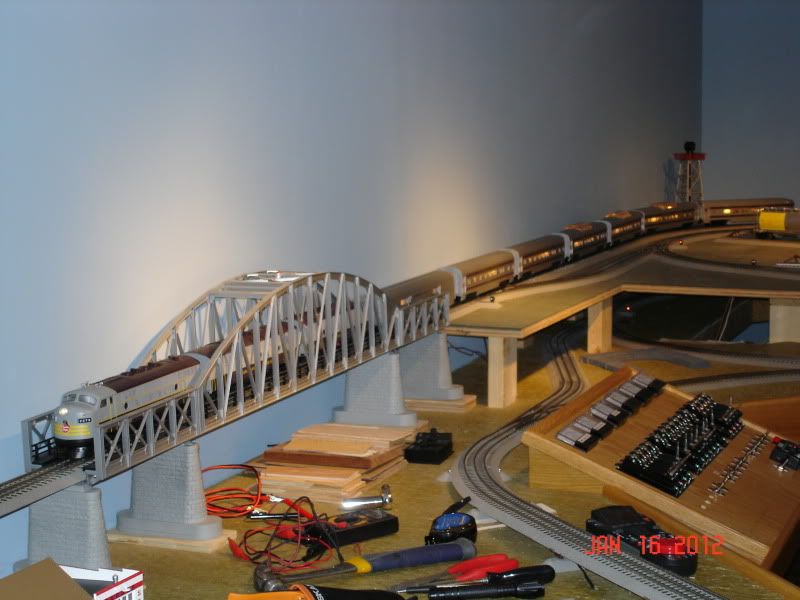
This pic shows the train as it passes through the MTH bridge, which is the start of the "Trestle" grade, leading back down to that front lower section shown in the first pic. You can also see just before the bridge is where my upper and lower loops connect. With the reversing loops on each level, I can switch trains back and forth between each level. This is where that longer yard lead is a must.....somewhere to "hold" the one train while making the switch.


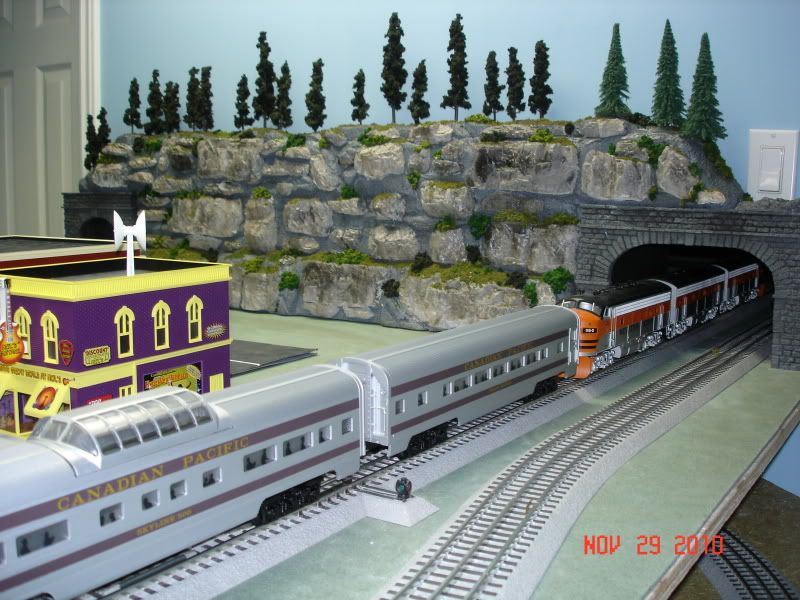
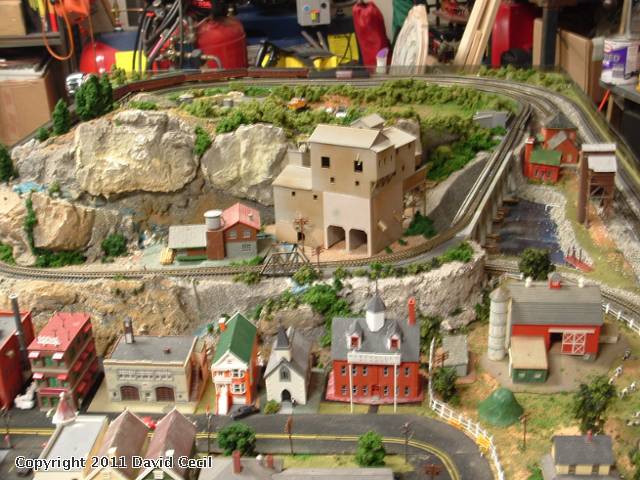
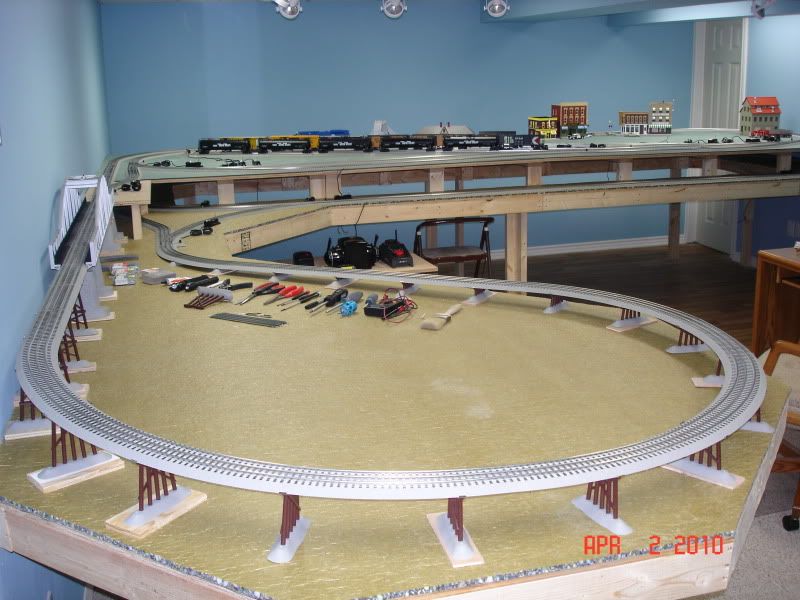
This is an older pic of the trestle grade, which will give you an overall perspective as to how the trestle grade connects, and shows where the lower loop comes back in to form the lower "reverse"loop. I plan on building a residential/tourist area in the space inside the trestle loop. You can see how my main table has the 2 levels. The outer lower loop is at 36" and the inner upper level is 42"......makes it easier to crawl around under the 42" for doing any wiring.


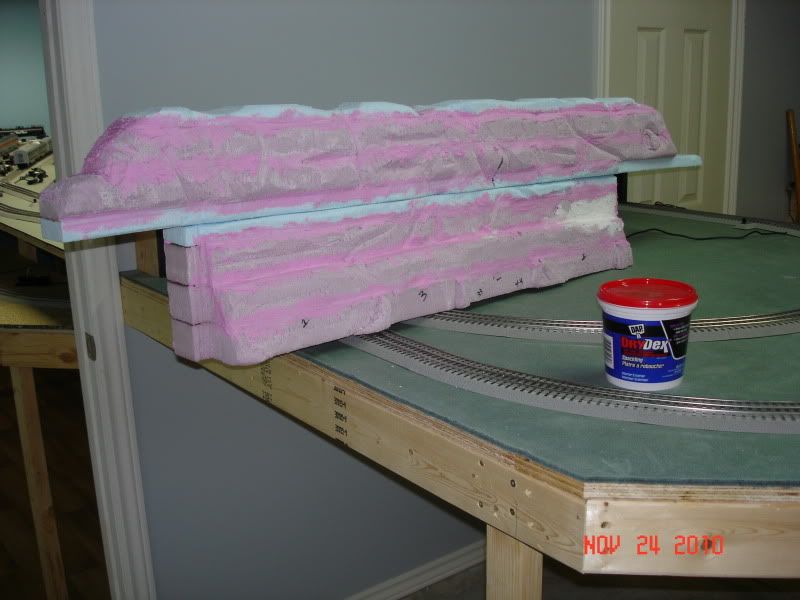
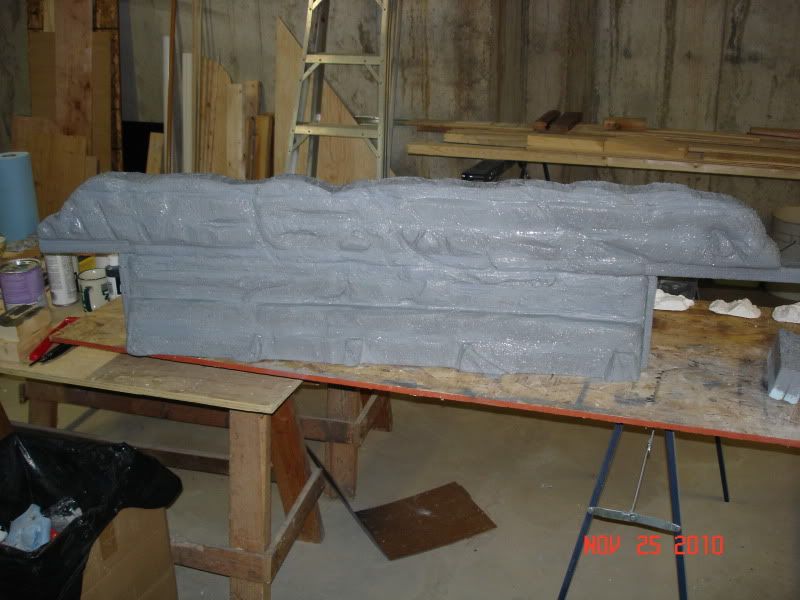
Hope you like the pics, and thank you for your interest. I too have only been back into model trains for the last few years, and it is a real enjoyment for me. Like I said though, I have to get my you-know-what in gear. My next project will be to build another Rock face wall, and add the tunnel portals along the lower track that runs along the front. Just can't seem to get started on it.

I saw a few of your pics on the scenic showcase thread showing your small hill project, you did a great job, looks very professional..... I like the shot of "Phil" waving from the train, the finishing between the tracks and turnout looks great. What are the dimensions of your layout? Looks to be a fair size, where you will have lots of opportunity to showcase your landscaping skills.

Have a great day.

REV
Last edited by revitupfaster
Post

OGR Publishing, Inc., 1310 Eastside Centre Ct, Suite 6, Mountain Home, AR 72653
800-980-OGRR (6477)
www.ogaugerr.com

×
×
×
×
Link copied to your clipboard.
×
×