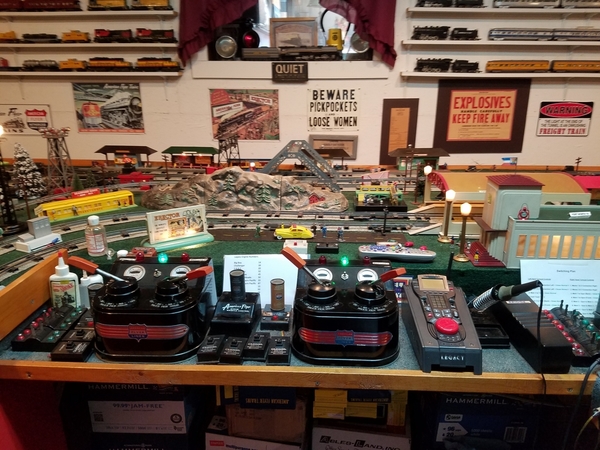
I have been checking this site several times a day hoping for conversation and activity.  With most of us being sequestered I would have thought more toy train chatter would be happening.

Let's have more fun and conversation.  What are you people doing in our hobby???? 

Last edited by Roundhouse Bill
Original Post

Replies sorted oldest to newest

Bill,

I agree that the amount of posts has not increased.

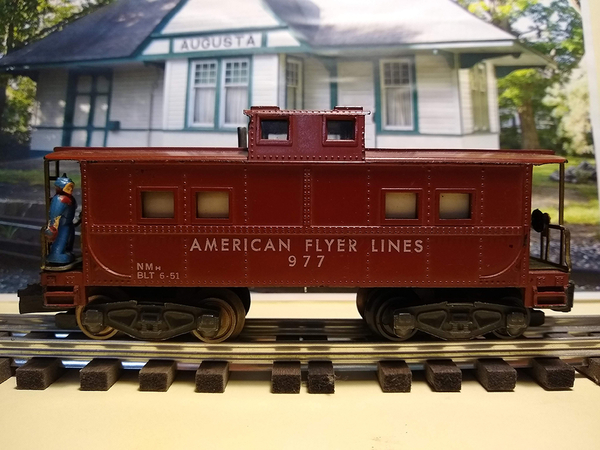
Among other things, I have been using the time to update many of my passenger cars to LED, my cabeese as well. 

With our club, we would normally get together weekly for what we call bragging rites, have a theme for that evening, and vote on the best consist of that theme for that weeks bragging rites member, with the shutdown, I am trying to make it a virtual bragging rites with video entries sent to a central point, our website, and let the members choose their favorite, and socialize in a virtual manner.


Jim Elster, of Scenic Express products, called me today to see how I was doing.

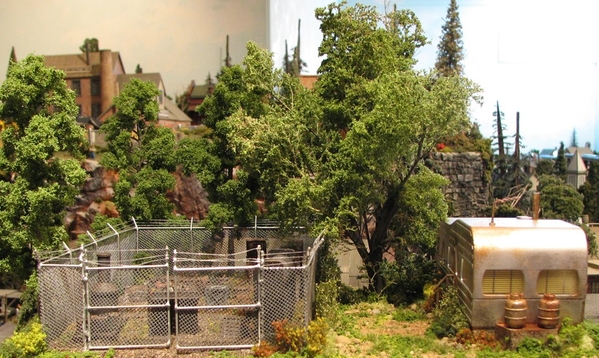
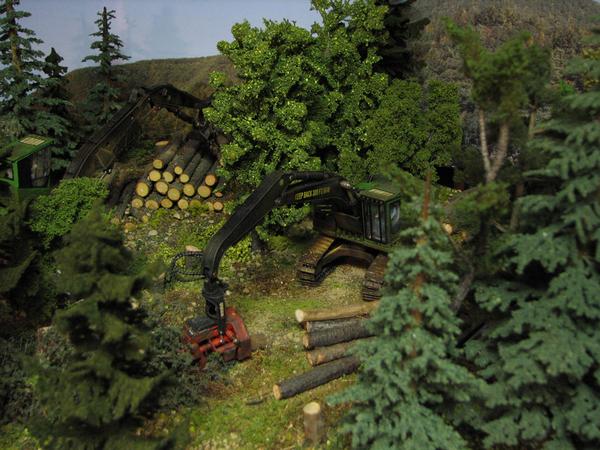
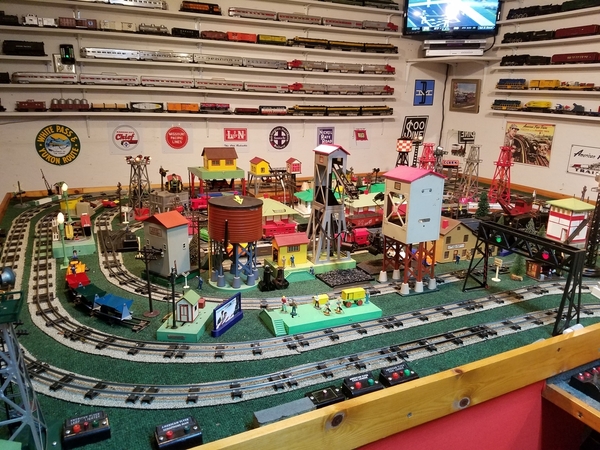
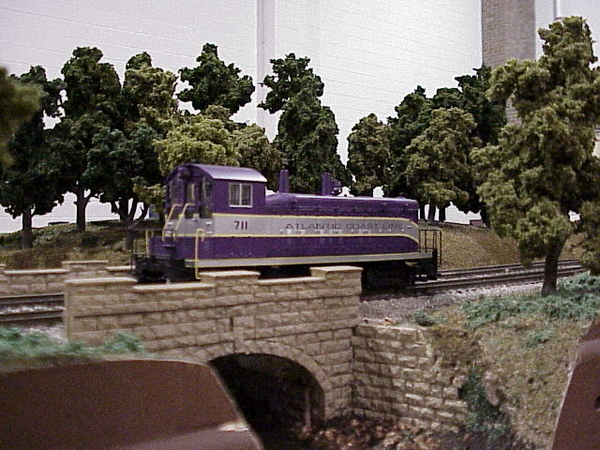
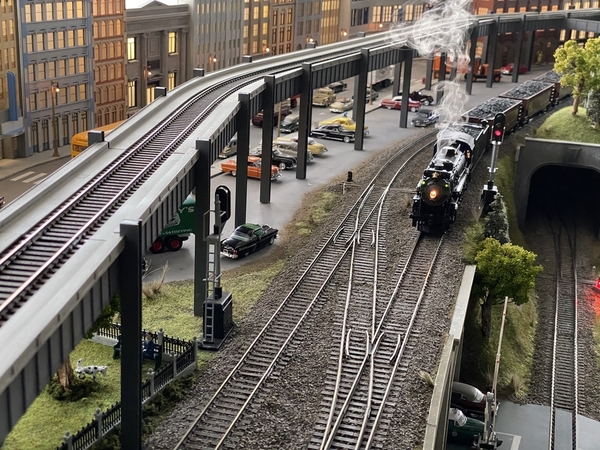
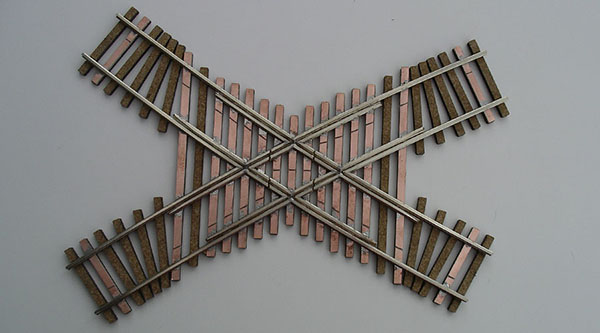
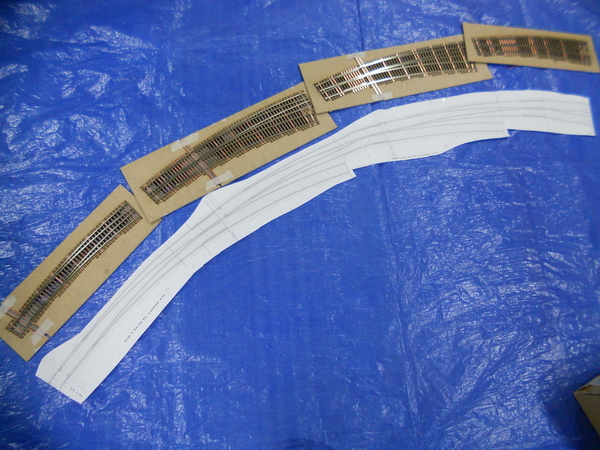
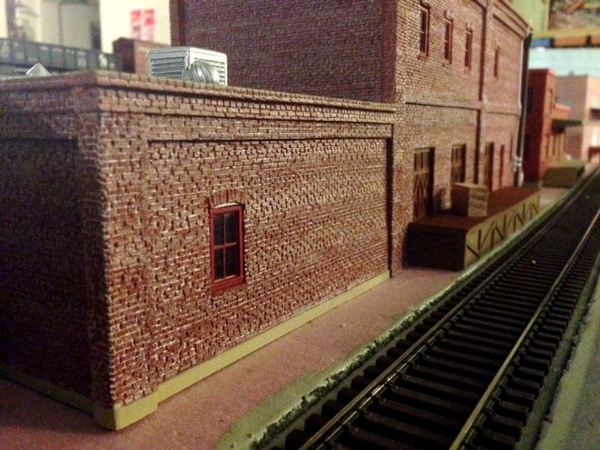
I have used his huge variety and excellent quality of products for decades, now, and recommend him to all of you, unequivocally. If you are looking for something to do, search through his site, and let your creative juices flow...x [2)IMG_9648IMG_5913b - CopyIMG_8483-2IMG_0553!

FrankM

Attachments

Images (5)
  • x (2)
  • IMG_9648
  • IMG_5913b - Copy
  • IMG_8483-2
  • IMG_0553

One of the working from home people, but without the long commute I have the time. My problem, as I have mentioned elsewhere, is convincing myself that  it is okay to lay out the funds for the next step, buying the track, which even on a relatively modest layout can be expensive (I am likely going to use Ross sectional and curve pieces, with gargraves for the straights). One of the frustrations of the time is that when I want to do something that requires materials, it isn't as easy as popping out to a store on a whim (for any kind of projects, not just trains), and with ordering stuff it takes time plus with people ordering truly essential stuff I get concerned about flooding shippers with what I have to admit is non essential stuff (unlike the dog chews that if I don't keep in stock, will mean two 100 pound dogs gnawing on my leg, or worse, looking all sad and depressed at my wife, who will in turn gnaw on my leg until I order them *lol*).  Then too I am coming into the outdoor season, that involves such wonderful things as powerwashing the siding, fixing a concrete patio, building a ground level floating deck, etc.

On the other hand in the past weeks this has served as a refuge, plus I have accumulated a lot of knowledge that once I get over my reluctance to spend on the layout, will help a great deal as I start working on it, and just to have some moments when  I don't have to think of the real world is a blessing. 

@Monsoon, the travel trailer in one of your pictures, is that scenic express? Would be cool to have something like that as part of the scenery on my projected layout

@Lionelski posted:

Rusty,

Preparing to move or rebuild?

What are your plans?

Lionelski, I'm preparing to move, but haven't bought a new basement yet.  I'm still going through my current house preparing it for sale.  There's also some things that can't happen until this C-19 thing settles down.

The old layout was designed to be taken apart, but not salvaged.  I'm kicking around a couple of ideas in my head.  I'll be starting fresh when the stars align.

Rusty

Lionelski, I'm preparing to move, but haven't bought a new basement yet.  I'm still going through my current house preparing it for sale.  There's also some things that can't happen until this C-19 thing settles down.

The old layout was designed to be taken apart, but not salvaged.  I'm kicking around a couple of ideas in my head.  I'll be starting fresh when the stars align.

Rusty

For a minute there, my puny little brain was in confusion mode.  I couldn't understand for the life of me why there was a problem with securing a D&RGW C-19 in any scale.  I figured you were going to Sn3, and needed to sell off equipment so you could convert to narrow gauge. 

Then reality set in..........................................................................................................

I liked my dream better. 

Regards,

Jerry


@Ron_S posted:

Bill,

I agree that the amount of posts has not increased.

Among other things, I have been using the time to update many of my passenger cars to LED, my cabeese as well. 

With our club, we would normally get together weekly for what we call bragging rites, have a theme for that evening, and vote on the best consist of that theme for that weeks bragging rites member, with the shutdown, I am trying to make it a virtual bragging rites with video entries sent to a central point, our website, and let the members choose their favorite, and socialize in a virtual manner.


Ah....in fact the activity on the forum has increased!  Comparing to last year at this time, we are approximately 1.3 million page views ahead of last April...!  All of the reports we are getting from our provider are showing a trend of more activity over the previous month as well as over last April's stats.  Of course, we expected this since we are "homebound"....

By the way, we already have a long going thread which discusses what folks have/are doing on their layouts so lets try to post there instead of having another similar thread such as this one...that way it will be much easier for the membership to find what other's are doing as far as layout activity.

Thanks!

Folks,

Now that I am stuck in the house, except to forage for food at the super market. I am working to write more material for "S Gauge Insights", a new section for the digital version of OGR magazine. We have already put one article in the Digital version and I am now finishing up two more S gauge articles that should appear in the Digital Edition of Run 313, the next issue of the magazine we will publish.

After that..more to come in a steady progression of S gauge articles for the Digital Edition of OGR.

So being stuck in the house is not so bad after all, when it comes to S and OGR

Ed Boyle, Partner, Associate Editor, O Gauge Railroading magazine


Right now, I"m doing absolutely nothing related to trains.  We were within 2 weeks of getting a real estate agent and listing our house and looking for anther house to move to  when the virus hit.  I had disassembled my layout and 99% of my trains and put it all in a climate controlled storage unit.  All I have is a few items on a display shelf in the basement to show potential buyers what can be done there.  We aren't listing the house since we don't want people trooping through the house, nor do we want to visit other people at this time.  And a "virtual" or video listing of a house is totally worthless.  Would you buy a house online?  So, we're stuck here. 
Doing OK, but missing not only my trains, but our grandkids' hugs.  When the weather breaks, I'll continue to do even more to spruce up the house and yard, and maybe take my hot rod out for an "attitude adjustment" from time to time.

I was really looking forward to the upcoming Train Season where I was planning on selling off a lot of surplus items and connecting with fellow train guys, but that ain't happening either.  All those items are also in the storage unit, so online selling isn't in the cards. 

Hope all of you out there are doing well and are staying healthy! 

Right now I am 1200 miles from my trains and not going anywhere soon. 

Thinking about it, it  was six years ago when we moved. The layout did not survive but I built a modest 6 by 16 that is more than enough. Sorry no pictures.
All I have here is a few train mags that are so used they are hard to read.

Hopefully we will all get back to normal. 

I'm playing "supermarket treasure hunt" (now with a mask) almost every day. I'm 78, but this virus will NOT have me hiding in a closet. Not playing with trains much, but shooting air guns in my basement and arrows in the back yard. Reading 2-3 books a week, and doing yard work. I watch very little TV, but belong to a LOT of on-line forums (total 14).  On eBay a fair amount. What, me bored?. 

Last edited by Joe Hohmann

I just finished some 652 heavyweight cars and some 649 circus cars.

Now I am rebuilding a 332 Gilbert 4-8-4 that had a DC motor and a burned out smoke unit. Boy are these buggers hard to disassemble, especially when they are packed with 70 years of congealed smoke fluid.
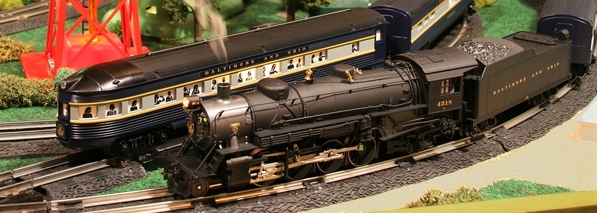
The loco has a nice patina and all the drivers are straight. It will get a Timko can motor and a new smoke resistor wire and wick from LBR enterprises. It will be the first time I have ever replaced the smoke element heater, even though I have been working on my Gilbert trains since 1956. I hope it goes well.

Last edited by RoyBoy

I've been rereading my collection of S Gaugian magazines from 1985 until 2012. The years 1992 through 1995 were very impressive with almost each issue announcing a new release from American Models and/or S Helper Service. Southwind Models and River Raisin were no slackers either! I had forgotten so many great tips and suggestions in the issues that I'm taking notes on what I can do to improve the layout. The review of the American Models GP9 noted that it was missing the handbrake on the long end of the locomotive, so I got that part plus MU stands and lift rings from B.T.S. and dressed up that model. Improving ballast and vehicles is a follow-up project. I thank every day that model railroading and not golf is my hobby.

@Caldwell posted:

Thinking about it, it  was six years ago when we moved. The layout did not survive but I built a modest 6 by 16 that is more than enough. Sorry no pictures.
Cal,

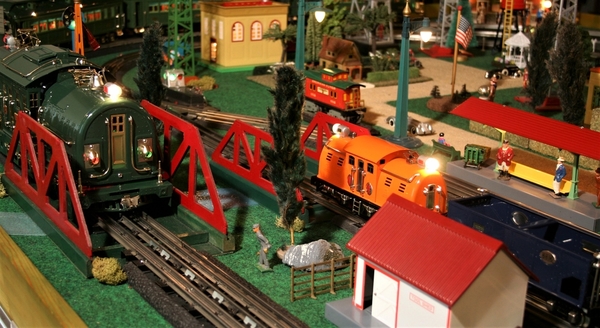
Luckily, when I built my layout I was mindful in constructing it with an eventual move in mind.  So I made it sectional.  I tested the concept years ago when I needed to do a home electrical repair where the layout was.  I removed one section, did the repair and replaced the section with no hassle.  Anyway, here's the tubs containing most of my trains awaiting transport to the storage facility:

And the layout itself in the storage unit:

Rusty,

At least with an argument among yourselves, at least one of you is right!  Too bad about those other two slackers, though.

Stay safe all of you guys out there!

Attachments

Images (2)
  • blobid0
  • blobid1

Jerry, smart to make the layout movable. The realtor told me to leave it up during showings so I had to scramble to pack up and tear down.  The layout was bolted together in sections so it might have been movable. But it wasn't to be. Did you use the same construction as the club layout. Looks like it would make moving easy.

Just to make Bill happy and keeping it going, I am posting one of two pictures of my current layout.

DSC00502

Hopefully one of these days things will improve and I'll feel comfortable to travel to see it and work on it again.

Attachments

Images (1)
  • DSC00502
Last edited by Caldwell
@Caldwell posted:

Jerry, smart to make the layout movable. The realtor told me to leave it up during showings so I had to scramble to pack up and tear down.  The layout was bolted together in sections so it might have been movable. But it wasn't to be. Did you use the same construction as the club layout. Looks like it would make moving easy.

Just to make Bill happy and keeping it going, I am posting one of two pictures of my current layout.


Hopefully one of these days things will improve and I'll feel comfortable to travel to see it and work on it again.

Cal,

Yes, I followed a similar way of construction as the club layout, foam and light weight construction.  I didn't use the same connectors because they're too expensive, so I just used spade connectors instead.  Since I don't plan on a lot of set ups and take downs, that's fine. 

Every realtor I've talked to didn't want the trains in the basement since they took up too much room.  Too bad, since I could really use a bit of a train fix about now.  It took me almost two weeks to pack up my trains and I'm still not completely done! 

It measured 10'x18'

Here it is at the lasst time I hosted a club meeting

I guess now it will never be finished.

BTW, I like the water tower too!

Sorry I couldn't find a way to send it "off line".

Take care,

Attachments

Images (2)
  • blobid0
  • blobid1

I have been busy on my S gauge  layout. I built an unloading dock and a coal bin, added a farm scene in a corner of the layout and installed two uncouplers. I also cleaned the dust off my buildings and touched up the ground cover. These are things I’ve wanted to do for a long time but procrastinated. 

Jim Zimageimageimageimage

Attachments

Images (4)
  • image
  • image
  • image
  • image
Last edited by Jim Z

Thanks Ed, the colors just happened that way. I just looked in the stash of craft paint and went at it. Actually I had the water tower since I was a kid. I broke one of stands off from the leg. No super glue then so my Dad took a stick match and melted it back together. A little wobble but still functioning 65 years later.

Jerry, I was surprised the realtor did not want it torn down. Everything I have seen always said tear them down. Unless your email changed I'll try  and contact you later.

I think I have spent more time on this forum in the last six weeks than the last six years.

Along with the virus thing I have also been blessed with consistently crappy weather so springtime activities have been limited. Finally got to complete one of my to do items. I had several of the TMCC and railsounds kits that I had accumulated in the last few years with the intent to convert a few AM trainmaster engines. Finally got around to taking one apart and couldn't figure out how to fit the boards in without great difficulty. Sent one off to Ed Goldin for a retrofit that I could use for an template and it was on from there. Run and sound great. The fleet is done!

IMG_1014IMG_1015

 Next on the list is to get a few Flyer steam and diesel locos running and then on to building and trying to install TMCC in a Smokey Mountain GE 44 tonner.

Rich

Attachments

Images (2)
  • IMG_1014
  • IMG_1015

Nothing revolutionary going on here because I am doing the exact opposite of moving. I have been performing some maintenance on the two layouts and a few engines. But, I have been mostly going downstairs, flicking the switches on, and enjoying what I am blessed to own. Not necessarily brand new pics, but they very accurately reflect current operations here in upstate Michigan. 

First up is an engine which is perennially on my Gilbert-inspired Flyer layout ... a Legacy Y3a, which is the best locomotive Lionel ever did for AF.

Y3a 2

Next up is a pair of Lionel Flyer Legacy SD70ACe diesel electrics in DL&W colors passing a UP Challenger which is on 'historic excursion' duty.

DL&W SD70ACe

An old favorite is the TMCC B&O Mikado posed with its passenger cars and being prepared for passengers (This shot was on the magazine cover back when I reviewed new Lionel American Flyer for the S Gaugian.).

Mike 4 edit 4

Finally, (and I maybe I should not admit to this here) is my 'other' layout, which is prewar-themed and features the exhilaration of running traditional tinplate. The St. Paul style electric profile engines at work here are a Lionel Corp. Tinplate Super 381 and a Lionel Classics 44E (which is, surprisingly, now 30 years old).

S381 and 44E 2b

Have fun and keep safe!

Bob


Attachments

Images (4)
  • Y3a 2
  • DL&W SD70ACe
  • Mike 4 edit 4
  • S381 and 44E 2b
Last edited by Bob Bubeck

Lockdown here in the UK meant that I was able to work from home on my company laptop. As part of my impending retirement in June I have off loaded all my project work and other duties, so am just working in a support mentoring role for the last few weeks.

This has given me a reasonable amount of free time,  so I have taken this opportunity to go through some of those boxes that have been labelled  ‘....the rainy day projects when I have some spare time’.

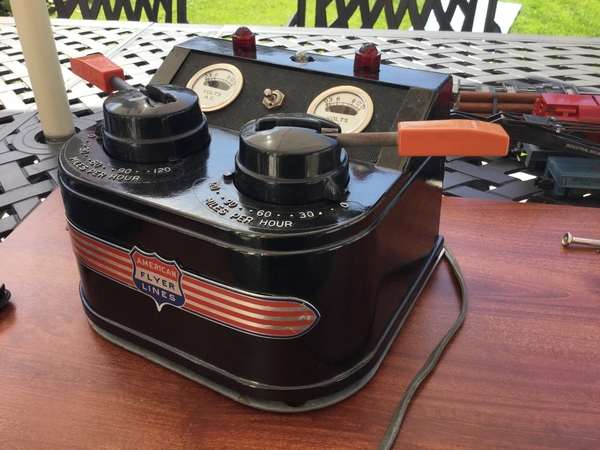
One of the first items to appear was a 30B transformer. It was very dusty, turrets felt like they were lubricated in sand and the Bakelite case was looking very dull and sorry for itself.

I pulled it all down, hoovered and brushed out the coil stack, polished the brass min/max plates each side of the coil stack and ran the soldering iron over all the soldered joints while checking the wiring.

The control turrets and housings were cleaned and reset with a small amount of lubricant and run smoothly now. The case was given a good clean and it now shines nicely, as good as new. The voltage on each turret is just over 18V and the gauges are still operating which was a bonus. The last job to do was repaint all the raised numbers and letters for the speed settings. Below is a picture of four hours work. I just need to order a replacement green light cover to make it complete.

4900C7D0-17CE-4A9E-913A-97F76C4519A4


Attachments

Images (1)
  • 4900C7D0-17CE-4A9E-913A-97F76C4519A4: Restored 30B transformer
@RoyBoy posted:

I just finished some 652 heavyweight cars and some 649 circus cars.

Now I am rebuilding a 332 Gilbert 4-8-4 that had a DC motor and a burned out smoke unit. Boy are these buggers hard to disassemble, especially when they are packed with 70 years of congealed smoke fluid.

The loco has a nice patina and all the drivers are straight. It will get a Timko can motor and a new smoke resistor wire and wick from LBR enterprises. It will be the first time I have ever replaced the smoke element heater, even though I have been working on my Gilbert trains since 1956. I hope it goes well.

The Northern turned out well. Smokes great, but somehow does not sound as smooth as it did before the motor change.

Upon investigating its Hudson brother (from the same original owner) the clunking and apparent lack of traction is likely caused by the front drivers being out of quarter slightly.

It was probably built that way as the original owner scratched the word "noisy" onto the bottom of the chassis. The holes in the front ends of the rods are worn in an unusual pattern. I have some quartering tools coming, but that type of mechanical work is not my forte.

Does anyone know when Gilbert changed the driver quartering from 90 degrees to 87 degrees?

Last edited by RoyBoy
@RoyBoy posted:

Just remember that the rectifiers will make the solenoid more quiet, but will also put a slight overload on them. So energizing a solenoid at full voltage and keeping it energized for a long time may cause it to overheat.

That's good to know, I hadn't thought of that as I am functionally illiterate with electronics.

Stoopid physics..... always a trade off.


All:

Glad you S gaugers are doing well amid this mess we're all having to deal with. It's good to read of your various projects.

I would say this has been an enjoyable thread, but...

Rusty:

Very sad to see the end of your layout. I do hope you're able to find a good home and relocate and have the impetus and drive to start over. What "Givens n' Druthers" thoughts are you mulling over for the "next one"?

richabr:

Always enjoy seeing pictures of your layout. Yours and Carl T's S scale layouts makes me wonder if my experience in S scale would have turned out different had I taken such an approach.

Hoping for the best for all of you!

Andre

@laming posted:

Rusty:

Very sad to see the end of your layout. I do hope you're able to find a good home and relocate and have the impetus and drive to start over. What "Givens n' Druthers" thoughts are you mulling over for the "next one"?


Andre

Don't really have a "Given n' Druthers" yet, that will really depend on the basement I buy.  There are a couple of things rattlin' around in the old noggin.

One thing that is firming up is wrapping a rubberband around 1970 (-2/+3 years.)  That way I can still use most of the stuff I already have, maybe "modernize" some of it, but not have to deal with things like ditch lights or no locomotive footboards (even though I think ditch lights are kinda cool...)

Most likely going to go with Fox Valley track instead of code 100, though.

Rusty

What makes you lean towards using Fox Valley track compared to AM and SHS/MTH flex track etc?

Rusty, It is sad for all of us to see the Plywood Glacier go. You took and posted many well staged, dramatic pictures for us to enjoy.

When it is time to rebuild I can second using the Fox Valley or MTH flex track. While it sounds non scale at .138" it in fact appears to the eye as much more scale like than code 125. The reason is the rail head is very "fine" in appearance. My layout is MTH flex with handlaid turnouts. I have some code 125 on the layout, the width of the MTH railhead is about 2/3 that of the code 125. I do not have a micrometer or I could give you the exact dimension. With darkened or rusted webs the .138 looks very good.

I have some AM .148 track, it does not look anything like scale and the color is wrong.

@Ukaflyer posted:

What makes you lean towards using Fox Valley track compared to AM and SHS/MTH flex track etc?

I've examined Fox Valley track and I like what I see.  It's also availability, perceived or otherwise.  Some of the guys on S Scale -io seem to think I'm a traitor for thinking about going above code 100.  Too bad...

AM track is good, (it's on my modules a couple of posts above,) but I'd have to modify the turnout frogs for scale wheels.

SHS/MTH doesn't have and isn't likely to make numbered turnouts and R20 is way too sharp for my needs.  I'm aware of Lionel's R27 turnouts, but even the manual versions are twice the price of Fox Valley's.

And, I have no desire to build my own turnouts, pure and simple.  Never did.  Not my idea of fun.

Rusty

Fox Valley only makes #5's and no one else is going to make numbered S gauge turnouts using .138 rail. Years ago Tom Stotz made them but he quit before I started my layout. So, I took about 5 deep breaths and paid to have the #5, 6 & 8 turnouts made for me. No way I was going to make them. It was really expensive but after three years of operating the layout I have mostly forgotten about the cost and really enjoy the result.

I've examined Fox Valley track and I like what I see.  It's also availability, perceived or otherwise.  Some of the guys on S Scale -io seem to think I'm a traitor for thinking about going above code 100.  Too bad...

AM track is good, (it's on my modules a couple of posts above,) but I'd have to modify the turnout frogs for scale wheels.

SHS/MTH doesn't have and isn't likely to make numbered turnouts and R20 is way too sharp for my needs.  I'm aware of Lionel's R27 turnouts, but even the manual versions are twice the price of Fox Valley's.

And, I have no desire to build my own turnouts, pure and simple.  Never did.  Not my idea of fun.

Rusty

Are you putting aside using SHS/MTH flexi track because they don’t make compatible turnouts in the style of AM and FVM?  Can AM and FVM turnouts be easily connected to SHS/MTH flexi track if you lean towards this track or is it just not worth any extra work to make it fit?

Also, are you moving away from AM track because of the need to modify the turnouts? I guess I am coming to the conclusion that the complete FVM track system suits your future needs in its entirety without having the need to modify anything, albeit the rail code is not in keeping for scale use. 

As retirement looms in a few weeks time I shall be busy adjusting to a new way of life, especially as our daughter has just had her first baby mid February and I have only seen him twice with lockdown now in place.  Also ‘management’ has a list of jobs that need doing before I get permission to start looking at building a permanent layout for running the Flyer. So if FVM seems the preferred route to go then I need to start planning how much I will have to purchase.

I've examined Fox Valley track and I like what I see....

AM track is good, (it's on my modules a couple of posts above,) but I'd have to modify the turnout frogs for scale wheels.

Rusty

Rich,

Are you saying that the frogs on FVM code 138 #5's can handle both scale and high rail wheels? I previously read up in these looking for that information but was left with the impression that they could not accommodate scale wheels.

@Ukaflyer posted:

Are you putting aside using SHS/MTH flexi track because they don’t make compatible turnouts in the style of AM and FVM?  Can AM and FVM turnouts be easily connected to SHS/MTH flexi track if you lean towards this track or is it just not worth any extra work to make it fit?

In a nutshell, yes.  SHS/MTH only has the R20 turnout.

Easy?  Maybe.  Depends on how much effort one puts into it. HOer's have been mating code 83 and code 70 to code 100 for decades.  Personally, I've never mixed rail codes regardless of what scale I was working in.

Also, are you moving away from AM track because of the need to modify the turnouts? I guess I am coming to the conclusion that the complete FVM track system suits your future needs in its entirety without having the need to modify anything, albeit the rail code is not in keeping for scale use. 

My modules were the only time I've used AM track, because it's what the club decided on a standard.  We had one turnout at the time and we always ran Flyer or Hirail on that loop. 

My home railroad always used code 100 track.  If I want to run some HiRail or Flyer, I throw some SHS track down on the floor in the man cave.

As far as "scale use," I'm becoming less fussy about such things as I get older.  I try to go for an overall effect, rather than down to the smallest detail.  I'm not doing nor never intend to do Proto:64.  If my rail's a little high, so what?  Besides, FVM track rail height seems pretty close in scale to what the mainlines are using nowadays.

Rusty

As retirement looms in a few weeks time I shall be busy adjusting to a new way of life, especially as our daughter has just had her first baby mid February and I have only seen him twice with lockdown now in place.  Also ‘management’ has a list of jobs that need doing before I get permission to start looking at building a permanent layout for running the Flyer. So if FVM seems the preferred route to go then I need to start planning how much I will have to purchase.


@Jim Z posted:

I have been busy on my S gauge  layout. I built an unloading dock and a coal bin, added a farm scene in a corner of the layout and installed two uncouplers. I also cleaned the dust off my buildings and touched up the ground cover. These are things I’ve wanted to do for a long time but procrastinated. 

Jim Zimageimageimageimage

Oh wow! This is a great looking layout. What is the size of the layout? 

@AmFlyer posted:

Fox Valley only makes #5's and no one else is going to make numbered S gauge turnouts using .138 rail. Years ago Tom Stotz made them but he quit before I started my layout. So, I took about 5 deep breaths and paid to have the #5, 6 & 8 turnouts made for me. No way I was going to make them. It was really expensive but after three years of operating the layout I have mostly forgotten about the cost and really enjoy the result.

Having been able to see a picture by Rusty showing a number of FVM #5 turnouts, I have to say that compared to ACG R20 turnouts they are definitely in another league. They look pretty good to me.

So looking into this deeper, how safe is it to say that in reality that FVM #5’s are going to fit the bill for most people running either ‘nostalgic’ Flyer stuff like me as well as running things like Lionel’s BB’s and Y3’s at the other end of the scale?

Looking at the pictures of the FVM turnouts I would like to think you could run these large engines through them and not worry too much that they will flow through them easily as compared to an ACG turnout where they squeeze through and you are on tender hooks as to if they make it through.

Is there a demand/requirement for #6 or greater turnouts and what is that need by people? Also, the larger the turnout the greater the footprint and real estate is valuable for a lot of us I would guess.

I doubt there is a large demand for numbered turnouts made with .138 rail. Any supplier of code 100 turnouts could make them, they just need a set of jigs modified to accept the .138 rail. These turnouts are not plug and play. They require rail gaps, wiring and a relay to flip the frog connections. In DCC I believe the pre-made Frog Juicer will do that.

Here is a picture of an interchange using a pair of #6 turnouts. The track is MTH flex. The picture is foreshortened by the camera lens selected. I used #5’s only in the freight yard. The rest are all #6 and #8 turnouts. The #8’s are 18” long. The turnouts were made using rail stripped from the MTH flex. These turnouts were designed and tested to run both scale and high rail. The only downside is they are unforgiving of incorrectly gaged wheel sets. I have spent a lot of time regauging Gilbert and AF by Lionel wheels. The SHS, MTH and AM cars are spot on every time.


6919307F-D7D5-4F3E-B711-E56190963EA4


Attachments

Images (1)
  • 6919307F-D7D5-4F3E-B711-E56190963EA4
@AmFlyer posted:

I doubt there is a large demand for numbered turnouts made with .138 rail. Any supplier of code 100 turnouts could make them, they just need a set of jigs modified to accept the .138 rail. These turnouts are not plug and play. They require rail gaps, wiring and a relay to flip the frog connections. In DCC I believe the pre-made Frog Juicer will do that.

Here is a picture of an interchange using a pair of #6 turnouts. The track is MTH flex. The picture is foreshortened by the camera lens selected. I used #5’s only in the freight yard. The rest are all #6 and #8 turnouts. The #8’s are 18” long. The turnouts were made using rail stripped from the MTH flex. These turnouts were designed and tested to run both scale and high rail. The only downside is they are unforgiving of incorrectly gaged wheel sets. I have spent a lot of time regauging Gilbert and AF by Lionel wheels. The SHS, MTH and AM cars are spot on every time.


That’s a nice looking layout and a credit to your skills. The multi level operating makes it all the more interesting as well. I like the building facades, can you tell me what they are and where they came from?  

You are also lucky in that you have the best of both worlds so that you can flip between hi-rail and scale operations , sounds like the expense of your turnouts paid off.

I was thinking is there a need for turnouts larger than #5 in general for people like myself who are largely Flyer operators, I can’t see one myself, but.........


Tom:

I have used the Fox Valley turnouts since they offered them.  I use an altered high rail turnout (see attachment) and run all types of wheelsets  code 110, 125, AM, SHS, MTH and L-AF high rail with not problems.  I find MTH, SHS and L-AF fasttrack will mate with them with no alterations needed as the rail size is the same in all 3.

Roger


Attachments

Images (1)
  • Fox Valley Turnout Modification 2
@AmFlyer posted:

Any supplier of code 100 turnouts could make them, they just need a set of jigs modified to accept the .138 rail. These turnouts are not plug and play. They require rail gaps, wiring and a relay to flip the frog connections. In DCC I believe the pre-made Frog Juicer will do that.

As far as I know right now, there's only one supplier of ready made code 100 turnouts left: Tomalco.  Shinohora and Old Pullman have left the building.

What there is, is a potential desire from FVM for #6 and #8 turnouts.  If FVM eventually sees a market, I'm sure they would make them.

I had both Old Pullman and Shinohora turnouts on my old railroad and not one single frog juicer.  All my frogs were energized through the points.  DC and DCC operations were just fine. 

Rusty

Rusty, I did not realize only Tomalco was left, that is sad. I agree with you, were there a market someone (FVM) would make them. I wonder why FVM does not set up a build to order program.

Roger, very nice job on those mods/improvements on the turnouts.

UkaFlyer, my skills were limited to envisioning the completed layout, hiring a professional builder and approving changes. The buildings are a mix of the few S scale kits that were available in the correct theme and some customized HO kits. The building fronts in the city are a few S scale kits that looked right, the balance were made from scan files of buildings that were resized to 1/64 and then laser cut out of 5 layers of lexan. These were glued together and detailed/painted by a model maker. The viaduct is the same, it is laser cut clear lexan and styrene plastic parts glued together and painted. Took about a week to do the entire 18' of viaduct, start to finish.

I have some engines with scale wheels that pull passenger trains with high rail wheels, it works perfectly as designed. Over the last two months I have been running trains about 1 1/2 hours a day, plus keeping up with all the minor cleaning and maintenance items.

@DRGWno1 posted:

Tom:

I have used the Fox Valley turnouts since they offered them.  I use an altered high rail turnout (see attachment) and run all types of wheelsets  code 110, 125, AM, SHS, MTH and L-AF high rail with not problems.  I find MTH, SHS and L-AF fasttrack will mate with them with no alterations needed as the rail size is the same in all 3.

Roger


I'd love to get more information on exactly what you did to modify them. I am helping a friend with his layout  in the near future, and I'd like to do this modification for him. 

Continuing the discussion of WFH, I had ordered some Mianne Benchwork modules to build an O gauge layout.  They could only send 3 4x8 modules at this time so I got to thinking maybe I could do something with my Flyer.  I designed the layout below so that I can run three trains at the same time, have possible yards and reverse direction when needed (I may need help with the electronics to do this).  The industry and buildings are just place holders at this point and use almost all of the Flyer operating accessories that I have, along with some of my Plasticville.    I would appreciate any comments about the design, especially the operating accessories.  I've never built or run a Flyer layout so I'm in new territory. Thanks in advance for any help.

LionelFlyer


Attachments

Images (1)
  • mceclip0
Files (1)

Chuck:

When using the FV turnouts with mare scale flanged wheelsets there are two areas of concern:

1.  The cast frog assembly will not allow these wheelsets to run through the turnout.  The wheelsets will drop into the space between the points and the closure rails.  To address this issue, I added 0.020 X 0.60" spacers attached with JB Weld.  This allowed the scale wheelsets to ride over the space in the cast frog assembly (see Illustration).

2.  The guard rails allowed the tread of the scale wheelsets (Code 110 and 125) to be misdirected through the turnout causing them to derail.  To address this issue, I decreased the width of the guard rail by attaching a 0.030 X 0.100 spacer to the original guard rail.  I roughed up the guard rail with 100 grit sandpaper to increase the bite for the adhesive (I used Eileen's "The Ultimate" ).  I painted the spacer with American Accents by Rust-oleum.  Color: Espresso, a perfect match for the original FV guard rail.  The spacer is difficult to see in the illustration as it has already been painted.

Haven't had any problems in the two years I have had over 20 turnouts on the layout.

Roger


Attachments

Images (1)
  • Fox Valley Turnout Modification 2
@DRGWno1 posted:

Chuck:

When using the FV turnouts with mare scale flanged wheelsets there are two areas of concern:

1.  The cast frog assembly will not allow these wheelsets to run through the turnout.  The wheelsets will drop into the space between the points and the closure rails.  To address this issue, I added 0.020 X 0.60" spacers attached with JB Weld.  This allowed the scale wheelsets to ride over the space in the cast frog assembly (see Illustration).

2.  The guard rails allowed the tread of the scale wheelsets (Code 110 and 125) to be misdirected through the turnout causing them to derail.  To address this issue, I decreased the width of the guard rail by attaching a 0.030 X 0.100 spacer to the original guard rail.  I roughed up the guard rail with 100 grit sandpaper to increase the bite for the adhesive (I used Eileen's "The Ultimate" ).  I painted the spacer with American Accents by Rust-oleum.  Color: Espresso, a perfect match for the original FV guard rail.  The spacer is difficult to see in the illustration as it has already been painted.

Haven't had any problems in the two years I have had over 20 turnouts on the layout.

Roger


My understanding from this is that those two shims you JB weld onto the frog allows the flange of scale wheel sets to maintain a reasonable height to allow them to continue through, is this right?

The bit I am confused with now is that if you have shimmed the frog to run scale wheel sets through nicely, won’t hi-rail wheel sets ride up higher onto the shim and you will have a gap between the rail head and the wheel?

Or have I missed something here?

@DRGWno1 posted:

…..I decreased the width of the guard rail by attaching a 0.030 X 0.100 spacer to the original guard rail....  

Roger,

Thank you!  Just to be sure I understand the above statement, I assume you are saying that you decreased the width of the opening between the guard rail and outer rail rather than decreasing the width of the guardrail itself, right? 

Also, I recognize this is getting off the topic of this thread, so I am happy to communicate with you directly about this off list at chuck7612@hotmail.com.

Thanks,

Ukaflyer:

Just went down to check on this.  Found that the L-AF flanges on their new cylindrical hoppers went through the frog smoothly.  There was a slight up tick when riding over the actual frog, but the wheels never left the top of the rail.  When running the Code 110 wheelsets, there is a slight drop between the closure rail and the frog at very low speeds.  This, however, did not cause a problem for me.

Roger

@DRGWno1 posted:

Ukaflyer:

Just went down to check on this.  Found that the L-AF flanges on their new cylindrical hoppers went through the frog smoothly.  There was a slight up tick when riding over the actual frog, but the wheels never left the top of the rail.  When running the Code 110 wheelsets, there is a slight drop between the closure rail and the frog at very low speeds.  This, however, did not cause a problem for me.

Roger

Thanks for the update. So, with a bit of ingenious modification you have effectively   got a universal turnout to suit all needs. Is it worth going to FVM with this and letting them know what you have done? It would then enable them just to make one model of turnout for all needs and they wouldn’t keep running out of the hi-rail version.

@gunny posted:

Lionelflyer,

Think you ought to take out the reverse loop. They require special wiring with 2 rail.

Gunny

Hi Gunny,

I might be a good idea.  Now that I think about it, I guess it would not be practical to reverse a train operating on one line and then move it to one of the other lines.  I could see that being a very complex electrical problem and I'm looking for simplicity.

Also, I appreciate the comment from Bill about having too much reach for the operating accessories.  I'll revise soon and re-post.  I've not anything better to do and it is better to plan first before building.

LionelFlyer

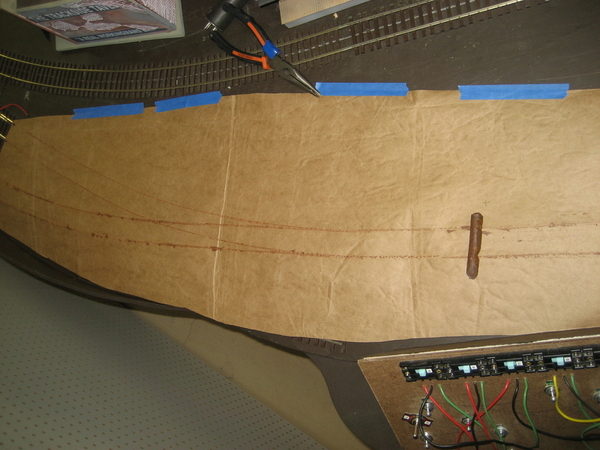
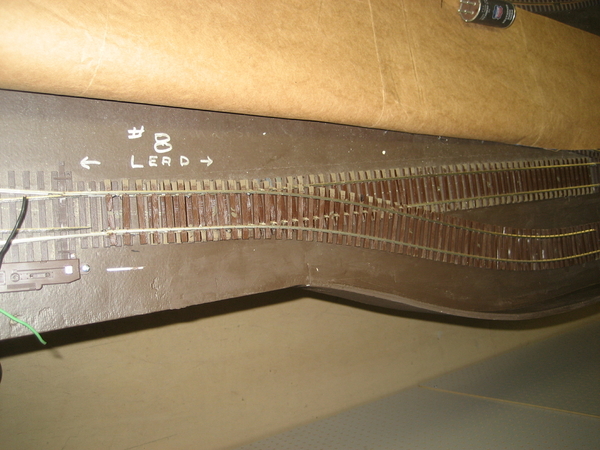
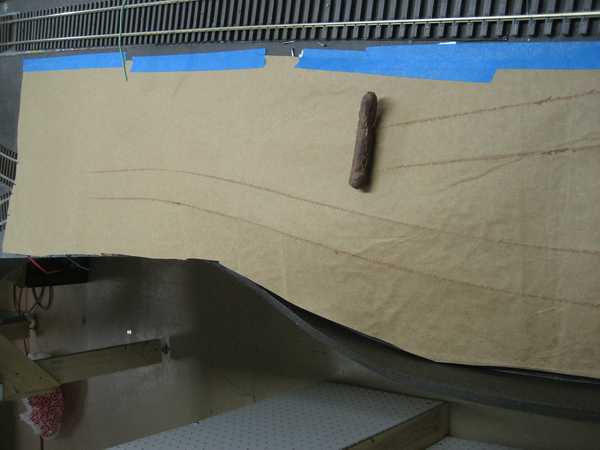
Concerning custom turnouts,  Brad strong of Signature switches makes just about anything in any gauge.  His workmanship is excellent, he will make any variances you want or need.  His prices are reasonable.  You can even crayon a template to converge any arrangement of tracks in any gauge, any code.

When I was building layouts his special switches made the impossible workable.

run a round build 024

run a round build 029run a round build 031

Brad #6 3-way Left Leading

Diamond on two curves.

Curved Diamond

He even makes curved and straight ladder tracks with the points butting up right next to the frog.

72 inch 60 inch curved ladder 003


Attachments

Images (6)
  • run a round build 024
  • Brad   #6 3-way Left Leading
  • Curved Diamond
  • 72 inch 60 inch curved ladder 003
  • run a round build 029
  • run a round build 031

LionelFlyer, I think the layout is a great first pass. These always take a few minor revisions to get to the "approved for construction" version.

The reverse loop is needed for all your sidings to work. If you take it out than then all the sidings should be "back in" If the running direction is CCW then the siding on the left is not practical. Wiring a single reverse loop is not hard, my issue would be "where there is one there has to be two", if not you will always be backing trains through the reverse loop to turn them. Two reverse loops is more difficult, both with space needed and wiring. All things considered I would take it out and have more sidings. I never put reverse loops in my temporary Gilbert layouts. My permanent scale layout has four, but each one is long enough to hold the longest train so they are trivial to wire up. Unfortunately those kind of reverse loops require a lot of space.

The pair of turnouts on the lower right will not work. Some engines if running CW will hit the housing of the turnout on the outer loop. I also recommend you try to eliminate the S curves by moving some of the turnouts so they are at the curve, one turnout uses the diverging route, one uses the straight leg. Now is also the time to think about operation and decide where you will put uncouplers and action car clip ons. Also mark where you will want fiber pins.

When I build a layout this complex I always mock it up on the floor so I can test everything and get the exact sizes of partial track sections so nothing hits.

@DRGWno1 posted:

Chuck:

When using the FV turnouts with mare scale flanged wheelsets there are two areas of concern:

1.  The cast frog assembly will not allow these wheelsets to run through the turnout.  The wheelsets will drop into the space between the points and the closure rails.  To address this issue, I added 0.020 X 0.60" spacers attached with JB Weld.  This allowed the scale wheelsets to ride over the space in the cast frog assembly (see Illustration).

2.  The guard rails allowed the tread of the scale wheelsets (Code 110 and 125) to be misdirected through the turnout causing them to derail.  To address this issue, I decreased the width of the guard rail by attaching a 0.030 X 0.100 spacer to the original guard rail.  I roughed up the guard rail with 100 grit sandpaper to increase the bite for the adhesive (I used Eileen's "The Ultimate" ).  I painted the spacer with American Accents by Rust-oleum.  Color: Espresso, a perfect match for the original FV guard rail.  The spacer is difficult to see in the illustration as it has already been painted.

Haven't had any problems in the two years I have had over 20 turnouts on the layout.

Roger


Bingo!

Tom Stoltz (formerly Tom's Turnouts)

in Maine

Yeah, sometimes a topic will drift from the original posting.  In most cases, good info comes to light anyway. 

I posted that in sequestration, I have very little train things to do, but here's a project I did just before I disassembled my layout (which may NEVER get done) and put it in storage.  It's a Pine Canyon Rigsby Freight Terminal that didn't quite fit in the spot I wanted. Here's the mock up in place:

Then after some judicious measuring, cutting, CA-ing and painting, here's the result:

It was a god kit, and I wish thy still made more. 

Maybe some day I"ll run trains again.

Attachments

Images (3)
  • blobid0
  • blobid1
  • blobid2

Okay, swerving back to another previous "track", I've tried making recommended changes to the layout that I was planning.  The reverse loop has been removed and all of the sidings have been modified so that a train can back in.  The entire layout was rotated 180 degrees and some space made so that operating accessories are within reach of the edges.  This covers most of the operating accessories that I own for now.  RR Track doesn't have a listing for the cow-on-track but I'm sure I can get it in somewhere.  

I appreciate the comments that I have received and will take into consideration any others.  Thank you all for the help.

LionelFlyer

Attachments

Images (1)
  • mceclip0
@poniaj posted:

Yeah, sometimes a topic will drift from the original posting.  In most cases, good info comes to light anyway. 

I posted that in sequestration, I have very little train things to do, but here's a project I did just before I disassembled my layout (which may NEVER get done) and put it in storage.  It's a Pine Canyon Rigsby Freight Terminal that didn't quite fit in the spot I wanted. Here's the mock up in place:

Then after some judicious measuring, cutting, CA-ing and painting, here's the result:

It was a god kit, and I wish thy still made more. 

Maybe some day I"ll run trains again.

Hi,

Where can I buy that Pine Canyon Scale Models freight terminal? Looks like they are not around any more.

That is very nice!

Chad(?),Try  web search.  Some dealer may still have one on the shelf.  I bought mine years ago from Pine Canyon and finally got a "round tuit" a few months ago.  Trains shows are a good source of old kits, but lately they're another victim of the sequester.   The Sprees and Fests were great at this kind of thing, not to mention the national conventions.  I also have done the Pine Canyon's Barrie's Custom Shop and gas station.  I was sorry to see the company discontinue full building kits.  It hurt my sensibilities to cut it up to make it fit, but it came out OK.

Speaking of resin kits, Twin Whistle may still have the Rialto movie theater kit.  Here's mine, which I just HAD to electrify with LEDs.  I use a 3V alarm battery for power. The roof vent is the on/off switch:

This building, along with my whole layout, is packed away, perhaps never to see the light of day (or the basement) again.

Attachments

Images (1)
  • blobid0

Add Reply

Post

OGR Publishing, Inc., 1310 Eastside Centre Ct, Suite 6, Mountain Home, AR 72653
800-980-OGRR (6477)
www.ogaugerr.com

×
×
×
×
Link copied to your clipboard.
×
×