


I agree Arnold. My start at kitbashing first destroyed two pricey kits, so I entered my design with some serious trepidation. Most of these kits are pretty expensive so you have to enter a kitbash with a strong stomach or bank account.
EmpireBuilderDave posted:I agree Arnold. My start at kitbashing first destroyed two pricey kits, so I entered my design with some serious trepidation. Most of these kits are pretty expensive so you have to enter a kitbash with a strong stomach or bank account.
Yeah. By my thinking, "kitbashing" is best practiced using random boxes of mismatched Plasticville parts, at least at first (look under the tables at the train show). This greatly lowers the stakes and makes experimentation and practice much more palatable.
A close relative to kitbashing are the so-called "craftsman kits". These are usually a box of pre-cut raw materials, and they are another "ice breaker".
Arnold's comments point out the fact that when you are buying any kind of kit, you are getting two different things: (a) a box of parts and (b) a carefully-thought-out design for a structure. These are two different things, and for many beginners "b" may be just as challenging as "a". Another way to address this is to scratchbuild a REAL building, working from photos. That is what I did with my gateman's shanty shown above. This lets you concentrate on materials and skills--inheriting the design from the architect of the real structure.
I have been "kit bashing" since a kid, turning my disliked Marx #21 into a double ended/cabbed diesel, uh, not particularly successfully. I have lots of practice, and attack expensive kits with no trepidation. I like them to be "different". Might be good idea to start small, and work up. But if you can make today's trains' electronics work, gluing together a box of sticks is well within your grasp.
Homemade Coal Mine and Coal Loading Station Operating Accessory
A Bachmann Coal Station was used to make a Coal Mine and Coal Loading Station operating accessory building that can load coal into a coal car remotely.

The Bachmann Coal Station kit was used to make the Coal Mine Entrance into the underground mine in the mountain.


A new “A” frame roof was built for the top out of 1/8 inch Masonite with a window in the end and the end was scored to be vertical siding. The roof was roofed with some of the kit roofing.

The Coal Loading Section was also made of Masonite. The outside walls were scored with a knife to be vertical siding. Windows were in the installed in the side and end walls.

A slide gate valve was made of plywood and held opened with a rubber band. A 12v solenoid (DC solenoid rectified to AC) was use to hold the slide valve closed and to return the solenoid plunger out to engage a notch in the arm of the slide gate valve to hold it closed. A coal storage funnel was made from card board stock.
Picture of Plunger return rubber band, slide gate with hole in center and notch for solenoid plunger, black solenoid and card board coal funnel is shown below. This rubber band holds the solenoid plunger in the notch in the arm of the gate and keep the hole closed, ready to hold and drop coal. See the wire in bottom of cone tied to the solenoid plunger which is operated to break up coal jams in cone. The black bridge rectifier can be seen that converts the DC solenoid to operate on AC.
This picture shows the slide valve closed (hole in slide gate is not under the funnel hole and the solid part of the slide gate is blocking the funnel hole) and the solenoid arm is holding the slide gate closed.

This picture shows the slide gate open (the slide gate hole is now under the hole in the funnel).

Picture of slide gate return rubber band. This makes the slide gate valve stay normally open and pulls the slide gate to open when the solenoid is triggered. Both rubber bands are easy to replace as the are in open screw eyes and around posts and last a few years.

PS: Recently (9-4-2017) it was not dumping. Turns out a plot of piston stoke from the magnet shows the most pulling power is when the piston is 1/16 to 1/8 inch out. It was much more so I had to modify by adding about 1/16 inch wood to the sloped part to make the trigger pull when about 1/16 inch out. That fixed it.
Picture of Power graph for Radio Shack Solenoid I used. You can see the pull in oz is much higher at 1/8 inch or small stroke.

Picture below shows the 1/16 inch thick strips of wood I added to the notch (appear whiter) to make the piston get more into the magnet and shorten the stroke for more power.

The coal is dumped into a coal car when activated with a push button on the control panel. A flat roof for the Coal Loading Section was covered with sheet metal roofing. Two 12 volt mini Christmas bulbs were installer in the outside corners of the floor and floor was cut out to illuminate the track below and inside the Coal Loading Section.
The picture shows the lights inside to light windows and cut through bottom to light coal car area below.

The picture is from the outside of coal mine loading station showing the lights working for inside the building and lighting the car below

Like most active accessories, the coal mine/coal loader should be located for easy hand access by the operator. The coal must be hand loaded into the funnel and the slide gate valve must be hand closed. Lionel plastic coal is used which came with a Lionel coal dumping car from the 1980s.
This was a fun project, especially figuring out a working coal car loading system.
Charlie
Attachments
Images (1)
Sound like it was a fun project and it looks really great. Nice lighting inside the building. I laugh when I see the little gimmicks people use to get things to work and I do the exact same thing. Stick a shim here or there and glue a piece of bent wood to make it work and fill a gap. Again great job kit bashing.

This diorama I built for Turkey Point Lighthouse Society and is displayed at Elk Neck State Park in Maryland. Park personnel were able to obtain the original blueprints from the national archives and each item was scratch built in 1/4 scale. Now back to the layout and to built some for me.
Attachments
Images (1)


I have two buildings from my brothers and my childhood layout on my layout. They were both made by our Dad, about 1950, using his childhood pedal powered scroll or jigsaw.
One building is a small train station, made from Masonite with the roof covered with model railroading roofing paper. The building has cuts scribed in to resemble siding. It has widows and other parts sawed out by jigsaw after drilling a hole and making inside cuts.
Train station built in 1950, roof paper was originally Green 

Charlie
Attachments
Images (2)
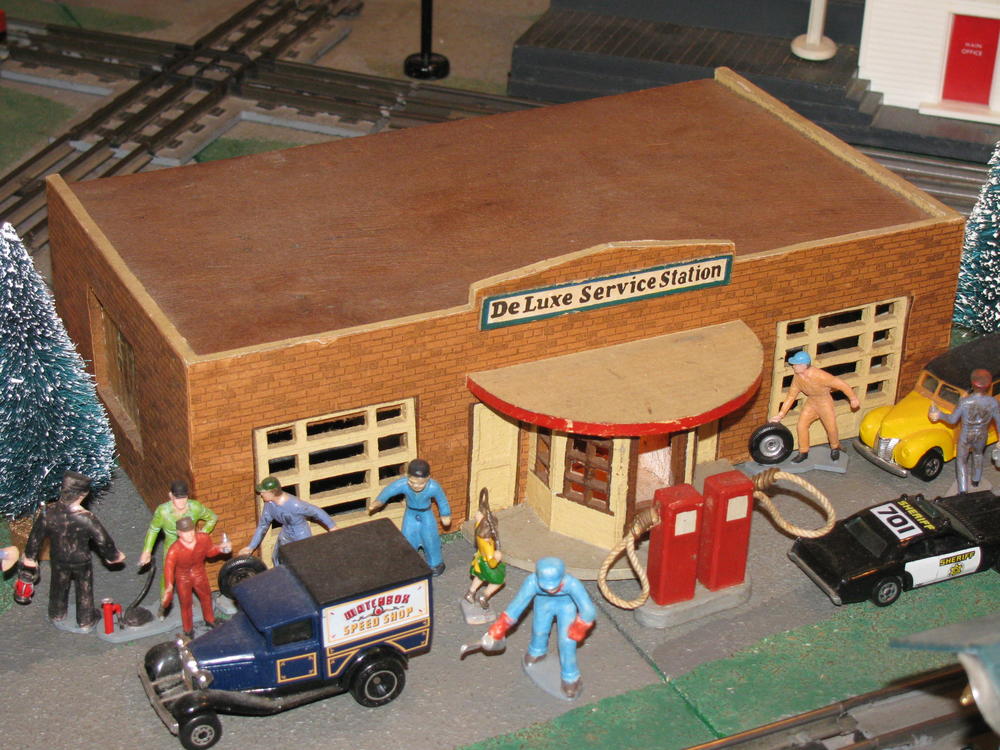
The second building is a gas or service station. It is made from some type of thin wood covered with paper on both sides. The siding has model railroading brick paper glued to the side to simulate brick siding. The two garage doors have windows cutout with a pedal driven jigsaw. The rear windows were made from some plastic window covering with cloth support simulating window panes.
Gas Station built in 1950 

These building construction methods lead me to build several of my building using Masonite and brick paper which is still available from hobby shops or on eBay. I got mine from Walthers years ago.
Charlie
It is time to revive this great topic and time for you all to update us on your latest Kit bash or scratch built building or other ones you have not already posted. I will start with an old homemade project.
Homemade Lionel Style Water Tower
A Lionel 6-12711 Water Tower Building Kit style Water Tower was made in the 1980s from 1/8 inch Masonite and brick paper covering. The tank was made from an oat meal round box and card board. The roof was covered with roof paper. Lights were added to the top of the water tank to illuminate the top of the coal tender from 12v mini Christmas tree lights. The spout was made from balsa wood. Ladder was made from cutting out every other tie from N scale rail tie minus the rails. I had the O scale door and window plastic parts. I think my homemade water tower is more handsome than the plastic Lionel Water Tower.


Below is the Lionel 6-12711 Water Tower Building Kit I modeled mine after (this one bought years later)

Charlie
Completely scratchbuilt newsstand. Styrene sheet and beams for support, colored plastic sheet for the walls, candy, magazine and newspaper images from the internet.

Attachments
Images (1)
Kitbashed and scratchbuilt subway lunch counter. Started with some laser cut counter kits and added details made from styrene and laser cut kit offcuts, plastic pen bits and bits of wire, some detail castings, and some internet images.


Attachments
Images (2)
Little scratchbuilt structure & scene....


Great modeling Joe and mwb! JohnA
@Choo Choo Charlie posted:It is time to revive this great topic and time for you all to update us on your latest Kit bash or scratch built building or other ones you have not already posted. I will start with an old homemade project.
Homemade Lionel Style Water TowerA Lionel 6-12711 Water Tower Building Kit style Water Tower was made in the 1980s from 1/8 inch Masonite and brick paper covering. The tank was made from an oat meal round box and card board. The roof was covered with roof paper. Lights were added to the top of the water tank to illuminate the top of the coal tender from 12v mini Christmas tree lights. The spout was made from balsa wood. Ladder was made from cutting out every other tie from N scale rail tie minus the rails. I had the O scale door and window plastic parts. I think my homemade water tower is more handsome than the plastic Lionel Water Tower.
Below is the Lionel 6-12711 Water Tower Building Kit I modeled mine after (this one bought years later)
Charlie
It's amazing what one can do with an oatmeal round box, cardboard and balsa wood!


Coach Joe
Neat idea on the scratch built Ice Cream Stand and great job on the O Clydesdale stable . Joe what did you make that swirly ice cream out of ?
Charlie


You guys have talent, great and inspiring work.
The only bonafide kitbash I've accomplished was on my first large layout and involved 4 IHC Engine houses to make a 2-story extra-long complex...lots of work and time. I detailed the interior as well, but I cannot locate the pictures right now. During divorce, I sold the entire complex, and would love to know if the guy still has it...cannot remember his name.


Attachments
Images (2)
Add Reply
Sign In To Reply
