In the past I posted my attempt to modify original Gilbert turnouts so that the diverging track curvature was greatly reduced. That method worked out OK.

I decided to put my "scrubs" back on, sharpen up the scalpels (bandsaw and dremel) and have a go at modifying original SHS (now MTH) turnouts to achieve a similar result.

The only reason I tried this is because a fellow S gauge friend came across 4 derelict SHS turnouts that had seen better days and we wanted to see if this modification could be done.

What I started with was a pair (L and R) of SHS turnouts that have the customary r20 diverging track like this:

DSCN1503

If you have ever tried to make a passing siding with SHS turnouts you know that you may need a "filler" to connect back up to the opposing turnout. I wanted to avoid that issue so I paid specific attention to the length of the newly created diverging leg of the turnout. I chose to use r24 SHS curves for the donor tracks:

DSCN1502

DSCN1507

The general idea is to

A. cut off the diverging track on the turnout,

B. cut the donor track to a length that allows standard sections of straight track to complete the run to the other turnout and

C. secure the cut donor track to the turnout.

First cut the diverging leg of track off the switch. Using a dremel cut the outer rail where shown in the following photo. Pull off (out) both short sections of rail and then cut the roadbed where shown. (The outer rail cut needs to be a 90 degree cut as measured across the roadbed.) 

DSCN1504 A

Next you need to cut the donor track to a length that makes the outer rail 9" long. (Your results may vary depending on how you cut the turnout). Always err on the long side of things...you can always cut or file a bit more but you can't put it "back on".  You'll also have to cut some of the roadbed along the inside of the curve to allow straight track sections to join the straight portion of the turnout.

What you'll end up with is something like this:

DSCN1488

Note that the outer cut rail on the donor curve is secured to the outer cut rail on the turnout with a rail joiner.

Where the roadbeds of the two tracks join is a real problem. You'll need to study long and hard at the two tracks penciling in a guide line as to where to make the cuts.

The underside of the newly joined tracks needs to be secured back together. You could use many types of glue...hot glue, epoxy, contact cement , etc. I chose to use clear caulk as an adhesive with bits of cut roadbed as "bridges" across the joined areas:

DSCN1494

DSCN1496

There's not a lot more to tell you about this modification. Just remember to take lots of time studying any proposed cuts before you make the cut. As to wiring the newly joined donor rails that's a topic for another time. This post is to show that it can be done. I think the roadbed cuts could be dressed up a bit better with some scenic elements such as ballast and glue but for now I have a working model of surgically altered SHS turnouts:

DSCN1487

Note that all the straight 10" sections of track remain uncut. The center to center spacing of the straight and divergent tracks is now right at 2 5/8". That's just about what was achieved in the original Gilbert Turnout surgery and is a vast improvement over original SHS/MTH track centers:

DSCN1510

So while I know not many people will attempt this modification (Heck I wouldn't have if it weren't for these junker turnouts!) at least now MTH will see that it could be done in a revised turnout release perhaps 200 years in the future! 

Mark


Attachments

Images (9)
  • DSCN1503
  • DSCN1502
  • DSCN1507
  • DSCN1504 A
  • DSCN1488
  • DSCN1494
  • DSCN1496
  • DSCN1487
  • DSCN1510
Last edited by banjoflyer
Original Post

Replies sorted oldest to newest

Thanks Dave and Jesse. This turnout surgery would allow many car storage tracks in a small area of a layout. The manufacturers probably won't spend the $$ needed to mold a new turnout roadbed designed like these.

Lionel/American Flyer S scale Fastrack switches are essentially identical to the SHS/MTH turnouts so they too could be modified like this.

Mark

Mark, that is very nice work you did. The finished turnout looks factory supplied. As far as turnouts to cut up I have never seen the manual SHS turnouts you pictured. They must not be as common as the powered versions which themselves were not that common. PortLines has some used SHS turnouts for $45. The new MTH turnouts are $65.

The problem with even the latest release of the SHS turnouts is the wiring and brass slides under the turnout are not robust and in my personal experience have a 90% chance of failing in routine use. These parts were clearly not made to pass 8A to 10A or for continuous switching use. I would cut up the SHS turnout as you did  Mark and then solder on new wires and use a relay or contacts on a Tortoise machine to power the frog and frog rails. This is the same as one would wire one of the custom made numbered turnouts. I have never taken apart a new MTH turnout to see how robust the electrical parts are. What I do know is the rail MTH uses is not the same alloy and quality that SHS sourced even though they look almost the same. When we stripped the rail out of the MTH flex track to use as stock to make the custom turnouts the difference between the MTH and SHS rail was obvious.

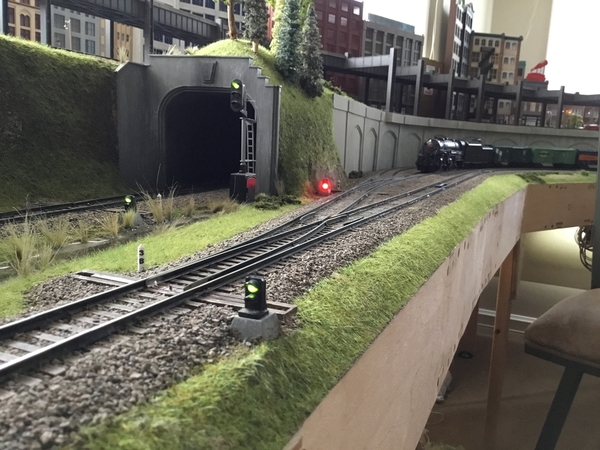
Tom your layout is stunning! We put some similar LEDs on the club layout. When I ordered them from an ebay seller (China) I assumed (incorrectly) that the top bulb was green and the bottom bulb was red. WRONG!. Both bulbs changed from green to red. So we doubled up the units with two bulbs facing one way and two bulbs facing the other. All the bulbs light up at the same time either green or red.

So what we have (not prototypical) is from either view the turnout shows 2 bulbs lit...2 green for the straight or 2 red for the divergent. Doesn't matter...everybody likes the tiny lights!

I need to read these ebay listings closer before I hit the Buy-it-Now button!

Mark

There are a few places I wish I had bi directional position lights like you now have even though they are not prototypical. One of these days (years?) I need to put the wood veneer I had cut on the exposed wood surfaces of the layout.

It really is a shame neither SHS nor MTH made turnouts with the wider radius diverging track. At least we have the Lionel 27"R turnouts and the pre-made #5's from Fox Valley.

Hi,  I originally modified some American Flyer switches for my yard but got stuck thinking about wiring switch machines etc... then I found a few used S Helper switches and went to work.  Cut the first one too short in the trial and error effort but the second round came out a little better.  I have reinforced all the new joints with screwed/glued plates underneath.  They fit now, just have to double-check the wiring.

If anyone would like the modified AF switches, they can be had for the cost of shipping from 14818.


TimIMG_1835IMG_1836IMG_1837IMG_1838


Attachments

Images (4)
  • IMG_1835
  • IMG_1836
  • IMG_1837
  • IMG_1838

RoyBoy,

I did the mods as shown by banjoflyer,  I cut the rails with a thin cutoff wheel mounted on my Shopsmith, I found on my bandsaw that the rails just killed the blade. The plastic though I did cut on the bandsaw. I then attached Styrene where the cuts were made with hot glue and painted  it.

Sad to say but I believe that Mark "banjoflyer" is no longer on the forum, our loss. I was fortunate to meet with him at S Fest in St. Louis, a super nice man and quite talented. The other fellas in his club gave him great accolades.

Ray

Wow, that's some great work.  I just got into S-guage (mostly MTH crazy, I know after they sold it off).  I'm running into a problem with the MTH S-Trax that I have been able to buy from a local hobby, plus splunking through the internet finding other hobby shops, and of course eBay.  Everything started off great, I received R20" curves used (could have been S-Helper R19).  I created a small loop for my PS3 Erie Lack switcher and I was really impressed with the track, and PS3.  I had only had PS2 O-gauge engines from mid 2000's.

Then a bulk shipment arrived from a Hobby shop I had ship 25" and 30" curves.  I waited a few days before trying them out on the family room hardwood floors.  To my shock, they don't seem to fit together.  I can't keep more than 2 sections of either 25" or 30".  When I try adding the 3rd section, the curve on the other side of the threesome actually pops off and unhooks from the middle curve.  When the curves are solo, they lay nice and flat.  When I hook 2 together, then inner diameter of the roadbed is raised.... the opposite of a banked curve!

Is there a trick I'm missing?  It looks as if the inner rail of the radius is too long, see picture attached.

Any help is greatly appreciated!

IMG_3801IMG_3808IMG_3810

Attachments

Images (3)
  • IMG_3801
  • IMG_3808
  • IMG_3810

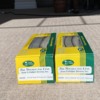
I like the SHS/MTH sectional track for temporary layouts. My permanent layout was built with MTH flex track. it makes a fantastic operating layout. For the record, all the sectional curves are the same diameters, regardless whether SHS or MTH. SHS could not seem to figure out how to mark their track, pictured below are two identical boxes of track, one marked 19”R, one marked 20”R.

I have never had any trouble making layouts with the sectional track. I quickly snapped together three sections of SHS 30”R curves and dropped them on the floor. As the picture shows, they lay perfectly flat. Not sure what is happening with your sections.BD387A7D-43E7-4DD3-B7B8-3FEF47CA7647816942D1-AFE9-4067-A485-261BB18EC1D5

Attachments

Images (2)
  • BD387A7D-43E7-4DD3-B7B8-3FEF47CA7647
  • 816942D1-AFE9-4067-A485-261BB18EC1D5

I use SHS/MTH sectional track to make quick, temporary layouts, it works great. My permanent layout was built using MTH flex track. First, all curves are the same radius, regardless of SHS or MTH manufacture. SHS could not seem to decide how to label their curves. Pictured below are two identical boxes of SHS 20”R curves, one box marked 19”R, one 20”R.

I just snapped together three SHS 30”R curve pieces and placed them on the floor. As the picture shows they lie perfectly flat. I have not experienced the problem you pictured and unfortunately have no experience correcting it.B72B6BCE-941E-4A57-9900-513333B4D944971BA949-3C20-4039-9136-84B623B84585

Attachments

Images (2)
  • B72B6BCE-941E-4A57-9900-513333B4D944
  • 971BA949-3C20-4039-9136-84B623B84585
@Scott Pater posted:

Wow, that's some great work.  I just got into S-guage (mostly MTH crazy, I know after they sold it off).  I'm running into a problem with the MTH S-Trax that I have been able to buy from a local hobby, plus splunking through the internet finding other hobby shops, and of course eBay.  Everything started off great, I received R20" curves used (could have been S-Helper R19).  I created a small loop for my PS3 Erie Lack switcher and I was really impressed with the track, and PS3.  I had only had PS2 O-gauge engines from mid 2000's.

Then a bulk shipment arrived from a Hobby shop I had ship 25" and 30" curves.  I waited a few days before trying them out on the family room hardwood floors.  To my shock, they don't seem to fit together.  I can't keep more than 2 sections of either 25" or 30".  When I try adding the 3rd section, the curve on the other side of the threesome actually pops off and unhooks from the middle curve.  When the curves are solo, they lay nice and flat.  When I hook 2 together, then inner diameter of the roadbed is raised.... the opposite of a banked curve!

Is there a trick I'm missing?  It looks as if the inner rail of the radius is too long, see picture attached.

Any help is greatly appreciated!

IMG_3810

Scott, I have experienced difficulty snapping that last little bit together.  Sometimes wiggling them back and forth works.  Check the underside to make sure nothing is hanging them up.  Another problem I've run into is not getting the rail in the adjoining rail joiner.  For me, it's hard to see and I end up with that frequently.  And I've had just the opposite where the tracks come apart too easily.  I've never seen them buckle though.

Tom Stoltz

in Maine

HI,  Check and see if the inner (or outer) rail has shifted one way or the other ( i.e. is the other end of your problem piece short?).  I've run into a few sections that happened to.  Use a little tack hammer to gently tap the 'long' end back into place.  Also, be sure the rail goes into the joiner not over.  Good luck.

I got a chance to speak with an S-gauge YouTuber that I noticed a lot of S-Trax on his layout loops.  He was kind enough to have a phone call.  Apparently there was a run of S-Trax that the inner rail was outside of the tolerances.  He said he went to his local hobby store and they owner told him MTH even put out an email.  Dremel tool fixes it.  

I actually went to my LHS and picked up 2 packages.  One was dated from 2014 on the price sticker and the other package had 2019.  The 2019 package had the same problem.  I seem to be on the right road...

Tom

Is the cork high enough when the track sits on top of it that it could meet up evenly with the S-Trax (included plastic roadbed)?  I'd like to use the 25" and 30" for my 2 mainline loops on either end of an L shape and then use the flex track in the visible front run of the L.  The back run will like be in a mountain as the 2nd level is going to be HO.

Scott

@Scott Pater posted:

Tom

Is the cork high enough when the track sits on top of it that it could meet up evenly with the S-Trax (included plastic roadbed)?  I'd like to use the 25" and 30" for my 2 mainline loops on either end of an L shape and then use the flex track in the visible front run of the L.  The back run will like be in a mountain as the 2nd level is going to be HO.

Scott

Scott, what I've used is 3/16" cork roadbed,  one piece of H0 and one piece 0 gauge side by side.  It is the perfect width for S (MTH/SHS) flex.  I place it on top of 1/8" cork and the height is spot on to mate with my S-Trax.

CORK ROADBED 1CORK ROADBED 2

Tom Stoltz

in Maine

Attachments

Images (2)
  • CORK ROADBED 1
  • CORK ROADBED 2

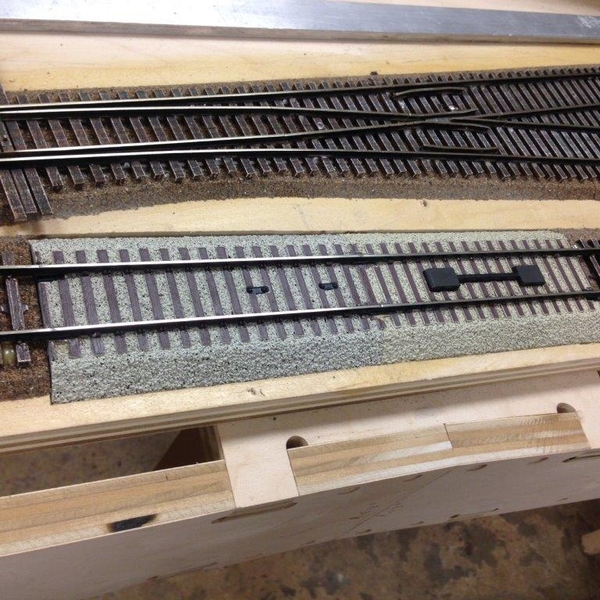
Since I was building a permanent layout I was unable to use Tom's clever way of matching the rail heights. Below are some pictures, the layout has about 30 pieces of SHS/MTH sectional track. The first shows two 5" pieces during construction. The plywood track base was routed out to lower the sectional pieces to match the flex. The rest of the pictures show some of the sectional pieces (uncoupler and actuating rail section) after ballasting.


4272B438-0283-40A7-8915-748CC75C346E79A4622F-48D8-40CE-BC8D-AE568C3AE78B540AFDFE-91AC-4E9B-86BE-535E6E7A9CFE

Attachments

Images (3)
  • 4272B438-0283-40A7-8915-748CC75C346E
  • 79A4622F-48D8-40CE-BC8D-AE568C3AE78B
  • 540AFDFE-91AC-4E9B-86BE-535E6E7A9CFE
Last edited by AmFlyer

Add Reply

Post

OGR Publishing, Inc., 1310 Eastside Centre Ct, Suite 6, Mountain Home, AR 72653
800-980-OGRR (6477)
www.ogaugerr.com

×
×
×
×
Link copied to your clipboard.
×
×