I'm looking for help getting started.  I am trying to build simple layout for now that allows me to build my Christmas scene.  I want to build a free standing mountain that is somewhat pointy at the top.  I have seen build using wood and then foam but i'm not that handy when it comes to building with wood.  I've seen the expandable foam and that is an idea but i don't know what i should build the base using.  I'm very new to trains and have a lionel O gauge polar express train.  Any help would be great!

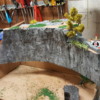
attached is what i have so far ( just started)

Thanks.

Mike

Attachments

Images (1)
  • IMG_6096
Original Post

Replies sorted oldest to newest

I recommend getting a good publication on scenery building. I would think OGR Magazine has such publications. There are also some classic scenery publications, but the names of the authors escape me for the moment. I'm sure some or our Forum colleagues remember them.

What I did for my mountain is to use cardboard strips taped together into a shape I like, covering it with plaster cloth I bought at a local hobby shop (very easy to work with), and then I painted it with acrylic paints.

Good news, I just went into my basement and found a great classic publication on scenery: Scenery for Model Railroads by Bill McClanahan. In it there is a chapter called Hard Shell Scenery that is very helpful. That publication covers all facets of scenery for model railroads and I highly recommend it. I would go on Amazon.com to find it.

Here is my mountain:

15367110460253735741329643995417

Arnold

Attachments

Images (1)
  • 15367110460253735741329643995417

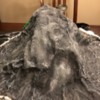
If I were you, I would put down a layer of thin plastic sheeting (or even Saran wrap). I would then build up the rough shape of what you have in mind using some kind of scrap material, such as foam packing blocks, crumpled up newspaper, woven strips of cardboard glued together with hot glue...whatever. Then, make up a pan of thin plaster of paris. Dip strips of paper towel into the paster, and lay them one-at-a-time on top of your shape. Let it harden overnight and pull out the stuffing. Then do the landscaping with your weapon of choice.

Messy but effective and fun.

mountain 4mountain 8

Attachments

Images (2)
  • mountain 4
  • mountain 8
Last edited by Avanti

I used Howard Zane's method- paper over cardboard strips, coated with Elmer's glue.  It worked fine, but I still had to make the shape using hot-melt glue and cardboard, then paint it, etc.  BUT....

Woodland Scenics has a relatively new product called Shaper Sheet. This is a stiff foil-like material that you use to make the basic shape of your mountain- with no other forms or "grids" of cardboard, or foam, etc. of any kind needed. Being made of aluminum- it is light, allowing you to build without an "understructure".

You stretch it out, and shape your mountain, and pour and spread lightweight Hydrocal or other plaster over the shape.   They say it is " is formulated to mechanically bond with the plaster to create a thin, hard shell ready for landscaping."  

After the plaster cures overnight- paint it all brown using latex paint (or a mottled brown and white if you are modeling winter), then get some fake snow at a craft store, some evergreens, and spray snow.  Put in a few of the Christmas ceramic buildings.  Viola!!  Mountain!!

The plaster itself is the shell of the mountain, and the aluminum would be fire-resistant, too.  And unlike a metal window screen base - no worry of electrical shorts.

Last edited by Mike Wyatt

I don't have a picture but i wanted it to go with the theme of the Polar express.  I wanted that mountain that the track will go around.  I'm not ready to make a winding mountain that the train can go up.  I just wanted it to be in the middle of the layout near one end of the track.  I might give the shapper paper a go since the skill is low.  The cost is a bit high but i think it might be the easiest to try for now.

  Basically, I was thinking screen might be handy as well. 

   I changed the screen in a few windows, then used the old screen and emptied  the closet of old plaster, spackle, wood putty, and wallpaper paste for a small tunnel. So it was free; more or less.  Spackle base, plaster mache" midship, wallpaper paste mache towards the top, then latex wood putty and spackle to fix terrain I didn't like.  

Mike Wyatt posted:

I used Howard Zane's method- paper over cardboard strips, coated with Elmer's glue.  It worked fine, but I still had to make the shape using hot-melt glue and cardboard, then paint it, etc.  BUT....

Woodland Scenics has a relatively new product called Shaper Sheet. This is a stiff foil-like material that you use to make the basic shape of your mountain- with no other forms or "grids" of cardboard, or foam, etc. of any kind needed. Being made of aluminum- it is light, allowing you to build without an "understructure".

You stretch it out, and shape your mountain, and pour and spread lightweight Hydrocal or other plaster over the shape.   They say it is " is formulated to mechanically bond with the plaster to create a thin, hard shell ready for landscaping."  

After the plaster cures overnight- paint it all brown using latex paint (or a mottled brown and white if you are modeling winter), then get some fake snow at a craft store, some evergreens, and spray snow.  Put in a few of the Christmas ceramic buildings.  Viola!!  Mountain!!

The plaster itself is the shell of the mountain, and the aluminum would be fire-resistant, too.  And unlike a metal window screen base - no worry of electrical shorts.

Go to Woodland Scenics website and view the instructional video on how to use Shaper Sheets - they actually build a small mountain in the video. I believe they use Shaper Sheet Plaster over the sheets - I'm not sure if tis is the same as the  lightweight Hydrocal plaster they make. You can also use their plaster cloths, as well.

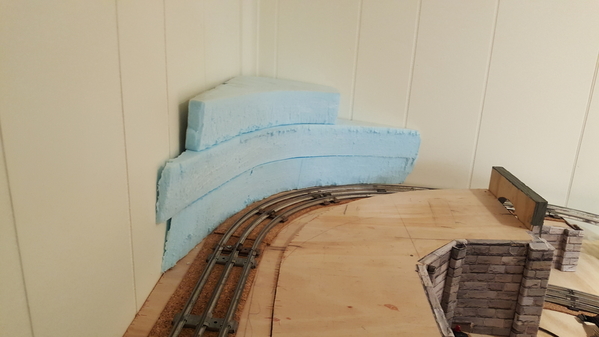
I made the attached corner mountain using Shaper Sheets.

I've also successfully used crumpled up wet newspaper for the basic free-standing mountain shape covered with a paper maiche'-like product sold at Michael's - very easy to work with and inexpensive.

Attachments

Images (1)
  • MTN 3

I have to say that the shaper sheet wasn't the easiest thing to work when trying to make a mountain that has a high point in the middle.  I think it would have worked great if i was just doing a hill type mountain that was long and short.  I am now ready to paint but i'm not sure what colors to use.  I've watched video of the painting techniques.  I'm looking for that Gray mountain that will have a white snow cap at the top.

Here is my mountain so far.  I still have to cut and trim the bottom but so far so good.

Attachments

Images (2)
  • mountain1
  • mountain2

You could create the peak you want now if you're not happy.  But I think you could manage with that as well. I like the sheer faces if it's going to be rock.

Water based acrylic flat craft paints. Black or dark grey as as a base color. About two bottles worth of 2oz at about a buck each will cover it; or spray the basebcolor if it pleases you, but no gaps; You need a total fill in cracks.

  Then dry brush a few shades of grey. Start darker; lighter shades on final highlights. Then snow. Thick for a rouñded flowing look. Thin for icy, maybe a blue tint. Satin or semi-gloss for "wet" snow. Blotchy drybrush for frost. Nothing stopping you from using two shades of white, drybrush a pure white on the highlights.

One grey on black, plain styrofoam, vertical strokes here for implied weathered edge up high(a weather wash would help, this is "raw" for the look)

20180919_212921~2

On cut box cutter sliced up styrofoam20180919_213731~3

Thick snow, frosted red brick, 2 blacks, 2 greys, gold in the tunnel (looks red-brown, you may see differently, one of those color tricks; live, it's gold metallic highlights.)
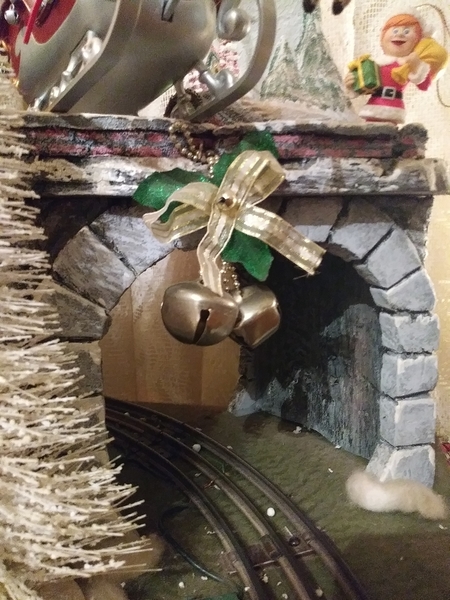
20180919_213031

More color tricks.

Some of the dark green is added because the green means copper ore. But there is also metallic copper drybrushing here that appears as green. In person it is also copper... and some gold too...again, it looks brown in the photo.
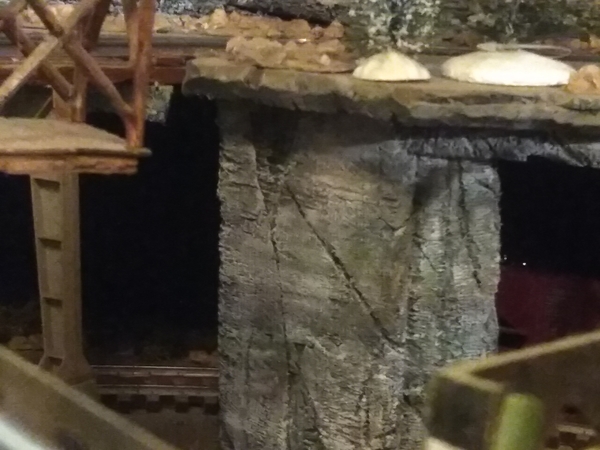
IMG_20180919_224453

Screen and spackle with "old school" look.

Hmmm shoulda changed it to a black&white shot to illustrate grey tone, but you can break this down to blk, drk gry, lt gry, white. (Brwn,grn, being greys)

IMG_20160908_030920_zpsegs38cvf_optimized 2[1)

Attachments

Images (6)
  • 20180919_212921~2
  • 20180919_213731~3
  • 20180919_213031
  • IMG_20180919_224453
  • IMG_20180919_224127
  • IMG_20160908_030920_zpsegs38cvf_optimized 2(1)

Mike,

The mountain in the middle of this photo is made of 2" foam.  It is hollow in the center and very lightweight.  It is also not attached to the layout and can be lifted off by one person.  I know it is much too large for under the christmas tree but it just shows what you can do easily and cheaply.

36240666_822341301289821_5809875739599699968_o [1)

Attachments

Images (1)
  • 36240666_822341301289821_5809875739599699968_o (1)
Mikl99 posted:

I have to say that the shaper sheet wasn't the easiest thing to work when trying to make a mountain that has a high point in the middle.  I think it would have worked great if i was just doing a hill type mountain that was long and short.  I am now ready to paint but i'm not sure what colors to use.  I've watched video of the painting techniques.  I'm looking for that Gray mountain that will have a white snow cap at the top.

Here is my mountain so far.  I still have to cut and trim the bottom but so far so good.

I think it looks great and Adriatic's painting/weathering techniques are spot on. I like to use small plastic dishes to squeeze the paint into and paint from there. They are available pretty cheaply at Michael's. If the paint is not the exact color you're looking for, you can always thin the paint first with water in the dish and see how that comes out.

Personally, I like to go lighter first and then go darker if need be, but either way works. You might want to add some turf/trees/logs etc. as you go depending on the look you're after.

The thing to remember is that it will get better looking as you add more paint and detail.

You should always start uneven terrain by painting it flat black. That way, the nooks and crannies will have the dark "shadow" look that they would have in sunlight. You may then paint the exposed surfaces as light as you please, but without starting with black, you will never get the shadows right. This is the other side of the coin of adding highlights by ending with a bright white dry-brush.

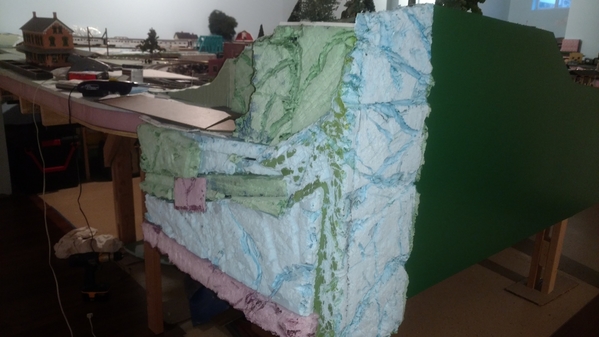
Here is what I did.  Scraps of Blue, Pink and Green foam hot glued together.

Ya know all those dull exacto knife blades you throw away?  Save them and just start hacking.  Literally just start swinging your arm in all sorts of motions chipping and flaking, causing a rough surface, gouges and creavases.  I also used a wire brush and an old soldering iron to make deep cuts (Careful of fumes... ventilate your room).

Get some cheap paint.  I buy the "ooops paint" from the box stores in the sample size for .50 cents.  White, Grey, Brown, Black and Red... yes, Red.  

Paint the whole thing a dark grey or black.  You will see I used grey on the pics below, but the second time I did this I used Black and I liked the results better. Then just start swiping on color.   Dab, dab, dab the they brush the dabs in circles and or in stripes.   I even heavily water down some of the colors so the water paint runs down the mountain finding the creavises to flow.  The older or cheaper the paint brush, the better.  The sloppier you are... the better.

Practice a little and Have Fun!!!

Ron

1 Tools2 Foam Parts3 Foam Parts4 Carve5 Carve6 Paint7 Paint8 Finished

Attachments

Images (8)
  • 1 Tools
  • 2 Foam Parts
  • 3 Foam Parts
  • 4 Carve
  • 5 Carve
  • 6 Paint
  • 7 Paint
  • 8 Finished

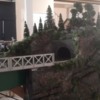
I built a two level permanent mountain for my layout and learned that the most important aspect of building a mountain is how the exterior is finished.   When it's all said and done that what is seen.   Mother Natural makes mountains in all shapes and sizes so it's hard to go wrong in that department.  I followed Dave Frary's book on building model railroad scenery which contains details on mountain/rock finishing.  I was really pleased how it turned out.  I also learned when it comes to ground cover, think layers.  Layer upon layer of different ground covers provides the texture of a more natural look.

Bravo Was the first step to use color bleed as part of the shading of topcoat or did you blend the areas? For those considering doing similar, I can't stress enough how easy and fun this kind of building and painting can be. I went at it like an exuberant kid and achieved what I felt were acceptable results. I only regret I did such a crude assembly of some vertical flats vs many layers built to a height. It's harder to to hide flat vertical planes.

The first part was trying to let the black bleed down the areas i thought needed the shading.  I then used the dark gray after that to as more of the base on top of the black.  I used 3 different Grays where the last gray was closer to white where i used the dry brush technique. Painting was a lot easier than I thought. 

I am going to try and use the Flex paste on the top of the mountain and at the bottom with some of it on the parts of the mountain that sticks out where the snow drift may have landed.  I'm then going to sprinkle on the snow.

I can't see, doe dee doe doe doe doe.. oh woe is me 

Mike99  Being able to see the small thumbnails comes and goes on Androids(mostly goes). Right now is one of the times I can't see anything if not inserted full size into the text.  If I tap a picture, I just get a grey screen.  This is most of the time vs occasionally fyi. And fyi, unlike other sites, full sized imagery has always been encouraged vs discouraged here to the best of my knowledge. 

  This is easiest to do this just before hitting "finished" during loading pics. A small checkbox appears after the "loading and processing", just as "successful" appears.... but between that section, and cancel/finished section. The checkbox is labeled "insert large sized" or something to that effect. Check the box.

A picture(s) get inserted wherever the cursor was last left.

  The checkbox is not there during loading and processing of the first photo, nor if a que of multiples is set up before the first one finishes. I.e. it needs to load 100% successfully, then it takes a split second and loads the checkbox. (Yes, more pics can still be loaded if you do this to check it early. ).  Otherwise you have to insert photos just before you hit post (or in edit now) using "insert photo" in blue at the bottom of each photo's sectioned off area at the lowest portion of the page. From here you can choose insert large, med., or small.

Add Reply

Post

OGR Publishing, Inc., 1310 Eastside Centre Ct, Suite 6, Mountain Home, AR 72653
800-980-OGRR (6477)
www.ogaugerr.com

×
×
×
×
Link copied to your clipboard.
×
×