


Darren, The trestle and roundhouse look great!
Like the Sherman tanks on the flat cars. Is that an MTH Model or your own kitbash?
The Sherman tanks are the MTH models, I am constantly in search of more ![]()
Can't ever have too many Shermans!!
Continued progress on the layout, showing one happy little boy!


Attachments
Images (4)
Darren Caruso posted:Mark,
I do have the trestle bents built and stained. Due to having little space between the bridge and the background area I want to complete that area, at least with the painting of the rock areas, before I start to build the trestle bridge into its place. Once I get that done, "I think" I should be able to construct the remaining portions of the bridge relatively quickly.
I've been working on the rock molds this morning, and I will continue with that tomorrow as well. Maybe by the start of next week I can begin the bridge.
Darren
Darren,
I just read this now, and don't know how permanently installed your fine looking trestle is as shown above, but you were 110% when you said what I bold-faced in red, in the quote. It is much easier to finish the slopes, rocks, etc. behind the trestle before it is in place. Even if you have to delay the project by a couple of days, it would be well worth it to delay the trestle permanent installation, or to temporarily remove it and work on the area surrounding it. ![]()
Either way I know that it will look great when you are done with it (and post a few pictures) ![]()
Thanks for sharing!
Alex
Alex, I designed the bridge so that it can be taken out with ease. The track is glued to pieces that I bent to the same radius as the curve, so it acts like one large rigid curve which just lays on top of the bridge. After the removal of a few track screws, the track can be removed then the bridge removed.
I have A LOT more work to do on the scenery around and behind the trestle.
Darren
Darren,
Good planning - excellent!
Alex
Is there a way to just see the photos on this?
Very impressive work.
Darren,
That last photo is worth a million!! Your son's face says volumes!!
I also like your planning for the trestle as you answered Alex!! Some very good Western Pennsylvania engineering, if I do say so myself!! ![]()
![]()
Thanks guys!
1Drummer, let me know what pictures your looking for and I will see what I can find, or take a few new ones.
Mark, that little boy loves trains, or as he refers to them as "Choo Choo's". Every day he asks me if I'm going to go work on the choo choo's, followed by "Can we go run the Choo Choo's?"
Darren
I meant all of them...like a slide show
And I see you have a track bender...you have a link for that?
Will it work on Gargraves?
I don't think a slide show is possible for all of the pictures I have ever posted, you can only post a few pictures at a time. As for the bender, I made templates using wood for all of the curves that are custom radius and sectional track for most of the 072 and 0-80 curves. I used a 2 x 4 piece of plywood, measured and cut the template from 1/4" masonite, secured the masonite to the plywood, then bent the gargraves track as per the instructions. I used a dremel and cutting discs to cut the track, then filed the track before re-installing the track pins.
If I may be so bold, a slide show is possible.
There's an app..lol
Collect all the pics, and post on YouTube
Then share the link to your YouTube page.
Seems I'm looking at 2 different, but very similar layouts..or my dementia is starting early.
From your thread, somehow I got on
https://ogrforum.ogaugerr.com/t...yout-update-01302013
And that's where I saw the track bender.
I must confess, Anheuser Busch products were liberally involved
1drummer posted:Seems I'm looking at 2 different, but very similar layouts..or my dementia is starting early.
From your thread, somehow I got on
https://ogrforum.ogaugerr.com/t...yout-update-01302013
And that's where I saw the track bender.
I must confess, Anheuser Busch products were liberally involved
That bender is gold. Designed by a guy named Norm from Az. 9Norm's Model Supply) he was working with Atlas. It was the only tool to curve Atlas flex. Then, he passed away (2013?) and no one picked it up, saved it etc. There were different roller sets for 2 rail and 3 rail.
If you ever find one, have it reverse engineered and build more.
Does anyone know if it's a multi type operation, or a 1 AND DONE bend?
And does it bend with the ties in place?
Anyone currently using one..who could make a video.
1drummer posted:Does anyone know if it's a multi type operation, or a 1 AND DONE bend?
And does it bend with the ties in place?
Anyone currently using one..who could make a video.
Don't derail Darren's thread...start a new post
1Drummer, I probably have a program on this computer already that would do that, I was planning on doing something similar once I have the layout more completed.
As for the track bender, that is on another layout, from another forum member. I did look into buying one, but decided to do it my way instead.
Darren
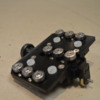
I decided to edit the topic title now that its been 2+ years. Felt it was appropriate due to the work that's now being completed on the layout. I switched from the scenery work to electrical, mainly switches and power blocks. Here are some pics of the control panel I've been working on, one thing for sure - I have a new appreciation for the worker who applies pin-striping to any vehicle!
Darren


Attachments
Images (3)
Darren, Nice power panel! Looks like Plexiglas with architecture tape?
What are the toggles? Is it for power
The other smaller buttons, are those for switches?
George,
Thank you, I used 1/4" plexiglass with auto pin-striping. Since I have the MTH DCS system I am using the toggles for track power, the other things that look like buttons are the LED holders. My plan is to have them illuminate green when power is applied to that particular section of the layout.
I do plan on placing 1/2" white numbers above the corresponding switches on the control panel, this way I, or any other user, can look at the control panel and determine what switch they want to operate, then use the DCS remote to operate the switch. As I am wiring the switches I am labeling them in order on the DCS remote, just trying to simplify things as much as possible.
Darren
Hi Darren,
Just stumbled upon your layout a few days ago on Youtube and decided to check the OGR forum for progress. Seems you've come a long way since then. I hope all is well, and wondering if you've progressed much since your last post in January. I'd sure be interested in a current video or pictures, and I'm positive the members that have been following would also! Of course, when you have the time.
I've seen the earlier sketches of the layout and I'm curious if the plan has changed much. I plan on rebuilding my layout soon, the existing layout is an around the room with 2 duck unders, but I would like to go with a similar walk in style like yours. Would it be possible to indicate the critical dimensions? I've attached an image of your posted plan with radius & dimension lines indicated to make this as easy as possible for you.
Thanks,
Joe Kunka
Attachments
Images (1)

By the way, nice job on the control panel. Are the toggle switches functional yet and what brand & type are they?
Joe,
I haven't done as much work on the layout as I wish, in fact, I plan to make some changes to the left side of the layout, just not happy with how it has turned out. I was running the trains with my son this morning and went to make a short video... the camera battery needed charged so I wasn't able to make a video.
I hope to complete some work starting in the yard and moving around the layout in that direction until I reach the left side then start the necessary changes.
As for your dimensional drawing I'll do my best to provide the answers your looking for.
- From left to right the room is approximately 27' long
- The "G" line you drew is approx. 12' in lenght
- From top to bottom, the total distance is about 18'
- The 'F" line is close to 30"
- Radius A & D are 0-72
- Radius C is 0-80
- Radius B is 0-63
Ironman,
The control panel is not functional yet, the toggle switches are from some famous on-line auction site, lol. They are SPST, just designed to turn power on/off to sections of the layout.
Darren
Hi Darren,
Thanks so much for the quick reply, this should help considerably! I was using your video, following the Y6B around, to get a sense of how my engines will look in a similar space. The Y6B looks comfortable and that puts me at ease!
I built my layout over 15 years ago, and was gung-ho for about the first 6 months, building all the benchwork and getting 90% of track laid. I played around with some yard trackage and wiring improvements for the following 6 months and haven't progressed since. I think progress stopped because I wasn't totally happy, probably the duck unders are what killed my motivation. With a 13 x 23 inch space, not bad by O gauge standards, I'm limited since I love articulated engines and have kept my minimum radius to 072. I can drift into some un-satisfactory areas, where my boiler is for one, for a reverse loop or hidden trackage if the need should arise.
On and off over the years, I've been sketching new track plans on my train ride to work. Your layout has given me renewed inspiration!
The best thing about a layout, once you get the trains running...there's no real rush. Have fun, progress as time allows and take your time. I doubt anyone is ever totally satisfied and finished. Besides running the trains, the fun is in the building and learning new skills along the way!
Looking forward to a new video!
Joe (ironman1)
Joe,
I hear you completely. For me, once the weather breaks here in western PA, I am running from one practice or game to another, my boys play hockey, baseball, golf (and I golf too!), so from April to September/October work on the layout is at a standstill, I just do not have the time.
This is the third layout I've constructed in the basement since 2007, with this being the most complete one. I just need to fix the left side; not enough space to walk through comfortably, too cluttered, etc. Basically, it was not planned very well because it wasn't planned at all. The rest of the layout I am happy with, a few touch ups, scenery, two buildings to purchase and build, and that area will be 90% (I have figures, trees, ground cover, ballast, cars all sitting in boxes waiting to be put on the layout).
I am currently planning the re-do for that area and will continue to plan with the hopeful construction to being in 2018.
I'll try to get a new video/pictures posted this week.
Darren
Good to hear of your progress, and I can understand the reasoning of a break. When I finished the mainlines of my layout, I was done for a while and just ran some trains. That was 11 months ago and now I am motivated again. Your layout looks awesome and I hope you have an easy time adjusting the one side of the layout. It is never done. I look forward to your update.
Hi Darren,
I had the same with my kids, and that's real important. Sports build character and keep the kids out of trouble. No time for trouble. The kids grow up too fast. Do it now, while you still have the steam.
Of course then, hopefully there's grandchildren and that's another story.
Enjoy the kids, run the trains, continue the layout when you have time.
Joe
Hi Darren,
I apologize for being fixated on your layout but after watching your existing video multiple times, it seems the trains are following each other on one continuous loop. It didn't seem obvious the first few times I watched the video and after reviewing the last track plan you posted, I believe that's the case. It's a little confusing where the loops overlap each other. I actually thought you had 2 independent loops. Am I correct?
Thanks,
Joe
Joe,
No problem, yes, it is one loop. I had two separate loops but decided on one larger loop. I like the fact that it takes almost 6 minutes for the trains to get back to their starting point, and if I can get the layout to where I want it will add another 2 minutes to the loop time.
Once I do that I am going to use power districts to control the amperage. I can currently run three trains on the loop, but I plan to run four once the adjustment is made. I also plan to use the upper level as a logging line, so I will be able to run a smaller logging train on that loop. That will give me the ability to run 5 trains at once, which the big kid (ME) likes.
I started working on the scenery last night and today. When I get a little further along I will post some pictures.
Darren
Darren,
When I realized it was one continuous loop I liked the plan that much more! It wasn't obvious when you see the trains passing each other. So cool.
With my Grandson, he's a little over 2 & a half, and he loves watching them run. I run 3 at once on 2 loops and have to be dilligent with the ones following each other since that is the shorter loop. It's a little tough since I'm trying to keep a hold of him on a step ladder so he can see, and juggle DCS & Cab 2 controllers!
Thanks for the quick reply. Looking forward to the updates.
Joe
Joe,
Thank you, I'm glad I'm inspiring someone, LOL!
When I run the trains (And I'm just using DCS) I start them up in order from the furthest away to the closest, then, in that same order, set the engine speeds one by one. I usually run between 18-20 scale mph, that's fast enough for me. I have noticed with larger trains (Meaning the entire length of the train) I have to increase the speed by 1-2 mph to keep the spacing equal, otherwise the smaller ones catch up, then I have one long train.
I am looking into the wifi system from MTH, I think the kids will identify with it more, especially in this day and age. We'll see if it speeds things up a bit when going from engine to engine.
Darren
Hi Darren,
Probably a stroke of luck that I stumbled upon your video. Since I’ve been bored with my current layout, design wise, I’m frequently looking for layouts, with an engine facility that appear to fit into my floor space. My 3 EM-1’s, 5 Y6B’s & an Allegheny have been my Achilles heel!
My existing around the room plan with an inner island reverse loop, and a minimum radius of 072 up to 0118 isn’t horrible, I just hate the 2 duck unders mostly. All my engines run around without hitting each other at least. I really want to include a 34” turntable and roundhouse and from what I can tell, your engine facility looks just about the size I can shoe horn into my space. If I had an extra 3’ width and 6’ length I’d have a little more flexibility, for an easier walk in design.
But once again, that continuous run on yours is what really sold me. I don’t quite have your space but, if I fold over the left side of your layout and compromise I can just get a similar run. I've attached my plan.
Joe

Attachments
Images (1)

Hi Darren,
Just before I left work I posted the proposed layout. I had some free time at work to refine my sketches. Although I could use smaller radius curves I wanted to see what would be the widest radius I could squeeze in. Not much room for a walk-in! :-) I can still go another 3 feet to the right if I move my access doors to my boiler and hot water heater... and very possible. Still a work in progress.
On my ride home on the train, I thought, have you considered running 3 trains as a lash-up. Not connected, but independent, spaced a safe distance apart. Theoretically, they should stay that same distance apart, no matter what the length of each. That's of course, if you're interested in is just watching trains run. I suspect that there will eventually be one catching another, but it may take awhile. I think I'm going to try it.
Joe
Hi Darren,
What is the left side of the layout? Where the trestle used to be near the pool table? or is it the big sweeper through the wall?
Is it the scenic look, the trackage or both that you don't like?
Joe,
I like the proposed layout you came up with, if you can squeeze another 3' to the right your room will almost be the same size I have, minus a few inches in length. I actually have a 28" turntable, which accommodates all of the engines I currently own. The lash-up is a great idea, I'll have to give it a shot as well.
What program are you using to draw your layout? I had originally used SCARM, but I'm having any success with installing the new version.
Carl,
I've been referring to the "left side" of the layout based on the drawing Joe posted of my room space. But yes, the area near the pool table with the trestle. It's not the trestle that's the issue, but the space between that area and the wall. You have to turn sideways to fit through there. After Christmas I plan to systematically take that section apart, continue the L-girder benchwork that I already have in place, and work out over the pool table. Now the crazy part of this whole plan is that I want to make this section move-able, to the point where I can detach it from a determined point and pull it away, SLOWLY, over to where I have my weights, so I can shoot pool. Which only happens when we have family gatherings, so 2-3 times per year at max. I have A LOT of planning to do, thus why I am not rushing it.
Darren
Darren,
Thanks for the compliment! I happen to be a graphic artist and I didn’t used any software for model railroading. It’s actually Adobe In-Design. Illustrator would actually make more sense but the latest version of In-design can do most of what I need. It’s not as flexible as a RR software program since there’s no switches or other constants you can drop in and move around. I have to create every line and curve, do it on a grid and just start moving pieces around. I started with sketches on graph paper, using a circle template to draw the curves and connect the points. Once I have a rough, plan I scan it and use it as a template to follow in In-design. When I’m confident it’ll at least fit, I just start laying track on benchwork and adjust as I go along. Not the best method but it works with a simple design.
Yeah, 3 feet would do it, as well as a smaller turntable, to ease my isle issue (a 34” table takes a lot of space with the roundhouse). Having to squeeze through sideways isn’t ideal. I’ve been fairly stubborn with my radius curves. If I kept within 072 to 081, maybe 090 I’d only gain maybe a foot or so. No matter what I do, I’ll need to open up some space in my basement, which will encroach on my boiler & hot water heater space. I think 2 feet will do it and leave access for service and replacement. I really don’t want to move any walls if I can avoid it. I think tonight I’ll accurately measure my space.
Joe
Darren,
What a great thread. It’s a terrific build, and the time spent with your sons is a gift. Looking forward to your progress. Keep it coming.
Andy
I echo previous replies a cool and interesting layout build.
Add Reply
Sign In To Reply

