First why do I choose an Atlas car? All new MTH cars come with Kadee mounts, so all you have to do is screw in the Kadee box. Atlas Master Line cars will be highly accurate representations of the prototype with accurate paint schemes, but no kadee mounts like MTH cars. Lionel cars are too difficult for the beginner to convert. How easy is it to convert an Atlas car? This easy. No real reason not to.

Step 1. Unscrew and take off the trucks.
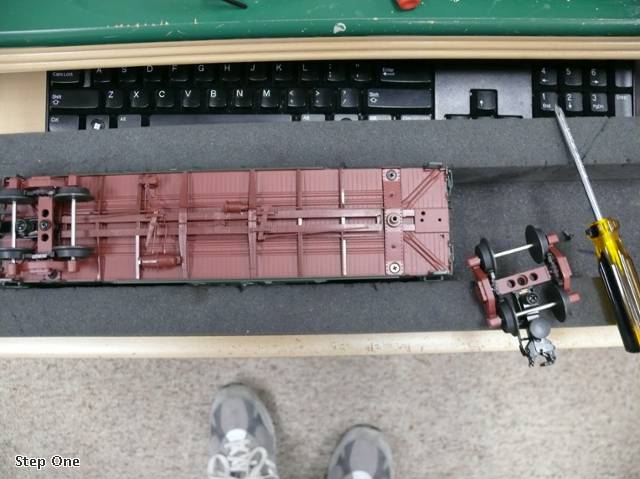

Step 2. Unscrew this screw.
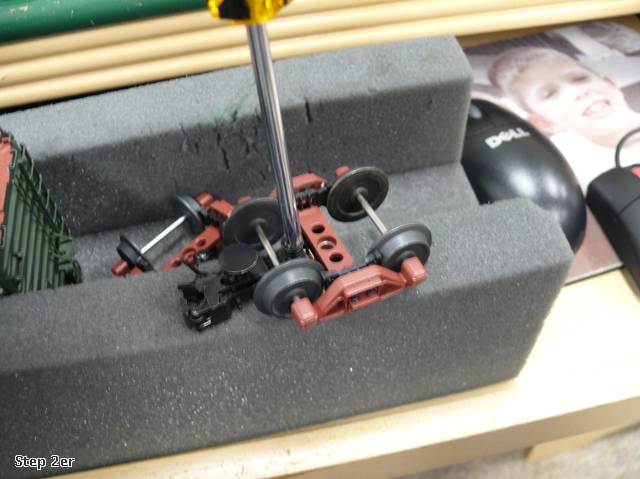

Step 3. Take these two screws off, one on each side.
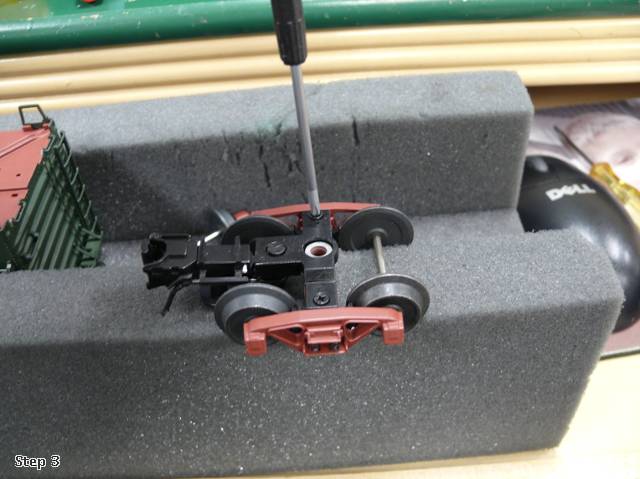

Step 4. Take this off and toss it!
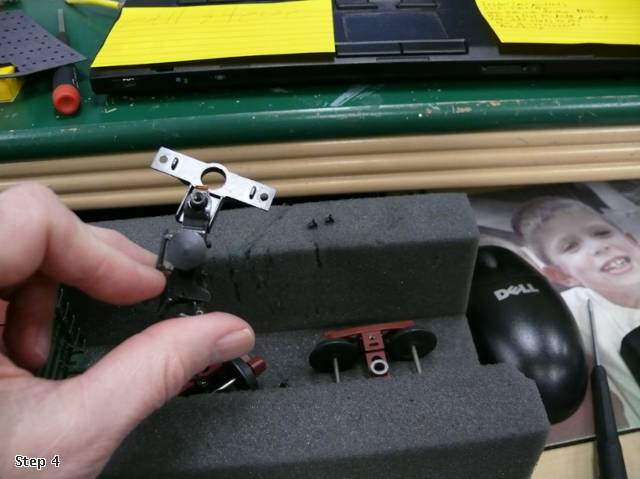

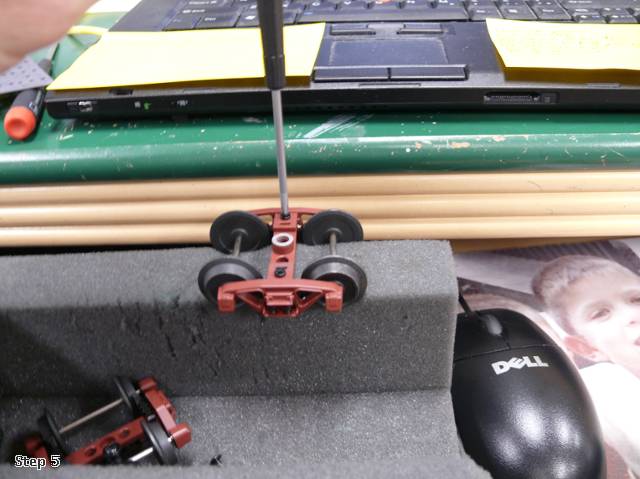
Step 5. Screw the two screws you just took out back in. Advanced Option: Don't screw these back in for truck equalization, but be careful, the trucks may come apart.

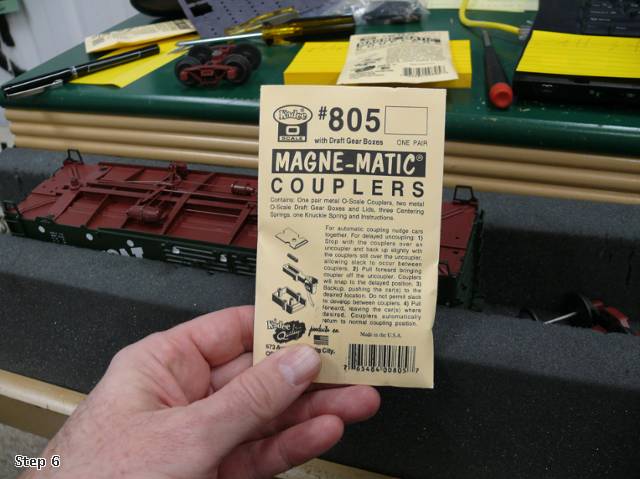
Step 6. Buy these couplers (Kadee 805s)

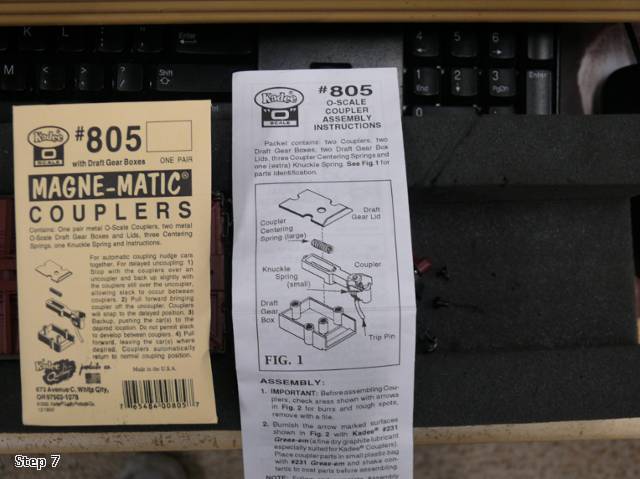
Step 7. Open up the package, follow these super easy assembly instructions.

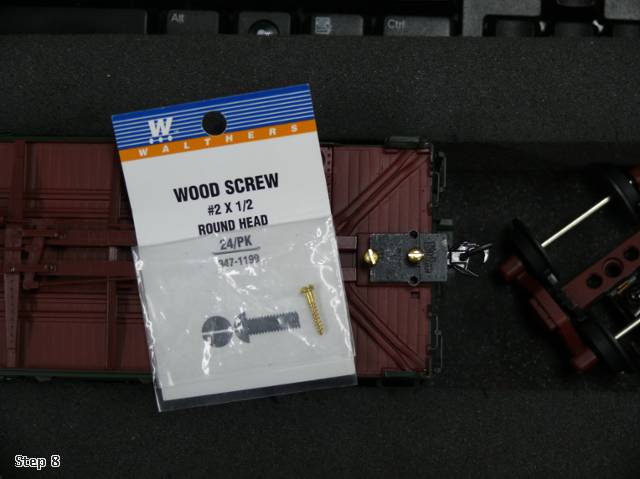
Step 8. Buy these screws from Walthers.

Advanced Option: You will notice that Atlas places the holes a little too far forward, causing the coupler box to stick out a bit.
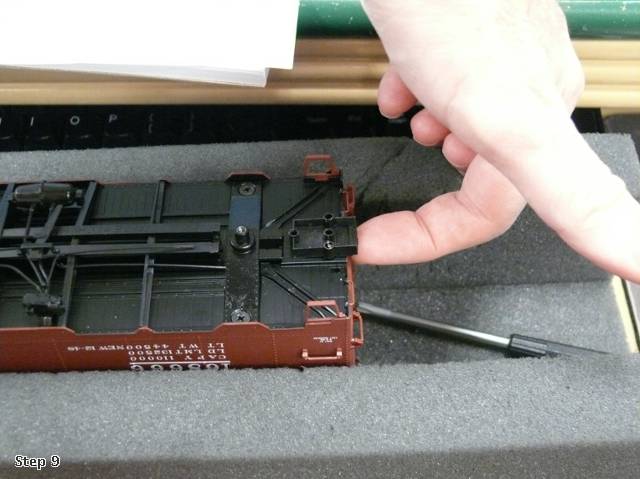

You can see here how the pre-drilled Atlas holes are too far forward.
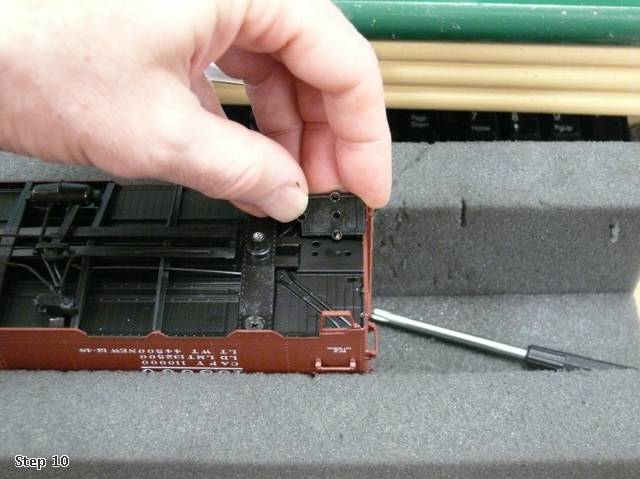

You may drill new holes if you like with a #51 drill bit, to do a proper job. Using the Kadee box as a guide/locator. The you can use #2 X 1/2" round head stainless steel sheet metal (i.e. self taping) screws from Micro Fasteners (1-800-892-6917)
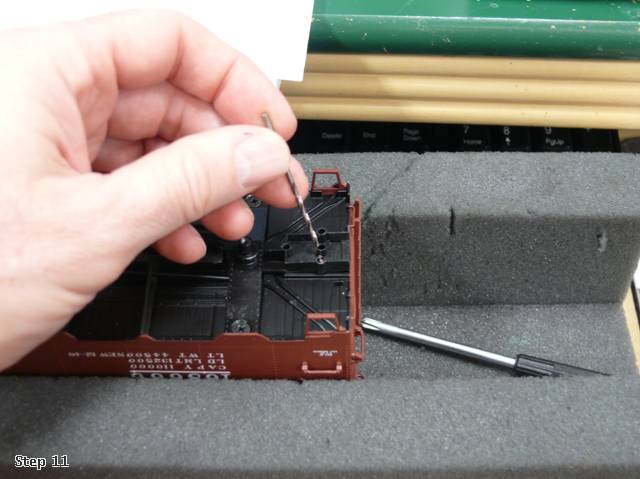

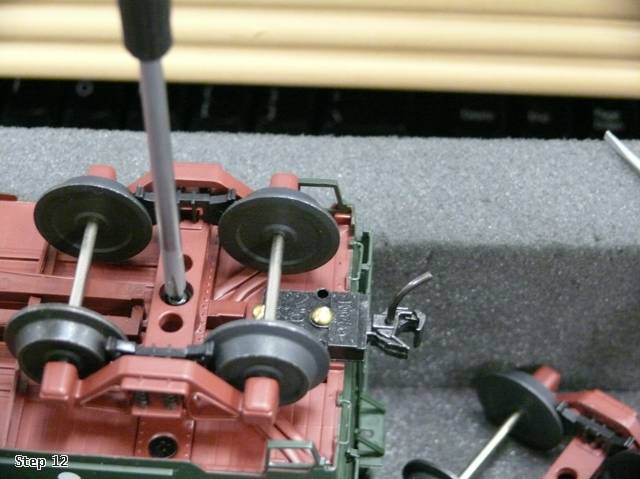
Step 9. Screw the coupler assembly in with the Walthers screws as shown, and put the trucks back on.

Buy one of these. A Kadee Height Gauge. Buy it here:http://www.kadee.com/


Put your car on the track to see if the height gauge is even with your new Kadee coupler.
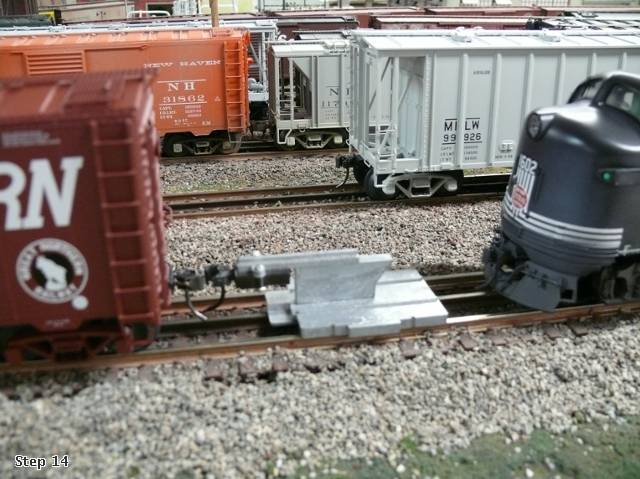

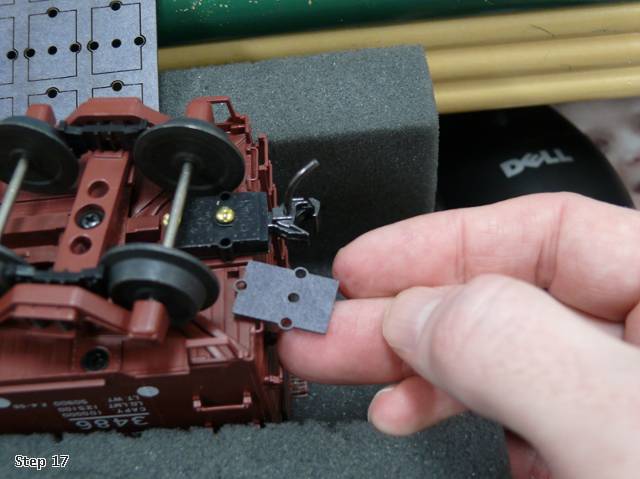
If it does not match buy these.


You can buy them here:


Then take off your coupler, and screw one or two of these underneath the coupler box to get to match the height of the gauge. Most likely all Atlas cars will need these, so you can do this in step 9.

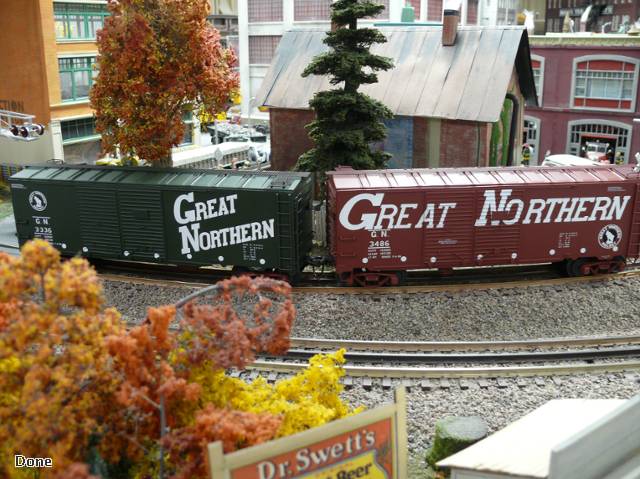
Done. You now have a 3RS Atlas freight car.

Of course you should have all these supplies before you start.
Last edited {1}
Original Post

Replies sorted oldest to newest

Great job Pete! Just what anybody wanting to get into 3RS needs to know about converting Atlas cars to Kadee.

However, one thing that I have descovered about Atlas cars is; those two screw mounting holes for the Kadee coupler box are not quite located correctly. You will notice that the Kadee coupler & box stick out past the end sill of the car. Thus, I have been drilling new mounting holes on all my Atlas cars so that the coupler box is flush with the car end sill. Never figured out why Atlas does that!
quote:
Originally posted by mwb:
Why do you use a wood screw vs. a 2/56 machine screw?


I use the 2/56 machine screws.

Also I found that atlas cars need 1 shim to get the proper height.

I also don't put the screws back in on step 5. I just leave those out. The screws disable the trucks ability to ride on the springs.

Excellent photo instructions!
Martin,

I think the wood screws take care of that slight mismatch between the spacing of the Kadee holes and the Atlas holes. You can start the pointed wood screws where you could not do the same as easily for machine screws. Plus they eliminate the tapping step.

I'm going to have to try them.

What I've been doing is tapping one Atlas hole for 2-56 (they come tapped for an odd metric size). I install the Kadee box with a 2-56 machine screw in this hole. Then, on the drill press, I drill through the other hole in the Kadee box and into the frame. Then, I tap that hole for 2-56 and install the second machine screw.

Pete's wood screw method eliminates those steps. Excellent how-to, Pete. Thank you. Smile

Jim
quote:
Originally posted by Trevize:
quote:
Originally posted by mwb:
Why do you use a wood screw vs. a 2/56 machine screw?


I use the 2/56 machine screws.

Also I found that atlas cars need 1 shim to get the proper height.

I also don't put the screws back in on step 5. I just leave those out. The screws disable the trucks ability to ride on the springs.

Excellent photo instructions!


Trevize,

Do you shim it with a .010 or .015 thick washer ... or something else?

Thanks,
GP
I believe the Atlas cars with the coupler pads are tapped for 2mm screws. As mentioned, they do not fit the Kadee pocket profile exactly. What I do is take a #43 drill and ream out the Kadee pocket holes I will be using to mount the coupler. This does leave the holes & sleeves completely intact. The 2mm screws (that I obtained from Micro Fastners) are also just a tad smaller in diameter that the 2-56 screws. The 2mm screws will now perfectly align with the threaded holes in the Atlas cars. Besides, the heads on these screws are allot smaller than the on the wood screws.
WOW! Guys, terrific response that I did not expect so soon! I started this last night as a work in progress and was going to finish it this morning, and never expected the great, enthusiastic responses so quick. I have to run out, but look for two more things I was going to add, height and shim pics. Remember, this is meant to attract guys to 3RS, new people, and maybe those that are sitting on the fence. If I make it too complicated, or add too many steps it will be a turnoff, look hard and defeat the purpose. Once someone tries this, and as they "get into it" I believe they will discover better and more correct methods on their own. We have to get them started first. So I may eliminate a step, and had planned to add two more pics. There were some good thoughts I'll address later, I have to run out now.

MWB,

quote:
I think the wood screws take care of that slight mismatch between the spacing of the Kadee holes and the Atlas holes. You can start the pointed wood screws where you could not do the same as easily for machine screws. Plus they eliminate the tapping step.


Jim's got it. But, again too much info may defeat the purpose here. I'll look at all the good tips you guys have added, figure out a way to simply incorporate them, in the next few days, change it with your everyone's good ideas to make it as simple as possible, and maybe submit to OGR? Word has to get out there is a new age dawning! Big Grin

Jack,

I don't get Atlas either, but last thing I want to do is start off with "take out your drill", you'll have the 3R guys running for the hills. Smile

Trev,

If you don't put those screws back, with some rough handling the trucks may come apart, again, don't want that to happen and frustrate someone. A good tip to add though.

Overall, we have to "tread" lightly here. Drill sizes, using measurements etc. believe it or not turn many guys off. Everyone here is dead on, but my goal will be to try and make it simple. So, there is a trade off. But I think once they get started, see the joys of realistic couplers, taking out the slack, uncoupling etc, the more advanced methods will come naturally.

Maybe outline the east way, and then in brackets or something outline the "advanced modelers tip"?
Pete,

You did not have to repost Jim's explanation; it was clear. I've used #0 x 3/8" wood screws for KD's for decades, but only on cars made of wood.

But for all plastic and brass I drill, tap, and go the 2/56 route. There are some good reasons for that.

And, I disagree with about providing drill sizes, etc -- giving novices a complete "how to" is the easiest way to make it foolproof. It's when they try something and use the wrong sizes of drills, taps, screws, etc and have problems or fail that their frustration sets in and they walk away wondering why they ever bothered and/or start using your name in vain, Wink

The more succinct and simple, a variation on the KISS principle, the better this will work for novices.
Way easier to do those than MTH.... Something to think about if you
do not own a lot of rolling stock already. Although new MTH isn't as
hard as older ones. Car disassembly alone can take some time on MTH.
(Tropicana tanker, for instance).

I use a Sharpie to color all the screw heads, and now usually do the springs
and axels while I am at it.
Scherbear57,

I much prefer walking around with a small screw driver to uncouple my Kadee couplers, instead of those HUGE "Lionel type" things. Besides, two points to consider: 1) you can always use the Kadee "delay" feature for backing cars into a specific "spot", and 2) my layout has all manual throw switches since it is a "walk-around layout". The Kadee couplers sure eliminate the crash & bash issues.

However, I really don't think that the Kadees will work all that well on your Lionel "Conventional Classics".
Like Mike mentioned, it's important to point out the level of difficulty in converting different brands of rolling stock.

If the beginner sticks with Atlas and Weaver, he can get his feet on the ground and be off to a good start. Starting out with one of the more difficult freight cars is sure to discourage.

I know that other manufacturers now provide Kadee mounting pads also on some newer models, but beginners should be encouraged to start simple, and all Weaver and Atlas are easy.

As far as uncoupling is concerned, in this day of walk-around command control, the screwdriver/coffee stirrer method works fine. Like Hot Water pointed out, by taking advantage of the delay feature you can spot cars in just about any "unreachable" location.

Pete, I think the time is definitely right for an OGR article on Kadee couplers.

Jim
Post

OGR Publishing, Inc., 1310 Eastside Centre Ct, Suite 6, Mountain Home, AR 72653
800-980-OGRR (6477)
www.ogaugerr.com

×
×
×
×
Link copied to your clipboard.
×
×