
First why do I choose an Atlas car? All new MTH cars come with Kadee mounts, so all you have to do is screw in the Kadee box. Atlas Master Line cars will be highly accurate representations of the prototype with accurate paint schemes, but no kadee mounts like MTH cars. Lionel cars are too difficult for the beginner to convert. How easy is it to convert an Atlas car? This easy. No real reason not to.

Step 1. Unscrew and take off the trucks.


Step 2. Unscrew this screw.


Step 3. Take these two screws off, one on each side.


Step 4. Take this off and toss it!


Step 5. Screw the two screws you just took out back in. Advanced Option: Don't screw these back in for truck equalization, but be careful, the trucks may come apart.


Step 6. Buy these couplers (Kadee 805s)


Step 7. Open up the package, follow these super easy assembly instructions.


Step 8. Buy these screws from Walthers.


Advanced Option: You will notice that Atlas places the holes a little too far forward, causing the coupler box to stick out a bit.


You can see here how the pre-drilled Atlas holes are too far forward.


You may drill new holes if you like with a #51 drill bit, to do a proper job. Using the Kadee box as a guide/locator. The you can use #2 X 1/2" round head stainless steel sheet metal (i.e. self taping) screws from Micro Fasteners (1-800-892-6917)


Step 9. Screw the coupler assembly in with the Walthers screws as shown, and put the trucks back on.


Buy one of these. A Kadee Height Gauge. Buy it here:http://www.kadee.com/


Put your car on the track to see if the height gauge is even with your new Kadee coupler.


If it does not match buy these.


You can buy them here:


Then take off your coupler, and screw one or two of these underneath the coupler box to get to match the height of the gauge. Most likely all Atlas cars will need these, so you can do this in step 9.


Done. You now have a 3RS Atlas freight car.


Of course you should have all these supplies before you start.
Last edited {1}
Original Post

Replies sorted oldest to newest

Great job Pete! Just what anybody wanting to get into 3RS needs to know about converting Atlas cars to Kadee.

However, one thing that I have descovered about Atlas cars is; those two screw mounting holes for the Kadee coupler box are not quite located correctly. You will notice that the Kadee coupler & box stick out past the end sill of the car. Thus, I have been drilling new mounting holes on all my Atlas cars so that the coupler box is flush with the car end sill. Never figured out why Atlas does that!
quote:
Originally posted by mwb:
Why do you use a wood screw vs. a 2/56 machine screw?


I use the 2/56 machine screws.

Also I found that atlas cars need 1 shim to get the proper height.

I also don't put the screws back in on step 5. I just leave those out. The screws disable the trucks ability to ride on the springs.

Excellent photo instructions!
Martin,

I think the wood screws take care of that slight mismatch between the spacing of the Kadee holes and the Atlas holes. You can start the pointed wood screws where you could not do the same as easily for machine screws. Plus they eliminate the tapping step.

I'm going to have to try them.

What I've been doing is tapping one Atlas hole for 2-56 (they come tapped for an odd metric size). I install the Kadee box with a 2-56 machine screw in this hole. Then, on the drill press, I drill through the other hole in the Kadee box and into the frame. Then, I tap that hole for 2-56 and install the second machine screw.

Pete's wood screw method eliminates those steps. Excellent how-to, Pete. Thank you. Smile

Jim
quote:
Originally posted by Trevize:
quote:
Originally posted by mwb:
Why do you use a wood screw vs. a 2/56 machine screw?


I use the 2/56 machine screws.

Also I found that atlas cars need 1 shim to get the proper height.

I also don't put the screws back in on step 5. I just leave those out. The screws disable the trucks ability to ride on the springs.

Excellent photo instructions!


Trevize,

Do you shim it with a .010 or .015 thick washer ... or something else?

Thanks,
GP
I believe the Atlas cars with the coupler pads are tapped for 2mm screws. As mentioned, they do not fit the Kadee pocket profile exactly. What I do is take a #43 drill and ream out the Kadee pocket holes I will be using to mount the coupler. This does leave the holes & sleeves completely intact. The 2mm screws (that I obtained from Micro Fastners) are also just a tad smaller in diameter that the 2-56 screws. The 2mm screws will now perfectly align with the threaded holes in the Atlas cars. Besides, the heads on these screws are allot smaller than the on the wood screws.
WOW! Guys, terrific response that I did not expect so soon! I started this last night as a work in progress and was going to finish it this morning, and never expected the great, enthusiastic responses so quick. I have to run out, but look for two more things I was going to add, height and shim pics. Remember, this is meant to attract guys to 3RS, new people, and maybe those that are sitting on the fence. If I make it too complicated, or add too many steps it will be a turnoff, look hard and defeat the purpose. Once someone tries this, and as they "get into it" I believe they will discover better and more correct methods on their own. We have to get them started first. So I may eliminate a step, and had planned to add two more pics. There were some good thoughts I'll address later, I have to run out now.

MWB,

quote:
I think the wood screws take care of that slight mismatch between the spacing of the Kadee holes and the Atlas holes. You can start the pointed wood screws where you could not do the same as easily for machine screws. Plus they eliminate the tapping step.


Jim's got it. But, again too much info may defeat the purpose here. I'll look at all the good tips you guys have added, figure out a way to simply incorporate them, in the next few days, change it with your everyone's good ideas to make it as simple as possible, and maybe submit to OGR? Word has to get out there is a new age dawning! Big Grin

Jack,

I don't get Atlas either, but last thing I want to do is start off with "take out your drill", you'll have the 3R guys running for the hills. Smile

Trev,

If you don't put those screws back, with some rough handling the trucks may come apart, again, don't want that to happen and frustrate someone. A good tip to add though.

Overall, we have to "tread" lightly here. Drill sizes, using measurements etc. believe it or not turn many guys off. Everyone here is dead on, but my goal will be to try and make it simple. So, there is a trade off. But I think once they get started, see the joys of realistic couplers, taking out the slack, uncoupling etc, the more advanced methods will come naturally.

Maybe outline the east way, and then in brackets or something outline the "advanced modelers tip"?
Pete,

You did not have to repost Jim's explanation; it was clear. I've used #0 x 3/8" wood screws for KD's for decades, but only on cars made of wood.

But for all plastic and brass I drill, tap, and go the 2/56 route. There are some good reasons for that.

And, I disagree with about providing drill sizes, etc -- giving novices a complete "how to" is the easiest way to make it foolproof. It's when they try something and use the wrong sizes of drills, taps, screws, etc and have problems or fail that their frustration sets in and they walk away wondering why they ever bothered and/or start using your name in vain, Wink

The more succinct and simple, a variation on the KISS principle, the better this will work for novices.
Way easier to do those than MTH.... Something to think about if you
do not own a lot of rolling stock already. Although new MTH isn't as
hard as older ones. Car disassembly alone can take some time on MTH.
(Tropicana tanker, for instance).

I use a Sharpie to color all the screw heads, and now usually do the springs
and axels while I am at it.
Scherbear57,

I much prefer walking around with a small screw driver to uncouple my Kadee couplers, instead of those HUGE "Lionel type" things. Besides, two points to consider: 1) you can always use the Kadee "delay" feature for backing cars into a specific "spot", and 2) my layout has all manual throw switches since it is a "walk-around layout". The Kadee couplers sure eliminate the crash & bash issues.

However, I really don't think that the Kadees will work all that well on your Lionel "Conventional Classics".
Like Mike mentioned, it's important to point out the level of difficulty in converting different brands of rolling stock.

If the beginner sticks with Atlas and Weaver, he can get his feet on the ground and be off to a good start. Starting out with one of the more difficult freight cars is sure to discourage.

I know that other manufacturers now provide Kadee mounting pads also on some newer models, but beginners should be encouraged to start simple, and all Weaver and Atlas are easy.

As far as uncoupling is concerned, in this day of walk-around command control, the screwdriver/coffee stirrer method works fine. Like Hot Water pointed out, by taking advantage of the delay feature you can spot cars in just about any "unreachable" location.

Pete, I think the time is definitely right for an OGR article on Kadee couplers.

Jim
Here is an "alternate" method of mounting the Kadee coupler box/coupler assembly on ANY manyfacturer's car:

1) Use a #44 dril bit to increase the hole sizes on the Kadee box.

2) Drill new a new hole/holes in the PROPER LOCATION (using the Kadee box as a guide/locator) with a #51 drill bit.

3) Using #2 X 1/2" round head stainless steel sheet metal (i.e. self taping) screws from Micro Fasteners (1-800-892-6917), screw the box to the underside of the car. Styrene shim stock from .125" thick up to .250" thick may be required. Simply drill the clearance hole in the shim with the same #44 drill bit.


Finally, for those of you trying to save the $16 for the Kadee "height gauge", DON"T TRY IT!!!! Your dealing with thousands of dollars worth of rolling stock, why skimp on one of the best little modeling aids available? Look carefully at Pete's photo above, and you will see that the rear end of the Kadee gauge even shows how much shim material you will need prior to mounting the coupler! That function alone has been a GREAT help when converting my steam locomotive tenders to Kadee couplers (I use 1/2" wide by .065" thick brass for that).
The gauge is also useful for bending the "air hose" to the proper height.
Not so important, perhaps, if you do not plan to use magnetic uncoupling,
but presumably important if you do.

Laid some of my first track last night. It was tricky because it was
a dual custom curves, 1% grade (1/2" over about 6' or so), and when I
rolled a car on it, it touched another and the couplers clicked together.
Too cool! Lots of switches on each end that need to be flat and level,
too. Nothing like starting simple :-)

Mike
quote:
Originally posted by mwb:
quote:
Originally posted by dws:
Great idea! Love simple solutions. How well does body mounted kaydee's work with sharper curves?
DWS


That is dependent on the length of your cars & engines and what you define as "small".


The majority of my cars are 40' and I am using Atlas 45 curves. I have also read where the coupler can be attached to the trucks but prefer to have them body mounted.

DWS
quote:
The majority of my cars are 40' and I am using Atlas 45 curves. I have also read where the coupler can be attached to the trucks but prefer to have them body mounted.


Its possible to modify the coupler shank and the box if necessary to get some more lateral movement. With such modifications, this car will negotiate 072 (36 inch radius curves).

By the way, this is a very good thread. Do we dare post a link over on the three rail forum?

Pete,

I think this is ready for publication for the masses! I did notice one broken image link, but I don't know if it's just my lame home computer or not. In my recent 3R postings, I have seen less resistance to Kadee couplers than in the past. I think you certainly have a winner here.

Finally, thanks for the image and contact info for Micro-Mark shims. I've been cutting mine out of sheet styrene ... That will make life much better.
quote:
Originally posted by dws:
quote:
Originally posted by mwb:
quote:
Originally posted by dws:
Great idea! Love simple solutions. How well does body mounted kaydee's work with sharper curves?
DWS


That is dependent on the length of your cars & engines and what you define as "small".


The majority of my cars are 40' and I am using Atlas 45 curves. I have also read where the coupler can be attached to the trucks but prefer to have them body mounted.

DWS


With 40' cars you should have no problem but the larger cars may be an issue particualrly if you have "s" curves or some funky switching arrangements. The nature of the engine also is important, length & wheel arrangement(s).
I really like the combined effort here. Smile Good Thread It has been mention about truck mounted KD couplers. Dave C did a very nice post a few months ago on this subject.


Doubleheadering Steam with scale couplers Click on the underlined phrase to link.

This approach to scale couplers reduces O-72 (Radius 36") even further. You might pick up a few more converts with this info.

Pete:
We do have something in common. I like those New Balance shoes. Smile
Best wishes all,
Mike CT
I can't lose,
it's my shoes!

Think they'll ever do a commercial about how NBs can improve the modeler's stance with stronger torque for taking out screws?

I remember Mike, that was a great thread. You have given another great idea, a thread on truck mounted kadees on cars instead of engines.

Jon,

I'll fix the pic!

Al,

Can we get Rich to make one of those connecting double threads to both forums like the Train America Studio thread?
Great thread with some great tips. I pretty much follow Cape Cod Northerns advice and use the 2mm phillips head screws and drill out the Kadee's slightly. I end up cutting off the 3 rail coupler mount on the Atlas truck as well as I have no intention of going back.

My favorite Atlas car is the Single Sheathed Wood Boxcar. There are no mounting holes provided to fasten a Kadee. The Atlas 2 rail car uses a plastic mount secured by 2 screws and then the coupler attaches to this with 2 more. I'd suggest picking up a few if you want to convert this car.

Start by fastening the mount with some 2mm screws.


Use the front hole as your drill guide. Drill and tap for a 2mm or 2 56 thread. When thats done. Remove the Atlas mount and snug done the Kadee's coupler box. Square it up and drill and tap your second hole.


Now remove the rear of the Atlas mounting hole to accept the Kadee mounting holes. One shim is usually needed to get the right height. The mount isn't required to get the job done. But it sure is a handy template to get you started off with the first hole correctly drilled. In the end a thick shim is needed and it serves that purpose nicely.

While the cars Pete has shown are a great way to get started. When you start doing everything you own and making custom mounts. A drill press is a great investment. As well as a numbered set of small bits and taps.
The CBS is a Transition era layout. We run mostly 40 ft cars, 4 axle diesel and Small steam. Only because this looks much better around 072 and 081 curves. Also gives the layout a much larger appearance. My kids do like the modern era of course. So I have plenty of larger 6 axle modern motive and 50 ft cars. Not too many cars larger than that, as again they don't look that good on my tight curves. However, we have never had a problem, kadee to kadee, doing anything.
This is a wonderful set of Q & A; just what the doctor ordered, answering many of my questions . But my layout is largely 042 and 054 curves, with turnouts to match ( It's C shaped in 13 x 14). Any thoughts on the best way to use kadees in this sharp curve environment, using 40 foot cars, RS 3s, Geeps and SW1 switchers + Lionel 0-8-0,K-Line 0-6-0 and the like ( PRR & NYC, thank you very much). Also, are you converting the engines or using them as is, with KDs on the cars only ?
Thanks,
Rubin
KD's work fine on my 26-28" radius (you can do the math...) tightest loop running a Weaver RS-3 and 40' cars as well as my NW-2 and all of my steam up through the 2-8-0's in 2- and 3-rail operation. I have one curve that is much tighter that limits use to just an 0-4-0 switcher. It's really dependent on your choices of rolling stock and motive power as well as era modeled. If you're going to ruin anything larger, you'll probably need larger curves or you're going to have "problems" using car mounted couplers that are limited in their swing motion by the their box. I put that last limitation in since the use of radius couplers in trolley operations permits the use of far tighter curves than one might normally consider possible.
I just mounted a #805 on the rear of my MTH GTW steel caboose. IT was a little un-nerving to cut the coupler mount off the MTH truck, you can not put it back together. The car does have 2 mounting holes, but I do need to get some shims. It needs one, but for now it is close. It really vastly improves the appearance of the car and I am definitly will be doing some more...This has been a great thread and would make a great article for OGR. I am sure that that would spread the word to alot more people...

Marty
quote:
Originally posted by DaveJfr0:
Spread the word indeed...maybe Kadee will make multi-packs for O-scale to save us some cash...I don't get how HO has like 80 types of kadees(atleast it seems that way when I walk into a well-stocked HO hobby shop) and we only have...well 800-806...which is more or less 2 types (short and long) in various colors and materials.


Once upon a time, right after we moved up from the bronze age, we only had the 804 and 805, and there would be 1 of each on the wall hidden amongst the 80 other packets of the other KD products...ask at the counter, "I think we have one packof those....somewhere...", Big Grin
quote:
Originally posted by guttlaw:
This is a wonderful set of Q & A; just what the doctor ordered, answering many of my questions . But my layout is largely 042 and 054 curves, with turnouts to match ( It's C shaped in 13 x 14). Any thoughts on the best way to use kadees in this sharp curve environment, using 40 foot cars, RS 3s, Geeps and SW1 switchers + Lionel 0-8-0,K-Line 0-6-0 and the like ( PRR & NYC, thank you very much). Also, are you converting the engines or using them as is, with KDs on the cars only ?
Thanks,
Rubin


Rubin, my layout will be mostly 042 and 054 too. Having converted several cars with body mounted kadees and testing on 031 and 036 carpet layout, I'm fairly confident I'll have no trouble on the layout. I haven't tested anything close to an S curve, but I'm not planning on anything too close to an S on my layout either. I'm planning to stick to 40 footers and shorter. Even backing up two 40 footers kadee coupled together works on 031. Very close, but still clears.
Does anyone use the 2 side mounting holes on the Kadee coupler pocket vice using the 2 centerline holes?

Also, does anyone cut off the "air hose"? I have had to bend practically every one of mine so they won't snag on the track. The only reason I haven't cut them off yet is because I had plans for using the between-the-rails magnets, but so far I haven't used them (does anyone?).

When I converted my rolling stock it seems like I had 1 or 2 Atlas cars that had to be done differently, because of interference with underbody details. They may have been older Atlas cars, I'll have to check.
quote:
Originally posted by Bob Delbridge:
Does anyone use the 2 side mounting holes on the Kadee coupler pocket vice using the 2 centerline holes?

Also, does anyone cut off the "air hose"? I have had to bend practically every one of mine so they won't snag on the track. The only reason I haven't cut them off yet is because I had plans for using the between-the-rails magnets, but so far I haven't used them (does anyone?).

When I converted my rolling stock it seems like I had 1 or 2 Atlas cars that had to be done differently, because of interference with underbody details. They may have been older Atlas cars, I'll have to check.


Yes, I cut most all of the "air hoses" off the Kadees. "someday" I'll get to imitation operating air hoses, and have cut the already ones off. IF they are dragging on the rails, they are too low. A tool that most any train modeler should have is a Kadee Coupler Gauge


Don't assume that the car you are lineing up to is correct.

Ed R
The new Walthers monthly sale catalog/flyer has 805's on sale at $2.98 per pair, so i just ordered 10 pairs from my dealer. I have converted alot of Atlas and MTH 3 rail cars to 2 rail using the MTH 2 rail scale trucks and 805 couplers, but i want to try converting my 3 rail fleet to scale couplers for better switching with no banging. I am confident in this type of conversion...The real question is has anyone converted their expensive Atlas or MTH 3 rail locos to scale couplers, [i may have missed the threads on this]. I'm kind of hesitant on maybe ruining the loco...I'm not a collector and do not care about re-sale values...When I go to that train layout in the sky, my wife and kids can worry about re-sale values...lol
Yes I have converted many MTH Premier Steam and Diesel loco's to Kadees. I just completed a Atlas MP15DC in which I also closed in the pilot. Almost all MTH hood diesels take a 1/8" shim between the coupler box and the bottom of the cast pilot assembly. MTH F units are quite a bit different.
Just finished a set of MTH F3's ABBAs for a friend in which I ran the MU tethers through the end doors and installed Kadees thru-out. Maybe the owner will take photos of the conversion and post.
I have not converted my Lionel SantaFE E6's or PA's, but did install Kadees between my Lionel F3's to shorten the gap.
To add to Rich Montague's answer above, YES I am currently converting ALL my "expensive" 3rd Rail brass steam locomotives AND "expensive" MTH Premier steam locomotives to Kadee couplers! I already have over a dozen converted, including my Lionel Legacy UP FEF-3 and SP GS-4 4-8-4 models. Some are MUCH easier to convert than others, however what also takes a LOT OF TIME is removing that damned diecast mounting extension on the rear truck for the big electro-coupler on MTH models! I have already taken two truck bolster pieces to the vise in the garage and hack sawed off that extension! In most cases, if you do NOT remove that extension on the rear tender truck, it will NOT clear the Kadee coupler box assembly, thus the truck swing will be restriced on curves (my "sharp" curve is 072).
quote:
.The real question is has anyone converted their expensive Atlas or MTH 3 rail locos to scale couplers,


yes! Every single 3rd Rail loco I own get's a kadee coupler the moment it comes out of the box. Basic 10 step procedure here is:

#1 - open 3rd rail box
#2 - unpack it carefully
#3 - stare in awe over the details for 10-15 min.
#4 - power up on test track
#5 - take it apart and install kadee couplers
#6 - head to the layout.
#7 - blow the whistle
#8 - have fun
#9 - tell wife "I'll be up in a minute"
#10 - get yelled at by wife 3 hours later.
quote:
Originally posted by Dtrainmaster:
Rich Montague,
Did you add the fixed pilot to the #4030? Could you retain the regular (large) couplers with it?
Thanks


Yes, I did add the fixed pilot. No, you cannot retain the large coupler. It just won't fit. The picture of ATSF 4030 is a little dark, so look at the picture #116, the GP 60M that follows. Both use the same pilot. As you will see, there's not enough room for the large tinplate electrocoupler to fit through the pilot. Even if that were not a problem, the large coupler mounts to the truck. A truck mounted coupler will foul in a fixed pilot and keep the truck from pivoting in turns. And as the guys point out, its kind of self-defeating to install a prototypical fixed pilot but retain an unrealistic coupler.

I'm guessing the reason you ask is that you like the fixed pilot, but don't like the idea of losing the electrocoupler's convenience. For me the scale accuracy is well worth uncoupling by hand. Remember, uncoupling is only part of the functionality equation. For all the ease of uncoupling with tinplate couplers and electrocouplers, they're not so hot when it comes to coupling, especially with a small cut of cars. That and appearance are where Kadees shine. And coupling must be at least half the equation, I should think.

RM
quote:
Originally posted by Billsrr:
Rich, I would like to convert my atlas diesels to kadee's. What are the steps to mount the pilot and mounting the kadees?


Bill,

It varies a little from engine to engine. I found that Bill Serratelli at Atlas, who was a tremendous help to me, didn't even realize all of the parts involved, so there was some trial and error. What follows is a general overview. If you have questions about a particular engine, I'll try to answer them. I'm calling up the steps and parts from memory. I can probably run down specific part numbers from my order lists, if needed:

For the Dash 8s (both standard and wide cab) you re-use the three rail pilot and fix it using a plastic spacer part that fits between the pilot and the frame. An additional part having a name like "coupler mount" or something like that provides the mounting area for the scale coupler and also fills the oversized hole in the pilot. These parts are unpainted plastic, so you will have to paint. Basically the steps required are:

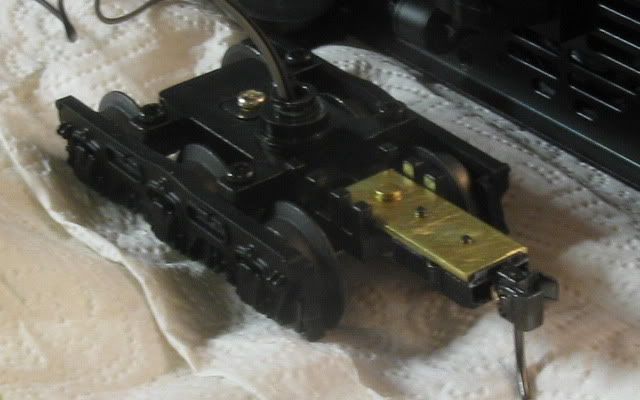
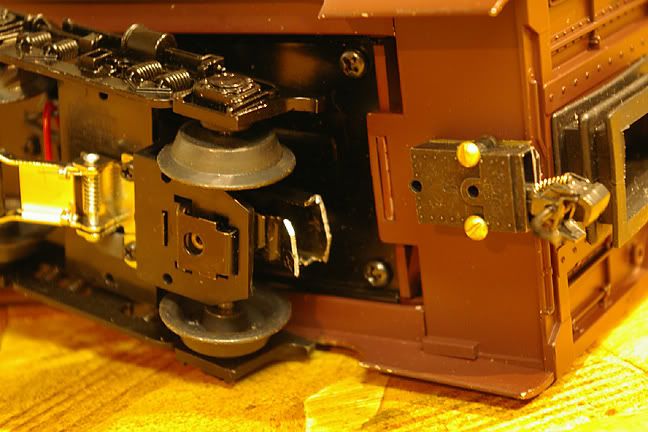
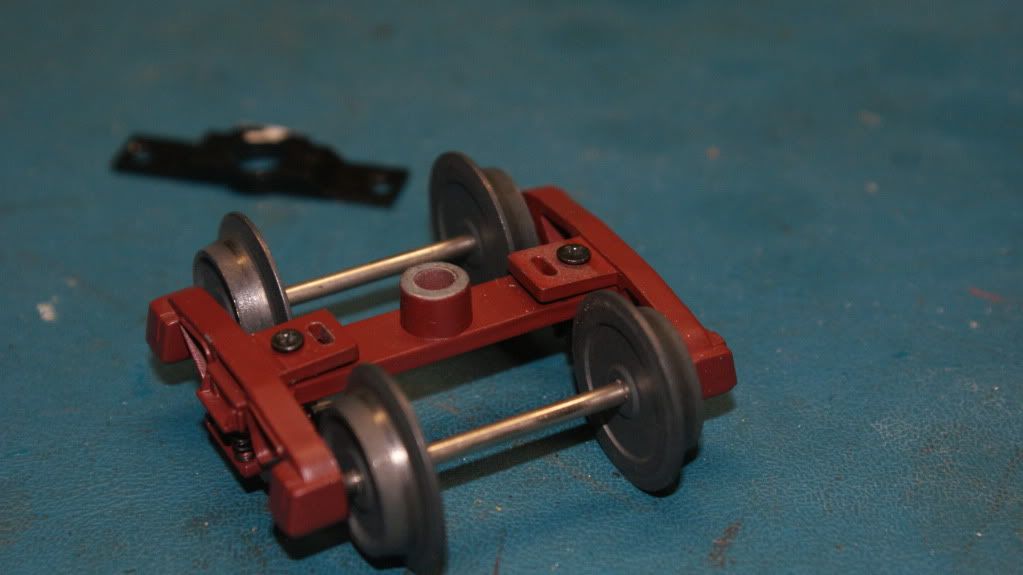
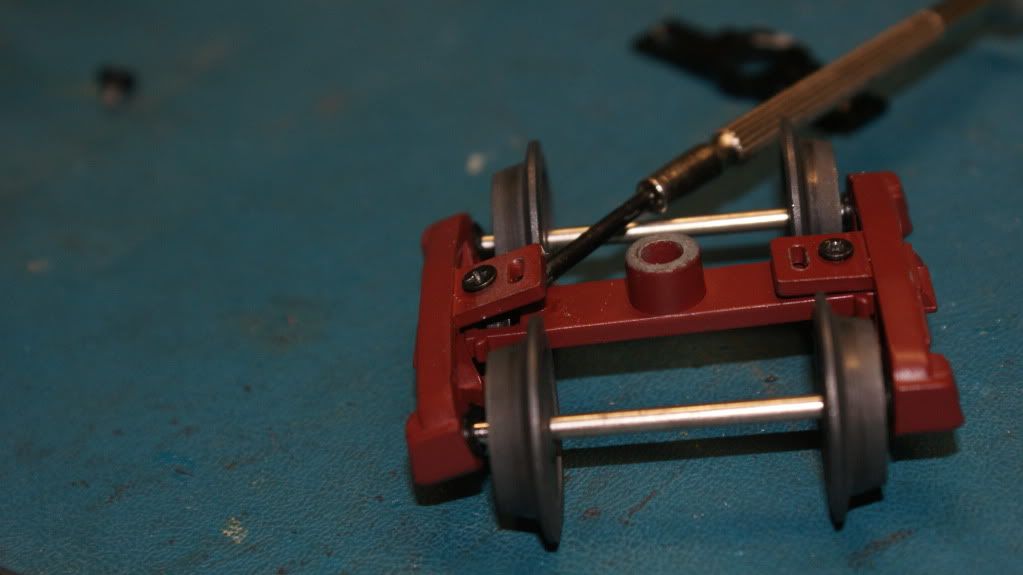
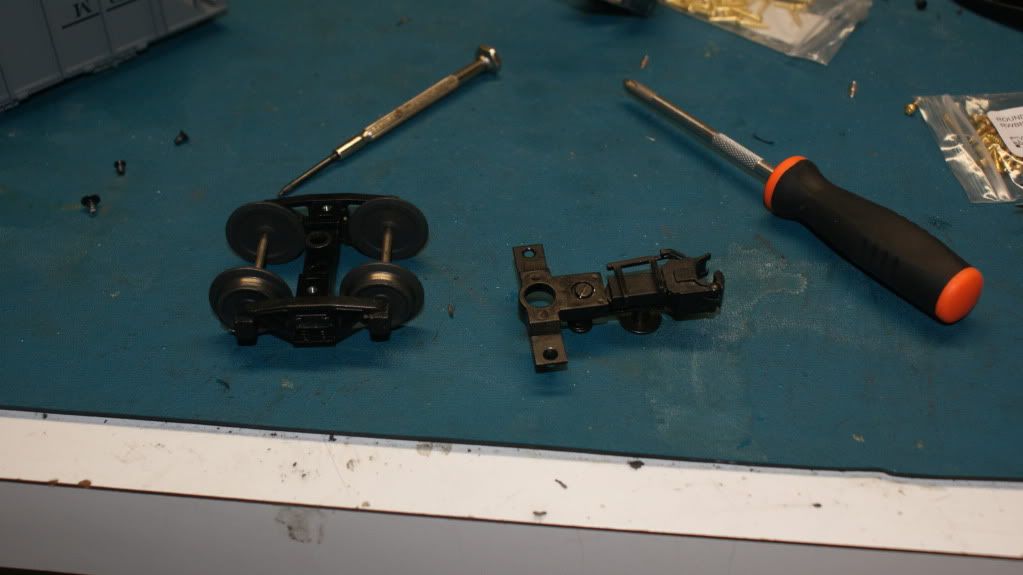
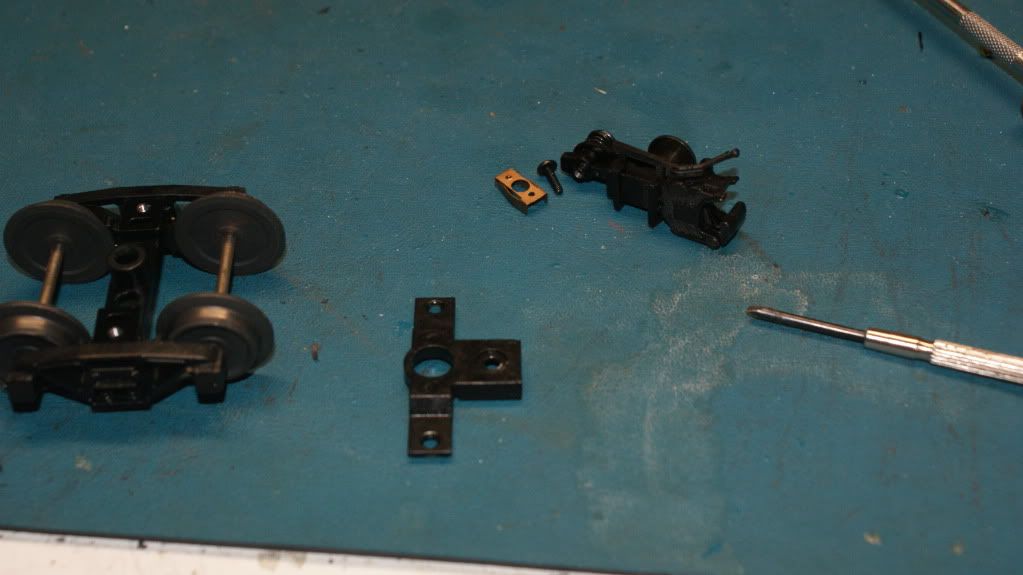
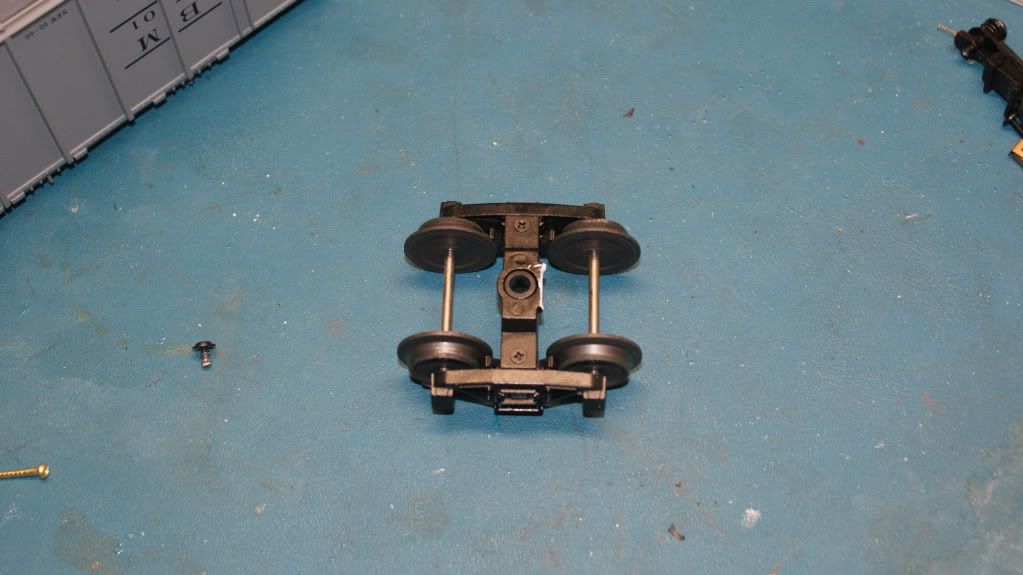
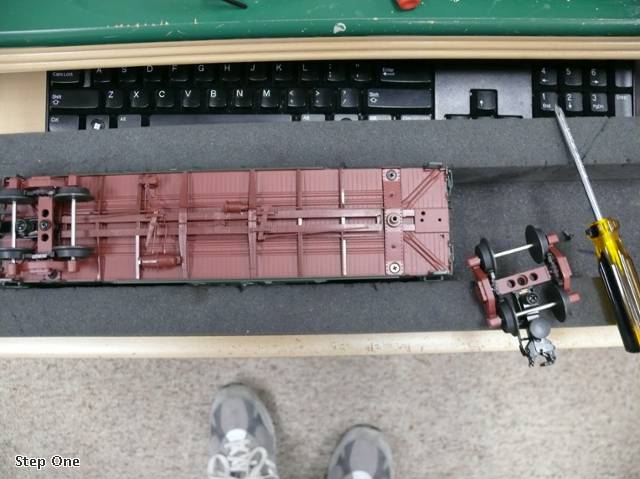
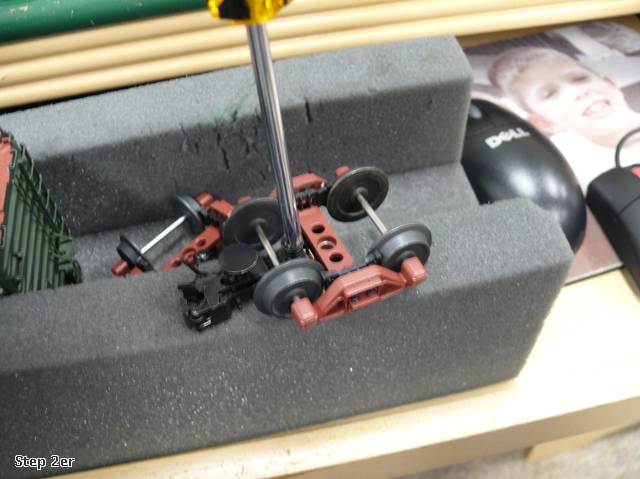
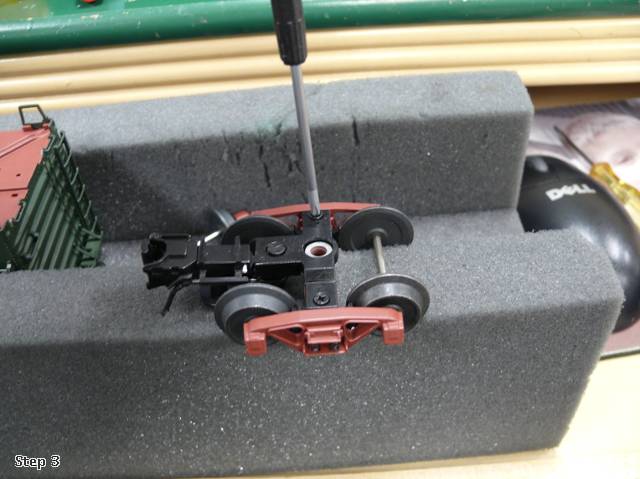
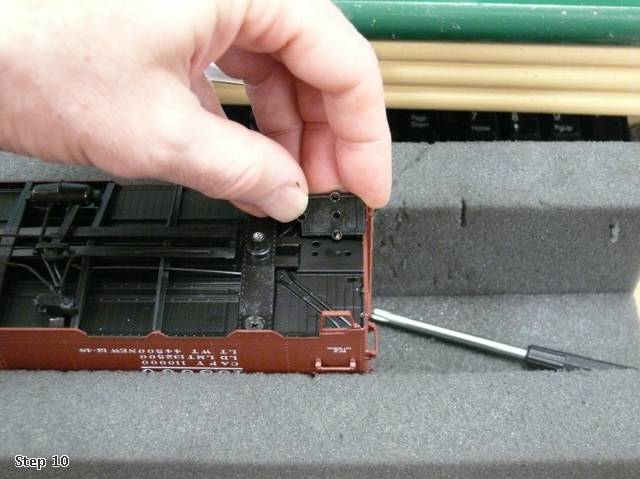
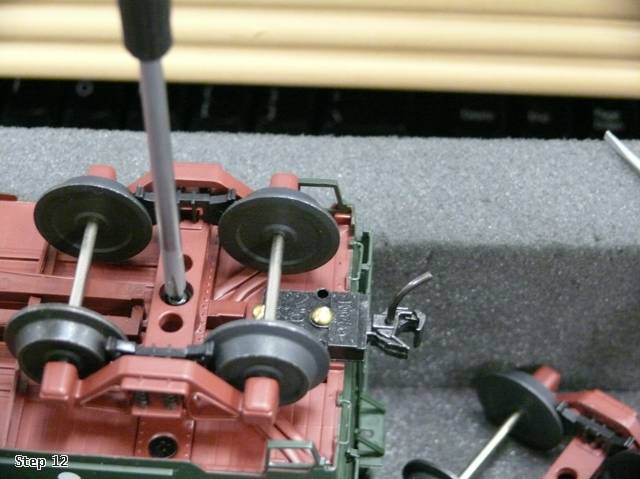
1. Remove the three rail pilot. You either have to drop the trucks or cut it off right where it mounts to the truck block. (Since it is extremely tight inside the Dash 8 shell, I opted to cut it off).

2. Regardless of how you remove the three rail pilot, you then have to cut off the tab that mounts to the truck block or that will foul the truck.

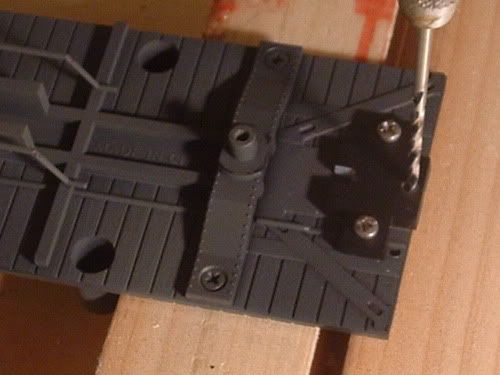
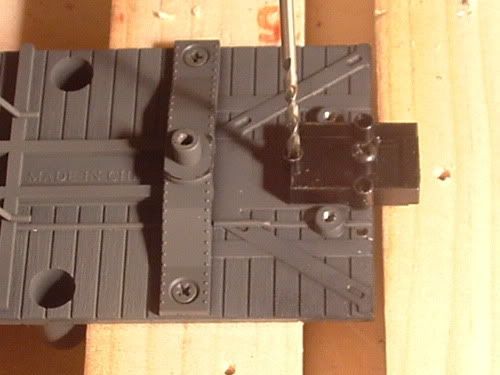
3. You probably will need to tap the mounting screw holes the frame (although a unit I bought in the last run came with these already tapped). Use a 2.5 mm tap. The screws to mount the pilot, spacer and coupler mount are available from Atlas. I don't recall the length, but I think its getting up around 18 mm (pretty long).

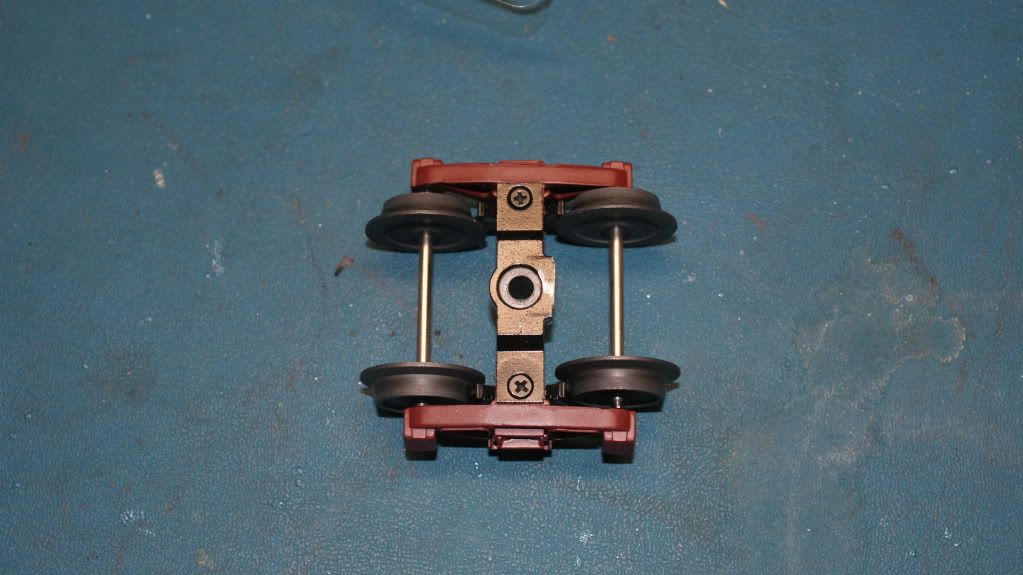
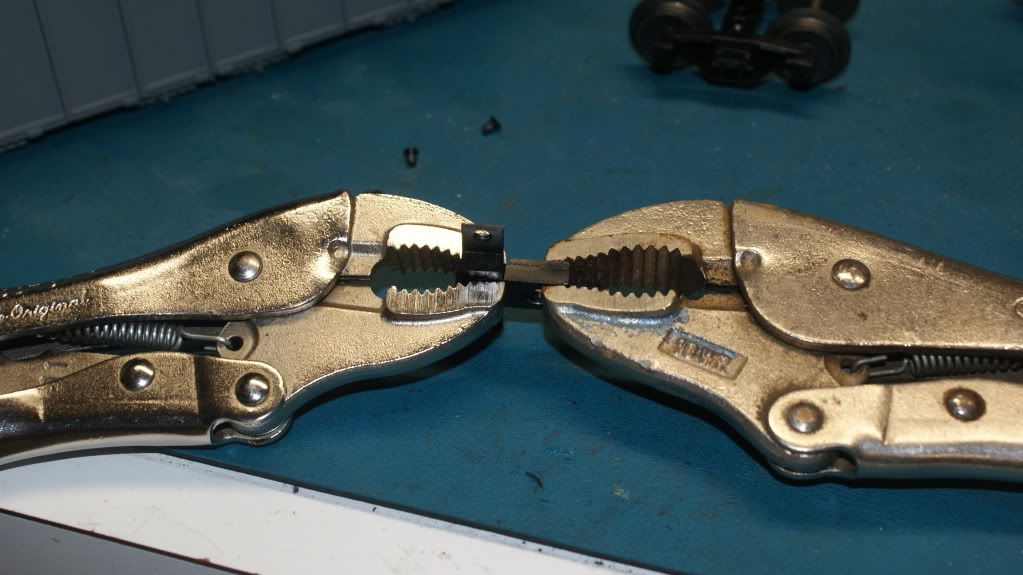
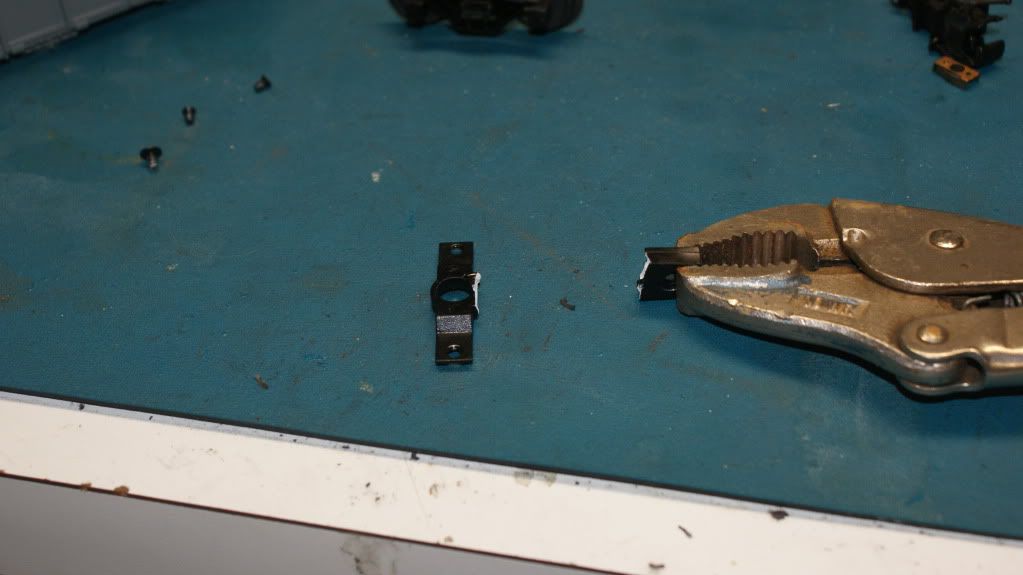
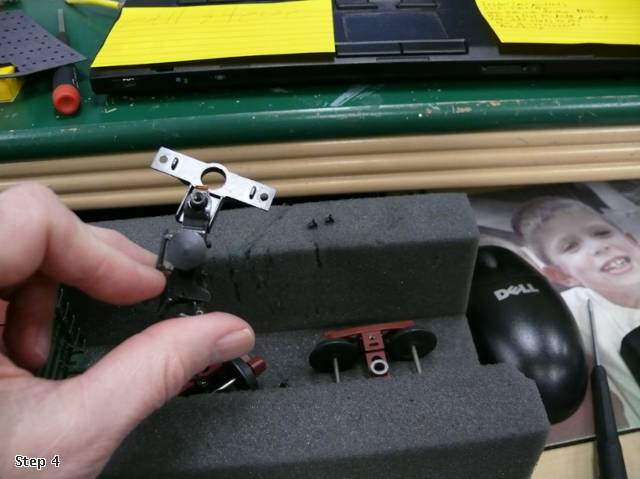
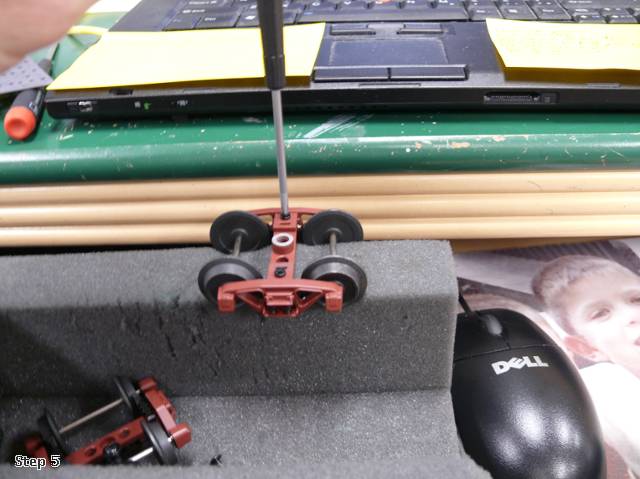
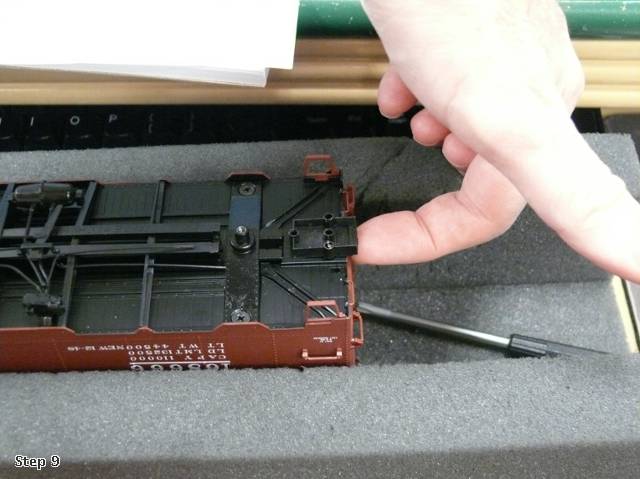
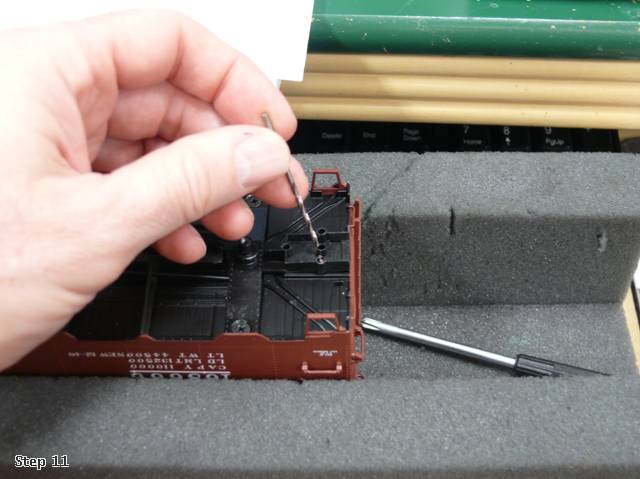
4. The Atlas scale coupler uses a single screw to mount. To mount Kadees, I drilled my own hole in the coupler mount (a pin vise will work; the part is plastic). You will need to shim it to the correct height. Because of the differences in the coupler box width, I also shim the Kadee box on the side to keep it in position.

5. For hand rails, you can order new ones from Atlas (if in stock -- they are not always) or make your own from wire or even paper clips. In addition be prepared to paint the parts to match the locomotive.

Most of the parts for the Dash 8s are available on the Atlas website, but be aware that the wide cab Dash 8s use a different spacer, and that is not available. Bill Serratelli at Atlas was kind enough to scrounge me some for my projects.

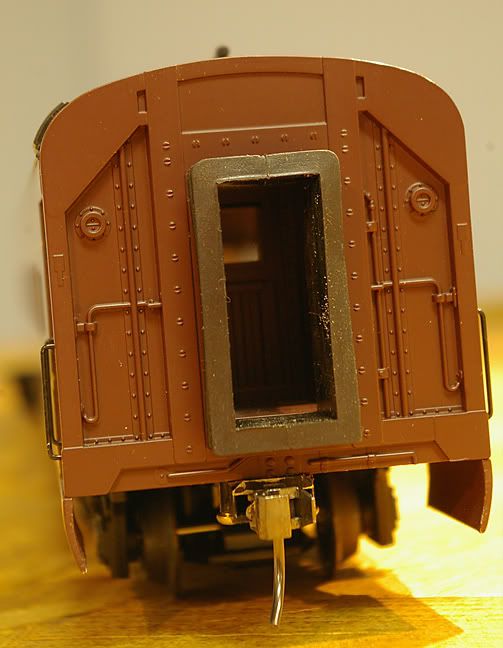
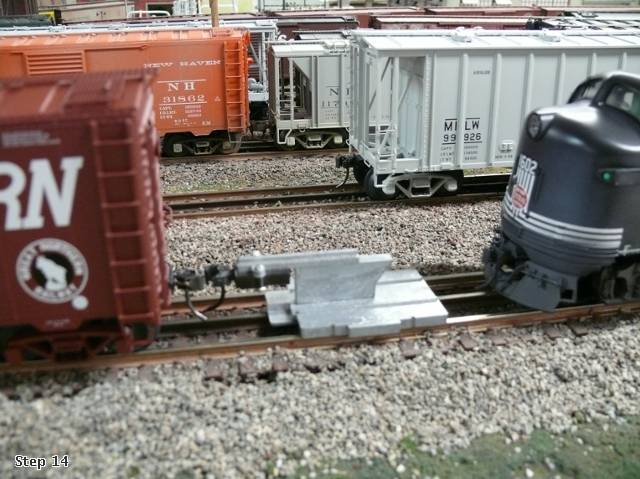
For the GP 60s, 60Bs and 60Ms as well as the SD40s, no spacer is used. Instead you buy a new full pilot, which you may have to paint. You also need to order the top steps. The other steps and most of the detail parts can be reused from the three rail pilot. Be aware that for the GP 60 series of engines, the front and rear pilots are slightly different. The rear pilots seem never to be in stock, so I used from pilots. The difference is where the MU recepticles mount. Its hard to explain, but they will be off slightly if you use a front pilot on the rear, but you can trim the MU recepticle parts to fit and look good. The MU recepticles are separate parts (three front and three rear) for the two rail model. Look close and you can see them in the picture above of ATSF 116.

In addition to the pilot and other parts, the GP 60s use a coupler mount or spacer. Its basically just a thick shim.

To mount the pilot you tap the holes in the frame (2 mm) this time. I can't recall the length of screws involved; about 6 or 8 mm, I think. Locations for the coupler are already tapped in the pilot. Like other Atlas products, the mount holes are off for Kadees, but you can use them anyway just by carefully working down the screws in alternate fashion. This comes out at the correct NMRA recommended height. To take off the three rail pilot you likely will have to drop the trucks.

The SD 40s also use a separate pilot (again order the needed top steps). The coupler mount piece is both a shim and it fills some of the pilot front. This one attaches to the pilot with its own set of screws (I don't recall the dimensions). Again, you have to tap holes in the frame (2mm again). I believe I mounted mine with 2 by 4 or 5 mm flathead screws. For the SD 40 you absolutely must cut off the large three rail coupler mounting lug at the front of the truck or it will foul on the fixed pilot. Like the Dash 8, I drilled my own hole to mount the Kadee; the Atlas scale coupler extends too far out in my view and Kadees are better in any event.

RM
I just realized the couplers that came with the Atlas Adjust-a-coupler set have shanks that are approx 1/8" longer than the Kadee #804. They fit fine in the Kadee pocket and work well with Kadee springs. Might be just the answer for a long car that has interference issues.


I have some data to share in case there's others out there in trainland that are doing this.

I have 2 Atlas single-sheathed boxcars with cut levers on each end. I attached the Kadee pockets as close as possible to the endsills and used a 1/8" styrene shim to lower the pocket to specs.

I was going to use Kadee couplers in the pockets, but found that the cut levers interfere with the Kadee knuckles because of the short shanks. I HAVE to use the long-shank Atlas couplers unless I (1) remove the cut levers or (2) add more shim to lower the pocket to less than 11/16" centerline to top of rail or (3) move the coupler out more from the endsill.

This combination of Kadee pocket and Atlas coupler (with Kadee spring) works fine on this type of boxcar.

I have an Atlas Woodrack car that does not have cut levers and the Kadees work fine as is.
I don't know if the following applies to Atlas cars with 3R couplers. All but one of my Atlas cars (first one ten years ago) were bought as 2R cars with 2R wheelsets and Atlas scale-sized couplers mounted to the carbodies. But if this may help anyone:

A few days ago I spent some time swapping out Atlas couplers with broken knuckles & experimenting with KDs on some boxcars and reefers. I found that the Atlas coupler box holes will accept 2mm diameter machine screws. 2x8 or probably better, 2x10 work well--AND because they are a bit narrower than 2-56, they can be used to attach a KD box to the Atlas carbody WITHOUT drilling or tapping any new holes.
quote:
Originally posted by jwmathews:
I don't know if the following applies to Atlas cars with 3R couplers. All but one of my Atlas cars (first one ten years ago) were bought as 2R cars with 2R wheelsets and Atlas scale-sized couplers mounted to the carbodies. But if this may help anyone:

A few days ago I spent some time swapping out Atlas couplers with broken knuckles & experimenting with KDs on some boxcars and reefers. I found that the Atlas coupler box holes will accept 2mm diameter machine screws. 2x8 or probably better, 2x10 work well--AND because they are a bit narrower than 2-56, they can be used to attach a KD box to the Atlas carbody WITHOUT drilling or tapping any new holes.


That's interesting. Does the front of the draft box line up with the end of the car properly? BTW, most of the 3-rail Atlas cars are pre-drilled for the scale couplers while a few (89-foot flats, cushioned underframe, etc.) need additional parts.
quote:
Originally posted by jwmathews:
A few days ago I spent some time swapping out Atlas couplers with broken knuckles & experimenting with KDs on some boxcars and reefers. I found that the Atlas coupler box holes will accept 2mm diameter machine screws. 2x8 or probably better, 2x10 work well--AND because they are a bit narrower than 2-56, they can be used to attach a KD box to the Atlas carbody WITHOUT drilling or tapping any new holes.


Yes, I am wondering why people are drilling and tapping for 2-56 when there are 2mm holes?
After buying my first atlas car (55 ton) in '03, I began installing Kadees' with 2mm screws (2x8's). It is the easiest conversion ever! Yes, Matt, you are correct the 89' flats have an additional piece that mounts between the carbody and draft gear. The 53' Evans box cars have that too.

quote:
Originally Posted by Bob Delbridge:
Does anyone use the 2 side mounting holes on the Kadee coupler pocket vice (versus?) using the 2 centerline holes?


Sometimes, when I create a custom mount for cars that have no real mounting platform for Kadees. Or I don't have a short shank coupler and have to cut the back of the gear box. Like K-Line's 40' diecast box cars(custom mount), AND.... when I mess up the center line holes Frown

quote:
Also, does anyone cut off the "air hose"? I have had to bend practically every one of mine so they won't snag on the track. The only reason I haven't cut them off yet is because I had plans for using the between-the-rails magnets, but so far I haven't used them (does anyone?).


NO, absolutely not. The "trip pins" are there to make automatic uncoupling possible and kinda-sorta look like air hoses. I have painted a few of mine to look like air hoses. If they are catching on the rails or grade crossings, bend them up slightly (as you are doing), Kadee makes a special tool for this:
Kadee Coupler trip pin tool #237
$12.35 gets you the good life!

I do have the 'between the rails' magnets #809, only one installed for testing at the moment. It works great! Since I really don't like the gap needed to install the magnets with Gargraves track and did not want to cut the ties, I cut the bottom magnet to fit in between the ties and put the top magnet over it. By placing some metal below the magnet, it increases the strength (I read that someplace).

quote:
When I converted my rolling stock it seems like I had 1 or 2 Atlas cars that had to be done differently, because of interference with underbody details.


I found that my Atlas PS-4427's interfere with their own brake detail on O54 curves and that's what the car is rated for! Usually I cut off the 'ears' on the draft gear boxes so that the wheels don't rub on them and fill in the gap so they look better.

For uncoupling; I use the 'larger/better' free chopsticks one gets for Chinese take out. I put them in the pencil sharpener and then dull the tip. The oval shaped ones work great! Just insert between the couplers, rotate and voilà!
The are apart as silently as they went together. They are plenty long and since there are two, you have a back up. Smile


On a side note: my Girlfriend is wonderful! (she wanted me to post that, and she is wonderful too!)

I hope I helped someone out there-

Photo: The chop job I had to do on my MTH Center I-beam car.
Last edited by dave5000
Body mount on full-length passenger cars is iffy. The idea posted above about cutting out the sides of the box will help.
I prefer to mount the coupler in a length of rectangular brass tube and pivot the assembly about the inner end of the tube with a spring to center it(H/T B&O Joe). You can select the pivot point to suit. John Armstrong used something similar, but more complicated; his design pivoted on the truck pivot.
Back in 1983 I got to talk to a Kadee rep at a national train show, and asked him about the O scale couplers. At the time I had quite a few of the "old" Atlas O cars from that time, and wondered about converting them to Kadees on a three rail layout. If you remember back in the seventies-eighties Atlas made O snap-track (2 rail) with a 24" radius curve. He said they used the Atlas track and cars to test their O couplers out on, so it should be good down to O-48.

BTW with the truck mounted dummy couplers the old Atlas cars could do pretty much any curve, I remember in the early seventies watching 50' gondola cars zipping around my O-27 curves with no problem! Eek
Put Kadee couplers on some old Atlas cars from the 70's. Here's a WM insulated boxcar next to it's Trainman counterpart. Interesting notes on details. The air reservoir is lower on the older version, which looks nice and it rides 1 shim lower than the new version.

These are quick because the trucks snap into place and you simply pry them loose and break the coupler pocket off by hand. Holes are there for the coupler too. Done.


quote:
Originally posted by FlyBoy:

I am floored by the spacing between cars and engines.


With 096 curves, you'll have no problem at all retrofitting high rail engines with Kadees. The excessive space between units is on the list of things I hate right along with oversized couplers, floating pilots, gaps and short hand rails.

MTH Dash 9 retrofitted with a fixed pilot and Kadees:


The space between units is much better, now:


RM
quote:
Originally posted by Lackawanna1223:
I'm waiting for some Micro Mark shims, but I've got a slew of KDs and I wouldn't mind getting started Brian


You can go to your local auto parts store and buy a $5 roll of gasket paper to make your own shims. This paper is the exact same paper that micro-mark uses. It comes in several thicknesses and a roll will make several hundred shims. The only difference would be that micro-marks shims are lazer cut and these would be cut with scissors. Thomas
This thread got me to finally start converting. Having come from HO I can't stand the having to (maybe) couple at warp speed. So far, as some said here, the Weaver cars are by far the easiest. The Atlas I'm finding vary all over. I've got one, maybe more, that has a pair of holes way off to the side of the Kadee box. Nothing a drill won't solve. Working my way up to the Lionel and MTH which look far more complex. So far the only real problem has been the batch of volume discount #805 couplers I got that don't have any springs on the knuckles and maybe one spare in the package. NOT happy about that at all. Checked all the local shops to no avail and ordered springs from TrainZ today.
Just replaced Atlas scale couplers on a GP-60 with Kadees to my suprise holes lined up using 2mm by 10 screws longer length for factory shim under coupler box. In the past I have always drilled and tapped for 2-56 screws, check out Micro Fasteners, Lebanon,NJ every thing you need in metric and US screws very inexpensive and fast shipping.
Although I model 2 rail, I've converted quite a few pieces of 3 rail rolling stock to 2 rail fine scale.
Here's the Atlas AEM7


The pilot packing piece was made from styrene, as was the blanking piece to fill the original coupling opening.
I made my own kadee coupling height gauge from timber and an old kadee 805.
The trip pins can be bent up slightly with two pairs of fine nose pliers if they're found to be catching any part of the track.
I also make my own packing shims for the 805's from styrene sheet.
Was lucky with this conversion as replacement wheelsets were available direct from Atlas, leaving just the pick-ups to be manufactured.
The engine has a micro-slide switch that changes power pick-up from the overhead wire or the two rail.
When running from the catenary the track power is used for the lights at a constant voltage.
Altogether, a most satisfactory conversion for under $25.

Chris.
quote:
Originally posted by rustyrail o scale:
quote:
Originally posted by Lackawanna1223:
I'm waiting for some Micro Mark shims, but I've got a slew of KDs and I wouldn't mind getting started Brian


You can go to your local auto parts store and buy a $5 roll of gasket paper to make your own shims. This paper is the exact same paper that micro-mark uses. It comes in several thicknesses and a roll will make several hundred shims. The only difference would be that micro-marks shims are lazer cut and these would be cut with scissors. Thomas


I bought some gasket paper today and it is making life so much easier. I had about 9 Atlas cars in 2-rail which got converted to Kadees with my homemade shims.
quote:
Originally posted by Rich Montague:
quote:
The majority of my cars are 40' and I am using Atlas 45 curves. I have also read where the coupler can be attached to the trucks but prefer to have them body mounted.


Its possible to modify the coupler shank and the box if necessary to get some more lateral movement. With such modifications, this car will negotiate 072 (36 inch radius curves).

By the way, this is a very good thread. Do we dare post a link over on the three rail forum?


Hi Rich, In the picture of this Atlas 89 footer, what number Kadee coupler are you using? On the prototype size cars, the coupler look's like it has a long shank and a short draft gear box. I suppose this is because of the extreme length of the trailers they carry and their overhang. I'm in the process of lowering my car using Athearn trucks and NWSL 33" wheelsets. The Kadee web site use to have dimentioned drawings for their couplers, but I can't find any for the 800 series. Any info you have will be greatly appreciated. BASEMENTBILL
quote:
Originally posted by Trevize:
I use these shims

Pete to date I haven't had a single truck come apart. While it is certainly possible that it can come apart with those screws out, I've never had an occurrence. With the high end atlas cars I'm buying there's a lot more that would break under rough handling anyway :-).

And... sure you've seen it before...

Why I like kadee couplers video


Apparently, Micromark no longer carries the Kadee shims based on the page that pops up when clicking on the link above. Might have to find something else or make your own shims.
quote:
Originally posted by Larry Neal:

quote:
Originally posted by Trevize:

I use these shims

Pete to date I haven't had a single truck come apart. While it is certainly possible that it can come apart with those screws out, I've never had an occurrence. With the high end atlas cars I'm buying there's a lot more that would break under rough handling anyway :-).

And... sure you've seen it before...

Why I like kadee couplers video


Apparently, Micromark no longer carries the Kadee shims based on the page that pops up when clicking on the link above. Might have to find something else or make your own shims.


The package of 60 shims is still available, I just ordered some and received a promotional discount. I think that Micromark stopped producing the package of 40 shims. Here is the link:

http://www.micromark.com/Searc...e+shims+(pkg.+of+60)
I've started to converting my rolling stock to Kadee.

A few modifications to others here. So far I haven't used to many shims. I've converted AtlasO and Weaver cars to date. Only a Weaver Caboose needed shims. Instead of using 2 X 1/2 wood screws I've been using 2 X 3/8 where no shims have been required and with Philips heads not slotted purchased from Micro Fasteners. The 3/8 length seems to work best for the gondolas and flat cars where I don't want a screw to pop up through the floor.


The issue I'm having now is with my new MTH rolling stock with the new couplers MTH is using. There so much to remove to get clearance for the Kadee box it doesn't seem worth it. May have to purchase trucks with out all the parts.

Any Ideas?
quote:
Originally posted by Will:
So the question is, is this enough, or is this just another step down the road toward the hard stuff- i.e. 2 rail? Because there is still that third rail. Big Grin


WHAT?!?!?! After all, this IS the 3RS forum, we have no qualms about the 3rd rail Roll Eyes

I recently took some new Atlas caboose trucks apart to remove the claw coupler, it was not an easy task, much like what needs to be done to a Lionel truck.

Having a Kadee mounting pad is a start, but a big problem is the underframes and bolsters causing the cars to ride so high (for 3-rail wheel clearance) that sometimes it requires a large amount of shim to get the Kadees to the correct height.

I'm currently redoing a MTH caboose because I found I can flip the metal floor and lower the riding height of the car plus reducing the amount of shim. I noticed this on my other rolling stock, don't know why I didn't notice the caboose (may have been my first conversion and didn't know any better).
marker,

Unfortunately I failed to write down the item number(s) of the cabeese when I bought them (I may have the sales slip though and will look later).

I have 3 MTH cabeese that I repainted/re-lettered for Seaboard Air line. 2 of them have metal floors that have a dimple where the trucks mount (the 3rd cab, a CA-1, doesn't have the same type floor). The one I flipped the metal floor on bears little resemblance to the original, I made new "plywood" sides for it so I could relocate the windows.

I simply turned it over on one of them, cut off the small bent-up sides (where the plastic battery box and brake gear are located) with a Dremel disk and reassembled the cab. I actually had to add a washer/spacer so the wheels wouldn't hit as the truck rotates.

I haven't done it yet to the 2nd cab and there's still a good 1/8" clearance between the wheels and the underframe.

The metal floor plate has large tabs at each end, I cut them off straight across so I could easily install mounting pads for the Kadees.

I'll post pix in a bit.
Here's my 3 MTH "Seaboard" cabeese:


The one on the right was a CA-1 cab, it has a plastic "wood" floor:


The one on the left is the cab I replaced the sides on and flipped the metal floor:


If you look real good you can see the dimple on the floor is inward not outward:


You can see the shiny washers I used between the truck and metal floor.


if you look real close at where the end of the plastic underframe is you can see the cut I made to the bent-up side lip.

The 3rd cab hasn't had the floor flipped yet:


If you look closely you can see the dimple on the outside, just past the end of the Kadee box.

Here's another photo, you can see where I cut off the claw coupler:


Also, the one with the flipped plate has a red oxide/rust Kadee box on it, you can just see the end of the metal plate where I Dremeled it off.

The one with the black Kadee box still has the metal "tab" on it (not Dremeled off yet). The shim and Kadee boxes are super glued to the metal "tab". I plan on flipping this one soon.

Hope you can see what I'm talking about!
Pete,

I've done about 20 Atlas cars and was wondering how you can throw this one key part of the coupler away?
in


I can't see how your trucks are staying together without this piece as this is the backbone to the Atlas truck. What I have been doing is removing the coupler at the screw and either cutting the end off or taking to vise grips and tearing off the end. then re-installing it.
and what is it holding together when you install the screw. Really take one of your trucks off one of your cars and look at it closely. Try flexing the two sides and tell me what happens?

Putting these two screw back in is doing nothing without the top piece with it.


The screw is not holding the bottom bar which held in place by the springs on each side.
Boy I hope this is the last time I have to use photobucket.

This is the way I do them.


As you can see without the cross bar and screws installed, the screw itself is not holding anything together.


Ok this is what I do: I remove the coupler


Clamp on with vise grips and bend.


You can either install as is or grind it smooth


re-install cross bar and put on your rolling stock.


If you don't do this and you press down on the car as these trucks have spring action, the sides might go flying or it may never happen. Anyway I would recommend this for the Atlas trucks

I'm not trying to prove anybody wrong just trying to help out the team. Wink
quote:
Originally posted by Ray Marion:
Gary

Thank you for this insight. I ran into this today and came to the same solution you did. I hope Pete K still lets us in on his Lionel truck secret.I don't see any way around cutting/grinding/snipping etc. Thanks again for the pics.

Ray Marion

Ray,

Concerning the Lionel truck "secret sic.", the problem occures when Kadee #805 couplers & boxes are used, because all that clap-trap steel stuff on the Lionel truck interferes with the rear of the Kadee box, when the truck rotates. When the "short box" Kadee couplers (#806 I think) are used, you do NOT have to cut all that crap off the Lionel truck.

Since I have long been using the Kadee #805 couplers (I purchase them in bulk), I have also had to use the Dremel to cut all that crap off the few Lionel cars/trucks I have up-graded, just as Laidoffsick has shown, above.

I am taking the plunge into Kadee coupler conversion. I have mostly Atlas rolling stock mainly single sheath boxcars, war emergency and fish belly hoppers. Which would be the easiest to convert? I have bought the #805 couplers but still need to order screws, shims and the Kadee height adjusting tool. Will do so today.


If you don't do this and you press down on the car as these trucks have spring action, the sides might go flying or it may never happen. Anyway I would recommend this for the Atlas trucks

I'm not trying to prove anybody wrong just trying to help out the team. Wink

Gary is correct and the trucks done his way, which is the way I do it, have better rolling characteristics.  I quit using Pete's method when I noticed the trucks didn't roll as well as they did before the conversion.  That isn't to say that they wouldn't roll.


Concerning the Lionel truck "secret sic.", the problem occures when Kadee #805 couplers & boxes are used, because all that clap-trap steel stuff on the Lionel truck interferes with the rear of the Kadee box, when the truck rotates. When the "short box" Kadee couplers (#806 I think) are used, you do NOT have to cut all that crap off the Lionel truck.

Since I have long been using the Kadee #805 couplers (I purchase them in bulk), I have also had to use the Dremel to cut all that crap off the few Lionel cars/trucks I have up-graded, just as Laidoffsick has shown, above.

I agree with Hot Water.  I used 806's without cutting the Lionel truck.  After seeing Laidoffsick's method, I tried it, and was then able to use Kadee 805/740 couplers which have better action than the 806/743 couplers.

Originally Posted by Bob Delbridge:

IMO a Dremel cutoff disk would be the tool to use.  Vise grips have always left marks on everything I've touched with them.  The problem with using a cutoff disk is avoiding gouging the wheels if you don't take the truck apart.  I have plenty of used cutoff disks laying around and use one that's small enough to get between the wheels.

I agree with Bob's statement, i.e. I would NOT use a Dremel to remove the crap from the Lionel, or any other manufacturers, trucks. I purchased a pair of EXTREMELY heavy duty, LONG handle side cutters from Snap-On Tool Co. (item #312CP), and simply cut off all the unwanted crap.

FYI.  While it's been a while since the above posts I offer the following for what it's worth.  Reference the discussion and pictures in the January 2013 posts.  The posts about the small screws not attaching the two parts of the truck frame together.


I have found some Atlas O  3 rail trucks where both parts are threaded and so the screws DO attach the two parts.


And as shown above, I have also found 3 rail trucks where only the "top" part is threaded and so the result agrees with the pictures and words above.


To investigate further I examined a truck from an Atlas O car that came from the factory with 2 rail wheelsets and therefore without the big black coupler adapter bar as shown above.  This car has both parts of the frame threaded and has the small screws installed.  So, the two parts are connected and truck is rigid from the factory.

Last edited by Austin Bill
Post

OGR Publishing, Inc., 1310 Eastside Centre Ct, Suite 6, Mountain Home, AR 72653
800-980-OGRR (6477)
www.ogaugerr.com

×
×
×
×
Link copied to your clipboard.
×
×