I plan to run a 12 volt and 4.5 volt DC bus around the layout and use suitcase connections. In the past I have used channel locks to crimp these. Is there a better alternative under $15?
Original Post


|
|
I plan to run a 12 volt and 4.5 volt DC bus around the layout and use suitcase connections. In the past I have used channel locks to crimp these. Is there a better alternative under $15?
Replies sorted oldest to newest
Let me give you some advice. A poor crimp can ruin your day - this day, the next day, and lots of future days. It can be hard to find, fail intermittently, and not show up for awhile. Don't scrimp on the proper tool for crimping suitcase connectors. If you don't want to pay for the right tool, borrow it.
I use the Klein linesman pliers (on the left). It will cost you a lot more than $15, but will be worth it. I borrowed and tried the 2 channel-lock type tools on the right, but they didn't feel right to me (too much play). My hands aren't particularly strong, so the proper crimping angle and positioning are important.


Best of luck,
George
I just "unlock" slip joint pliers and crimp with those.
John
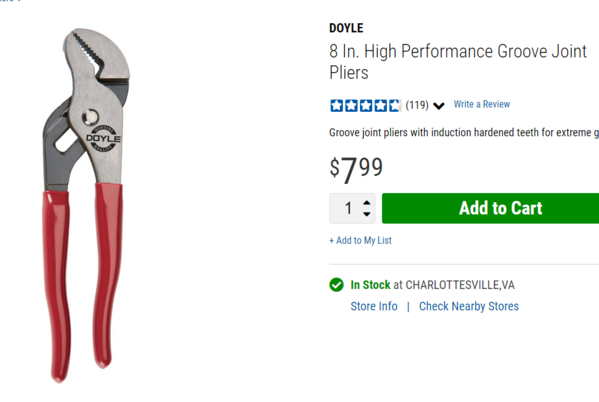
Agreed that pressing straight down on the metal tab into the plastic housing is less likely to cut part of the wire, not as easy with linesman pliers. Generally I prefer to buy higher quality tools, but for this application, an inexpensive 8" groove joint pliers (adjusted for near parallel clamping in the 3/8" to 1/2" range) will do the job correctly. Here is one example for about $8. Most home centers, hardware stores and online retailers have something similar. I would suggest avoiding the ones with the V-groove in the jaws for this application.
Something like this should help.
These look to be the best...
@Tommy44 posted:Something like this should help.
Actually, that's designed for crimping insulated and non-insulated connectors like those shown below, not suitcase or IDC (insulation displacement connectors) types.


The Harbor Freight item looks promising.
George

@cjack posted:These look to be the best...
Chuck, those do look like nice pliers, but they have a 3/8" jaw opening. The suitcase connectors I have are ~1/2" OD from the bottom of the housing to the top of the deactivated position of the metal tab. Do these come in a larger jaw opening like 5/8" or so?
Thanks for all the help. I may need to stick with the channel locks.
I have been using one of these like Steve suggests and George shows on the right in his picture. As Steve mentions, the issue with the parallel jaw pliers is their opening is not sufficient for the suitcase connectors (need to be 1/2 inch or so). All the ones on amazon and micro mark appear to be too small a mouth opening and I found nothing at Harbor freight.
This tool from Harbor Freight has been good for the crimping connectors like George shows.


@SteveH posted:Chuck, those do look like nice pliers, but they have a 3/8" jaw opening. The suitcase connectors I have are ~1/2" OD from the bottom of the housing to the top of the deactivated position of the metal tab. Do these come in a larger jaw opening like 5/8" or so?
Hard to find. The channel locks might be the best choice.
The 3-M parallel jaw model E-9 has interchangeable jaw tips which can be flipped out for different size insulation displacement connectors.
Yes, they cost more but the process is perfect and painless. I use the yellow electrical tape for a better grip.

I avoid suitcase connectors like they’ve got the plaque,......they are not worth a darn period. Seen so many failures and tail chasing because of them. Yes they’re easy to use, but they also fail easily too,....I’d use a butt crimp long before I ever consider using a suit case connector, and I’m not really crazy about them either. Solder & heat shrink is a guaranteed service.
Pat
@harmonyards posted:I avoid suitcase connectors like they’ve got the plaque,......they are not worth a darn period. Seen so many failures and tail chasing because of them. Yes they’re easy to use, but they also fail easily too,....I’d use a butt crimp long before I ever consider using a suit case connector, and I’m not really crazy about them either. Solder & heat shrink is a guaranteed service.
Pat
Hi Pat, one thing I have to note is much of what we discuss here is subjective. Any tool, any design, any material, is only as good as the person using it or or the environment in which something is used.
In my benchwork world I have seen very poor soldered connections, misaligned 3/4" plywood joints, kinked track joints, crossed wire, loose crimped terminals; name it, somebody can mess it up.
Years ago we had a U-Haul business and saw insulation displacement connectors (suit case connectors) smashed, buggered and ruined by D.I.Y. customers using pliers. It happens.
On client jobs we only soldered connections with heat shrink tubing. As you say, that is the gold standard (IME too).
On my present build I have sought to push the boundaries of commonly rejected practices. Among 5.5mm plywood decking, OSB decking, modules totally glued w/o any fasteners at all, legless platforms, non adhered subroadbed, and other reaches, there are an assortment of wire connecting devices used. Among them, IDC aka suitcase connectors.
There are several hundred connections with at least 50 of them IDC installed with parallel jaws.
I have yet to experience electrical failure with any RR application nor with any U-Haul connections we made.
One thing to consider, there are many different size IDCs available. Down side is their molded size marking are very hard to read. It is not just color distinction. If you hold them up to a strong light you will see the applicable wire ga.
If someone would use the wrong size they can only blame themself.
So, as has been said "It's not what you have, it's how you use it".
@Craftech posted:I just "unlock" slip joint pliers and crimp with those.
John
Agreed. A quality set of good ole slip joint pliers on the wider setting work just fine. I also have several dozen suitcase connectors on my layout and they've provided reliable power delivery for 16 years and counting.

No" magic" pliers needed.
I also agree with Tom. Using the appropriate sized connectors is important as well. Don't try to splice an 18 guage feeder into a 14 guage suitcase on a 14 guage bus. I keep bus and feeders for each given application the same size wire guage for this very reason. Not a voltage drop in sight.
The nice thing is you can slip a power/common drop in at any time during the construction of your layout. I can add accessories or track feeders into my layout just as easy today as when my layout was bare benchwork.
@Tom Tee posted:Hi Pat, one thing I have to note is much of what we discuss here is subjective. Any tool, any design, any material, is only as good as the person using it or or the environment in which something is used.
In my benchwork world I have seen very poor soldered connections, misaligned 3/4" plywood joints, kinked track joints, crossed wire, loose crimped terminals; name it, somebody can mess it up.
Years ago we had a U-Haul business and saw insulation displacement connectors (suit case connectors) smashed, buggered and ruined by D.I.Y. customers using pliers. It happens.
On client jobs we only soldered connections with heat shrink tubing. As you say, that is the gold standard (IME too).
On my present build I have sought to push the boundaries of commonly rejected practices. Among 5.5mm plywood decking, OSB decking, modules totally glued w/o any fasteners at all, legless platforms, non adhered subroadbed, and other reaches, there are an assortment of wire connecting devices used. Among them, IDC aka suitcase connectors.
There are several hundred connections with at least 50 of them IDC installed with parallel jaws.
I have yet to experience electrical failure with any RR application nor with any U-Haul connections we made.
One thing to consider, there are many different size IDCs available. Down side is their molded size marking are very hard to read. It is not just color distinction. If you hold them up to a strong light you will see the applicable wire ga.
If someone would use the wrong size they can only blame themself.
So, as has been said "It's not what you have, it's how you use it".
And that’s all good, it is only my opinion, but the subjective side for me is, if I caught one of my guys attempting to use a crummy, lazy way out like a suitcase connector, I’d subject them to a beating with a hammer, right before I fired them.....if a trailer comes in for service of the lights, and I see a bunch of suitcase connectors, step 1 is to notify the customer we’re ripping out all existing wiring and start over. If not, it doesn’t get worked on at my place.....BUT, to each his own,...and if y’all see their purpose, have at it,....me personally, H-E double toothpicks NO.....😉
Pat
@harmonyards posted:And that’s all good, it is only my opinion, but the subjective side for me is, if I caught one of my guys attempting to use a crummy, lazy way out like a suitcase connector, I’d subject them to a beating with a hammer, right before I fired them.....if a trailer comes in for service of the lights, and I see a bunch of suitcase connectors
Pat
Phew, sure glad I'm only using them on my layout, and not on a trailer ![]() .........
.........![]()
Anybody need a happy pill?
@RickO posted:Phew, sure glad I'm only using them on my layout, and not on a trailer
.........
It’s a pride thing for me Rick, clean, precise work is what’s kept the lights on in my shop going on 35+ years. I’m not knocking anybody that uses them, ......it’s just me personally,.......as I’ve mentioned before, I’ve seen so many failures attributed to them, and fortunately, I’m not that shop that uses them, I’m the guy that fixes them correctly when they fail,....if you do clean, precise work, they’ll beat a path to your door 365 days a year,...😉
Pat
I completely agree
@Tom Tee posted:Hi Pat, one thing I have to note is much of what we discuss here is subjective. Any tool, any design, any material, is only as good as the person using it or or the environment in which something is used.
...So, as has been said "It's not what you have, it's how you use it".
THIS! In a nutshell. I had some trouble with my technique in wiring the first 2 switches in a switch bus. I was seeing bent and misaligned crimps, incomplete penetration of the insulation, and loose connections. Turns out I was using the wrong IDC connector (a 905-knockoff instead of the correct 558). I was trying to put the wrong size wire into the 905; the 558 would be the correct connector for that. And the 558 has that double set of teeth. Getting the right IDC and being attentive to technique cured the problems. Below, that's the 905 on the left and the 558 on the right.
-Ap_250")

George
-Ap_250")
@Tom Tee posted:Anybody need a happy pill?
I’m as a happy as they come Tom, ...I smile from ear to ear knowing I’ve done the job right,....☺️
Pat
Call me crazy, but I agree with both sides of the discussion.
1) on a indoors model train layout in a properly humidity controlled environment, if you use the correct size suitcase connectors for the wire being connected and good technique, then a reliable connection can be made.
2) trailer connections are another story. These connections are subjected to frequent water, salts, and grime which made a great recipe for oxidation of the exposed and unprotected copper wire and whatever metal is used in the suitcase connectors. Oxidation= high contact resistance= problems. If that problem is in the electric trailer brake system, well that's really bad news.
@RickO posted:Agreed. A quality set of good ole slip joint pliers on the wider setting work just fine. I also have several dozen suitcase connectors on my layout and they've provided reliable power delivery for 16 years and counting.
No" magic" pliers needed.
I also agree with Tom. Using the appropriate sized connectors is important as well. Don't try to splice an 18 guage feeder into a 14 guage suitcase on a 14 guage bus. I keep bus and feeders for each given application the same size wire guage for this very reason. Not a voltage drop in sight.
The nice thing is you can slip a power/common drop in at any time during the construction of your layout. I can add accessories or track feeders into my layout just as easy today as when my layout was bare benchwork.
I run wire to terminal strips. And I let the wire bundle loosely in wire guides. If I want a takeoff, I just cut it there and install another terminal strip.

@SteveH posted:2) trailer connections are another story. These connections are subjected to frequent water, salts, and grime which made a great recipe for oxidation of the exposed and unprotected copper wire and whatever metal is used in the suitcase connectors. Oxidation= high contact resistance= problems. If that problem is in the electric trailer brake system, well that's really bad news.
I use waterproof butt connectors. Here is an interesting video on those:
John
I agree with Pat when it comes to trailers. When I had a boat sales shop we used home run wiring. Those trailers were frequently submerged in salt water. The U-Haul connections were inside the trunk or compartment.
However this discourse is indoors with model trains.
As an aside. On my normal approach, which is soldering, for wires that will be receiving a soldered tap, before I slip the wire into the wire management holes I slide on shrink wrap segments, usually a few more than I expect to need.
@Tom Tee posted:I agree with Pat when it comes to trailers. When I had a boat sales shop we used home run wiring. Those trailers were frequently submerged in salt water. The U-Haul connections were inside the trunk or compartment.
However this discourse is indoors with model trains.
As an aside. On my normal approach, which is soldering, for wires that will be receiving a soldered tap, before I slip the wire into the wire management holes I slide on shrink wrap segments, usually a few more than I expect to need.
That’s exactly what I do Tom, if I need to tap a leg, super simple to open a section, western Union a feeder in, solder it, slide down the shrink, and done.....I think, and it’s only my OPINION, most model railroaders poses the skills to solder, so why should wiring under the layout be exempt from this practice?......with easy to use wireless irons, it’s a no brainer for me, ....I already own rolls of solder and rolls of heat shrink,....no need to purchase anymore supplies,......( just a thought) those that want to use butt splices, and suitcase connectors, feel free,....I’m not condemning anybody or anything,....
Pat
I think using suitcase connectors vs. solder to join feeders to a buss is at its core a question of time vs return on effort.
Having made some 10s of thousands of soldered wire connections, I've developed some speed and efficiency at it. Given that, I would estimate the following times for me:
Move hot soldering tools while crawling around under the bench with them, strip insulation from existing buss wire and feeder, twist wires together, solder, heat shrink; about 90 seconds average.
versus
With pliers, wire cutters and suitcase connectors in pockets crawling under the bench, fit connector and wire into connector, squeeze with pliers and snap connector closed; about 15 seconds.
So if I have for example, 100 connections to make, that's a difference of about 2 hours; 1000 connections would be more like 20 hours.
If you really enjoy soldering overhead and want the peace of mind knowing that those soldered connections will outlast your grandkids, then you have my respect and best wishes.
Others may not want to spend that much time under their layout for many reasons (plus there's the rosin and lead fumes in a confined space to contend with).
If there ever is a continuity problem with one of the suitcase connectors, it would be easy enough to trace and fix.
Everything considered, I'd rather spend time working on more rewarding parts of the layout and running trains.
I would surmise that @hokie71 (the OP) had already decided this for himself when asking for a suggestion about the best tool to use for this, which he's already been using.
@hokie71posted:I plan to run a 12 volt and 4.5 volt DC bus around the layout and use suitcase connections. In the past I have used channel locks to crimp these. Is there a better alternative under $15?
@SteveH posted:I think using suitcase connectors vs. solder to join feeders to a buss is at its core a question of time vs return on effort.
Having made some 10s of thousands of soldered wire connections, I've developed some speed and efficiency at it. Given that, I would estimate the following times for me:
Move hot soldering tools while crawling around under the bench with them, strip insulation from existing buss wire and feeder, twist wires together, solder, heat shrink; about 90 seconds average.
versus
With pliers, wire cutters and suitcase connectors in pockets crawling under the bench, fit connector and wire into connector, squeeze with pliers and snap connector closed; about 15 seconds.
So if I have for example, 100 connections to make, that's a difference of about 2 hours; 1000 connections would be more like 20 hours.
If you really enjoy soldering overhead and want the peace of mind knowing that those soldered connections will outlast your grandkids, then you have my respect and best wishes.
Others may not want to spend that much time under their layout for many reasons (plus there's the rosin and lead fumes in a confined space to contend with).
If there ever is a continuity problem with one of the suitcase connectors, it would be easy enough to trace and fix.
Everything considered, I'd rather spend time working on more rewarding parts of the layout and running trains.I would surmise that @hokie71 (the OP) had already decided this for himself when asking for a suggestion about the best tool to use for this, which he's already been using.
And as I mentioned Steve, I’m not condemning anybody’s use of them, if that’s what floats your boat, then by all means enjoy,.....and I’m not going to get into timing which one is faster, but your description of how you solder sounds awful primitive as to what’s available in this century, ......automatic strippers, and battery operated irons that heat up and cool down super quickly have been around for decades now,....all of which can fit in your pocket too,....😉
Pat
@harmonyards posted:And as I mentioned Steve, I’m not condemning anybody’s use of them,
Pat
No...... your just beating them with hammers....![]()
![]()
![]() I'd rather take condemnation myself.
I'd rather take condemnation myself.![]()
@RickO posted:No...... your just beating them with hammers....
I'd rather take condemnation myself.
That’s only for my employees,....they have sign a waiver to work for me that says I can bludgeoned them to death for being lazy and irresponsible,....😆😆😆 ....very therapeutic,.....😉
Pat
@harmonyards posted:And as I mentioned Steve, I’m not condemning anybody’s use of them, if that’s what floats your boat, then by all means enjoy,.....and I’m not going to get into timing which one is faster, but your description of how you solder sounds awful primitive as to what’s available in this century, ......automatic strippers, and battery operated irons that heat up and cool down super quickly have been around for decades now,....all of which can fit in your pocket too,....😉
Pat
Wow Pat, I think you've done a fine job conveying your opinion about what you think is the best way to wire your layout. I was attempting to point out that how others choose to wire theirs is often a matter of what they want to spend their TIME doing.
Can you please point to a video example of a middle aged person with average soldering skills doing the kind of repetitive soldering for hours on end where they're averaging significantly less than 90 seconds per connection done they way you recommended and working overhead in a confined space and crawling from one set-up to the next all the while adjusting the position of their fume extractor? I would like to learn from that person.
You've mentioned twice now that you're not intending to condemn anyone (while using borderline insulting language towards me and talk of violence towards one of your employees right before firing him), so would you please consider being kind enough to recommend your favorite battery operated soldering iron and/or heat gun to this "awful primitive" so that I might continue to evolve out of the stone age?
Thank you
@SteveH posted:Wow Pat, I think you've done a fine job conveying your opinion about what you think is the best way to wire your layout. I was attempting to point out that how others choose to wire theirs is often a matter of what they want to spend their TIME doing.
Can you please point to a video example of a middle aged person with average soldering skills doing the kind of repetitive soldering for hours on end where they're averaging significantly less than 90 seconds per connection done they way you recommended and working overhead in a confined space and crawling from one set-up to the next all the while adjusting the position of their fume extractor? I would like to learn from that person.
You've mentioned twice now that you're not intending to condemn anyone (while using borderline insulting language towards me and talk of violence towards one of your employees right before firing him), so would you please consider being kind enough to recommend your favorite battery operated soldering iron and/or heat gun to this "awful primitive" so that I might continue to evolve out of the stone age?
Thank you
Here ya go Steve, ...the latest and greatest,...been out for 7-8 years now,....no stopwatch required,...😉
Pat
@harmonyards posted:Here ya go Steve, ...the latest and greatest,...been out for 7-8 years now,....no stopwatch required,...😉
Pat
Thank you for the recommendation Pat. Here are more details:
Weller BL60 MP Cordless Soldering Iron
One charge provides 45 minutes continuous soldering or 1,100 solder joints
LED illumination
Reaches 536 °F, solder melting point, in 35 seconds (goes up to 950 °F)


@SteveH posted:Thank you for the recommendation Pat. Here are more details:
Weller BL60 MP Cordless Soldering Iron
One charge provides 45 minutes continuous soldering or 1,100 solder joints
LED illumination
Reaches 536 °F, solder melting point, in 35 seconds (goes up to 950 °F)
Steve, I did not mean to hurt your feelings or offend you, ....but when you wrote:
Move hot soldering tools while crawling around under the bench with them, strip insulation from existing buss wire and feeder, twist wires together, solder, heat shrink; about 90 seconds average.
I kinda envisioned you having to carry around something like this,...😉
Pat
@harmonyards posted:Steve, I did not mean to hurt your feelings or offend you, ....but when you wrote:
Move hot soldering tools while crawling around under the bench with them, strip insulation from existing buss wire and feeder, twist wires together, solder, heat shrink; about 90 seconds average.
I kinda envisioned you having to carry around something like this,...😉
Pat
That's much nicer, it's electric.
Here's mine:

Might be a nice thing to try. Years ago I contracted with one of my vendors to do a wiring job for me and I was amazed at how he used a flame and went like a sewing machine. So I modified a butane torch like his and now can just sail along under the platform. Defeating the safety makes for a one hand, one click hot shot. Very quick.
I do have some hard to reach areas which is where the IDCs come in very handy.
@SteveH posted:That's much nicer, it's electric.
Here's mine:
🤣🤣🤣🤣.....that’s funny right there,......no matter how much we agree to disagree,.....
Pat
With that iron in mind Steve, I concede to the validity of suitcase connectors!....😆😆😆
Pat
@harmonyards posted:With that iron in mind Steve, I concede to the validity of suitcase connectors!....😆😆😆
Pat
Glad you thought that was funny, that was my intent. Joking aside, thank you for the apology. No hurt feelings here.
Milwaukee has a cordless iron also...a little wide around the handle since it uses the same plugin 12 vdc Li ion batteries that the 12 v drills and their other tools use. It breaks over into a semi pistol style though. But handy battery wise if you use other Milwaukee 12 v cordless tools.
Vey informative thread and thanks to all for the posting. I learned a bunch and wanted to highlight a few that probably have wide application.
1) The connectors: @G3750 mentioned these 3M 558 connectors with the double bite (two clamps instead of one) seem to have an added layer of security. Plus that is a nice surface to squeeze down upon. I had not seen these.

2: the pliers: many good suggestions and price points. @Gilly@N&W noted the self adjusting robogrips and I found these at Lowes. It appears they are trying to mark down their Kobalt line and andf for $15, I plan to check them out today. Can't have too many pliers!

As @cjack and others mentioned, I do plan to use terminal strips where ever I can. For $2.50 and the convenience of the pre made jumper strips, these are hard to beat:


@cjack posted:Milwaukee has a cordless iron also...a little wide around the handle since it uses the same plugin 12 vdc Li ion batteries that the 12 v drills and their other tools use. It breaks over into a semi pistol style though. But handy battery wise if you use other Milwaukee 12 v cordless tools.
Chuck, thanks for the info about the Milwaukee cordless soldering iron. I've always had great performance out of Milwaukee tools. I still regularly use the first 7 1/4" circular saw I bought 30 years ago, and many others acquired since. Not one of them has failed (unless you count the numerous 12V Ni-Cad batteries, which I don't attribute to being Milwaukee's fault).
Very good! You will love the new Li ion batteries if you don't already have them. The don't lose charge for months. And seem to last years...I think I had one fail around 7 years ago out of a dozen.
@cjack posted:Very good! You will love the new Li ion batteries if you don't already have them. The don't lose charge for months. And seem to last years...I think I had one fail around 7 years ago out of a dozen.
Agreed the Li-ion batteries are much better in every way (including weighing much less)!
I found an extra wide pair of linemens pliers with long handles so I can get some extra pressure on the crimp.


 I had tried various pliers for “suitcase” connectors, but I finally found this very old design type of pliers to be the most effective. The patent is from 1890 and 1892. My dad had a pair that I talked him out of some 55 or more years ago. In more recent years I have bought 3 or 4 more pairs on the “bay.” I love it. The tool has parallel jaws. Because of the design, it also gives you more force. And it has wire cutters as part of this great tool. The larger size has jaws that open wide enough to use on the “suitcase” connectors.
W. SCHOLLHORN BERNARD CUTTERS PLIERS.
My Dad had one too (without the wire cutter, that is way cool), It must have been the tool of choice for that generation. Wish I knew what happened to it.
Access to this requires an OGR Forum Supporting Membership


