I am in the process of building a new basement layout, and want to incorporate both Standard Gauge and "O" Gauge trains.  Following an article in OGR from quite a while ago, I have just completed a 4' x 8 foot "anchor table", with attached transformer table/shelf.  After allowing generous room around the perimeter of the prospective layout, I can easily create an 8' x 8' layout.  Additionally, having already reconfigured an "O" Gauge layout in an adjoining room that had two large duck-unders, I definitely want to be able to reach items on the layout with a "stretch".  (Note to self: never trust a "30 Something" to design and build a layout with duck-unders if you may be using the layout for several decades...) 

With respect to both the table and the layout, I hope to rely on the fact that with Standard Gauge, the buildings are often large, and colorful, and the central portions of the layout don't necessarily have to be filled with track work to be pleasing and fun to operate.  Thus, once the buildings have been placed, there will be less necessity to move them.  This will keep the track work on the perimeter and within easy reach. 

Given these considerations, any suggestions for a table configuration, or, for a track plan?  I presume one option would be a 6' X 8' table, since, given the easy access to all sides, I should be able to comfortably reach all items on the table.  Also, any references to Standard Gauge track plans would be helpful.  

As always, thanks!

Original Post

Replies sorted oldest to newest

You might consider using the 5-rail track that others on the forum use, as then one could run O or Standard gauge on the same loop and you could also run loops of O gauge inside of the outer loop.  

Personally, I have an 8' x 20' layout with a loop of Standard gauge on the outside and 3 loops of O gauge on the inside.  

My layout does not incorporate any switches, so it is comprised of 3 ovals and a dog-bone shaped loop for the inner-most oval.

NWL

This is my current tinplate layout at the Roanoke Valley Model Railroad Club. The left side if the page is in one room and that is the original layout I built. The black line is a wall between the rooms. Prior to going into the other room the loops connected before the wall.
Current Tinplate layout
Here is a video before the expansion. There's a lot of action. I wasn't unhappy with this layout as is; however when they offered the space I decided to act upon it.

Here is the last video with the expansion (yes the table is rotated).

Scott Smith

Attachments

Images (1)
  • Current Tinplate layout

Currently my Tinplate layout is 7x10. All track, switches and lock-ons are vintage Lionel . The outside “O” loop is O72. The next loop is STD with operating 222 switches. This allows me a choice of 2 STD consist to run. The inside “O” loop is O31 with four 021 switches. This allows me two running options. The first is to run two small “O” consist of either 252, 253 or 259. The second is to run one train as a outside loop. I wanted a white table because I like the tinplate color contrast against the white. also when I switch to wintertime the white base is my snow.

My table in on casters that allow me to roll it away from the back wall to gain access to that side and also the display shelves.

I’m still on the hunt for some additional tinplate stations, villas and bungalows for the center. However, the plasticville works for me currently. Winter time table converts to that theme using Dept 56 style buildings.

Hope this helps!

89E588DF-E8AE-4413-900B-1C921E0373176EF7C4CE-C874-46EB-A7F1-538874801D785E6CAAE0-B906-4861-970D-3EA644330874E24C9283-CA19-45F2-B06F-B6CF6F0BF71E

Attachments

Images (4)
  • 89E588DF-E8AE-4413-900B-1C921E037317
  • 6EF7C4CE-C874-46EB-A7F1-538874801D78
  • 5E6CAAE0-B906-4861-970D-3EA644330874
  • E24C9283-CA19-45F2-B06F-B6CF6F0BF71E
Last edited by Rich Wiemann

NWL, Scott, and Rich,

Thanks for all of the excellent suggestions and the gorgeous videos and pics.  You have really created some very attractive and "playful" Tinplate layouts.

NWL,

That sounds like a great size for a Standard Gauge outer loop, with the ability to run 4 trains simultaneously.  Your idea for the 5 rail track is a good one.  I have a recollection of some Forum members having a little difficulty operating the larger SG locos with the "lower profile" 5 rail track.  Perhaps the 5 rail tubular might be better for these larger locos.  After reading your post, I did a little searching for the 5 rail tubular, but will have to do a more thorough search.

Scott,

Thanks for the detailed layout plans, and the two wonderful videos.  Both layouts are visually pleasing, and offer a tremendous amount of continuous action.  I was planning on "trial and error" for the track plan, but may have to settle for a specific table size, and consider design software.  You've reminded me that multiple levels are both appealing from an operating standpoint, and solve a lot of space problems by expanding the available real estate for multiple independent runs.  The selection of operating trains is also awesome!

Rich,

Thanks for the multiple pics.  That's both a very attractive layout, and, a very handsome train room.  I hadn't thought about using a white table for something other than a Christmas layout, or, a winter themed layout.  You are absolutely correct that the white table really allows the Tinplate trains and accessories to showcase their vivid colors.  I'm now leaning heavily in favor of adopting your excellent table color suggestion.  Another nice feature of your layout is that the the switches allow you to simultaneously keep other trains on the layout, which is a nice operating bonus.

Thanks again to each of you.

  I was planning on "trial and error" for the track plan, but may have to settle for a specific table size, and consider design software. 

Let's talk about the software. My track design was done with the RealTrax Layout software MTH use to give away to club members. It had the advantage of being free. For design purposes 72 in O-Gauge RealTrax is the same as 72 Standard Gauge.

Scott Smith

Last edited by scott.smith

Dennis,

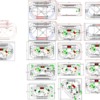
I started in Std. gauge about 10 years ago.  Initially I ran occasionally on the floor.  I spent a few years drawing layouts before I finally  built my layout .  I have included several of the proposed layout plans in the attached PDF. The JPEG on this screen doesn't show the details. They were drawn with CAD and feature USA track's, 42, 57 and 72 inch curves.  My first thought was the 5 x 10 shown on the top row  and I finally built my 8 x 12  layout based on the drawing on the far left.  As you can see I like 90 degree crossings.

Hope this helps!

Jim Z

Std Gauge layouts


Attachments

Images (1)
  • Std Gauge layouts
Files (1)
@scott.smith posted:

Let's talk about the software. My track design was done with the RealTrax Layout software MTH use to give away to club members. It had the advantage of being free. For design purposes 72 in O-Gauge RealTrax is the same as 72 Standard Gauge.

Scott Smith

Thanks Scott!  I had totally forgotten about the Real Trax layout software.  Over the years, I had several versions, so I'll have to see if I still have any left.  That's a great tip regarding the O-Gauge RealTrax and the SG.

Thanks Jim,

Those CAD drawings will be very helpful. As you indicated, the attached file using the Joint Photographic Experts Group format is much easier to compare and evaluate.  For my track plan, I can see how having a figure 8 for the center "run" would certainly add interest, although it would significantly affect the types of interior structures to be used -- not necessarily adversely though.

Unlike my permanent O Gauge layout, I think that I will keep this layout more "fluid" for a period of time, so I can easily make changes to the track plan, or the placement of the structures without tearing up a lot of finished wiring and scenic elements.  Standard gauge is especially suited to a "drop" and then "run" strategy.

Finally, you don't happen to know if USA Track is still available, do you?  I did a brief search yesterday for USA Track without too much success.

Thanks again!

Last edited by Dennis GS-4 N & W No. 611

For a layout with standard gauge and O gauge  - Size:  Big, Very Big

IMG_2185IMG_2186IMG_2187

Forced perspective is a really good idea, especially since standard gauge is so big.  That is why the O gauge is farthest away.  I didn't really have a detailed plan, but I started by defining benchwork depth and height.  I built the benchwork first and glued carpet padding to the top.   I put down the loop closest to the inside edge and went from there.  If I waited to do a detailed plan, no track would be laid yet.  I used mostly USA track, some new, some used.  I like tubular track, I can cut it any length to suit my track layout.  I considered having grades on the standard gauge loops, but decided against it and put the grades on the O gauge loop.

Attachments

Images (3)
  • IMG_2185
  • IMG_2186
  • IMG_2187

Thanks for the wonderful pics, and the explanation of your planning and construction.  Your efforts turned into an excellent layout, with great size and operating capabilities.  Also, the train room itself adds significantly to the layout itself, both in terms of visual appeal, and the expansive viewing areas.  putting the grades on the O gauge loop was also likely the best decision given the heft of many standard gauge locos and consists.

I'm sure that kids of all ages are thrilled to go into your train room and watch the trains run.

@Mr Fixit posted:

For a layout with standard gauge and O gauge  - Size:  Big, Very Big

Forced perspective is a really good idea, especially since standard gauge is so big.  That is why the O gauge is farthest away.  I didn't really have a detailed plan, but I started by defining benchwork depth and height.  I built the benchwork first and glued carpet padding to the top.   I put down the loop closest to the inside edge and went from there.  If I waited to do a detailed plan, no track would be laid yet.  I used mostly USA track, some new, some used.  I like tubular track, I can cut it any length to suit my track layout.  I considered having grades on the standard gauge loops, but decided against it and put the grades on the O gauge loop.

Love your layout and the way you creatively incorporated the tinplate bridges. I'd like to see more photos if you have them anywhere.

A couple added questions:

1.  Knowing that wider radius is better, would the larger standard gauge locos look good on 57" curves?

2. Also,  knowing that a greater distance to the edge of the table from the outermost mainline is often better, what minimum distance would you leave from the table edge to the outer rail?

While these questions may elicit some obviously subjective responses, what dimensions worked well for you?  

I was thinking of starting out with a 6' x 8' table, with the option of going to an 8' x 8' total area, using at least one bridge.  The 8' x 8' would still leave me with very wide aisles that could be "harvested" at a later date to expand the layout using track against the 2 outer walls and bridges

Thanks again!


Last edited by Dennis GS-4 N & W No. 611

Add Reply

Post
The Track Planning and Layout Design Forum is sponsored by

AN OGR FORUM CHARTER SPONSOR

OGR Publishing, Inc., 1310 Eastside Centre Ct, Suite 6, Mountain Home, AR 72653
800-980-OGRR (6477)
www.ogaugerr.com

×
×
×
×
Link copied to your clipboard.
×
×