
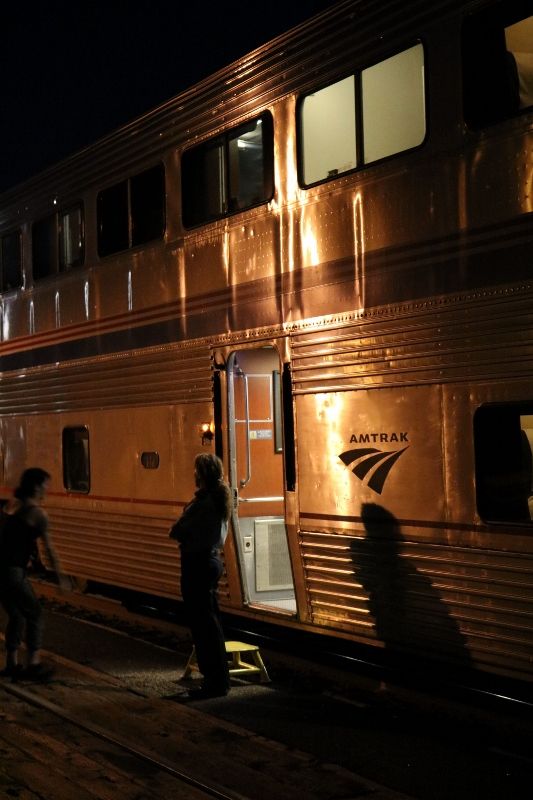
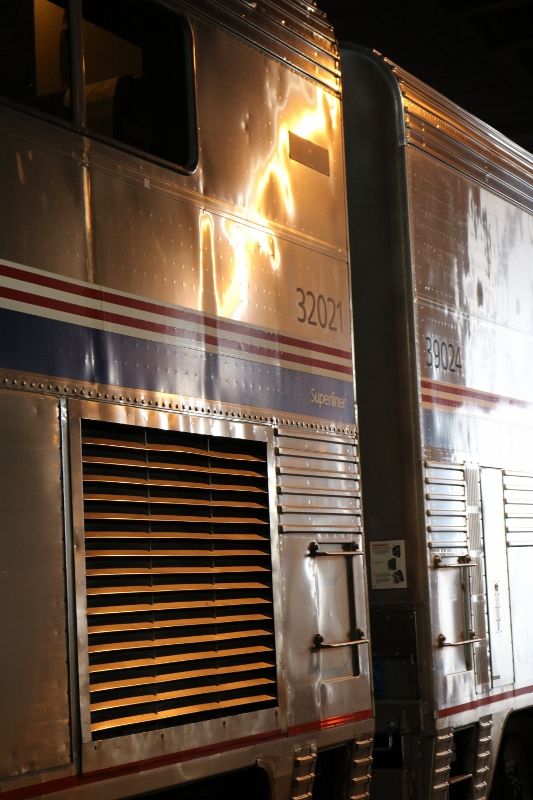
I have two more projects in my bag; the first one is in the title of this topic; I want to share with you this new idea which is for me a big challenge! why a superliner? Several reasons: these cars have an incredible style and here, in France, we have no cars like that except the TGV 2N (N = niveau = levels for you) and some commuter cars. More, I don't find a to scale model of this car anywhere. So I decided to make one! not easy but I found on the web many informations, photos and videos to have a precise idea how do build it.

For this evening (for me!) I just want to show you some 3D drawings I made to start this project; I have also writen the complete specification which describes how I manage the whole design of this passenger car. Sorry, these documents are in french! but I can insert them on the forum if you want and it will be better than a long monologue!!

vue27

All the drawings are made with SKETCHUP software and I think that a number of parts will be made in a 3D printing way. I don't have this printer today but I found a guy near me with the 3DHUBS website to make me what I want; I will show you in a next message the first pieces he made for me.

Some others drawings:

vue24

vue25

vue18

I have tried to respect the 1/48 scale for this model and it will be made like a real one that's to say: for the side faces, two partitions, inside and outside and a frame in between (other drawings showing that are in the specification). Not easy, but a very big challenge for me!

Hope you like

That's all for tonight!

jpv from France

Attachments

Images (4)
  • vue27
  • vue24
  • vue18
  • vue25
Original Post

Replies sorted oldest to newest

Thanks to all for your comments! it's nice and make me happy!

I didn't know that Overland made these cars; but without interiors for a brand like that! it's like a living room without a sofa! no?

Thanks Alan for your proposal; 

---> COASTERP: I use SKETCHUP Make (free version); really easy to use, believe me. Just some basic knowledge of the software, that's all; you can find on the web many videos for beginners and you will see that it's not hard at all.

See you this evening for more pictures and the specification.


jpv

JPV, I'm sure you can see from the excitement around this post, that there is a market for accurate interiors, as well as the cars themelves...  Definitely interested in seeing how your project progresses and ultimately if any products become available.  Really like the level of detail I see thus far in your renders.  

Thanks Mike!

Some more pictures:

The chassis and how are fitted the two partitions (in and outside)

Elévation châssis

Couple

14 pieces make the chassis; they are from different size of spacing; her is the longest:

Couple 46

and now the same printed in 3D by the guy I told you about earlier:

frame part

Here is the adjustment of some pieces in the middle of the car; all fit together well!  phew!!!

Coupe au couple central

Last one, the first piece I made yesterday: it's the rest room partitions (lower level)

rest room partitions

See you later for the specification; files must be too  large..

jpv

Attachments

Images (6)
  • Elévation châssis
  • Couple
  • Couple 46
  • frame part
  • Coupe au couple central
  • rest room partitions

Wow, amazing work.

I spent a lot of time in Superliners in September when my wife and I (and some friends) crossed the country from NYC to Seattle, via the Capitol Limited and the Empire Builder.  The Roomettes were nice but a little tight quarters at night when not actually sleeping...

I'm looking forward to seeing your scale rendition of the sleeper areas.

That's nice work JPV.

In 1998 I had an 8900 mile Amtrak trip around the USA, mostly on Superliner trains. Traveled coach all the way on an economy ticket. I usually had an empty seat next to me at night and it gave more space to try to sleep. The big cars ride well. The coach seats are spacious and comfortable. Unfortunately some of the coach seats don't line up well with the windows, if you want a view.

I spent a lot of time in the lounge-observation cars too. A superliner coach has five rest rooms on the lower level and I never had a wait to use one. Top speed for those trains seems to be 79mph, limited by track and signalling standards.

A string of scale Superliner cars would need a rather large layout to run on!

134-3439_IMG

My photo at Dry Canyon trestle near Hotlum siding on the north slope of Mt Shasta in 2003.

Attachments

Images (1)
  • 134-3439_IMG
Last edited by Ace

Thanks all for your kind comments!

P51---> You are right, but if I put the seats in as planned, why not the partitions even they are not visible (perhaps a little bit when lights will be on)?

Here are other pieces for my "3D guy" to print:

the stairs:

escalier

and the lower part of the chassis (8 pieces)

couple partie basse

See you soon

jpv


Attachments

Images (2)
  • escalier
  • couple partie basse

Yesterday and today's work:

The floor of the upper level, the bottom parts of the body I have re-done because the first ones were not as I thought and the ventilation grids:

5_8_16 a

A little closer

5_8_16 b

The grid is made with triangular strips (1mm) glued in the good direction (toward bottom!) to look like the real one:

5_8_16 c

I also received today the bottom parts for the chassis (3D printed); here are two parts among others:

5_8_16 d

And how will be fitted these parts to the bottom of the body (not yet glued!!)

5_8_16 e

That's all for today!

Tomorrow, beginning of the body with many many windows to cut!!!

jpv in France

Attachments

Images (5)
  • 5_8_16 a
  • 5_8_16 b
  • 5_8_16 c
  • 5_8_16 d
  • 5_8_16 e

Thank you, PRR,

To this day, I don't know exactly how to do this, to say the truth! I will go next week in a graphic arts shop close to my house where people is very competent and which has many and many  kinds of spray paints; as they have internet I will ask them to go on a superliner site and they can see with photos and compare with what they have. Hope to find what I wish! 

jpv

Check out Alclad II metalizer paints and finishes.  They have lots of different metal finishes from chrome to stainless to aluminum, plus window tints.  It's a multi-step process where the primer or base coat color can subtly affect the finish coat color.

AK Interactive has a similar system as well.  You can find plenty of youtube video tutorials for both as well as videos comparing results for both products.  Both products are very common with military models but obviously can be used for anything needing a realistic metal finish.

OGR member AntonioFP45 has a thread discussing the use of Alclad II.  I originally saw his posts on the old Atlas forum (in HO) and after that on the Atlas Rescue Forum.  You may find additional information on the process if you search those other forums.

I hope this gives you some ideas.  Who knows, perhaps you local supplier will recommend one or the other.  

Jim

I have had many difficulties with the first side of the car I've done yesterday (round corners not round, bad straight lines, etc... ): directly to the trashcan!!!

Here is the second one I made today; it's better! I also reduce the size of the strips to 0,5 x 0,5 mm; it's the most little I found.

10_8_16a

10_8_16b

This time the round corners are round!

jpv in France

Attachments

Images (2)
  • 10_8_16a
  • 10_8_16b

today's work: the first intenal face is done with the frame glued on (bottom of the photo):

14_8_16a

The two holes in length are for inserts of the upper level floor (same two on the other side not on the shot).

The external face will be glued on the frame to look like that:

14_8_16b

It will remain to fitt the window blocks...

See you soon

jpv

Attachments

Images (2)
  • 14_8_16a
  • 14_8_16b

Keep on cutting windows on the last face....

Next week, I will give to my "3D guy" .stl files for the seats to make for me a prototype. Perhaps it will interest some of you, as said at the beginning of this topic.

As soon I receive it, I will show you 

Eclaté siège 2 places

The seat is made of several parts for easy painting; when I created it, I had thought to put on real cloth! perhaps stupid but I liked the idea... so do something good  !!!

jpv

Attachments

Images (1)
  • Eclaté siège 2 places
jpv69 posted:

Does somebody know the meaning of the numbers on the little board (to the left on the photo): car number, train number, time, anything else?

1251755_orig

Some discussion here:

http://discuss.amtraktrains.co...g-car-numbering-101/

Posted 28 April 2009 - 01:09 PM

Here's a basic primer on car numbers, sometimes called consist position numbers. These are not the fleet inventory numbers by which Amtrak tracks the maintenance, location within the system, and availability of the car. I’m referring to the numbers that one finds on one’s tickets when booking sleeping car accommodations and the number that can be found on a variable display right next to the car doors.

For example, one booking the Lake Shore Limited westbound in a sleeper might find oneself booked into car #4911. First of course, the first two digits (the thousands and hundreds position) represent the train number; in this example train #49. If the train number is 3 digits, like trains 448/449, then the lead digit is normally dropped.
 
Then there are questions about whether Amtrak still uses this methodology. Possibly they might not want to change the train number on each variable display on each car when the train is turned for a return trip. In any case, the cars are assigned different numbers to help passengers find the car they are booked on. Maybe someone else can elaborate on it further.
Last edited by Ace

Some 3D pieces delivered today:

29_8_16

The two ends of the car, stairs, upper level partitions and four little pieces for the assembly with the roof; they will be glued inside of the end faces. I have these pieces made because the curve of the roof and the partitions is very special and to have exactly the same shape for each would have been not easy!

Now, it's time to work!

jpv

Attachments

Images (1)
  • 29_8_16

Thanks for your comments!

Mike---> as I'm too far away to appreciate, and for my information, how is the comfort on a superliner (silence, seats,...)? 

I finished today the design of the truck in 3D. Now I have to make its components easy to do in 3D printing; it's the most difficult! but take heart!!! 

bogie superliner

Always done with SKETCHUP Make (free version)

jpv69

Attachments

Images (1)
  • bogie superliner
jpv69 posted:

Thanks for your comments!

Mike---> as I'm too far away to appreciate, and for my information, how is the comfort on a superliner (silence, seats,...)? 

I finished today the design of the truck in 3D. Now I have to make its components easy to do in 3D printing; it's the most difficult! but take heart!!! 

bogie superliner

Always done with SKETCHUP Make (free version)

jpv69

The ride and comfort on a superliner is one of the better experiences you'll have in the US.  Certainly not on par with most European trains, but if comparing Superlines vs Amfleet vs Horizon for short/medium distances the Superliner will win out, as the seating offers greater leg room, folding leg supports (can sleep in the coach seating) vs just a foot rest in Amfleet or Horizon cars.  Long distance depending on which accommodations you pick, some say certain options can be cramped, etc... but realistically that is the only choice in many cases when traveling by rail.

Mike DeBerg posted:
 

The ride and comfort on a superliner is one of the better experiences you'll have in the US.  Certainly not on par with most European trains, but if comparing Superlines vs Amfleet vs Horizon for short/medium distances the Superliner will win out, as the seating offers greater leg room, folding leg supports (can sleep in the coach seating) vs just a foot rest in Amfleet or Horizon cars. 

Correct regarding Amfleet 1 cars. Amfleet 2 have leg rests + footrests, and a substantially greater seat pitch. I've done enough 9 to 17-hour trips in them to know

---PCJ

Here are the two end platforms over the trucks with the batteries for lights inside the car (LED strips not yet arrived) and their bases, not glued on the platforms, just layed down between two strips of styrene (1,5 x 2 mm); it's easier if I have to remove them.

04_9_2016

Two holes in front for kadee couplers and one hole for trucks rotation axles. I have to do holes for the on/off switches when I will get them.

The two end partitions for the upper level are not painted; it's just self adhesive paper coloured with SKETCHUP textures.The blue color is not exactly the same for the one at the bottom; the ink cartridge is empty! obviously!!!

04_9_2016a

jpv 

Attachments

Images (2)
  • 04_9_2016
  • 04_9_2016a
jpv69 posted:

------> P51,

I refer to your post of the last 30th of june; here is how I imagine the bedroom areas in the 2nd car(it's not yet complete; lacks the upper bed):

3 bedrooms

But it's not for tomorrow.....later...later! 

jpv


Maybe the design changed over the years, but the roomettes I rode in last year lacked that center white pillar (which I have no idea what it is from your graphics). Maybe the earlier ones had a different look to them? If you want, I think I might have taken some photos of the roomettes if you'd need any later on.

p51 posted:
jpv69 posted:

------> P51,

I refer to your post of the last 30th of june; here is how I imagine the bedroom areas in the 2nd car(it's not yet complete; lacks the upper bed):

3 bedrooms

But it's not for tomorrow.....later...later! 

jpv


Maybe the design changed over the years, but the roomettes I rode in last year lacked that center white pillar (which I have no idea what it is from your graphics). Maybe the earlier ones had a different look to them? If you want, I think I might have taken some photos of the roomettes if you'd need any later on.

That's because what you are looking at are bedrooms, not roomettes.  Bedrooms have a combination toilet/shower which is what you see.

Today my "3D guy" brought me the prototype for the seats; it looks fine:

13_9_16

It remains to paint and glue the pieces together!

If you are interested for filling empty cars, it's perhaps the solution......

I have fitted the on/off switches on the end paltforms but also reinforced them because they are above the trucks and they will support the weight of the car!

13_9_16b

I will connect the wires tomorrow.

jpv


Attachments

Images (2)
  • 13_9_16
  • 13_9_16b

Today, electricity!

The lower level first; only one strip of LED (22 cm long); it's enough; connected to the battery and switch with 2,5 mm banana pins:

14_9_16a

And now some other shots to see the result (sorry for the first one: I had not seen the soldering iron! I'm a bad photographer as I already said )

14_9_16b

14_9_16c

14_9_16d

14_9_16e

Tomorrow, I will connect the second platform for the upper level and glue the floor to the partitions of the lower level; but the roof is not yet made; like that, all will be ready when it will be done.

jpv

Attachments

Images (5)
  • 14_9_16a
  • 14_9_16b
  • 14_9_16c
  • 14_9_16d
  • 14_9_16e

Thanks, Dan!

Now, all is glued, all is connected; the pins on the first level floor are waiting for roof lighting.

15_9_16a

Always the soldering iron!!! he likes to be on the photos!!! 

I cut the back of the battery supports; so I can glue them on the end platforms and I also can remove the battery easily:

15_9_16b

See you soon!

jpv in France


Attachments

Images (2)
  • 15_9_16a
  • 15_9_16b

Hello,

Today's information: I have got the price from my "3D guy" for the seats: a complete set for a coach car is 20€ (shipping not included). I think it's a good price; you can contact me if interested; I will give you his mail and phone. It's not an advertising.

-----> P51: here are the roomettes; is it what you saw on your trip?

3 roomettes

JPV

Attachments

Images (1)
  • 3 roomettes
jpv69 posted:

-----> P51: here are the roomettes; is it what you saw on your trip?

3 roomettes

JPV

YEP, just missing the upper bunk folded up, just above the windows. But yeah, that's it.

I have to admit, if I modeled the modern era and standard gauge, I'd do what you're doing (though probably not as well) to build a model of the superliner we rode on the Empire Builder almost exactly one year ago now...

I wanted to ask about the posters in the car here:

Have Superliners ever carried posters from the past like these? I'm not saying you're wrong, I'm saying I wanted to know if they ever used these because all I ever saw was posters for modern other Amtrak trains, like these:

Great modeling, I am seriously impressed with your work on this car. Such a shame that so much of the detail will never be seen from the outside...

Last edited by p51

The proto seat is done; I'm waiting for the 36 remaining.......

6_10_2016a

6_10_2016b

It was a long time from my last post; the reason is that I had a big default squaring when I made the assembly; I had to unglue most of the pieces end re-glue them after and it was perilous to do! now all is right and I'm more easy! 

The second car will not be built in the same way, sure! the modifications are already written and drawn!

jpv

Attachments

Images (2)
  • 6_10_2016a
  • 6_10_2016b

This afternoon (here!), beginning of assembly: here is an exploded view of a complete piece of two seats:

Eclaté siège 2 places

There is a left and a right seat; they are fitted on the foot with the two little strips (in green) which trip over the edges of the horizontal and vertical parts of the foot; so the seats are well lined up on the foot; the photos below show the assembly of these parts:

19_10_2016_002    19_10_2016_003     19_10_2016_004

at last some assembled seats without the armrests and back (painted but drying!):

19_10_2016_005

jpv


Attachments

Images (5)
  • Eclaté siège 2 places
  • 19_10_2016_002
  • 19_10_2016_003
  • 19_10_2016_004
  • 19_10_2016_005

PRRHSC----> Thanks. The outer side on the photo is just put with wedges to have the seats at the right place inside the car following this drawing:

amtrak-diagram-superliner-coach

Sides, ends and the roof will be painted separately.

Paul----> Thanks; yes it's a lot of work but it's interesting, even funny to do! a lot of patience too!

jpv in France

Attachments

Images (1)
  • amtrak-diagram-superliner-coach

Thanks, BOBBYD; I made my first attempt for painting two days ago; cleaning of a piece of styrène then first coat of primer and paint (TAMIYA TS17 - gloss aluminium spray) -I have no air brush; the result: not too bad but not like I thought...I will try again; perhaps I have to add gloss dulcoat after....Tomorrow is another day!

jpv

jpv69 posted:

Now, some more photos; the lower level is waiting for passengers!

20_10_2016a

20_10_2016b

20_10_2016c

I am uniquely impressed with your work. If you put passengers in these seats, they'll have to be the best figures you can find as this car deserves them.

I've said it here already, but it's a shame that all this detail will not be easily seen when it is all completed. Before you place both sides on the car permanently, you need to get some good "cut out view" photos of this car when the interior is complete.

Amazing modeling!

Both sides and the roof will be a single and removable piece (you can look at the specifications I posted at the beginning of this thread). So I have a permanent access to the inside of the car.

For the second one (sleeping car); the way to build it will be different, but always with access to inside; I will talk about it later...


jpv

Hi all,

I have noticed recently that a rivet strip was laid along the face; luckily, the paint was not yet done! so I decided to put these rivets like the real photo shows; they are from Micromark as raised decals. The most difficult was to line up them!

4_11_2016

Now, I can paint!

After that, I re-do the different markings for the car with OPEN OFFICE software. I don't yet know if I print the decorative blue and red strips on paper (the easiest way) or on decal paper (one more time more difficulties to line up and the least default will be seen on such a lenght). These files are PDF; hope you can read them.

jpv

Attachments

3D pieces arrive today!

the roof parts:

25_11_2016a

Once assembly is done (not glued yet): these pieces will be covered by 2 sheeets of styrene 0,25 mm thick.

25_11_2016b

Parts for the ends of the car:

25_11_2016d

The way I will fit the roof and the ends:25_11_2016e

And now, the "coffee machine" (I don't know exactly the word for this piece!) on the upper level:

25_11_2016c

This piece will not be painted; several colors on a little surface area! no! so, I will put on a decorated sheet of self adhesive paper, fitted to the size of the piece:

décor desserte

A little blurred.....

Now, it's time to work!!!


See you soon

jpv in France


Attachments

Images (6)
  • 25_11_2016a
  • 25_11_2016b
  • 25_11_2016d
  • 25_11_2016e
  • 25_11_2016c
  • décor desserte

Begenning of the ends!

02_12_2016

I had to glue a styrene sheet of 0,25 mm on the 3D piece because the surface is a little striped due to the printer and after several attempts, the result with paints is not perfect, even after sanding.

At the top left of the photo, in black, the external part of the diaphragm (photo is bad framed, sorry!)

Grabs come from TICHY TG; I have ordered some PSC parts from P&D Hobby Shop (air hoses, MU heads..)

My "3Dguy" has forgotten this part: the structure of the diaphragm! and I can't go further!

renfort extrémité

Hope they arrive tomorrow!

JPV in France

Attachments

Images (2)
  • 02_12_2016
  • renfort extrémité

The two pieces I'm waiting for arrived yesterday: the framework for the diaphragms:

07_12_2016

Now, they are glued on the faces:

08_12_2016

It lacks the diaphragm itself; but I don't know exactly how it's done and I have no photo close to this part. Is it made of  rubber or other and what is its shape (like the new Amtrack luggage cars or viewliner?)? If someone has any information, it would be very nice; thanks in advance!

The only photo I have is this one and my question is for the black piece:

8742622693_04ff0b5511

I suppose it's this one?

1140386

jpv in France


Attachments

Images (4)
  • 07_12_2016
  • 08_12_2016
  • 8742622693_04ff0b5511
  • 1140386

Thanks, Max!

I think this diaphragm has no pleats and after looking more at some photos I have found I'm quite sure of. The last photo I posted seems to be the right one. Diaphragms with pleats is an old method and don't suit to these recent cars. In any case, mine will be like that.

I have seen this method of pleats in reality in a factory which made curtains for the french railways: the cloth is folded between rods of metal and heated with steam to keep the pleat (without going into details!).

jp

I received the wheels and the brass bearings from NWSL a few days ago.

NWSL wheels

The final dimensions of the trucks are now updated, taking the width of the wheels into account; here are some .stl files I will send tomorrow to my "3D guy":

the side frame:

bogie_longeron

the bolster

bogie_bolster

the journal box

bogie_boite d'essieu

and the inside reinforcment piece (I don't know exactly the name...) to be fixed with bolts on the internal face of the side frames.

bogie_traverse haute

Here is the whole truck; you can find in the pieces shown above:

bogie superliner

Other pieces to come...

See you soon

jpv in France


Attachments

Images (6)
  • NWSL wheels
  • bogie_longeron
  • bogie_bolster
  • bogie_traverse haute
  • bogie_boite d'essieu
  • bogie superliner

I have waited, waited and, at last, I have taken advantage of a spell of milder weather to go on my terrace and paint the different faces of the car:

24_12_2016a

The color highlights the rivets line:

24_12_2016b

I think it's not too bad for a first time!

The paint I've chosen is TAMIYA # TS-30 "silver leaf".

Now, let it dry!!!

Decals will comme after.

Merry Chrismas to you all, fellows!

Joyeux Noël 

jpv in France

Attachments

Images (2)
  • 24_12_2016a
  • 24_12_2016b

Many thanks Bob2 and Matt!

---->Bob2: I have not a 3D printer; the faces are made of 0,5 mm styrene and I did not want to make the rivets one by one with an awl! that's why I made them with decals (from MICROMARK). Some other parts are made for me in 3D by a friend who has a 3D printer; on the other hand, the faces are too thin and too long for him to be printed.

jpv in France

jpv69 posted:

Close up on the car number; the zoom highlights also the defaults (look at the decal rivets strip)!!!!......

28_12_2016


I wouldn't call that a flaw at all, as even in a photo it isn't obvious.

I am amazed at this project with each new photo. You are doing an incredible job. The finished car will simply be too good to run on a train at this point, given how good the modeling is.

Thanks, Eric and Lee!

Lee, I build it to run not to display; it's the goal!

I only hope that the second one will avoid me doing design mistakes I have made on this one! the drawings are now upgraded and it will certainly be better and easier to put together. But, it's the first one, a prototype!

I will talk you about it again...

Se you soon, next year...probably! 

jpv

Here are the side doors:

10_01_2017a

10_01_2017b

Once in place, I notice that the window with "4916" inside is too large; too late! somme aspect defaults too....

The granular aspect of the door comes from the 3D print and quite impossible to remove! all the wires I use for this step are 0,5 mm dia.

Just now to add a gloss varnish on all the faces before gluing the window glazing on the inside face of the door. Others windows will be made later, when the in and outside faces will be fitted together. This is the 3D file:

Modules baies

jpv69

Attachments

Images (3)
  • 10_01_2017a
  • 10_01_2017b
  • Modules baies

Wow, each new photo is amazing. Such a shame that a lot of your work won't be able to be seen, probably not even though windows. But there's a satisfaction in knowing you did everything, whether someone can see it or not.

Once this car is done and running on a layout, I'd love to see video as well as photos of it.

I hope you intend on doing a magazine article on the build of this car!

Thank you fellows for your kind comments! 

Lee----> For me, write a magazine article would be very hard and very loooong because I don't have a full knowledge of your language; I don't speak fluently and I have always the dictionary beside me!!! if I would write, this would be for the second one because the way to build it will change and will be more fonctional and logical; this one is a prototype on which I look for better ideas and design. But I will speak about this new design soon in this thread.

Eric----> Pleasure to share; that's why I subscribed to this forum! here, the O scale is a very closed place and if you build US models or an US layout, not many people find an interest to follow you! that's also why I don't post on the french O scale forum anymore: it's a shame but to read some unpleasant and sarcastic comments make me angry and in this case, I answer nastily (french language is very rich in words!)  !

Scale C D----> I have the car but no layout; you have the layout but no the car! what to do? 

Bonjour de France

jpv (frozen!)

Received yesterday the first parts for the trucks:

18_1_2017

Unfortunately, the 4 pieces in the middle ("longeron" in french, chassis side piece perhaps for you?) are too large (7,2 mm on average) instead of 6,9 mm and have some miner defaults due to the fineness of the drawing. The bolsters (top left and right are very well done.

Here are the axle boxes with the hole for the brass bearing (ruler in mm!)

SAM_1334

So, the chassis side pieces will be re-done soon; as they are today, I can't make the assembly because the bolster don't fit exactly with when I put the reinforcement part (bottom left and right on the photo) which has the exact size; you can see the complete truck 3D drawing in a previous post. Sorry, not easy to explain...! 

jpv in France


Attachments

Images (2)
  • 18_1_2017
  • SAM_1334

I spent the last ten minutes looking at the progress of this car - it looks so cool! It probably cost a fortune to pay for the 3D printing, not to mention the failed parts you threw out. I would never have the patience to do this, seeing it took you over five months and counting.

I'd love to use a 3D printer to make parts to convert an O Scale SD70ACe into an SD70ACS.

Thanks to you all, fellows! I know, I work on this car very slowly.....but I'm dependent on my friend for the 3D parts and he don't work only for me!! more, it's the first car I make, so I have to be careful during the development phase. So, patience is the master word! if I reach my goal, the second one will be easier to build! 3 essential steps (in french!): prototype, pré-série, série! never to place one before another! that's what I learned when I was working in the french railways society (SNCF)! and the prototype phase is always the longest.

In fact, I'm having a lot of fun to work on this plan!

See you soon

jpv in France

Hello all,

New and re-done parts arrived yesterday evening! 

So I began today the building of the first truck:

first, assembly of the main damper (upper part) on the bolster with brass bolts and nuts 1 mm:

02_02_2017a

Then fitting of the sides on the bolster with polyamide bolts and nuts 2 mm

02_02_2017b

02_02_2017c

Insert of the bearings inside the axle boxes:

02_02_2017d

Now, I'm waiting for the springs (the truck will be suspended), other (very ) little bolts and some brass pieces to keep on working.....

jpv in France

Attachments

Images (4)
  • 02_02_2017a
  • 02_02_2017b
  • 02_02_2017c
  • 02_02_2017d

Hello all,

Too much work in my appartment these last days, so no work on the passenger car! 

Now, I can start again!

In the last post, I wrote that the brass strips were too strong; I changed my way of assembly using simply styrene strips of the same thickness.

Here is the first axle box fitted on the truck frame:

13_02_2017a

The spring is just behind the shock absorber:

13_02_2017b

And it works!!!!

The nuts are not yet locked; this allows me to adjust the axle box during the final assembly of the truck and wheels.

I can tell you: it's not easy! but "qui va piano va sano!"....

See you soon

jpv in France


Attachments

Images (2)
  • 13_02_2017a
  • 13_02_2017b

First step for the two trucks done!

15_02_2017a

15_02_2017b

Now I'm waiting for bolts ( 5 and 8 mm long) and some nuts I ordered for the second step; they will probably arrive tomorrow...with the new bolster!

Until now, I had 10 mm bolts that I cut to lenght and filed but it's not the best!

Her is also the prototype for the large windows; just some little work with a sweet file to fit inside the faces and it's done!

16_02_2017

jpv in France

Attachments

Images (3)
  • 15_02_2017a
  • 15_02_2017b
  • 16_02_2017

Fitting of the truck parts: bolster, axles and side frames; all seems to be good; the wheels turn smoothly.

18_02_2017a

And now, second step: first level of the suspension; funny to put together! irritation not allowed!! 

18_02_2017b

After attempt, I will have to insert a 2 mm sheet of styrene between the floor and the truck pivot to heighten the car, otherwise the trucks can't move around or a very few; result: I will have to pull down the couplers of the same high!

jpv in France

Attachments

Images (2)
  • 18_02_2017a
  • 18_02_2017b

Thanks Max!

All parts are made in 3D printing material (ABS); the parts for the truck chassis (bolster and sides frame) are enough thick to have a very good resistance and they will support the weight of the car without any problem; the little pieces on the second shot have no effort to do; they just complete the truck design. At the beginning they were planned to have a mechanical role but it was to hard to make for me!

jp

Many thanks to you! it's very kind!

Mike----> I have seen on EBAY some passengers sets (coming from China..!) but I don't trust this website! I have to ask a friend of mine who has an Ebay account to buy them for me!

Dan----> the track and turnouts come from ROCO (bought 30 years ago....); the turnouts are 2 meters radius; never seen so large until I knew the ATLAS 7,5° ones. The ballast comes from a french brand (GPP) which don't exist anymore and it's a shame; it was made from crushed stones (I have seen their amazing factory).

See you soon

jpv in France

Add Reply

Post

OGR Publishing, Inc., 1310 Eastside Centre Ct, Suite 6, Mountain Home, AR 72653
800-980-OGRR (6477)
www.ogaugerr.com

×
×
×
×
Link copied to your clipboard.
×
×