
Hello all,

      It's been almost two years since the old JADA Railroad was dismantled, and we moved into a new home. As always when you move there's a ton of things to do WAY! before we could start on a layout.We've been working on house remodeling, outdoor remodeling, and anything else you can imagine. We still have at least another year before we can say the house and yard are done, but at this time the house is in great shape so we can slow down a bit on it, and i can get to SOME layout work.

     The layout room and layout work will be a day here or there, maybe once in a while I'll be able to get two day's in a row. So far i was able to insulate the ceiling joists with pink insulation, which still needs to be secured a bit deeper into the joists cavities, gotta hand it to  these builders they really know how to space joists 16 on center LOL !!!. I'm also yet to find a square 90 degree corner, they seem to forget what a tape measure, framing square, and a level is. I've owned a total of three homes in the past including this one , I'm yet to find a builder who uses the tools mentioned above.

  Here's some details... room size 27 x 15 ceiling height is 9 feet. Ceiling cannot be finished due to ALL utilities are running through it. Cement block wall, smooth concrete floors. Walls will be sealed and then painted a very light  blueish color, floor is very smooth and will remain the way it is. Heat will be most likely  220 electric or natural gas (not sure yet).

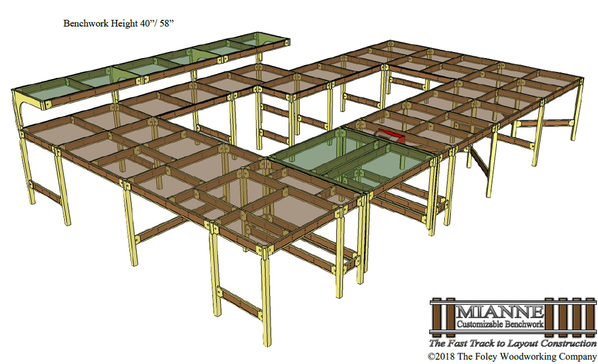
  As for the layout itself table height will be higher than my previous one, I'm thinking 45 inches maybe an inch or two higher. Bench work will be 2x4s and 1/2 inch plywood .Track will be Gargraves , switches will be Ross. Actual layout size will be 21x 10 1/2.

  Anytime progress is made i will post it on this thread, here's a quick video.

Thanks for looking, Alex

Video will be uploaded shortly

Attachments

Videos (1)
F6632F34-0725-4089-99E7-732B68DA31F0
Last edited by Alex M
Original Post

Replies sorted oldest to newest

Hey Alex. Looks great. I am sure you are excited to get started.

My only suggestion would be to cover up that ceiling. I understand all the utilities. I have the same situation and solved the problem with a simple Armstrong 2X4 drop ceiling on a grid with removable tiles. I also have concrete floors with block walls. I covered the walls around the layout as needed with studs and drywall. I have one exterior wall that I also insulated before the drywall.

For the floor, I have 2'x2'x5/8" thick foam tiles that interlock together. You see these tiles at trade shows, etc in the booths. They are removable if needed but make a BIG difference when standing or working. The cushioning feels good underfoot.

Over time, regardless of how secure you get your insulation, it will sag and pieces will come off. Not to mention it is amazing how much dust will filter down from above. The drop ceiling will catch all of it and keep it off the layout. With a 9' ceiling, not a problem. I only have a 8' ceiling and it works for me at being 6' tall. I dropped mine down around 6" or so, not too much. I then installed 6" LED flood lights thru the tiles on a 4'x4' grid for even coverage.

My layout area is around 25' x 30' and I heat it with a 220VAC wall mounted heater. It keeps everything nice and warm during the winter. I live in southeast PA.

Anyway, that is my suggestion. Good luck with the build and keep all of us posted on progress!

Donald

The hardest part(after planning) is always starting. It always seems that after you get started, things just start coming together quickly even if that is not actually true. I can remember when I had started on my HO layout in my teens, it started slow, but once it was started, it came together quick.

Weird houses seem to always be the case. We've been trying to get things done on my late mother's house and the person doing the work has said the same thing about no straight lines, no right measurements, the works. This sort of is the case with houses built in the 1800's I suppose, just don't know where in the 1800's but what also doesn't help is the add on's on it.

Good luck Alex, hope to see progress come quick and hear the distinct sounds of steam as well as see the smoke.

Alex,

I too agree on the need for a ceiling. However, rather than suspended, I'd go with regular drywall fastened to the joists with screws. If ductwork , piping, or electric wiring runs along the bottom of your joists, just add wood spacing blocks or runners to the joists. Doing that will essentially extend the joists below those utilities so you'll have something to screw the wallboard onto. With a 9 foot high space you can most likely lower the ceiling to 8 foot without feeling cramped or boxed in. That ceiling will not only cut down significantly the possibility of dust drifting down from above over time but another advantage would be if there should ever be a leak from any of those overhead water pipes, instead of it dripping or spraying directly onto the layout below, the wallboard will help catch and diffuse the water and hopefully, providing the water's not gushing out, you'll be alerted by any visible water stains on the ceiling to tend to it immediately before it becomes a significant and major problem. Also those interlocking foam floor tiles are a great idea since they'll not only provide cushioning for your feet and be kinder to your knees over the years ahead but they will provide a layer of insulation over that cold concrete slab floor.

It is great you are finally getting started on your next layout.  Looking forward to seeing your progress.

Dave NYC Hudson PRR K4 posted:

The hardest part(after planning) is always starting. 

From my experience, Dave is right on with that statement.  Also, don't be like me and constantly tweak the layout to get it perfect.  Once you have a good plan, start building.

Congrats Alex!  I'm am really happy to see you getting started, and I can't wait to see your new creation.  Given your previous layout, I'm sure it will be impressive.  That's about the space I have for mine, but I'll bet your will outshine me significantly, you are a true artist when it comes to that stuff!  Mine will be 20' x 12' 6" at the widest point.

I'll probably have basic benchwork up first, but I suspect you'll roar right by me in making a great looking layout.

Attachments

Images (1)
  • mceclip0

Best wishes on the new layout.  We're all looking forward to your pic/video progress updates.

Alex M posted:
...gotta hand it to  these builders they really know how to space joists 16 on center LOL !!!. I'm also yet to find a square 90 degree corner, they seem to forget what a tape measure, framing square, and a level is. I've owned a total of three homes in the past including this one , I'm yet to find a builder who uses the tools mentioned above.


Sounds like your builder and crew might be genetically related to the my builder.  Wonder if there is a category within Ancestry.com that could trace that stuff.  If like me, at least you will get many opportunities to add to your "The Great Big Book of Swear Words".

Hi Alex,   I am sure the layout will be fantastic!  Its kind of funny on the concrete floors, I work in a relatively new high-rise office in Seattle, the floor I work on is mainly polished concrete and the ceilings are open with exposed pipes and beams, that are mainly painted black.  It actually looks pretty good. I think you will make yours work well as described. The concrete floor will be easy to clean.  

I had the same issue with utilities in my train room. Before installing the ceiling, I took pictures of everything so I would know where everything is in the event of a problem. There are a few cleanouts in the ceiling (not over the layout thank goodness), but if I ever need to get to them, I can locate them and will make access panels in the unlikely event I would have to get into the ceiling. Just a thought. 

Either way, it looks like it will be a great train room. Keep up the great work. 

John

Beautiful room Alex. Looking forward to your layout and your designs as my room is approximately the same dimensions. I have 24 by 13 I just bought my house approximately a year ago I moved in and there's so much other work to do first but I'm just about there so good luck and looking for your updates...... let the fun begin.

hi Alex can't wait to see the completed layout! I really enjoyed running my trains on your last layout especially your double slip switch worked perfectly on my big boy engine and the engine I bought from you!

You are truly a great  artist and very talented  builder! hope to se you at York if your going will be there next Friday my good friend!

Alan

Hello everyone, 

  I've had the honor of having Mike Reagan , and  Roger Farkash from TW TrainWorx design my new layout  track plan for me.  I received an email from them this morning with the final drawing , so I'd  thought I would share it with you. Just an FYI i will be building the entire  layout. 

Here's a few details 

You will be able to run a single train on all tracks or run three trains at one time. 

LARGEST CURVE 080,

MINIMUM CURVE 054 

MAX GRADE 2.5 %

UPPER LEVEL HEIGHT 7.25 

UPPER MAIN LEVEL 054   COLOR BLUE ON DRAWING 

INNER LOWER MAIN 072    COLOR RED ON DRAWING

OUTER LOWER MAIN 080  COLOR  MAGENTA  ON DRAWING 

I'll be happy to answer any other questions 

Thanks, Alex

WILL UPLOAD PHOTOS SHORTLY 

SORRY FOR THE PHOTOS BEING A BIT BLURRY, I'LL UPLOAD NEW ONES LATER ON 

73D84C59-73EE-4436-9E5D-C1C4E9DA7AB36A5A5FB9-B0DF-4434-B86E-508AFD388A54


Attachments

Images (3)
  • 73D84C59-73EE-4436-9E5D-C1C4E9DA7AB3
  • AEFE1E6C-EA78-44E3-A304-A5F94A2568C9
  • 6A5A5FB9-B0DF-4434-B86E-508AFD388A54
Last edited by Alex M

Hello all, 

Thank you for the nice comments, this build will be a very slow process as I'm super busy with repairs and upgrades. So progress updates will be far and few between. The way the layout was designed i won't have to climb on the table to reach anything . This saves a lot of time and saves my knees and lower back. 

Coach Joe , Yes the upper connects to the lowers at 3 O'clock. it was designed so a train can travel on the entire layout. 

Rich, here's a photo of the room layout which i should have posted LOL, the peninsula has been repositioned for much better access. 

Thanks, Alex

6B8A23BB-F2CE-4F71-9189-59E208338E7D


Attachments

Images (1)
  • 6B8A23BB-F2CE-4F71-9189-59E208338E7D
Last edited by Alex M

This is going to be something to see, that's for sure. I like how trains will be able to travel the entire layout. All the plans(at least 7 or 8) that I have worked on(dream layouts at this point, and unfinished) that's the one thing I wanted to try and do. When you start getting this to come together, maybe it will help my railroad block that I have(of course my time has been greatly divided as of late unfortunately).

How many levels are there Alex?

Excited for you Alex! I am also starting a layout, my first permanent one, an irregular shape but should work out well! I will be following your progress! Right now I'm trying to think of everything I need to do before starting benchwork! You already helped me, I have to paint the back wall a shade of blue before I start or maybe some sort of backdrop picture! Best of luck on this project! Bill

Hello all, 

It's been a year and a month ! 

Needless to say during these rough times, I've had a bit more time on my hands during the weekend's. So for the last three weekend's i was able to get back into my layout room. 

Layout plan's have changed completely ! the original plan was fantastic and i loved it , but it made it almost impossible to get to the house utilities. Here in NJ inspectors are a bit of a pain in the A** lol , so i decided to go a different route. 

I'm NOT one for layout plan software, I built my first large layout by simply figuring things out as i went along, and it ended up being a fantastic layout. The new layout is going to be quite simple, it will be an around the room layout with two lift up/out bridges. So far it will be a double track main 088 and 080 curve, with a small peninsular in the middle which will house the turn table and roundhouse. Width of table's against the walls will be no more than 24 to 30 inches, I've learned my lesson about having to climb up on top of the layout (I'm done with that).  As far as an upper level that will be determined at a later date. One more thing table height will be at least 44 to 45 inches. 

ROOM SIZE 26 X 14 

LAYOUT SIZE 23 X 14 

I will post pictures and a video shortly 

Thanks for looking and be safe , 

Alex 

8C11A3CC-3DC0-4F56-90C4-E2CC6592D0B301DF2F3D-9E8E-4917-9AAC-984F2692EC0EA34EDB6C-5557-496B-A7FE-AC3AF6592FB5

Attachments

Images (3)
  • 8C11A3CC-3DC0-4F56-90C4-E2CC6592D0B3
  • 01DF2F3D-9E8E-4917-9AAC-984F2692EC0E
  • A34EDB6C-5557-496B-A7FE-AC3AF6592FB5
Videos (1)
trim.FE2CF502-A8E6-454F-A09C-E90C6DEBFA17
Last edited by Alex M

HELLO EVERYONE, i thank you all for the very kind comments, I'm actually having a blast building this. Carpentry comes quite easy for me , from when i was around 9 years old my father and uncle started teaching me. They were two master carpenter's, they taught me well. 

 I actually owned and operated a carpentry business for 10 years, plus i do all of my own work at home. The building, electrical, and track laying will be quite fast. I would say two or three more weekends and it will be done, what will slow me down is the scenery work . 

I'm doing things quite different this time around. As you've seen in my video's everything is very easily reachable, also the track plan is quite simple. I'm just looking to enjoy trains running at a slow pace, also most all of the buildings will be flats and WILL NOT  have lights. Only complicated thing will be the turntable, which will have tracks separately powered. 

As for space around the layout, there's two long walkways, one is 16'x  2' wide, the other is 17' x 6'  wide. There's also a 14 x 4 foot spot behind the layout to view it . I kept the 16 x 2 foot space small because I wanted the 17x 6 foot space as large as possible., this is the main hangout area. Unfortunately this layout room is much smaller then my previous layout, my old home i used pretty much the entire basement, which was 25' x 38' . This house the basement is HUGE 80' X 40  but most of this my mom's apt. My layout room is 26 x 14 , which to me is a perfect space to enjoy running trains. Unfortunately It's going to be pretty much impossible to have the huge get together's we had in previous years.

I will keep everyone updated as i make progress. 

Thanks for looking, Alex

Alex, your father and uncle taught you well! 

My dad started me out at that age or earlier, but I couldn't make a straight cut to save my life.  He had no power tools, we did EVERYTHING with muscle power, sawing, drilling, even cutting up trees with a two-man crosscut saw.  I have two cordless drills and a good hand power saw.  I still can't make a straight cut!  

Electrical is a different story, I worked 43 years in electrical/electronics.

Your photographs confirmed my idea for the around the wall benchwork is sound!  Thank you!!!

RickO posted:

If it ends up looking anything like your test track it should be awesome!

Except for the upside down NYC tender shell of course

Enjoy your well deserved time with your OWN trains Alex!


Rick 

That tender shell is from a ready to run set , it’s actually junk LOL. It’s funny many people ask me about it , because they see a shell just thrown there. I have to get it off my test track and toss it in the garbage. Lol 😂 

Alex 

Ted Bertiger posted:

Alex,

Jack and Diane Touhey will be proud of what you've done with the basement. Never met his wife yet but know Jack quite well from the Sunday night football club and seeing him at the clubhouse pool (if that ever reopens this year).

Looking good as I see you have plenty of indoor time on your hands.

Thanks Ted, 

 Jack and Diane would never recognize this entire home LOL we did everything over. Say hello to them for us 

Thanks, Alex 

Add Reply

Post

OGR Publishing, Inc., 1310 Eastside Centre Ct, Suite 6, Mountain Home, AR 72653
800-980-OGRR (6477)
www.ogaugerr.com

×
×
×
×
Link copied to your clipboard.
×
×