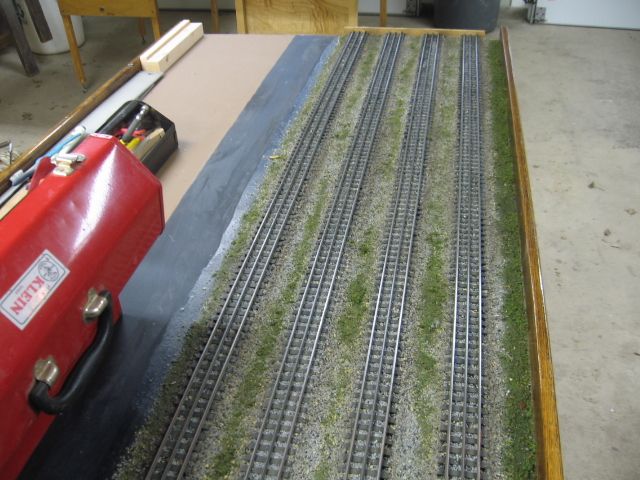
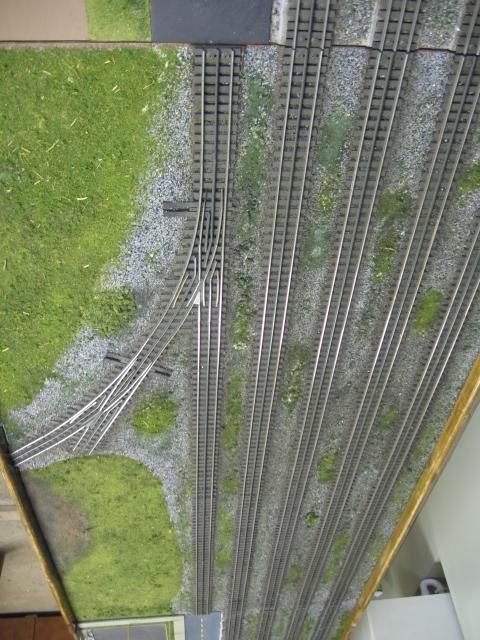
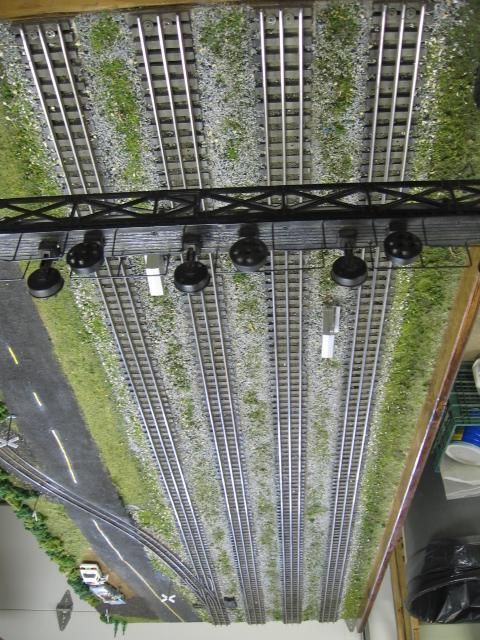
Im ready to add weeds and grass to my dirt. Any thoughts on how to do so realistically?


Attachments
Images (3)
Original Post


|
|
Im ready to add weeds and grass to my dirt. Any thoughts on how to do so realistically?
Replies sorted oldest to newest
I use a combination of ground foam, dirt, and other materials to create some texture and then apply static grass with a home made applicator. You can buy one made by Noch for around $160.00 or make one from a Harbor Freight electric fly swatter for about five bucks. There are videos all over you tube explaining how to do it.
You have a very nice looking layout!
Joe Shipbaugh

Youtube can be your friend
Zeke
Love your back drop. Is it commercial or painted in place?
David, that's the making of a fine looking scene. In fact everything posted looks great. My go to product for weeds. Is made by Noch. #NH07004. Available from Scenic Express. They become addictive to keep adding to the scene. Once you get to the super detailing stage of any layout. Be prepared to spend. It's this attention to detail though that visitors notice.


The last 2 photos use a lot of Woodland Scenic ground foam. Was great back in the day. I still use it. Just so much more available now. The good thing about weeds. You can just keep adding them.
I use real weeds on my garden railroad. If I leave them long enough they turn into scale trees.
Chris Sheldon
I take a few paint bristles, apply super glue and dip into static grass. The result is the tall weeds that resemble thistle weeds. Not my idea... Youtube.
Have Fun! Ron
")

")
Ron045 posted:I take a few paint bristles, apply super glue and dip into static grass. The result is the tall weeds that resemble thistle weeds. Not my idea... Youtube.
Have Fun! Ron
Ron,
How did you make your cinder block wall? It looks really good. Did you score insulation foam?
joedaddy posted:I use a combination of ground foam, dirt, and other materials to create some texture and then apply static grass with a home made applicator. You can buy one made by Noch for around $160.00 or make one from a Harbor Freight electric fly swatter for about five bucks. There are videos all over you tube explaining how to do it.
You have a very nice looking layout!
Joe Shipbaugh
David,
Like Joe D, I do a mixture. Status grass is awesome and I use the majority of the Woodland Scenics line of ground covering materials. I actually bought a Noch applicator and have no regrets. It looks awesome. I have not used mats, but many have gotten good results with them. I think the more you mix it up with static grass, ground foam, tufts, and mats, the better it will look.
I've also used sections of fake fur I found in a Hobby Lobby.
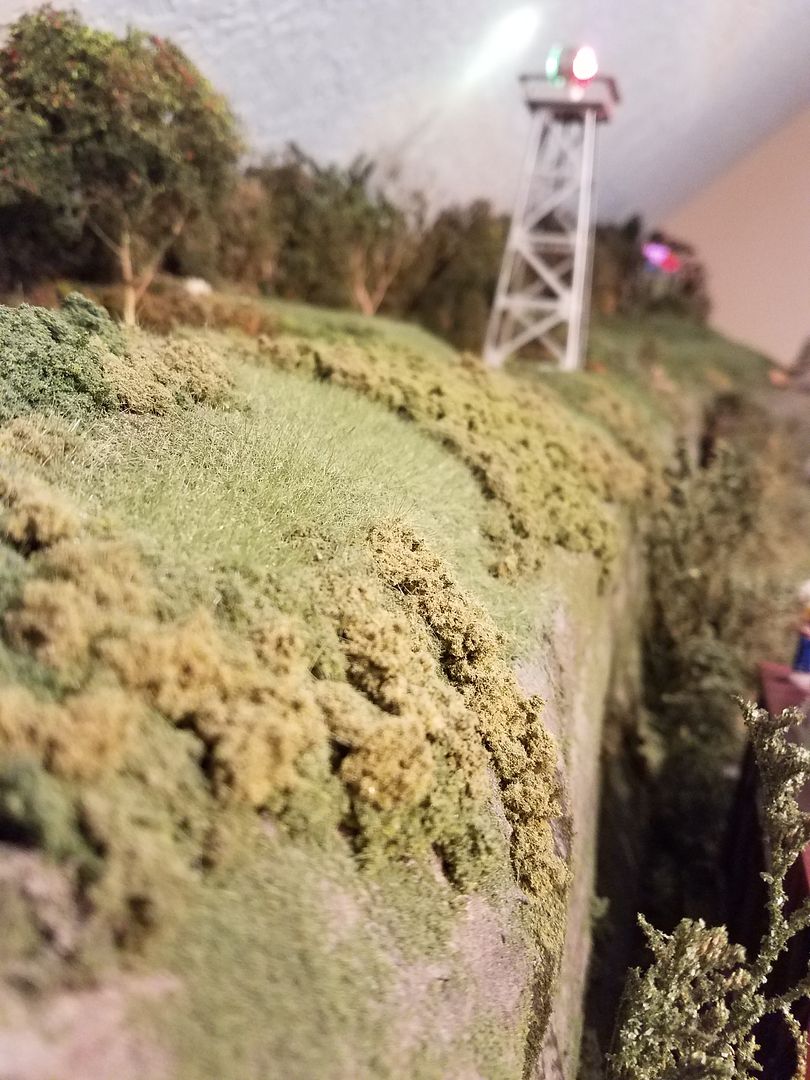
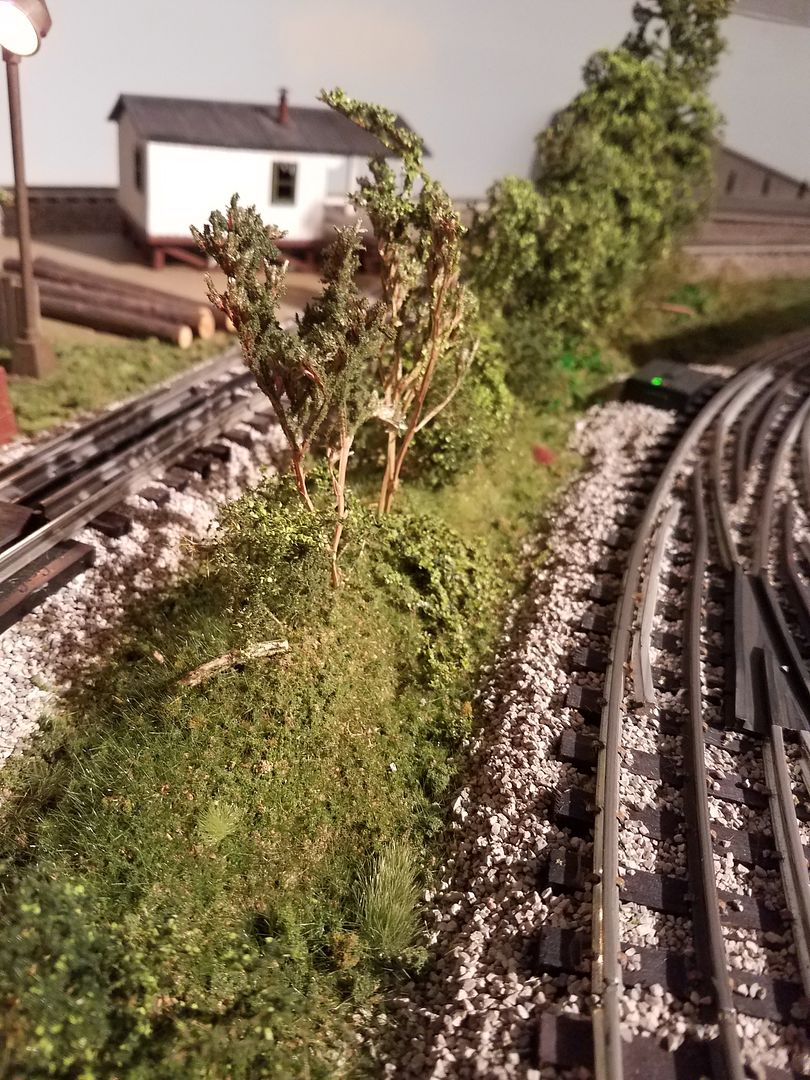
DavidBross, You've been provided with so many beautiful, realistic examples, above, in answer to what you asked, I am hesitant to add my own method and photos so you can see the results. But here is what I do:

Any trees or shrubs are cemented in-place first with NON-water-based glues, such as Crazy-Glue, which must, then, dry thoroughly so that the next layer does not undermine what I fixed in place first.
Then, I saturate the area with a water-based glue, usually that made by Gorilla Glue, or Liquid Nails. Next comes the gravel, detritus, and a variety of groundcovers, sprinkled on using a long-handled spoon , usually utilizing Dennis Brennen's inventory of groundcovers.
Once I have that in place, but still wet and mushy, I press into the landscape, using a dentist's pick and long-handled tweezers, all the small greenery and weeds and grasses I may picture in my imagination. Loose foliage is sprinkled into place using my fingers and/or a teaspoon.
If any white glue is still visible, thru it all, here-n-there, it gets a quick overcoat of detritus and/or soils.
Here are the results...


FrankM

Boo Man posted:Ron,
How did you make your cinder block wall? It looks really good. Did you score insulation foam?
I scored what I believe was a roll of Dept 56 brick on the clearance rack at my LHS. It cost me $10. It's rubber. All I did was cut the desired size and apply some lightweight spackle.
Ron


amazing photos guys!!!
some progress

Moonson,
My wife always says less is more, but man you sure know how to make "more" look really realistic. Great stuff.
Ron
Ron045 posted:Boo Man posted:Ron,
How did you make your cinder block wall? It looks really good. Did you score insulation foam?
I scored what I believe was a roll of Dept 56 brick on the clearance rack at my LHS. It cost me $10. It's rubber. All I did was cut the desired size and apply some lightweight spackle.
Ron
Looks great. I'm making a note of it. Thanks Ron
Moonson posted:
FrankM
Frank, your scenes truly are works of art! I'm amazed at the depths and textures you achieve and your material combinations blend seamlessly to make your diorama's absolutely believable. I really enjoy looking over your work and trying to mimic your style, albeit poorly. Your scenes are really inspirational.
Paul
Ron045 posted:Boo Man posted:Ron,
How did you make your cinder block wall? It looks really good. Did you score insulation foam?
I scored what I believe was a roll of Dept 56 brick on the clearance rack at my LHS. It cost me $10. It's rubber. All I did was cut the desired size and apply some lightweight spackle.
Ron
There is also a cobble stone material that looks more in scale for O (if you are worried about it, not me).
The brick is good for Standard Gauge/gauge 1 Scale?
Both Lemax and Dep. 56 makes it.

Sometimes a large-holed sieve is good to have on hand to "rain down" larger textured ground covers on your glue area. We also keep a small coffee bean grinder on hand to chop up some of the larger chunks of foam. It will never be quite the same so don't plan on using it for coffee again. Lastly, consider the branches of larger pre-made trees (Life-Like et all) cut off for use on the ground. If the color is not quite right, spray them with Krylon Matte Finish or Kamar Varnish and dust them with the flock or ground cover of your choice.
I had used Scenic Express products, Fort Pitt Highrailer modules. I liked Green Adirondack Blend EX897B.

You may want to try a static grass/flock applicator. Make the simulated grass stand.
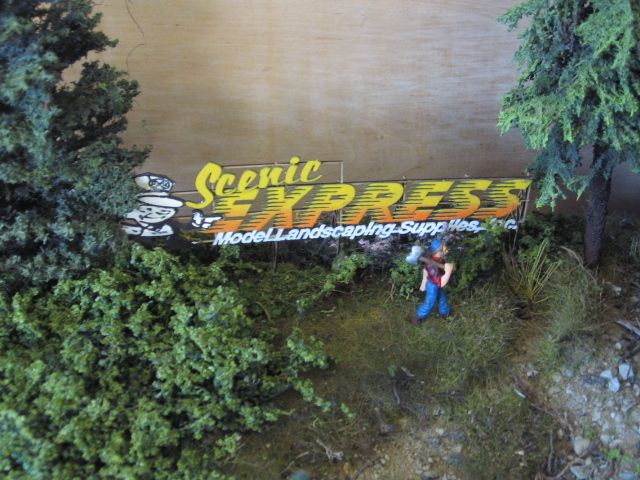
Also review the Scenic Express catalog, a wonderful model railroad build tool, IMO. Available electronic download or they still list a paper catalog. One of our sponsors.
Serows1 posted:Frank, your scenes truly are works of art! I'm amazed at the depths and textures you achieve and your material combinations blend seamlessly to make your diorama's absolutely believable. I really enjoy looking over your work and trying to mimic your style, albeit poorly. Your scenes are really inspirational.
Paul
Hi Paul, I much appreciate every word you posted here. Thank you, very much, for such encouraging feedback, as well as for the "Like" you sent me.
My Thanks, also, to the following voices who sent me "Likes" for the pictures I posted in this thread: joedaddy; John H; pennsynut; trestleking; Tom Densel; SoutghernMike; Trussman; Boo Man. Receiving such outreach is totally enjoyable and motivating.
FrankM
Moonson posted:Serows1 posted:Frank, your scenes truly are works of art! I'm amazed at the depths and textures you achieve and your material combinations blend seamlessly to make your diorama's absolutely believable. I really enjoy looking over your work and trying to mimic your style, albeit poorly. Your scenes are really inspirational.
Paul
Hi Paul, I much appreciate every word you posted here. Thank you, very much, for such encouraging feedback, as well as for the "Like" you sent me.
And my Thanks to Ron 045 for your good natured comment. How about this for another example of "less is more"?
NOT!
My Thanks, also, to the following voices who sent me "Likes" for the pictures I posted in this thread: joedaddy; John H; pennsynut; trestleking; Tom Densel; SoutghernMike; Trussman; Boo Man. Receiving such outreach is totally enjoyable and motivating.
FrankM

I buy cheap paint brushes with the natural bristle. Take apart the brush, soak the bristles in cheap watered down green tempera paint. Then break up the bristles into smaller pieces, drill a hole, insert weed into hole with a few drops of white glue. Add some small rocks and ground foam to add some detail.


Steve
As Steve suggest, I to use disposable brushes for weed. Did a post a couple of years back but unable to find it as it showed step by step detail. If I find it I will re-post it here. Any way here is some info.
Loco is a ETS 3 rail O gauge 0-4-0.
Disposable paint brush was taken apart and used as track side weeds for a display case.


Type "weeds " into the search and you will find a tone of info.![]()
I usually start with fine ground foam is varying colors then a coating of Green Scene Scenery from Scenic Express then I hit the area with static grass using a home made applicator. I follow up with Silflor grass tufts, coarse ground foam, Super Turf by Scenic Express then wild bushes by Creative Accents in varying colors depending on what area or scene I'm working on. Just remember nature is random, a wonderful chaos with an unsaid purpose.
Paul
Scenic Express had done a module for the Fort Pitt Highrailers several years ago. Here is a link to pictures of the module.
I noticed that in Jim's (Scenic Express) handsome diorama, he did not skimp on the trees and foliage. That , to me, is far more interesting for folks to see than a couple of lone, zombie trees shoved in the middle , all on their lonesome, of several scale-acres of plaster landscape. IMhO, if you want effective scenery/landscaping, you have to be willing to spend a buck-or-several.
A good example would be Serows1's' two photos, above. He spent a couple-bucks on scenic ingredients and added to it his talent and growing artistic imagination and skill, and got handsome results.
FrankM
P.S. And, Hey Paul, I really liked your advice, above, that "nature is random, a wonderful chaos with an unsaid purpose." Excellent artistic sense. I'm going to remember that.
Steve24944 posted:I buy cheap paint brushes with the natural bristle. Take apart the brush, soak the bristles in cheap watered down green tempera paint. Then break up the bristles into smaller pieces, drill a hole, insert weed into hole with a few drops of white glue. Add some small rocks and ground foam to add some detail.
Steve
Hey Steve.
I really like the contrast between the rocks and greenery.
QUESTION: What did you paint the rocks to get that color? I think they really captured that "western feel"..
Thanks.
Donald
Moonson posted:Moonson posted:Serows1 posted:Frank, your scenes truly are works of art! I'm amazed at the depths and textures you achieve and your material combinations blend seamlessly to make your diorama's absolutely believable. I really enjoy looking over your work and trying to mimic your style, albeit poorly. Your scenes are really inspirational.
Paul
Hi Paul, I much appreciate every word you posted here. Thank you, very much, for such encouraging feedback, as well as for the "Like" you sent me.
And my Thanks to Ron 045 for your good natured comment. How about this for another example of "less is more"?
My Thanks, also, to the following voices who sent me "Likes" for the pictures I posted in this thread: joedaddy; John H; pennsynut; trestleking; Tom Densel; SoutghernMike; Trussman; Boo Man. Receiving such outreach is totally enjoyable and motivating.
FrankM
All that scene needs is a lady and a LOT of cats!!!!! ![]()
Nice work as always sir!!
Moonson posted:I noticed that in Jim's (Scenic Express) handsome diorama, he did not skimp on the trees and foliage. That , to me, is far more interesting for folks to see than a couple of lone, zombie trees shoved in the middle , all on their lonesome, of several scale-acres of plaster landscape. IMhO, if you want effective scenery/landscaping, you have to be willing to spend a buck-or-several.
A good example would be Serows1's' two photos, above. He spent a couple-bucks on scenic ingredients and added to it his talent and growing artistic imagination and skill, and got handsome results.
FrankM
P.S. And, Hey Paul, I really liked your advice, above, that "nature is random, a wonderful chaos with an unsaid purpose." Excellent artistic sense. I'm going to remember that.
Thank you Frank!!
And, your advise doesn't have to be expensive either. I purchased nearly all of my materials over several years for under the cost of a few box cars. I mix allot of the purchased items with stuff around the house like crushed leaves, sticks, twigs, sand, coffee grounds, saw dust and plain old ground foam to add depth and to stretch them out, it doesn't have to be expensive just experiment and have fun.
Paul
If I could just post a compliment to all who shared their work here, and the OP for starting this. It reminds me of waiting for Sunday mornings when the scenery post would start!
Excellent work all.
3rail 2 posted:Steve24944 posted:I buy cheap paint brushes with the natural bristle. Take apart the brush, soak the bristles in cheap watered down green tempera paint. Then break up the bristles into smaller pieces, drill a hole, insert weed into hole with a few drops of white glue. Add some small rocks and ground foam to add some detail.
Steve
Hey Steve.
I really like the contrast between the rocks and greenery.
QUESTION: What did you paint the rocks to get that color? I think they really captured that "western feel"..
Thanks.
Donald
Donald,
The rocks are rocks, not painted. My scenery starts with layered celotex carved up and painted with brown latex paint. Then brush on white glue + water mix and sprinkle on the red sand I got from a local creek. The rocks are pieces of a sandstone that I break-up and crush to get smaller rocks and glued into place with white glue. Maybe the western look is because I live in western Colorado and my material is found in nature. The ground cover is Woodlands Scenics.
Here is a link to a post I did on my build on this area. https://ogrforum.ogaugerr.com/...17#74073050734170817
Steve


Steve24944 posted:Donald,
The rocks are rocks, not painted. My scenery starts with layered celotex carved up and painted with brown latex paint. Then brush on white glue + water mix and sprinkle on the red sand I got from a local creek. The rocks are pieces of a sandstone that I break-up and crush to get smaller rocks and glued into place with white glue. Maybe the western look is because I live in western Colorado and my material is found in nature. The ground cover is Woodlands Scenics.
Here is a link to a post I did on my build on this area. https://ogrforum.ogaugerr.com/...17#74073050734170817
Steve
Thanks Steve.
Donald
Steve 24944, great job on the coal loader!
Now back to the OP's question. You've gotten lots of good info here. For weeds and around track work you want to go with loose items, commercially available ground foams of various colors and smaller sizes, grass clumps, and foliage like cattails and the like. I've got a couple of packages of lose "grass" I believe from Woodland Scenics. two different colors, about 1-1/2 to 2 inches long that you could glue to the surface in any size bunch or clump and trim to height as needed for the scene. The suggestions about using natural bristle paint brushes is the same idea but probably more economical in the long run. The fake fur mentioned above comes in like 10 or 12 inch squares. The fur can be used for larger areas and trimmed to taste or can even be used to donate strands for clumps like the paint brushes. I've never tried the static grass but pictures of it look great. Green felt teased with a small wire brush, like one to clean suede, is another look that works for lawns and well groomed areas as do the commercially available mats. There's always the "old dye the pencil shavings" route although I doubt anyone does that any more. As for bushes, tumbleweeds and larger clumps of weeds I used to use lichen. I haven't bought any ground cover for sometime and don't know if lichen has been replaced by some other material. Then there is always the craft stores, Michaels, AC Moore, Hobby Lobby, a walk around those stores may present many different materials for use as round covers.
Access to this requires an OGR Forum Supporting Membership


