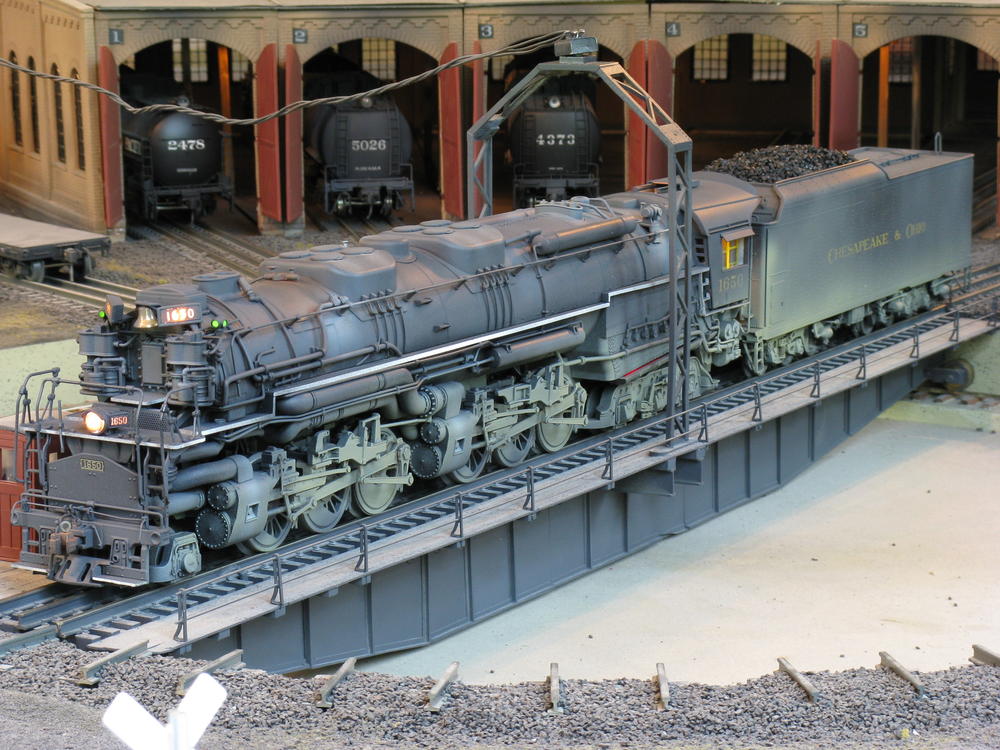
HI All; Well it had to happen; I found an engine I can't seem to remove the boiler from. I need to service the smoke unit. The owner's manual is totally useless, it shows body screws in locations that just plain don't even exist on this engine. Has anyone had one of these apart that can shed any light on the mystery?   Thanks in advance.

Rod


Original Post

Replies sorted oldest to newest

This is interesting to me. I don't have this or ever worked on it. The steam engines I have taken apart, were all straight forward with screws at the cab, and others at the front of the boiler. I think some of the larger articulated can be more complex. Some even have steam pipes that need to be disassembled the correct way.

 I have both the 3rd Rail and the MTH versions and both come apart fairly easily. I always wanted the Lionel version in my collection and just ran out of space and money for anymore engines.

 I bet Alex M has taken this apart!

Looks like the one that Hot Water also had!

See the source image

Last edited by Engineer-Joe

Yes that's the one Joe. Nice weathering job on that one BTW. I imagine Alex M. or Marty F. has had one of these things apart. I have taken a total of 10 machine screws out of the bottom so far. Two from above the front truck, two from the mid-point under the rear power truck steam chests, and no less than 6 from the plate above the rear trailing truck. No joy. I can get a little movement up front and a little at the back, but something in the middle seems to be holding it on. No other screws that I can see. I am amazed by the miriad of separately applied parts on this engine, never fully appreciated that before. Very much like the VL Bigboy for add-on details. Pretty good for a 12 year old pre-Legacy engine.

Rod

C&O Allie posted:

Rod,

I've taken mine apart.  There are 4 screws, 2 under the cab, and two at the back cylinders.  The manual is showing the wrong front screws.  It should be this:

Allegheny 

Thanks Allie for the help. So there are no screws at the front that come out? I have got all the ones you show removed, plus several more, yet it is holding on tight in the center area. is there nothing else to remove there at all? Maybe I just need a bigger crowbar?

Rod

Nope.  Once the 4 screws are out, lift from the back.  The front power wheels have an "L" like pivot that goes into a slot.  Lifting from the back should back it out.  If you look closely, there is something that looks like a washer that is curved up on the edges that swivels on a plate.  The L pivot goes through that washer.

Well I have been wrestling with this thing for about an hour with no joy. It looks like the parting line is just below the running boards, is that correct? If so that would mean that the lower boiler circled in red below, as well as the front and rear power trucks (circled in yellow and aqua) all come off with it?

H-8 #1650

If so, the issue is that the front of the lower boiler assembly seems to separate by about 3/8" or so, but the back near the cab and the can motor won't give. Seems like it is jammed on something inside the boiler. Any ideas?? I am beginning to think some wires are pinched in the area of the can motor or something similar.

Rod

Attachments

Images (1)
  • H-8 #1650

Hi Rod 

 I only read your original post so I don’t know if this has been mentioned yet. There’s two front screws hidden under the front articulated truck, they’re under the piping deep in the boiler . Turn the truck one way and you should see it. 

There should only be two rear screws under the cab, also i think the top cab  has to be removed. There might be two screws in the rear truck steam chests . If I remember correctly the top of the boiler should then pull off. 

Alex 

Last edited by Alex M

I worked on one of those not long ago, did a Super-Chuffer upgrade.  I seem to recall there were only four screws, but I may be remembering the wrong locomotive.  You have to remember that after you take the screws out and start to separate it, you have to move the boiler slightly to unhook the front truck from it's spring loaded support hook.  Sometimes the spring and curved washer will shoot out right after that operation.   Also, there are a couple of wires that go over the support in the boiler that have to be unplugged before you totally separate the two pieces.

Ron,

I now seem to remember and can validate when I get home.  Take out the 4 bolts I mentioned above, then turn the engine right side up and lift up the top of the boiler.  If I remember correctly, the boiler separates just under the walk platform along the side of the boiler, so really, this engine has a boiler that is cut across the middle, and when you pull the top off, the smoke unit comes with it.

If this doesn't work, I'll take mine apart tonight and attach pictures.

Allegheny

Attachments

Images (1)
  • Allegheny
Rod Stewart posted:

Thanks Alex. I think I found all the screws you have mentioned, but I have not taken the cab off. Will check it more closely to see how it comes off. 

Rod

Rod,

You don't need to take the Cab off.  From my picture above, the Cab will remain with the top of the boiler when you separate it from the bottom of the boiler.

romiller49 posted:
Rod Stewart posted:I have taken a total of 10 machine screws out of the bottom so far. 

Put them back and start over. If not you’ll have things falling off to never return. There are only 4 screws to take out. The post from Allie shows them. 

Yes, carefully. I don't have the loco, but 10 screws is not the answer.

I have had this same engine apart once and yes, the manual wrongly identifies where the forward pair of body screws are located. But your problem seems to be that  the boiler shell is binding at the back/cab end.

With all the screws you’ve taken out it’s possible that something inside the engine is out of alignment and catching on the shell. I’d see if the screws that are definitely not part of the body mountings will go back in place.

Apart from that, are you sure you have taken out the right pair of screws at the cab end? From memory it was not obvious to me which ones they actually were because at first sight they seemed undersized. But otherwise once I found them the upper boiler assembly separated from the lower part connected to the drive train without any difficulty. 

Someone else has offered to check his own disassembly process against yours if you are still having problems; can’t say fairer than that with this particular model. P.S. The only Lionel steamer I know where you have to take off the cab to get the boiler parts to separate is the AC-12 cab forward.

OK here is where I am at so far:

IMG_1929

Per Allan I have removed two screws at each location marked by a green arrow; total of four screws, two each side. There are also two screws close to engine centerline at the location marked by the red arrow, but removing them did not seem to do anything. I have a hunch that they are for mounting the can motor to the frame, judging from the parts layout on Lionel's site.

Next:

IMG_1930

Again per Allan, in this view I removed two screws at the location marked by the green arrow; one each side of the rear power truck steam chests, as suggested.

Lastly:

IMG_1931

Per Alex M. I removed two screws at the location marked by the green arrow near the front; one each side. With these screws removed the front of the frame lifts from the upper boiler by about 3/8" easily. Not related, but the red arrow looks like a screw is missing from this location, but I have no idea what it might have been; there are threads evident in the hole??

Now when I place the engine on the bench wheels down and try lifting the back of the cab as suggested by several people, it will not lift off the frame. It is stuck fast, and fairly aggressive effort will not budge it.

Anyone got any ideas what I am missing here? I am at a complete loss.  

Rod


Attachments

Images (3)
  • IMG_1929
  • IMG_1930
  • IMG_1931

Ron,

You took out way to many screws.  Put in all but the 4 I showed.  Then turn the engine over and lift off the top of the boiler.  The wheels/motor/TMCC boards will all stay on the chassie and not be removed.  If you still have issues, I will take pictures of mine tonight after I put my daughter to bed.

Photos are helpful to jog my memory; unfortunately my Allegheny is stored away or I'd turn it over and see where the telltale screw removal burring up is located.

Regarding your first photo,  I believe that the pair of screws at the very back of the frame either side of the IR tether are not body shell mounts (although in some Legacy and 3rd Rail steamers there are body screws roughly in that position). The screws you've located with the red arrow are right under where the can motor is and I think you are right about them being there as part of the motor fixings. I'd put all those screws and any others apart from the four that might be body screws back in place to secure what's inside before you next try to get the shell off.

The thing that puzzles me is the screw at the position shown by your middle green arrow. From the photo there is not a second one on the other side but it may just not be visible. That is not the position of the rear body screws as shown in the manual and it might be worth checking whether there is another pair under the trailing truck and near the rearmost driving wheels. I think that the position of these screws was not obvious when I looked for them.

Now the whole thing is like a murder mystery and I need to know the ending! 


C&O Allie posted:

Ron,

You took out way to many screws.  Put in all but the 4 I showed.  Then turn the engine over and lift off the top of the boiler.  The wheels/motor/TMCC boards will all stay on the chassie and not be removed.  If you still have issues, I will take pictures of mine tonight after I put my daughter to bed.

Allan; that would be greatly appreciated if you wouldn't mind. This should be simple but it's behaving like Rubik's cube for some reason.

Rod

Hi Rod,

I was slightly wrong - I got my articulated engines partially mixed up.

Here is how to open it:

Take out the following 4 screws (the manual is wrong on both sets listed):

Front:

Allegheny 01

Back:

Allegheny

The last step on the under side, which I forgot, is you need to pull out the rear grab irons lower connection from the bottom hole insert:

Allegheny 03

Now, just turn the engine onto its wheels and gently lift off the top of the boiler (it separates at the walk platforms).  Careful to not break the solder connection to the handrails (antenna).

That should do it for you.  Let me know if you have questions.  


Attachments

Images (3)
  • Allegheny 03
  • Allegheny 01
  • Allegheny
Last edited by C&O Allan

OK that worked perfectly. Actually someone had glued the grabrails into the lower brackets, so I just gently unscrewed the brackets from their mounting pads, no problem. Then there are actually 4 separate wiring harnesses to unplug; two at the rear on either side of the can motor, and two up front on either side of the smoke unit. Pretty straightforward though. I must confess I have never had to remove grabrails before to open up an engine; another first! I wonder if any other Lionels have this "feature"? I'll be documenting with pictures exactly how this guy comes apart, because sure as heck if I ever have to dig into it again, I will have forgotten the grabrail trick!  

As nice as this engine is, and it is quite a beautiful piece, someone at Lionel ought to be shot for producing that completely bogus and incomplete drawing showing the screws to remove. Just my nickels worth. Thanks again to all, and especially you Allan.

Rod

Rod Stewart posted:

 I must confess I have never had to remove grabrails before to open up an engine; another first! I wonder if any other Lionels have this "feature"? I'll be documenting with pictures exactly how this guy comes apart, because sure as heck if I ever have to dig into it again, I will have forgotten the grabrail trick!

The Lionel TMCC BB1-rats also have this "feature".  You must pull the grab irons out of the main body shell to separate the shell from the frame.

There are actually lots of locomotives, both steam and diesels, that have railings that have to be pulled out to remove the shell.  After a while, you learn to look for those if the normal screws don't get things moving.

There's also the locomotives that simply have binding when removing the shell, those are a PITA as you're "SURE" you have all the screws and handrails out, but things still don't come apart.

Add Reply

Post

OGR Publishing, Inc., 1310 Eastside Centre Ct, Suite 6, Mountain Home, AR 72653
800-980-OGRR (6477)
www.ogaugerr.com

×
×
×
×
Link copied to your clipboard.
×
×