
This post is for tracking my very first ever O scale building, the Twin Whistle Co's Whistlestop Diner.  The prototype is The Lunch Box, Malden, MA built in 1940 by the Worcester Lunch Car Company.  Posts will likely be intermittent as I have other things that I should be doing at the moment, and I also want to spend some time planning various interior details.

My first step was to xerox the instructions so that I can scribble ideas and measurements on them.  Next, I scanned the signs and "floor" to allow for modifying them in a graphics program if desired.

Here's the kit and the signs.

Tomlinson Run Railroad

Attachments

Images (2)
  • mceclip0
  • mceclip1
Last edited by TomlinsonRunRR
Original Post

Replies sorted oldest to newest

I really like this kit and it looks fairly easy to assemble.  However, one of the things that struck me was that the window proportions are too tall.  Originally, the diner would have had windows with a top sash or transom that had stained glass as shown in the attached photos. 

I thought it would be easy to use a permanent (orange or purple) magic marker on the back side of some clear plastic to simulate the stained glass.  That failed miserably.  So, I'm pondering somehow gluing colored tissue paper to the panes or hauling out my acrylic paint and trying that. 

I don't have time right now to experiment with whether the upper sash will be glued to the inside or outside of the model.  (Lots of these diners have outside window trim, which makes it look like the upper sash is on the outside.)  Unfortunately, the windows on the model were not cut to a consistent size -- some are wider than others, which may add to the challenge.

What the windows should look like. Note the stained glass and added trim:

So, instead of grappling with the windows, I switched to thinking about how I want to design the chrome back splash panel inside the diner ... a much more manageable project.

Tomlinson Run Railroad

Attachments

Images (2)
  • mceclip0
  • mceclip1

But first before beginning any project, it's important to have the right tools.  And in this case, it was an inspiring Dream Diner mug and some caffeine.  As Chef Chuck Wagon demonstrates, the added benefit to having one's caffeine served via hot chocolate, is that once you clean off the extra powder from the packet, there's a nice dull silver grey lining on the inside.  Imagine the possibilities!

Now about that chrome backbar, I found some interior photos of the actual diner on the web and started to sketch plans for setting up a kitchen in the rear of the building. Previously, I had been collecting silver or chrome-like materials with the idea of trying some of them as car mirrors.  I had previously painted some mirrors with silver paint, which don't look so great. 

Brewer's Yeast cans have a quilted-pattern on their foil liner.  It reminds me of canteen trucks, which are a modern equivalent of the original wagon-based diners of the turn-of-the-last-century.  Had I owned an appropriate O scale truck body, I wanted to try and create a canteen truck out of these tops. 

But, now I'll be using a section of the quilted foil as the chrome back bar behind the stove.  I just ordered a "Viking" stove and a 50s-era refrigerator from youngatheartminiatures.com/shop/, along with some other accessories.  Unfortunately, I'll have to wait a couple of weeks to get them to learn their measurements.  Those will dictate how elaborate the back bar will be.  Meanwhile, I experimented with ideas to cover the windows shown on the right in the photo above. The backbar will cover them on the inside, but I want something visually interesting to cover the windows when seen from the outside.  Ideas so far include a boarded up left window, some dirty chrome for the middle window, and a clear window on the right which would look in on the interior and the back of the refrigerator (depending, of course, on its size).

Given the restaurant application, it was funny how many silver materials came from food items.  The foil example on the left, which Chef is standing in front of, is from a Brewer's Yeast can. The one in the middle is a nice dull grey that came from a Jiff Peanut Butter lid liner.  The smaller one on the right has a bit more shine to it (more obvious in the photo below).  It was the safety liner for grapefruit juice. 

Here you can get a better sense of the contrasting silver/chrome examples.  I may use the middle one to cover the windows in the diner end piece shown above.  The quilted section will cover the windows on the inside and I am planning on having a range hood that will follow the curve of the roof.  Stay tuned ... as I said, it will take a while for this project to unfold ...

Tomlinson Run Railroad

Attachments

Images (6)
  • mceclip0
  • mceclip1
  • mceclip2
  • mceclip3
  • mceclip4
  • mceclip5
Last edited by TomlinsonRunRR

Ah, one final thing: The roof supplied with the kit is curved, which is fine.  But the corners on the ends have been beveled, which is incorrect.  Today I bought an X-Acto Medium Saw Blade. It's 4.5" long, 1" deep, 40-teeth to the inch, and .010" thick.  It seemed like a handy thing to have.  I'm wondering whether I can use it gently on the curved roof to get rid of the beveled ends without snapping the wood.  If this is abject foolishness, feel free to warn me!  Cutting off the ends will shorten the overhang but it should still be acceptable, if successful that is.  Thoughts? Ideas?

Tomlinson Run Railroad

Attachments

Images (1)
  • mceclip1
Last edited by TomlinsonRunRR

Suggestions on the colored transoms....

Large crafts-oriented stores....Michaels, JoAnn's Etc., Hobby Lobby, etc....often have colored transparent gel film in squares about 10" or so, multiple colors.  Laminating/substituting a strip of this in the transom area might help.

Similarly, there are clear paints (Tamiya, Testors, et al make them) in a few transparent colors that can be applied to the inside of the transom film area.  I know for certain (work at LHS) that they make an 'amber' (orange?) in support of the automobile modelers.  An experiment mixing red/blue might also give you a suitable 'purple' for this application....perhaps.

Somewhat surprised that a marker pen of the appropriate color didn't work, though.  That would've been my first attempt, too.

Looking forward to your build!

KD

KD,

The transparent gel film sounds like a great idea.  The film might offer the kind of control needed to shape the curves.  I think there's a JoAnn's in the next town.  But today I have to work on school stuff. 

The art supply store where got the saw blade had various types of clear inks in the caligraphy section.  I was afraid they wouldn't spread on the plastic properly, but you are giving me an idea that might work for hinting at the lead in the stained glass.  If I can dig out my old drafting pen set that is ...

I should also note that the marker experiments were done with clear throw-away plastics like those found on placards for batteries, sushi container tops, and anything else encapsulated in clear plastic that I've bought and saved recently.  So it's not the highest grade but it's plastic that I've used successfully for windows on my N scale rolling stock.  The markers were Berol Prisma art colors and they were too faint.  I just tried a purple Sharpie with better success. It's a bit dark but does simulate the varigated colors in the real photos I included above.

Thanks for the ideas amd interest,

Tomlinson Run Railroad

Last edited by TomlinsonRunRR

Pennsylover, cellophane is an idea as well, although I wonder if it will add extra shean?  The windows will sandwich plastic, cellophane, and then plastic again. Next weekend, I'll be visiting my mother where I know I can get some red and green samples to try.

The chef figure is indeed an Arttista.  He's the chef/RR chef figure #1474.  I've noted elsewhere on the forum that I'd like to get extra chef figures and file the spatula down to a knife shape on one of them, and maybe try for a spoon on the other.  I'm sure Chef would enjoy putting in his usual long hours at your Plasticville Diner. 

Tomlinson Run Railroad

Today was devoted to school work.  I just sent a rather lengthy chapter introduction off to my dissertation supervisor.  Yeah! 

So, here are some odds and ends, which is all that I had time for.  Yesterday I applied Rust-oleum flat gray primer to some Model Power unpainted animals, No. 6171. The box contains 36 assorted O scale pieces at a bargain price.  The details are great and there's a wide variety of poses and sizes for most species.  These are animals that Chef Wagon will either use to produce milk and cheese or will be "guests" at his PRR dining car table or the new track side diner:

Today's bright sun showed up some little plastic nubs that I could have filed off a bit better but these are great animals.  On the right are the milk producers, on the left are the meat producers.  Don't be alarmed by the horse.  It will be set out to graze behind the completed diner, which in turn will give rise to rumors (unfounded) about Chef's mystery meat blue plate specials.  Once painted, the horse may sport a "sandwich" sign horse blanket advertising the diner.  Sort of a new twist on roaming advertising.  If not, I've found a security envelope pattern that will make a great all-around horse blanket.

Yesterday evening, it was fun looking a photographs of the different animals to plan my painting strategy for each figure.  Missing from this shot are the two sheep included in the assortment.  They have long tails and thus, Chef tells me, are wool producers, not food or milk producers.  The hand cart is a Bar Mills pewter casting. Filing off the flashing reminded me of my three college years as a jewelry major before switching to something even less practical.  I'm glad that I kept my mini-files and other tools; they certainly have come in handy on the Tomlinson Run Railroad.

Unfortunately, stores were closed today (Easter), so I couldn't get the Crazy Glue that the diner kit requires.  I did, however, check to see that my plastic cement purchased who-knows-when was still viable.  Luckily it is, but had it not been, I found a new trash can for behind Chef's diner:

Tomlinson Run Railroad

Attachments

Images (2)
  • mceclip0
  • mceclip1
Last edited by TomlinsonRunRR

I'm very pleased with the Alvin self-healing cutting mat that I bought yesterday.  Here, I'm using it to try out the X-Acto saw that I also picked up.  After a few test cuts, I think the saw just may work after all to remove the beveled ends of the diner model roof (shown in a prior post).

As alluded to yesterday, I could write an entire post about food-related items like those jar and canister lids that can be used for modeling.  In the photo above alone are a popsicle stick, a drink stirrer, and some really great gelato spoons.   The latter may be maple or something. I cut off the bowl of one spoon (see pencil marks). After I file the edges of the bowl down to the pencil line, I will experiment with painting an egg on it or something catchy as a visual advertisement for the diner.  If successful, the curved shape will add a sculpted effect to either the side of the diner, the roof sign, or a roadside sign.  Heck, I've got enough of them for a sequence of Burma Shave signs leading up to the diner.

Today I also picked up an odd red plastic cross-shaped drink stirrer at Dunkin' Donuts.  It may be possible to adapt a short length of it into a "metal" corner upright to support a 90-degree angle "glass" sneeze guard.  I want to create a sneeze guard on a counter top to protect Chef's pies from the sniffling riff-raff.  That investigation will have to wait until I can see how much space will actually be available in the diner's interior.  And that depends on the kitchen accessories that are on order from California.  Although, I could just experiment for the fun of it ...

Tomlinson Run Railroad


Attachments

Images (3)
  • mceclip0
  • mceclip1
  • mceclip2

OK, last post of the night, I promise.  I know that there have been some serious discussions about creating scale Venetian blinds and I followed with great interest MaxSouthOz's efforts at Port Elderly.  The following photo doesn't do it justice, but a certain telephone company has a great lined envelope interior.  While a bit too wide for scale, the lines look great as a suggestion for blinds or a general window treatment.  The lines are actually a nice strong black and look well positioned horizontally as well as vertically.  Heck, after buying all those craft and art supplies yesterday, free stuff is free stuff:

In thinking some more about how to create the stained glass, I found some more photographs that I had taken of Worcester Lunch Car Company diners.  The Mt. Pisgah Diner is in Winchester, NH; the Miss Bellows Falls is in Vermont.  Notice how both have a more angular style of stained glass than the pictures that I posted previously.  I suspect this style is chronologically later than the model's prototype but they look easier to create. Notice also the roof length on both buildings.  It confirms that cutting off the beveled roof ends won't sacrifice much overhang, assuming that the roof survives the "surgery":

Tomlinson Run Railroad

Attachments

Images (5)
  • mceclip0
  • mceclip1
  • mceclip2
  • mceclip3
  • mceclip4

It's late in the day and too dark for photos, but I got some green cellophane when I visited my mother recently.  Sadly, the red was gone.  And, even more sadly, I learned that Jo-Ann's fabrics is gone, so there's no nearby source for gel film.  So, today to move forward an inch, I bought Crazy Glue and a second heavy duty X-Acto knife. But there was no time to work on sash window experiments or spray paint the parts with primer. 

Regardless, I'm rather excited about the sushi roll that I grabbed for lunch.  It was undistinguished tasting and entirely forgettable, but the bottom half of the packaging is a terrific blue-purple transparent plastic.  It's just screaming "Hey you! Yeah, you with the soy sauce. Clean up this green horseradish and try me for simulating the stained glass!"  Due to the ridges, embossed lettering, and slanted corners, I'm not sure that there is enough plastic for all of the windows.  But if the color and thickness work for the stained glass window sections, getting more will be easily and enjoyably solved.

I'll say it again: there's something to be said for augmenting a diner with free food-related modelling supplies.  It's not intentional but there's just so much great wooden (birch) and plastic stuff at hand.  For example, I've been eyeing plastic utensils and Greek yogurt containers. Specifically, I've been analyzing the curves and ridges of their respective handles and bottoms for possible diner counter tops and matching footrests.  The end of the handle of a plastic knife would make a great scale sink if there's room for one.   And, some utensil handles have a texture that could pass for a classic diner "boomerang" pattern -- if you squint just so that is ... I call it "Squint-0-Vision".  Given the vagaries of having a carpet layout, Squint-O-Vision is the only way to go on my railroad.

Sadly, I've heard nary a peep from the mom and pop business in California where I ordered the 1/4" scale stove, refrigerator, coffee pots, and miniature cookware 'way back when. I'm bummin'.

Tomlinson Run Railroad

Last edited by TomlinsonRunRR

Thanks, Max.  Or should I say Sherlock?   Add some grey to that diner window reflection and, by George, you've got it!    

Wish I had time to actually experiment with these ideas but for now I'm just thinking/dreaming and trying to find time around weekend schoolwork.  There's a flaw in my thinking about using that plastic I found today for the stained glass.  It's likely fine as a solid color upper transom pane.  But if I want to suggest the outlines of the actual stained glass shown in my photos, then painting, ink, or fine cutting is still required to avoid adding unwanted thickness. Ah well ... That's were the thinner gel or cellophane would work better.

TRRR

MaxSouthOz posted:

I'm sure that you will work it out. 

Thanks for the encouragement, Max.  Upon awakening I've been kicking around ways of adding the colored plastic on the inside of the model so that the extra "sandwich" layer won't be so evident.  Of course, doing so still adds a third layer of plastic and the resulting refraction problems.  But some diner owners do add full storm windows to protect their antique stained glass.  This begs the question, so popular in my industry these days, "But, will it scale"?   However, for now the day job beckons.

TRRR

After whining about how my delivery of interior details was taking a while to arrive from California, after work yesterday my package from Debbie Young at www.youngatheartminiatures.com arrived.  It was well worth the wait!  I'm thrilled with the scale refrigerator, cook-grade stove, bakeware, dish set, incredibly small toaster, and two-pot industrial coffee machine.  As usual, my camera fails to do it (or anything else) justice.  Please checkout the seller's website for better photos.

Viking Stove and Frigidaire Refrigerator

(Hard to see -- bottom) Bakeware and one set of Fiesta china:

Out of the package this time -- but the photo's not much better!:

On the left is an out-of-focus two pot industrial coffee maker seen on a frontal view.  On the right is an out-of-focus 3-D printed sprue (?) with two clear coffee pots -- one for regular and one for decaf.  Help!  I have no idea how I'll get them off of the matrix without breaking those teeny tiny handles:

To save money, I bought the toaster kit instead of the pre-painted and assembled version.  It's a flea-sized toaster with a thin wire plug that you're supposed to somehow paint and then insert into a hole that's so tiny, I can't see it.  Of course, it might help visually if I took it out of the package :-).  The toaster is so small ("How small is it?") that there's no point in even trying to photograph it.  Whether or not I can "build" it is another story, but hey, I saved about $15 on the kit :-).

More out of focus madness:  Roxy the waitress posing with the two key appliances against the embossed foil that I'm going to use to create the chrome backspash for the stove.  Better pictures to come in the post that follows - I PROMISE!

Tomlinson Run Railroad


Attachments

Images (5)
  • mceclip0
  • mceclip1
  • mceclip2
  • mceclip3
  • mceclip4

OK, so the miniature appliances arrived.  Because the seller didn't provide measurements, their arrival was key to moving on to the diner's interior design.  So, last evening, I got started. But, first, a distraction.  I'd been eyeing the thin lip on the bottom of yogurt containers, wondering whether they could be cut and used to suggest a wall-based counter top with a "lip". This kind of window-facing counter was prototypical in early diners used with a set of stools.  The lip or edge around the counter was pure fancy on my part.  It was approaching midnight and I was too lazy to measure 90-degree angles for the sides and finish the job, but you'll get the idea:

To complete the counter, I would have cut across the section with the green line above the writing as shown on the left.  However, after experimenting, I decided to ditch this idea.  The Whistlestop diner kit has a built in wooden shelf, the yogurt container plastic is weak when cut that thinly, and so on.  But it was worth the experiment.  Now, I can stop saving those stupid containers! :-)

Tomlinson Run Railroad

Attachments

Images (1)
  • mceclip0
Last edited by TomlinsonRunRR

Now we get down to business!  Of course it was now about 1:00 AM Friday (or should I say Saturday?)  when these photos were taken.  Here's Chef Chuck Wagon checking out the spacing in what will be his new kitchen built in one end of the diner, just like the prototype in Massachusetts. You can see some of the fine detail on the stove top in this view and the next.

The kit looks simple but the instructions aren't so great.  In one construction drawing, Whistlestop shows the diner sides extending beyond the diner ends.  So if it was a sandwich (yes, I really did write that), the diner sides would be the bread and the diner end with the appliances would be the filling. In another drawing, Whistlestop shows the short ends as the "bread" and the long sides as the filing.  Make sense?  What all this means is this:  The two appliances side-by-side fit best when the sides overlap the ends.  From the instructions, it isn't clear which the manufacturer intended because they show both (argh).  Constructing the wall joins in this manner (with the sides overlapping the ends) will shorten the diner by about one tenth of an inch.  However, because I plan on cutting off the rounded ends of the roof, as shown in a post above, it shouldn't really matter.  My roof line will be a little shorter, but so will the length of the building.

In this next photo, you can see a chip in the lower corner of the resin counter provided with the kit.  I also finally measured the windows last night.  It was a little worse than I feared.  Two, not just one, windows were oversized.  The measurements are seven windows are .57" wide, one is .6" wide, and one is ("Super-size me"), a whopping .725" wide.  Once I figure out how to create stained glass sash windows, we'll have to see how problematic these outsized windows are.  At least the left and right sides share this anomaly.  The second and third windows from the top are the .6" and .725" ones, respectively.  My plan is to place them at the back of the diner where the kitchen is.  That way having them covered up with blinds or something may make visual sense.

Speaking of windows, I also spent some time on the internet last night looking for photos of the backs of refrigerators.  I want the back to show through the window on the left.  In particular, I hope to have some condenser coils visible.  The centre and right windows will be covered by the chrome backbar.

In the photo below, notice also the detailing on the counter front.  It looks like it's trying to simulate tile.  In my next post, we'll see some absolutely awesome ORIGINAL Worcester Lunch Car tile work from the 1930s. 

I keep getting these foolish plastic cards in the mail for some promotion that I have zero interest in; however, I have been saving them.  I don't know whether they will be suitable for gluing and modelling, but here's one that I plan on cutting and adding to the side of the counter to give it a try.  This will 1. Hide the chip in the resin and 2. Provide space for Chef or Roxy the waitress to stand behind and serve up pies or wisecracks.  You can also see that I've added the door's full swing arc to the drawing.  In the prototype, the door opens inward and I don't want to have it banging into some customer trying to enjoy their morning coffee and newspaper:

Coming Up Next!  Real world research!

Tomlinson Run Railroad

Attachments

Images (4)
  • mceclip0
  • mceclip1
  • mceclip2
  • mceclip3
Last edited by TomlinsonRunRR

As I wrote, it was now after 1:00 and I was frustrated because I still didn't know how many diner booths that I would be able to fit into the remainder of my floor plan.  I sketched out where the windows would be but I wasn't sure whether diners typically lined booths up with windows.  Plus, I have no idea what the booth measurements would be.  For this age diner, we're talking wooden booths that have back-to-back seats that are grouped around a table.  There was only one way to solve this problem!  Road trip!

Today it poured rain, so there was no way I could prime the wood and various resin parts.  Besides it made for a perfect excuse to go to a nearby Worcester Lunch Car diner from the same era as the Whistlestop model and do some real world research.  The heavy rain, I reasoned, pretty much ensured that I'd get a booth, too.

Here is the Airport Diner, Shirley, MA.  It is the same diner whose stained glass windows I posted photos of previously.  Sadly, they are gone.  The stainless steel siding isn't original; that siding would have been enamel:

One can't do true field research on an empty stomach, so ...

Now, that's what I'm talking about.  They didn't have any decaf, so painting my new appliances would be out of the question for today.  My hands would be too shaky after a bottomless cup for such fine detail!  In addition to my meal (a work in progress), notice that the table is actually beautiful striated pink marble!  It rather reminded me of bacon ... umm, bacon (the bacon was really good.):

\

Although I packed my tape measure to measure the table and benches, I left it in the car.  The waitress was very nice but seemed to have a cold.  I didn't feel quite right adding to the hassle of her day by having some rail-diner fan asking permission to measure the table, booth, and windows.  So, I took the width of the marble table in "notebook length" units.  Distracted by food, I forgot to measure the table's length.  No matter. I've decided to eye-ball measurements for my model because my head would probably explode if I tried to do math. 

I love this diner because it has its original "Greek Key" tile flooring.  I don't know if this pattern can be reproduced and successfully reduced or somehow "hinted at" to make a convincing tile floor in my diner model, but it's worth a try:

There are so many wonderful things going on in the photo above.  Notice the large tile on the side of the counter -- somewhat akin to the counter provided in the kit.  Next, there's the fabulous Greek Key tile border, and lastly, one of my favorite diner tile patterns.  I call it the "basket weave".  I will not be trying that.  The border and basic floor pattern shown here is used around the entire circumference of the diner's interior.  That should be easy to try, right?  Also, there is a runner down the middle of the aisle.  Next up is the original ice box (next to the TV), and some more marble:

The corner tile work on the floor and the diner and counter sides, and the runner:

Here are some ideas for things to put on the walls of my model and how to paint the miniature coffee maker that I bought:

I had been struggling with what colors to paint the inside and outside of the diner.  The prototype is currently red and white, which isn't era appropriate and is frankly kind of boring.  Going back to the "source" provided the perfect solutions.  My interior will be a light tan with pink? granite (if I can pull it off), and small touches of black and white for the window trim.  See below.

Past this fellow's head is one of the remaining stained glass windows.  Funny, this one is purple, but the ones that used to be on the outside windows were orange.  This color is close to the purple-bluish plastic sushi container that I've set aside to experiment with.

UPDATE: I must have conflated two different diners.  The windows have always been purple.

This outside shot shows the funky large lights on the ceiling.  Look closely at the upper-left corner. There are three of these lights in a line down the center:

Is that a bullet hole in the window?!?  I will not be modelling that!

Here are the windows with the storm windows removed. The storm windows were shown in my earlier post from years' ago.  It looks like an easier window project now without that added layer (taken through my windshield):

Lastly, here are some sketches -- I don't know whether they will make any sense to any of you or if they will be readable.  I tried to capture the profile of the carving in the double booths.  There's only a suggestion of an ogee (?) shape to their profile and feet, so I'll have to ponder if I will try and recreate that or do something really basic:

In a different color, could this envelope interior pass for the pink marble counter tops? Could it pass for (umm) bacon?

I hope that you enjoyed the prototype tour.  After today's visit, I've got lots of inspiration to work with.  Now, if only I can find the time!

Tomlinson Run Railroad

Attachments

Images (16)
  • mceclip0
  • mceclip1
  • mceclip2
  • mceclip3
  • mceclip4
  • mceclip5
  • mceclip6
  • mceclip7
  • mceclip8
  • mceclip9
  • mceclip10
  • mceclip11
  • mceclip12
  • mceclip13
  • mceclip14
  • mceclip15
Last edited by TomlinsonRunRR

TRRR,

Having built two Whistle-Stop Diner kits, I am following your posts with great interest. Just one comment. The window construction on my two (much older) kits is very different from yours. On my kits, the window openings were not pre-cut, so I did not encounter a problem with unequal window sizes. Rather, the openings were constructed with individual window posts applied to the side sheets. I do have photos if you're interested. It would be possible to do your windows in the same way. Keep going...

MELGAR

MELGAR,

Thanks so much for your interest and ongoing support.  Your diner model post helped encourage me to move forward.  In fact, I've consulted the photo that you provided that shows the interior of your Moe's Diner several times.  I did notice that your windows were uniform and I saw the wood side posts.  But, I didn't realize that they had to be cut out in the earlier kits - although you did mention a certain amount of scratch building.

If you already have some photos on hand of your windows and their construction, I would welcome the posts.  But don't go to any extra trouble.  I suspect that, with enough thinking and experimenting, the solution to creating authentic-looking sash hung windows will come to me.  Some of it is "analysis paralysis" and some of it is that I really have schoolwork that I should do (!).  

My choices are to add the overlapping upper stained glass and lower clear window sashes to the inside (easy) or add them to the outside and add trim.  (The latter would look more prototypical and perhaps add depth to the windows, but it's harder for a first time modeler).

Trying to even out the window widths probably isn't worth the effort.  I'm just going to work with what I have on this model.  Windows often were changed and resized on prototypes.

One thing that puzzles me about the kit instructions is the placement of the floor.  The instructions describe how to decorate the floor and then say to not put it in yet.  But they never show how to put it in, nor say when to do so.  

It looks like the floor should be suspended about midway on the side walls, obviously just under the door frame.   However, it's not clear how the floor will be attached to the sides.  The bottom of the diner has a "skirt" of sorts on the outside that looks longer than the diner sides but it is structurally weak.  I probably just need to take all the interior pieces and line them up.  They look very different than what is in your model.  And, now that I have a better idea of the interior paint scheme and can move forward, it may be easier to figure out how the floor will be supported.  If it's via gluing it to the bottom edge of the interior wainscoting-like trim, that may be a problem because I don't intend to use the wall trim.

Perhaps I can scan the details sometime if this is unclear and too rambling ...

Thanks again!

Tomlinson Run Railroad

Last edited by TomlinsonRunRR

MELGAR,

You are too kind :-).  Thank-you for the excellent photographs.  This kit has been totally redesigned!  Yours is reminiscent of actual 2x4 construction. The manufacturers have greatly simplified construction.

At this very moment, I'm laying out all the parts and can better see how the floor might work. But, it certainly looks like it will need to sit upon some little bits of scrap wood to ensure it stays in place.  I will try to photograph as I go along.

Thanks again for the very clear and informative photos.

Tomlinson Run Railroad

Don,

How very good of you. I just sent you an email reply but that was before I saw that you had included this great photo in your post.  (It wasn't in the forum's automatic email and I somehow missed your reference; it was a long day.)

Wow!  What a fantastic scene you have created!  It's got a real mood and "real life" about it: The street and sidewalk slush and other details and the headlights in the distance make the scene.  And those red gel windows set in full length black frames with the curtains and backlighting are just perfect!  In fact, I think that I played at that bar back in my old band days  .  You have great imagination, great observation, and the skill to carry it through.

Thanks again; this is truly inspiring, Don.

Tomlinson Run Railroad

Nothing says "commitment" like primer!  (No, not even a wedding ring or vows, folks. Primer :-)  Yes, I took the plunge and started spray painting the basswood parts in the kit.  The wood was so nice to look at plain and untouched by my novice hands, but it wasn't getting the model built.  Because Don/Scale Rail is mailing me some gel samples, I wanted to have some design questions and issues resolved and out of the way so that I can focus on experimenting with the windows when the gels arrive.  So, I took the plunge.  It's kinda scary, commitment, is.

I had a little unexpected time that allowed me some time for thinking and a little doing. Unfortunately, I didn't prime all of the parts that I ultimately need to, but it was a good start. The walls, floor, and roof are at the top:

 After I primed the food animals shown in a prior post, I spent two hours with nail polish remover getting the paint off of myself.  Doh! This time, I used a wire coat hanger to hold aloft the parts with holes (windows) to be hung (swung) from while I spray painted.  I also wore plastic gloves.  My wire rig was kinda comical as there wasn't much control, but it worked.  In fact, having the parts swinging in the breeze off the end of the wire ensured that I got the light coat that I was aiming for.  Literally.  While drying, it looked like the edge of the long sides warped a bit at the thin tops where the windows are cut out -- and yes, I did flip them over to ensure even drying.  But upon further drying overnight per the instructions, they seem OK. 

Previously, I manged to file two of the four pewter stools before hand cramp set in.  The stools are at the right center in the photo above, and below them are two hand carts that also needed filing before priming.  Two sheep, the two roof vents, and the resin diner counter round out the photo.  I wasn't happy with the nubs of flashing that still remained on the stool tops and realized that my jeweler's files weren't going to cut it.  This encouraged me to pull out my Dremel tool and instructions to see what I had and to learn how to use it to save time with the two remaining stools.  To date, I've only used the Dremel tool for removing excess metal that prevented RR track sections from connecting properly.  It seemed like organizing my tools before I dive into this model will pay off in the future.  So, I did just that -- in a big way:

Fortunately, I have the right accessories to file and polish, and thus improve the look of the tops of the stools. They will have black seats, silver sides, and white bases like the stools in the diner I recently visited.  Next my files were a rusted mess from years in the basement, so they got the WD-40 and steel wool treatment (before photo):

They're still a rusty mess, but less so.  I find that for O scale modelling, I most often turn to my size 2 triangular files.  Because of their shape, triangular files are very strong and because they're tapered, they can fit almost anywhere.  They are also good for rounding off flashing on, say, Bar Mills handcart tires.  If you can imagine it, they maneuver well over round surfaces in ways that the other file shapes don't.  My next go-to file is a size 3 tapered flat file with a stiff spine on the back.  Like the triangular files, it's also great for cleaning up the slats on handcarts.  Gone are my college days of making truly awful silver jewelry but I'm glad I kept the tools.

From my Dremel tool and files, I moved on to reviewing the paints that I had on hand.  To see whether I was missing any important colors or finishes, I wrote down where in the spectrum the colors I had sat; whether they were tube acrylics or jars of latex; matte or gloss finish; and then I spent some quality time with a color wheel.  It looks like I have all that I need for painting this model -- thanks in part to a generous holiday present of artist paints from my company some years' ago.  A future step is to create paint swatches on Fudgcicle sticks to have on hand for planning future painting efforts, without having to haul the paints out.  I like making color samples on wood and have been doing it for years with stains (on tongue depressors :-).  And, in keeping with this project, Fudgcicle sticks are free, food-related, and seem to be in unlimited supply in my house .

Lastly, I have on hand some very fine sable brushes.  These will be needed for detailing the resin refrigerator, stove, coffee maker, dishes, and teeny tiny toaster.  I hope to paint some of these this weekend for a certain "team track" event.  However, I remembered that small brushes were rarely standardized across manufacturers.  One company's size "2" would be larger or smaller than another.  So, I laid my fine detail brushes out by thickness and bristle length.  Then I numbered them with a paper sticker from 1 (longest and thickest) to 7 (shortest and thinnest).  This way I won't have to root around in my paint box guessing which No. 2 is actually the right size for the job; I can just look at my sticker number and grab the right one.  

Before I actually do the fine detailing on the appliances, I tried using the different brushes on each detail that I will color, but without any paint.  I am glad that I did.  For example, the brush that looked best suited for a particular space on the bottom of the refrigerator actually split the bristles in a way that would have made a mess of the model had paint been on it.  So, using dry brushes, I figured out what numbered brush would work best for each feature and wrote it down for when I do the painting.   It seems compulsive but I think it will save future annoyment, disappointment, and reduce the risk of ruining these really nice accessories.

Tomlinson Run Railroad

Attachments

Images (3)
  • mceclip0
  • mceclip1
  • mceclip2
Last edited by TomlinsonRunRR

Interlude ... while I was spray painting, Chef Chuck Wagon was off dreaming about provisioning his diner.  To that end, he ordered an American Heritage Charles Chips delivery truck. Some of you of "a certain age" from Pennsylvania or other parts of the U.S. East Coast may remember Charles Chips deliveries.  Yummy potato chips, pretzels, or cookies made in Lancaster, PA would be delivered to your door in these really nifty large tins:

As a kid, whenever my family would visit our great aunts near Harrisburg, PA, we'd look forward to the Charles Chips delivery.  And, the chips were even better than waiting for the delivery.  Apparently, Chef has some fond memories as well.  He's ready ("primed?") to unload a tin or two:

Uh-oh!  Someone should have warned Chef that when you "order a Charles Chips truck" you aren't actually ordering a truck load of Charles Chips.  Poor Chef is overcome with disappointment:

To revive Chef, the Tomlinson Run Railroad's art department will manufacture the appearance of a truckload of Charles Chips tins.  And since appearances are everything, hopefully, Chef will be satisfied (betcha can't each just one):

But seriously, I found a small (i.e., medium diameter) plastic drinking straw in my collection that is the perfect circumference for creating scale Charles Chips tins.  However, cutting the straw without crushing/splitting/splintering the ends may be problematic.  So for now, I will try and create a miniaturized mock-up of the back of the truck as it would appear when the door is open.  Unfortunately, one of the model's Phillips screws is impossible to remove, so I'll have to fit the cardboard mock-up in through the rear door.  Not ideal but it'll do.  When I get to it that is ...

Tomlinson Run Railroad

P.S. -- You can buy Charles Chips again but Amazon posters complained they don't taste the same.

Attachments

Images (4)
  • mceclip0
  • mceclip1
  • mceclip2
  • mceclip3
Last edited by TomlinsonRunRR
MaxSouthOz posted:

Very entertaining reading for me this Sunday morning, TR. 

What a great thread this is becoming.  I like your systems approach to modeling. 

Thanks, Max. "Entertaining reading" is probably as close as I'll get to my old dream of being a Sunday morning newspaper cartoonist .

And, regarding "systems approach to modeling", is it that obvious that I work with computer programmers?  I do take that as a fine compliment.

I have more to post regarding the final selection of a "flooring", challenges of using the kit's inside and outside trim (or not), color schemes, and more.  However, I am behind with my school work and in the dog house, and therefore must get back to writing.  Speaking of which, I've been too busy to reply but have been following your winch posts at Port Elderly. Nicely done!

Tomlinson Run Railroad

MELGAR posted:

TRRR,

A suggestion for painting very fine details... I often use a Woodland Scenics foam nail or the point of a pin dipped into paint to color a very fine detail. I think it's more precise than a brush.

MELGAR 

MELGAR,

Thanks so much for mentioning the 2" nails or a pin point.  I sometimes use toothpicks (or a pin) for the same reasons of control and precision.  However, I was so focused on the new 0/3 and 0/5 brushes that I bought recently, that I forgot all about it.  Your technique may be exactly what's needed for the detailing on the gas stove burners.

Great suggestion!

Tomlinson Run Railroad

MaxSouthOz posted:

Thanks, TR.

I gleaned from an earlier post that you are a musician, as well.

I've just retired as the double bass player with the Cherry Pickers.

Jam Grass 2 - Copy

Ring any bells?

Max,

That's fabulous!  As they say on Spinal Tap "More Bottom!". I have just spent a very pleasant evening tapping my toes to your band's You Tube videos!  You have a great sound!  I hope that you will keep playing even after your retirement, if that's something that you'd like to do.  Truly wonderful choice of tunes and the audiences loved you!

Coincidentally,  I was a bass player, too -- mostly classic rock and some big band jazz, a few weddings.  It was something of a novelty to be a female electric bass player way back when.  When I moved to the boonies after college, I played Country and Western because that was what "played" out in the wilds of Central Massachusetts.  I also played acoustic mandolin and more recently got  a 5-string electric mandolin.  Mostly folk, country, or jazz.  No bluegrass.

Then, after about twenty-five years of bass player head bobbing in the background of the band, and who knows how much hearing loss standing next to the cymbals, I switched to electric guitar so that I could concentrate on lead vocals and some simple melodic leads.  (Unlike Sting and Paul McCartney, I couldn't play bass and sing well at the same time.  It was one or the other.)  I sort of semi-retired after some injuries, performing mostly low key stuff with friends at my church.  Now, I have zero time to play or sing.  I must say that I really miss performing.  Hopefully, some day I can get back to it. I'm even thinking of picking up the dobro if/when I retire.  Anyway, enough about me!  It's a long winded way to say that I enjoyed listening to your tunes and it brought back fine memories.

Train Mention 

And to keep this thread "on track" for our equally fine moderators, I listen to a local bluegrass-jazz radio station every Tuesday night on my drive home from work.  They play the best TRAIN songs!!  Bluegrass is just overflowing with them!  Who knew there were so many awesome train songs?

Thanks for sharing this fabulous tidbit and another one of your many talents, Max.  Most impressive.

Tomlinson Run Railroad 

Thank you for your kind words, TR.

Sadly I shredded my rotator cuff and two other tendons in my right shoulder and now I can't play for more than a few minutes at a time.  Plus, we were offered some tours and as I have a 30 year start on the other guys, I'm really over being away from home. 

You sound like you are still right into it. 

Here's a shot of us performing at Shottesbrooke Winery, near to home.

I'm singing Chug-a-lug or something.

Shottesbrooke

You can see that the boys are very impressed. 

Attachments

Images (1)
  • Shottesbrooke

Wow.  I'm very sorry to read about the right shoulder, Max. Mine was the left RC, twice, but nothing that bad. Since then, a guitar or mandolin strap is not the greatest thing to have hanging off it.  Hopefully, you aren't limited in your modeling.  Such nice photos (good publicist?), but I can see how the travel would lose its appeal.

Across all New England today we are due for a Mother's Day drencher, so I can't finish the remaining wood priming.  After church, (where I will atone for my wanton yet somehow surprisingly wholesome musician days) I will try and write-up why using the diner model's supplied inside and outside trim forces you to pay special attention to the window detailing.  And, for which in my opinion, they don't provide an adequate solution.  It seems that the challenge of this kit keeps coming back to "window treatments"!  

Perhaps I'll close with a word or two about my attempts at mass producing O scale diner china.  Then it's back to the dissertation chapter for the rainy remainder.

How about a new title for this post: The Tin Whistle Stop Diner?   Stay tuned as I fiddle around some more ...

TRRR

Last edited by TomlinsonRunRR

The gels that Don sent arrived last week.  They are much thinner than I expected and the colors really "pop".  They have great potential, especially due to their thinness, and I look forward to experimenting with them as time allows. (Unfortunately, I have lots of school work to do.  Here are some ponderings from last week when I was home sick and so could goof off guilt free.) 

Before moving forward with the stained glass windows, I must determine whether to add inside and possibly outside trim to the windows.  It seems like I will have to and I think that picking up some bass wood will be the way to go versus painting plastic or cardboard that is cut to size.  That means buying some wood (or snagging some coffee stirrers ).

Here's why I think trim will be needed:

#1 The full diner wall with the windows is 1/16" thick. This version of Whistlestop's model adds a 1/16" thick interior panel that fits just under the windows.  The instructions are faint, hence the faint scan.  Try and enlarge it if possible:

An aside: This extra layer means that the stove and refrigerator in the kitchen at the end without the door won't fit unless I cut the inside trim as indicated with the red line.  I'm OK with that. The kitchen area often has renovations that ruin the diner's original interior.  I could skip adding the wall, but I think that using the inside wood will make it easier to paint simplified simulated tile trim that I am planning to go around the interior walls' edges. Plus, the supplied wood is a bit smoother for painting than the larger windowed wall.  More about those painting plans later.

#2 The model also has an outside sign that goes the full length of the diner side, and the full height, up to the bottom of the windows.  It also is 1/16" thick:

I could just skip the outside sign but if I don't, what all of this translates to is that the 1/16" window frames and their posts are now sandwiched in between 1/16" boards on each side.  I'm afraid they will visually get lost.  Also, the instructions just to say glue the "glass" in above the inside wall.  Well, what's the point of having a nice painted interior wall with some bare plastic pasted above it?  Yuk.  That would defeat the nice interior detailing like the tiled counter and chalk board menu that are included in the kit.  So, it looks like window trim is needed to hide the plastic and to build up the windows to match the width of inside "wall".  Window trim on the outside might be less critical/important but it may still be necessary depending on how I address the stained glass window sashes. And, keep in mind that I haven't a clue what I'm doing .

Here are links to MELGAR's diner post that show how the model has changed from his earlier kit to mine (unless you made some additions of your own, MG) and also a post by Dave C. The latter post shows the outside windows. Here, the outside gap doesn't look so bad, but Dave's used larger corner trim (for example) than the awfully thin 1/32" trim supplied in my kit. Great models, guys!:

https://ogrforum.ogaugerr.com/t...68#72101420630074268

https://ogrforum.ogaugerr.com/t...12#71819767801617512

Here are some interior shots of a diner near me, the Moran Square Diner, Fitchburg, Mass.  (taken from the web via their FB page and RoadsideArch?). They just scream "Yo! Architect! Window trim is required (ya lazy bum).":

The next photo is my own outside pix.  Note how the windows seamlessly blend with the enamel side panels.  No, 1/16" gap there ... well, then again ... maybe there is!  It's 1:1 scale after all! .  In addition to its great preservation and fine food, the nice thing about this diner is that the outside trim looks easier to model than the other example that I posted:

And, just for fun, here's a parting shot -- an "art shot" that I took on the same day.  It's got three different architectural styles captured in a single frame:

Tomlinson Run Railroad

Attachments

Images (6)
  • mceclip0
  • mceclip1
  • mceclip2
  • mceclip3
  • mceclip4
  • mceclip5
Last edited by TomlinsonRunRR

Last night it was really hot, thundering, and not great for sleeping so I started to create some Fudgcicle stick paint "swatches" starting with the Golden Artist Color acrylics my company gave us one holiday.  Because the Fudgcicle stick wood (Linden?) is similar to birch/bass, creating these little paint sticks gave me a real sense of how the paints would spread on the model's wood.  These paints are really, really nice!  They go on smoothly and retain their color when diluted with water.  This AM, I continued this effort and made a paint stick swatch with a Rustoleum's American Accents example that I picked up in the craft section of my hardware store.

What a difference!  The Rustoleum, which is made for craft projects, didn't adhere to the wooden stick as well, which weakened the color.  I was surprised because this latex paint is designed for crafts, usually, I assumed involving wood as the label shows.  I don't know whether the difference is between acrylic vs. latex or if these artist paints are just superior.  They do like to spoil us at work, so I'm banking on the superior part.  I don't have photos yet, so I'll close with a little post from Chef Chuck Wagon.  When you're feeling like you need a little pick-me-up, try Chef's Ginger Hot Chocolate:

0. Preheat some water. For ambiance, use a diner-themed mug. This is from the Littleton, NH diner.

1. Take some fresh ginger and mince up so much of it that you think it's too much. Put it in the mug to steep.

2. Add a packet of good hot chocolate mix. Don't forget to save the packet so that you can use the silver inside lining for a modeling project.

3, Stir and enjoy!  Chef says "It's wicked good" and as you can see he stands by his work:

And, now off to my work!

Tomlinson Run Railroad

Attachments

Images (3)
  • mceclip0
  • mceclip1
  • mceclip2
Last edited by TomlinsonRunRR
MaxSouthOz posted:

Andre, you're right.

It reads like a Carter Brown. 

So what you're saying, Max, is that these posts are either a "crime" or a "mystery".  And, if this model ever gets built, people will be asking, "Who done it?". Right? 

But, honestly, I had to look up Mr. Brown .  I don't get out much, so thank goodness for Wikipedia!

Perhaps we'll end up with a final post along the lines of "Whistlestop Diner:  The Graphic Novel". If Chef Wagon has anything to say about it, it'll be a "cereal". :-)

Thanks, Max.

TRRR


Last edited by TomlinsonRunRR

Max, you had me laughing out loud! :-} 

Well, the weekend is here and that means that it's time to play "Dissertation versus Distractions"!  So to get those distractions out of my system and get some writing done, here are a couple of updates, and then it's "nose to the grindstone" for me ...  Hope you enjoy the pretty colors!

De Colores

Forgoing sleep last night (who needs it? sleep is for sissies), I finished creating the color stick swatches from the acrylic artist and acrylic and latex crafts paints that I have on hand.  Here they are all lined up in a row. "Pretty" impressive, huh?:

The color swatches are grouped so that the centered sticks are the Golden Artist acrylics that I raved about in a previous post.  I am still raving ... (OK, no wisecracks, guys!).  The sticks that extend to the left in the top photo and extend upward in the bottom photo are Model Master acrylics.  The sticks that extend to the right/downward are Rustoleum American Accents (oh, gosh, "American accents", like I have?).

This was a really worthwhile exercise.  I learned a lot, and I now have test colors on wood that I can use without having to haul out the actual paints or make a less useful paper chart.  Two of the Golden Artist paints were extra thick, which is good to know if I use them in the future (the mfr even lists that kind of data on the tubes). Otherwise, with these paints, it was one coat and you are done!  Luscious, vivid colors and with only light brush lines visible (except for the thick red).  Clean-up was a breeze.

I purchased the Model Master acrylics a while ago for an HO-scale house that I (shock, surprise) never finished.  These paints separated out over the years.  All of them were a disgusting runny grey until I remixed them.  Fortunately, they remixed fairly well, with the color being consistent and evenly distributed after stirring.  However, there was some clumping at the bottom of the jars.  As I recall, these paints worked well for the small brick and slate walkway details that I was painting on a Patel plastic house model.   But this exercise is all about how the paints work on wood with a grain that's similar to bass wood, and they were OK.

The American Accents latex paints continued to disappoint me.  As you can see in the 9th sample from the left, coverage was poor on wood.  But the worst thing was that the paint dried too quickly or something -- it was evening three of a heat wave.  So, the paint brush or the paint brushed on the Fudgcicle stick would have a rubbery clump of paint stuck on it that would then get dragged around with each brush stroke.  That was not good.  By the way, the right-most stick is a silver metallic paint.  The photo doesn't do it justice.  It's actually decent if you are careful to prevent the clumping problem.  I've used it to suggest mirrors for scale trucks and autos that had the body color where the mirrors should have been.  Not great but not bad. Lastly, the "just cleans up with soap and water" was misleading.  I was covered in the stuff that wouldn't come off with soap and water, and my counter top still has some tiny specks that was Comet bleach resistant (!).

Now let's see this stuff in action!

Previously, I worked out how I want to paint the tile on the resin counter that was included in the Whistlestop Diner kit.  On two sides there are nicely inscribed lines for the tiles.  In a notebook, I drew a grid that represented the actual number of etched "tiles" on both surfaces. Using the Airport Diner's black, white, and salmon tile as a model (see here), I determined exactly what color each tile would be to end up with a visually balanced pattern.  I hope to actually paint it this weekend, but for now, use your "Squint-O-Vision" to anticipate the finished product:

From top-to-bottom, the front of the counter will have a white row, two rows that create a black and white checkerboard, a middle section that will have two centered crosses created out of the light blue -- with perhaps a Titan Buff center, more white, and then the bottom two rows will be black.

On the short side of the counter, the patterns from the front will wrap around to the side.  But because of the narrow width and thus fewer rows on the side, the traditional tile cross won't fit.  (It can't be centered.)  Instead, there will be a centered square whose opposing quarters will be blue and buff or blue and that darker tan.  Both represent a classic diner color combination.  Usually, it can be hard to find modern materials that match 1930s and 1940s tile colors, but I think that these paints are perfect.  These will be out-of-the-tube colors because the choices are so great. 

The rear will be a light tan suggesting wood. I hope to draw a simulated series of shelves with plates or coffee pots or something on them to glue to the back side.  The top will simulate pink marble with brown lines, so I'll have to do some mixing when the time comes.  And, speaking of time ...

Distractions: 1 Dissertation: 0

(Unless you count the purple 5x7" index card in the photo that has dissertation notes on the other side ... )

Tomlinson Run Railroad

Attachments

Images (4)
  • mceclip0
  • mceclip1
  • mceclip2
  • mceclip3
Last edited by TomlinsonRunRR
MELGAR posted:

TRRR,

You are amazingly systematic. Keep going but don't put off the dissertation work. I know from experience how stressful it is to write one. Model trains and diners are a good diversion...

MELGAR

MELGAR,

Thanks for the encouragement.  It's always nice to hear from someone who's been through the experience.  Congratulations!  (And, in what subject, if I may ask?)  Yes, trains and diners are the perfect diversion. 

Max,

I got a chuckle out of your "weapon of choice" wisecrack and, yes, I have a page written.  In fact, I have three chapters of seven done, and "bits and bobs" here and there of others.  Unfortunately I have to discard one because the thesis topic shifted.  It's all part of payin' the dues, I suppose.

Diner Update:

While taking a typing break, I painted the tile on the kit's resin counter.  To my surprise, the black paint bled when applied on top of the white wash that I placed over the grey primer.  Perhaps the white paint wasn't as dry as it looked?  Regardless, the incised lines didn't hold the paint in place as hoped.  This feature will definitely require two coats, and perhaps I'll need to switch to a toothpick with a filed, angled edge or perhaps a nail.  Having the paint bleed with a super small brush was NOT what I expected. 

I also painted the scale refrigerator white and fortunately it came out well.  I'll add the secondary colors (chrome and grey) and other small details like manufacturers "lettering" tomorrow.  Photos when completed.

Distractions: 1  Dissertation: .75 and counting

Tomlinson Run Railroad

Last edited by TomlinsonRunRR

And one last post for the evening:  A couple of posts back, Chef Chuck Wagon shared his recipe for ginger-flavored hot chocolate.  The mug it was prepared in was from the Littleton Diner in Littleton, New Hampshire.  Here's a photo that I took of that diner some years' ago. (The mansard roof isn't original, but you knew that :-):

The Littleton  Diner was manufactured by the Sterling Company (1940?).  That's the same manufacturer that brought us the "streamliner" diners that looked like moderne-style trains, like this one in Rhode Island (my photo):

I mention the Littleton Diner because if you look at the pinstripe and etc. detailing on the enamel panels in the top photo, you'll see similarities with laser detailing that has been added to the windows in the newer version of this diner kit.  The primer kind of hides it, so look closely:

Although, like paper, the bass wood seems to have a "side" to it, I suppose that if you don't like the laser lines, that you can flip the wall over and use the detailed side as the inside wall -- in fact, that might add a nice interior touch.

As part of my color exploration this weekend, I have decided to make the outside of the diner an old-fashioned green as shown above.  The prototype building, which still exists, is mostly white with red accents.  That's a bit too 1950's for me for the architectural era represented by this model.  Instead, I'm going with traditional muted colors from the 1930s and 1940s -- including the black, white, and salmon tiling in the actual Airport Diner photos referenced previously.

Lastly, here is Roxie, the roller skating waitress, demonstrating the use of a color wheel.  Roxie shows us that by combining equal parts orange and yellow and then adding white to tint it, a nice shade of salmon will result.  Sorry, Roxie, that's salmon as in the color, not the fish.  (Chef says to just stick to burgers and fries for now.) 

If I use the supplied interior "walls" then I will paint them salmon with a band of black tile and maybe some centered black tile crosses. Those will match the motif that I just added (ever so sloppily) to the resin counter.  I want to experiment with using calligraphy pens on scrap wood for creating straight lines for the wall tile without having to resort to masking tape, but that's an experiment for another time -- after I dig out my pens.

Have a great rest of the weekend.

Tomlinson Run Railroad


Attachments

Images (5)
  • mceclip0
  • mceclip1
  • mceclip2
  • mceclip3
  • mceclip4
MaxSouthOz posted:

You did a PhD in Mechanical Engineering, Mel?

Respect, man. 

Yes, very impressive, MELGAR.  I work with two aerospace engineering PhDs, and too many physicists to count -- both amazing backgrounds to have.  Both fields seem to instill a particular way of thinking and responding to the world that translates well for problem solving in software.

TRRR

It Seemed Like a Good Idea at the Time

Tina, the CFO at the Tomlinson Run Railroad, really likes the scale "Fiestaware" from Youngatheartminiatures.com.  While the price is reasonable for the detail and quality, Tina was concerned about the cost of ordering enough to add to the diner model.  Eventually, my plan is to take what's learned in this wood project and translate it to building up the railroad's MTH Madison PRR dining car kitchen and dining room.  That project would include stacks of dishes in the kitchen, as well as place settings.  (The seller offers a quantity discount but the threshold may be higher than is needed.)

As head of engineering, I was tasked with finding an inexpensive solution.   The Fiestaware dinner plates are about 1/4" in diameter.  The salad plates are a bit larger than 1/8".   I happen to have two paper punches: one is 1/8", the other is 1/4" diameter. 

In keeping with the theme of repurposing food-related materials, I started with the bottom of a plastic tofu container as a test material to simulate plates.  I punched a series of 1/8" holes in the plastic.  My idea was to place and glue the plastic with the holes in it over another sheet of a contrasting color.  By centering the 1/4" punch over the 1/8" hole, I can create scale plates with a raised and colored rim.  Either the rim or the center of the plate can be a color, or both.  In these tests, I just simulated a white rim and colored background -- I didn't bother with gluing on a backing sheet.  Perhaps, I should have as that would add thickness.

Here's Tina holding the purse strings, while Roxie is floored by the thought of handling such fancy china while on roller skates.  The fancy unpainted Fiestaware is in the lower right corner:

The two plates in the bottom center give an idea of what I was trying to do. They have white rims and a colored center.  The plates to the left of them were created to give an "impression" (literally and figuratively) of an indent but without the color.  They were created by only applying enough pressure with the 1/8" punch to create an indent in the plastic.  Then the 1/4" punch was used to punch out the plate around the centered indent:

The two paper circles in the upper center in the photo were created with a regular 3-hole punch and are too large.  But, they might pass for a serving platter or charger plate.  Just above Roxie's tray, you can see two holes with red centering lines drawn on them.  Unfortunately, the lengths to the centers of the punches differ, so it is tricky to eye-ball centering the larger punch over the smaller hole. Because of this difference, you can't rely on the body of the punch itself when placed against the edge of the plastic to stop at the right place.  Even after measuring the difference, it is still an imprecise manual process to line the two holes up.  The fact that the punches have clear covers helps.  You can see that I managed to center one out of two.  The foodie-rocker Meatloaf would tell us that "Two outa three ain't bad."  So, hopefully, lining up the top punch will improve with practice.  Although characteristically out-of-focus, you can also see a bit of the (5) solid plates with the indents here:

This experiment wasn't a success but it wasn't a total failure, either.  For example, I tried stacking the plastic punched plates. It will be tricky but possible with glue.  In that scenario, I will only have to create an indent on the top plate in each stack of dishes.  I see stacked dishes like these working better in the dining rail car kitchen than in the diner model, which has even more limited space.

Lastly, an update: This weekend I created a 1.75 x 7" "tile" floor pattern by scanning a security envelope pattern and then sizing it to match the bass wood floor's dimensions.  I will need to reduce the pattern by 6 scale inches or so to experiment with adding a tile border around the four sides.  I still need to detail the refrigerator and I am still trying to improve the painting of the tile counter.  I've experimented with a "tool" that I created for paining individual tiles.  I will post those results when done.  Chef was hungry, so I started to paint a black-headed sheep ... (not to worry, it's just for milk for cheese :-). 

Tomlinson Run Railroad

Attachments

Images (4)
  • mceclip0
  • mceclip1
  • mceclip2
  • mceclip3
Last edited by TomlinsonRunRR

Well, it was a lovely long Memorial Day weekend here in the States. On Saturday, I made preparations so that I could devote all of Monday to working on the diner model and/or its accessories.  First up was a trip to Ace Hardware to buy a Dremel grinding stone #997 -- a small, thin pointy tip.  I had filed down the mold seams on the pewter diner stool castings by hand for two of the four diner stools.  It was tedious and, given my limited time, I figured there was a more efficient way to remove the seams -- like (doh! forehead slap emoji) with my Dremel tool.  In reality, the Dremel tip worked OK on the low speed, but I realized that I had the best control with my jeweler's files.  When I have time, I'll hand file the remaining two stools and then paint them.

While at the hardware store I picked up a twenty compartment box with movable partitions.  I can't resist a partitioned plastic box.  Until I can set up a work space, I'm sure I'll find some use for it.  If not, it can store all the Arttista figures that I have on order for a Team Track Tuesday post extravaganza that I'm planning for July 4th.  (I like the idea of a "paintbox" where the 'paints' are the right figures, cars, or accessories to complete a scene ... yeah, right ...)

I also discovered that Ace sells bass wood.  Because I purchased a resin scale gas stove for my diner's kitchen, I'll have some leftover wood from the kit because it includes a section to make a stove.  However, there won't be enough left over wood to craft tables and booths, and maybe some window trim.  So I picked up a sheet of bass wood.  I spent considerable time looking for the cleanest most delicate grain so that it will match the quality of the wood in the kit.   Unfortunately, I didn't notice that the board had a little warp to it until I got to the car.  Hopefully, it won't matter:

As I said, this was a day for preparations.  When I got home, I dug into a storage closet that was buried behind four mandolins (count 'em) and a couple of guitars.  Well, technically, three mandolins, a mandola, a bass, and a guitar, but who's counting?  What a bonanza lay in store for me afterward: I located my calligraphy pens (which I want to try to use to simulate tile patterns and trim), and also a ton of ex-art major goodies like jewelry tweezers, a paint color mixing map, my technical drafting pens, colored India inks, some circle and curve templates, a huge collection of pastels for weathering touches, and a paint box of 40-45 year old acrylic paints and brushes -- some of which are still usable.  More about those paints later ...

Here is an X-Acto Jr. in the shape of an airplane that I uncovered; it looks like a Beechcraft to me.  This was my father's modeling knife when he was a boy.  The tail is hinged.  It opens to reveal a compartment where you can store double-ended blades:

To wrap up this "preparations" post, I also experimented with some furniture touch-up markers that I have.  It's hard to find liquid nick/touch-up stain these days.  I was forced to try these markers to fix some of the damage my (ex-)cleaning lady, Shiva the Destroyer, caused.  They are OK for touch-ups on chair and table legs but they did not work well on Fudgcicle sticks -- my go-to-standard for excellence. In the photo below, look at how spotty the application is:

Update: What I had in mind here was the mahogany and oak interiors of some diners.  See my prior post of interior photos. Stains or paint would be better.

The orange sample is a Berol Prismacolor Marker that I was inspired to try to see whether the problem was with the marker's delivery system.  Amazingly, the color matches my orange acrylic paint perfectly but the coverage on wood is spotty, just like the wood touch-up markers.  But, because the Berol Prisma colors are "true" colors and so match my paints, using a marker like this one may be a way to pre-weather a detail such as trim found on the outside of the diner.  Who knows? It's worth a try.

Tomlinson Running at the Mouth Railroad

Up Next: Getting down to business ...

Attachments

Images (4)
  • mceclip0
  • mceclip1
  • mceclip2
  • mceclip3
Last edited by TomlinsonRunRR

It was going to rain the next day, so on Saturday I finished priming the remaining wood pieces so they'd be dry in time for painting today.  I decided to use the interior wall supplied with the kit, but knew that it would need to be shortened to accommodate the combined width of the refrigerator and stove. They will be placed side-by-side at the short end of the diner, opposite the door, and fit very snugly without the inside wall.

Removing one inch of the wall length worked well with my intended floor plan.  It helps define the kitchen area, too.  Because the wall height matches the resin counter height, I wanted to use one of the cut-off ends as a side wall for the counter.  This would create an L-shape behind which Chef or Roxie the waitress could stand.  My intention was to scribe lines on the wood that matched the tiles inscribed on the counter, and then paint the wood extension accordingly.  Unfortunately, cutting lines kneeling on the kitchen floor on an overcast day didn't work very well.  In fact, I cut a little too deeply on one score, and will need to redo this section or try and glue it.  Unfortunately, the interior wall is very thin at about 1/32" -- half the thickness of the wood that I bought on Friday.  You can just barely see the vertical score lines where the knife tip is pointing in the photo below. The horizontal lines came next:

The interior wall was to be painted salmon with black "tile" touches.  A nice salmon, according to my color wheel, is made from equal parts of orange and yellow, tinted with white.  To my pleasant surprise, in the box of ancient paints that I dug out on Friday was a pre-mixed tube of  Yellow Orange.  OK, it wasn't "Golden Artist" paint but hey ... it was yellow orange.  After all these decades, the paint in the tube is still liquid and I checked the color against my Color Map chips (see below) to confirm it didn't go "bad".  It's still good to go!  It's the stick that sticks out:

I think the Yellow Orange goes well with the green that I've chosen for the outside of the diner.  So, when lightened with white, the yellow-orange should still blend well. 

And speaking of "going well", Chef Chuck Wagon thought that Mochi, Japanese ice cream, would go well with the traditional Memorial Day hotdogs and buns that I had planned.  Who am I to argue with a 1/48 scale pewter figure?  Besides, I got to eat all the ice cream and, in keeping with our food theme, the container made a perfect paint mixing tray. Unfortunately, the mixing did NOT make anything perfect let alone remotely like "salmon":

Chef thought that he could do better mixing these:

There definitely wasn't enough red in it.  So maybe the next time I'll start with plain orange and add white.  Because my time was limited to this holiday and I wanted to do as much as possible, I went ahead and painted the inside walls with this pseudo-salmon, knowing that it was temporary.  Later, I will spend some quality time with my rediscovered Color Map & Mixing Guide.  (Who knows what I was thinking when I bought it years ago, but maybe it will finally come in handy?)  The map unfolds to reveal actual graduated paint chips in all the available colors, and shows in excruciating detail how to create various shades and hues.  It's got to be better than the paper wheel that "looked so good on paper", but failed in the execution:

Here are the outside and inside walls, and a sample end wall:

I originally thought that I would paint the insides of the windows white but after I started, I decided that they looked better primer grey.  So they look pretty messy at present.  I'll touch up the areas where the white slopped over the sides later. It was so overcast today that the white looked just fine under my working lamp.  However, when I took the pieces into the bathroom and fired up the overhead heat lamp for photographing, the extra light revealed that a second coat is in order!  Yuck!  (The heat lamp also messed with the color of the primer - it's neutral grey, not blue.)

In actuality, most of the white may end up being covered by whatever the window solution ends up being, and the trim will be black.  Side note:  I'd hoped to paint my three Bar Mills hand carts this weekend, too, but only got part-way through painting one.  You can't tell in the top photo, but it's a different shade of green with a nice high gloss that I'll try and tone down after the rest of the detailing is done.  Compared to staring at a computer Monday through Sunday, painting was quite meditative.  I just wish the results had been a bit cleaner.  But there's nothing here that a little touch-up can't fix.

This weekend, I also tried to add a black border to the "tile" floor pattern that I picked out of my various security envelope patterns that I've scanned.  Here it is:

Unfortunately, in my two graphics programs the pattern is huge!  It may be how it was scanned.  I spent a lot of frustrating time trying to understand why it wasn't behaving and/or fix it.  And speaking of unexpected results with scanning ... Up Next:  Experiments with ventilation ...

Tomlinson Run Railroad

Attachments

Images (8)
  • mceclip0
  • mceclip2
  • mceclip3
  • mceclip5
  • mceclip6
  • mceclip7
  • mceclip8
  • mceclip9

Did I mention that some of the colors that I pulled out of my high school and college era paint box had names like Raw Siena (a/k/a "Dirt") and Burnt Siena (a/k/a "Burnt Dirt").  Seriously, you can't make this stuff up!  So the next time you weather your model with dirt from your front or back yard, know that you are working with the best possible ingredients.  You are a Master Modeler.  Just make sure that the tube says "Golden Artist"! :-)

A while back I scanned the door that came with the kit.  It has a louvered section at the bottom for ventilation.  I wanted to scan the door so that I could print it out and then cut out the louvered section. Once shaped, I intended to glue it above the door to model the classic ventilation found on the ends of barrel roof diners.  (See prior photos -- especially some of the interior shots.)  Unfortunately, like the "tile", the scans ended up "super-sized". Here's the color one; I also did one in black and white:

Fortunately, recently I located some foil that had stamped edges in a miniature grille-shape that would be just perfect for this application.  The Whistlestop diner model side walls are unfortunately a bit too narrow, possibly to accommodate the shallow curved roof.  So, in measuring and placing my ventilation grilles, I decided to use the inside width of the door's window as the length for a grille.  (There are two of them above the door and they appear as mirror images.  Sometimes an air conditioning unit is in between them.  Their shape follows the curve of the roof.  Here are my test measurements (yes, I know 5/10ths is 1/5th!):

I cut out some examples free-hand and just positioned them as a test.  The curve can hopefully be improved, then I'll paint the foil with an India ink or similar wash and then glue the "vents" in place.  Unfortunately, Mr. Heatlamp and my flash turned the silver to red in the following photo, but you get the general idea:

Tomlinson Run Railroad

Attachments

Images (3)
  • mceclip0
  • mceclip1
  • mceclip2
Last edited by TomlinsonRunRR

Windows!

One of the reasons for trying to move forward with the painting is that I really want to be able to figure out how to solve the "window problem", and the painting needs to be done first.  Recap:  1. I want to simulate the sash windows that the prototype diner originally had. The upper sash is shorter and is a mixture of stained and plain glass.  2. I want the window "glass" to look finished on the inside of the model, which the model instructions don't take into account.

One challenge when it comes to proportions and possible solutions is that the model windows are too vertical.  They should be more horizontal.  This is especially visible in the end sections.  Additionally, as I've noted previously, the windows are different sizes and the spaces between them also vary -- hindering the addition of any interior window framing. 

However, I did decide that I will not add exterior framing.  It's not necessary.  I wanted to insert the finished windows directly into the openings -- until I noticed that the corners of the windows are rounded.  That will make a tough job even tougher.  So, I'm still thinking about this and want to do some tests with overlapping sheets of plastic, borders, and so on.  The plastic for the windows that came with the kit is about the thickness of two sheets of 20 lbs weight paper.  It's pretty thin.  The gels that Don sent are closer to one sheet in thickness, and I have some purple plastic that is thicker than two sheets. So I have lots of things to experiment with when I next have some time.

Toward that end, today I confirmed measurements and decided how high to make the stained glass portion.  That's an important first step.  It's a bit over a third of the entire window; and it will need to have a silver border around it, too.  So, it's going to be fairly small to work with. PLUS, only part of the upper sash has stained glass:

Here are two of the colored cells -- both in colors that a prototype would have (orange and purple).  In fact, one of my Airport Diner photos (above) shows a purple stained glass end window, and the diner's side windows originally had orange stained glass, now lost.  So, these old diner builders thought nothing of mixing and matching colors that didn't necessarily work together :-).  Again, please ignore the sloppy paint. How embarrassing. This is just to show how much color would appear with my proposed proportions -- except that the color would conform to one of the two patterns in my sketch above:

Tomlinson Run Railroad


Attachments

Images (4)
  • mceclip0
  • mceclip1
  • mceclip3
  • mceclip4
Last edited by TomlinsonRunRR

If you are still with me this far, then you know that Chef Chuck Wagon thought he could do a better job of mixing "salmon" colored paint than I could, but by using ingredients commonly found in his kitchen.  Here's Chef ready to prove his point and use some left over Memorial Day Weekend hot dog buns in the process. Note that, unlike Chef on a bad day, this crab's fake:

I dunno Chef, that doesn't look like salmon to me:

Chef's excuse, it would seem, is that the French's Mustard didn't look so "hot", so he used Grey Poupon instead. (Well, pardon me!)  Apparently, Chef's shopper was too busy buying plastic boxes, Dremel tips, and bass wood to think of celery.  Fortunately, she did manage to get an avocado.  So what color do you get when you mix Hellmann's white, dark mustard yellow, and avacado green?  Nope, it's still not salmon, but I can kinda see (and taste) it coming together:

Viola!  It's another culinary masterpiece from the Chef at the Tomlinson Run Railroad -- The Short Line with the Short Chef!

Tomlinson Run Railroad (P.S. -- It really was tasty!)

Attachments

Images (4)
  • mceclip0
  • mceclip2
  • mceclip3
  • mceclip4
MELGAR posted:

You are very ambitious and detail oriented. Your model will be a contest winner.

MELGAR

Ah, MELGAR!  If only that were true!   I'm just viewing this project and its many details as a learning experience.  I find that if I try to be somewhat ambitious, when I fall short, it's still further along than had I not tried ... at least that's the plan.

As always, thanks for your encouragement.

Tomlinson Run Railroad

TRRR,

Here's a suggestion for doing the windows. Although you may consider it crude, I think it is satisfactory for placement on a model railroad and to expedite completion. For the window glazing on my diner models, I cut one large piece of acetate which covered all the window openings on each long wall. I then glued it to the inside of the wall. I think this looks fine when viewed from the outside. You can then apply framing (of basswood or styrene) on the inside to define the window frames on the interior and cover the inner edges of the glazing if you think it's necessary. It seems to me you could then apply the material to tint the upper part of the individual windows. These 1:48 scale diner models are really quite small. In my experience, sometimes compromises must be made, and it may not always be possible to achieve perfect modeling of the prototype. Perhaps that thinking is why I'm not even a contest entrant...

MELGAR

MaxSouthOz posted:

I think that the primary purpose of the exercise is to eat more delicious stuff. 

Max,

You have grasped the very essence of the TRRR!  

Have I shared my retirement goal of a TV show on our town-supported cable channel?  It would combine running and playing with model trains, cooking something related that might have been served on a dining car or in a diner, and absurd off-beat humor.  

My first show might be something like "Cooking for the Zombie Apocalypse, or tips for eating on the run".  Those little Lionel figures would be perfect as Chef and Roxie's mild-mannered neighbors.  Of course, the recipies for that episode would be legit and focused on easy to prepare meals for busy people, and not what you might think .   I dream of a certain local hobby shop as a sponsor so that the trains and rolling stock featured would change every episode.  Like that would ever happen! But as I said previously, I do like to dream big and see where it leads :-).

TRRR

MelGar,

You are absolutely right, I expect that I will have to compromise somewhere here.  I'm learning that about 1/48 scale a lot it seems.  In fact, your suggestion for the windows is one that I was considering this weekend.  The linden wooden drink stirrers we use at work are thin and just the right width for the interior framing between each window.  However, the top edges of the windows might need to be unframed due to lack of space/skill. With the kit's "inside wall" now being added, I'm not sure of the clearance for the bottom sill and need to remeasure.  The vertical trim boards alone may be enough. 

A similar but more ambitious thought was to use the bass wood I just bought and duplicate the window holes and posts in a single sheet.  Then place that cutout on top of the sheet of plastic to hold the plastic and suggest framing.

However, without laser cutting, I'd have to get fine blades for my jeweler's saw and figure out a work surface for doing fine cutting.  And then there's the challnge of measuring the unevenly sized windows.  Like you, I also considered plastic or even cardboard framing.  That may be a place to start, say, with clear plastic  to trace the window variances, cut out the centers, paint, and glue.

In either of these scenario, it would be easy to add the tinted smaller window, as you said.

I hope that someday my modeling and painting skills can approach yours!   Please do keep the tips and thoughts coming as they arise.

Tomlinson Run Railroad

Steam Railroading posted:

For your stained glass problem.

I would suggest you use a drawing program on your computer. Draw them out and then have them printed on transparency material at FedEx office (they used to be Kinkos) or some place like that. 


Steam Railroading,

Actually, I thought the stained glass would be the easy part but now I'm not so sure.  My plan was to cut out the shapes and add the leading via a thin brush and silver paint.  The raised paint for the leading, if it works, would add visual texture. At one point I considered thin 35 mm slide tape for simulating edging.  But it likely won't work at this scale. 

However, your suggestion of drawing the features would certainly solve the problem of the stained glass, the leading, AND the aluminum framing.  And you can't beat the precision that a drawing program affords.  I will  give this some serious thought!  Thanks!

Your suggestion makes me wonder whether there might be a way to use scanning/xeroxing and printing to generate a template for cutting a single piece for the inside trim.

Thanks for getting the wheels turning!

Tomlinson Run Railroad

Last edited by TomlinsonRunRR

MELGAR,

Thanks for the mention of other available bass wood thicknesses.  The hardware store had only one.

Special thanks for pointing me to the recent post of a completed kit!  What a great job the builder did did.  And, the lighting adds so much.  I figured I'd consider some illumination after I complete the model, but it shows the possibilities and value of lighting.  It's also interesting that the builder stuck to the standard paint scheme but added such variety to the interior.  It shows that the space can be utilized to great effect.

No doubt you noticed that the window plastic was just glued in per the kit instructions and your suggestion.  The great close-up photos provided lots to look at with that regard.

Thanks again.  I printed that post out for future reference, including some of the miniature accessories.

I would have completely missed that post otherwise.

Tomlinson Run Railroad

Avanti posted:
TomlinsonRunRR posted:


Wow! A Digital Equipment Corp. ruler.

Used to consult for them a million years ago. I still have a nice collection of DEC coffee mugs and other SWAG.

Ha, Pete!  I figured that somebody on this forum would get a kick out of that ruler.  It's a hefty brass one that's good for scoring line, although it's awfully short.  I too was a consultant and then an employee, perhaps during the same million years ago as you?? :-).  

I never got any mugs, but they apparently were popular "swag".  I have my ruler (I worked on that product), a five-year anniversary Cross pen, and a DFO3 modem that actually works with an Amiga 1000 computer.  

Digital had the BEST online forums and user groups 'way before the internet.  You've now got me wondering whether there were any forums for model trains/railfans?  It was a great company with great people. Glad that you had a chance to be a part of it, although consulting can be hard.

Tomlinson Run Railroad

Last edited by TomlinsonRunRR

I've been working on some supervisor changes at school this month and haven't had much time for my diner model.  But I have had time to work on some of the accessories.  I desperately need a new camera but I also need a new phone, so I'm holding off on the camera. Who knows, the phone may be good enough.  Until then, please bear with me; the photo quality is poor. Be sure to use your "Squint-O-Vision" liberally!  Some photos are borrowed from a recent Team Track Tuesday post.

Here's the resin counter that came with the kit.  It is almost complete and took forever to do.  To paint the individual tiles as cleanly as possible, I created a painting tool by cutting a 2-mm wide tip out of a wooden coffee stirrer.  I beveled the tip about 45 degrees.  The tip fit the tiles perfectly but using it left streaks in the paint.  The wood was too rigid or something.  Likewise, for this particular task, nail tips and toothpicks weren't as effective as I had hoped.  So, I returned to small paint brushes.  The model took several coats to get decent white coverage over the grey primer.  Also, I had to redo the tiles several times to clean up paint that went over the lines.  I intentionally left some white showing on the bottom 2-rows of black tiles to indicate the grout.  I dunno, it was a judgment call:

The checkerboard tiles look uneven in these photos.  I think that's because of the unevenness of the model itself. They look OK in the wild.  On the right side of the counter is a four-tile embellishment that is prototypical. The top two tiles are light blue and buff, respectively, and the order is reversed on the bottom tiles.  This creates a sort of "diapered" effect.  As I wrote earlier, it was a way to get a 2-tile centered design in this narrow space because the 3-tile crosses couldn't be centered. The blue and buff colors may not seem to go with the black and white, but such mixing was prototypical.  The same buff color is used inside the black crosses to tie the tile designs together.

Yet to do: The pink "marble" top needs to be darkened with some purple and some brown striations to simulate the original marble in the photographs that I took of the Airport Diner, Shirley, MA (see posts above).  I also hope to create some sort of image for the back of the counter that will look like shelves with dishes stored in them.  It may not be visible once installed in the diner, in which case, I might just skip it.

Here's the refrigerator, which Chef calls his "Frigid Dare":

I tried to add a bit of grey to the door seals but it didn't work.  So, I left them au naturel and rely on shadow to create the effect.  I may draw some condensers/coils for the back of the refrigerator if it will be visible from one of the rear windows.  In this photograph you can also see two of the three hand carts that I painted in various mixtures of glossy green and red.  They could use some weathering. 

In the truck in this photo, sitting on top of the unpainted stove, is the itty bitty toaster:

I bought the unpainted toaster kit (considerably cheaper), which has a thin copper wire that you are supposed to glue on the side for the electrical plug.  I painted the "cord" alternating colors and left some copper visible to simulate an old cloth weave cord cover. The toaster cords that I remember often had a bit of copper thread. But I rather like the toaster without the cord.  I held the toaster in a long large pair of tweezers so that I could apply silver paint to the sides and black to the bottom, slots on the top, and the handle.  The tweezers' tips left blank spots in the areas that they had covered.  I then painted those areas in a simple grey color that I hand-mixed.  Using grey here and there, instead of making the whole toaster silver, gave it a more realistic "reflective" look.  At least I think so, but until I get a better camera, you'll just have to pretend that you can see it, too.

Out-of-focus accessories outdoors with flash, note the writing on the fridge emblem:

The stove will take some advance planning before painting as it has very complex surfaces.  The Suffolk sheep is from a large package of unpainted animals that I got -- some of which I showed in grey primer in one of my earliest posts.  I tried to follow good painting techniques -- really I did:  I started with a dark brown on the under body  and in areas that would be in shadow, added buff to the underside and etc. to indicate dirty wool and more shadows, then used white for highlights.  There are also brown highlights that you can't see for the eyes, and inside the ears, and on some hooves.  The head and legs are black.  I was disappointed with how it came out.  I tried a buff or white wash (I forget which) to tie the colors together but without success.  However, now I think that I may need to extend the white highlights down the sides further to get a more realistic look.  Then wash it again to smooth the transitions.  That might help.  (Note that the flash is likely accentuating the contrast more as well.):

Thanks for looking!

Tomlinson Run Railroad

Attachments

Images (8)
  • mceclip0
  • mceclip1
  • mceclip2
  • mceclip3
  • mceclip4
  • mceclip5
  • mceclip6
  • mceclip7
Last edited by TomlinsonRunRR

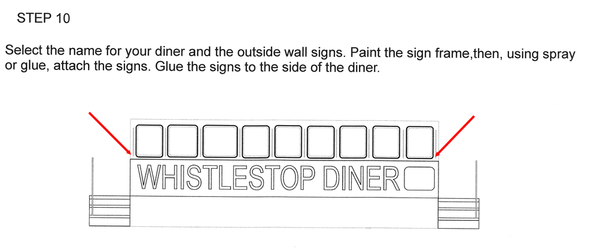
Today's Diner Project: Mustard and Catsup squeeze bottles; Beer bottles and a cup of Chili from Toothpicks

Disclaimer: I'm really not looking for food items to use in my diner model.  Honest. They just find me!

We don't have just any old toothpicks where I work.  We have "Tea Tree Therapy MINT Toothpicks":

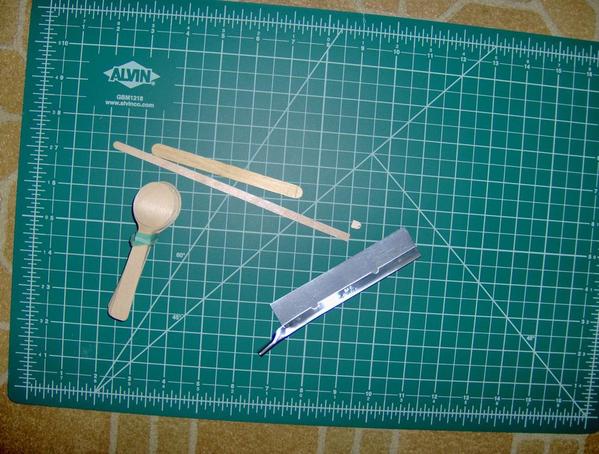
These birchwood toothpicks are "infused with [Australian -- take note Max!] TEA TREE OIL, mint, cinnamon" and more to help "freshen breath and kill bacteria".  Good to know.  But what I found more interesting was their suggestive carved shapes!  I could envision scale pepper mills, cups, goblets, and more depending on where and how one cut the carved ends.  You could even split them down the center axis for even more possibilities.  And, as an added bonus, the top of each toothpick is raised and has a sort of reddish "grain" suggestive of food -- Chef's 3-alarm chili comes immediately to mind.  Here were some initial experiments dividing the tops up into three different sections:

These were the most obvious divisions to me.  It's a hard to see, but in the photo above at about 9:00 is a bowl of chili (on its side), at about 1:00 or 2:00 is a bottle with the neck facing upward, and about 00:25 is a footed bowl.  [Some better photos below ... ] These items were created by cutting from the top downward, leaving a pointed stick for more minty fresh modeling projects. 

The pause that refreshes: Never one to miss a culinary opportunity, Chef Chuck Wagon suggests pairing these minty fresh toothpicks with a tall cool glass of Pappy's Sassafras Tea -- it's "Refreshing as Spring ... All Year Long". Who can argue with that?:

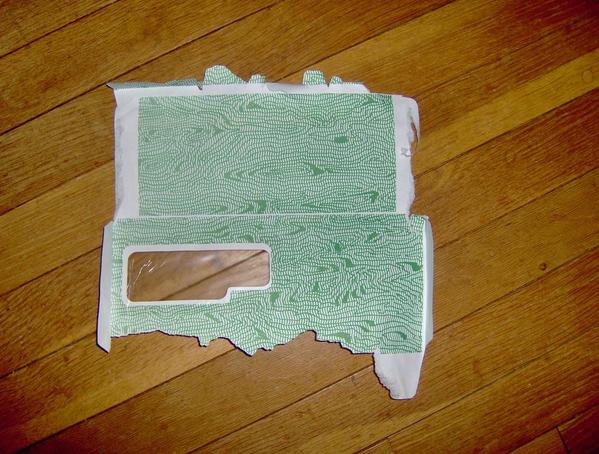
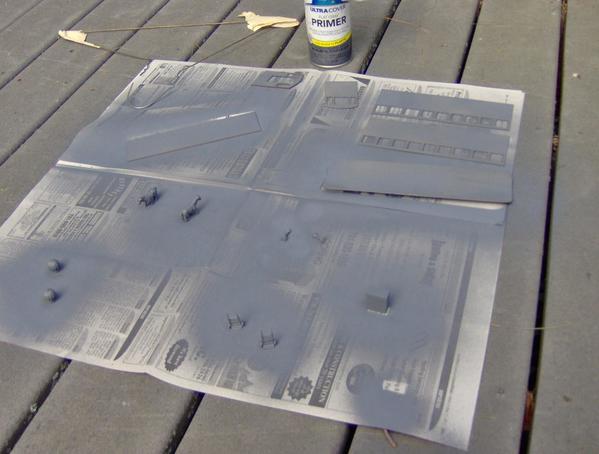
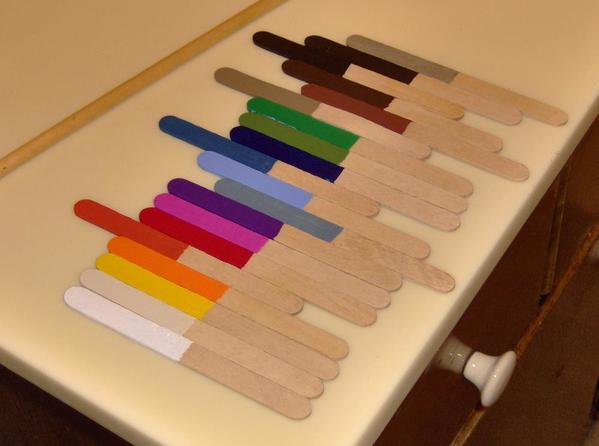
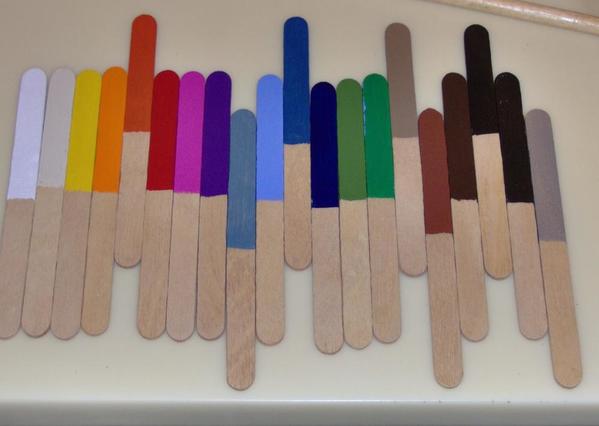
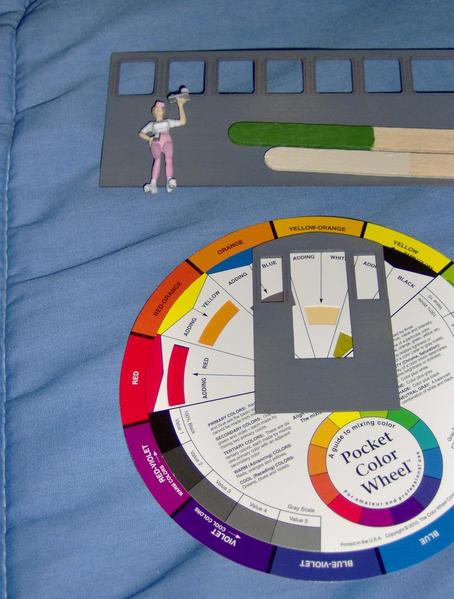
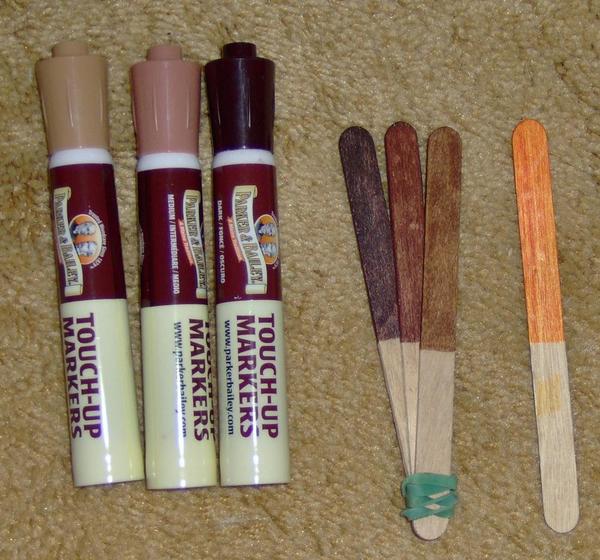
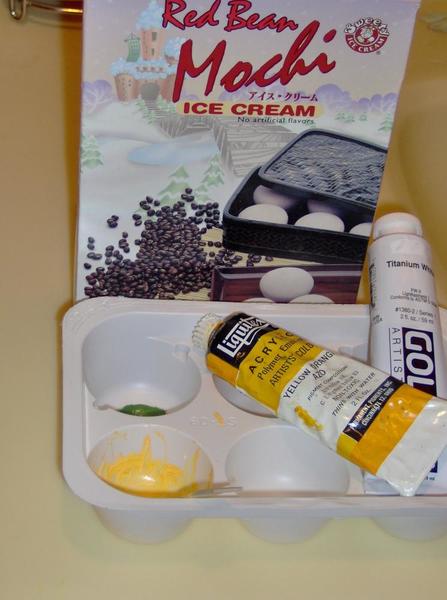
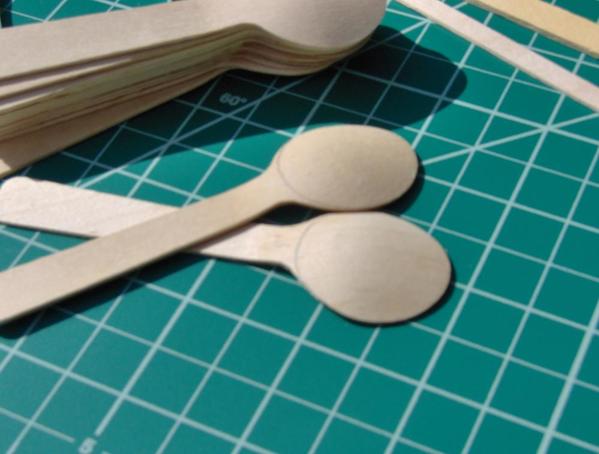
This morning I decided to use these toothpicks to create four sets of mustard and catsup squeeze bottles for the tables and counter that I will be adding to my diner model.  Here, I've painted four catsup and mustard sticks, plus two glossy green sticks from which I will make bottles. 

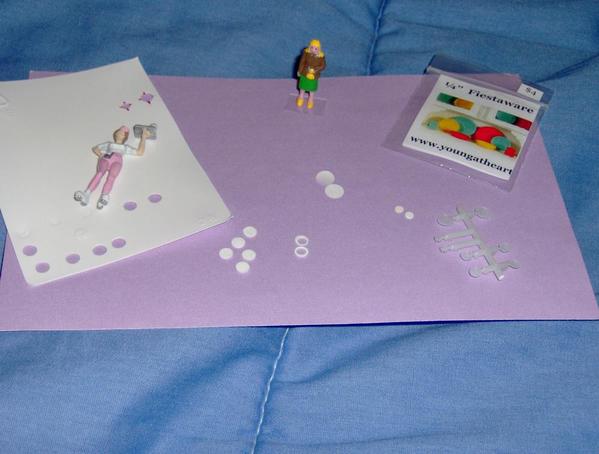
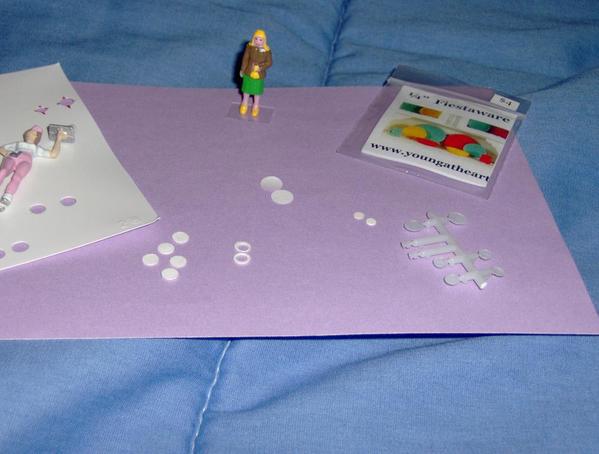
But first, a digression: Previously, I purchased a set of miniature "Fiesta ware" plates.  Here's Chef modeling them (he thought it was "Fiesta wear" and was pleasantly surprised to find out they were china):

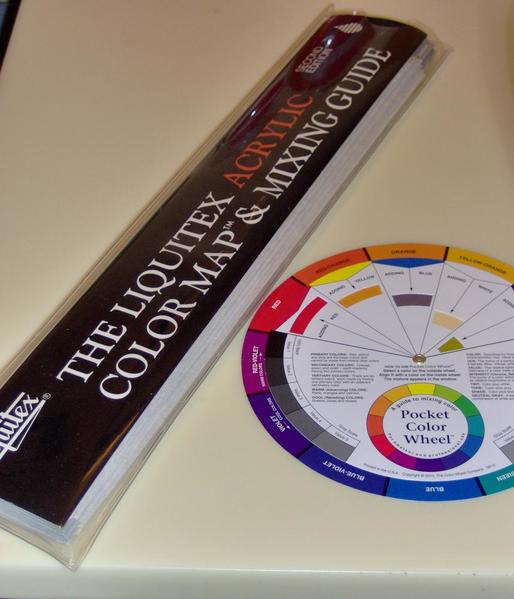
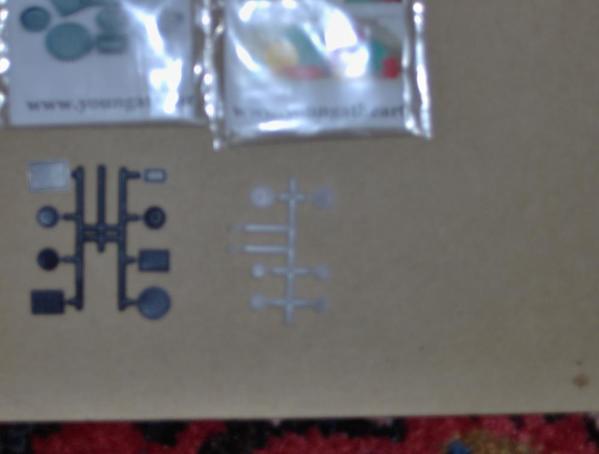
Fiesta ware comes in different mix and match colors.  Had I purchased more of these plastic dishes, I would have (spray?) painted each sprue a single but different color, clipped the plates out of the sprues, and then mixed them up to create new sets.  It seemed more efficient to paint them all one color than try to hand paint different dishes different colors on a single sprue.  But, these lovely dishes are expensive, and being cheap, I decided to experiment with other ways of making dishes such as using the paper punches on plastic sheets that I described earlier.

However, I had the Fiesta ware painting approach in the back of my mind when I started to create my mustard and catsup squeeze bottles.  By painting the ends of the sticks a single color, when I cut out the bottles, I'd get bonus "dishes" -- one a cup of chili, the other a footed bowl, as by products.  If I use lots of colors, the result is instant mix and match Fiesta ware!

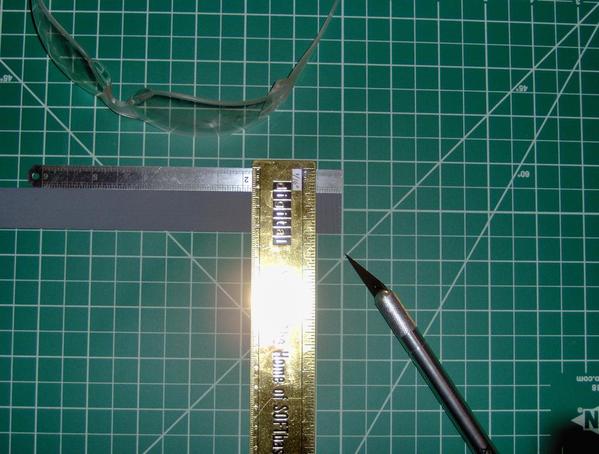
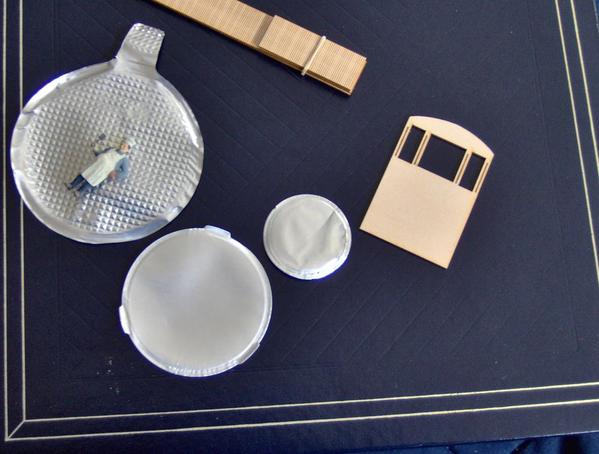
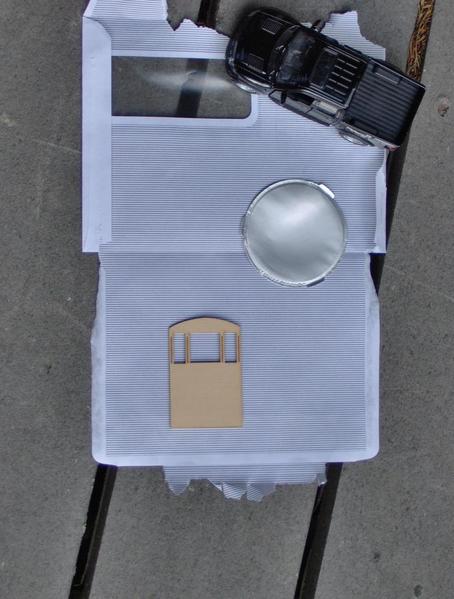
Here's the first cut, which creates four cups of chili:

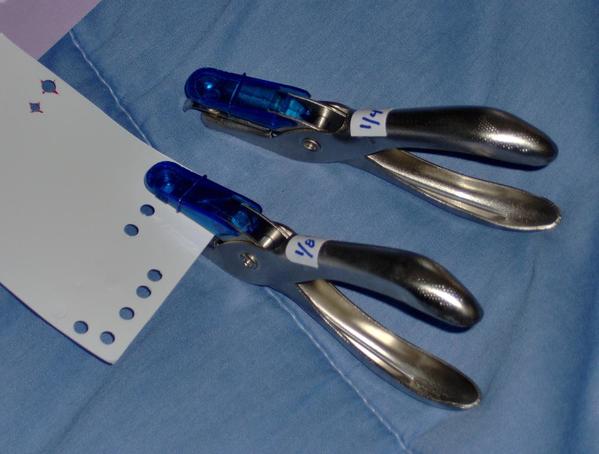
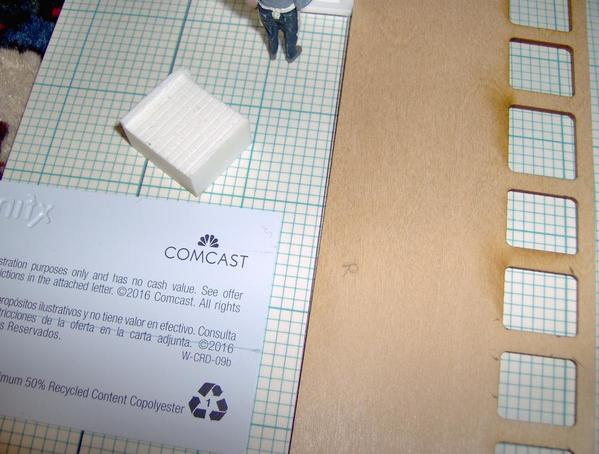
The cups of chili are sitting on a paper prototype of a dish that I created using a standard size paper punch.  The blue dot to the right is a "Blue Plate Special" that I created from a Tums lid. The punch is 3/8ths of an inch or something and could be a bit larger, but the Tums lid makes for a really nice shiny plate. (By the way, those tweezers are useless.  Items as small as the cups of chili need a longer pair with a lot of spring, which I switched to, but didn't photograph.)

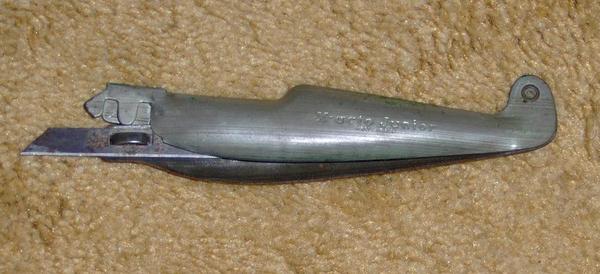
As you can see in the photograph above, there was some loss of paint in the remaining sections.  From these I will create the squeeze bottle and then a footed bowl.  I touched up the paint on the bottle "necks", and did a little light filing before continuing with the cutting. Garnet paper would have been best for touch ups but I didn't have any.  Cutting was easy with a #1 X-Acto knife and facilitated by rolling the toothpick while applying pressure.  A few chili cups were lopsided, but in general, this technique worked well.

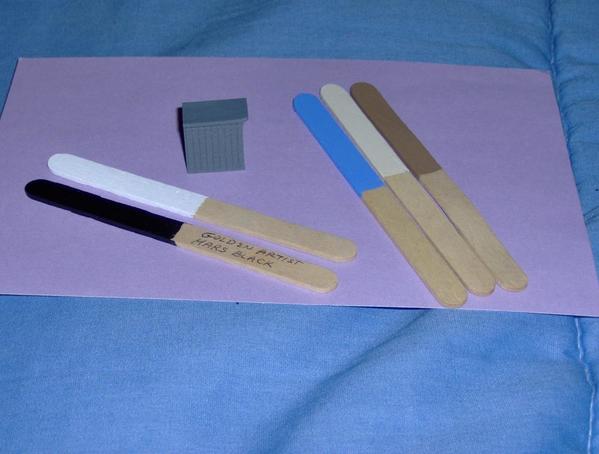
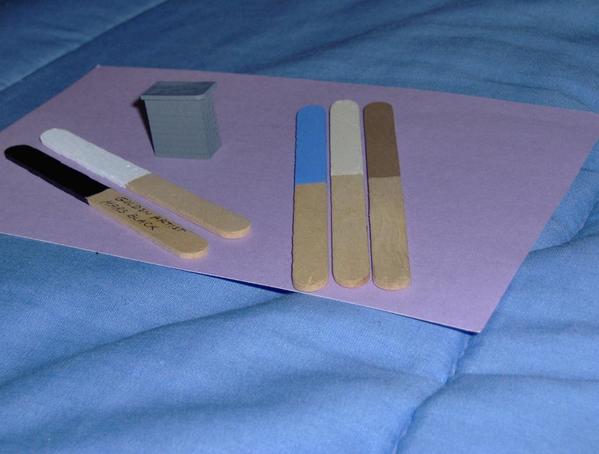
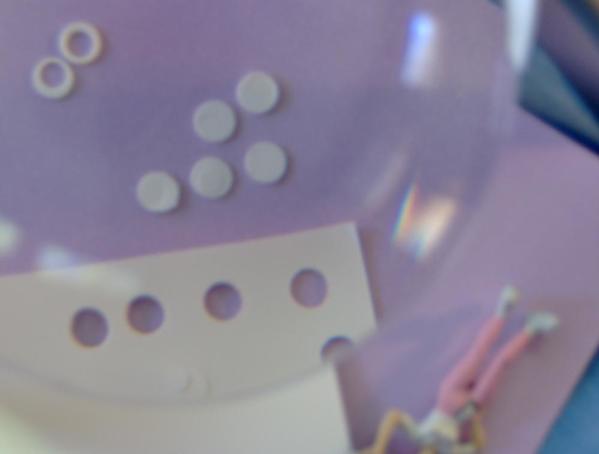
Above are what will be the mustard squeeze bottles sitting on top of what will become footed bowls.  The cups of chili have already been removed and are on the blue lid.  The tops of the yellow "bottles" didn't need as much touch-up as the red ones did.  This photograph also shows the plastic Tums lid.  I cut out bits of the rim so that the paper punch could be slid onto the lid to create some sample Blue Plate Special dishes.  If I had used a regular punch, cutting the rim wouldn't be necessary.  However, the paper punches may provide greater visibility for lining up smaller punches to suggest plate depth as I described in a previous post. 

Here is my head steward modeling two sets of catsup and mustard squeeze bottles.  He's getting ready to place them on a table in the diner, except that I haven't built those yet!

As you can see, some bottle necks are a little wider than others. I'm not sure whether that was due to differences in the (minty fresh) toothpicks or the klutz cutting them.  I'm inclined to suspect the latter.

By the way, to hold the bottles on the tray, as well as to keep the figure upright, I used double-sided Scotch tape. For the tape on the tray, I've left a little nubbin on the left side so that I can remove the tape easily after photographing. Ignore it.  So far, the tape doesn't seem to remove paint on the figures.  It has just enough hold to position items or a figure for, say a photo shoot, and then it looses some of its hold.  I'll be cutting out little plastic square stands and using them for posing figures in the future.  The double-sided tape allows me to add temporary plastic stands to figures, then disassemble them so that the figures can be stored flat in their packaging.

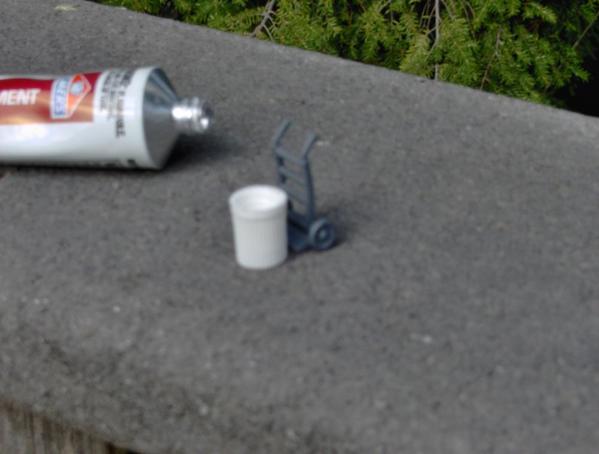
Here's what looks like a Heineken bottle and a cup of Chef's 3-alarm chili, along with some Fiesta ware in various stages that are waiting to be released from their toothpick matrices:

Here are all the items that I can fashion out of a single minty fresh toothpick:

Rear of tray: Heineken bottle, catsup squeeze bottle, mustard squeeze bottle

Front of tray: Footed bowl/egg cup, cup of chili.

Foreground: Before and after minty fresh toothpicks. And, when I say "minty fresh", I mean it.  These things are strong -- if not 'refreshing as spring'.  Oh, yeah, and you can actually use them as toothpicks, too. Another view; note the textured reddish tops:

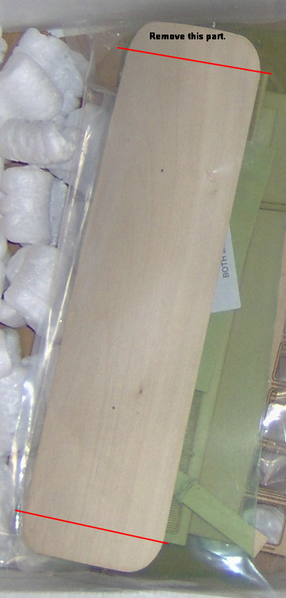
A note about the "footed bowl/egg cup". This is the last item fashioned out of the toothpick's carving. You can either paint below the last carved shape or not.  At first I thought I'd cut the toothpick at the base of the last "shape" (red line). 

This would create a bowl with a foot on it similar to an Asian rice bowl.  I intentionally painted beyond this section so that I would have less retouching to do after painting.  But then I realized that if I cut into the toothpick section below, that I could create a real foot -- like a wine glass or goblet has (blue line, approximate).  So, that's what I did here.  It's more stable and looks better.  Because I cut further than I painted, it also gives a two-tone effect.  A #5 X-Acto did the trick.  My X-Acto medium saw blade worked, too, but caused some splintering.

Any suggestions of projects for the leftovers?  They still make great 1:1 toothpicks . And they are so minty fresh!

Tomlinson Run Railroad

Attachments

Images (15)
  • mceclip0
  • mceclip1
  • mceclip2
  • mceclip3
  • mceclip4
  • mceclip5
  • mceclip6
  • mceclip7
  • mceclip8
  • mceclip9
  • mceclip10
  • mceclip11
  • mceclip12
  • mceclip13
  • mceclip14
Last edited by TomlinsonRunRR
MaxSouthOz posted:

Inspired modelling there, TR.  AA Elephant

I did take note . . . I know that you will love a touch of pedantry . . .

http://trove.nla.gov.au/newspaper/article/22857040 

Thanks, Max.  Your encouragement means a lot. 

The newspaper article was an interesting read (speaking of which :-).  And here I thought that the "Tea Tree" allusion had something to do with the fact that these toothpicks are stored in our tea cabinet! 

And speaking of "pedantry" ... I'm supposed to be working on Chapter 5 today.  Yikes. Better get to it.

Thanks again,

Tomlinson Run Railroad

Prototype Road Trip #2!

Too much work and too little time and I've made *no* progress on my diner building other than lots of thinking about interior and exterior accessories.  However, with the long holiday weekend, I did manage another prototype research road trip -- this time to the actual prototype. 

Yesterday, I drove to Charles Ro in Malden, Massachusetts to pick up a long awaited Lionel railbox car. Then I walked all of .6 miles on the former Boston and Maine rail trail (conveniently situated at the foot of Charles Ro's parking lot) to the Lunch Box diner at 902 Eastern Avenue.  This is the real life prototype for the Whistlestop kit.  Google Maps said the diner was "Permanently Closed".  Fortunately, it looks like it's under new management as the "Crazy Good Kitchen".  My camera setting used was "beach & sun" to try and offset the time of day and strong back lighting, so the new blue-grey paint looks more grey than blue. I finished the road trip with dinner at the Pearl Street Station (1892 Boston & Maine), also in Malden.

Inspiration: The real diner's white trim clearly needs a second coat, as do my model's white sections.  I'll try and get that done during the long weekend.

The journey begins ... "Durable" bumper on rails in between Charles Ro's parking lot and the East Coast Greenway/U.S. Bicycle Route 1 (nee Boston & Maine Railroad). The locals would call this a "bumpa":

On my way, some nice construction workers waved "hello":

The backside of the diner; I made a mental note-to-self to study the interesting roof detail, colors, rust stains, and etc.:

Perhaps I've already written that I've been struggling with how to treat the roof. Under consideration so far: just paint it (keep it simple principle), painted rough-side tape, glued and painted foil yogurt tops (rough surface), or to-be-determined.  Studying photos of barrel-roof buildings shows that many have flat grey or red tile as shown here.

If any of you read my recent post to the diners, trolleys, and converted rail car restaurants topic, notice the circles on the roof line. This indicates that the original diner had the row of light bulbs featured in that post.  Their traces are so ubiquitous that this light bulb placement under the eaves must have been a factory feature.  As I've said before, wouldn't it be fun for someone to model!

I've already described my plans for the rear wall but every so often I think about getting one of those MTH (?) telephone shacks or outhouses and simulating the real thing:

I can imagine some of you easily tackling the current version of the ventilation system, shown above and below. I'm going to stick with the cyclone vents that came with the kit. I did manage to get them painted but they need weathering:

Here's proof that it used to be the Lunch Box Diner:

I remain very interested in the roof details where the roof line joins the body.  I'd really like to have a solid section to raise the roof line slightly as is shown here and in the side-view 4 photos above:

The side porch is a nice touch.  Given the interior details that I plan to use, I won't be adding a door. There just isn't enough wall space in the model:

Of course, rows of soda cases would look nice, as shown above.  Here's another side view with window detail:

Looks like layering a short top pane over a larger bottom pane (adding the stained-glass/wood trim detail), and then gluing the unit to the inside of the window might do the trick.  The motto on the side says "Not Responsible for Your Obsession" Since 1930.  (I don't get it, but I guess it goes with the "Crazy Good" name. They serve acai bowls. 'Nuff said.)  Notice the old brown ceramic telephone insulator installed side-ways:

One of the "accessories" that I've been thinking about adding is an air conditioner on the side, just above the door. The prototype doesn't have one but it does have the classic vents -- now converted to windows. I'd previously posted experiments for simulating a mesh version of these mirror windows:

Tomlinson Run Railroad

Attachments

Images (13)
  • mceclip0
  • mceclip1
  • mceclip2
  • mceclip3
  • mceclip4
  • mceclip5
  • mceclip6
  • mceclip7
  • mceclip8
  • mceclip9
  • mceclip10
  • mceclip11
  • mceclip12
Last edited by TomlinsonRunRR

It's been a long time since I've contributed to this topic, or more accurately, to this diner kit.  My school work, job, and etc., are taking top priority -- especially the school work which has a hard and
fast approaching deadline. Yiikes.   However, I *have* managed to do some pondering and a teeny bit of experimentation.  AND, at the risk of now having *two* unfinished diners, I decided to pick up a Bachmann Plasticville Diner.  It was on sale, so why not?  Thus, I am temporarily hi-jacking this thread to document my efforts working with that kit.  I say it's better to have one topic and two unfinished diners than two topics and two unfinished diners, right? :-}  (I'll see whether I can rename the topic accordingly.)

This week, I am on a staycation and so have had a little time to devote to the simplier Plasticville kit.  My theory: By focusing on a simple build and not fussing with the interior details (for the equally fussy Chef Chuck Wagon); hopefully, I can accomplish something around school work and Chef can have his diner.  The Plasticville example is *really* a nice building and many of you have done great things with it as a starting point. 

But first, last fall, I had what I call a "Golden Opportunity".  An art playspace held a going out of business sale and offered art supplies at ridiculous prices.  I managed to pick up some more Golden brand paints (mostly colors I already had) and a bottle of their gloss medium. All for a song!:

Pondering #1: A Six-pack

Chef was thirsty, so I immediately set about seeing how well the gloss would simulate glass by mixing it with matte brown paint.  Here are some of those nifty mint toothpicks that I wrote about before. You can see that the gloss gave the flat brown paint a nice sheen.  A somewhat uneven application (or incomplete mixing?) was a benefit in that it resembles glass with different reflective patterns. Each "bottle" looks a little bit different as you would expect with glass and natural light:


(For comparison, the green example was a low semi-gloss color to begin with.)  The next photo shows the toothpick "beer bottles" with 2-color labels and gold caps, ready to be released from  their toothpick matrix.  I think the caps are too big.  The next time I make some, I'll crop them closer as I did in the green example above.  I'm not too fond of my choice for the labels but am running low on toothpicks:

Using some prior experience with origami, I worked out a way to fold a long strip of paper that simulated a six-pack carton, complete with a bottom, mirrored side creases in all the right places, and a cut-out carrying handle.  As a proof of concept, it worked, but the execution was sloppy.  I've since misplaced my POC, which should indicate how "pleased" I was with my first attempt.

When I have time, I'll create another one and provide a drawing of the paper strip and how to fold it.  It was fun working out how to shape and fold the strip.  I'll create a new topic for Pondering #2.

Tomlinson Run Railroad

Attachments

Images (4)
  • mceclip0
  • mceclip1
  • mceclip2
  • mceclip3
Last edited by TomlinsonRunRR

Pondering #2: Zip Tie AC Units and Single and Double-slice Toasters

Another little pondering project from last fall involved experiments with zip ties. They come in various colors, and sizes, and you can literally find them all over the place.  When you cut off the tie part, you are left with an interesting shape that suggests many possibilities. 

Here is Chef with a florescent green zip tie that I will paint and use as an air conditioning unit on the Twin Whistle kit when I get back to it.  The shape and size, and even the two little divots look great in the classic AC position located just above the side entrance.  It also looks good in the corner of a window on the front of the diner.  Once the tails are removed, the black examples can become double or single-slot toasters for Chef's kitchen.  With the addition of tissue paper "napkins", the smaller one might work as a napkin holder for the counter or a table:

I love free stuff!

Tomlinson Run Railroad

Attachments

Images (1)
  • mceclip0

Pondering #3:  Neon signage

Although this pondering was originally intended for the wooden diner kit, due to the size and proportions involved, it is best (perfectly) suited for the Plasticville kit. 

My office recently added a cafe.  The baristas use cups called "Greenware" that are apparently made out of plants.  Who knew?  On the bottom is embossed "COLD DRINKS ONLY".   Because of the embossing and the natural transparency, I thought that it might be possible to add color to "COLD DRINKS", cut it out, simulate a hanging or electrical wire, and place it in the front and side windows of my diner.  Instant three-dimensional neon signage.

It's hard to photograph, but here's an attempt at capturing what I'm talking about:

I've been experimenting with adding red and orange color with Sharpie markers.  Unfortunately, the Sharpie tip (or my hand) isn't precise enough. 

Next, I tried to add the color to the rear -- using the well of the embossed area to catch the pigment, and then -- in theory, wipe off any excess.  That should leave just the letters colored.  But, in this case, the embossing wasn't deep enough for this to work.  Wiping off the excess in effect removed all the color. 

Another possible approach is to use an ink pad if I can locate one somewhere around the house, and then add ink that will stick to this plant-based "plastic".  If just light pressure is applied in "stamping" the embossing, then the letters and not the surrounding area should pick up the color. 

Obviously, there are a lot of "ifs" involved here.  Any suggestions are welcome. 

We are having super hot weather this week and the relative humidity in my den is currently 76.  I'm going outside in the "90s, feels like 100s" temps to cool off and bring in Chef's pitcher of homemade "sun tea".  More info and pics will follow after I scan photos of the prototypes that I'm using for the Bachmann diner.  I hope that you enjoyed these little forays into past ponderings before moving on to the Plasticville build.

Tomlinson Run Railroad

Attachments

Images (1)
  • mceclip0
Last edited by TomlinsonRunRR

Add Reply

Post

OGR Publishing, Inc., 1310 Eastside Centre Ct, Suite 6, Mountain Home, AR 72653
800-980-OGRR (6477)
www.ogaugerr.com

×
×
×
×
Link copied to your clipboard.
×
×