I've had these kicking around for some time, but I never used them before.  What a dummy, they made it much easier to lay the track in my yard!  We all know the issue, you get down to where two tracks are meeting, it's always a struggle to get the pins in and get the track laying flat again.

Not with these #910-4 Strip Track Connectors!  No more wrestling the track back down to the table as the pins seat, now you just cut the track to size, and drop it on the blades.

I'm sure there are old hands that have used these for years, but I actually haven't seen them mentioned here, so I thought it might be nice to give them a little exposure.  I'm relatively new to Gragraves flex track, my new layout was my first major build with it.  I wish I had thought of these a bit earlier, it would have saved me a bunch of time on the main layout platform.

These are perfect for modification to the track where you don't want to rip up a bunch of track to make one simple change, say inserting a switch, for instance.

The installation in pictures...


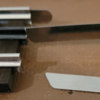
The blades with one installed

Gargraves #910-4 Strip Track Connectors [Fit-Up Blades) N1

You just insert as shown and gently tap into the rail until about 1/2" is exposed.

Gargraves #910-4 Strip Track Connectors [Fit-Up Blades) N2

Here's a rail ready to mate with the joining rail.

Gargraves #910-4 Strip Track Connectors [Fit-Up Blades) N3

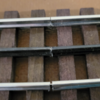
Just lay the joining rail onto the blades with them centered under the rail openings.  Note that the ties have been pushed back to make room for them to slide up into the rails.

Gargraves #910-4 Strip Track Connectors [Fit-Up Blades) N4

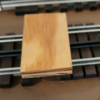
Place a wooden block on them and gently tap them into place with a small hammer.

Gargraves #910-4 Strip Track Connectors [Fit-Up Blades) N5

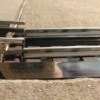
Once they're seated, the ties are slid back to go under the blades and secure the rail from popping up, job done!

Gargraves #910-4 Strip Track Connectors [Fit-Up Blades) N6

Attachments

Images (6)
  • Gargraves #910-4 Strip Track Connectors (Fit-Up Blades) N1
  • Gargraves #910-4 Strip Track Connectors (Fit-Up Blades) N2
  • Gargraves #910-4 Strip Track Connectors (Fit-Up Blades) N3
  • Gargraves #910-4 Strip Track Connectors (Fit-Up Blades) N4
  • Gargraves #910-4 Strip Track Connectors (Fit-Up Blades) N5
  • Gargraves #910-4 Strip Track Connectors (Fit-Up Blades) N6
Original Post

Replies sorted oldest to newest

Great how to. One of the downfalls of tracks with connecting pins. When a change is made and over time there will be a few. With ballasted track it becomes almost impossible to insert pins when say adding a turnout. You can bend the pins up slightly at one end then just drop the other over the blades.

From what I remember. The Gargraves blades are stainless. You can substitute brass strip stock if you want a soldered connection.

Personally I never had much luck with those blades.   I just used a track pin with the nubs ground off, then use a needle nose vise grip to clamp it in place on the inside of the rail, that will line the rails up, then solder in, you may need another pin on the outside of rail to help line up better. don't solder inplace. easy to take apart just heat up again.

Last edited by clem k

Besides using these as track joiners - occasionally for future layout changes or failed switch replacement. But also use to make lift section mechanical connection (as in lift section as walk through from outside to inside of layout. I install blades into the track that is mounted on table top, and then I make undercuts on the track section that is part of the lift, leaving just the top of the tubular rail as a small U shaped section that will drop over the blade. Marked cuts on one of @gunrunnerjohn's pics attached, the attached pic of undercut track section.

lift joint

20191126_111440

Attachments

Images (2)
  • lift joint
  • 20191126_111440
@MED posted:

Besides using these as track joiners - occasionally for future layout changes or failed switch replacement. But also use to make lift section mechanical connection (as in lift section as walk through from outside to inside of layout. I install blades into the track that is mounted on table top, and then I make undercuts on the track section that is part of the lift, leaving just the top of the tubular rail as a small U shaped section that will drop over the blade.

Why would you have to cut anything?  They drop right on.  If  you want to make them looser, just spread the bottom seam of the track slightly.  It seems like you'd just be opening up the tiny piece you left after the cutout for damage if it got bumped.

@clem k posted:

Personally I never had much luck with those blades.   I just used a track pin with the nubs ground off, then use a needle nose vise grip to clamp it in place on the inside of the rail, that will line the rails up, then solder in, you may need another pin on the outside of rail to help line up better. don't solder inplace. easy to take apart just heat up again.

Wow, they worked seamlessly for me, and it was my first time using them.  Where exactly did you have issues?  I actually expected to have some issues, and was pleasantly surprised that they worked so well.

@Susan Deats posted:

Thanks a bunch for the tip.  They will really come in handy when doing any track work.  If I knew about them at one time I forgot.

I bought them when I started working with Gargraves track and then forgot them.  I ran across them digging in my box of track pins and screws and realized they'd be great for laying the yard track.  I kick myself for not remembering them when I was doing the layout!

I used the blades on my layout when I did some of the short siding tracks. I installed the blades on one track section and on the other I pulled back 2 or 3 ties and then dropped the track in place and then pull the ties back into place which tighten the blades to the bottom of the track.

The club also used them on the club's 4ft by 16ft layout. We used ( 3 ) 6 inch sections of track to bridge the track together.

100_1796

The first of this year the club give this layout to the past club president that moved into a small house and wanted a layout.

Attachments

Images (1)
  • 100_1796

Add Reply

Post
The Track Planning and Layout Design Forum is sponsored by

AN OGR FORUM CHARTER SPONSOR

OGR Publishing, Inc., 1310 Eastside Centre Ct, Suite 6, Mountain Home, AR 72653
800-980-OGRR (6477)
www.ogaugerr.com

×
×
×
×
Link copied to your clipboard.
×
×