The lights and outlets are on seperate breakers. There is an outlet every 4ft.
Southern4501 posted:The lights and outlets are on seperate breakers. There is an outlet every 4ft.
Great! Sounds like you really thought this out! Nice work!![]()
It has been a learning curve. I messed up with the lighting. I hope i can go back and seperate the stairwell lighting from the room. I didnt think that through for running trains with the lights off. 🙄 Install a clapper. 🤪
glad you thought of all the electrical requirements before the sheet rock ![]() now that all the messy work is finished, the fun part is next!
now that all the messy work is finished, the fun part is next!
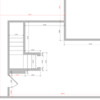
i love drawing these plans, its a fun challenge, so i figured i'd give it a shot. i think i'm pretty close with this version, just the dimensions in red aren't working out with your photos. and i'm also still unsure whats going on behind the attic door! I've set the pdf up for 11"x17" paper size and the scale is 1/2"=1'-0" in case you want to print it out and take measurements.
I like the idea of keeping it simple as Moonman suggested, but I also like the idea of either hiding a main or reverse loop in the unfinished attic OR breaking through the wall by the attic door (to the right of wall 8), creating a shelf above the stair and popping back out at wall 3. that'd be cool.
anyway if you want to mark up the plan and let me know whats going on in the unfinished attic or if you figure out the couple of red dimensions I'd be glad to update.
Attachments
Well. I can not guarantee the room is completely square. It was framed when the house was built. I would have had to rip it all out but the measurements are extremely close. The attic behind the door is huge. It is where my hvac system is. So its a wide open space. I was going to use that space as the mainline return as well as a hidden staging area against the back of the stairs. Basically two mainlines will go through the wall on the right side above the recptical (#3 pic) over the stairs and into the attic and turn left towards the door. The two mains will come back in the room (#8 pic) to the left of the door and travel along the longest wall. The reverse loop would exit above the center of the hvac return (#4 pic) and come back in at the same point. You can see this in the picture that has the foam and ductwork in it. That space is roughly 70”x85”. It is larger but the rafters start right above and front of the hvac return.
I hope that helps some. I will try to draw it in paint from your and jans drawings.
Where the reverse loop is I measured from the stud next to the hvac return to the corner of the stairs on the outside. So I have roughly a 70" x 85" area to work with for that. I hope this drawing helps to get my idea across for outside the room. My biggest problem is I am having a hard time trying to figure out what to do past the the double mainlines that jan had drawn up. I have never had more than a 4x8 or around the room shelf layout. I am a visual person as well. So its hard for me to know what I can do in this space. I was thinking along the walls maximum of 36" deep tops for most of the layout. Probably 24" along wall #8 until it gets out into the main room. I have to keep in mind that at some point my hvac will have to be replaced so that is why we put in a 32" door. That area will have to be removable. Only the polar express will go to the north pole.
Attachments
That sure looks like a heck of a plan! I cant wait to watch you building it!![]()
That is one advantage of having an unfinished space to use for a layout. It is easy to wire as many lights, switches, outlets, and circuits as you want.
I had a bit of a hassle adding two LED track lights to the little room. Now that I have the larger family room, I have to figure out what to do before I get too far into the layout. I think I will bring up the problem on my topic I have a link to in my signature.
Southern4501 posted:Where the reverse loop is I measured from the stud next to the hvac return to the corner of the stairs on the outside. So I have roughly a 70" x 85" area to work with for that. I hope this drawing helps to get my idea across for outside the room. My biggest problem is I am having a hard time trying to figure out what to do past the the double mainlines that jan had drawn up. I have never had more than a 4x8 or around the room shelf layout. I am a visual person as well. So its hard for me to know what I can do in this space. I was thinking along the walls maximum of 36" deep tops for most of the layout. Probably 24" along wall #8 until it gets out into the main room. I have to keep in mind that at some point my hvac will have to be replaced so that is why we put in a 32" door. That area will have to be removable. Only the polar express will go to the north pole.
Okay, that gives a good idea of what you're looking to do with the space, but I've got a few concerns.
Not to nitpick, but your measurements still don't add up. The area by the door add up to 62.25" (25.5+32+4.75). Add the 7.5" bump, the 47" stairway and the 81" left side of the nook, you get a total of 197.75. However, the right side of the nook is 48.5" and the right side wall is 148". That adds up to only 196.5". Probably won't matter, just thought I'd point it out.
If the Polar Express is the ONLY train that will go to the North Pole, that makes that reversing loop useless for the rest of the layout the remaining loop is not enough,you need 2 in opposite directions.
If you block the hallway to the AC until, you also block access to the reversing loop. If you need to fix a derailment or something, you'll need to crawl under the storage tracks you plan to put in the hallway. It's one thing to make those tracks removable for access to the AC unit, but quite another for what could be every day access. I also think you'll need access to the AC unit more often than just replacing it in 12 years or so.
Have you given any thought to the brand of track you intend to use? Chances are someone will use SCARM or AnyRail to help with design and choice of track might make a difference. I assume you're going to want O72 minimum curves, so here's a rendition to show what kid of space those size curves require. It's one thing to draw ideas, but quite another to actually make the track fit. ![]() As you can see, storage for 5 full trains in the hallway is iffy at best, unless you want to back in or out with just one entry point. The reversing loop is also going to be problematic. O72 curves need upwards of 80" in width.
As you can see, storage for 5 full trains in the hallway is iffy at best, unless you want to back in or out with just one entry point. The reversing loop is also going to be problematic. O72 curves need upwards of 80" in width.
Attachments
Hey dave thanks for looking at this. I was going to build a liftout at the door to access the sidings and reverse loop. The attic is wide open. It really isnt a hallway. I have a pathway built now that i walk on where the sidings would be and also one for the hvac. It is very easy to get to. I can take a better picture. Im not sure why the room doesnt jive as far as the measurements. I didnt frame it. I will check them again. I dont have any locos that need curves above 054. My bigboy is the kline version. So outside of the main room can be smaller a smaller radius. Inside can be whatever that would make it fun for the kids. It is for me but I want to be able to share this with the neighbors and others to get kids in the hobby. The hidden sidings can be just for engine storage if needed. The single helix around the mountain can be a smaller radius too because the polar runs on 036 but that would probably be too steep. I am really not sure what all i can fit in the main space as an around the room. I will most likely be using gargraves to cut down on cost.
Thanks
I said "hallway" because the last photo shows it being 35" wide and 16' long. Those last 2 photos show insulation and open floors, so I assume those will be finished at some point, but 35" doesn't leave much room for the track and yard on the left side of the diagram. Not that the space can;t be used, just maybe nor exactly the way drawn. ![]()
Yeah its more of a pathway. Where the 35” is a verticle post. I can go wider but it would have to go around that post. Right now everything is piled up in the storage area because of waiting on carpet for me to get better pictures.
I was just trying to figure out how to have a dissappearing double main and maybe a siding or two outside the main room. I loved the idea of going out of the room and over the stairwell.
DoubleDAZ posted:Southern4501 posted:Where the reverse loop is I measured from the stud next to the hvac return to the corner of the stairs on the outside. So I have roughly a 70" x 85" area to work with for that. I hope this drawing helps to get my idea across for outside the room. My biggest problem is I am having a hard time trying to figure out what to do past the the double mainlines that jan had drawn up. I have never had more than a 4x8 or around the room shelf layout. I am a visual person as well. So its hard for me to know what I can do in this space. I was thinking along the walls maximum of 36" deep tops for most of the layout. Probably 24" along wall #8 until it gets out into the main room. I have to keep in mind that at some point my hvac will have to be replaced so that is why we put in a 32" door. That area will have to be removable. Only the polar express will go to the north pole.
Okay, that gives a good idea of what you're looking to do with the space, but I've got a few concerns.
Not to nitpick, but your measurements still don't add up. The area by the door add up to 62.25" (25.5+32+4.75). Add the 7.5" bump, the 47" stairway and the 81" left side of the nook, you get a total of 197.75. However, the right side of the nook is 48.5" and the right side wall is 148". That adds up to only 196.5". Probably won't matter, just thought I'd point it out.
If the Polar Express is the ONLY train that will go to the North Pole, that makes that reversing loop useless for the rest of the layout the remaining loop is not enough,you need 2 in opposite directions.
If you block the hallway to the AC until, you also block access to the reversing loop. If you need to fix a derailment or something, you'll need to crawl under the storage tracks you plan to put in the hallway. It's one thing to make those tracks removable for access to the AC unit, but quite another for what could be every day access. I also think you'll need access to the AC unit more often than just replacing it in 12 years or so.
Have you given any thought to the brand of track you intend to use? Chances are someone will use SCARM or AnyRail to help with design and choice of track might make a difference. I assume you're going to want O72 minimum curves, so here's a rendition to show what kid of space those size curves require. It's one thing to draw ideas, but quite another to actually make the track fit.
As you can see, storage for 5 full trains in the hallway is iffy at best, unless you want to back in or out with just one entry point. The reversing loop is also going to be problematic. O72 curves need upwards of 80" in width.
Do i need to get measurements of the inside of the stairwell and that might help with the skewed measurements?
Southern4501 posted:Do i need to get measurements of the inside of the stairwell and that might help with the skewed measurements?
Not at all. I believe you've already said the inside of the doorway was 31" and the stairway was 37", but it's the outside where the benchwork will go that matters and you have that at 47". The problem is that the 25.5" short wall to the left of the door, the 32" of the door, then the 4.25" of that little wall to the right of the door add up to 62.25". When you add that to the 7.5" of that small bump-in, the 47" of the stairway and the 81" of the side wall of the nook, it comes to 197.75 where as the 48.5" of the right side of the nook and the 148" (my diagram shows 137) of the right wall add up to 196.5. Granted, it's only 1.25" and the walls might just be off that much. Like I said, it probably won't matter much, but when you start cutting plywood for decking, it would be nice to know if the wall is straight or not. If the left end is deeper than the right, the doorway wall might not be 90° either. One way to check is to simply measure from the bottom wall to the top wall of the nook just in front of the stairway.
Attachments
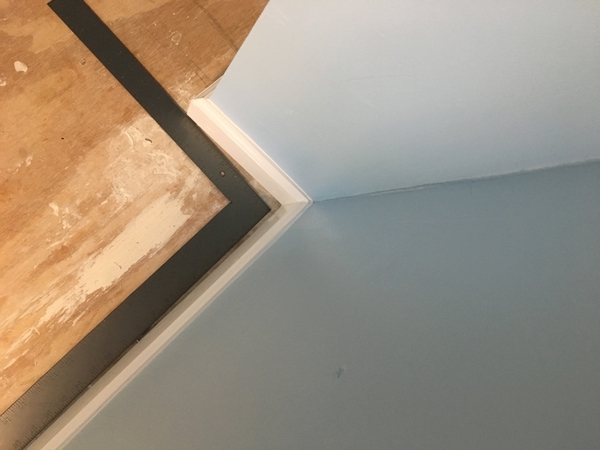
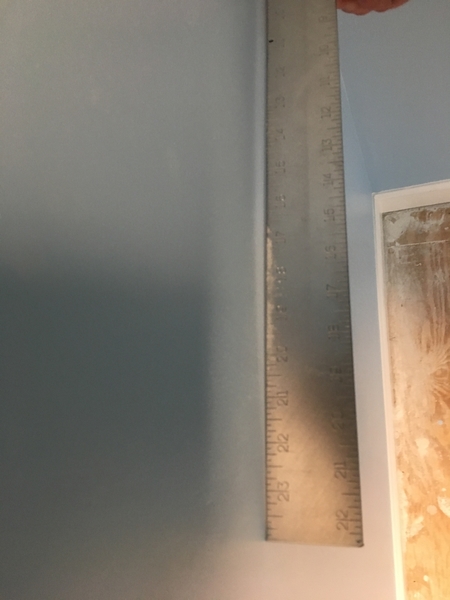
I measured what you asked about in the red and its 196.5 I am thinking the opening is not square, it might be spread open a smidge. Im gonna get my framing square up there and see if it is that.
Okay, had some time today, so I fiddled with some of what you drew and said you wanted. Mind you, I make no judgement about the design ![]() , it's intended only to show what you're up against. I'm also not including the SCARM file because I don't want folks to get bogged down trying to make suggestions based on a design I don't think is going to work as drawn.
, it's intended only to show what you're up against. I'm also not including the SCARM file because I don't want folks to get bogged down trying to make suggestions based on a design I don't think is going to work as drawn.
That said, I used mostly GarGraves O54 curves, Ross 11° switches off the mainline as well as in the storage yard and Ross O54 switches in the reversing loops. Obviously, things will change using different brands of track, mostly the switches. I raised the track leading to the "helix" to 2" and then the helix goes up to 8" for the Polar Express "mountain". You can add more rings to the helix to go higher. I changed the yard to a storage yard rather then a through yard to provide maximum capacity. The green represents 30" deep decking. I had to change the direction of one of the reversing loops at the last minute, but didn't take the time to realign the tracks close to the wall by the stairway. Hopefully it all makes sense to you. ![]()
Attachments
Southern4501 posted:I measured what you asked about in the red and its 196.5 I am thinking the opening is not square, it might be spread open a smidge. Im gonna get my framing square up there and see if it is that.
Okay, thanks. At least now we know that the overall width matches on both the right and left. You should be able to deal with any out of square now that you know there might be some. It's not at all unusual, so don't stress about it. ![]()
DoubleDAZ posted:Okay, had some time today, so I fiddled with some of what you drew and said you wanted. Mind you, I make no judgement about the design
, it's intended only to show what you're up against. I'm also not including the SCARM file because I don't want folks to get bogged down trying to make suggestions based on a design I don't think is going to work as drawn.
That said, I used mostly GarGraves O54 curves, Ross 11° switches off the mainline as well as in the storage yard and Ross O54 switches in the reversing loops. Obviously, things will change using different brands of track, mostly the switches. I raised the track leading to the "helix" to 2" and then the helix goes up to 8" for the Polar Express "mountain". You can add more rings to the helix to go higher. I changed the yard to a storage yard rather then a through yard to provide maximum capacity. The green represents 30" deep decking. I had to change the direction of one of the reversing loops at the last minute, but didn't take the time to realign the tracks close to the wall by the stairway. Hopefully it all makes sense to you.
Yep an eye opener. I think the helix is definately not gonna work. Keep the mountain maybe but fit it in the corner like a quarter of the pie. There will be no walkway to that back corner if i install the helix and mountain. Maybe change the north pole loop to 048 or even 036 so there is room for some scenery and shortened for walk around clearence. Can the hidden reverse loop be flipped the other way? Can the main be a double? Say outside be 054 and inside be 048. Thanks for your help. I am open to all suggestions and help for sure.
I’ll see what I can do, but it might be awhile.
No problem there. Take your time. Im really thinking about dropping the north pole loop all together considering how much space it will eat up. I want to be able to run trains and be able to have people up there. That north pole loop takes up alot of room.
Thanks again Dave.
Okay, I need to stop. I believe I asked earlier, but never saw an answer or I may have missed it, but since you seem to want to expand on this design I need to know what track you plan to use.
You've mentioned O54 curves in the past, but just now you mentioned using O48 curves for the North Pole loop. That suggests you plan on using FasTrack since I believe it's the only brand that has O48 curves. If that's the case, it makes a big difference to the design software I use.
If you are going to use FasTrack, the outer main will have to be changed to O60 if you want to run anything that requires O54 or wider curves. The same applies to the reversing loops. All the switches will have to be changed and that will affect the loops and storage yard. It's not a big deal, but I'm not going to spend any more time changing things until I know what track library to use.
also just be aware the space where the reverse loop is drawn also needs to be double checked for size. i'm not sure how that works back there.
DoubleDAZ posted:Okay, I need to stop. I believe I asked earlier, but never saw an answer or I may have missed it, but since you seem to want to expand on this design I need to know what track you plan to use.
You've mentioned O54 curves in the past, but just now you mentioned using O48 curves for the North Pole loop. That suggests you plan on using FasTrack since I believe it's the only brand that has O48 curves. If that's the case, it makes a big difference to the design software I use.
If you are going to use FasTrack, the outer main will have to be changed to O60 if you want to run anything that requires O54 or wider curves. The same applies to the reversing loops. All the switches will have to be changed and that will affect the loops and storage yard. It's not a big deal, but I'm not going to spend any more time changing things until I know what track library to use.
Sorry about that Dave. I had put in there to use gargraves track when I was looking at the menu in scarm and I had atlas pulled up too. Its my fault.
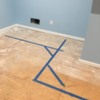
I dont want to waist your time for sure or anyone elses. I am going to stick with atlas to get the tighter curves. I didnt realize what I was doing or up against trying something new. When the carpet is finished tuesday I am going to go up and lay down some painters tape on the floor to line out the bench work at 30” and 36” depths to see what will be left for walk around room.
Thanks Wayne
No problem Wayne, just couldn’t go any further until I knew what track to use. FWIW, I won’t mind it if you change your mind after you see what can be done with Atlas. GarGraves is the easiest to cut and their flex track is easiest to bend. You just confused me with the O48. I have some errands to run in a bit, but I’ll work on it after that. Since you have SCARM, I’ll post the file too so you can play with it. Let us know where you plan to use 30” and 36” depths.
Okay, finally got our errands done and was able to put this together using Atlas O45 for the inner run, O54 for the outer run, hidden loop and Polar Express loop, and O72 for the yard.
The purple tracks are the grades up to the Polar Express loop that has an 8" elevation. The biggest problem with the Polar Express loop is access the the hidden tracks, so I would make a removable mountain using rigid foam.
The red track in the crossover is a cut track because no combination would fit exactly. However, you might be able to use smaller pieces (10", 10", 4.5" & 1.75") if there's enough give in the track when connected.
To download the SCARM file, simply right-click on the filename and select Save File As or Save Link As, something to that effect.
Attachments
I think that is a nice plan around the walls, Dave. Southern4501, are you looking to just go around the walls or add a peninsula in the middle with a big 054 curve on the end?
I want to back up to the walls not being square. Since you had an agreement with the contractor, you can take it up with him as far as a discount, but I don’t see it as a problem with layout design. You will be able to make adjustments as you build. Just allow some space between the track closest to the wall and the wall.
Well I dont know if the grades will fit on the walls because of the roof starting to climb. I was planning on building the main 8” below the the roof climb for scenery. Im trying to figure out how to plan the north pole loop which seems to be taking up alot of room. Mark, I think your idea of the peninsula for the north pole might work better. Not sure.
I can work on that tomorrow, I forgot about the ceiling being low on the sides. I’ll see if a peninsula will fit.
No problem Dave. I saw it started climbing in the attic too and thought it would look goofy with two different height tunnels and I know I dont have room for that anyways. The expense of switches in that yard for not being able to run through them has got me thinking as well. I shortened them up a bit to get away from the door. I can always add them later. I was trying to save as much floor as I could for other things on the layout. With the way its looking right now it will only be two trains running at the same time. Im starting to watch the scarm tutorials.
Attachments
Went upstairs and taped off the table depths on five walls at 36” except for the 48.5” wall. Its depth is 24” unless the curves say more is needed. I dont think a peninsula will work coming from the wall with the window from the inner loop. I also cant reach the window from 36”. Stubby arms 😜. 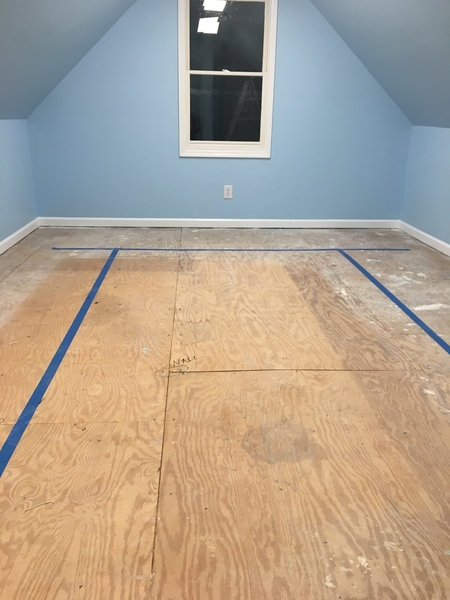

Attachments
Here's an Atlas 4 Way throat for a run through yard -
3 Wyes on each end
Having that or the cross-over and yard behind the wall will require a camera for operations or a bunch of location sensors.
Think that through when designing stuff for behind the wall.
Attachments
30" tables leave plenty for scenic items and buildings. 24" even works. 36" is only needed for a siding or to handle an area that where the track needs it. Like, the font where the roof slope is steepest. That will require at least 6" from the wall as the closet a track can be to permit clearance for engines and high cars. That leaves 30" for the track and scenery.
Try 30" on the sloped wall walls and 24" on the straight walls.
Here's a variation minimizing hidden track. The Polar Express loop uses O54 curves and O72 wyes. It can be done with O45 curves to get a little more aisle space, but then you wouldn't be able to run all your engines through it. The yard uses #5 switches. All tracks are at 0" elevation.
Happy Birthday Elvis! ![]()
Attachments
Southern4501 posted:I am trying to figure out Scarm or is there a easier track planner out there?
i played with scarm for a few days, then i played with xtrkcad for a few days. i liked xtrkcad better, but now i can't remember why. both are free, and either will do fine, but both have a learning curve and some time required before things are easy ![]()
Not sure why you like XTrackCAD better, unless they've improved it since the last time I used it. Each software package had is pros and cons. The big advantages to SCARM are that many folks here use it (probably because the beta was free for a long time) and it has a more realistic 3D simulation. AnyRail is probably the easiest for new folks to learn, but it had a lot of errors early on. It certainly does a better job with landscaping than the others, check Ken_OSCALE's designs.
DoubleDAZ posted:Here's a variation minimizing hidden track. The Polar Express loop uses O54 curves and O72 wyes. It can be done with O45 curves to get a little more aisle space, but then you wouldn't be able to run all your engines through it. The yard uses #5 switches. All tracks are at 0" elevation.
And the corner curves can probably be increased to O63/O72, though that really only affects the visual for engines with a lot of overhang. The Polar Express and hidden revering loop still need to be O54 or tighter, so that still limits the size engines you can run.
Carpet is in 🤩🤩. Carpet central here i come.
Attachments
The carpet looks great! I didn’t think of the window when I mentioned a peninsula. I understand completely having lived in two houses with sloping ceilings, one with an attic like yours, the other a cape cod with the bedrooms in the similar sloped ceiling space. I like the basic plan without the peninsula.
Looks great! Nice comfy and a perfect place to lose little screws and such! Lol I have berber in my train room and lose stuff all the time! Lol


