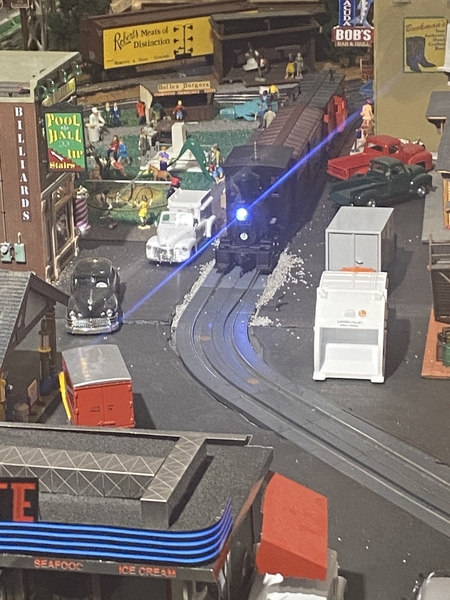
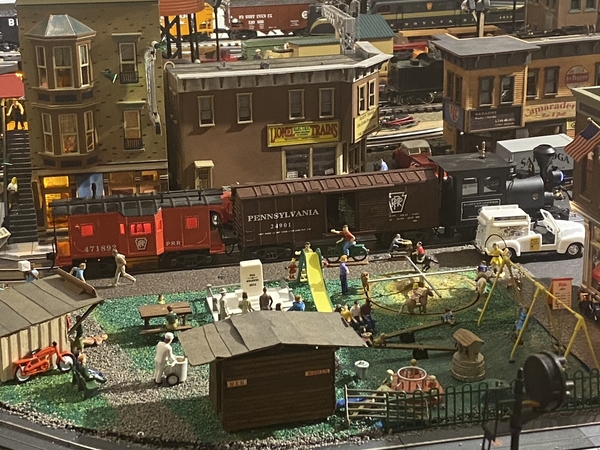
After reviewing more pictures of the Oyster Bay yard, I noticed that there are a lot more weeds and growths than I originally thought. I started the process of adding more to overgrowth to additional areas around the yard. More to follow.
Andy
|


|
After reviewing more pictures of the Oyster Bay yard, I noticed that there are a lot more weeds and growths than I originally thought. I started the process of adding more to overgrowth to additional areas around the yard. More to follow.
Andy
@Steamfan77- Keep that up Andy and you are going to have to hire landscapers soon.....![]()
@luvindemtrains- I have fond memories of our local Woolworth's growing up Dave. We had them, and a 5&10 in the same shopping center. Paper route money went a long way.
Nothing much for me on the layout to report. I'm waiting on parts from GRJ to tune up my new Boston and Maine RS-3. I did clear some LIRR equipment off (sorry Andy ![]() ), to make room to run my Santa Fe F3's once I finish some minor repairs.
), to make room to run my Santa Fe F3's once I finish some minor repairs.
Bob
@RSJB18 posted:
😂 Bob that was great!😂 It looks great Andy!
Bob, the landscaping crew is standing by…
Thanks Rich.
Andy
Thank you Andy!
RSJB18-Yes, and the great thing about it is I could stand outside of the store and see trains go by up the street. The mainline was just a few short blocks away.
Dave
Got the last of my tables, lift sections in for the along the wall temporary layout. Also painted the plywood. I was helped greatly by the book from the Forum section Building a Layout (think that is it, with the late Backshop author's layout) where he detailed lift sections. I was happy how they work, even with my tables not attached to the walls (although I found I should brace them against the walls).
Was great to have the last two weekends to work on this and should have trains running before the fall semester starts and wipes out my free time...
Scott you did a very nice job on the building. It reminds me of growing up in W Va and going with my Dad when he visited customers. He sold insurance to coal mines.
Jeff you have continued a beautiful memory. Thanks for sharing it.
Peter good job on the ballast. We have a ballast king which saves a lot of time when ballasting. It is not being used at present and we would be glad to loan it out. If you want to give it a try, let me know and we can meet somewhere to hand it off.
We have continued making progress on the layout. Charlie and Steve were a tremendous help in getting TIU 2 working. I knew nothing about a “super TIU” but have them now. All MTH engines are loaded into the remotes and all work.
Both transformers are in place and are wired awaiting new construction. Two of four AIUs are in place; two more have been ordered.
Rich returned from trout fishing yesterday… he and Pat caught over 100. He was here right after lunch and ready to start on the new floor. The flooring crew arrived and soon slabs of marble were being put in place. What a fantastic difference it makes.
Paula painted the walls in two end rooms. In the central section, the main walls are Colonial Red. The walls and floor are perfect for the mahogany counter that Rich is building. He is also cutting the walls that fit between the central lobby and end rooms.
A train schedule board circa June, 1955 will be on the rear wall. No photo as copyright.
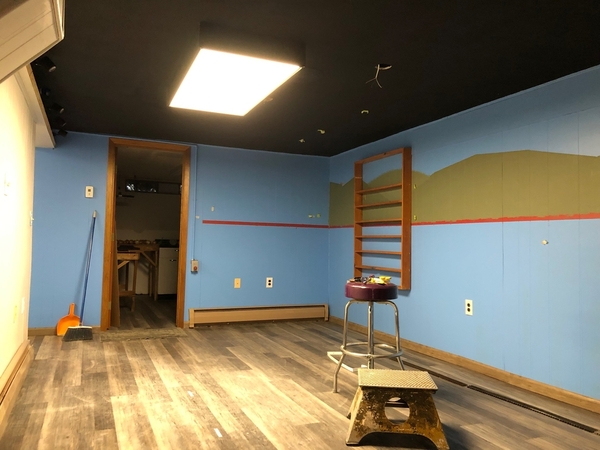
Managed to get ONE ceiling-mounted LED panel light installed, only took most of the afternoon, lol. These Lithonia Lighting 2x4 panels are meant to drop into a suspended ceiling, good plan at the old basement, but needed a new plan at this basement. Their flush-mount kit to the rescue ! Yikes, easier said than done, at least for me ! Is it square to the wall, are all 4 sides square - so the LED panel slides in & is retained properly, is it wired right ? ....the answer, finally, is yes ! The next 3 should go smoother, I now  have a plan ! Rich in SD
I really enjoyed all of your updates. Everyone is making great progress. I sure wish I had some of your skills in my skillset, that's for sure!
My goal this weekend was to get the retaining wall completed on the southern incline and detail the the Rockville bridge a bit. Progress was slower than expected due to rain (except for dry brushing at the end I paint outside) and my search for appropriate size and color "boulders".
Here's the rest of the retaining wall (yes, both sides are done):
For the Rockville bridge, the slots on the base for the bridge piers are too wide and there is an unsightly gap (at least to my eyes). My goal was to install "boulders" around the bases to hide the gap. I went to several streams in my area until I found something along the lines of what I was looking for. Here are the results after glueing in place:
I also wanted to add real sand to the cover the fake sand on the base as well as make a beach but I didn't have time to get that done. Hopefully this weekend.
-Greg
@Greg Houser posted:For the Rockville bridge, the slots on the base for the bridge piers are too wide and there is an unsightly gap (at least to my eyes). My goal was to install "boulders" around the bases to hide the gap. I went to several streams in my area until I found something along the lines of what I was looking for. Here are the results after glueing in place:
-Greg
Greg,
Nice work, it’s looking really good! Your water looks very refreshing; I’m ready to jump in. It’s 90 degrees here.
Greg we really like the retaining walls and need to build a lot of them, at least 100 feet and 10” high. That appears to translate into significant $$$ unless we find a reduce the height/use another type wall.
Any ideas?
Thanks
Paula went to the post office and picked up her new grass insertion module, a RTS Greenkeeper 55KV. She can’t wait to try it out.
It might weigh 8 ounces, if that much. Should be interesting.
Bill, have you tried to make a mold of one section? You can make all the plaster sections you need. I did this about 12 years ago. I bought a foam brick retaining wall and made a very durable mold. Very cost effective.
Bob
I see @Bill Webb there’s a reason Ms. Paula is the green keeper,
She grows Christmas Cactus like my wife Carol. Every window in our house contains a pot with the Christmas cactus…
Ill be watching the layout to see the use and success of the Webbs green keeps 😄
@Bill Webb posted:Greg we really like the retaining walls and need to build a lot of them, at least 100 feet and 10” high. That appears to translate into significant $$$ unless we find a reduce the height/use another type wall.
Any ideas?
Thanks
Paula went to the post office and picked up her new grass insertion module, a RTS Greenkeeper 55KV. She can’t wait to try it out.
It might weigh 8 ounces, if that much. Should be interesting.
I would make them out of foam. There's a company called Green Stuff World which specializes in Dungeons and Dragons type wargaming. They make textured rolling pins - just press and roll over the foam and it puts a pattern in the foam. Here's a youtube tutorial:
https://www.youtube.com/watch?v=V5N7FFwS2KM
I'd suggest scribing them yourself but at 100' and 10" high it would take forever. I'd invest in a good industrial hot foam cutter than you can just push an 8' length of foam through to get a piece that's 1/2" thick or so. Something like this:
https://www.goldstartool.com/h...-cutting-machine.htm
And then use a textured rolling pin.
That's some impressive space to have a layout!
Let us know how your experience with the Greenkeeper is. I have a home-made static grass applicator that works well enough up to 4 - 6mm and am thinking about a more powerful unit down the road.
-Greg
Hi guys, I am so far behind on what is going on here it would take me an hour to comment on everyone's great work! It took me a little while just to read everyone's post for the last time I was here and you're all doing great and Amazing projects! I have nothing to share with you and I hope to be able to get back to the train room someday soon! LOL
It has been a little busy here and I hope to be done next week sometime, at least in my own mind I think I will, but that could change due to the CEO and her ideas! LOL
I hope you all have a great week and find time to have fun with your layouts and trains!
https://ogrforum.ogaugerr.com/...handling-door-wheels
The wheels have arrived, courtesy of @AlanRail:
Almost a shame to cut 'em off the sprues... ![]()
Here's a mockup photo of what I have in mind:
The basic idea in my alternate universe is that the El in Philadelphia got extended to the Frankford Arsenal (about half a mile from the Bridge St. terminal) and from the Ferries to the Philadelphia Navy Base. The Q (Quartermaster) class of cars were designed to haul supplies and equipment between the two military sites. The walls of the cars would be reinforced steel, and the roofs would be blowaway canvas. Thus, if any ammo went off, any blast would be vented upwards more-or-less harmlessly, and since the cars would be running on the elevated tracks, no risk to street traffic...
Anyhow, I look forward to working on this in the autumn! ![]()
The basic components will be a double truck Bowser/Pittman Brill and a milk car shell...
And thanks again to AlanRail! ![]()
Mitch
@M. Mitchell Marmel posted:https://ogrforum.ogaugerr.com/...handling-door-wheels
The wheels have arrived, courtesy of @AlanRail:
Almost a shame to cut 'em off the sprues...
Here's a mockup photo of what I have in mind:
The basic idea in my alternate universe is that the El in Philadelphia got extended to the Frankford Arsenal (about half a mile from the Bridge St. terminal) and from the Ferries to the Philadelphia Navy Base. The Q (Quartermaster) class of cars were designed to haul supplies and equipment between the two military sites. The walls of the cars would be reinforced steel, and the roofs would be blowaway canvas. Thus, if any ammo went off, any blast would be vented upwards more-or-less harmlessly, and since the cars would be running on the elevated tracks, no risk to street traffic...
Anyhow, I look forward to working on this in the autumn!
The basic components will be a double truck Bowser/Pittman Brill and a milk car shell...
And thanks again to AlanRail!
Mitch
I can’t wait to see this! Please send progress pictures!
Go Navy!
@M. Mitchell Marmel posted:https://ogrforum.ogaugerr.com/...handling-door-wheels
The walls of the cars would be reinforced steel, and the roofs would be blowaway canvas. Thus, if any ammo went off, any blast would be vented upwards more-or-less harmlessly, and since the cars would be running on the elevated tracks, no risk to street traffic...
Mitch
Oh WHAT could possibly go wrong!!! ![]()
![]()
That’s a great idea Mitch. That could have provided an early start to the reconstruction project on the el.
Mitch this is going to be fun to watch.
Bob, thanks for the idea. We have never tried making molds and will put that on the list right behind the station. We have an expert plaster man… our retired orthopedic surgeon is an expert with casts.
Greg thanks for the suggestions and videos. We are going to try this too. The rolling pin is a major time saver. We had looked at the hot foam cutter at York for years and never been ready. Looks as if we are now.
Seth Paula has Christmas cactus blooming 9-10 months a year. She can be the static grass guru.
The past two weeks have been difficult but today she can say that she is cancer free. God is good.
Yesterday I rewired the lighting in the front part of the Roanoke passenger station. Then Rich arrived with two small walls and the ticket counter. We cut the walls to fit, painted them, installed the counter, and by then the walls were dry enough to put them in. Last, we installed a beam to hang two chandeliers from and then tested the lights. All six sections and the chandeliers worked.
This morning Paula donned her interior decorator’s uniform and started by installing the schedule board from June, 1955. Then she went to the train room and went thru our supply of interior and exterior accessories (stuff) and half of her people. She brought in items to consider and the box of Arttista figures. We began buying these items about five years ago and recently acquired some from Don Jones. Don you will recognize things from Mr Johnson’s collection when you see the station.
Next Paula has to install what she has chosen and then we can complete the chandeliers and replace the roof sections.
@Tranquil Hollow RR posted:That’s a great idea Mitch. That could have provided an early start to the reconstruction project on the el.
![]()
![]()
![]()
![]()
I think Mitch is the Gomez Addams of the OGR Forum!!!
Most important is the cancer free information. Congratulations, that’s a long physical and emotional roller coaster.
Thanks. Melanoma is scary. The doctors jumped on it immediately.
I have memories of being in my Dads car on the waterfront in Brooklyn NY about 1949. He had to dodge steam engines moving boxcars from the wharf to warehouses. There was another area where the LIRR ran in a cut across Brooklyn from the docks to Long Island At McDonald Ave there was a switch and they would push freight cars up onto the trolley tracks. Many were destined for the Coney Island subway yards

 I’m trying to capture my memories and create a street operation. My problem is that the engines and caboose negotiate the tight Streets curves, the boxcar does not. It’s a little longer than the caboose and the wheel sets hit the scale coupler mounting .
I would appreciate any input on how to modify the boxcar.
@pennsyfan posted:I can’t wait to see this! Please send progress pictures!
Go Navy!
Keep watching this fall! ![]()
@Apples55 posted:Oh WHAT could possibly go wrong!!!
Fortescue + high explosives? Nothing at all! ![]()
@Apples55 posted:
I think Mitch is the Gomez Addams of the OGR Forum!!!

@Bill Webb posted:Thanks. Melanoma is scary. The doctors jumped on it immediately.
Great news! ![]()
Mitch
I would suggest replacing the trucks with a set of MarX trucks. MarX rolls on O Gauge track. They are smaller then Lionel or MTH trucks. You'll have to adjust the height of the scale coupler mounts.
You are creating a memorable scene. Looks great.
@Bill Webb posted:Thanks. Melanoma is scary. The doctors jumped on it immediately.
Bill, Please tell Paula I'm glad she is now cancer free. Praise God for her healing. The lighting looks great, and I'm sure Paula will come up with some great detailing for building
I had some time between conference calls this morning (gotta love that telework!), so I thought I'd quickly lube up and take one of my shelf queens for a spin on the layout. I selected our first MTH locomotive, a conventional 4-6-2 Hudson (my kids and I had many good times with her). However, when I started removing her from the shelf, I didn't realize that two flatcars with my meticulously crafted, painted, and detailed military models and figures were attached to the tender coupler. Needless to say, I launched them on a maiden flight to my trainroom floor. After swallowing my heart, which had lodged in my throat and wiping away my tears, I spent the past hour with a flashlight on my hands and knees scouring for all of the broken pieces. I think I got everything and overall, it could've been much worse - at least I didn't drop the engine and the two flatcars seem ok, only suffering broken brake wheels. Looking forward to my new, unscheduled, project of gluing everything back together this weekend.
I can relate to that; I’ve had some close calls that way. My latest fiasco was test running a locomotive, and it stalled at the other end of the layout. I went over there and played with the e unit I reversed it because I was using the main for my test and it was occupied. I thought it would be slow enough that I could get back to the controls. Well it took of and I tried to chase it and I tripped. I knock over a stool that had 7 new MTH Christmas cars and some postwar and MPC. It hit the floor and I hit it. I faired better than the post war and the MPC. I broke the rear truck on a 2400 observation and a plastic truck on a boxcar. MY Daughter asked about the cut on my head. I told her I got hit by a train. Oh the chassis being tested; it stopped when it ran into the loco of the stopped train. No harm done there.
@Strap Hanger posted:I had some time between conference calls this morning (gotta love that telework!), so I thought I'd quickly lube up and take one of my shelf queens for a spin on the layout. I selected our first MTH locomotive, a conventional 4-6-2 Hudson (my kids and I had many good times with her). However, when I started removing her from the shelf, I didn't realize that two flatcars with my meticulously crafted, painted, and detailed military models and figures were attached to the tender coupler. Needless to say, I launched them on a maiden flight to my trainroom floor. After swallowing my heart, which had lodged in my throat and wiping away my tears, I spent the past hour with a flashlight on my hands and knees scouring for all of the broken pieces. I think I got everything and overall, it could've been much worse - at least I didn't drop the engine and the two flatcars seem ok, only suffering broken brake wheels. Looking forward to my new, unscheduled, project of gluing everything back together this weekend.
I assume the Department of the Army will want to do a full investigation......![]()
All kidding aside, that really sucks. ![]()
![]() That's why I don't couple cars together on the shelves.
That's why I don't couple cars together on the shelves.
@pennsyfan- Another unfortunate story. Who knew model trains were a contact sport.
@Bill Webb- Glad to hear Paula is OK.
Bob
@RSJB18 posted:I assume the Department of the Army will want to do a full investigation......
All kidding aside, that really sucks.
That's why I don't couple cars together on the shelves.
@pennsyfan- Another unfortunate story. Who knew model trains were a contact sport.
@Bill Webb- Glad to hear Paula is OK.
Bob
"That's why I don't couple cars together on the shelves" - Lesson learned the hard way, Bob. Yes, all papers have been filed with the department and I await adjudication, LOL!
@pennsyfan - Hit by a train! LOL! Heartbreaking, but glad you didn't have worse than a cut.
Well Strap Hanger and Pennsyfan I am terribly sorry these “accidents” which recently occurred…
I am certainly not immune from such situations, such as the tripping/falling and pulling attached cars from the train shelves along with the beautiful expensive engines we dearly love.
In fact even if they do occur I flat out quit explaining what has just occurred to my lovely loving wife. While limping and wiping blood I don’t release nor disclose the private information 😝.
Of course I would get from her, “I’m certainly glad you did not get hurt, can you please run to town for the short grocery list now? “ Along with, “well that’s definitely a lesson that you must watch what you’re doing! “😜😜 Did you break that really expensive engine we talked about this week?😏
Since Wednesday I have been doing “bench work” on the benches for my MTH passenger depot.
And yes, while I am on my way to the grocery I must stop at the True Value for a supply of new glue.
@Seth Thomas posted:The last three engines that I have purchased recently new and/used each one was a problem. So I have been extremely hesitant to test run my Santa Fe engine I received from my servicer this week.
I am happy to report she fired up and ran with no problems, no, I’m truly excited. 😅But I only tested in conventional operations so I have one more test with Legacy to worry about until tomorrow 😆
Looks good so far to me Seth.
Not to worry . Good luck with the Legacy operation. ![]()
Strap Hanger glad things are fixable. You and Pennsyfan had quite a week.
SIRT the buildings really look great. Quite a redo I am sure.
Last Saturday I wiped two MTH remotes clean… totally empty. Finally got them reprogrammed late yesterday. At least I learned what not to do. Thank goodness for complete descriptions in the computer.
@SIRT- Looks like your windows update went smoother than when I upgraded to v 10.....![]() Nice work.
Nice work.
@Bill Webb- more software issues? Better you than me.
@Seth Thomas- Who's benches are you using? The laser kits I bought for my station platform were a PITA to cut off the sheets. I wound up breaking half the parts and had to fabricate new ones.
Your wife sounds a lot like mine......![]()
Bob
@SIRT posted:
Your ability to observe is well above average. Excellent work.
@Seth Thomas posted:Of course I would get from her, “I’m certainly glad you did not get hurt, can you please run to town for the short grocery list now? “ Along with, “well that’s definitely a lesson that you must watch what you’re doing! “😜😜 Did you break that really expensive engine we talked about this week?😏
Count your blessings; I long for a honey do list.
Feeling a bit nostalgic today and decided to run my first train set (1970s) that I converted to AC earlier this year. If it goes too slowly, it will lose power over the turnouts and crossings. It’s almost comical how quickly it has to go compared to the other trains that are running so slowly and smoothly.
Access to this requires an OGR Forum Supporting Membership
