Bruce, I have the R-7000 on the right, like in your picture. The ultimate in portable radios.
No pics tonight. Mr. Brown dropped off my order from Scenic Express. Pays to lives close to them. I got the order in two days. So this evening I ran trains and made up more trees. Tomorrow I run to the Depot and get wood to make my control panel and a shelve underneath for my transformers..............Paul
Had purchased a nice baggage car on the forum but the paint scheme was wrong so bought some Pollyscale acrylic Tuscan red at my LHS today. Brush painted it, two coats, and it really did I nice job. Also bought a "book" today put out by the US Army in 1944 with plans and specs for the standard army buildings. This includes just about everything including a bamboo hut. I was a little disappointed in the few RR buildings and info in it. There was more on horses !! Did get official plans for a water tank, ash pit trestles, loading wharfs and two yards layouts Of course, a bunch of the work shop and living quarters would have been used for the railroads.
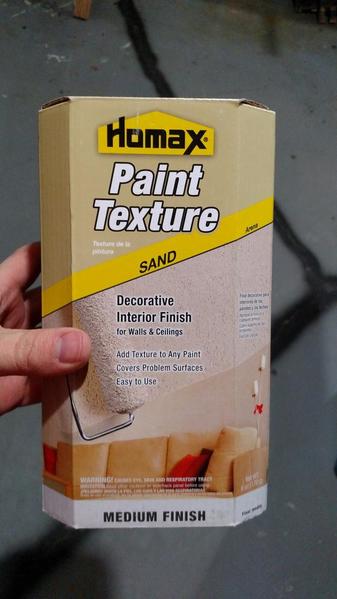
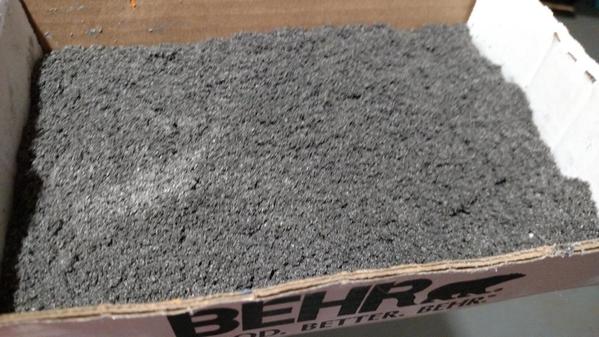
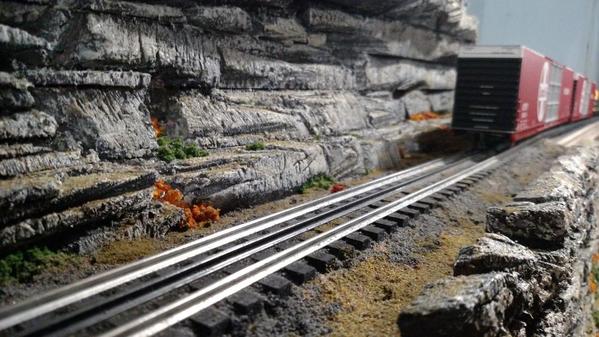
Made my first attempt at ballasting track. Used Homax wall texture sand dyed black for cinders, play sand for filler and color. Did about 12 feet. Thoughts?
Attachments
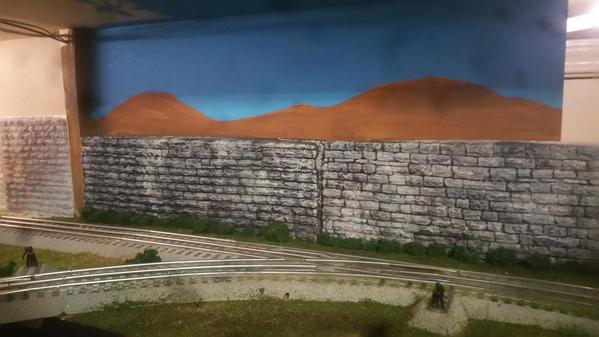
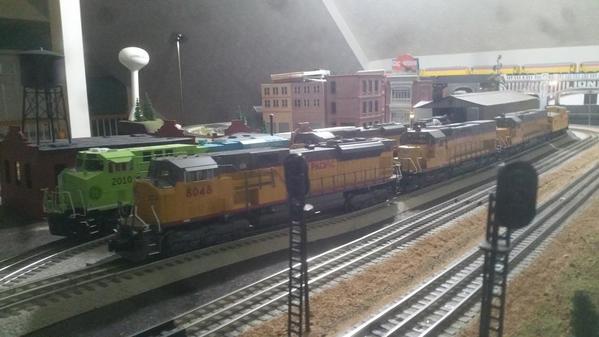
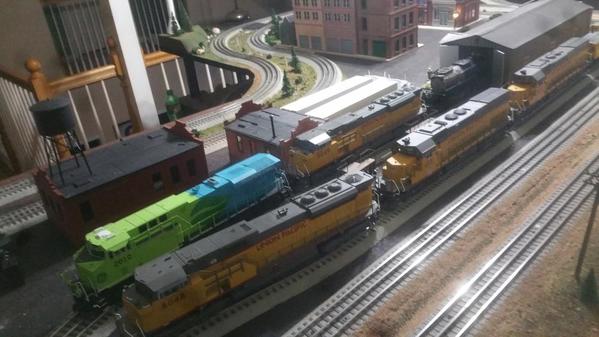
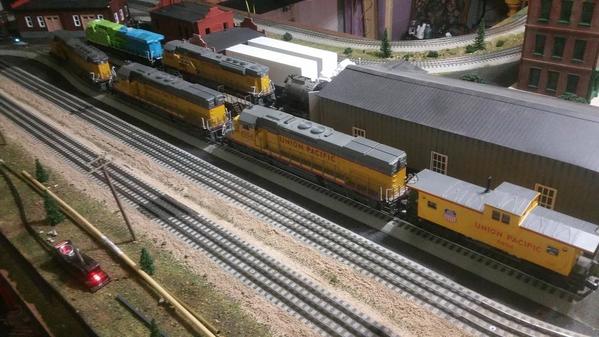
I ran trains for alittle while. moving all the UP engines to one spot. then did a little scenery I'm awaiting some fusion fiber to show up so i can work on the bridge area some more. Never used fusion fiber so this should be a new experiance. painted my first mural ![]() kind of different .
kind of different .
Attachments
J, I like what you did as ballast. Your scenery is coming together. Can't wait for the next pics and the area under the bridge...............Paul
paul 2 posted:J, I like what you did as ballast. Your scenery is coming together. Can't wait for the next pics and the area under the bridge...............Paul
Thanks Paul. I appreciate it. I feel like most ballast looks out-of-scale - at least for Kansas - Missouri which is what I'm modeling. I have seen larger chunky stuff showing up in areas along the tracks in Missouri where wash-out might occur - however most mainlines in Kansas - Missouri are crunchy and not pleasant to walk on, but not made of the big-honking stuff I see on most O scale layouts. The stuff I've seen in my years living along the tracks is mostly a 1/2 inch to 2 inches in size - scales out to somewhere around .01 to .04 inches. That's pretty fine. Examples from ATSF Mainline:
Melvern, KS
Lebo, KS
I'm going to try coloring some of the play sand, but I feel like I'm on the right track.
Attachments
Jacobpaul81 posted:paul 2 posted:J, I like what you did as ballast. Your scenery is coming together. Can't wait for the next pics and the area under the bridge...............Paul
Thanks Paul. I appreciate it. I feel like most ballast looks out-of-scale - at least for Kansas - Missouri which is what I'm modeling. I have seen larger chunky stuff showing up in areas along the tracks in Missouri where wash-out might occur - however most mainlines in Kansas - Missouri are crunchy and not pleasant to walk on, but not made of the big-honking stuff I see on most O scale layouts. The stuff I've seen in my years living along the tracks is mostly a 1/2 inch to 2 inches in size - scales out to somewhere around .01 to .04 inches. That's pretty fine. Examples from ATSF Mainline:
Melvern, KS
I'm going to try coloring some of the play sand, but I feel like I'm on the right track.
Jacobpaul81, I think you are on the right track (pun intended) and feel your real-ilfe examples support your point perfectly for a finer ballast.
Unfortunately for me, I installed my ballast very early in the game - back in 1995 when I first built my layout - and have only since learned better. It always seemed to me that I should have used HO ballast but bowed to the pressure of what was marketed as "O-gauge" ballast. I am sorry I did that. I'd change it all, now, if I could, but there is no practical way I could ever attempt such a task nowadays, given all the scenery that is in-place, etc. These photos are examples of my disappointment in the ballast I have on the layout, since 1995. Much of it is glued into place, and thus, is permanent.
So, I make my "confession" here as a word-to-the-wise, so none of my fellow hobbyists do what I did. Also, I want to be supportive of your careful, exacting efforts.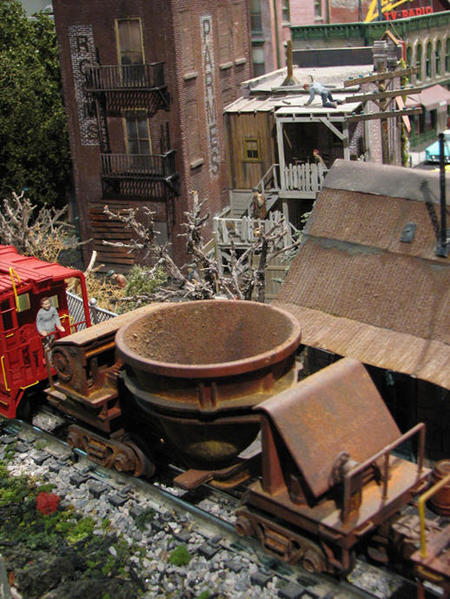


FrankM. ![]()
Attachments
Frank: Ya know, I actually think that your ballast looks pretty good. On my layout I have been using the crushed rubber ballast, which doesn't look bad to me, either, and at one point when I was making some changes and adding a bit of track, I did use some finer ground stuff. That part doesn't look as correct to me, anymore. The major problem for me is that the rubber is all pretty much the same color, I think that most real ballast has varying colors of stone used. In one place, I added some dark gray to the light gray that I had been using and I think that looks good, too.
And, I remember seeing a stretch of brand new railroad, back in Wisc, that had what I thought was "huge" pieces of rock for ballast. Wish I would have photographed it, because the ballast just barely fit in between the ties. I would have sworn that the rock size was between 3" and 4" for each piece.
Guess there's a prototype for anything.
Paul Fischer
I walked over to my train layout building with my 4 new cars that I got for Christmas and unboxed them and set them on the track. This was the first time that I have been in the train building in about 2 months, last time I was in the train building was Thanksgiving weekend. Spend 20 days in December in the Hospital. It takes longer to recover from Heart bypass at 65 years old than at 42 years old. BUT should be good for another 10 years of running trains,![]() God willing.
God willing.
fisch330 posted:Frank: Ya know, I actually think that your ballast looks pretty good. On my layout I have been using the crushed rubber ballast, which doesn't look bad to me, either, and at one point when I was making some changes and adding a bit of track, I did use some finer ground stuff. That part doesn't look as correct to me, anymore. The major problem for me is that the rubber is all pretty much the same color, I think that most real ballast has varying colors of stone used. In one place, I added some dark gray to the light gray that I had been using and I think that looks good, too.
And, I remember seeing a stretch of brand new railroad, back in Wisc, that had what I thought was "huge" pieces of rock for ballast. Wish I would have photographed it, because the ballast just barely fit in between the ties. I would have sworn that the rock size was between 3" and 4" for each piece.
Guess there's a prototype for anything.
Paul Fischer
Thank you, I appreciate the encouragement, Paul Fischer. I believe most of my ballast is that rubber stuff, too, and some of it so-called, or actual, "real granite." However, on a couple visits/drives to Upstate New York, I have actually counted the average number of ballast stones between ties and came up with 5 - 6, straight across, for whatever good that does me.
The ballast thing is only a question that nettles me; none of our visitors to the layout ever mention or give a rat'spatootie about that detail. I trust they have enough to see otherwise, including the trains themselves, of course. It's all relative, huh.
Attachments
Painted my 15" baggage car PRR Tuscan and looks good. The only problem is that it has a black plastic shiny roof and trying to decide to paint it flat black or Tuscan ?? The coaches have Tuscan roofs. Which is best ??
CBS072 posted:I walked over to my train layout building with my 4 new cars that I got for Christmas and unboxed them and set them on the track. This was the first time that I have been in the train building in about 2 months, last time I was in the train building was Thanksgiving weekend. Spend 20 days in December in the Hospital. It takes longer to recover from Heart bypass at 65 years old than at 42 years old. BUT should be good for another 10 years of running trains,
God willing.
Keith,
I am glad you are recovering and got to finally go to the train building. May you recover fully and have many more years to run trains.
Progress was made today. Chris and I are about 1/2 finished constructing the Great Northeastern Railway's corporate headquarters building to sit at the east end of the yard on the uppermost level of our layout. Another 2 days work is necessary before it can be installed in its final resting place on the layout.
Completed and tested the PS2 upgrade to my K-Line Trainmaster. Tests went well.
Need to dress up the wiring, load the software and install the shell.
Attachments
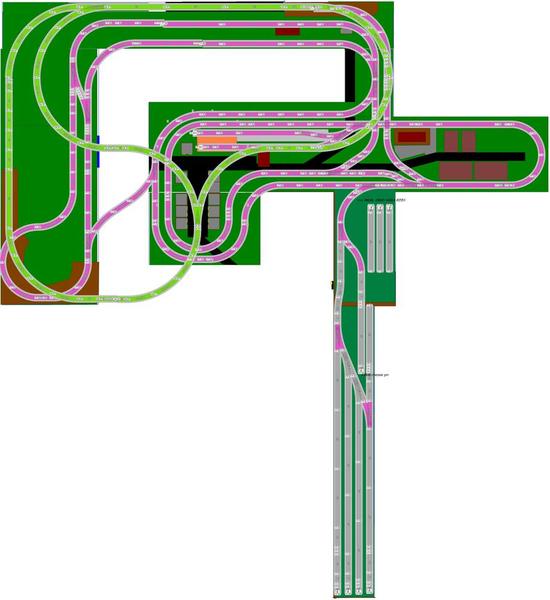
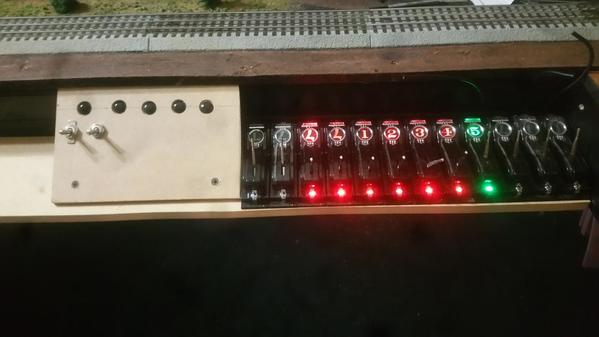
well since i awaiting more scenery products i decided it's time to make a control panel of sorts. a place for the remote switches and power for the sidings. figured since the transfer table area seems to be where i spend most of my time standing its a nice place to put it now the task of running all the wires for the switches to that one spot. Found the snow plow for the Evolution Hybrid. and i think i finished up my upper level track plan it's all 072. uploaded the scarm file if anyone wants to see it the photo of the switch remotes i know of 4 more that are needed for whats on the layout now and 1 more for the 3rd level then any manual switch i replace will add to the list of switch remotes ![]() I added up if replacing the manual switches it's 13 more switches
I added up if replacing the manual switches it's 13 more switches ![]() lionel bring the price down please
lionel bring the price down please
7X 036 LH
3X 036 RH
2X 072 RH
1X 072 Y
Ouch
Attachments
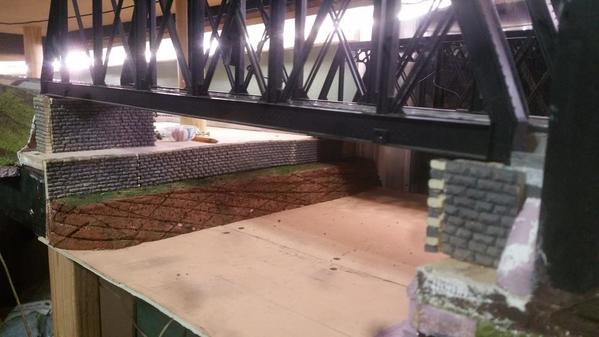
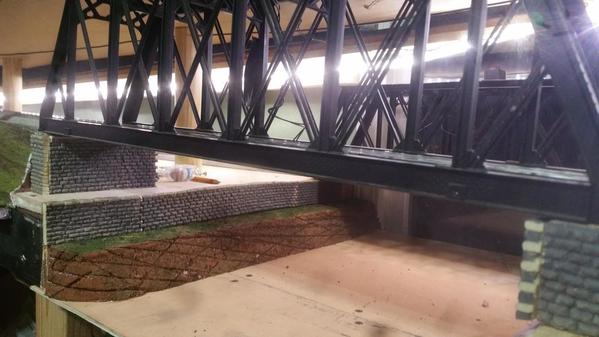
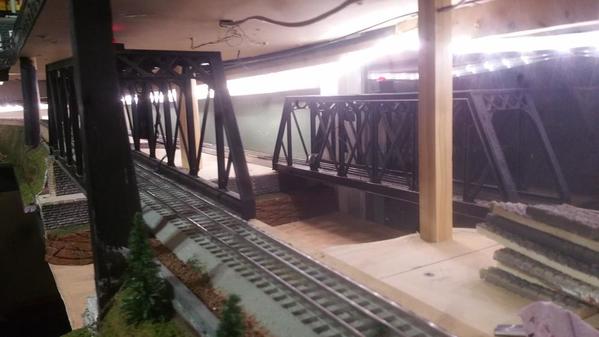
Today was spent replacing two wheels out for three rail wheels in a few two rail trucks on a couple of cars I bought. And I cut the base around a Korber switch tower so it would fit in the area better. I started cleaning up another area to put in scenery under the bridge and around and down to the station. I also got my measurements for making my control panel and now I can get the wood. I did run trains today............Paul
I thought I would have both projects I have been working on simultaneously done last night, and photoed, but I still have lettering and detail glitches to correct. The cucumber vinegar tank car for the Menards pickle plant needs numbers, and the pepper loco water tank, for use near the pickle packing plant, needs signboards. (can't decide to call this area "Pickleville, Peiffer after the plant, or Pepper Station", if I decide to build an odd-ball station for the area...mulling over station designs) Since this water tank was scratchbuilt out of an old model magazine article, with some bashing, it is "unusual", and unlikely to be found on other layouts. (and here I am on record as not liking fantasy cars, and these are both fantasies; a car and water tank)
Jhainer posted:
You will LOVE Fusion Fiber! It has been my flagship product for the last 5 years. It is a one sitting scenery application, it is light and it is reusable if you color it with acrylic paint. You have made a good choice.
jim pastorius posted:Painted my 15" baggage car PRR Tuscan and looks good. The only problem is that it has a black plastic shiny roof and trying to decide to paint it flat black or Tuscan ?? The coaches have Tuscan roofs. Which is best ??
The Pennsylvania Railroad's box cars had Tuscan red roofs.
Today was a Hodge Podge of little things. Ran trains for the afternoon but I got one weaver trailer flat changed over from two rail to three rail and added it to the one train. The other car I converted over I have to hunt down some couplers for it then that one is done. I made up another batch of trees and cleaned off the next area for scenery work. Pics of the area. I finally figured which switch tower to use. I have to take out the plaster in that area so it will sit flat. Then I can do shrubs around it................Paul
Attachments
Finally made the decision and painted the roof of my Madison baggage car Turscan. After thoroughly dry I will hit it with some clear lacquer. Also whipped up another batch of smoke fluid.
I finally finished both the Pickleville enclosed water tank, and the cucumber vinegar car. I would like to build a vegetable themed caboose and railroad station for Pickleville, but haven't come up with any ideas. I looked at artificial decorative red peppers for the caboose, but didn't think there was enough room in them to hollow out with windows, doors, etc., and that would have just looked right as a bobber caboose.
jim pastorius posted:Finally made the decision and painted the roof of my Madison baggage car Turscan. After thoroughly dry I will hit it with some clear lacquer. Also whipped up another batch of smoke fluid.
batch of smoke fluid ??? How
Today was a different kind of day. got a few packages in full loop of 072, roofs for Thomas passenger cars, and a Lion Chief Thomas set new in Box. all for the granddaughter minus the 072 even tho Thomas will look good on the layout on the 072 loop. so I setup her Thomas lion chief. and then setup a loop of mth tracks for her transformer Thomas. She got to run both Thomas's at the same time. then I started wiring up Switches. 
Attachments
I turned on the layout for the first time in a while (maybe 4 months) ran some trains and upgraded Legacy to V1.60.
Today I glued down what I did last night. Then I started a couple of areas toward the station. That is a wrap for today I have promised to take the CEO of the railroad out for dinner tonight. Pic of yesterdays work from the back side of the bridge and the two areas I put foliage down. Have to make up some plaster to fill in where I moved the station back. On the backside of the station I still have to mount the mural before I can add more scenery.....Paul
Attachments
Completed the PS2 upgrade on my K-Line Virginian Trainmaster. Dressed the wires, checked lights, sounds, direction control, etc. prior to placing the shell on the chassis. Uploaded the software, tested great.
Jhainer,
I like the panel with the switches.
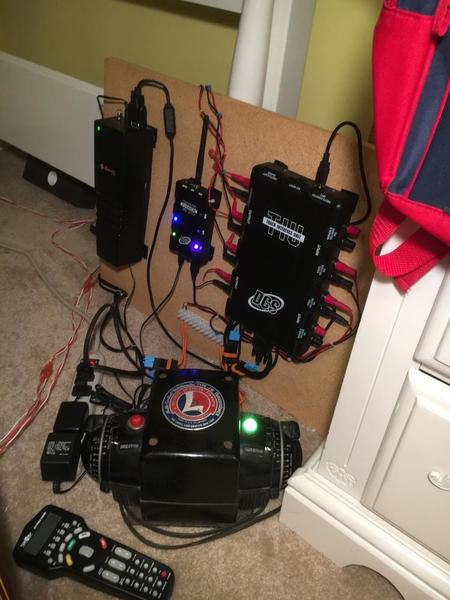
I finished up my panel today for my temporary layout. Prior to Christmas everything was laying on the carpet for a jumble of wires. At Christmas, since I was going to run conventional trains, I removed the DCS and some of the wire. Today, I got the panel in, ran a DCS engine both with the remote and my iPhone. The next thing to do will be to figure out how to run my new TMCC engine via the TMCC base connected to the DCS.
Attachments
Looks like you are ready to launch a moon rocket !! If I have 2 wires I have a jumble.
"Main street" is beginning to take shape. 600 grit sandpaper with woodland scenics asphalt brushed over the seams to look like crack filler.
"Pole butts" were added to help prevent careless drivers from ending up on the tracks.
A gravel road will eventually go around the back of the hardware store
I also dry bushed in some" traffic wear".
The spot on the right will eventually be a SMALL parallel parking area for the station out of view.
Attachments
I got in a book, on canning and pickle packing all over eastern Colorado, off Amazon. When I have done a couple of drives through SE Colorado and across the southern portion from the Rockies to Kansas, it has seemed very arid and unlikely to be growing and packing fruit and vegetables. Not true. Into the 1990's they were growing and packing all kinds of stuff...gooseberries, no less, and tomatoes, and tons of pickles. I wondered if I was stretching things a bit with a pickle salting station there. Nope, there were a lot of them, and canning companies, so my packing plant and train cars are legit. They shipped a lot of railcars of pickles east. Amazing that there are books on veggie and fruit packing in Colorado. But today, I passed up, because of price, a number of booklets I had not seen before, on logging railroads in central Pa., so I guess there is a book on everything, if you can find it.
RickO posted:"Main street" is beginning to take shape. 600 grit sandpaper with woodland scenics asphalt brushed over the seams to look like crack filler.
"Pole butts" were added to help prevent careless drivers from ending up on the tracks.
A gravel road will eventually go around the back of the hardware store
I also dry bushed in some" traffic wear".
The spot on the right will eventually be a SMALL parallel parking area for the station out of view.
Excellent work. That's a good looking scene.
got my creeper out and am trying to figure out way some acc don't work ,geeepers creepers
Mark Boyce posted:Jhainer,
I like the panel with the switches.
I finished up my panel today for my temporary layout. Prior to Christmas everything was laying on the carpet for a jumble of wires. At Christmas, since I was going to run conventional trains, I removed the DCS and some of the wire. Today, I got the panel in, ran a DCS engine both with the remote and my iPhone. The next thing to do will be to figure out how to run my new TMCC engine via the TMCC base connected to the DCS.
I did the same thing about a week ago. this is mounted under the layout. today I didn't do much train stuff as the temps were nice outside. I don't know if anyone remembers but my step brother wrecked one of my cars a 2001 Mustang Roush. well at the time it was only going to be used in the off chance I needed it while my 2013 was in the shop for warranty work. well he borrowed it and wrecked it. so today I went and bought a parts car to replace what he broke still gonna be a lot of work for a car that won't be worth it but it was promised to my daughter 9 years ago and she wants it fixed ![]() . I did manage a little project today before going and getting the parts car. made a batch of fluid for the first time. worked real good
. I did manage a little project today before going and getting the parts car. made a batch of fluid for the first time. worked real good ![]()
Attachments
Finally got around to running accessory wiring bus today.
Wired in log loader, coal loader, 213 lift bridge and railroad control tower.
Great to see the youngest playing with the two loaders. Ah that pesky escaped Lionel coal!
Have a great Sunday.
Nick
Attachments
Installed a hotter resistor into a Williams Turbine's Fan driven smoke unit (Lionel smoke unit). It now smokes great.
Replaced the resistor in my Dad's Lionel 2055 steamer and added some batting. Also smokes much better now.
Re-soldered the pick-up wires on our reissue of the Merchandise car.


