Looks great, love the lights!

Is it to scale? If so, it must take up a huge section of the layout. A pal of mine wanted to build a regulation baseball field with stands in HO scale and once he did the math was shocked at how much room it'd take up even in that scale. He gave up on that soon after.

Thanks, everyone!   It's not scale.   The infield is very close to being scale for a Little League field.   They outfield is short of being scale.   When I measured for a scale regulation field I didn't have close to enough room.   Then I tried to measure for a scale Little League field and I still didn't have enough room.    Thus, I eyeballed it.  LOL.

The field actually does take up a good bit of room.  I had a section on my layout and couldn't come up with any good (and cheap) accessories for the area.  I love baseball so I decided to build a baseball field.

I was out in the Pittsburgh Area during the week for a change and had time to make the short drive over to Delmont, PA and visited Scenic Express.  Walking through the warehouse and seeing all the items in person is worth the trip if you can make it.  Much better than going to a train show and a whole lot less crowded.  I picked up some flexible rock wall panels and a lot of ideas.  I highly recommend making the trip there if your passing through Pennsylvania.

Seems like wanting too and getting the time to is two different things. A bit of the morning allowed me to piece together some pieces of track  I had in the basement to see what it would look like. I am trying for some interesting track patterns. A pic of my first idea. Switches in the pic may not be the ones I finally use. I just wanted an idea. So now I am getting ready to head out for lunch with a bunch of train guys.........Paul


DSCN2447

Attachments

Images (1)
  • DSCN2447

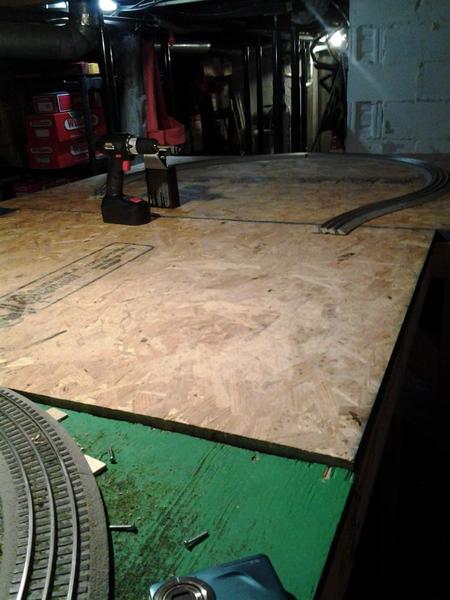
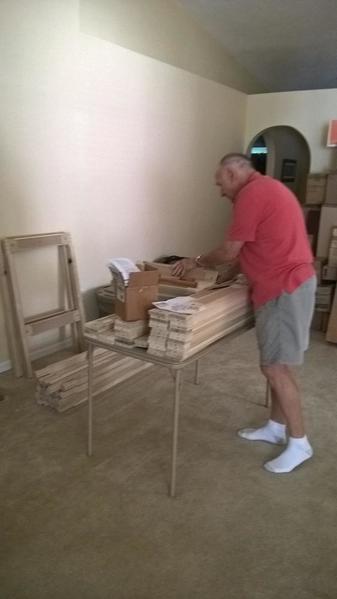
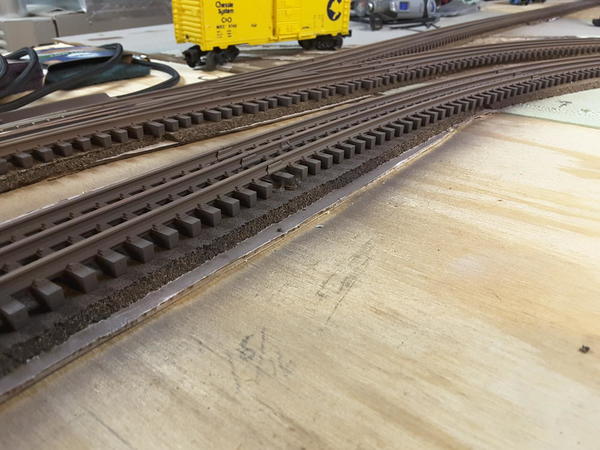
I built a extension for my layout. My layout is a 6x8 with a 4x5 'L'. I added a 3x4 and a 4x5 end table to accommodated a O48 horseshoe.  I'm really bad at explaining this so just look at the pictures. This is a big accomplishment for me because I have nerve damage from a motorcycle accident so I'm taking my time. I just need to paint it, add grass or ballast and get more track. I still need to wire for accessories, lights and maybe buildings. I mainly want to make a longer train yard, but now I'm seeing more possibilities. I made a few little goofs, but I can work around them.

100_2313100_2314100_2316IMG_20160714_213759

Attachments

Images (4)
  • 100_2313
  • 100_2314
  • 100_2316
  • IMG_20160714_213759
Len B posted:
EddieZ posted:

I know my wife and I are kinda odd mixing O Gauge trains and Legos but we have fun.  Our Grandkids live out of town and we seldom see them so this is a way for them to see our lay out.  Hope you enjoy the video. The link is below.

Regards,

Eddie

https://youtu.be/qMHD55_KSGE

Your video is one of the best I've seen on here. Very well done.

Great video Eddie. You should check out this Lego train video.

https://www.youtube.com/watch?v=r64yQi7ceBs

DennyM posted:

I built a extension for my layout. My layout is a 6x8 with a 4x5 'L'. I added a 3x4 and a 4x5 end table to accommodated a O48 horseshoe.  I'm really bad at explaining this so just look at the pictures. This is a big accomplishment for me because I have nerve damage from a motorcycle accident so I'm taking my time. I just need to paint it, add grass or ballast and get more track. I still need to wire for accessories, lights and maybe buildings. I mainly want to make a longer train yard, but now I'm seeing more possibilities. I made a few little goofs, but I can work around them.

Denny,

It looks great!  I am sorry about your nerve damage.  I can relate a bit with arthritis making it a bit more difficult than before.  My hat is off to you!

Mark Boyce posted:

Denny.

I have been looking at buying or renting a miter saw as well.  I am going to start a new layout after our last daughter at home gets married and moved out this September.  A friend told me he bought a chop saw and used that, but looking at one, I think the miter saw would be better.

Mark,  

Buy the miter saw.   By owning it, you will also gain the gift of "time" - bench work can be more than a weekend project.   It is a handy tool to have in your shop arsenal.  

Congratulations on the opportunity to gain space.   Hopefully, you have set aside money for the layout as well as the wedding.  

Dave

darlander posted:
Mark Boyce posted:

Denny.

I have been looking at buying or renting a miter saw as well.  I am going to start a new layout after our last daughter at home gets married and moved out this September.  A friend told me he bought a chop saw and used that, but looking at one, I think the miter saw would be better.

Mark,  

Buy the miter saw.   By owning it, you will also gain the gift of "time" - bench work can be more than a weekend project.   It is a handy tool to have in your shop arsenal.  

Congratulations on the opportunity to gain space.   Hopefully, you have set aside money for the layout as well as the wedding.  

Dave

Dave,

Yes, the money is there.  Our house is paid for.  Fortunately the young people are keeping costs down and trying to pay as much as possible themselves.

Bought some more woodland scenic ready-made trees at Hobby Lobby this morning (it's on the way to work). I have a hug box of super tree sprigs, and I intend on finally putting trees onto the layout. I have, I think eight of the big ready-made ones already. I'm still not sure when static grass application will start, but I'm doing at least one of the following this weekend:

  • Getting bushes made with poly puffs and ground foam
  • Putting static grass on the layout (I have 5 containers of the stuff)
  • Making/putting in trees

Mianne layout diagram and receipt of kit, have assembled most of it and started the plywood top (19/32) .  Will be putting a fiberboard on top of that.  Really liked the ease of assembly.  Need to attach the clips to the ply, paint the fiberboard and start laying track.  Predrilled holes for the wiring.

Mort


WP_20160630_14_21_19_Pro

WP_20160715_13_40_12_Pro


Attachments

Images (2)
  • WP_20160630_14_21_19_Pro: Unboxed the parts for 16x10 layout
  • WP_20160715_13_40_12_Pro: Ply laid on the benchwork,  Half of layout shown, rest is waiting to be setup
mort1345 posted:

Mianne layout diagram and receipt of kit, have assembled most of it and started the plywood top (19/32) .  Will be putting a fiberboard on top of that.  Really liked the ease of assembly.  Need to attach the clips to the ply, paint the fiberboard and start laying track.  Predrilled holes for the wiring. 

Mort,

Good that you took photos of the earliest part of the build. When I started building my own layout (my first real layout ever) two years ago, I documented almost everything from the first steps. Seemed kinda silly at the time during the process, but I'm so glad I did it now, as I can go back and show non-modelers how much work really went into it. The finished result doesn't show all the work you went through to get there and non-model-builder types don't see that it didn't just start like it looks today...

DennyM posted:

I built a extension for my layout. My layout is a 6x8 with a 4x5 'L'. I added a 3x4 and a 4x5 end table to accommodated a O48 horseshoe.  I'm really bad at explaining this so just look at the pictures. This is a big accomplishment for me because I have nerve damage from a motorcycle accident so I'm taking my time. I just need to paint it, add grass or ballast and get more track. I still need to wire for accessories, lights and maybe buildings. I mainly want to make a longer train yard, but now I'm seeing more possibilities. I made a few little goofs, but I can work around them.

100_2313100_2314100_2316IMG_20160714_213759

I finished screwing down the plywood and painted it. I sprinkled a little grass on the wet paint just for character. There is a auction at the local hobby shop tomorrow and one of the lots is used Fastrack. I'll look to see what kind of shape it's in before I bid on it. If I don't like it there are some passenger cars I have my eye on. Maybe I'll bid on both.


100_2318100_2319100_2320100_2323100_2324100_2325100_2326

Attachments

Images (8)
  • 100_2318
  • 100_2319
  • 100_2320
  • 100_2321
  • 100_2323
  • 100_2324
  • 100_2325
  • 100_2326

Yesterday was a train day for my mailman, as he both dropped off and picked up choo-choos...

Someone in Albany wrote me out of the blue wanting a Marx 666 loco and cars, so I sent out a consist with track and transformer.  At the same time, I took delivery of three Lionel steam engines: 

GEDC2491

Three Pennsy beauties!  The two LLC jobs are, I think, pulls from "Pennsylvania Limited" train sets.  The 2020 is a rare bird indeed:  Original 1946 build with the light bulb smoke unit (still working!) and the plug-controlled E-unit (a tad sticky, but I cleaned it up and got it working fairly well)... 

Just to keep things on topic, the package also had a trolley (seen here with its Corgi PTC buddy, in the process of being powered): 

GEDC2492

Since I already have a Christmas trolley, this may get a respray into Razorback Traction or Giraffe Express livery.

Also, since there's a shocking lack of trolley pole, I may install a pantograph or bow collector for that Euro look:

GEDC2493

Even with no trains running, Shop Supervisor Norma Bates Kitteh finds the train room relaxing:

GEDC2490

Mitch

Attachments

Images (4)
  • GEDC2491
  • GEDC2492
  • GEDC2493
  • GEDC2490

Over the last 2 days finished another 7 4x8 areas of main line; plan is to finish the last 4 tomorrow.  Goal is to have main line wired and running by Thursday as my nieces and nephews will be staying over as they are back from Germany (sister and brother in law are in the military) for the summer and they were really disappointed when I told them I had to tear down the old layout.  I am hoping to surprise them by having subway and main line running when they come over.

DSC_0868[1] 

Also I had to make a modification to the swing bridge that I bought at April York.  I was told that the clearance could handle modern auto carriers well it doesn't by about 1/8 of an inch because of this metal tab that really doesn't do anything.  So I had to get in there and grind out a passage way.

DSC_0873[1]

Attachments

Images (2)
  • DSC_0873[1]
  • DSC_0868[1]

nada the last couple of days, and also this weekend. Have had to knuckle down to do school work for my two very intense University summer school classes. Spent much time, cleaning and organizing a small area in my now sitting room (formerly used as a bedroom by my college age daughter), to bring down my antique writing desk to create what I call and "ADD school kid" (me) grown- up study space in the house. Set up against a mostly blank wall, except for a large wall clock now over the computer. Everywhere in this house and gardens has too many districting things to take up my artttention, including the trains! Focus is very hard for me sometimes, but I've got to plug through and pass both of these classes with at least a "B".

IMG_2472


Attachments

Images (1)
  • IMG_2472

Worked on this park today.  It's not yet quite complete, however, close.  Planted a few trees here and there on my layout too.  Went to hobby shop to get a background piece.  Took a photo of my Lionel switcher at the grade crossing. My good friend Randy is coming tomorrow to help me with the layout.  The park will be named the Charles L. Whitehead Freedom Park in honor of my Dad who landed on Omaha Beach June 6,1944.  The park will include authentic stones from Omaha Beach, which I brought back, when my brother and I accompanied my Dad back to Normandy in 1999. This park also has an authentic  piece of the Berlin Wall.  And thats the latest news from Patsburg!IMG_0177IMG_0178IMG_0180IMG_0171

Attachments

Images (4)
  • Freedom Park: Patsburg, Md.
  • Freedom Park
  • Freedom Park
  • Lionel Switcher: Free State Junction Railway.
Last edited by trumptrain

Mitch-liked the photo of Norma Bates Kitteh taking a much needed break from supervising your shop workers.  Went to the Greenberg Show today and, although not the biggest, I had a good time. Brought back a few treasures. The hard core model railroaders were there at 10 but by  1, when I left, Mama and the kids were taking over.  Certainly looked like a family affair.  Picked up a couple of "projects" such as an Ives Standard gauge engine 3235, needs work but runs. Also got a Lionel Standard gauge  514R refrigerator car.  I have wanted one but were always pricey. This one is complete but dirty. I can deal with dirt. Also delivered two engines to different repairmen for work I didn't want to tackle. A lot of layouts were set up and running.  The Pgh. Hi-Railers were there and watched several current production trains run-the modern stuff. Wanted to see what I am missing.

I probably walked right past you Jim.  :-) I always love seeing the Pgh Ind. HiRailers too.  Yes I saw a new UP 844, the NS 911, a great military train.  Missed the Aerotrain.  Had a good time talking to the guys.  I got a new in box 2005 hot box car for less than half the price of the new ones.  Tried it out on the Ceiling Central, and it works good.  Kids will like it.  I also got a modern Borden operating milk car and platform and a rodeo/horse car.  Ha, everything I got were things I hope kids will like.

Added a 4' sliding sheet of lexan to stop dust getting on some trains down low. I took two 1/4 round moldings and attached them, near back to back to form a channel, along the bottom right edge of the layout frame, in front of those shelves.  The lexan sheet is lightly tinted and looks good with trains behind it. Free from an old projection tv I tossed. It's cracked corner actually made it fit the length from table end to a switch. From there it hides, and slides away nicely.

A "dry run", I might do a hanging roller set up for it if I still like it in a week.

Mark Boyce posted:

... I got a new in box 2005 hot box car for less than half the price of the new ones......  Kids will like it....

...  I also got a modern Borden operating milk car...

...and platform and a rodeo/horse car.

 Ha, everything I got were things I hope kids will like.

 Yep they will. It may get to you after a bit, but I run mine all the time lights on, sound off, smoke off, and wait for guests to notice to it show off

The milk car will get used most successfully by "The Button Mashers".

   I think I had about every PW horse car open fence-to- bobbing-to-operating stockcars. There' got to be new ones too. Which one?

Ok, just keep horseing around, and telling yourself that


Adriatic posted:
Mark Boyce posted:

... I got a new in box 2005 hot box car for less than half the price of the new ones......  Kids will like it....

...  I also got a modern Borden operating milk car...

...and platform and a rodeo/horse car.

 Ha, everything I got were things I hope kids will like.

 Yep they will. It may get to you after a bit, but I run mine all the time lights on, sound off, smoke off, and wait for guests to notice to it show off

The milk car will get used most successfully by "The Button Mashers".

   I think I had about every PW horse car open fence-to- bobbing-to-operating stockcars. There' got to be new ones too. Which one?

Ok, just keep horseing around, and telling yourself that


 Ha, everything I got were things I hope kids will like.

Ok, just keep horseing around, and telling yourself that

I didn't say whether the kids are 6 or 60. 

The horse car looks to be from the '70s, but it came with no box, and doesn't have a built by Lionel date.  It would take a bit of research.

Today (after several week's worth of work) I finally finished gluing down all of my "paved" roads and set two sidewalk areas, a parking lot, and several delivery access areas in place.  This has been a lot more work that it appears and has been quite a good learning experience.  I owe a lot of thanks to various posters on OGR that have offered different ways of creating roads, sidewalks, and parking lots.  This is my first attempt at creating these items.

The roads still need to be weathered and sealed.  They are made from 2mm black foam sheets with acrylic paints and automobile pin striping (I decided not to use the Durham's water putty due to unsuccessful tests with trying to apply a very thin layer to the foam).  Pin striping tape will not stick to the painted foam without applying a thin layer of clear glue over the tape.

The parking and delivery areas are 2mm black foam sprayed with two coats of Rustoleum "aged iron" paint.  These have not as yet been glued in place which will get rid of the seams visible in the photos.

The sidewalks are 3/16" Gatorfoam painted with acrylic paints (brush and sponge).  Lesson learned:  I should have waited until all buildings were purchased and set in place before painting the sidewalks as it is not really possible to match the exact paint formula when painting at different times days (or weeks) apart.

Actually I think that I will be very pleased with the final product once I add a bit of weathering powder to the roads.

Howard

Attachments

Images (7)
  • IMG_4960
  • IMG_4961
  • IMG_4962
  • IMG_4963
  • IMG_4966
  • IMG_4967
  • IMG_4969
HMorgan125 posted:

Today (after several week's worth of work) I finally finished gluing down all of my "paved" roads and set two sidewalk areas, a parking lot, and several delivery access areas in place.  This has been a lot more work that it appears and has been quite a good learning experience.  I owe a lot of thanks to various posters on OGR that have offered different ways of creating roads, sidewalks, and parking lots.  This is my first attempt at creating these items.

The roads still need to be weathered and sealed.  They are made from 2mm black foam sheets with acrylic paints and automobile pin striping (I decided not to use the Durham's water putty due to unsuccessful tests with trying to apply a very thin layer to the foam).  Pin striping tape will not stick to the painted foam without applying a thin layer of clear glue over the tape.

The parking and delivery areas are 2mm black foam sprayed with two coats of Rustoleum "aged iron" paint.  These have not as yet been glued in place which will get rid of the seams visible in the photos.

The sidewalks are 3/16" Gatorfoam painted with acrylic paints (brush and sponge).  Lesson learned:  I should have waited until all buildings were purchased and set in place before painting the sidewalks as it is not really possible to match the exact paint formula when painting at different times days (or weeks) apart.

Actually I think that I will be very pleased with the final product once I add a bit of weathering powder to the roads.

Howard

Howard, 

I like the pavement cracks - photo #6 shows it best.  Did you draw those in?   Very nice.  

Dave

Add Reply

Post

OGR Publishing, Inc., 1310 Eastside Centre Ct, Suite 6, Mountain Home, AR 72653
800-980-OGRR (6477)
www.ogaugerr.com

×
×
×
×
Link copied to your clipboard.
×
×