


Looks great, Anthony!
Today, after walking my two miles, I got really fired-up to get the whole shebang ready for inviting quests in for the Holidays, which can include seeing the layout, if they wish it.
So, first thing on the list, for today, was making certain everything ran like clockwork. I ran all ten trains and the trolley. I had to make sure that the two MTH trains, which are not part of my TMCC system, were ready and not about to punish me with the dreaded "clang-of-death," which, thankfully, did not happen, especially considering I had not run trains for several months.

")

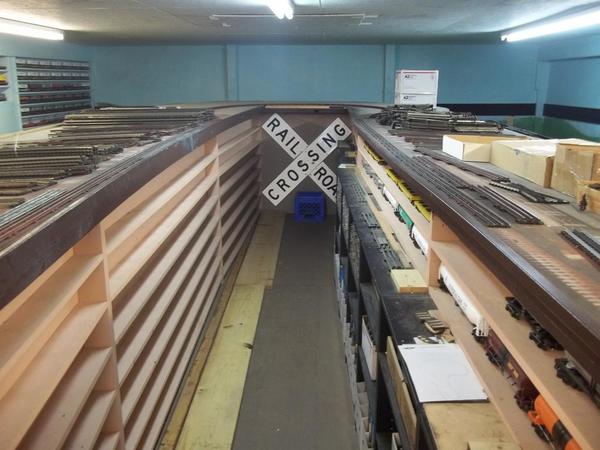
My next move was to begin dusting the entire layout by starting with this newer section of the layout, which is the area removed from the garage and added to the basement, some years ago.....

The ZW bank is situated where the garage now ends and the basement-devoted layout room begins, when approached from the in-ground garage, via this door on the left.
I even turned on all the in-structure lights to make sure the glow was going to be as I designed it. All was well (though somehow never enough!)
I must admit, especially since I did not have to mount the layout to rescue the MTH engines from having been clanged to death and rendered useless, that I had a good old time of it all, getting my imagination into it all once again and looking forward to The Holidays and sharing my trains - excuse me, our trains - my wife's and mine, and very happily so, with friends and relatives.
P.S. The two hi-chairs are for children to move around and sit or stand upon to see better into the layout.
FrankM, Moon Township, USA 
 (It'll take me all of November to get all the decorations in-place and ready for decorating the rest of the house for Christmas. Then, I'll dust the remainder of the layout one last time, and be ready to roll.
Attachments
Images (5)
")
Frank, I am glad you did not hear the clang of death! That is always so discouraging!
Welcome...to the City of Elizabeth...


Attachments
Images (4)
Moonson - Frank - your layout never ceases to entertain and inspire me!! Your work is a wonderfully authentic contribution to our fine hobby! Thanks for always being willing to share your artistic talents!![]()
Upon arriving home from work Friday, I ran trains for about 40 minutes and totally enjoyed every moment! Nothing like finishing a week's work and coming home to train on a fall Friday evening! WOW!! ![]()
![]()
![]()
gandydancer1950 posted:Welcome...to the City of Elizabeth...
Looks absolutely fabulous Gandydancer!! WOW!!
My latest creation:

I was asked to see if I could get a Harbor Freight klaxon to work for sound effects for my audio theater group. Quick answer: Not without a full size car battery. So, I decided to scrounge...
The Klaxon has been gutted and bolted to the hard case, and now contains a speaker from an old "Sounds of Steam" tender. Inside the hard case: The board from a Lionel diesel sound shack. The #90 switch controls the sound, and has a couple feet of wire so that the horn can be placed remotely if desired. After I took this pic, I put velcro on the switch to attach it to the hard case.
Should be fun showing this to the theater group!
Mitch
Attachments
Images (1)

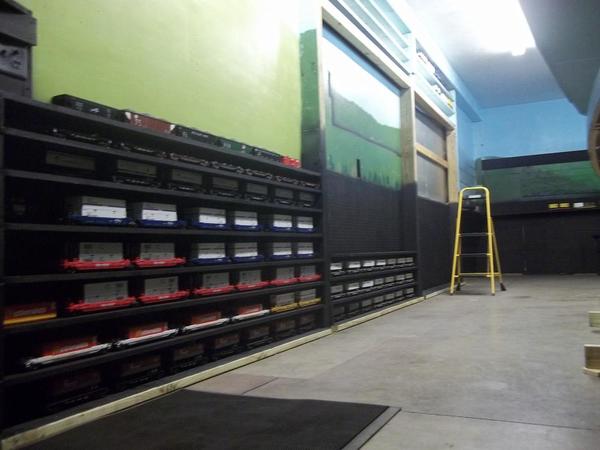
not to much, just started moving the train shelves down to the floor and painted.....

Attachments
Images (2)


briansilvermustang posted:
not to much, just started moving the train shelves down to the floor and painted.....
Do you use an airless sprayer Brian? Doesn’t seem too messy.
rustoleum flat black, paint brush and roller, not very fun.....still drying in picture....
hopefully will get to finish the rest of them tonight.......
Gandydancer, Trumptrain is certainly right about your Elizabeth town being fabulous. I second that emotion and add another WOW, too, WOW!.![]()
![]()
FrankM.
Moonson posted:Gandydancer, Trumptrain is certainly right about your Elizabeth town being fabulous. I second that emotion and add another WOW, too, WOW!.

FrankM.
Trumptrain and Frank....thank you!
My wife is a quilter, so I added this Lemax quilt shop to the layout as an homage to her considerable skill. Probably won’t get me a legacy engine, but maybe a few cars... ![]()


Attachments
Images (2)
TedW posted:My wife is a quilter, so I added this Lemax quilt shop to the layout as an homage to her considerable skill. Probably won’t get me a legacy engine, but maybe a few cars...
Looks great Ted. Maybe adding Santa and his sleigh landing on the roof will get you a little bit closer ![]()
Bob
Not to much work on the layout, but do run trains everyday for about an hour while I do my PT to get my shoulder back in order. Usually run five trains on my single track loop to loop. My Z-Stuff grade crossing gates get a real workout. amazing they still work after ten years.
Clem
Ted, That looks great! It may not get you an engine, but I bet you sure made your wife happy! I will have to keep that in mind when the time comes!![]()
trumptrain posted:Moonson - Frank - your layout never ceases to entertain and inspire me!! Your work is a wonderfully authentic contribution to our fine hobby! Thanks for always being willing to share your artistic talents!
Such really pleasant and positive things to say, Trumptrain, Thank You! Thank you very much!
FrankM
Went to the Raleigh, NC train show and had a good time. Got there early, not crowded, not as big as the Pgh shows but I managed to spend my budgeted $$ all on one Lionel standard gauge engine. Met some nice people,for sure. Looking forward to the Dec . TCA show.
Moonson posted:Gandydancer, Trumptrain is certainly right about your Elizabeth town being fabulous. I second that emotion and add another WOW, too, WOW!.
FrankM.
No doubt about it, they are right!
That moment when you're waiting for the glue to dry.
Might as well post it.....

Attachments
Images (1)
Mark Boyce posted:Moonson posted:Gandydancer, Trumptrain is certainly right about your Elizabeth town being fabulous. I second that emotion and add another WOW, too, WOW!.
FrankM.
No doubt about it, they are right!
Thanks Mark!
I hacked and.cobbled on a second track worthy VW today (for tow anyhow).
Not a Bus, but a panel van. A diffrent toy maker and also representing a slightly earlier VW vintage. Except that the sliding door should be two hinged doors ![]() . Maybe a tiny bit larger scale. It is ⅛-¼" taller than the red/white Bus.
. Maybe a tiny bit larger scale. It is ⅛-¼" taller than the red/white Bus.
Once it was rolling, the palm tree graphics package was wet sanded off with 400 or 600 wet/dry paper (? ![]() ). I was hoping the paint would be thick enough to polish out again, but white primer is bled through already, so who knows, maybe a repaint; maybe just a clear coat, then weathiring. I'll clean up sanding corners and edges at my leisure while I decide.
). I was hoping the paint would be thick enough to polish out again, but white primer is bled through already, so who knows, maybe a repaint; maybe just a clear coat, then weathiring. I'll clean up sanding corners and edges at my leisure while I decide.
I used plastic MPC wheels and axles this time because the flanges are so tall that I now know any metal wheel set will fit later. Being very black, they look good on this in a side view imo. Sits slightly lower in the rear..bingo.
I also ground for the wider flange thickness of the fat, blunt, wheelsets. The top center of the wheel tubs were open up too. The passenger side's front flange encroached into the sliding cargo door track, but it cant overclose, so the gap doesnt matter. The lower arm of the door also had to be trimmed. The boss area of a guide pin had to be reduced to match the pins O.D...It rubbed the flange with the cargo door closed.
The front needed the most grinding. A brown dremel stone disk, maybe (½" dia?) was near perfect for flange clearance. The front also needed the plastic "trough"/ axle bearing both shotened/ narrowed and opened about 1/32" for the Lionel needle tip axle.
The rear was simple! Popped the pullback spring motor out of it's snaps, gound off a1/32" from the rear of the wheel well mudflap area and reassmbled it with the other MPC set.
This will be the easy one to power eventually; level frame, removable interior, room for hacking gear holes with no significant weakening, etc.. I think all I need is an ho driveshaft to put my last scap HO motor in action here and I think I have a toy motor & worm gear set too.
Looking at the pullback gearbox, I'm thinking about trying to mount wheels right on the toy gearbox for the next one.....yea, there are at least 2-4 more I have plans for, depending on how the different power trains that I'm thinking of work out.
?? Now , what jobs to give them ?? My favs so far, in order after.the taxi which might end up a firetruck, I hadn't thought of yellow but I cant recall a "V dub" "squirt gun" done in yellow. 
With windows, the Micro Bus will be an ambulance...or "RESUCUE"?
I think this design is more period (50s-early 60s)
But where do I find decending point type cheap?...I dont. And my hand lettering isnt good enough anymre. So below with dry tranfers or old 1:24 model decals is more likely.

I'm wondering if I could find similar small enough to fit from a brotherhood or association?
![]() This one really has this flame job .......sans-fire dept
This one really has this flame job .......sans-fire dept ![]() While turning it red I realized a punny was laughing right in my face
While turning it red I realized a punny was laughing right in my face ![]() So, I re-colored it quickly for Mike G.
So, I re-colored it quickly for Mike G. ![]()

Attachments
Images (13)


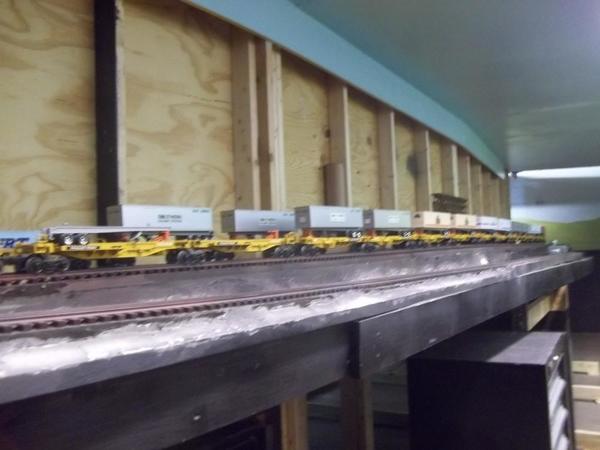
taking shelves down......

and loading shelves up with cars.....
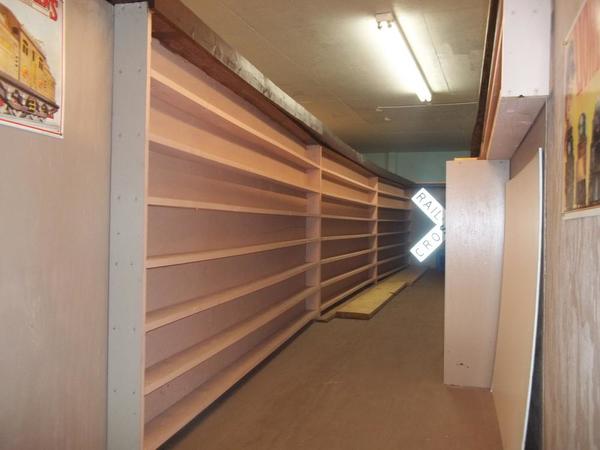
found out I cut the boards for the next set of shelves to short....![]()

filled these shelves with cars and moved a used wood pile up here........

running out of room to store wood......next weeks project......
Attachments
Images (7)


ADRIATIC-
How about this one..

Adriatic, Great looking work there, I cant wait to see them running down the track! But as you stated I do like the red ones, and the none with the flames maybe alittle much I think its really cool!![]()
![]()
When you get them powered up, please post how you did it! Thanks!![]() P.S. if you get board try typing using just one thumb, see how it changes things! LOL
P.S. if you get board try typing using just one thumb, see how it changes things! LOL![]()
Hi Brian, you tell me the height of the 3 levels on your layout? Your layout looks great ! Art
Brian, you sure are moving thing right , then Left, its making my head spin how you get so much done in such little time! You keep going and I will keep watching! LOL Love your pace!![]()
Made good progress on the engine yard and fuel depot yesterday. Painted the board, ballasted the track and set the old tanker in place.
Before I did this I split up the track power into two blocks so that I can park a train on the short section after the turnout. I discovered that the center rail on the turnout was dead since I isolated it from the joining track, so I had to add a jumper to the center rail. Not the first time these 5121 switches have done that.

I used grass paper under the elevated track for now. Too tight to try and paint around the base of each trestle. The rest is going to get covered with gravel so I can blend it in.


I found this guy laying down on the job this morning so he was fired!

Now the bad news- while I was taking these pictures I hit my 060 Docksider with my elbow and it took a swan dive to the floor. ![]() Now it won't run. Must have bent something on the drivers.
Now it won't run. Must have bent something on the drivers. ![]()
Attachments
Images (9)


I like the way the tank is supported a lot. ![]()
I don't like "black swan dives" by engines either, even if it isn't mine. I'm pulling for you with some fingers crossed ![]()
katy409 posted:Hi Brian, you tell me the height of the 3 levels on your layout? Your layout looks great ! Art
thanks Art !
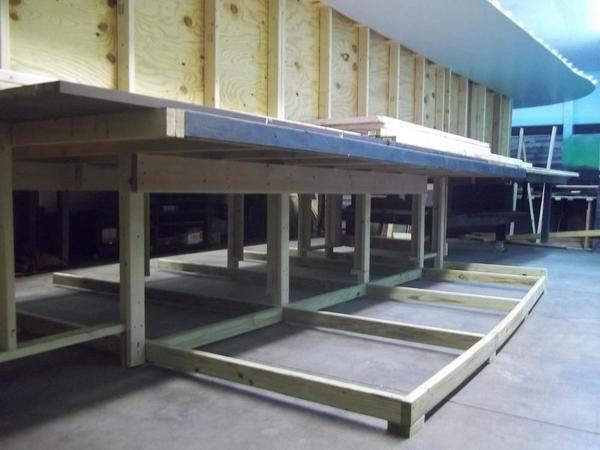
there are three main levels, the floor level started, 2nd level 30" to 40", then the
3rd level is 74" to 76" high, with stairs up to the 3rd level.....
kind of a mushroom type layout......
trains will run on a 1% grade from the floor level to the upper level on about 900' of track

shooting for something like this eventually.....

with an upper level......

stairs to the upper level....
the upper level......

Attachments
Images (7)


Adriatic posted:I like the way the tank is supported a lot.

I don't like "black swan dives" by engines either, even if it isn't mine. I'm pulling for you with some fingers crossed
Thank you Sir! Worked out perfectly. I had a post war gondola with electro-couplers that kept opening on a switch. When I bought the tanker for this project I was able to swap the trucks on the gondola.
Yea- I'm bummed to say the least. Mad at myself for not being more careful too ![]() . First time for a swan dive, had to be one of my favorites !
. First time for a swan dive, had to be one of my favorites !
Bob
Bob, you work is looking wonderful to say the least~! I am so sorry for the mishap swan dive. It's always bad, but really bad when its one you really like!![]()
Making the table bigger so I can run O72 :-)
Attachments
Images (2)


mike g. posted:Bob, you work is looking wonderful to say the least~! I am so sorry for the mishap swan dive. It's always bad, but really bad when its one you really like!
Thanks Mike. Just making it up as I go. Having fun too! ![]()
Preliminary assessment of my 060 "flyer" looks like it may have survived. Need to do more investigation later and a test run.
Bob

lunchtime train break....![]()

Attachments
Images (2)


Almost done! Just gotta add an inner track.
Attachments
Images (1)

It appears that my Lionel 060 "Tank" engine is built like one. Nothing more than a dislodged bell and a small chip on the roof. The fireman took a bit of a spill too but he has been firmly placed back in his seat ![]() .
.
It must have landed perfectly flat on one side. Not even a bent grab bar.
Bob

Attachments
Images (1)
Videos (1)

Daydreaming (again) about the future expansion of my Std. Gauge layout. This morning- completely out of the blue my husband says to me, "So... am I going to have to build you another layout table?" (which would be a slightly larger version just like the one I have)
BRIANSILVERMUSTANG:
You have an astonishing train room! Love your work!
Add Reply
Sign In To Reply
