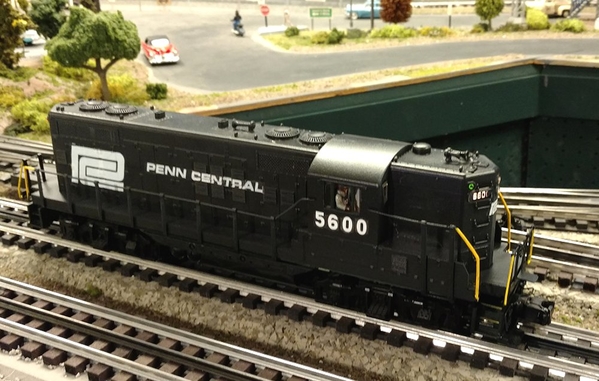
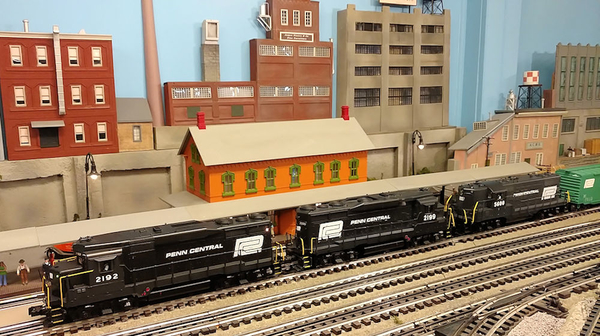
Just rolled out of my shop. Penn Central GP7 (underneath it's an MTH Premier GP).
Yeah Paul, that is a concern of mine with that little piece. It is just an oddity, but it has to be that way. All I need is something else to trip over.![]()
![]() We can talk about it when you come over. Like I said, it's not a high priority, but it would be fun to add some scenery to it. Nothing too fancy though. I don't want it to upstage other elements of the actual railroad in aisle three.
We can talk about it when you come over. Like I said, it's not a high priority, but it would be fun to add some scenery to it. Nothing too fancy though. I don't want it to upstage other elements of the actual railroad in aisle three.
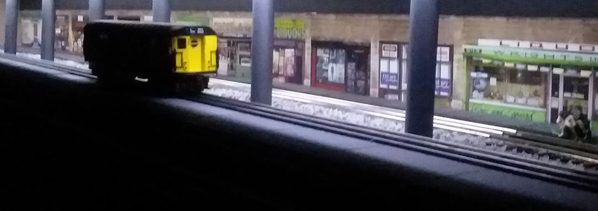
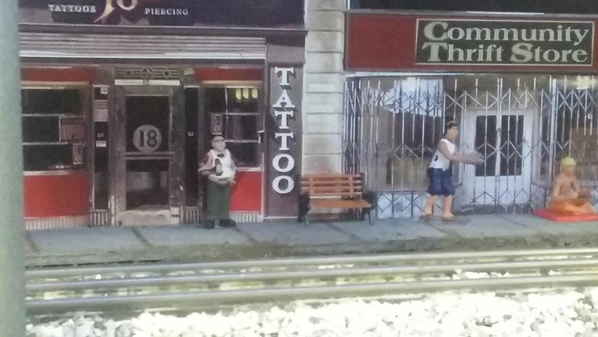
Got the new outdoor shops and subway lines done including the overhead lights to light the platform and shops. Just need to add people and some misc accessories (trash cans ect) Here is what it looks like now. AND Paul will be happy because now the new elevated line can begin.
Attachments
Bryan, nice job on the shops and lighting. That area came out great. I will wait to see a few pics of the elevated line going in before I believe you LOL.
Didn't get too much done today. That last bad rain we had I ended up with a couple of spots where some water seeped in. Not bad but I wanted to get a job before the next rain starting tonight. I had used Flex seal liquid to do the base of the wall which sealed the leaks but a couple started higher so I used the spray cans this time. That is sure potent stuff but for the better part of the day I had a fan running to circulate air to get rid of the fumes. The smell from curring has dissapated. I finished the building. Spackling sealed the small gaps between the corners of the flats. I did find another backdrop at Model Train Stuff that I can use for back ground buildings. Plus I got my package from WayTek . More 14 gauge tinned stranded wire, terminal blocks and also terminal block jumpers. That was the day. Pics................Paul 2
Attachments
I installed three more main line power connections. I wired three Lionel yard lights. I pulled the wires to power three sidings. I corrected a weak point in the elevated portion of my track. And I started a primitive engine shed for my LC+ steam engine. When I came in to shower, I left a Texas Special #1055 hauling two gondolas and my favorite caboose. Guess I should shut down for tonight. I'm tired. The under table work left my arms sore and the on-table work was hot. All worth it, my railroad is better tonight than last night.
Attachments
Wow, Lee/P51, Wow.
FrankM

another dreary wet rainy day here... ![]()
Attachments
briansilvermustang posted:
another dreary wet rainy day her...
One of the better black-and-white photographs I've seen.
thanks Vincent...

Santa Fe trains passing under a moonlit night...
Attachments
Morning everyone, I have been away for the past day and a lot has happened! You guys sure do great work! I could sit here all day and read what you all do. But then nothing would get done out in the train room! I would like to call out all the great work, I just don't have the energy, I spent the other night in the Hospital so I am whooped right now, even thinking about a nap! LOL
But I do want to say that I soak in everything you guys are doing. Paul the motor I have is a variable speed, I just think the all thread needs to be finer. Elliot That is one out of the world way to run your uncouplers, I cant wait to see it in action!
Mark, thanks for the support! Means a lot!
Well its Thursday, I hope everyone has a great day. But most of all have FUN!
keep resting up Mike, hope you are feeling better !!

Attachments
briansilvermustang posted:
keep resting up Mike, hope you are feeling better !!
Thanks Brian, you sure know how to make a guy smile!
Moonson posted:Wow, Lee/P51, Wow.
Thank you very much, Frank. My layout takes place during WW2 in rural Tennessee, so there wouldn't be hardly any electric lights away from the towns and very few of any kind at night due to wartime blackouts (which in retrospect were kind of silly for inland communities), though I suspect they weren't adhered to nearly as much for folks up in the hills...
Mike, I sure hope you get better soon!
Me too Mike. Back to work on it this afternoon.
Greetings all. No train time but I did get a much needed day of R&R on the links yesterday. Won $150.00 too. ![]()
Received the BCR I had ordered from MB Klein for my new RS-27. Hope to get some time to install and run the loco soon.
Hope you are felling better Mike.
Attachments
Bob, good choice to go BCR. I have been changing out all my engines before even running them.
I couldn't wait for Christmas in July so I moved it to June. Mr Brown dropped a nice package on my back porch. I did not know what was in it till I opened it. I am always surprised because I forget what is coming. Well here are pics of what came today. Hope to run the engines this weekend. I did get my backdrop glued to the foam board and with a little more trimming it will be ready to mount on the backdrop..............Paul 2
Attachments
WOW, nice delivery Paul !! nice engines,
them 86'ers are on my wishlist to go with my autoracks ... ![]()
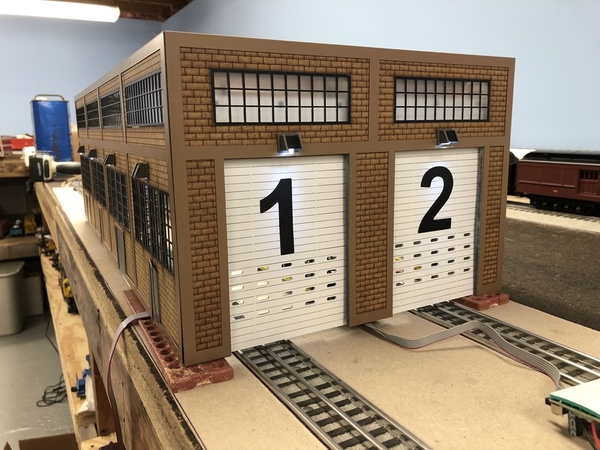
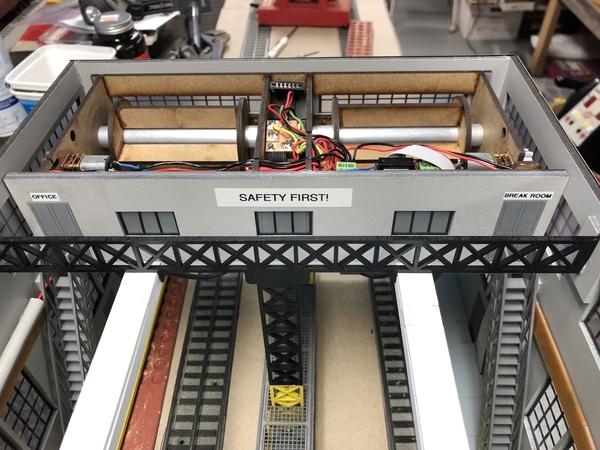
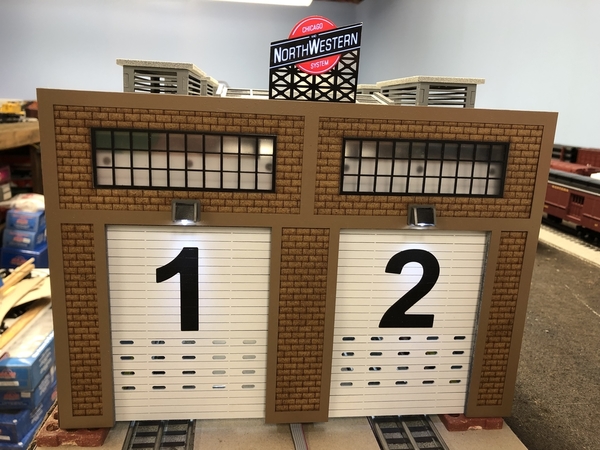
At last! Completed North Western’s Marshalltown (Iowa) engine house from Proses Hobby in Turkey. Next project: Raise fountain and floor to sit flush on Fastrack.
Attachments
That engine house looks great Patrick.
Nice haul Paul. Those Geeps look sharp in the packages can't wait to see them on the rails.
Bob
Worked on some small projects: moved a water tower from close to Magooville (about mid picture in the 1st pic) to the mountain area; put some buildings and scenery in a corner of the southside of the layout; and after rearranging some track started planning out a waterway. Haven't figured out where the water will "start" from, back behind the Big Cletus BBQ shack is a large pop up, may put a pond/lake there will a spillway to the river.
Attachments
Mayor Magoo posted:Worked on some small projects: moved a water tower from close to Magooville (about mid picture in the 1st pic) to the mountain area; put some buildings and scenery in a corner of the southside of the layout; and after rearranging some track started planning out a waterway. Haven't figured out where the water will "start" from, back behind the Big Cletus BBQ shack is a large pop up, may put a pond/lake there will a spillway to the river.
Your layout shows some GREAT modeling!
I spent about four hours working mainly on the uncouplers this afternoon. With the neuropathy in my hands, doing this small stuff takes me at least twice as long as it used to.
These little gizmos are a polyfuse, which is just a solid state circuit breaker, and a couple butt splices crimped on to the ends. Each uncoupler will get one of these to protect the coil from being fried. In the last couple days, I've made about 60 of these.
Here are the uncoupler activation bolts from the front.
This is what it looks like from the back. I'm going to have Patrick help me with these on Saturday.
Attachments
Ralph, good looking Trio! You sure do some nice work on those engines! I also love the background! Nice work![]()
Paul, nice delivery! Everyone would be very happy with a haul like that, even me! LOL![]()
Patrick, WOW that looks great! Very nice work indeed! ![]()
Mayor Magoo, wonderful looking layout! Shows attention to detail!![]()
Well I didn't do much today as I lack energy! I did work a little on the new motor setup for my crane, but have a long way to go. Oh well one step at a time.
Thank you everyone for the kind words! Just a little in site, Monday Night early Tuesday morning I had a seizure. First time in my life so was taken to the ER for a check up, of course nothing was found so I am still in the dark as to why it happened. I hope to get to the head doc soon!![]()
Well Tomorrow is FRIDAY I sure hope everyone has a great weekend!![]()
Attachments
Big_Boy_4005 posted:I spent about four hours working mainly on the uncouplers this afternoon. With the neuropathy in my hands, doing this small stuff takes me at least twice as long as it used to.
These little gizmos are a polyfuse, which is just a solid state circuit breaker, and a couple butt splices crimped on to the ends. Each uncoupler will get one of these to protect the coil from being fried. In the last couple days, I've made about 60 of these.
Here are the uncoupler activation bolts from the front.
This is what it looks like from the back. I'm going to have Patrick help me with these on Saturday.
So Elliot, this is all new to me. So what your saying is you just touch the blots with your finger and the switch changes? If so WOW What a great idea!![]()
Yeah Mike, the bolt is connected to a capacitive touch sensor circuit, like the ones used to turn on a lamp. Then that controls a relay module which sends the power to the magnet coil. It's a little "Rube Goldberg", but the idea is to make it foolproof for non 3 rail guys. This was all Gunrunnerjohn's idea, but it's pretty cool stuff. I suppose you could use it to throw switches, but I plan to use the computer for that on my layout.
Sorry to hear about your little scare. Not knowing the cause is always worrisome. A trip to the hospital is never a fun way to spend an evening.
Finally knocked my stuck sprocket on the log loader loose last night so I was able to rewire it tonight. Now all wires will run down from inside the base and nothing will be visible. Constant power to the lights, switched to the motor and solenoid
Rainy day project yesterday.... so I bought these toy building kits after Christmas a couple of years ago. (they were in clearance for 3.98 and they had 50% off clearance items so end cost 1.99 each) Didn't really know if I could use them ever for the layout but for 2 bucks each couldn't pass them up. They are more HO size length beams, but I had a stroke of genius and was like just combine 2 beams together to make it the correct height. Obviously the red plastic wasn't going to do so after creating my structure I spray painted the entire thing with a gray to give it a better look. (Spray paint cost just as much as the structure lol) Add in a Menards crane and I think this scene is going to work all for 8 dollars.
Attachments
Bryan, nice idea on the girders. Building with the crane looks good. But alas.......I see you found another diversion to put off working on the elevated line........LOL.......Paul 2
paul 2 posted:Bryan, nice idea on the girders. Building with the crane looks good. But alas.......I see you found another diversion to put off working on the elevated line........LOL.......Paul 2
At least I am getting stuff done during the rainy days.....but don't worry the wife leaves with my mother in law for their mother/daughter trip to Europe next week so I will have 2 weeks of uninterrupted elevated line work. I even told her that when she returns it would be done so I now will have 2 people nagging me to finish that area.
mike g. posted:Patrick, WOW that looks great! Very nice work indeed!
Mike,
Thanks.
Patrick
I was way behind, so I threw out a bunch of 'likes' again!
Bob, that sounds pretty nice you won a prize!! Will it go toward trains?
Brian, nice black and white photographs!
Paul, what a haul of new car and engines!
Bryan, the new under construction buildings look great! The kits remind me of a set of plastic girder building parts I had growing up. It would have been smaller than 1:48th. This was back in the mid '60s.
So, it took me two weekends to put down the supports for the narrowing extension of the upper level. I have the plywood secured with only two screws until I decide on the final cut. Then I will put down the Homasote roadbed, cork, and take it outside to spray the rock textured paint for temporary ballast. At this rate, I will be all summer on this one piece.
Attachments
briansilvermustang posted:
Brian, it is amazing how beautiful a well-done black-and-white photograph can be.
Mark Boyce posted:Bryan, the new under construction buildings look great! The kits remind me of a set of plastic girder building parts I had growing up. It would have been smaller than 1:48th. This was back in the mid '60s.
So, it took me two weekends to put down the supports for the narrowing extension of the upper level. I have the plywood secured with only two screws until I decide on the final cut. Then I will put down the Homasote roadbed, cork, and take it outside to spray the rock textured paint for temporary ballast. At this rate, I will be all summer on this one piece.
Yes these are smaller than 1/48 if you follow the directions but by doubling each vertical beam it looks much better.
You did make one big mistake by telling us you are working on an upper level because now Paul will start bugging you to get to work on this daily until you finish. Should be nice to have someone to share that task masters wrath with.
Bryan in Ohio posted:Mark Boyce posted:Bryan, the new under construction buildings look great! The kits remind me of a set of plastic girder building parts I had growing up. It would have been smaller than 1:48th. This was back in the mid '60s.
So, it took me two weekends to put down the supports for the narrowing extension of the upper level. I have the plywood secured with only two screws until I decide on the final cut. Then I will put down the Homasote roadbed, cork, and take it outside to spray the rock textured paint for temporary ballast. At this rate, I will be all summer on this one piece.
Yes these are smaller than 1/48 if you follow the directions but by doubling each vertical beam it looks much better.
You did make one big mistake by telling us you are working on an upper level because now Paul will start bugging you to get to work on this daily until you finish. Should be nice to have someone to share that task masters wrath with.
LOL At the slow rate I am going, I need someone cracking the whip!!
What I need to do is quit this lousy part time job, tighten the belt, and live off our pensions and social security!
Bryan and Mark, let me dust off my whip LOL
Paul, Can I get a 1 day pass O benevolent one. I really want to go see THIS today, and its only a once a year happening.


