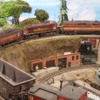
Johan, Wonderful scene! I love the shot into your engine shed!

Kevin, You better have your daughter help you. It will cut the time in half with both of you working on them! They both look great!

Lew, Looks so much better! I would try the same thing on my layout, but I am scared that things would stop working and I would have to start all over again! LOL

Paul 2, I love the idea of coloring the plaster first, looks great! Are you mixing dry plaster?

Bryan, The wall looks great! What did you use for printing the wall, IG; Program?

JHZ563, Looks good, I am glad it worked out for you! Are you going to use both sides also how many feet of I beam do you have to use?

Howard, Just wonderful! You have done such a great job you cant even tell its card stock from the photo!

I hope everyone has a wonderful day and fids time for there trains and layout!

mike g. posted:


Bryan, The wall looks great! What did you use for printing the wall, IG; Program?

Thanks Mike,

I use this website textures.com.  They have thousands of images of real life textures.  I combine a few items together in Photoshop to create a wall with a heavy stone top.  They also have rusted rebar pictures so I was able to add a few of those on a couple of wall panels to give it a maintenance needed look.  As for the graffiti I just search google images and then take the images to Photoshop and using the background eraser tool I can eliminate the background so only the graffiti remains.  I print everything card stock and then spray adhesive it to foam.  


                  Marci wanted a new couch...


                                                               I wanted more shelves...


        win, win...   will fill them up tonight       flowers are on the way to Marci


Attachments

Images (7)
  • mceclip0
  • mceclip0
  • mceclip0
  • mceclip2
  • mceclip3
  • mceclip4
  • mceclip7
Last edited by briansilvermustang

Thanks Mike g. Years ago I used to use drywall compound. Then I switched to Gypsolite and have used that since. I like it because it is porous after  it dries and accepts coloring good. But this time I decided to mix in some color. I mix one batch at a time using a ratio of one cup water to two cups Gypsolite.

Lee ( p51 ), nice find.......Paul 2


paul 2 posted:

Well Bryan had to work today so I think I may still have the edge on him. With what I want to do I may not get it all done for Friday night. Today I was ready to do plaster but first I went next door and walked their stone driveway and found some nice rocks for the waterfall area.. This time I decided to color the plaster first when I mixed it up. Before I was putting the plaster down then going around adding the color after the plaster dried. Took a trip to Menards and was lucky to find these bottles of color. The mixing came out pretty good. Now I have the basic earth color down and where there is still white I am going to go back mix up some grey and apply it for rock look. Maybe after dinner I can look for the grey I have somewhere. Pics..............Paul 2

DSCN0153DSCN0154DSCN0155

Good progress Paul, looking forward to more updates.

You may want to try something in addition to coloring the plaster. I use powdered plaster (dries quick, I have no patience), coloring added, but I also add about 25% scrounged sawdust. Gives a little texture.

Mike G.,

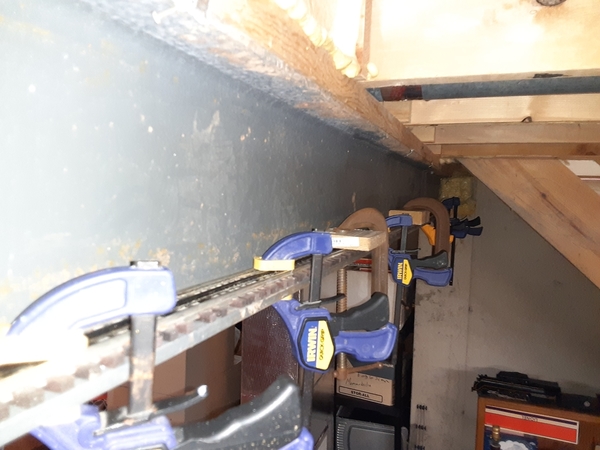
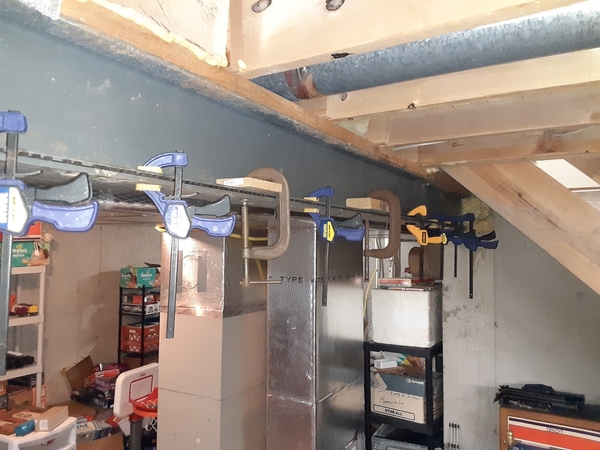
 I can really only use one side of the beam as the other side is largely up against the hvac ductwork.  I think I will have about 25' all together.  Even though this is a purely temp solution, I was also thinking about a row of led Christmas lights to illuminate the shelf to enjoy the trains a bit more.  

I had intended to put my 816/2816 hopper collection up there but the width is just a hair too narrow to get them on the tracks without the dumper handwheel mechanism shaft hitting the beam.

Bryan should of jumped ahead of me today. This morning I had to get the leaves out to the street for leaf pickup tomorrow. So I had only the afternoon so far to work on it, After that I turned the module around and place the lift off section in place. I had some 1/4 inch balsa strips so I laid them down in front of the scenery. Then I put down the plaster tape. Mixed up some plaster and got it all down between the tracks. I was going to add  ballast to the track but decided against it because not knowing what modules would be butted to me I went with the fast track as is. Still looking for my woodland scenics grey so I can do the rock areas next. then onto the river bottom. Pics......Paul 2

DSCN0156DSCN0157DSCN0158DSCN0159DSCN0160

Attachments

Images (5)
  • DSCN0156
  • DSCN0157
  • DSCN0158
  • DSCN0159
  • DSCN0160
paul 2 posted:

DSCN0156

Paul, nice to see the track in place.  I had the hardest time trying to imagine how you were going to add two rail lines to the water falls and stream section.    I didn't realize that your styrofoam section was only half of the puzzle piece.  Nice to see the whole picture.   I really like the forest backdrop you painted!  Well done and looking good!

Cheers, Dave

Last edited by darlander

Bryan, Thanks for all the information! I will have to give it a try!

Brian, WOW Your right, its a win win for you all! Marci and Izzy are really going to enjoy the couch and you get more shelf's!

Paul 2, Thanks, How much color do you add? The module really looks good with the track in place! Nice work on the plaster. But I still have 2 more questions. 1) Is everyone using fast track? and 2) what is your plan to hide the seam? It's really looking great!

Johan, wonderful scene! I love the concrete bridge and pillers!

JHZ563, any spare shelf's are better then none! LOL

Here I am stuck at the store, but Mr. Brown did bring me something new, I got a new Band Saw to use on my build of my layout. Also I was thinking how I was going to make the parts for a fixed pilot and Kadee coupler pocket. Come to find out Shapeways makes just what one needs for that project. So I ordered a pair to see how thing work. If its nice and ease I will be getting more for my other engines!

I hope everyone had a great day and some fun with there trains and layouts!

geysergazer posted:

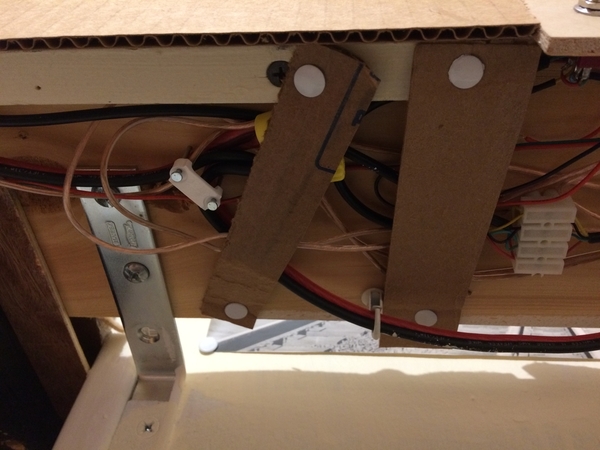
What'd I do today? Something I'd been thinking about since making the decision to standardize on PS3 motive power running under DCS (Remote Commander). With DCS wiring can be pretty simple and I like simple so I ripped out various vestiges of no longer needed wiring. Also, as everyone here knows, over time and tweaks wiring trends in the direction of rat's-nest so it was time to really clean it up.

Rat's nests:

                IMG_4256 [1)

                IMG_4257

You can see evidence of 4 track-plan tweaks what with 3 empty holes.

                IMG_4258

The dark area to the left of the Z-1000 brick is a mass of wires and wire-nut junctions.


Out with the old!

                      IMG_4259

Much more tidy.....and easier to follow/troubleshoot/modify:

                   IMG_4261    


                   IMG_4262

                   IMG_4260

One 14V buss (the red/black #10 wire pair) powered by the Z-1000 brick runs everything: power drops to track, switch machines, structure lighting and, of course, the venerable 282 Lionel Electromagnetic Gantry Crane.  The Z-1000 has a quick-pop circuit breaker and I wired a TVS diode across it's output terminals.

Still more tidying up needed:

        IMG_4271

This rat's nest is after simplifying the wiring. So I used some of a favorite modeling material:

IMG_4272

Heh. Cardboard and thumbtacks!

        IMG_4273

Neat&tidy 


Attachments

Images (3)
  • IMG_4271
  • IMG_4272
  • IMG_4273

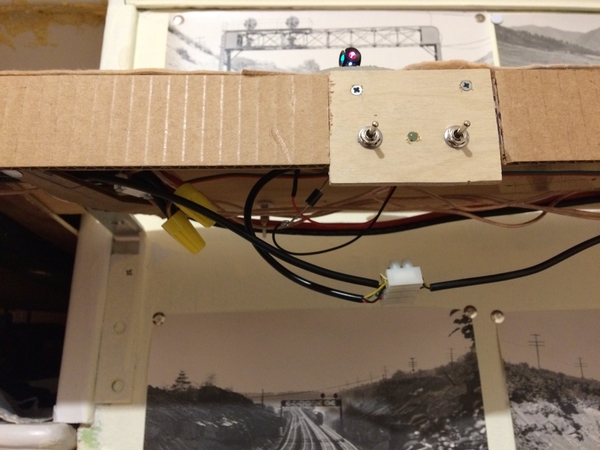
Lew uses cardboard like Red Green uses duct tape.  Spare no cost as Red would say.  It looks great, Lew!

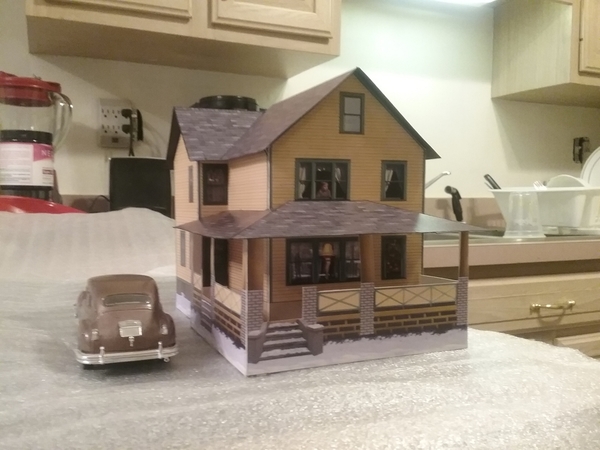
Howard, the house looks great even though I have never seen the movie.  Mrs. B always has Hallmark Christmas shows on instead!  

I’ll just say I like what everyone has done.  I still can’t sit at the computer desk for more than a minute at a time, and my pointer finger is getting tired typing this on the iPhone 6s.  LOL

Last edited by Mark Boyce
jhz563 posted:

One of the more interesting things I have thought to try.  I need some display space in my unfinished basement,  so I am trying to get some spare gargraves to adhere to a structural beam.  If this seems secure I will have gained several feet of shelving for next to nothing.   I am just trying rtv to keep the track down.   We will see how this turns out tomorrow. 20191124_17202620191124_172016

Don’t put your best stuff on the beam until you know if the activity above it will not cause the trains to jump to the ground. 😜

I learned that the hard way.

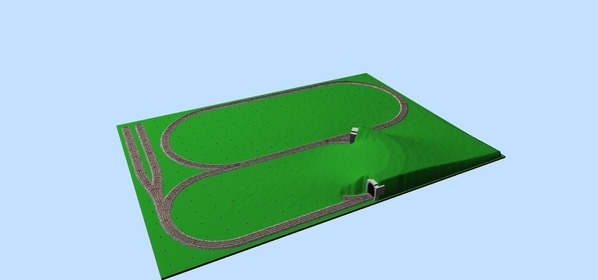
Not "on the layout" technically, but work on mine is beginning to pick back up again! I've finally settled on a track plan for the expansion of my current 4x8 layout to an 8x11 layout. The terrain of the actual thing is not accurately reflected in this SCARM illustration, but is not of utmost importance to me anyway.

track-plan-7

The next phase of the project is to resolve the power issues I have with my current setup, as well as getting some long-overdue scenery projects done on the side. My goal is to have the layout functionally complete by Spring. Excited to see everything come together!

Attachments

Images (1)
  • track-plan-7
Guitarmike posted:
jhz563 posted:

One of the more interesting things I have thought to try.  I need some display space in my unfinished basement,  so I am trying to get some spare gargraves to adhere to a structural beam.  If this seems secure I will have gained several feet of shelving for next to nothing.   I am just trying rtv to keep the track down.   We will see how this turns out tomorrow. 20191124_17202620191124_172016

Don’t put your best stuff on the beam until you know if the activity above it will not cause the trains to jump to the ground. 😜

I learned that the hard way.

Hopefully you don't live in earthquake country

Actually, It was 2 days ago when I installed an Erector Set Bridge across the Harlem River between Yankee Stadium and the Polo Grounds. LOL.

Here is a photo of the bridge, given to me by Leroof, when he and his lovely wife stayed over at my house on the Saturday night before the recent train show in White Plains, NY:

20191125_235619

Below is a video of an MTH Proto 3 CSX diesel pulling oil tankers between the baseball stadiums and across that bridge:

Happy Thanksgiving everyone! Arnold

Attachments

Images (1)
  • 20191125_235619
Videos (1)
20191126_213711

Before I start I hope everyone has a Happy Thanksgiving.

Got a late morning start because I couldn't find my woodland scenics grey. I did find a tube of Mars black. It was a trial and error. I made a regular batch of plaster up and thought it was a tad too dark so I found a tube of Titanium white and started adding a bit at a time. Got to the color I was happy with. Once the grey is dry I'll apply a diluted black wash to it. Still have to do something with the falls area and the river bottom. After lunch I'll start making up the water fall out of clear caulk. 

Mike g, I'm still mulling it over about the straight line as to what to do with it. Plus I noticted I'll have to screw down the scene in the front because it has bowed.........Pics............Paul 2

DSCN0161DSCN0162DSCN0163DSCN0164

Attachments

Images (4)
  • DSCN0161
  • DSCN0162
  • DSCN0163
  • DSCN0164
briansilvermustang posted:


        thanks Mark...  found out the new couch is good at holding train boxes,

                          while I'm loading up the shelves... 


That is what basement couches are for when the train crew is not visiting.

Mine currently has a large box of Flyer S gauge on it waiting for my closet branch conversion to S gauge, a Plasticville Interchange waiting for a place on Warrenville and a few tools that I will use today to finish some wiring.

A happy and healthy Thanksgiving everyone!

PS: Cool pic Brian

After puting on the grey while it was drying I had some old white latex and put a thick coat down on the river bottom. After dinner the grey was pretty much dry so I did a black wash on it. Then I took the tube of clear caulk and made my waterfall on wax paper. Tomorrow I am going to dry brush white on the grey and add another coat to the river bottom. Pics.............Paul 2

DSCN0166DSCN0167DSCN0168DSCN0169DSCN0170DSCN0171DSCN0172

Attachments

Images (7)
  • DSCN0166
  • DSCN0167
  • DSCN0168
  • DSCN0169
  • DSCN0170
  • DSCN0171
  • DSCN0172

I had some time this morning before we have to head out. I put a second color of earth on both the scene liftout and the module with tcks on it. Also got down some secenic foam. When we get home later tonight I plan to glued that down. The caulk for the waterful is still curing and it hasn't turned clear yet. Pics...................Paul 2

DSCN0173DSCN0174DSCN0175DSCN0176

Attachments

Images (4)
  • DSCN0173
  • DSCN0174
  • DSCN0175
  • DSCN0176

Guys....the mods have reported to me that we have gotten quite a few alerts on this thread over the last few days and especially the last few hours.  WHY? ....well, because this thread is beginning to become a free for all...chit chat sub forum.  I remind you to read the title and stay on topic.  By the way, we have several Happy Thanksgiving, etc. threads going on now so this does not have to be one of them....  This thread is too good to turn it into a "coffee cup chat" sort of topic.  Help keep it on track and don't derail it please....

Add Reply

Post

OGR Publishing, Inc., 1310 Eastside Centre Ct, Suite 6, Mountain Home, AR 72653
800-980-OGRR (6477)
www.ogaugerr.com

×
×
×
×
Link copied to your clipboard.
×
×