@Lionelski posted:

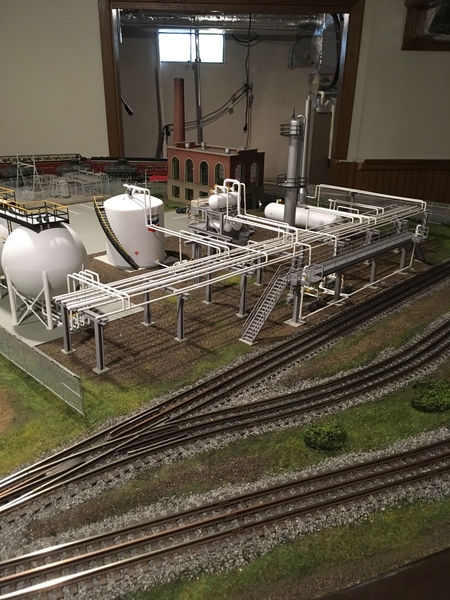
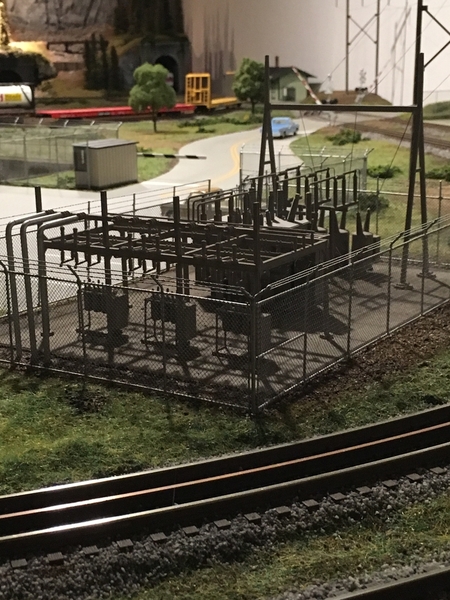
I finished the 2 reversing loops a lot quicker than I thought I would. The only thing not yet done is adding the controllers. Problem here is I have absolutely no space on my main switch control panel to put them. The sub-control panel show in the 2nd pic is for the operating accessories located in the "Absolute Yards"

I've found that, with the help of Lionel's non-derailing feature, if I initially set the switches in a certain direction, the train  will run the entire upper level in a different direction every other time - this added interest was my original goal.

BTW, the liquor train shown is over 18, 1/2 feet long.

Ski, how often does someone finish something quicker than they thought they would??  Did you dip into that liquor train? 

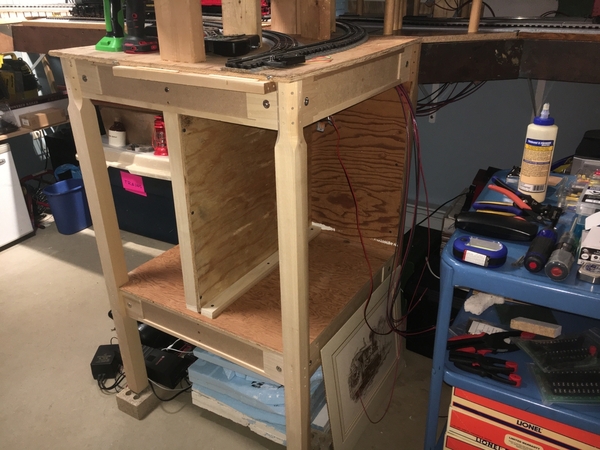
The last couple of days I worked on two backboards for my TIU, MTH terminal blocks, and whatever I control my switches and anything else with.  The shelf is handy for my Z4000 and TMCC controller.  By splitting the 24"x24" shelf in two, every connection will be only a little more than a foot away so I can see what I am doing.  This is the location where my two lift-up bridges will attach for the walk-in area.

2020-12-08 17.36.102020-12-08 17.35.57

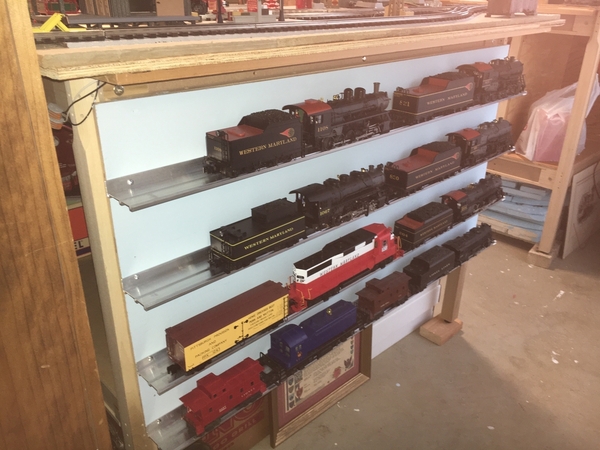
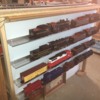
Next, on the opposite end of the lift-up bridge chasm, there is a nice 4-foot area of Mianne benchwork which is just right to hold the 4 shelves I bought from Alan Dechant (aka MrTrain) from nearby Knox, Pennsylvania.  I had just enough 1x2 left to make a frame to mount the 2'x4' section of plywood with braces on 16-inch centers that I can attach the aluminum shelves.  I first thought of painting the plywood white to show off the trains, then thought it may be nice to paint it the same as the light blue wall on the other side of the 27" aisle.  We will see.

2020-12-08 17.04.36

Attachments

Images (3)
  • 2020-12-08 17.36.10
  • 2020-12-08 17.35.57
  • 2020-12-08 17.04.36
Last edited by Mark Boyce

Thanks Rich.

Bob and Mark, they are all empties now.

Mark, simple, I guesstimated how long the project would take then I "got lost in the basement" ( a quote from Mrs. 'Ski). Time flies when you get on a roll doing something you love. Couldn't go anywhere as we were just finishing our Covid isolation together so a lot of time playing downstairs by myself was a good thing. There is only so much togetherness with me any sane woman could stand, even after 46 years of marriage.
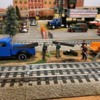
Morning guys, just because I can't work on the layout I can share a couple photos I took this morning of work before my seizure. Please don't tell the CEO I went out to the train room.

First is the Menards engine building I turned into a drive threw bar. We have one here in Wa. where they let Harley Davidsons and other choppers drive threw to show off there bikes

!IMG_20201209_091820753

The second is where I put up a couple yard lights near my crane.

IMG_20201209_091837344

I hope everyone is doing well and yes Mark the wife and doc are trying to do there best to take care of me!

I want to thank everyone for the well wishes and I hope to get back to doing more then just watching t.v.

Attachments

Images (2)
  • IMG_20201209_091820753
  • IMG_20201209_091837344

Its Wednesday, mid-week, and page 968 of this long running thread and everyday I see something new, very interesting and simply Amazing. Yes, Lionelski, John, has a website, with a plethora of valuable information. John, your layout, basement, man cave is fantastic. I just read your many comments, viewed your magnificent layout, and am so glad to see such a beautiful work of art. I recommend others to go to your website and witness what is an incredible journey of your interest in toy trains. He has pictures of many of his friends layouts, comments on how to build a layout, tips, ideas, and a great vision of the hobby. We do have one thing in common, the love of Lionels Milwaukee Road GP7 #2338. My first diesel that I actually loved. Thank you John, for your humble and kind words on many of the layouts pictured on this thread, Yours is Amazing. Happy Railroading Everyone 77F4990D-EF2C-4676-93C6-A23C5CD470BFDC154C51-2211-4B57-BD6C-8FCFBBB90D4525DCF138-8B72-4360-99BF-75FA16FA24CDCF0AEDF3-53B8-4423-AB9D-DC80377B13F0

Attachments

Images (4)
  • 77F4990D-EF2C-4676-93C6-A23C5CD470BF
  • DC154C51-2211-4B57-BD6C-8FCFBBB90D45
  • 25DCF138-8B72-4360-99BF-75FA16FA24CD
  • CF0AEDF3-53B8-4423-AB9D-DC80377B13F0

John, the issue with USPS has been going on for almost a year now. Remember there is a time limit to file a lost item claim, at least file a tracking request. I sold a car through the bay, was not delivered after a month, I filed a claim, was paid for the lost item and 6 weeks later the item was delivered to my customer. My customer ended up getting a free car as late as it was.  Your items will probably get to you someday.  Jeff

@leapinlarry posted:

Its Wednesday, mid-week, and page 968 of this long running thread and everyday I see something new, very interesting and simply Amazing. Yes, Lionelski, John, has a website, with a plethora of valuable information. John, your layout, basement, man cave is fantastic. I just read your many comments, viewed your magnificent layout, and am so glad to see such a beautiful work of art. I recommend others to go to your website and witness what is an incredible journey of your interest in toy trains. He has pictures of many of his friends layouts, comments on how to build a layout, tips, ideas, and a great vision of the hobby. We do have one thing in common, the love of Lionels Milwaukee Road GP7 #2338. My first diesel that I actually loved. Thank you John, for your humble and kind words on many of the layouts pictured on this thread, Yours is Amazing. Happy Railroading Everyone 77F4990D-EF2C-4676-93C6-A23C5CD470BFDC154C51-2211-4B57-BD6C-8FCFBBB90D4525DCF138-8B72-4360-99BF-75FA16FA24CDCF0AEDF3-53B8-4423-AB9D-DC80377B13F0

Great pics LeapinLarry, keep 'em comming.

I also have an operating control tower, I replaced one of the switchmen with a bikini girl. The remaining switchman chases her around and around. Not PC, but, heck, it IS my layout and I'll do what I want.

Much thanks for your very kind comments on the website and the WVRR. If one could see through the Covid 19 protest beard I started to grow on Thanksgiving, one would see me blushing!

Have fun!

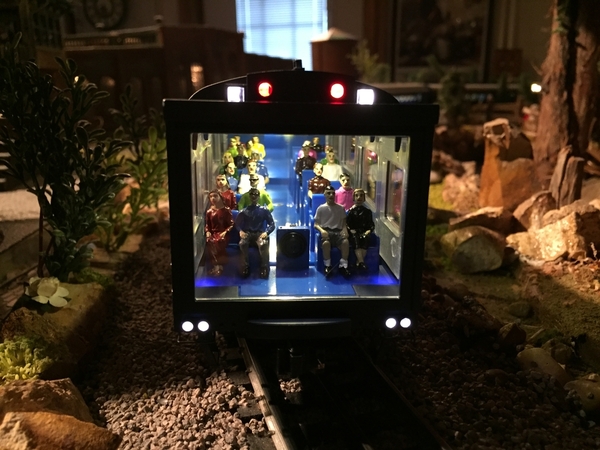
Lionelski John, Wow, Im so glad you read my comments about your model railroad and the great website you have, amazing. I think it’s a great idea to have your pictures in a portfolio like that, (website) with the different topics concerning your ideas, your friends, pictures, your history in model trains. Thank you. The passenger car with the folks sitting in the rear of the car is the CSX Theater car and it comes equipped with a camera, similar to the cam caboose cars. A Lionel sales gimmick that I like. There are probably many other modelers on this forum with similar websites so now I’ll be checking on them. Happy Railroading 1E6C0172-DBD2-47DF-A86C-2CF3C0448EF5

Attachments

Images (1)
  • 1E6C0172-DBD2-47DF-A86C-2CF3C0448EF5

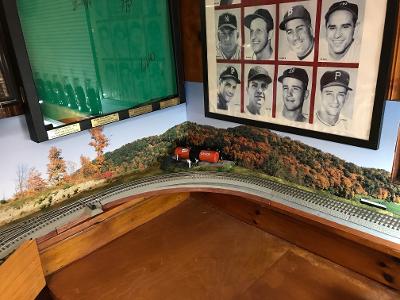
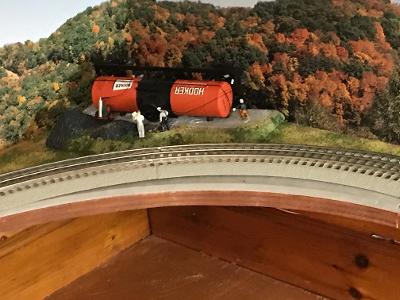
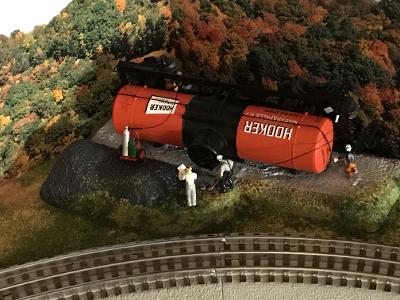
Installed the Lionel Hooker Tank Car accident in a remote, unused corner of the layout. I had thought of various other options for this corner, but liked this one the best.

I first cut and taped two sections of a photo background on either side of the corner. Then raised the whole area about 3/4" with some green foam insulation and painted it earth brown and sprinkled it with green and yellow fine turf. Drilled a hole for the accessory wires and threaded them through and under the layout and placed the accessory in place.

I like putting some accessories like this one on a switch, so I wired it to a lighted toggle switch on the fascia of the layout off of a 14v accessory power terminal block under this part of the layout.

I then put some scenic glue around the base of the accessory and sprinkled it with more green and yellow turf to blend in with the surrounding  area.

I have a couple of LED floodlights on order that I will install to light up the area even when the accessory is not on. Also, considering placing the Menards crane on site.

FINISHED TT - 3HOOKER 1HOOKER 2HOOKER 4

Attachments

Images (4)
  • FINISHED TT - 3
  • HOOKER 1
  • HOOKER 2
  • HOOKER 4
Videos (1)
Video (9)

Glued more struts on my scratch bridge, (mixed the epoxy wrong, its been 10 min for 5 min epoxy annd its still soft.... dang dang dang.) Sooooo I dropped off some track, Lights, Enclosed bridge, sheep and two trains for the Grandkids to put up at their house, under the tree.... They are 8 and 5, been handling and running carpet layout since age 5 and 2..... They sent this video of the progress.

Yup, I could not be prouder of them! Even have the Train Sounds App and the BlueTooth Speaker setup...... and they were.... "Giving the Sheep Rides"..... its a great day! Building memories?? Heck, we were just having FUN!

Attachments

Videos (1)
IMG_8153

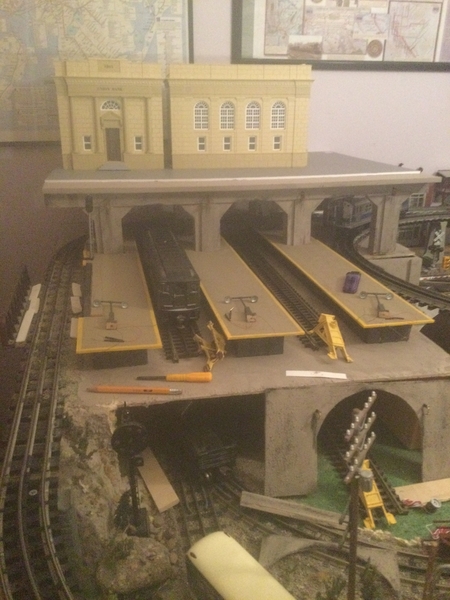
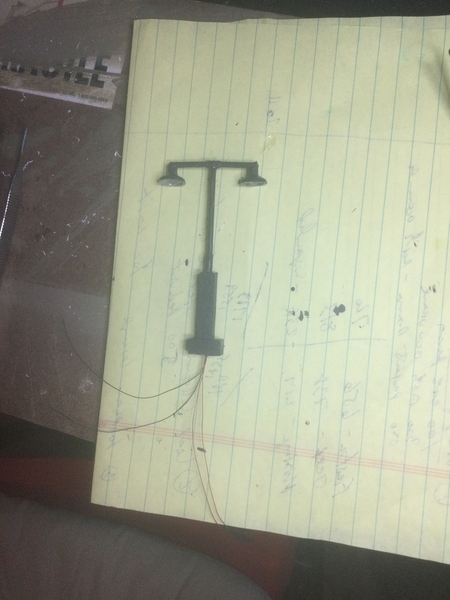
Today I Scratch built 5 led station platform lights to go with my under construction elevated station. 4 more to go.   I’m hoping to have the grand opening for the station sometime in 2021 but i  keep delaying the cutting up of these beautiful mth banks. I just can’t bring myself to do it yet.  

Suddenly I am seeing several kitbashed train stations ! Nice work Strap hanger and Ron045. The use of the MTH Bank buildings makes a lot of sense.

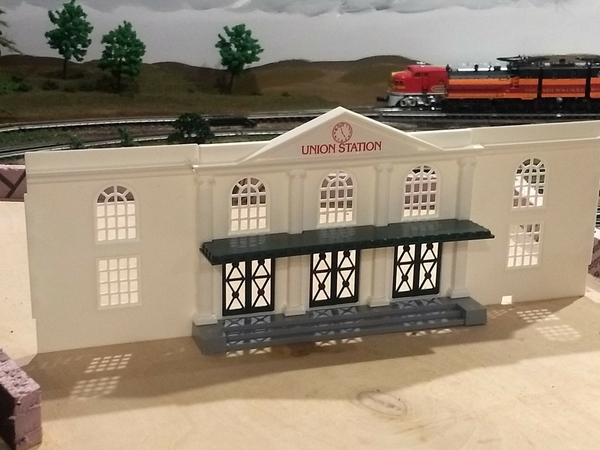
Not aware of the MTH option, I picked up a Plasticville Train Station and started the construction. Here are the sides glued to the front to make a grander entry. I just wish it was about 4 inches taller. Of course my rr town of Twin Pines has a population of about 50 so hard to justify a public edifice like Chicago's Union Station. I really wanted the "x" look of the front doors - now to add foam board walls and a roof - lighting, interior finishes, people, busses, parking lot, landscaping etc. 

IMG_20201211_143618406_BURST000_COVER_TOP

And then the CEO stopped in to check things out (I love the way you guys refer spouses as "the CEO") and asked if I was going to put grass or something in the open area. But she did say the town was beginning to look like a real town. Does that mean more investment dollars are approved??

I have just enough room for an Atlas switch tower above the lead to the yard switch and will put in a siding and a Phoenix Fuel depot where the tool and die building sits.

  IMG_20201211_143455181

Attachments

Images (2)
  • IMG_20201211_143455181
  • IMG_20201211_143618406_BURST000_COVER_TOP

Scouting dad - very nice work on your scratch built station. The MTH banks are also excellent for such projects as you can see from B&O fans superb rendition.

Jay Francis - Thanks! The platforms were made with leftover hobby lobby balsa wood and Home Depot rulers for the base. The lights were made with leftover plastruct tb-3, tb-4 tubing and plastruct LF-6 lampshades attached to center drilled quarter inch wood sticks.

The hard part was threading the Pico sized LEDs into the tubing. I also used 5mm round clear fishing beads as the glass lamp case over the LEDs inside the shade. The beads are drilled in the center so they can be threaded with fishing line and fit right over the LEDs. It gave it a nice look.  I purchased the pre wired LEDs here - https://lighthouseleds.com/040...te-ultra-bright.html

B&O Fan, if mine looks half as good as yours, I’ll be very happy. Outstanding work.  I love the dome feature at the top. Did you use a hand saw or a dremel to make the cuts? I need to work up some more courage before I finally commit to taking a knife to such beautiful models.

Last edited by OGR CEO-PUBLISHER

Yesterday I ran everything I had on the shelves through the portals to test run clearance on the sides and top.

Decision was I didn’t like how close the longer cars ran through the double portal. The single portal past the inspection.  I will attempt to add an inch to the inside clearance.

The portals are the Pennsey stone portals from a scenic Express.  Tomorrow I must purchase crazy glue and reattach the three pieces in the double portal together. Will cut and glue onto the back of the arch a piece of solid styrene to add strength and support since I have done a great job of weakening the arch.

I’m looking forward to seeing how the longest cars pass through the widened double portal.

Attachments

Images (3)
  • 1B39E187-8D74-4540-92FD-8E33A0193ADB: Trimmed a single & cut my double portal
  • 7CF7CDCB-6205-440A-A764-54972F2C3252: Added an inch to the inside
  • 16253479-A9D3-4CC6-8F7B-D19B9F70273F: Cars were running too close through my double portal

Strap Hanger,

  I primarily used hand saws for better control. Picked up the Zona razor saw set from micromark for the project. Welcome addition to the work bench and I use them a lot. The buildings have some thick plastic reinforcements so you need to just take your time.

Thanks for the compliments and I look forward to seeing your end product.

Stay safe- Scott

Wow!  The Baltimore and Union Station stuff here are really inspiring!  I am working on a Chicago scene and am wishing I can figure out a way to fit in a union station with a passenger loading area beneath.  Thanks guys!  Strap Hanger, your 3 level picture is very cool and really fits into my vision and my layout design.

Attachments

Images (2)
  • UNION STATION 2ND LEVEL 2
  • UNION STATION 2ND LEVEL

I finally finished cutting out my 9 foot wide Chicago skyline that I attached to foam board.  Tedious work but not as difficult as I thought.  Too bad my Bears are doing so lousy because I had Soldier Field placed in the foreground.  My next step will be to mount it a little higher using velcro so I can run my subway set in front of it without blocking the view.CHICAGO BACKDROP

Attachments

Images (1)
  • CHICAGO BACKDROP
@IRON HORSE posted:

Wow!  The Baltimore and Union Station stuff here are really inspiring!  I am working on a Chicago scene and am wishing I can figure out a way to fit in a union station with a passenger loading area beneath.  Thanks guys!  Strap Hanger, your 3 level picture is very cool and really fits into my vision and my layout design.

Thanks Iron Horse. That’s the beauty of this place and OGR magazine. I’ve learned so much and virtually everything I’ve done on my layout has been inspired by so many posters/articles in the almost 20 years I’ve been coming here.  Both are truly valuable resources and as you know, a layout is never done.  Good luck and much enjoyment for you on yours and I look forward to seeing some photos of your Chicago El and station down the road.

Last edited by Strap Hanger

Add Reply

Post

OGR Publishing, Inc., 1310 Eastside Centre Ct, Suite 6, Mountain Home, AR 72653
800-980-OGRR (6477)
www.ogaugerr.com

×
×
×
×
Link copied to your clipboard.
×
×