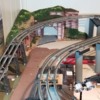
Well Chris, after several attempts this week I could not replicate your great look on your walls. I have failed with the acrylics so I have been reverting to the pastel powders to weather the exterior walls on the layout. I appreciate your kind assistance.
Seth, Sorry to hear that news. The powders are a good choice to create some differing shades and not end up with a wall that looks like it was "painted one color".... In the next couple of weeks, I am going to find out if I can duplicate the look I ended up with on the first set, as I have decided to extend that wall further. Maybe I'll try turning on the video camera this time. Finally used some DAP 3.0 clear caulk adhesive to glue together all the concrete cast wall parts my son had printed up for me. Got really tired of knocking them over and having to reset them. I'll post some photos later. Today is clean up and re-organize the basement/train layout/work bench day.
Bob, nice work fixing that point rail/tie bar. Tedious work to say the least. I have had to do that on some Ross switches, never fun, but rewarding when it works right.
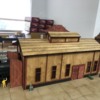
WinstonB, is that a scratch built? It looks great.
@Tranquil Hollow RR posted:WinstonB, is that a scratch built? It looks great.
Thanks! Yes, on the base. No on the engine house.
Scratch building a light fixture and pole for my corner tunnel project. Pix to follow when I have it ready for it's close-up. ![]()
Bob
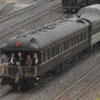
I spent the last two days working on the roof detail of my “Northland” car project. It has a unique roof detail that I wanted to model. With the help of some new photos, I was able to map out the roof. I needed to remove the seam ribs so I constructed a form that allowed me to sand down the ribs on the clearstory section while leaving a small section of rib to support some of the piping. I used various pieces of brass rods, a 3/64 copper tube and a 1/8 square hollow brass rod to fabricate the piping. Taped everything in place and solder it together. After test fitting on the roof, it was washed and epoxied in place. It currently is in the grips of several rubber bands to hold it in place while the epoxy cures. The white stuff is spackling compound which I commonly use to make everything look like its a perfect fit. The next step will be to clean up the sparkle, add the antenna, which runs the full length of the car, add chimneys, additional venting, prim and finish coat with flat back.
Now I am gearing up for a break to enjoy a little winter along Lake Superior in northern Minnesota!
Thanks to all for the many neat project posts!
Cheers, Dave
Attachments
Nice detailing, that will look great! ![]()
Any idea on what all that piping was for? Only thing I can think of is retrofit lighting or other electrical runs for fans or electric heating.
@gunrunnerjohn posted:Nice detailing, that will look great!
Thanks John! FYI - my WIU and TIU will be dropped off at my MTH tech tomorrow for repair. Thank you for your help in trouble shooting my WiFi connection problem. Hope it is the USB connection and he can get it to work!
Cheers, Dave
@ScoutingDad posted:Any idea on what all that piping was for? Only thing I can think of is retrofit lighting or other electrical runs for fans or electric heating.
That is a good question. The Lake Superior RR Museum is currently closed because of Covid so I am unable to stop there to get more information. I assume that you're probably correct about retrofitting. The car behind it (second picture) is a combined, car W-24. I have that model and it will be my next project after I get the Northland done. Those two cars usually run together.
Cheers, Dave
Took some photos after I had had enough cleaning and organizing... Gonna be at that chore for a while ! Many thanks to my son who printed up these cast concrete walls and posts, they really make the town scene. While I was there, decided I'd take some other photos from angles I don't normally get to with the camera.
Attachments
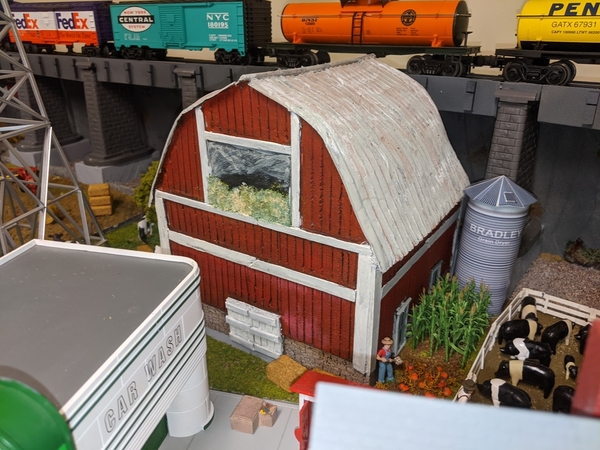
I finished making and then installing my new barn. I wasn't finding anything commercially made that fit the space I had for it. I tried a $15 paper building model, but wasn't really satisfied. This barn courtesy of "The Crafting Muse" on YouTube.
Attachments
ChrisA , terrific pictures and great looking layout.
@Tony H posted:
Painted on Saturday, spread the ground cover, Sunday sprayed with the water/glue mixture. I am pretty happy. Still have to put some trees and bushes, but mainly done. Two more corners to work on.
Attachments
This weekend I got a good start on my lift up bridge construction.
Please take a look at my Blackwater Canyon Line topic for more photographs and details.
Attachments
Chris A, the Kadee's work great on your heavy weight cars! I always like your pennsy block walls! IMOP you have one great looking layout!
Clifford, wonderful scene !
WinstonB, Outstanding job on the engine house base!
Pennsynut, your doing such a great job that nobody is going to be able to tell that there is an access hole there!
Dave, that is one heck of a project to under take, sure looks like it's going to be a perfect match! Very Nice!
Brad, Nice work on the barn.
Tony, the mountain is really coming along, looking really good!
Mark, I am glad you got a start on the lift bridge, if you have any questions just ask!
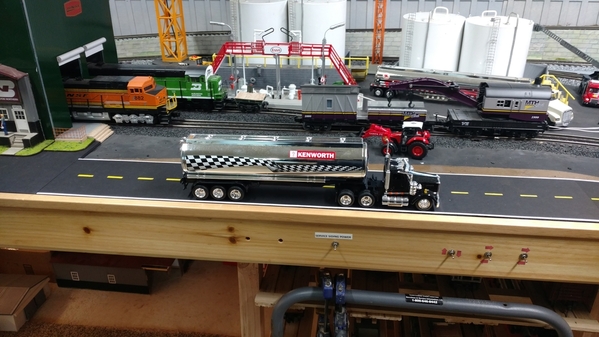
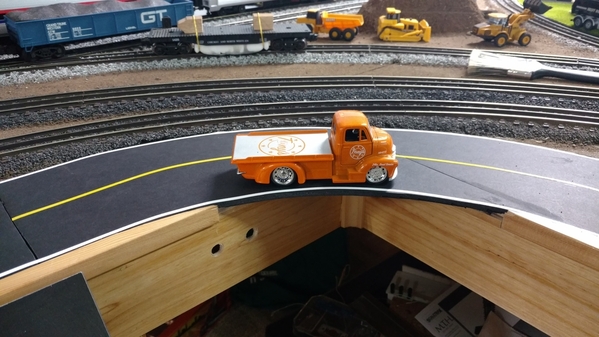
Well as for me with the rain pounding down I was able to get into the train room and worked on my new roadway from the city to the industrial area. Here are a couple photos.
I hope you all had a great weekend and I hope you all dont get snowed in! Just rain here, but I see on the news its nothing but snow in the east! If you can get to your layout I hope you have fun today!
Attachments
Chris a - I like all the new angles of your shots. Especially the shots that show the cement fencing along the side of the sidewalk/street. As always, good job. With snow coming, it’s time to get the plow on my maintenance train. Eastern NH to get 10-18”. Stay safe all.
Snowy day here in NY.
Nice looking road work Mike.
Mark- Those bridges are going to look great.
Tony H- very realistic looking hillside.
Brad- I'm working on a paper model too. very nice!
Chris A- more great photos of your layout. One day I need to dabble in 3D printing. We have a studio at the College I work at. I should start hanging around there more often. ![]()
Dave- you could make a nice living as a steamfitter. ![]() The car is going to look great.
The car is going to look great.
Pennsynut- the landscaping is shaping up.
Bob
Chris A, great looking photographs!
Mike, The highways are looking great with the striping!! If I was to model asphalt roads here in Western Pennsylvania, I would have to put in lots of potholes, patches, and edges broken off. ![]() We only got about 2 inches here in Butler, so far. We are actually in a sweet spot here. We usually don't get hit as bad as others by the nor'easters, the lake effect snow from Lake Erie just to the north, or the more mountainous region just to the east of us.
We only got about 2 inches here in Butler, so far. We are actually in a sweet spot here. We usually don't get hit as bad as others by the nor'easters, the lake effect snow from Lake Erie just to the north, or the more mountainous region just to the east of us. ![]()
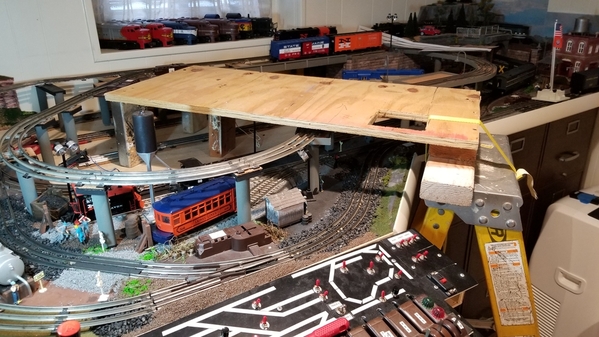
I tackled access to the back corner yesterday. A scrap of 3/4 ply and some old 2X4's later I was airborne. ![]()
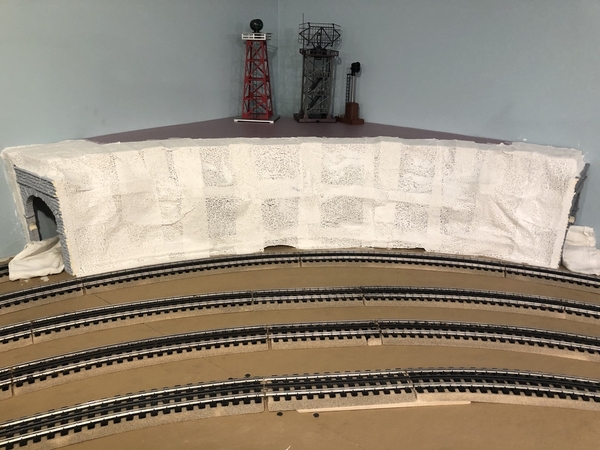
With access granted, I dropped the hillside into place and started working on the track above. I have to remove the trestle supporting the track so I'm making a bridge to clear the roadway. Today I will cut the supports to the proper length and can begin to blend the tunnel into the table.
Several hours will be spent behind my snow blower too. 

Bob
Attachments
Thanks for the nice comments guys!
Bob, the hill and tunnel looks great back in the corner! Wonderful idea for a work platform! I really like how you scratch built the curved bridge!
Very productive day Bob.
Bob, That's a great 'poor man's topside creeper' you built!! I may need to do something similar for the one square foot where my wye is and the peninsula starts. That is the only place that is a strain to reach on my layout, so I'm pretty happy with that!!
@Mark Boyce posted:Bob, That's a great 'poor man's topside creeper' you built!! I may need to do something similar for the one square foot where my wye is and the peninsula starts. That is the only place that is a strain to reach on my layout, so I'm pretty happy with that!!
It does the job for sure. I did have one OOPS though. When I set it up I saw that I had about a 1/2" clearance above a couple of my yard lights. The smart guy voice in my head said- you better lay them down so they don't get smashed. The dumb guy- ME- didn't listen. ![]() Now I'll have two lights to repair after the corner is done.
Now I'll have two lights to repair after the corner is done. ![]()
@RSJB18 posted:It does the job for sure. I did have one OOPS though. When I set it up I saw that I had about a 1/2" clearance above a couple of my yard lights. The smart guy voice in my head said- you better lay them down so they don't get smashed. The dumb guy- ME- didn't listen.
Now I'll have two lights to repair after the corner is done.
I can identify with you, Bob! I'm The dumb guy- ME- I don't listen. ![]()
I had to laugh out loud RSJB18 - Years ago I did something similar. A piece of plywood, a couple 2X 4's on the layout end, and the other end on the back of a chair. Mrs. Lionelski sat on the chair for ballast. Over and over she was saying " I'm not responsible when you come crashing down on the layout!" (I didn't).
I later added an access hatch to that area.
Very nice looking bridge.
I screwed plywood on top of my benchwork in my expansion to my original layout. This is my industrial area with two mines, a small town, and the interchange track at the back against the wall. My original layout did not have room for industries so I expanded into my Wood shop. This will be the last expansion as I barely have room for my equipment. ![]()
Nice progress, Dan!
Dan, Looking good! If you plan well and precut all your wood you could move everything out of your wood shop and expand into there! LOL
So I went out today and wired in the lights for my scratch built auto ramp, along with a work light to help the switcher hooking up at night and while I was at it I wired in the newly installed switch for that little siding! Here are a couple photos as I know no photos it didn't happen! LOL


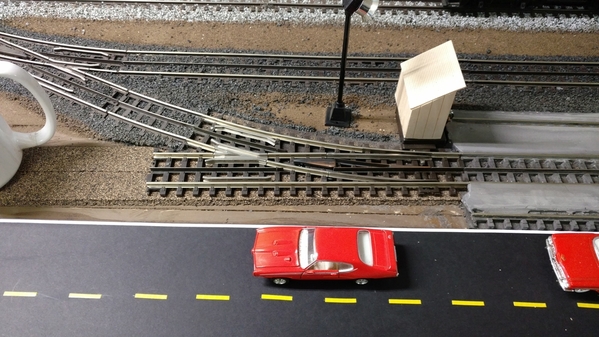
Attachments
Thanks, Mark. I noticed as I get older, I work slower! Maybe a correlation......![]()
@mike g. posted:
The lights look great, Mike! Yes Tank needs a walk!
Dan, I agree. I’m slower. Good thing I’m not working anymore! That is the answer to my late father-in-law’s statement that he doesn’t know how he got anything done when he was working.
Mike g.
Please share with me your materials and method to stripe your new roadway.
I am certain you have described this in the past for us but , please hit me again.
I have plain black styrene panels from Evergreen ordered to use for my roads...
Thanjs much!
John d.
Hey Mike, I sure could but I think the elements may cause some issues with my cast iron equipment. LOL


