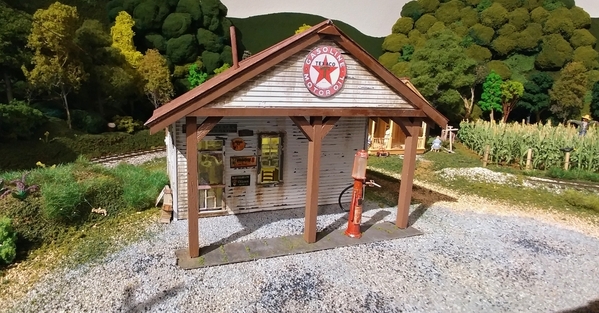
I remember pumps like that, Steve! Looks great!
@Lionelski posted:And so it begins NS1975, this is how the never ending expansions of Warrenville began, small. Not enough room to make it bigger over time you might say? I said the same but a wall removal, gutting a closet, and later cutting another closet (that was in my way) in half changed that.
Your layout looks great, have lots of fun with it.
Thanks for the encouragement!
@charles mcdaniel posted:Looks great, I love the cabin.
Thanks!
@ScoutingDad posted:Nice modeling - well done!
Glad you like it.
Attachments
Dave thanks....not sure, had it a long time
would like to find a high lift one someplace
@ScoutingDad posted:With the siding coming off in the foreground, doesn't that give you the reversing loop? What I want to know is how high do the trains fly when the recliner opens and hits the track from below? Of course you may no longer be able to reach them so it may not be an issue. Enjoy the pool and da beer in which ever order you choose.
Not to far lol. The chairs are fine the part of the couch your feet can touch platform with foot rest but you cant recline. Its only me and the wife.
@sidehack posted:
Thats really great.
Lot's of great stuff going on.
Been busy lately and haven't had much time for the layout.
Our daughter graduated from our local University this week. No ceremony unfortunately but we made the best of it at home with the immediate family.
I did get to something kind of layout related- built a small shelf unit for my work shop to hold my cordless drills so I could get them off the floor. Ran power today and installed a new quad receptacle so I have a place to charge the batteries. Nice to have power on that side of my workbench finally too.
Have a Happy Memorial Day and thanks to all who served.
Bob
Attachments
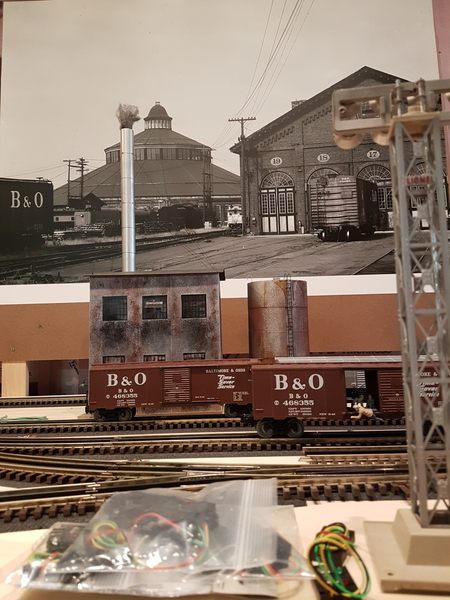
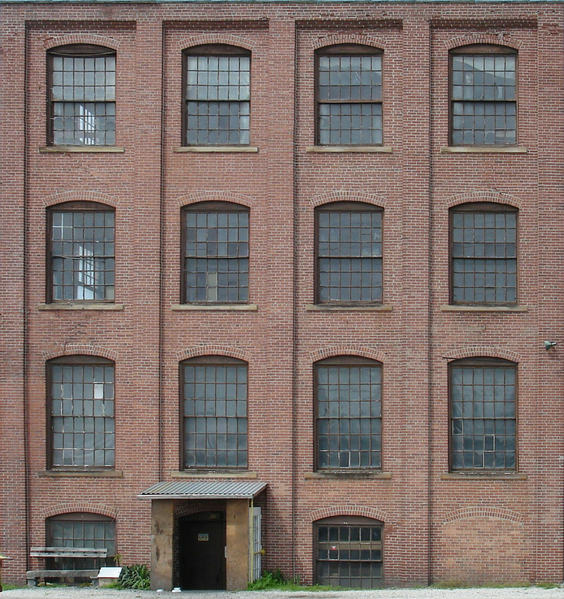
Today I got another background photo mounted. Also had time to get another building facade planted and powered up.
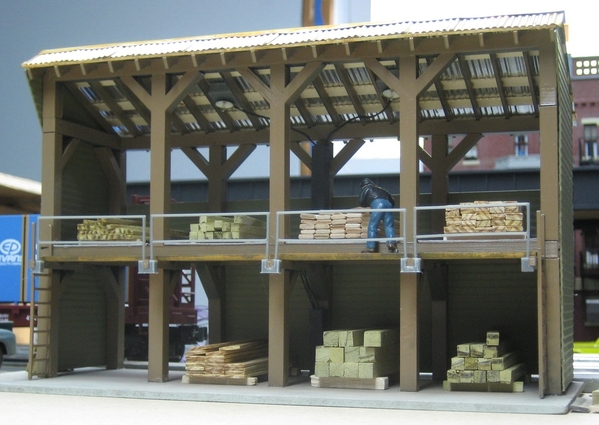
Ray - nice work on the lumber yard building. I'm surprised how quickly your buildings seem to come together, nice work.
Scott
Attachments
@sidehack posted:
Ray....great scene....the forklift looks realistic...resembles a Toyota. I'd like to have one for the layout. What brand die-cast is it?
@Capetrainman posted:Ray....great scene....the forklift looks realistic...resembles a Toyota. I'd like to have one for the layout. What brand die-cast is it?
Thank you, I will see if I can find out where I bought that fork lift. Dave "darlander" also would like to know. I know it was a while back as this picture was taken Apr 2007
Attachments
@RSJB18 posted:Lot's of great stuff going on.
Been busy lately and haven't had much time for the layout.
Our daughter graduated from our local University this week. No ceremony unfortunately but we made the best of it at home with the immediate family.
I did get to something kind of layout related- built a small shelf unit for my work shop to hold my cordless drills so I could get them off the floor. Ran power today and installed a new quad receptacle so I have a place to charge the batteries. Nice to have power on that side of my workbench finally too.Have a Happy Memorial Day and thanks to all who served.
Bob
Congratulations on your daughter's graduation! ![]() I didn't go to my own graduation, but I was 48 at the time so it was a little different!
I didn't go to my own graduation, but I was 48 at the time so it was a little different! ![]() Have you noticed how it take me so long to do things.
Have you noticed how it take me so long to do things. ![]()
The shelf looks great! Now I need to get a workbench before thinking about a shelf. A folding table leaves a lot to be desired! ![]()
Ran some trains and made some videos. MTH Premier action here. NYC E8 - the green ones - beautiful and also an older Canadian National fill the screen. Subscribe to my channel - more to come...
Enjoy..
John
@Mark Boyce posted:Congratulations on your daughter's graduation!
I didn't go to my own graduation, but I was 48 at the time so it was a little different!
Have you notices how it take me so long to do things.

The shelf looks great! Now I need to get a workbench before thinking about a shelf. A folding table leaves a lot to be desired!
Thanks Mark. I was 43 when I graduated from College.....went to my Commencement though.
@SIRT posted:
I really like that. That's a great touch.
The creative juices never stop flowing around this forum and hopefully for all of us they never cease. I did a quick review of the past few pages but catching up totally just ain't gonna happen. As usual, I snooze, I lose.
The last 6 months around the layout has been spent adding a few extra sidings for operational flexibility while rewiring in a home run pattern using 12 gauge stranded for better DCS reliability. Only a small layout section remains to be transformed. In order to gain better access to the layout and surrounding storage a large swing away section replaced a temporary duck under. Pull out shelving was adapted into a new lower yard area to assist in keeping trains at hand rather than in boxes. A former inaccessible area has been opened up for future display space, something there is never enough of. Rearrangement of the power distribution center is also ongoing while never walking away from the layout without it remaining at least 75% operational.
If I find interest waining then a few operating sessions gets me right back in the swing of things. The recent unpleasantness only increased productivity as I was well stocked with ideas and the materials to carry them out prior to the new year. Now that I am accomplishing long desired dreams of doing train related tasks casually on a daily basis I'm in my happiest place ever! Here's hoping you all get the most out of this hobby... especially now.
Bruce
Nice work being done on layouts.
I am still working on six Preiser 65602 Unpainted Seated People 24-packs. The 144 people will go in six Norfolk Southern 21" passenger coaches for the 611 Steam Excursion train.
I saw Nassau Hobbies has the Lionel Alaska Railroad 21" passenger cars listed. I did not expect them until August, 2020. I need to keep painting my remaining four 24-packs for those cars.
I finished the 18 people with babies. Painting them myself allows me to make a number of color variations for the figures. Preiser only offers two variations in their Painted Factory Sets. Many times stores don't have available all five packages that are in the 65602 24-pack.
UPDATE: I opened four more Preiser 65602 24-packs and painted the three people with babies for the Alaska 21" passenger cars. The three other figures on the sprue are also almost finished.
Have a good Memorial Day.
Sincerely, John Rowlen
Attachments
Attachments
Yesterday I posted a question about removing the yellow stripes on a K-Line RPO car. Got to work on it and posted pic there. In the process I replaced a keeper ring to secure on the swivel post on one of the trucks. Might do some switching later today.
@sidehack posted:
Looks great Ray. Now when you need material for a project you can go shopping right on your layout ![]()
Bob
Weather's been nice, so spending a bit of time in the great outdoors. Here's Shop Superintendent Norma Bates Kitteh practicing train signals.
To be honest, I'm not sure if that's "Proceed with Caution", "Back Up" or "Take A Nap".
Mitch
Attachments
@M. Mitchell Marmel posted:
Or she could be posing for a Chessie advertising?!![]()
@Trainmaster04 posted:Or she could be posing for a Chessie advertising?!
She's done that, too...
Mitch
Attachments
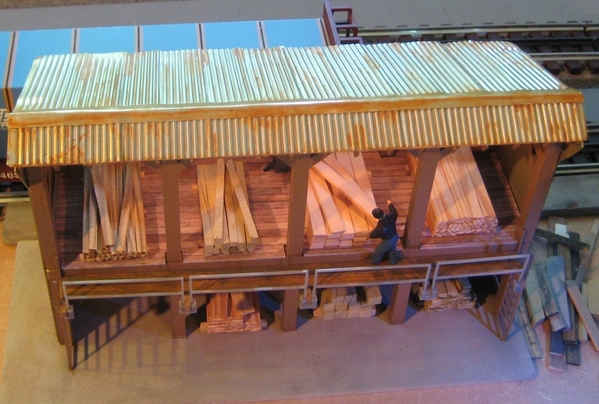
Ray, always good to keep the inventory / stock level up, and keep the lumber dry too...nice shed![]()
@sidehack posted:
Shed is a real head turner. Great work.
Thanks Paul and Rob, I have been looking for a nice high lift fork lift, if I can't find one I like then it might be time to design and 3D print one.
Finished my rendition of the layout in LCS. It's a little squashed, especially vertically, because there's a walkway from lower left to upper right of the room. Overall dimensions are 24 x 13, so it IS a tight fit, but I managed it using o72, 81 and 90 curves. The upper and left yard area is complete and i have about 85% of the "prototype track lay" completed for the big loop area. I'm doing it as simply track placed on foam risers and track bed, so i can do trial runs on the layout to discover any problems prior to committing to the track scheme. (Just missing part of the tunnel track under the big loop curving out to the double crossover in the "middle" (that's actually along an aisle edge).
Attachments
@luvindemtrains posted:Ray,
Shed is looking good. What did you use for your lighting?
Dave
Thanks Dave, those are the Old Fashioned Green and White Lamps from Miniatronics
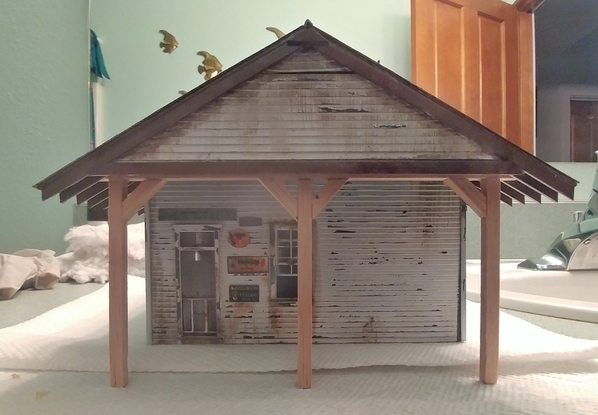
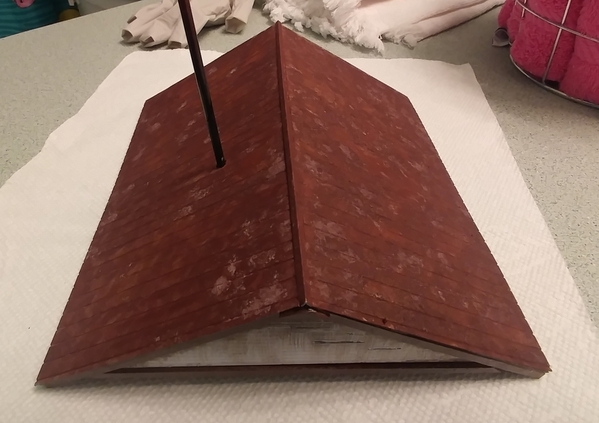
I've made a lot of progress on my new store. Interior is in place, I'm waiting for the walls to finish curing with the glue, and all I have to do now is put the front door into place, and then start on the roof. The roof is done and painted, but still need to do the front support posts, weather the roof as it is tin, then do the gasoline pump from out front.
Attachments
Attachments
P51: Outstanding detailed modeling.
@Michael Hasty posted:
That's great. I have downloded a bunch of cardstock models. I really like the realism. Did you use anything other than cardstock to make it more hefty?
Hooked power to track to test layout. Had to move a switch due to collision hazard, nothing major though. Next wiring, 2 trains on a single and blocks
It's just printed on 90 lb card stock. I used the internal stiffeners from the download. This is a fairly small model, so it doesn't need much. If it was a larger model I'd look at either using some foam core or wood strips to stiffen the structure.
@Michael Hasty posted:It's just printed on 90 lb card stock. I used the internal stiffeners from the download. This is a fairly small model, so it doesn't need much. If it was a larger model I'd look at either using some foam core or wood strips to stiffen the structure.
Thanks Mike. I am gonna start with some of the smaller stuff then work my way up.
@p51 posted:I've made a lot of progress on my new store. Interior is in place, I'm waiting for the walls to finish curing with the glue, and all I have to do now is put the front door into place, and then start on the roof. The roof is done and painted, but still need to do the front support posts, weather the roof as it is tin, then do the gasoline pump from out front.
Really like that
@SIRT posted:
Small Industries - rough cut phase...
Great!.....Now I have the Empire Carpet jingle stuck in my head.....![]()
today was spent on the computer, looking to come up with a design for a structure for the lumber yard. This is my first idea, probably not my last.
Attachments
The last rearrangement of the track plan got underway today. The first shot shows the siding just added at the left and the subsequent removal of a turnout, leaving the dead end stub. This siding is tucked along side the main under an upper level and holds a passenger train of about 10, 18" cars. New 12 ga. wiring in the home run style has been retrofitted as track laying progresses.
Now on to rearranging the tracks to the right, requiring the unscrewing of about 8' of main to create parallel mains and add a crossover. Mid construction mess
down at the other end the position of the crossover is roughly placed at back. It is still being determined whether another crossover is to be worked into the plan. Work halted early due to attic temps today.
A few months back I detailed this former NKP, MTH waycar more to my liking....better suited to follow behind scale warbonnet F3's.
Bruce
Painting 10 Preiser 65602 Unpainted Seated People with 24 figures. (240 people) The most important is the man feeding a baby. This figure appears in most of my passenger cars. Sometimes he is one side of a Dome Coach on the lower level, and on the other side in the Dome.
I cannot purchase more figures from my German suppliers since Ebay will not allow German sellers to make shipping labels to the United States My last order of four 65602 was delayed by the German post office for over two months. German sellers are $10.00 cheaper than US hobby shops. Most US hobby shops are out of stock.
I have completed 60 of the 240 and have another 20 almost finished.
Have a good evening.
Sincerely, John Rowlen
Attachments
@John Rowlen posted:
I cannot purchase more figures from my German suppliers since Ebay will not allow German sellers to make shipping labels to the United States
Have a good evening.
Sincerely, John Rowlen
John, has eBay offered an explanation for the change? Do the German vendors have access to PayPal's discounted shipping website as an alternative to eBay's automated version?
Keep up the great work!
Carl, I believe that the German Post Office is the decision maker. I spoke to an Ebay representative when my four Preier 65602 packs went missing in the tracking system. The representative said the decision was wreaking havoc for Ebay sellers and buyers. I assumed then it was not Ebay's decision, but the stoppage of printing shipping labels was to prevent the two plus month delay I experienced. I did get a refund. When the four packs arrived, I sent the money back to the seller through PayPal.
Current German sellers list they do not ship to the United States. I contacted another seller who has 10 packs, but he still cannot make a shipping label to the United States. Hopefully soon he said. Probably not if virus transmission is a concern of the shippers.
The irony is that the fifty $9.99 Chinese figures from Evemodel arrive quickly from China for only $2.00 shipping. Unfortunately, the Chinese figures do not include any of the parents with babies that come in small pieces and must be assembled.
Have a good week.
Sincerely, John Rowlen
Attachments
P51, Lee, that’s super great modeling and the interior setting is so real looking. Thanks for posting. Happy Railroading
Lee, I agree with Larry. The interior looks tremendous!!
@leapinlarry posted:P51, Lee, that’s super great modeling and the interior setting is so real looking. Thanks for posting. Happy Railroading
Thanks a lot, Larry, and also to those others who made comments. I really appreciate it.
I finished weathering the roof tonight. The straw is going to be the stack for the pot-bellied stove inside, it's just sitting like that so all the rust effects can dry upright.
I also have the supports for the front done, but I still have to paint those, and glue them in place.
Then, I have to assemble the gas pump and paint it. I'm still trying to figure out how to recreate the half bowl filled with gasoline in the visible pump. I assume I would use resin for that, but I'm not sure how to color it and make it completely level on top when it dries inside the glass bowl...

Attachments
Looks great Lee. Should be right at home on your layout.
Bob
Another late report.
I have not visited my train building for five weeks. I spent that time erecting a new 1260 foot antenna. Yesterday I mocked up a third level for my layout. I moved track around till I found a fit for the available space. I used lots of lumber scraps and placed the new level on my layout. I think I will like it. Pictures were taken after quitting time last night. I'll cut nice supports today. Five weeks was a long time with no trains.
Attachments
Been noodling about in RailModeler with a possible future O27/O42-based layout inspired by Ken Hoganson's plan in the February/March issue, to be built on a 4' x 12' former theatrical flat...
Mitch
Attachments
@Odenville Bill posted:Another late report.
I have not visited my train building for five weeks. I spent that time erecting a new 1260 foot antenna. Yesterday I mocked up a third level for my layout. I moved track around till I found a fit for the available space. I used lots of lumber scraps and placed the new level on my layout. I think I will like it. Pictures were taken after quitting time last night. I'll cut nice supports today. Five weeks was a long time with no trains.
Bill, I'm glad to see you are back on the layout! The third level should make for lots of action!!
Hello,
I have been painting Preiser 65602 Unpainted Seated People for years now with over 5,500 seated people painted. I have been working on 10 packages of 24 or 240 more people for the last week and my eyes need a break.
This afternoon the postman delivered the Lionel Alaska Denali StationSounds Dining Car from Nassau Hobbies. Fast delivery on their Memorial Day Sale. This is just what I needed to give me a break and a different task, painting the interior and adding the people.
The Alaska four pack of 72' Baggage, two coaches and a Dome Coach is in transit. I am holding off from purchasing the Generator Baggage and an additional Coach. I wanted to see the Yellow color on the dining car. A five car passenger train may be enough behind my two Alaska GP35 Legacy engines.
UPDATE 1: I started painting the underside and supports for the dining tables in Earth Red. The table tops received three coats of five in Flat White. I will mix more tan for the seats and paint the 1/4 inch strips of .040 Plastruct that will become seat backs for the dining room chairs. Once the seat backs are glued in place, I fill in cracks with more tan paint. When the interior is finished, I will add the Preiser 65602 Seated People/
I had a surprise in the mail today, the Lionel 2027200 Norfolk Southern Station Sounds Great Dome "Delaware" arrived. It is a beautiful paint job.
Have a great week.
Sincerely, John Rowlen
Attachments
@Odenville Bill posted:Another late report.
I have not visited my train building for five weeks. I spent that time erecting a new 1260 foot antenna. Yesterday I mocked up a third level for my layout. I moved track around till I found a fit for the available space. I used lots of lumber scraps and placed the new level on my layout. I think I will like it. Pictures were taken after quitting time last night. I'll cut nice supports today. Five weeks was a long time with no trains.
I like the way the layout is evolving Odenville Bill.
1,260 foot antenna? Another reason why I run my trains conventionally, I don need no steekin' antenna.
@Lionelski posted:I like the way the layout is evolving Odenville Bill.
1,260 foot antenna? Another reason why I run my trains conventionally, I don need no steekin' antenna.
LOL
John Rowland, you have the patience of a saint. I can’t even comprehend painting 5000 figures. Your cars are beautiful.
Attachments
@M. Mitchell Marmel posted:
I like the T-shirt, Mitch.
I also like the pic of your layout in the Photo Album section in the latest issue of CTT. Congrats!
After a few days of battle with the heat some good came from it. The Houdini like contortions you see are a completed rearrangement of trackage to form a few extra added feet and a junction.
From the left are the rails leading into the new area. The car is positioned on the only level section of track. Wedges of cork form a base for transitioning track elevations, otherwise, ceiling tiles are used to form a roadbed.
Panning to the right you get the gist of the junction plan. The crossover will give quick access to the elevated reverse loop in the background. Although many feet of double track sections exist, the layout is generally a single line traversing the room twice.
Further right the four entering lines turn into 3 exiting and then another single crossover. The changes enable the elimination of a bottle neck and enhances operation. When the upper reverse loop was permanently installed it was decided that the bridge built here would get closely spaced ties. Now it's on to wiring this entire area with the new 12 guage. NO more track laying for now.
Bruce
@Lionelski posted:I like the T-shirt, Mitch.
I also like the pic of your layout in the Photo Album section in the latest issue of CTT. Congrats!
Thankee kindly! I'll have to pick that up; didn't know I was in it! ![]()
Mitch
@M. Mitchell Marmel posted:
I hate to be the one to break it to you, Mitch, but Gi-raffs lie ![]()
![]()
I’m wondering - is talking to gi-raffs going to be the post-pandemic version of the voices in my head told me to adulterate that poor defenseless GG-1??? ![]()
![]()
The Lionel 2027200 Norfolk Southern StationSounds Great Dome "Delaware" arrived today by USPS. It was very fast shipping from Nassau Hobbies.
The car's color looks good and will go nicely with my Norfolk Southern Excursion Train that I have detailed along with private cars. The car is next in line for detailing after the Alaska Dining Car.
Have a good evening.
Sincerely, John Rowlen
Attachments
@Apples55 posted:I hate to be the one to break it to you, Mitch, but Gi-raffs lie


I’m wondering - is talking to gi-raffs going to be the post-pandemic version of the voices in my head told me to adulterate that poor defenseless GG-1???

THE GI-RAFFS MADE ME DO IT!!! ![]()
![]()
![]()
Mitch
Mitch: Great shirt! Love the Giraffe cars, I have several myself including 2 made by Lionel (MPC) in the 70's for "Toys R Us" where the giraffe is "Geoffery" their trademark.
SIRT : What a great looking building, super job. Thanks for showing us the finished product.
Don
SIRT, The Empire Carpet building turned out nicely. Excellent detail work. I think the fun in building for a model railroad is the many details that can be added to a building. It is very nice.
Sincerely, John Rowlen
I fixed a short on one of my mainline. I needed to get out the soldering iron to get something to stay connected. Done.
Nice work on the Fender factory, SIRT. Looks like they've been producing Strats and Les Paul's for some time.
All wiring to the newly reworked section has been run and connected in temporary form. The star wiring converges near the transformers into makeshift gang bars made fom copper plumbing hanger. In general, the entire main is wired to one kill switch while sidings and such have individual switches. Once a permanent control panel is constructed then the gang bars can be transferred to It with minimal disturbance.
At this stage I can now disconnect the original Romex wire that served as Buss wiring to track feeders. The Romex will now serve to power layout lighting and switch machines.....ugh...more wiring! Fingers are crossed as the disconnection process commences that power to all the rails remains.
Bruce
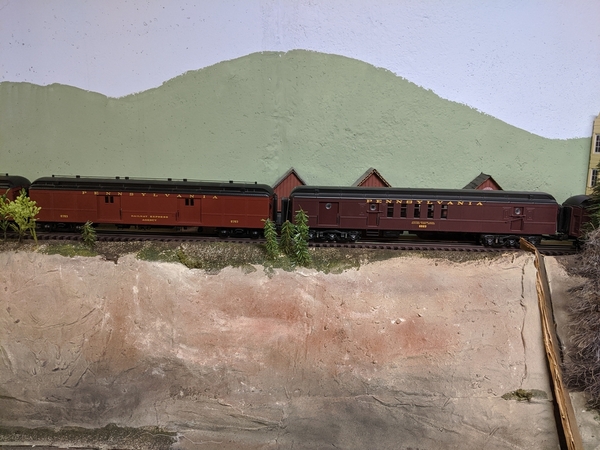
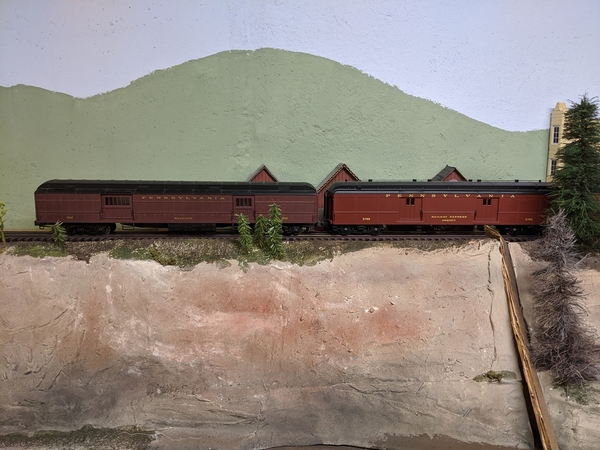 Tonight I ran the local passenger with the E6. Then the B6 pulled 8 cars from the staging yard to the town for spoting and pulling freight cars. That's as far as I got for running trains. I started vacuuming the floor and cobwebs and moving buildings and dusting the layout. I have a lot more to do.
Last week I removed the stripes from a K-Line RPO and a baggage car. I will edit this to post comparative photos to show color difference. Not to confuse, the second photo is the K-Line baggage and a Weaver B60, the first photo is another B60 and an MTH RPO.
Edit: Initially I found information that indicated that PRR passenger cars were painted Tuscan Red. So the color differences for the O scale models puzzled me. Today I found this site.
http://jbritton.pennsyrr.com/i...-to-match-prr-paints
This resource indicates that the Munsell formula for "Tuscan Red" varied for different time periods. Tuscan Red for PRR according to this site came in shades of light, medium, Pullman light, and dark Tuscan. Obviously, fading in varying degrees also comes into play. For fast mail trains and local commuter trains I think the color variations add interest to the consist.
Attachments
I am in the home stretch for this structure.
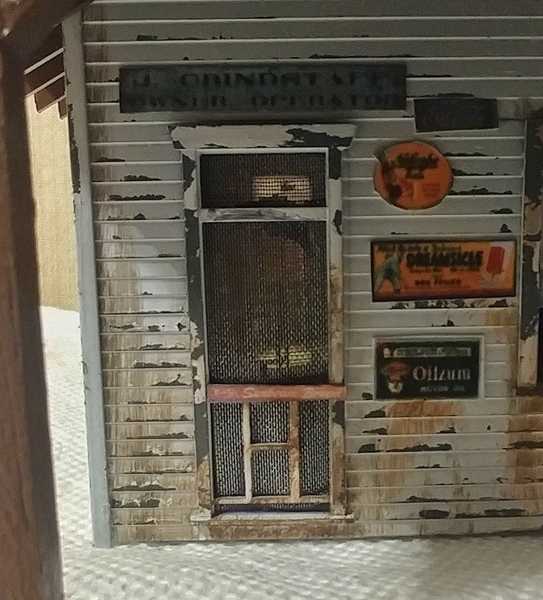
I finished the gas pump, though the kit was a real nightmare to build, without any instructions. I used original photographs of pumps to try to figure it out. I then decided not to model it with gas in the bowl, because it wouldn't just be sitting there like that. I also redid the Pet Milk sign on the side, and did a Sunbeam bread advertising bar on the screen door. I realized those were actually very common in that time and place...
I took some sheet plastic, carved it into a grid, and carved some cracks in it. It is going to be used under the front roof supports, and the gas pump will sit on that. Fuel stains and grass between the cracks will be added once the paint dries.
Once I am done with that, I'm going to add some figures on the inside, then re-scenic the spot for it and get it into place. It should be up and running by next week, I would think
Attachments
@p51 posted:I am in the home stretch for this structure.
I finished the gas pump, though the kit was a real nightmare to build, without any instructions. I used original photographs of pumps to try to figure it out. I then decided not to model it with gas in the bowl, because it wouldn't just be sitting there like that. I also redid the Pet Milk sign on the side, and did a Sunbeam bread advertising bar on the screen door. I realized those were actually very common in that time and place...
I took some sheet plastic, carved it into a grid, and carved some cracks in it. It is going to be used under the front roof supports, and the gas pump will sit on that. Fuel stains and grass between the cracks will be added once the paint dries.
Once I am done with that, I'm going to add some figures on the inside, then re-scenic the spot for it and get it into place. It should be up and running by next week, I would think
Great job on the gas station Lee. Really looks good, I like the peeling paint effect.
Scott
Lee, I agree with Scott! Great pealing paint effect on a great looking station!
@pennsynut posted:
Tonight I ran the local passenger with the E6. Then the B6 pulled 8 cars from the staging yard to the town for spoting and pulling freight cars. That's as far as I got for running trains. I started vacuuming the floor and cobwebs and moving buildings and dusting the layout. I have a lot more to do.
Last week I removed the stripes from a K-Line RPO and a baggage car. I will edit this to post comparative photos to show color difference. Not to confuse, the second photo is the K-Line baggage and a Weaver B60, the first photo is another B60 and an MTH RPO.
Edit: Initially I found information that indicated that PRR passenger cars were painted Tuscan Red. So the color differences for the O scale models puzzled me. Today I found this site.
http://jbritton.pennsyrr.com/i...-to-match-prr-paints
This resource indicates that the Munsell formula for "Tuscan Red" varied for different time periods. Tuscan Red for PRR according to this site came in shades of light, medium, Pullman light, and dark Tuscan. Obviously, fading in varying degrees also comes into play. For fast mail trains and local commuter trains I think the color variations add interest to the consist.
Tuscan and DGLE fall flat ( pun-ish ) when produced with little or no gloss. I understand the reasoning behind avoiding gloss to promote realism but the consequent loss of color depth destroys any chance of accurate matching. Variations in color due to age, time period or mixing liberties are documented within the wealth of color photography from '40's forward. Even when film, camera and lighting variables are factored into the equation, there is a perceived depth of color lost on the finishes applied to most models.
When time permits, most of my PRR passenger equipment will get a shot of semi-gloss, at least on the sides, to better represent them after cleaning and in service. A lot of head and equipment appears less cared for....Probably cut in after the rest was washed. Further down the road they all may get weathering.
Bruce
p51 : What superb modeling on your store/gas station , the realism is excellent. Great job!
Don
Just finished 2 hour clean up of train basement and dusting cars. Tonight I may get out the train order cards and play around with switching. It seems everytime I want to run trains, I have to first clean the basement, then the track, tweak some switch operation, fix a building or work on a rr car modification. But I'm getting closer!
Hi guys, Its been awhile again! Life has just got in the way to much. I have been able to get a few minutes here and there out in the train room. I have been adding facia to the edge of the layout table and rewiring toggle switches for building lights and the 2 cranes I have. I am sorry Lew I haven't taken any photos yet but will try soon!
I just gave out a boat load of like as I had to go back 4 pages to get up to speed Everyone is doing outstanding work and I would like to comment on everyone, but that is way to much work. But I would like to say I really like the modeling of Ray, SIRT, and Lee! You guys sure make things look easy!
I hope you all keep up the wonderful work and I did notice a few new faces which is always nice to see in our hobby! To all the new folks sorry it took me so long but welcome!
Remember I hope you all find time to have fun with your layout and trains!
The last few days I worked on fixing the 'bump' at the top of my long grade that lifted the front drivers of the 2-6-6-2 off the track. It is better, but not best. Check and see here for more detail.
Attachments
What make/model are those string of boxcab electrics?
@modeltrainsparts posted:What make/model are those string of boxcab electrics?
Funny you ask that I had a feeling that someone would ask about them. They are all made by Lionel and are equipped with TMCC and RailSounds 5.0. I recently picked them up, not for personal enjoyment, but to actually fix them. They had some minor problems and run great! If you would like to see them operate I will post a running session, plus two other locomotives, sometime tomorrow.
Yesterday I ran trains and made a few videos. No work. All pleasure.
enjoy, comment and subscribe.
John

 I spotted cars at their starting locations to set up for session 1 of my train operations. Then completed part of the yard order making a train of box cars and reefers to switch in town. Tomorrow I will complete the rest of the yard order making a train of mixed cars for through traffic to an imaginary yard in another town.
Attachments
I have been bouncing back and forth painting people and working on the Alaska Dining car interior. I had to order more Plastruct .040 1/4 inch strips for the seat backs for the Alaska Dining Car.
I now have 140 of the 240 Preiser 65602 figures painted. Here are nine pictures of the last 90 figures plus some China figures from Evemodel. The dark green and red figures in the first picture are from China.
Update: The last figures pictured are painted without hair. This gives me the option to add hair, slightly balding or a full head of hair, when I place the figure in a passenger car.
Have a good evening.
Sincerely, John Rowlen
Attachments
Looks, great everyone! Some of you have been wondering about those box cabs so here is a running session of them and two other trains going around my layout. I hope y'all enjoy it and happy railroading!


