


Oh don't worry Matt, he has to come back for Final inspection! He just signed off on the framing part! Of course it didn't hurt that we were both in the MARINES and I have a Bull dog! LOL![]()
Mike, it’s looking good, really good. It’s appearing to look larger now than when you first started posting pictures. Keep us posted as more progress is made. I wish I had your carpentry talents. Happy Easter evening, God is Good! All the Time..
Looks great, Mike! I’m glad the inspector was happy. Good think Tank was on the job!
I did a bit of home improvement myself! My front doorbell button was deteriorated to the point where a gust of wind would ring the bell.
So, until I can get to Lowes for a replacement...

![]()
Mitch
Attachments
Images (1)
Former Member
looks good to me
Thanks Larry and Mark! I was lucky when I first got out of High School I went to work for a custom home builder and he taught me everything I know! Been trying to improve my skill ever since!![]()
Mike, Really great to see the train room addition is moving along. Looks great, and seems like your getting to the home stretch.
M. Mitchell Marmel posted:I did a bit of home improvement myself! My front doorbell button was deteriorated to the point where a gust of wind would ring the bell.
So, until I can get to Lowes for a replacement...
Mitch
Why do I get the feeling that you will never make it to Lowes???
Happy Easter Mitch 🐣🐇🐣🐇
chris a posted:Mike, Really great to see the train room addition is moving along. Looks great, and seems like your getting to the home stretch.
Thanks Chris! Things will be a little slow for a little bit. The siding is $35 per sheet, so I will only be able to get half of them one payday and the rest of them the next payday! But that's how life is right now, and I am ok with it as long as I keep moving forward! I hope to have the outside and inside done before end of summer with a little bench work already up. We will see how that goes!![]()
Did some break in running on my "new" MTH GT SW9 and MTH C&O Berkshire on the layout while I was home for the Easter holiday.
Apples55 posted:M. Mitchell Marmel posted:I did a bit of home improvement myself! My front doorbell button was deteriorated to the point where a gust of wind would ring the bell.
So, until I can get to Lowes for a replacement...
Mitch
Why do I get the feeling that you will never make it to Lowes???
Happy Easter Mitch 🐣🐇🐣🐇
That's really cool Mitch. Now you need to hook that up to a old air-whistle tender......
Gotta figure out how to get the CEO to let me do the same........![]()
Bob
mike g. posted:Hi everyone, So today its raining, so what do you do when its raining? You go outside and put gutters up! Well atleast that's what I did for Easter! Now I have 90% of the roof done, the gutters up, all that's left is to side it and it will be ready for final inspection! A couple pictures for who wants to see.
An of course the inspector had to check things out, He doesn't look to happy but lucky for he he is an easy bribe! LOL


The train room is looking good Mike. I hope Tank does more than sit around and watch you work. Gotta train him to bring you a Coors Light once and a while.
Bob
OK So I hope this is a REALLY BAD APRIL FOOLS JOKE ![]()


The scene out my living room window this morning. 2"-4" expected. Where the H..l is Spring!
Wired up my first dwarf signal yesterday while dinner was in the oven. This is just the test unit but I think I've got it with a little fine tuning. Gotta trim the board down to size and figure out how to cover up the back. I think I'm going to make a small base for them to sit on too.


Attachments
Images (4)


Videos (1)

Mitch -- cool door bell button !! Next time use a ZW.
RSJB18 posted:Apples55 posted:Why do I get the feeling that you will never make it to Lowes???
Hee!
That's really cool Mitch. Now you need to hook that up to a old air-whistle tender......
Could be doable. IIRC, these things run on about 12VAC, so...
jim pastorius posted:Mitch -- cool door bell button !! Next time use a ZW.
LMAO! ![]()
Mitch
chris a posted:
")
")
WOW. Scenes like this make me wish sometimes that I wasn't modelling a backwoods railroad in the mountains where buildings like this never were.
Great work!
Bob, Yes we got about 6 inches of snow too! Oh well!
The signal light is coming along nicely!!
RSJB18 posted:OK So I hope this is a REALLY BAD APRIL FOOLS JOKE
The scene out my living room window this morning. 2"-4" expected. Where the H..l is Spring!
Wired up my first dwarf signal yesterday while dinner was in the oven. This is just the test unit but I think I've got it with a little fine tuning. Gotta trim the board down to size and figure out how to cover up the back. I think I'm going to make a small base for them to sit on too.
Bob, thanks for the kind words on the train room! If its ok I want to shoot you an e-mail as I have a few off forum questions to ask you.![]() For the Coors, last time I let him get a hold of a Coors can, bang 4 holes and beer flowing everywhere! LOL
For the Coors, last time I let him get a hold of a Coors can, bang 4 holes and beer flowing everywhere! LOL
As far as Snow!![]() Sorry buddy, but better you then me! LOL The signal light looks great, what are you going to be using to trip the lights?
Sorry buddy, but better you then me! LOL The signal light looks great, what are you going to be using to trip the lights?![]()
mike g. posted:Hi everyone, So today its raining, so what do you do when its raining? You go outside and put gutters up! Well atleast that's what I did for Easter! Now I have 90% of the roof done, the gutters up, all that's left is to side it and it will be ready for final inspection! A couple pictures for who wants to see.
looking GREAT Mike, getting CLOSER ![]()
Thanks Brian! Every step is a step closer to getting a layout! The cool think is the wife has become even more supportive now that she can see the building going up!![]()
Finally... after nearly 7 weeks of rehabbing my basement after the flood I am finally finished and ready to start railroading again.....

Attachments
Images (2)
Sure looks like a nice place to relax and run trains! Great looking job!![]()
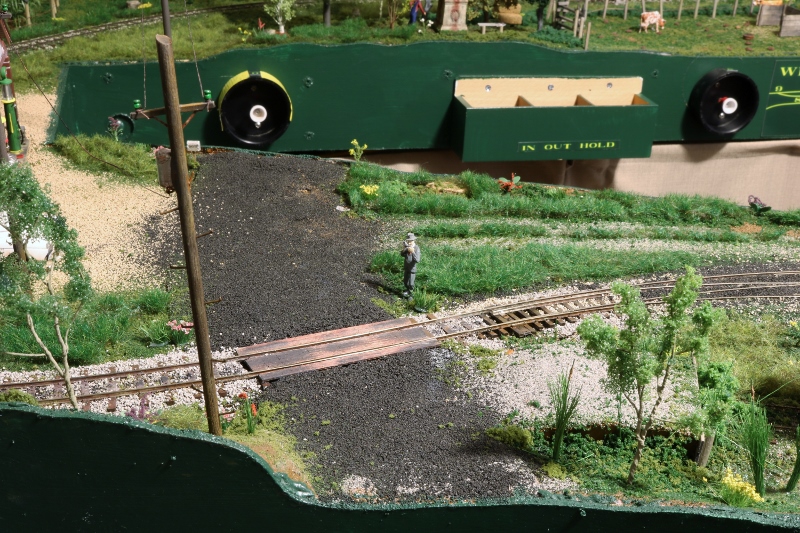
Just a couple of pictures of the area under "The Eastbridge Viaduct" heading toward the Lift-Out section. Added a bit more scenery and an old boxcar that the railroad uses as a storage shed. Hope ya'll like 'em. ![]()


Chief Bob (Retired) 
Attachments
Images (3)
Yesterday I finally bit the bullet and started assembling the 4 modules for my layout. Each module is 2 ft x 7 ft plus 2 4x4 ft. spacers between the 2 rows of modules. Got 3 modules finished yesterday, hope to complete it today. I might cut the length back about a foot though.
mike g. posted:RSJB18 posted:OK So I hope this is a REALLY BAD APRIL FOOLS JOKE
The scene out my living room window this morning. 2"-4" expected. Where the H..l is Spring!
Wired up my first dwarf signal yesterday while dinner was in the oven. This is just the test unit but I think I've got it with a little fine tuning. Gotta trim the board down to size and figure out how to cover up the back. I think I'm going to make a small base for them to sit on too.
Bob, thanks for the kind words on the train room! If its ok I want to shoot you an e-mail as I have a few off forum questions to ask you.
For the Coors, last time I let him get a hold of a Coors can, bang 4 holes and beer flowing everywhere! LOL
As far as Snow!
Sorry buddy, but better you then me! LOL The signal light looks great, what are you going to be using to trip the lights?
Mike- on the lower section they will be controlled by a toggle switch corresponding to which side of my KW is powering the track. I am considering block relays for the high line. I have a Lionel 153-IR relay box that I may try too. Saw your email- reply sent.
Bob
PUFFRBELLY posted:Just a couple of pictures of the area under "The Eastbridge Viaduct" heading toward the Lift-Out section. Added a bit more scenery and an old boxcar that the railroad uses as a storage shed. Hope ya'll like 'em.
Chief Bob (Retired)
Looks great Bob! That pick up truck needs a serious bath though ![]()
We ran trains for friends several times in the last few days, do my Retiring from my Job. Now, we can spend many fun hours finishing this layout.


Attachments
Images (8)
I had to catch up on a few days so some of this is a little delayed.
Bryan I like the structure in the corner next to the Menards building under construction. Is it an apartment building? it sure looks like one. Scratch build?
Chris A nice work on the shallow relief backdrop building.
Mike you're doing a great job on the train room.
Mitch, why do I get the feeling there was nothing wrong with your old door bell? You just got bored because Fortesque was playing with the Easter Bunny.
Larry, The layout looks great as always! Congratulations on your retirement!!!!!!!
Chief Bob, looks good, its the nice little details that make a big difference!![]()
Jim, sounds like you have a good start! Don't forget pictures along the way so the rest can drool! ![]()
Bob, thanks for the update on the information on the signal lights!![]()
Larry, spending many hours to finish a layout? Looks like you have a great layout as is!![]()
Thanks for the kind work Coach Joe!![]()
coach joe posted:Bryan I like the structure in the corner next to the Menards building under construction. Is it an apartment building? it sure looks like one. Scratch build?
Funny story about that building is that is was originally designed to be a hotel is s scale. I first saw this from a vendor (David Blum, American Flyer Trains) in the orange hall at york. He sets up near Sidetrack Hobbies. When I first saw it I said it looks like a prison (which is what I had been looking for) The vendor said No, its a hotel and I wasn't trying to be rude because I just thought I could convert it to a prison. I asked if they could upsize the kit for O scale and he said he would see what they could do. I paid for one and he said if they couldn't do it he would refund my money. About 3 months later I get a package in the mail and sure enough it was that building in O scale. The key was spray painting it with a texture/flack paint that looks like prison gray. I liked the look so much that I ordered 2 more stories to give me a total of 4. I have seen him at a few other shows and he mentioned to me that others have also remarked that it looks like a prison so he can market it both ways and asked if I could send him some pictures of my completed project.
As for that area I still need to add the fence and barb wire around the entire structure as well as many more prisoners.
Here are 2 close up pictures before I added on the 2 additional stories.


Attachments
Images (3)

mike g. posted:Hi everyone, So today its raining, so what do you do when its raining? You go outside and put gutters up! Well atleast that's what I did for Easter! Now I have 90% of the roof done, the gutters up, all that's left is to side it and it will be ready for final inspection! A couple pictures for who wants to see.


WOW Mike !! Your train room is looking great ! Your going to have a big area for a big layout.. keep up the great work.
Bryan, that is a great story of how you got the parts you made into that great prison!!
Thanks Bob, it looks big now, but when things get inside I bet it will shrink really fast! But that's ok, its just for train stuff only! No storage for anything else! In exchange I have to build the wife a Green House but that will only be 8' X 6' nothing big!![]()
You know Bryan I did think it looked like an interior of a cell block but I never thought about an open air cell block. Nice imagination.
leapinlarry posted:We ran trains for friends several times in the last few days, do my Retiring from my Job. Now, we can spend many fun hours finishing this layout.
Leapinlarry - Congratulations on your retirement!! Your layout looks fabulous!!! Wishing you many years of fun with your trains!!!
Ran trains last night for a long time while creating scenes and doing some photography. Also ran trains for a short bit today. Had lots of fun!!


Attachments
Images (6)


Trumptrain,Nice looking scenes! I sure hope they were able to get all the cars back on track ok!![]()
Decoynh, Looks like you have a great crew working there, They might get done by the time your done with the yard!![]()


leapinlarry posted:We ran trains for friends several times in the last few days, do my Retiring from my Job. Now, we can spend many fun hours finishing this layout.
Congratulations Larry! I'm sure this is an exciting time for you. Now it's time for the real fun.
PUFFRBELLY posted:Just a couple of pictures of the area under "The Eastbridge Viaduct" heading toward the Lift-Out section. Added a bit more scenery and an old boxcar that the railroad uses as a storage shed. Hope ya'll like 'em.
Chief Bob (Retired)
Nothing like seeing that beautiful blue on the rails.
NS6770Fan posted:Today I have so far attempted to install the track into our Walthers Engine Shop. 3 hammers, 2 pieces of flex track,and a helper (Henry the cat)
have all been used so far
Looks good, but you forgot to give the pliers some credit! LOL![]()
leapinlarry posted:We ran trains for friends several times in the last few days, do my Retiring from my Job. Now, we can spend many fun hours finishing this layout.
Congratulations LeapinLarry! Enjoy your your retirement and the extra time with the world's best hobby!
1934 Ford pickup truck.....before and after weathering...

Attachments
Images (2)


mike g. posted:Hi everyone, So today its raining, so what do you do when its raining? You go outside and put gutters up! Well atleast that's what I did for Easter! Now I have 90% of the roof done, the gutters up, all that's left is to side it and it will be ready for final inspection! A couple pictures for who wants to see.
Fantastic work Mike. Looks like a new Menards structure, Mike’s Train House ![]()


JD2035RR posted:mike g. posted:Hi everyone, So today its raining, so what do you do when its raining? You go outside and put gutters up! Well atleast that's what I did for Easter! Now I have 90% of the roof done, the gutters up, all that's left is to side it and it will be ready for final inspection! A couple pictures for who wants to see.
Fantastic work Mike. Looks like a new Menards structure, Mike’s Train House
Thanks JD, I thought about that name, But some company already took it! I think they make trains! LOL![]()
Former Member
another flamingo frosty bar![]()
randr posted:Made signs
For my granddaughter
Randr, really like your billboards! They really turned uot looking great!![]()
Former Member
randr posted:Made signs
For my granddaughter
If you can give me a mailing address, we can get you a flamingo to go with your
grandaughters flamingo frosty bar ![]() '
'
John
been super busy at work re arranging the shop for a new machine center, long days...

before, shop a mess, stuff everywhere...


after, getting this part of the shop re arranged...


 the new CNC machine... will start setting it up today...

the shop some what back together yesterday... I'm tired...
now hopefully to get back to some trains... ![]()
probably after a long nap... ![]()

can't wait till things are some what back to normal...
Attachments
Images (13)


beardog posted:randr posted:Made signs
For my granddaughter
If you can give me a mailing address, we can get you a flamingo to go with your
grandaughters flamingo frosty bar
'
John
I always had flamingos in the front yard, but now I live in a condo and there are probably restrictions in the rules and regulations
Continued working on my layout. The major components are made and assembled now I must add bracing to the bench work for stability and bear the weight. Not heavy lifting but tedious and time consuming. No really good place to cut wood which is a bummer. But I will have some track down soon.
Due to medical problems, l just barely got my order in for two 3rd Rail HW RPO's, for the mountain prairie states ,for D&RGW and Burlington. Also wanted Mopac and RI, not offered. (and C&S) for a postal dist. ctr.
Brian, That is a great looking shop, and nice CNC machine! Do you own the shop? I can see that would take time away from trains!!!
no, the owner lives in Florida,
I take care of things here for him... I am usually here 7 days a week...
briansilvermustang posted:been super busy at work re arranging the shop for a new machine center, long days...
the new CNC machine... will start setting it up today...the shop some what back together yesterday... I'm tired...
now hopefully to get back to some trains...
probably after a long nap...
can't wait till things are some what back to normal...
wow now thats a CNC! where in Ohio are you?
Toledo, Oh.

Amtrak station here...


Attachments
Images (4)


briansilvermustang posted:no, the owner lives in Florida,
I take care of things here for him... I am usually here 7 days a week...
I would say he has full confidence in you! Great job!
thank you Mark ! been here going on 27 years now,
started here with Bridgeport mills that didn't even have digital readouts on them...
we now have 10 CNC machines; 4 wires, 2 lathes, now 4 mills...
RSJB18 posted:OK So I hope this is a REALLY BAD APRIL FOOLS JOKE
I also made my own dwarf signals. Check out page 206, 4/23/16, page 221, 6/30/16 & page 231, 8/16/16 for details.
You should be able cover the back with sheet styrene. I would suggest using cat5 wire and conceal everything in the body of the signal. I installed my signals to indicate switch allinment. Good luck with the snow and your signals. Dave
Brian, the shop looks great! How did you move everything and keep the floor looking so good! I bet you had a good night sleep after that!![]()
Bob, I was watching the news this morning and they said you could get more SNOW on Saturday! Sorry !![]()

briansilvermustang posted:thank you Mark ! been here going on 27 years now,
started here with Bridgeport mills that didn't even have digital readouts on them...
we now have 10 CNC machines; 4 wires, 2 lathes, now 4 mills...
I worked at a tool and die shop near here in Saxonburg, Penna when I couldn't get work in electronics back in the mid '80s. About 2 years ago, my friend showed me CNC machines at the shop where GE made the prime movers for their latest Tier 4 diesel engines where he retired from last year. Amazing!
mike g. posted:Brian, the shop looks great! How did you move everything and keep the floor looking so good! I bet you had a good night sleep after that!
Bob, I was watching the news this morning and they said you could get more SNOW on Saturday! Sorry !
Last year we had a freak snowstorm that gave us a good inch of snow on May 15th. It is still early!!
Former Member
beardog posted:randr posted:Made signs
For my granddaughter
If you can give me a mailing address, we can get you a flamingo to go with your
grandaughters flamingo frosty bar
John
randr posted:Recycled unused plasticville and accessories
the flamingo I am talking about is about 2" tall
randr posted:Recycled unused plasticville and accessories
Very nice! Great way to seed the young mind with train items first then trains! LOL![]()
mike g. posted:Brian, the shop looks great! How did you move everything and keep the floor looking so good! I bet you had a good night sleep after that!

a lot of scrubbing where the machines once sat...

this stuff was a pain to get off the floor...

you can still see where the machines were...
I came in Easter morning and gave the floor a good mopping and send him some pictures, the floor is one of the owners pet peeves... which I found out the 1st week I started here, dropping a 12' I beam, chipping the new finished floor, he still hasn't forgotten...![]()
![]()

I called the owner once the machine was set in place and checked out, to tell everything looked good, one of his following questions was, " how does my floor look, good ?" kinda' funny...
Attachments
Images (4)


Well Brian, I sure hope you sent him the pictures, cause from what I can see the floors look GREAT!![]()
Hey guys, I shot a bunch of before and afters for "show and tell" this weekend at the Modelers Retreat. There are 40 pairs in the slide show, here are a few of the most dramatic. Before was done for last year's retreat, 13 moths ago.


Here are the latest of the bluff. I worked on it all day yesterday. I ran out of already made trees from enterTRAINment, and finally found my buckets of material.

I had a huge box of already shaped Woodland Scenics armatures. I just slather contact cement on the branches, and dip them in the bucket.


Nothing like having individual trees to make a big impression. I figure there are over 100, I didn't count.


As I approached the carved section, I started using clump foliage instead of trees, hot gluing it in place.

I got that seam to almost disappear.

Still have some work to do.

Should wrap up this project Thursday, then I can start on the ground. I just picked up my last construction vehicle at the post office this morning. It was tough finding this one with the fork attachment. Got it on the bay, from a guy in the Netherlands.

Attachments
Images (25)
Yes, some big differences Elliot! 100 trees sure don't go far, do they! But they sure look great!
Wonderful work Elliot! You got more done in a year then I ever got done on my last layout, before we moved! I hope to fallow in your footsteps with this layout as far as working on it as much as I can! Thanks for sharing!![]()
I’m working on changing the “Stoney Creek Road” on the layout. It never looked right to me, and I recently read where someone made a decent looking paved/gravel road with 100-grit sandpaper. I bought some a couple of nights ago and gave it a try. I did all the work with a couple of uncut sheets of it on the table, working on it with paints and such. I think it didn’t turn out half bad, better than it is right now, anyway. Now I just need to figure out how to scrape down the existing road surface and get this cut out and then glued into place.

You can sort of tell the layout of the road from the edges I drew (wider than I think I'll need, just in case). The bottom right corner on the right sheet is to cover a corner right up to the grade crossing this road spans. It was just short a tiny bit for the one sheet to cover the longer of the two segments. I also put in lines from cars turning out of the driveway to a depot as well. I wanted to not to have to do much of anything else other than gluing it down and getting the edges matched to the rest of the layout (which I assume will be the hard part).
Attachments
Images (1)
p51 posted:I’m working on changing the “Stoney Creek Road” on the layout. It never looked right to me, and I recently read where someone made a decent looking paved/gravel road with 100-grit sandpaper. I bought some a couple of nights ago and gave it a try. I did all the work with a couple of uncut sheets of it on the table, working on it with paints and such. I think it didn’t turn out half bad, better than it is right now, anyway. Now I just need to figure out how to scrape down the existing road surface and get this cut out and then glued into place.You can sort of tell the layout of the road from the edges I drew (wider than I think I'll need, just in case). The bottom right corner on the right sheet is to cover a corner right up to the grade crossing this road spans. It was just short a tiny bit for the one sheet to cover the longer of the two segments. I also put in lines from cars turning out of the driveway to a depot as well. I wanted to not to have to do much of anything else other than gluing it down and getting the edges matched to the rest of the layout (which I assume will be the hard part).
Looks good Lee! Please keep us posted on how you get the old road out and some pictures of the new road in place!![]()
p51 posted:I’m working on changing the “Stoney Creek Road” on the layout. It never looked right to me, and I recently read where someone made a decent looking paved/gravel road with 100-grit sandpaper. I bought some a couple of nights ago and gave it a try. I did all the work with a couple of uncut sheets of it on the table, working on it with paints and such. I think it didn’t turn out half bad, better than it is right now, anyway. Now I just need to figure out how to scrape down the existing road surface and get this cut out and then glued into place.You can sort of tell the layout of the road from the edges I drew (wider than I think I'll need, just in case). The bottom right corner on the right sheet is to cover a corner right up to the grade crossing this road spans. It was just short a tiny bit for the one sheet to cover the longer of the two segments. I also put in lines from cars turning out of the driveway to a depot as well. I wanted to not to have to do much of anything else other than gluing it down and getting the edges matched to the rest of the layout (which I assume will be the hard part).
I used 3M non-skid material that is used on stairs. It has a very sticky backing that settles down nicely. It can be painted to represent the age of the road. The material is black so I applied a coat of a grey-black paint. After that I dusted a grey chalk over the road to the degree that I felt I was looking for.


Attachments
Images (3)

The Two Percent Tunnel is complete at the JRM Museum in Springdale!

https://ogrforum.ogaugerr.com/...e-two-percent-tunnel
Mitch
Ran trains with the 4 yr old twins again. they sure have a lot fun, give each one a DCS remote ![]() and the only accidents where caused by me
and the only accidents where caused by me ![]() Of course three trains on one loop is alway fun
Of course three trains on one loop is alway fun ![]()
Been busy installing barb wire..........
Lee and Howard, the roads look great!
Watching Mitch's trolley on the linked topic was great!!
p51 posted:I’m working on changing the “Stoney Creek Road” on the layout. It never looked right to me, and I recently read where someone made a decent looking paved/gravel road with 100-grit sandpaper. I bought some a couple of nights ago and gave it a try. I did all the work with a couple of uncut sheets of it on the table, working on it with paints and such.
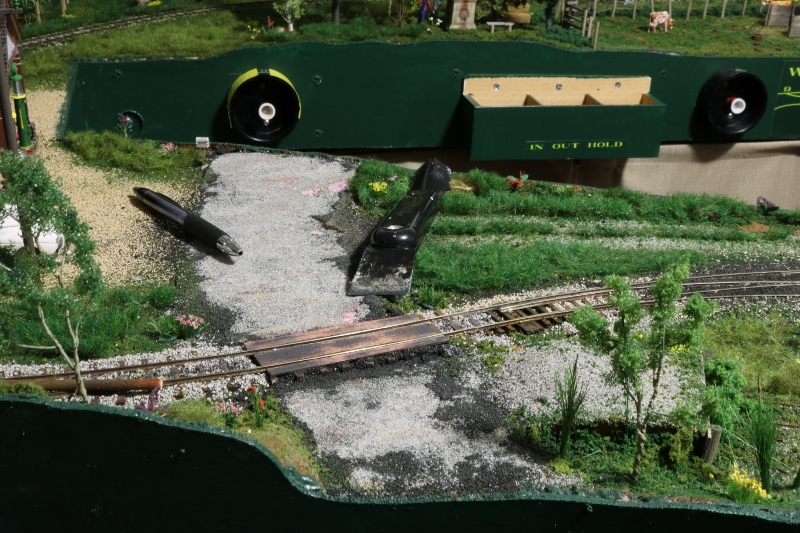
Well, the Sandpaper idea failed miserably. I put the paper down, weighted it, and something about the backing didn't want to stick to anything. Then, it looked exactly like what it was, a flat piece of something with relief painted on it. So, I scraped everything clean again and put a very thin layer of fine ballast down in it's placs. It looks a lot like the tar and gravel roads that were there anyway. I will eventually put some weathering, for exhaust stains and oil spills, and some cracks in the surface after the glue dries, sometime tomorrow or later. In other terms, the normal debris on a country road. But still, it looks a lot better than it did earlier today.
The white car is where it is in the shot to keep the photographer figure upright while the glue dries. I had to remove him during this project.

This is actually the look I was looking for, anyway. The actual road this represents was not paved at the time the layout takes place, and instead was a gravel road held together with oil and tar.
Attachments
Images (1)
p51 posted:p51 posted:I’m working on changing the “Stoney Creek Road” on the layout. It never looked right to me, and I recently read where someone made a decent looking paved/gravel road with 100-grit sandpaper. I bought some a couple of nights ago and gave it a try. I did all the work with a couple of uncut sheets of it on the table, working on it with paints and such.Well, the Sandpaper idea failed miserably. I put the paper down, weighted it, and something about the backing didn't want to stick to anything. Then, it looked exactly like what it was, a flat piece of something with relief painted on it. So, I scraped everything clean again and put a very thin layer of fine ballast down in it's placs. It looks a lot like the tar and gravel roads that were there anyway. I will eventually put some weathering, for exhaust stains and oil spills, and some cracks in the surface after the glue dries, sometime tomorrow or later. In other terms, the normal debris on a country road. But still, it looks a lot better than it did earlier today.
The white car is where it is in the shot to keep the photographer figure upright while the glue dries. I had to remove him during this project.
This is actually the look I was looking for, anyway. The actual road this represents was not paved at the time the layout takes place, and instead was a gravel road held together with oil and tar.
I like it Lee. I made a dirt road, (made of real dirt) also in my town of Coalwood. I may have to borrow your idea of a gravel road for my town of Walnut Creek. 
Attachments
Images (1)


darlander posted:RSJB18 posted:OK So I hope this is a REALLY BAD APRIL FOOLS JOKE
You should be able cover the back with sheet styrene. I would suggest using cat5 wire and conceal everything in the body of the signal. I installed my signals to indicate switch allinment. Good luck with the snow and your signals. Dave
Just looked at your old posts Dave. Exactly what I'm going for. I think I will stay with the boards though. I thought the shrink tubing would get too bulky. The signal bodies are square so the styrene will fit right to the edge. The tubing is a good idea to act as a stand and to hide the wiring. I'm using some old 22/4 phone wire. The colors are right and its stranded so it takes the solder better. Thanks for the reference material.
Bob


Attachments
Images (3)


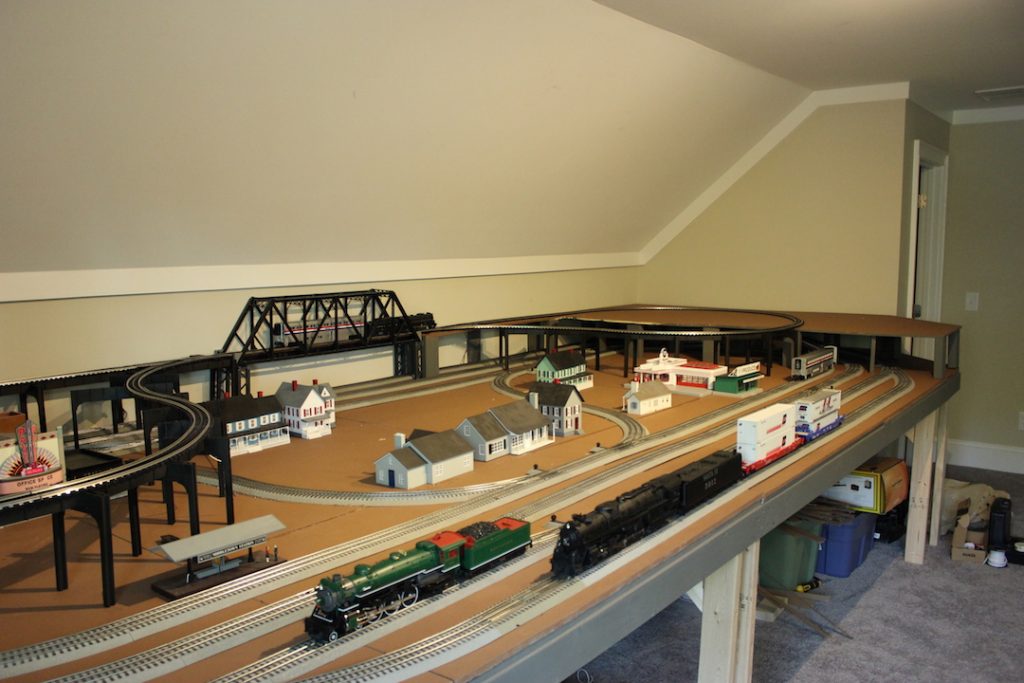
We’ve made a fair bit of progress on the layout since the last update:
- Removed all track, bridges, and accessories and painted homasote and plywood to seal and prep for scenery
- Painted elevated bridge sections in flat black
- Cut Gargraves track sections to connect track to switches
- Installed Ross O-54 switches and wired up the DZ2500 Switch Motors for non-derailing operation
- Wired up first two drops for the elevated section
We painted the homasote and plywood to seal out moisture and give it a more dirt and stone look. Given that homasote is a compressed paper product, we want to ensure as we’re adding scenery and gluing it down with white glue and water, the homasote doesn’t swell.
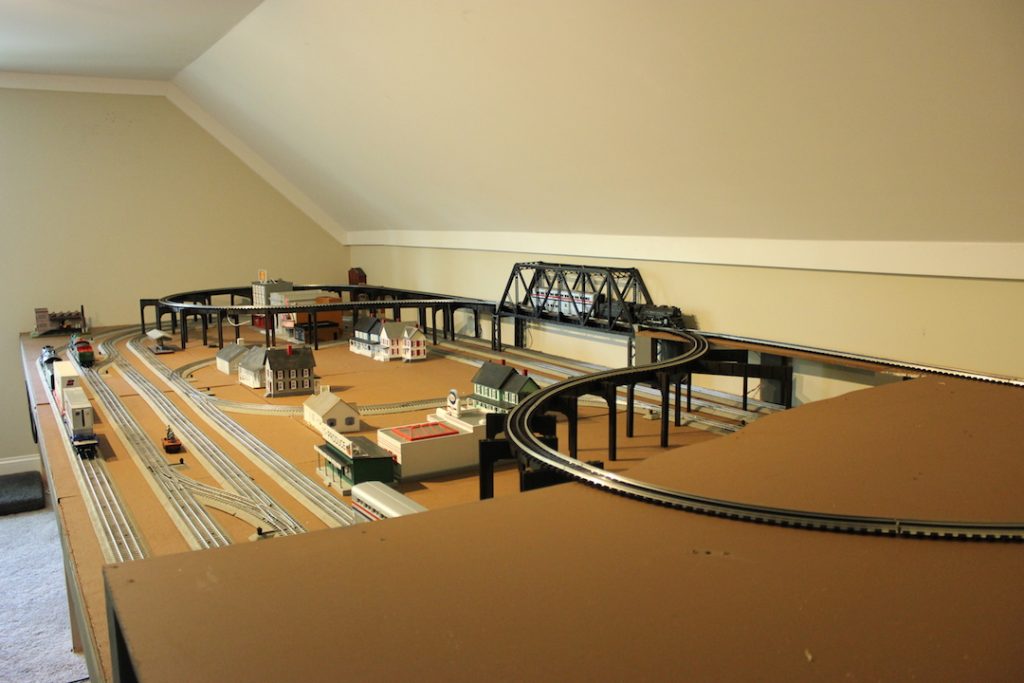
The elevated section is coming along nicely, we’ve been able to run a test train around to test connectivity and the non-derailing features of the switches. We still have the following to do for the elevated section:
- Extend insulated rail section for non-derailing operation to allow for faster trains on the upper loop
- Wire two more power drops for the elevated section
- Cut, paint, and glue track support girders under each switch curved section
- Glue down bridge supports in their final locations
- Figure out how we want to wire up the DZ2500 switch motors for remote throwing
One “lesson learned” from the Ross switches, or rather the Z-stuff DZ2500 switch motor, is that unlike the DZ1000 motors, the DZ2500s throw at a prototypical speed (read: slow). While I’m sure it looks great for switches closer to the observer, it’s not really needed for our elevated section since the switches are at the back of the layout and we’re really aiming for fast performance rather than prototypical operation. What I may do is wire up the non-derailing wires (green and yellow) rather than the Thru and Out wires (blue and white) so the motors will always throw at their fastest speed.
Once the elevated section is complete, we’ll have all tracks operational and be able to run four trains simultaneously with no operator intervention (and five trains if we keep an eye on it).
Yes, we realize there’s some odd consists running on the layout (a 2-10-4 Texas with Intermodal cars and an O-27 Lionel 2037 with a scale Superliner), but that’s just to test overhead and curve clearances :-)
Brian, once again some really nice BN/BNSF pictures ! Love them!![]()
Matt, things are really looking nice! The elevated section is going to be fun to watch, and with being able to run 4 trains is great! Keep up the good work!![]()
pretty busy at the station today...

Attachments
Images (2)


Matt, The layout is looking great! I haven't used the Z-Stuff switch motors, but have some DZ1000 switch motors to install on my new layout. I think I'll be happy with the faster action.
Soldered wires, drilled holes, feed wires , hooked up to terminal strips.
New layout with rail yard, turn table and operating accessories,
Accessories 's 21 thru 24, couple more to go.
Jushavnfun posted:Soldered wires, drilled holes, feed wires , hooked up to terminal strips.
New layout with rail yard, turn table and operating accessories,
Accessories 's 21 thru 24, couple more to go.
Sounds like a good days work! Better take a break and relax! It will be there tomorrow!![]()
Finished the bench work on my new layout and couldn't stand it so I flattened out about 9-10 heavy duty shipping boxes I had from moving. Covered the bench work and put down a loop of Standard gauge track then O gauge. Ran trains !! Not pretty but it works until I get my Homasote. My first Lionel engine, a Standard gauge 318 had the honor of running the first train and my 2018, first Lionel engine I ever bought ran the first O gauge. Second train was my M1000 to test the curves, it hadn't run in almost a year. All went well, a good day. Will take some photos tomorrow.
Jim, You are really making progress on that new layout!! Congratulations!!
Chaos theory? String theory? I'll ask young Sheldon.
Attachments
Videos (1)

Ok now I wish I never watched that! Now my head hurts! LOL![]()
Whatever it takes to get the job done!


Excellent, Kon!!
mattrain posted:We’ve made a fair bit of progress on the layout since the last update:
- Removed all track, bridges, and accessories and painted homasote and plywood to seal and prep for scenery
- Painted elevated bridge sections in flat black
- Cut Gargraves track sections to connect track to switches
- Installed Ross O-54 switches and wired up the DZ2500 Switch Motors for non-derailing operation
- Wired up first two drops for the elevated section
We painted the homasote and plywood to seal out moisture and give it a more dirt and stone look. Given that homasote is a compressed paper product, we want to ensure as we’re adding scenery and gluing it down with white glue and water, the homasote doesn’t swell.
The elevated section is coming along nicely, we’ve been able to run a test train around to test connectivity and the non-derailing features of the switches. We still have the following to do for the elevated section:
- Extend insulated rail section for non-derailing operation to allow for faster trains on the upper loop
- Wire two more power drops for the elevated section
- Cut, paint, and glue track support girders under each switch curved section
- Glue down bridge supports in their final locations
- Figure out how we want to wire up the DZ2500 switch motors for remote throwing
One “lesson learned” from the Ross switches, or rather the Z-stuff DZ2500 switch motor, is that unlike the DZ1000 motors, the DZ2500s throw at a prototypical speed (read: slow). While I’m sure it looks great for switches closer to the observer, it’s not really needed for our elevated section since the switches are at the back of the layout and we’re really aiming for fast performance rather than prototypical operation. What I may do is wire up the non-derailing wires (green and yellow) rather than the Thru and Out wires (blue and white) so the motors will always throw at their fastest speed.
Once the elevated section is complete, we’ll have all tracks operational and be able to run four trains simultaneously with no operator intervention (and five trains if we keep an eye on it).
Yes, we realize there’s some odd consists running on the layout (a 2-10-4 Texas with Intermodal cars and an O-27 Lionel 2037 with a scale Superliner), but that’s just to test overhead and curve clearances :-)
I have both switches on my layout and while the 2500's do throw slower, they have a quick throw when wired for non-derailing. Honestly, I can't tell a difference between the non-derailing speed of either of the two switches.
Everything is looking real good. Good Job!
That’s good information, Thaddeus; since I am new to Z-Stuff!
Former Member
I disassembled the Joustra Silver Arrow I recently got after it toasted itself.
I am not sure what this motor is, any one have any ideas? The train came
from France so it could be anything.
I used to rewind and balance Mabuchi can motors back in my slot car
days in the 60's, but that has been a looooonng time. 


Attachments
Images (6)
Kon,your yard looks nice! Keep up the good work and pictures!![]()
Former Member
Ok, take right hand, firmly slap forehead. Its a DC motor, they don't run real well
on AC. When the seller said it was electrified for three rail I didn't even think DC.
Lots of you guys are familiar with how DC motors can run on AC, what do I need to have to make
it run on AC, or should I just hook up a DC powerpack when I run it.
beardog posted:Ok, take right hand, firmly slap forehead. Its a DC motor, they don't run real well
on AC. When the seller said it was electrified for three rail I didn't even think DC.
Lots of you guys are familiar with how DC motors can run on AC, what do I need to have to make
it run on AC, or should I just hook up a DC powerpack when I run it.
https://www.radioshack.com/pro...0v-bridge-rectifiers

The two contacts in the middle go to the AC. Wire one to the pickups and one to the ground. The + contact goes to the red wire on the motor; the - contact goes to the blue wire on the motor. Your DC motor will now run fine on AC power.
Have fun, and good luck!
Mitch
A friend of mine is very into Star Wars, and he just did up a rendition of Fortescue as a Clone Trooper...
Note the armor trim; perfect match for the blue of 3376/3386 gi-raffe cars...
![]()
Mitch
Attachments
Images (1)

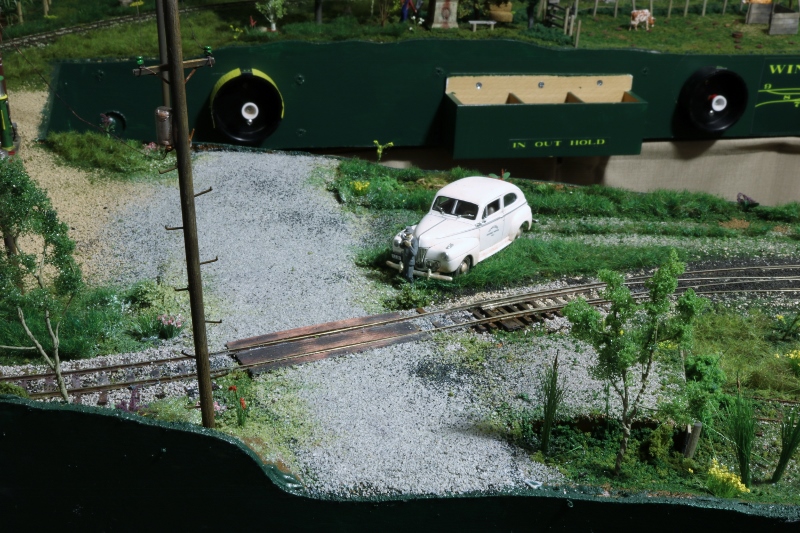
Over the last two days, I decided to rip up the road surface on one of to grade crossings on the layout. The road surface was a work in progress that I never liked. The real road was gravel and tar, and the black surface I had just didn't look right. So, I ripped it all up, laid in fine ballast for a new surface, let that glue dry overnight and I just finished placing paint and powder highlights to look like a well-travelled but still relatively decent road surface. I even dry-brushed signs of someone having to stop quickly for a train at the crossing the past.
These shots show the progression at the same point, in order:
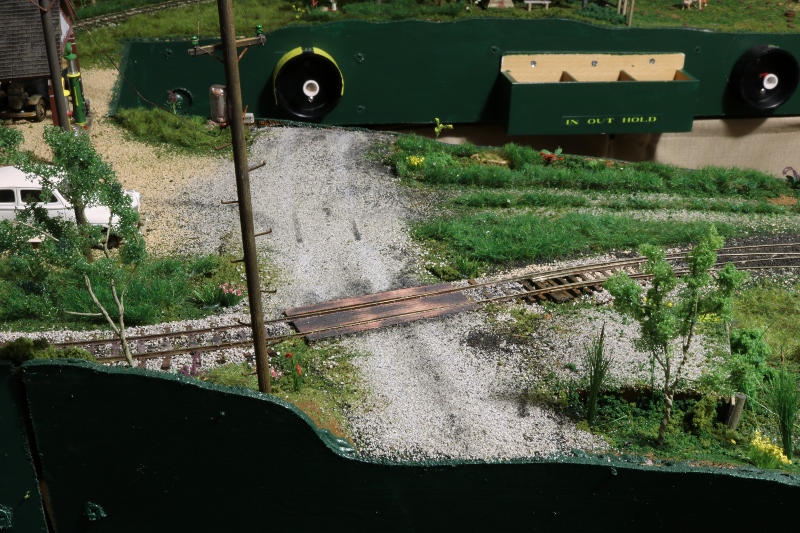
And finally, a side view showing the painted detail and weathering:
Former Member
Thanks Mitch, I went to the RS link, says they are sold out online. So
I just searched online. Got 10 of them for $3 on ebay so if you need
any let me know.
p51 posted:Over the last two days, I decided to rip up the road surface on one of to grade crossings on the layout. The road surface was a work in progress that I never liked. The real road was gravel and tar, and the black surface I had just didn't look right. So, I ripped it all up, laid in fine ballast for a new surface, let that glue dry overnight and I just finished placing paint and powder highlights to look like a well-travelled but still relatively decent road surface. I even dry-brushed signs of someone having to stop quickly for a train at the crossing the past.
These shots show the progression at the same point, in order:
And finally, a side view showing the painted detail and weathering:
Lee, how did you do the oil spills?
beardog posted:Thanks Mitch, I went to the RS link, says they are sold out online. So
I just searched online. Got 10 of them for $3 on ebay so if you need
any let me know.
Thankee! I've got a few yet, but I'll keep your kind offer in mind... ![]()
Mitch
Lee- the new road looks great. We had tar/ gravel roads in my neighborhood growing up.
You nailed it IMHO. ![]()
Bob
Little train time this week except for surfing the forum. Been working on a project for the CEO- finishing the closet in the den I renovated last year. Bottom is done just gotta install the hinges and paint. Working on the top door now.
Ordered the styrene pieces I need for my signals. ![]()

Attachments
Images (1)


Attachments
Images (9)


Lee, I think the road turned out looking great! Nice weathering !![]()
Bob, the closet is looking sharp! The CEO should be proud of you!![]()
Brian, I have been kind of keeping track, I think you need a few more engines! LOL![]()
gandydancer1950 posted:p51 posted:
Lee, how did you do the oil spills?
Tell you what, I'll go over the whole thing, just in case anyone else was wondering about other details:
I put down as fine ballast as I could get, then sprinkled in a few cinders and placed larger ballast on the sides of the roads (for the little rocks and debris you see on the sides of roads, knocked there by traffic), and some ground foam.
As for the oil stains, they were painted in. I also cut to parallel lines on a sheet of paper and used that as a stencil to dry brush a skid mark in place.
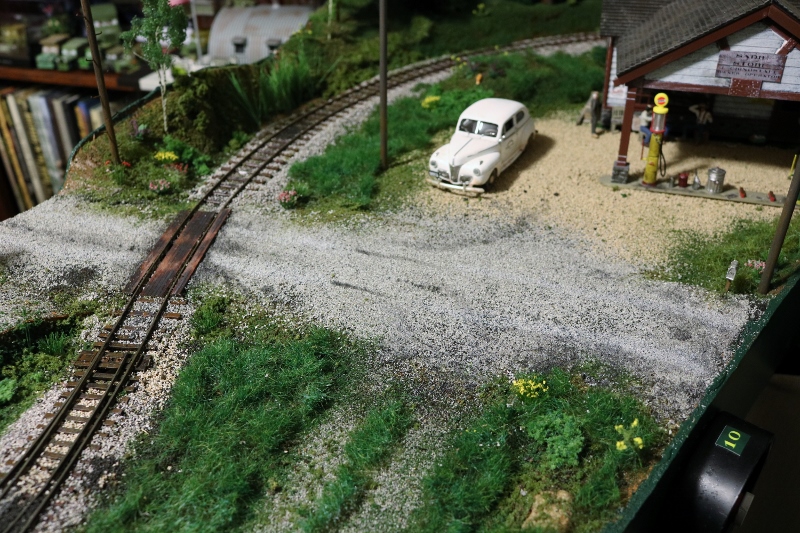
Note the lighter color lines where the majority of the tire contacts would be. That's a feature of every gravel road I've ever seen, so I dry-brushed white into two parallel lines in that spot. You can't really see it until you back up.
I then dry-brushed some general stains and grime (using mostly Floquil Grimy Black) in random spots on the surface. I also did some drips and marks coming in/out of each side road.


Oddly, the tire marks on the road from the above photo don't seem to match the marks on the crossing planks, but I think it's the angle of this shot. When you look down the road from a O scale driver's perspective, they do line up.
Lee- the new road looks great. We had tar/ gravel roads in my neighborhood growing up.
You nailed it IMHO.
Thanks much, Bob!
Lee, I think the road turned out looking great! Nice weathering !
Thank you very much, Mike! If you're heading to the model train show in Chehalis this weekend, I'll have a sales table there tomorrow. Be sure to say hi if you see me (I'll probably be wearing my NASA jacket)
Attachments
Images (2)

p51 posted:gandydancer1950 posted:p51 posted:
Lee, how did you do the oil spills?
Tell you what, I'll go over the whole thing, just in case anyone else was wondering about other details:
I put down as fine ballast as I could get, then sprinkled in a few cinders and placed larger ballast on the sides of the roads (for the little rocks and debris you see on the sides of roads, knocked there by traffic), and some ground foam.
As for the oil stains, they were painted in. I also cut to parallel lines on a sheet of paper and used that as a stencil to dry brush a skid mark in place.
Note the lighter color lines where the majority of the tire contacts would be. That's a feature of every gravel road I've ever seen, so I dry-brushed white into two parallel lines in that spot. You can't really see it until you back up.
I then dry-brushed some general stains and grime (using mostly Floquil Grimy Black) in random spots on the surface. I also did some drips and marks coming in/out of each side road.
Oddly, the tire marks on the road from the above photo don't seem to match the marks on the crossing planks, but I think it's the angle of this shot. When you look down the road from a O scale driver's perspective, they do line up.
Lee- the new road looks great. We had tar/ gravel roads in my neighborhood growing up.
You nailed it IMHO.
Thanks much, Bob!
Lee, I think the road turned out looking great! Nice weathering !
Thank you very much, Mike! If you're heading to the model train show in Chehalis this weekend, I'll have a sales table there tomorrow. Be sure to say hi if you see me (I'll probably be wearing my NASA jacket)
Thanks!
mike g. posted:Lee, I think the road turned out looking great! Nice weathering !
Bob, the closet is looking sharp! The CEO should be proud of you!
Brian, I have been kind of keeping track, I think you need a few more engines! LOL
Lee, Bob, Brian, What can I say except ditto to what Mike said?
Thanks Guys. Got the top door assembled. Waiting for the glue to dry. How many clamps does it take to glue a door?

That many....
Attachments
Images (1)
Bob, you are a man of many talents!
Former Member
Now I know the true meaning of "slow boat from china". The bridge rectifiers I ordered yesterday
shipped yesterday. ETA 4/29-5/29
Mark Boyce posted:Bob, you are a man of many talents!
If only I used them for good....not evil 😈🤣
beardog posted:Now I know the true meaning of "slow boat from china". The bridge rectifiers I ordered yesterday
shipped yesterday. ETA 4/29-5/29
One of our daughters buys a lot of fiber art supplies from China. The prices are dirt cheap, but you had better not be in a hurry!! I think they still go around the horn!! ![]()
beardog posted:Now I know the true meaning of "slow boat from china". The bridge rectifiers I ordered yesterday
shipped yesterday. ETA 4/29-5/29
Yeah, if you're in a hurry, click "3 Day Shipping" in the search. Pricier, but it won't take a month to get here... ![]()
A couple of my more recent projects:

A cracked caboose shell and a beatup flat car combine to make a transfer caboose, and a couple of Fasttrack bumpers made with #26 bumpers. Tried a couple of different methods: The bumper on the left has been trimmed down to fit on the track, while the bumper on the right has had holes hogged out of the road bed to fit the tabs on the bumper. I think I prefer the right hand method, as one can readily reuse the bumper on tubular track should the need arise...
Mitch
Attachments
Images (1)
Mark I like your way of thinking! tomorrow I get to Ditto you! LOL![]()
Bob, things are looking very nice at your house! What's next for the CEO before you come back to the dark side!![]()
Mitch, the things you think of is just amazing!![]()
Interesting evening planned. My son is coming over after work and my wife is fixing a nice home-cooked dinner. Then we are going to have a small family operating session. My wife jokingly said that maybe she would want to learn how. My son and I jumped on that like "a dog on a bone" or "a duck on a June bug" depending on your favorite saying.
So I spotted cars, developed and printed some schedules, and we will see how it goes. I was experimenting with my new Eola Yard this week and was reasonably happy with the results. I am going to try having my wife start out as engineer with my son as her conductor. I will run the "meat train" and the locals while they are busy making up trains in the yard and switching some local industries.
I'm excited about this for many reasons:
- Trying to get my wife more interested in trains.
- Having a fun family night.
- Practicing operations to work out the bugs and improve the experience.
- See which method of train control is preferred, handhelds or PC tablet.
- Take a break from just working on the layout every day lately.
Art
mike g. posted:Mark I like your way of thinking! tomorrow I get to Ditto you! LOL
Bob, things are looking very nice at your house! What's next for the CEO before you come back to the dark side!
Mitch, the things you think of is just amazing!
Roof siding and kitchen.......trains too!
Pray for me 🙏
mike g. posted:Mark I like your way of thinking! tomorrow I get to Ditto you! LOL
Bob, things are looking very nice at your house! What's next for the CEO before you come back to the dark side!
Mitch, the things you think of is just amazing!
Mike, Ditto!
Former Member
LUKE, THERE IS NO DARK SIDE..........ONLY THE FLAMINGO SIDE
Bob, I pry for everyone on here! But I have a special prayer for you and your honey do list!![]()
Art, sure sounds like you hit the jack pot! Trains, the son, and the wife all at the same time! Take time and enjoy it!![]()
RSJB18 posted:Thanks Guys. Got the top door assembled. Waiting for the glue to dry. How many clamps does it take to glue a door?
That many....
Bob;
You can never have too many clamps (nmp)...

Attachments
Images (1)
Not for my current layout, but for a small one I'll build when I retire this summer. Son and I began working on a Korber O scale grain elevator. We got the silos done today . Also began putting together a dust collecting cyclone kit, HO scale from Walthers (Wish I could find a O one, but the HO one should work since cyclones come in a lot of sizes.
Attachments
Images (1)
Former Member
New recruits arriving daily............
Attachments
Images (1)
Former Member
ten HUT!!!!!
Attachments
Images (1)
I wanted to go out and hunt flamingos but instead went to Home Deot in Carlisle, Pa. and got my Homasote. They cut it for me which saved a lot of work. Had to trim two 2 ft wide pieces and a sharp utility knife took care of that. Brought it back and soon had it down with track on it. Ran some teast trains. Next is the green indoor/outdoor carpet and figured a way to put it down with minimum fuss and bother. It was mild today and snow tomorrow morning !!
Former Member
It is noted that some are not going to come to the flamingo side easily...........
M. Mitchell Marmel posted:beardog posted:Now I know the true meaning of "slow boat from china". The bridge rectifiers I ordered yesterday
shipped yesterday. ETA 4/29-5/29
Yeah, if you're in a hurry, click "3 Day Shipping" in the search. Pricier, but it won't take a month to get here...

A couple of my more recent projects:
A cracked caboose shell and a beatup flat car combine to make a transfer caboose, and a couple of Fasttrack bumpers made with #26 bumpers. Tried a couple of different methods: The bumper on the left has been trimmed down to fit on the track, while the bumper on the right has had holes hogged out of the road bed to fit the tabs on the bumper. I think I prefer the right hand method, as one can readily reuse the bumper on tubular track should the need arise...
Mitch
Mitch I've got some more busted SP shells, plus a box of S Gauge Flyer busted caboose shells if you wanna make more...![]()
Former Member
just more hiding places for them terrorist gi-rafs, i think
beardog posted:just more hiding places for them terrorist gi-rafs, i think
That's peace loving freedom fighting gi-raffes, if you don't mind! ![]()
Mitch

Attachments
Images (1)

Brian: That wooden obs looks like a really nice car. What make is it? Do you have a complete train of those old woodies? Prototype for that style of car would have been about 1895 to 1905. I've always felt that this period has been neglected by most manufacturers, both for cars as well as engines. The only similar car that i'm aware of was made by MTH and then, I don't remember if it was ever made as an observation car.
Paul Fischer
I'm pretty sure it is a MTH car, I will check after work tonight on that, I think I have a 3 car set of these cars...
Working on switch inputs to signal system. Once I get the signals working properly, I'll hide/conceal the wires on the bridge.
Nearest track is east yard lead which ends at this interlocking and gets the stop signal since all switches are lined for the mains. Track 1 and Track 2 both get clear signals through the interlocking.

Throwing the switch for the cross-over from track 1 to 2, gives a medium clear signal to track 1, and stop for track 2.

Attachments
Images (2)
Anthony K, sure is some nice looking work there! You get a chance would like to see more of your layout!![]()


you need to go into business Mike !! ![]()

thanks again for mine !!! ![]()
Attachments
Images (1)

briansilvermustang posted:you need to go into business Mike !!
thanks again for mine !!!
Do that and then it wouldn't be fun anymore!![]()


Attachments
Images (3)


Had the kids and grand kids here for the past 5 days. But while they were here a few nice things came in. I got my tickets from Menard's for the train show they co-sponsor in Eau Claire Wi in July. Then my set of Weaver trucks came. Today I went to the Medina Ohio show and pick up a few vehicles. The show seemed to be missing a number of vendors and the crowd was on the small side. Unless it picked up after I left. Then on the way home I made a side trip to Menard's and picked up my Morton Salt trucks and the freebie trucks. Now with the house quiet I can go back to working on the layout. I will be hosting my Tuesday night group the week after York. And with going to York it does not leave me a lot of time to get the layouts ready. Got to double down now. Pics.....Paul


Attachments
Images (4)
Another project from this weekend was to respray a junk Plasticville station I had sitting around in pieces. I replaced two missing doors with some scrap sheet plastic, with sewing pins for doorknobs. Came out pretty good, if I do say so myself...

The Razorback Traction Co. transfer caboose is complete! Railings were cut down from the Lionel RS-3 whose chassis is under the Crocodile and whose shell adorns the Red Monster. When you're impoverished, you learn to reuse and recycle... ![]()

Fortescue J. Gi-raffe approves of the work...

But what's this?!

A...FLAMINGO INVADER!!!

So far, things seem cordial enough, but who knows what will happen? ![]()

(Many thanks to Beardog for the flamingo! It's adorable!)
Mitch
Attachments
Images (6)
Former Member
uhoh
Former Member
ALLLLLL will come to the flamingo side................hahahahahahaha
Hey Paul, if you're coming to the show in Eau Claire, it's just another hour to my place. I was also planning to hit that show. Sounds like it's gonna be huge.
Former Member
God I am so jealous, hasn't been a train show in my area for years. I used to live in
Ill and go to dupage every month. There used to be at least an annual one in Reno
but those stopped years ago. so now it all the bay
Paul, I'm glad you got to spend time with the kids and grandkids. That's neat you are going to the show in Eau Claire! Sounds like you could meet up with Elliot!
Briansilvermustang asked me if I had done any more with my layout. Over this weekend I did get a bit done. I pulled out the tacks I used to secure the cork, then sanded the rough edges off the cork and smoothed it up a bit. I then took a tip from someone several months ago and sprayed the cork with gray stone paint by Rustoleum to give the impression of ballast until I do ballast sometime in the future. I first tried Testors, and that little can was gone in no time flat. Some folks ballast before putting in the rest of the scenery, and others leave the ballast go until after the scenery. I found in HO that I fit in the latter group. One photograph.

Attachments
Images (1)

Mark,
Now I like that, changes the look of the Cork entirely! Very nice job.
PCRR/Dave
Hooked this up
Attachments
Videos (1)

Pine Creek Railroad posted:Mark,
Now I like that, changes the look of the Cork entirely! Very nice job.
PCRR/Dave
Thank you, Dave!
Jushavnfun, That is a cool bridge, and it runs great for you!
Former Member
briansilvermustang posted:you need to go into business Mike !!
thanks again for mine !!!
My favorite 'vette. 1963 split window.
Yes Dan, I think that is one of the better Vettes too!
Mark, the cork came out good. Paul
paul 2 posted:Mark, the cork came out good. Paul
Thank you, Paul!
I do have to tell you and Dave my first try was too thick, so I just wiped off and sprayed very thin layers. I went back a second and third time until I got all the spots I missed.
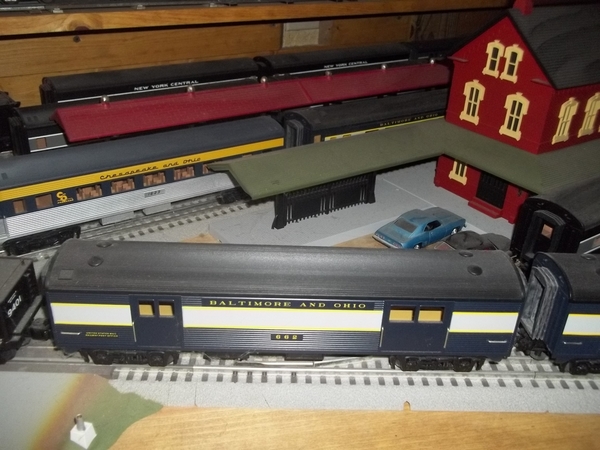
I wanted to try out my new Broadway Limited cars, but, with one mainline out of commission and the other two somewhat crowded with engines/trains, I had to spend about half an hour shifting things around on the layout. I guess if I used the deus ex machina method (aka the hand of God), I could have cleared the tracks in five minutes, but there was something decidedly enjoyable about getting everything off the tracks without any crashes ![]()
![]()
Here is a short video of my six car Broadway Limited behind a Visionline GG-1.
Overall, I am very pleased with these cars - they are beautiful. I haven't set up the Sound car yet, so all I have is the running sounds and they are way cool. However, I did find a few very minor issues when I got the cars on the track...
- the operating coupler on the observation car was binding on curves - simple fix, just had to back off the two very small screws holding the plate over the coupler a slight bit
- one coupler on the sleeper kept opening, usually on a curve - another simple fix... when I close the coupler by hand, it was very stiff - if I pushed it in hard, it locked and stayed shut. Since I am not going to separate the cars (when not running, they will sit as a unit on a siding), no big deal
- the sound car doesn't light up - I have no idea how to open the car, so I am not sure if it is worth trying to open the car to see if something is loose. Not a big deal to me.
Next stop Chicago!!!
Attachments
Videos (1)

Monkey work
Attachments
Images (1)
Got a lot accomplished on the new layout. Homasoted own, green carpet down, 3 loops of track down, extra boards in the middle to narrow the opening to make more space for "stuff" and hooked up a ZW for the Standard gauge track. The one I had used on my old layout somehow got a short in it. Using a KW for the 3rd track. Will gradually start moving some of my buildings and engines on to the layout this week. Have the towers, signals, people and vehicles to go. More fun.
Apples55 posted:I wanted to try out my new Broadway Limited cars, but, with one mainline out of commission and the other two somewhat crowded with engines/trains, I had to spend about half an hour shifting things around on the layout. I guess if I used the deus ex machina method (aka the hand of God), I could have cleared the tracks in five minutes, but there was something decidedly enjoyable about getting everything off the tracks without any crashes
Here is a short video of my six car Broadway Limited behind a Visionline GG-1.
Overall, I am very pleased with these cars - they are beautiful. I haven't set up the Sound car yet, so all I have is the running sounds and they are way cool. However, I did find a few very minor issues when I got the cars on the track...
- the operating coupler on the observation car was binding on curves - simple fix, just had to back off the two very small screws holding the plate over the coupler a slight bit
- one coupler on the sleeper kept opening, usually on a curve - another simple fix... when I close the coupler by hand, it was very stiff - if I pushed it in hard, it locked and stayed shut. Since I am not going to separate the cars (when not running, they will sit as a unit on a siding), no big deal
- the sound car doesn't light up - I have no idea how to open the car, so I am not sure if it is worth trying to open the car to see if something is loose. Not a big deal to me.
Next stop Chicago!!!
I had the same issue with the sound car “no lights” before I set it up. No need to open it. Once you assign an ID to the car and program it, the lights come on. The light switch on the bottom of the car is set to “on” from the factory. Enjoy, the sound car is a lot of fun.
Attachments
Videos (1)

The sounds are great! Really wonderful!
Mark,
They are, I agree. Station sounds, Diner sounds, and general car sounds are terrific. They add much to the fun of operating.
ToledoEd posted:
I had the same issue with the sound car “no lights” before I set it up. No need to open it. Once you assign an ID to the car and program it, the lights come on. The light switch on the bottom of the car is set to “on” from the factory. Enjoy, the sound car is a lot of fun.
Thanks Ed. I'll give it a try (as soon as I can find an available number in my Legacy remote ![]()
![]()
![]() )
)
paul 2 posted:Had the kids and grand kids here for the past 5 days. But while they were here a few nice things came in. I got my tickets from Menard's for the train show they co-sponsor in Eau Claire Wi in July. Then my set of Weaver trucks came. Today I went to the Medina Ohio show and pick up a few vehicles. The show seemed to be missing a number of vendors and the crowd was on the small side. Unless it picked up after I left. Then on the way home I made a side trip to Menard's and picked up my Morton Salt trucks and the freebie trucks. Now with the house quiet I can go back to working on the layout. I will be hosting my Tuesday night group the week after York. And with going to York it does not leave me a lot of time to get the layouts ready. Got to double down now. Pics.....Paul
I'm glad to see you have your tickets already !!! See you at the Menards booth !!
Attachments
Images (1)

Paul, I am glad you had a good time with the Kids and Grandkids! Some great finds there and a really good deal from Menards! Sure sounds like a great weekend!![]()
Mark, I think the cork turned out looking great! Now you just have the rest to paint! LOL![]()
Jushavnfun, That bridge really looks nice and seams to run smooth! Great job!![]()
I sure wish I was going to the train show in Eau Claire, WI. Sounds like it going to be a fun time by all! Plus a chance to meet Bob again and Elliot! What a great plus!![]() Just a long drive from Hoodsport, Wa.
Just a long drive from Hoodsport, Wa.![]()

Attachments
Images (1)

Some new motive power arrived, ie MTH latest run RS-3. This one is a Boston and Maine in Delivery colors.


Attachments
Images (3)
I may have actually (almost) finished my basement/train room (well, I don't know if you call it finished, let's call it half civilized) and if the myriad little things I am finding get fixed, might actually be able to start seriously moving forward with a layout. If the layout takes as long to conceptualize and build as the basement has, by the time I start the layout Elliot will have finished his current layout, gotten bored with it, torn it down and built an even bigger one that replicates the entire original NYC route, gotten bored with that and built himself a real railroad by himself![]() .
.
Seriously, I might actually see the promised land, somehow I expect I'll get the first pieces for the table together and my wife will decide it is time to move and that is that....or I'll look at the cost of the track and such for the layout I want to build and drop dead of shock......![]()
ToledoEd posted:I had the same issue with the sound car “no lights” before I set it up. No need to open it. Once you assign an ID to the car and program it, the lights come on. The light switch on the bottom of the car is set to “on” from the factory. Enjoy, the sound car is a lot of fun.
Ed;
You're a gentleman and a scholar!!! Programmed the sound car (Engine 97... fortunately I still have some lower numbers available) and set it up as a train with the GG1 - luckily they are both Legacy, so I wasn't restricted for the train number. And there was light.
Thanks.
Bigkid, Its all good, we all go threw that! It will pass and the wife will let more and more go!![]()

right now, nothing, we`re in NJ getting the old house ready for sale, retired to fl. 2 years ago, keep havin` fun guy`s and gal`s, that`s why they call it retirement, lol ......
I had the photographer over the other day and he took 208 pictures. I never new it would be such hard work taking pictures. move lights and stage trains. snap, snap and move everything again. I was ask not to post pictures yet but I will post them as soon as I can. I did run trains this week end with my grand children and I loved every minute with them. I'm getting ready to start installing my new control panel this week.

Former Member
Another in the shelf queen series, took down this Marx M10000 red and silver. I actually
thought I had tuned this one before. Guess not. It was pretty shaky and jerky so I did
the clean and lube thing. I display this as power car and 5 coaches so that is how I put
it on the track. Can you say wheel slip? I could get it to go on its own with only power car
and three coaches which is how it came originally I think. When I added the fourth coach
it made a bit of progress, but needed the five finger helper engine to get the momentum
going.
Attachments
Videos (1)

WOW ![]() So much great stuff going on around here. Keep up the good work everyone!
So much great stuff going on around here. Keep up the good work everyone! ![]()
I actually turned on the power to the layout this morning for the first time in two weeks. I received my RMT Beep and gave it a quick test run before work. Cool little diesels for sure.
Bob


Attachments
Images (2)


RSJB18 posted:WOW
So much great stuff going on around here. Keep up the good work everyone!
I actually turned on the power to the layout this morning for the first time in two weeks. I received my RMT Beep and gave it a quick test run before work. Cool little diesels for sure.
Bob
Bob, nice that you got to run a little this morning! Sounds like you need some more SNOW days! LOL![]()
Mike, it snowed here all day yesterday and last evening. There was only a half inch accumulation! 26 degrees this morning and I had to scrape frost. I couldn’t justify that as a snow day. LOL. The weather man says 70 degrees Friday, then cold again.
Mark, I feel for you! All we are getting is rain and a little wind. But that's norm for here!![]() Spose to be in the upper 50's all week with more rain!
Spose to be in the upper 50's all week with more rain!![]()
Yes Mike, I know you get lots of rain! That makes for such lush forests, but has to make it hard to build a train room!
Mark Boyce posted:Yes Mike, I know you get lots of rain! That makes for such lush forests, but has to make it hard to build a train room!
It does Mark, but I hope to be out there this weekend rain or shine putting up T-111 siding ! We will see how it goes. I might have to wait till the fallowing payday to finish the siding as it's $35 per sheet!![]()
Mike- snow days don't help. I need to get out from under the CEO's project list ![]()
![]()
![]()
RSJB18 posted:Mike- snow days don't help. I need to get out from under the CEO's project list

In that case, your stuck! LOL![]()


NS6770Fan posted:
First test light of the new engine house, We used SLOANLED #701960-6WS241 leds
That is one beautiful building, very nicely detailed. With all the windows, you'll be able to see everything going on in the shop. Very nice job.
Thanks! I still need to at roof supports to fix the sagging middle and people. Then I can start my next project of weathering it.
Moving some buildings to make room for the new sash and door company from Menards. I think I have a spot.
Dave
Day in the life with Grandpa, on a special layout trip….

1 At local hobby shop checking out the Lionel FasTrack.

2 What can I help grandpa with on the layout?

3 Cool! - Some stuff for the layout.

4 No! Grandpa is not Santa Claus.

5 Both of the grandchildren running slot cars at the local hobby shop.

6 The Oakland County Airport is right behind our local hobby shop.

7 Watching airplanes take off & land.

8 Check out this cool Bi-plane hanging in the terminal.

9 Rail-fanning at the Pontiac Amtrak Station, only about five miles from the airport.

10 Check this out, Union Pacific 9045 freight train, south bound to Detroit.

11 Amtrak Genesis on it’s way to Chicago.

12 Back at Grandpa’s train room after a long day of having fun. Running two LionChief Plus Locomotives. Reading & Northern, Pacific and New York Central, Hudson.
Hope you enjoyed our day out. April 10, 2018: Gary
Attachments
Images (12)


Great day out with the boys, Gary!! The photographs all brought a big smile to my tired face! :-)
Thank you for sharing with us!!
Looks like they had a great time Gary. I bet they go home really tired after a day with Grandpa (you too I'm sure) ![]()
Bob
What a great Grandpa Gary! I bet you all had fun! Its special times like that, that will live forever!![]()
I know those boys love visiting Grandpa Gary. He takes them to all the cool places.![]()
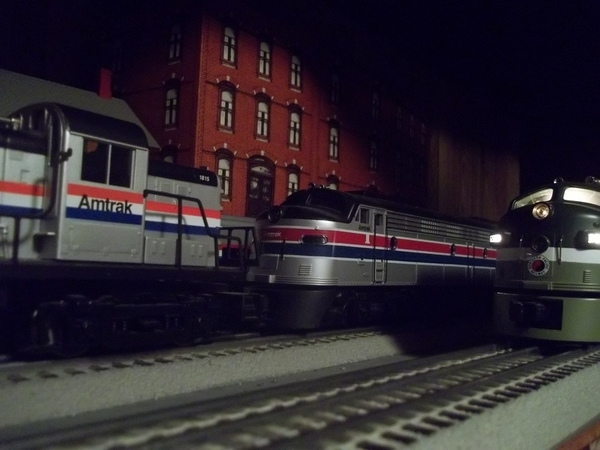
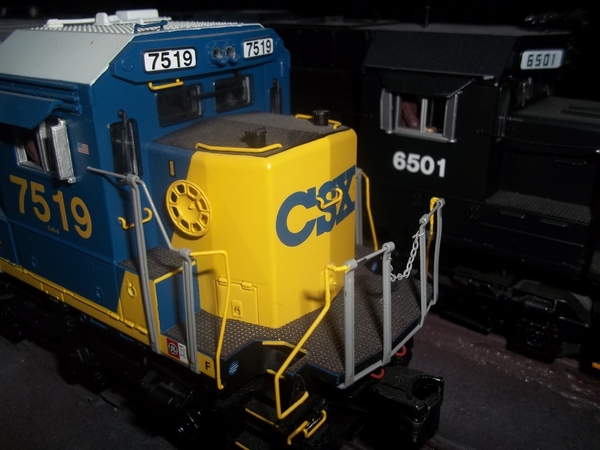
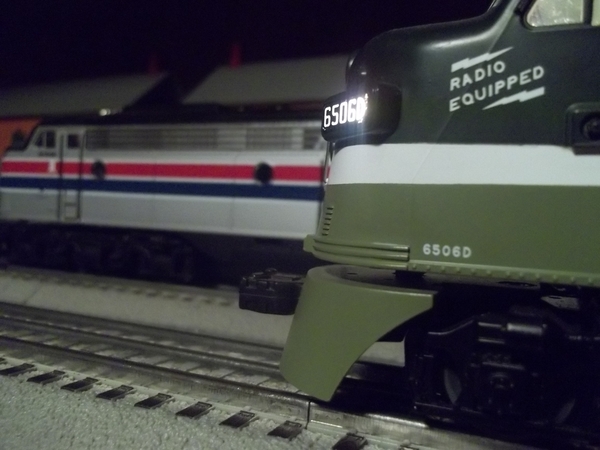
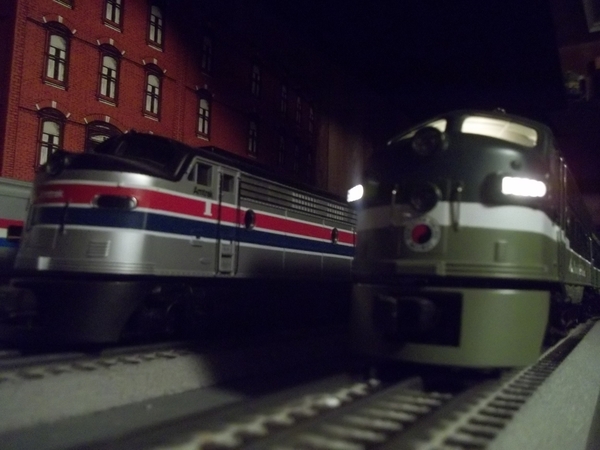
Amtrak slowly taken over...


Attachments
Images (10)


Add Reply
Sign In To Reply
