


Update of the Auto Ramp I am building for another fine member of this Forum! Ramp is complete, just needs paint and decals. Base still needs rams and legs, then paint!

Brian, More great engines!
Mike, another great ramp!
Performed a motor/wheel transplant from an extra Lionel #8 in to a #380 I just got that needed wheels. So now I have two 380s. the latest is in original paint but needs a few things.
With York fast approaching and yesterday was a day full of train stuff. Lunch again with TCA guys, after lunch a trip to see a layout then Tuesday night train crew get together. So no time for work. Today a different story. I have to make a conservative effort to house clean on the layout. Week after York to host makes this job one. Maybe post pics of before and after shots..........Paul
Gary, thanks for sharing. What a great day! My grandpa used to do stuff like that with me 40+ years ago when I was their age. I will NEVER forget it.
After a nearly week long hiatus from actual layout work, I was back downstairs yesterday. I tried my hand at a new technique. It has actually been around for a long time, but I've never done it before. This hair-like material came from Woodland Scenics. It looks almost like static grass, but it isn't.

I just grab a pinch of it, making sure that the top ends have a variety of lengths.

A quick snip evens up the bottoms...

and they're ready for planting in a dollop of hot glue

Then you fluff them up a bit when the glue cools, and they look like this.

I spent the better part of five hours working on just a two square foot area.

Still not quite satisfied, but it's getting better.

Did a little ballasting.

Got a few more trees planted in the triangle, and covered up the missing piece of backdrop.

The overall effect.


This was a bad shot for the grass demo, but I love the low angle close up.

Attachments
Images (12)
The overall effect.
looking GREAT Elliot !!! very nice !! like this picture !
Attachments
Images (1)


Attachments
Images (2)


Big_Boy_4005 posted:
It's really taking shape Elliot. I will be in the cities this weekend for our state swim meet and would like to stop for a short visit if possible. I will give you a call Saturday afternoon to see if our schedules mesh. Really like this scene you have created. Great work!!!!! Dave
It looks great, Elliot!!
2 rail O gauge visit after NMRA Div 7's meeting:
See post for pictures:
Nice work Elliot! I sure hope Paul2 and Bob take the time to come over and see your layout! I know if I ever make it to the east side of the world I will be asking for a tour! LOL![]()
Former Member
I posted awhile back about all the AF and Marx streamliners being powered by
available steam type motors complete with steam type spoked wheels. Not
very attractive considering the streamliners (not streamlined steam locos)
were all distillate or diesel engines. I recently picked up a Marx E7 diesel power
truck on the bay. I am thinking of experimenting with some of my streamliners.
I am attaching photos of my AF M10005 with it's original steam type motor and
another with the diesel truck under it. Any mods will have to be done to the motor and
not the body, but this one seems fairly easy. I like the diesel motor better. The body is
still too high, but lowering it would mean modifying the whole train to match.
What do you guys think?
John

Attachments
Images (2)
I like the diesel truck better, too. So does Fortescue. ![]()
Mitch
Attachments
Images (3)


Attachments
Images (3)


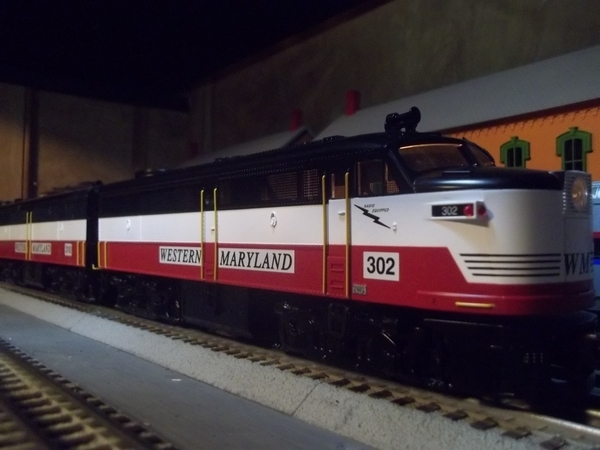
briansilvermustang posted:
Nice!![]()
Brian never disappoints!!
Thanks Brian, Dave, Mark and Mike as well as those who just hit the like button. I appreciate all the support.
-----------------------------------------------------------------
I spent 9 hours down there yesterday, a 4 hour session in the afternoon, and another 5 in the evening. I just put on the Twins game in the background. Good game! Joe Mauer got his 2000th hit and the Twins won their third in a row. Maybe these guys are for real.
This is the stuff I was installing on Tuesday. I did a little more of it as well as a bunch of other little things.

I ballasted and glued this little section at the opening under the bluff.

I went back and tidied up the ballast around the long ties of a bunch of switches.

I also re-ballasted along the base of the rock face.

I grabbed an auto rack from the Ford plant, and brought it over for a clearance test. No problem with the new rock near the opening.

Low angle photography is the way to go!

As I was heading up stairs, I spotted a box that I hadn't opened. Jackpot! More trees! In my haste to get out of the mall, I had people just stuff things into boxes. These poor trees, after 25 years, were squished into a nearly solid mass. I spent a good chunk of the evening getting them apart, and cleaned up. As I dug through that box, I found more rodent evidence.

There were actually quite a few trees in there. I also found a couple huge chunks of virgin, clump foliage.

Then I spent the remainder of the evening sorting and cleaning the used clumps. The box on the floor still needs sorting. Very time consuming, but it should pay off later, when I can just grab what I want. I was pulling out all the big ones first. The really small ones will go back into the tree making buckets, as that's where most of that came from anyway. You kind of go cross eyed sorting out four shades of green.![]() The medium and the dark are the toughest.
The medium and the dark are the toughest.

Attachments
Images (9)
Looks great Elliot. The autorack against the bluff looks superb. Tell the truth- did you fire up a diesel to go get the car or use the hand of god? ![]()
A little Christmas in April finding the trees. I guess you do really see the trees for the forest.
Bob
Thanks Bob. Air mail. I haven't turned track power on in quite a while. The hand of God is reserved for scenery.![]()
![]()
Yeah, the bright colors of the trains really POP against the soft earth tones of the rock face.![]()
beardog posted:I posted awhile back about all the AF and Marx streamliners being powered by
available steam type motors complete with steam type spoked wheels. Not
very attractive considering the streamliners (not streamlined steam locos)
were all distillate or diesel engines. I recently picked up a Marx E7 diesel power
truck on the bay. I am thinking of experimenting with some of my streamliners.
I am attaching photos of my AF M10005 with it's original steam type motor and
another with the diesel truck under it. Any mods will have to be done to the motor and
not the body, but this one seems fairly easy. I like the diesel motor better. The body is
still too high, but lowering it would mean modifying the whole train to match.
What do you guys think?
John
I like the diesel truck too although it makes the rear truck look out of place. Do you gave something more scale looking for the rear?
Former Member
yeah I thought that too, unfortunately the rear truck matches all the trucks on the cars in the train.
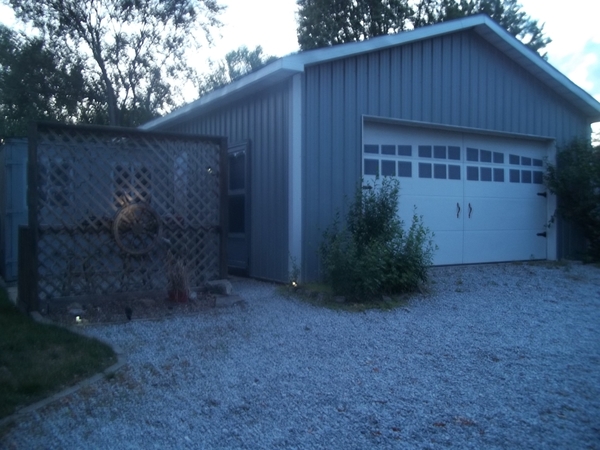
Hi Everyone, didn't get much done on the Auto Ramp today. Spent a hour driving to the nearest Lowes to get T-111 siding. Got there and they were out! LOL Now off for another 5 mile drive in the city to the next Lowes. Yee Ha! they have what I need, and the only reason I go to Lowes is they give me 10% veterans discount!!! So now another hour and a half drive home and I get to put up some siding! 1 sheet left to cut and I am done with siding till next payday!

Attachments
Images (2)
Elliot, you are for sure a man on a mission! What long hours you put in, with such great results! I see Paul2 is going to come and visit! You guys in the east get all the fun! LOL![]()
Keep up the great work and I hope you don't have to buy anymore trees after your found jackpot! Nothing better then finding something you weren't sure you had or not!![]()
Mike, that sure does make a big difference!!! Looks great!!
Question Mike. I just noticed the siding comes down pretty close to the ground. Are you going to have a problem with the rain splashing up onto the siding. I have that problem with one corner of my shed as it has settled over the years.
Elliot, always nice to find trees you didn't know you had to keep working. That cliff has come out fantastic. Sorry Mike you live on the other coast. It would of been great to catch up with you too. You never know maybe someday I'll be knocking on your door ( ROAD TRIP ) LOL. You have moved along on the the train room. Looks like not much more to go on the outside and you can start to work on the inside and the layout. Get a Champagne bottle ready for the running of the first train. And it is also going to be nice to meet Elliot and see his layout and to meet Cabinet Bob (dad ) in person at the train show..............Paul
Home Depot gives the Veterans discount also, always ask a lot of places have 10% discounts.

Making sure everything works for the D3R guys Saturday
mike g. posted:Hi Everyone, didn't get much done on the Auto Ramp today. Spent a hour driving to the nearest Lowes to get T-111 siding. Got there and they were out! LOL Now off for another 5 mile drive in the city to the next Lowes. Yee Ha! they have what I need, and the only reason I go to Lowes is they give me 10% veterans discount!!! So now another hour and a half drive home and I get to put up some siding! 1 sheet left to cut and I am done with siding till next payday!
Mike, it's beautiful! Mark has a good question, however: Aren't you worried about the siding licking up rainwater?
beardog posted:I posted awhile back about all the AF and Marx streamliners being powered by
available steam type motors complete with steam type spoked wheels. Not
very attractive considering the streamliners (not streamlined steam locos)
were all distillate or diesel engines. I recently picked up a Marx E7 diesel power
truck on the bay. I am thinking of experimenting with some of my streamliners.
I am attaching photos of my AF M10005 with it's original steam type motor and
another with the diesel truck under it. Any mods will have to be done to the motor and
not the body, but this one seems fairly easy. I like the diesel motor better. The body is
still too high, but lowering it would mean modifying the whole train to match.
What do you guys think?
John
I really like the looks of the diesel trucks and I don't think the rear trucks look all that bad...
Mike ![]()
mike g. posted:Hi Everyone, didn't get much done on the Auto Ramp today. Spent a hour driving to the nearest Lowes to get T-111 siding. Got there and they were out! LOL Now off for another 5 mile drive in the city to the next Lowes. Yee Ha! they have what I need, and the only reason I go to Lowes is they give me 10% veterans discount!!! So now another hour and a half drive home and I get to put up some siding! 1 sheet left to cut and I am done with siding till next payday!
looking GREAT Mike !! ![]()

Attachments
Images (1)

The train room looks great Mike. Almost done with the heavy lifting!
Paul2- very jealous that you are going to visit Elliot.
Beardog- I vote for the diesel truck.
Bob
Attachments
Images (3)


mike g. posted:Hi Everyone, didn't get much done on the Auto Ramp today. Spent a hour driving to the nearest Lowes to get T-111 siding. Got there and they were out! LOL Now off for another 5 mile drive in the city to the next Lowes. Yee Ha! they have what I need, and the only reason I go to Lowes is they give me 10% veterans discount!!! So now another hour and a half drive home and I get to put up some siding! 1 sheet left to cut and I am done with siding till next payday!
Mike,
At this rate you'll have trains running next week, lol. It looks like in no time you will have bench work going up. Great progress!
Hi Everyone, thank you for all the nice words! Mark and Joe as far as the siding goes I have found that if you use a good outside paint the water just runs off, for the licking up water I know it is hard to tell from the pictures but the bottom of the sheeting is 31/2-4" off the ground and I paint the bottom edge of it also!![]()
Clem Home Depot does give Veterans discounts. But they have changed there rules, You have to be active military, Retired, or receiving services from the VA that states it is military service connected.![]()
Paul, I am sure you will have a blast ! Bob, AKA (DAD) is a great guy to hang with! Enjoy the time you have there and take in all you can at Elliot's!![]()
Televue, the tables are looking great! One step at a time!![]()
Brian, another set of great pictures! I will give you a call tomorrow if you will be around!![]()
sounds good Mike !!
Attachments
Images (1)

Mike G,
Take your DD214 as proof into the Lowes Store, this is a one time thing. Lowes uses the DD214 to register you now for the Veterans Account. This gives you a 10% discount on every item you purchase. They will then reference your Veterans Account by the telephone number you provide for them, each time you purchase at check out.
There were a lot of low life's posing as Veteran to scam Lowes, so they used the DD214 to eliminate the scam artists.
I never have any trouble at Home Depot, they still accept our Military ID as proof at the check out counter.
Construction work on the new addition looks to be nearing an end, Train Layout work starts next weeK!
PCRR/Dave
Pine Creek Railroad posted:Mike G,
There were a lot of low life's posing as Veteran to scam Lowes, so they used the DD214 to eliminate the scam artists.
PCRR/Dave
Never ceases to amaze me how low some people will stoop...
Mike ![]()
mike g. posted:Hi Everyone, didn't get much done on the Auto Ramp today. Spent a hour driving to the nearest Lowes to get T-111 siding. Got there and they were out! LOL Now off for another 5 mile drive in the city to the next Lowes. Yee Ha! they have what I need, and the only reason I go to Lowes is they give me 10% veterans discount!!! So now another hour and a half drive home and I get to put up some siding! 1 sheet left to cut and I am done with siding till next payday!
Mike that looks like the makings of a great place to have a layout. Love watching your progress. I was going to mention Home Depot has a 10% veterans discount too, but I didn't know about the requirements. Menards has 11% rebate again this week, but you may not have any nearby. Anyway, keep up the good work and please keep sharing with us.
Art
LoadMaster Mike,
Heck in my era we had low life's running to Canada to evade the Military Draft, President Carter then pardoned this bunch of low life's, so they could spit on us Viet Nam Vets as we returned home.
These kind low life people are still around, you can believe they are still that low as to Scam businesses who treat us Veterans decently. Heck they Scammed the US Government by becoming Draft Dodgers and got away with it, Scamming a business is no big deal to them.
PCRR/Dave
PCRR/Dave
Thank the Good Lord that we still have people that respect and thank those who gave of themselves in the service of their country. Too bad the miscreants/unworthy seem to get all the press.... But, enough of that - let's get busy with some more trains!
Mike ![]()

Attachments
Images (3)


Pine Creek Railroad posted:Mike G,
Take your DD214 as proof into the Lowes Store, this is a one time thing. Lowes uses the DD214 to register you now for the Veterans Account. This gives you a 10% discount on every item you purchase. They will then reference your Veterans Account by the telephone number you provide for them, each time you purchase at check out.
There were a lot of low life's posing as Veteran to scam Lowes, so they used the DD214 to eliminate the scam artists.
I never have any trouble at Home Depot, they still accept our Military ID as proof at the check out counter.
Construction work on the new addition looks to be nearing an end, Train Layout work starts next weeK!
PCRR/Dave
Thank you....USN 1968-72.
briansilvermustang posted:
Great photographs once again, Brian!! Now that is one that I have high on my little want list!!!
mike g. posted:Hi Everyone, thank you for all the nice words! Mark and Joe as far as the siding goes I have found that if you use a good outside paint the water just runs off, for the licking up water I know it is hard to tell from the pictures but the bottom of the sheeting is 31/2-4" off the ground and I paint the bottom edge of it also!
Mike, Good deal!! I knew you had it covered! (pun intended) ![]()
![]()
Dave, I was able to sign up for Lowes Veterans program on line at Lowes.com. If you go to Home Depot it will tell you about the new rules to get Veterans Discounts.![]()
Art, thanks for the kind words, I know I still have a ways to go before I see trains moving, but it's going in the right direction!![]()
Brian, Great Pictures!![]()
Mark I knew if my plan didn't work, someone here would let me know and give a better idea!![]()
Had some friends over for dinner yesterday. The husband lost all of his trains in a divorce years ago. Took them down to see the layout and ran the trains for a while before they left. If you could have seen the look on his face....priceless ![]()
Mike G- a 1' wide gravel border around the foundation will help reduce the splash and keep the siding cleaner. Looks like the overhang on the roof should protect the walls pretty good too. I have a 25 year old shed with T-111 siding and its still in good shape.
Former Member
RSJB18 posted:Had some friends over for dinner yesterday. The husband lost all of his trains in a divorce years ago. Took them down to see the layout and ran the trains for a while before they left. If you could have seen the look on his face....priceless
Mike G- a 1' wide gravel border around the foundation will help reduce the splash and keep the siding cleaner. Looks like the overhang on the roof should protect the walls pretty good too. I have a 25 year old shed with T-111 siding and its still in good shape.
Too bad about your friends trains. During my divorce my ex hid all my trains at her parents house.
My attorney talked to the judge and he ordered her to bring them all back.
My large HO collection and my Dad's old Lionel's are still in my parents attic. I haven't spoken to them in over 20 years do to some family drama. I know exactly how my friend (and you) feel.
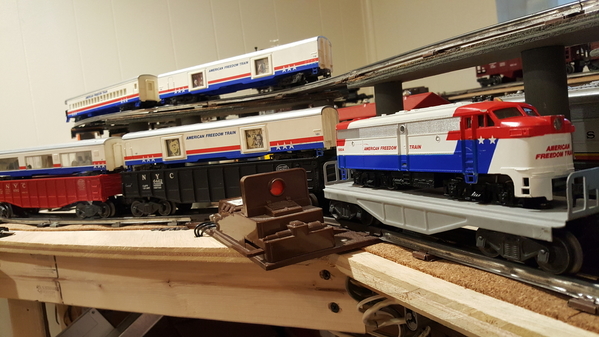
like your Freedom Train Bob... ![]()
Attachments
Images (1)

beardog posted:RSJB18 posted:Had some friends over for dinner yesterday. The husband lost all of his trains in a divorce years ago. Took them down to see the layout and ran the trains for a while before they left. If you could have seen the look on his face....priceless
Mike G- a 1' wide gravel border around the foundation will help reduce the splash and keep the siding cleaner. Looks like the overhang on the roof should protect the walls pretty good too. I have a 25 year old shed with T-111 siding and its still in good shape.
Too bad about your friends trains. During my divorce my ex hid all my trains at her parents house.
My attorney talked to the judge and he ordered her to bring them all back.
Ha! Mine too! She walked away with a HUGE settlement after we decided that trains are NOT community property.


Attachments
Images (8)


Inspiration!
Help...I need inspiration.!!Have done nothing all winter,,,
Bob, thanks for the idea of gravel around the foundation, was thinking washed rock!![]() I am really sorry for your friend losing his trains to his Ex. and everyone else this has happened to! That just sucks!
I am really sorry for your friend losing his trains to his Ex. and everyone else this has happened to! That just sucks!![]()
More Great pictures Brian!![]()
Daveland, I have no idea for inspiration but if all the great work being done by the great members of this forum does not inspire you, maybe you just need a kick in the rear! LOL![]() The key is to make it fun, something you want to do not have to do! Be a little kid again just don't forget your big boy drink! LOL
The key is to make it fun, something you want to do not have to do! Be a little kid again just don't forget your big boy drink! LOL![]()
Not sure this qualifies for the thread, but after a few months on display, I changed out AT&SF 3222 and a reefer for SP Daylight AC9 X3811. Fantasy, I know, but I think it looks purdy... ![]()

Attachments
Images (1)
that sure looks GREAT Ted !!! ![]()
JD,
Finalized the Restoration of the Tin Plate 817 Caboose, I am very satisfied with how the 817 looks in Black and Gold. Andy & Rocky will love it!
PCRR/Dave
It will make a serious addition to the 817 Consist.


Attachments
Images (3)


Looks really nice Ted!![]()
Dave, the caboose turned out great! Nice work!![]()
throwing around some ideas for Walnut Creek....not a lot of acreage as it passes through my utility room.....


Attachments
Images (4)
Ron, the road bed is fitting right in! Looks like its going to turn out great!![]()
Gandy, Looking good, I know whatever you come up with it, it will be impressive like everything else you do!![]()
Thanks Mike...I've got a few more ideas cooking......
Pine Creek Railroad posted:JD,
Finalized the Restoration of the Tin Plate 817 Caboose, I am very satisfied with how the 817 looks in Black and Gold. Andy & Rocky will love it!
PCRR/Dave
It will make a serious addition to the 817 Consist.
Turned out REALLY nice...
Mike ![]()
TedW posted:Not sure this qualifies for the thread, but after a few months on display, I changed out AT&SF 3222 and a reefer for SP Daylight AC9 X3811. Fantasy, I know, but I think it looks purdy...
Hey, it's YOUR fantasy and I think it's great...
Mike ![]()
Mike,
Thanks much!
PCRR/Dave


GANDYDANCER, with the area you have to work with you are utilizing it to the max without overcrowding things together making for a good scene. Today I actually did a little work on the layout. I have been trying to clean off the table tops but it is a slow process because it is hard to find storage space under tables that are already full of stuff. This afternoon I took the two city backdrops I had done and taped them top the backdrop. The one I scribbed the back so it would fit into the curve of the corner better. I hope to fill in in front of them with more building flats which I hope to get at York this week. Pics................Paul


Attachments
Images (2)
Nice Paul, that's going to look wonderful!![]()
The Razorback Traction Co. entertained the folks at the "Spirits of Yesterday" party at the Elm Springs Cultural Center last Friday!
https://ogrforum.ogaugerr.com/...ction-in-elm-springs
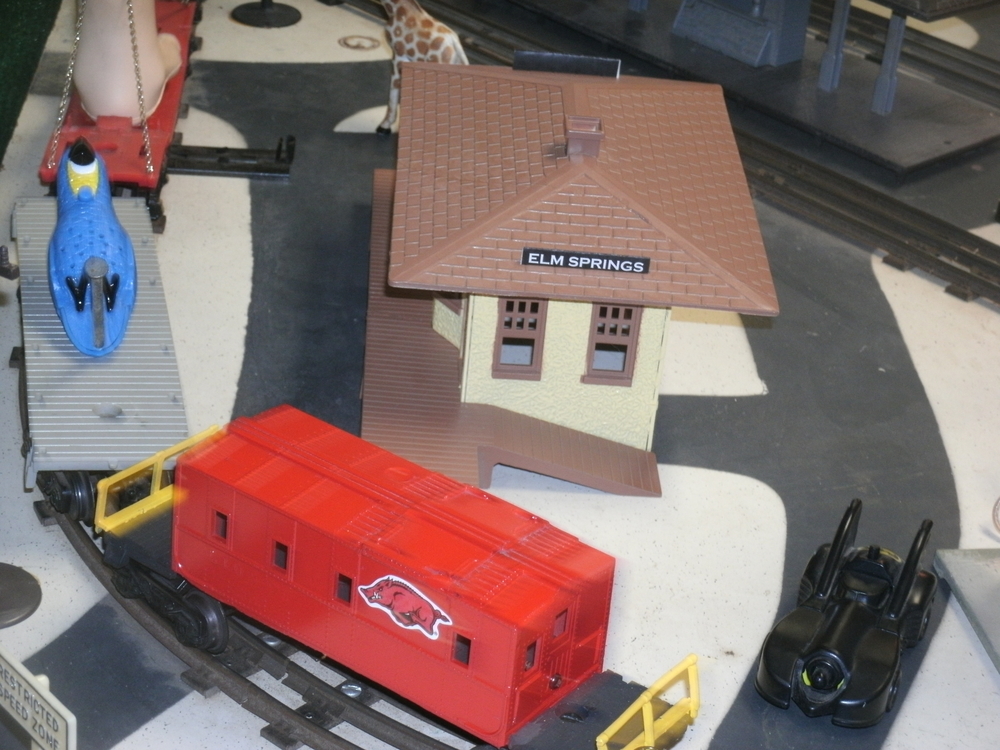
Mitch
briansilvermustang posted:
like your Freedom Train Bob...
Thanks Brian- It's a Tyco HO set that a guy I work with was getting rid of. The set needs some work when I get around to it.
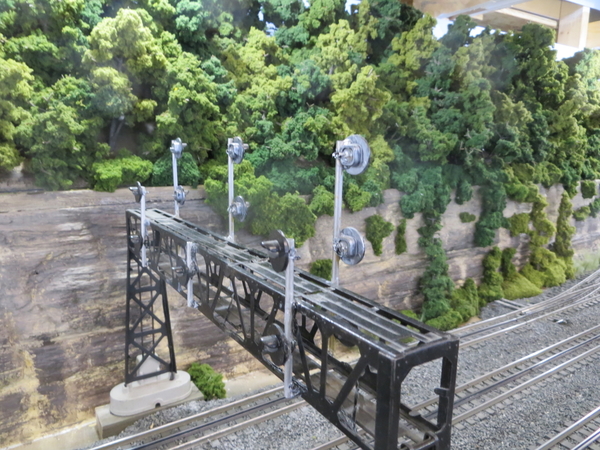
Over the course of the weekend I painted my bridge in red oxide primer, wrapped some 2x4's in foam, scored them to look like block and assembled the whole thing. I also started assembly and gluing my theatre kit with included marquee from Miller engineering. The black structure on top is the support I created for the marquee that will get attached next.


Attachments
Images (2)
Mlindberg posted:Over the course of the weekend I painted my bridge in red oxide primer, wrapped some 2x4's in foam, scored them to look like block and assembled the whole thing. I also started assembly and gluing my theatre kit with included marquee from Miller engineering. The black structure on top is the support I created for the marquee that will get attached next.
WOW That sure turned out looking GREAT!![]()
Mlindberg posted:Over the course of the weekend I painted my bridge in red oxide primer, wrapped some 2x4's in foam, scored them to look like block and assembled the whole thing.
That was brilliant how you did the bridge foundations...
Mike ![]()
LoadMaster posted:Mlindberg posted:Over the course of the weekend I painted my bridge in red oxide primer, wrapped some 2x4's in foam, scored them to look like block and assembled the whole thing.
That was brilliant how you did the bridge foundations...
Mike
Thanks, I've been working on adding some scenery to the layout that I started for my son a couple of years ago. I wanted to add some interest but keep the green carpet so it's a little more durable and kid friendly (i.e. easy coal clean-up from the 97 coal loader). As such I've been trying to create structures and scenic pieces like the bridge that can stand on their own and be lifted out.


Have been working on the "back half" of the mountain.
Over the last three days, I have made 40+ rock castings, 1 Tunnel Entry casting (plus two more that I hope to turn into a viaduct later). Today, I added the last of those rock castings, applied "Great Stuff" foam to be carved tomorrow and then filled in with and added some crushed aluminum foam tunnel walls.
Tomorrow: carving!!
paul 2 posted:GANDYDANCER, with the area you have to work with you are utilizing it to the max without overcrowding things together making for a good scene. Today I actually did a little work on the layout. I have been trying to clean off the table tops but it is a slow process because it is hard to find storage space under tables that are already full of stuff. This afternoon I took the two city backdrops I had done and taped them top the backdrop. The one I scribbed the back so it would fit into the curve of the corner better. I hope to fill in in front of them with more building flats which I hope to get at York this week. Pics................Paul
Paul, I too am going to use backdrops to obscure the furnace and pipes. I hope to have them finished in several weeks. Thanks for the compliment.
RSJB18 posted:Had some friends over for dinner yesterday. The husband lost all of his trains in a divorce years ago. Took them down to see the layout and ran the trains for a while before they left. If you could have seen the look on his face....priceless
Mike G- a 1' wide gravel border around the foundation will help reduce the splash and keep the siding cleaner. Looks like the overhang on the roof should protect the walls pretty good too. I have a 25 year old shed with T-111 siding and its still in good shape.
My wife’s grandfather put the shed on a bed of slag from the mill 50 years ago when they built the house. It has held up well with the cross braces sinking maybe an inch or two over time. After we moved here my wife put earth on top of the slag and planted flowers when I didn’t know it. That’s when my problem started!! LOL
Today, I made new tender headlight covers for the locomotives, replacing the styrene ones I never liked. The real ones were sheet metal, put in place at the start of WW2 when they were all repainted to basic black.

")

They look so much better in thin brass than they ever did in plastic.


Attachments
Images (5)
")
Lee, goes to show you can always improve something. Nice job. Does make a big difference. Last night I started applying ground turf to areas around the bridge abutments and streams. Still have more to add. Pics.....Paul


Attachments
Images (6)
looking GREAT Paul !!! ![]()
Lee, That is the great thing, a layout and existing fleet is never done!! Great idea to add the shroud!
Paul, Your backdrop buildings look good! I really like what you are doing with the stream banks!
Lee, you see details most would miss. The improvements you make sure make a difference of not only what your change, but in the whole layout ! Nicely done!![]()
Paul2, the ground cover is looking wonderful! Just like Lee's project what your doing is bring out more and more of your layout! The streams are coming alive with color, it really helps it stand out and where you put them on the bridge abutments gives it a finished look! Great work!![]()
Thanks Mark, Mike and Brian. This was my first attempt at doing water. I am going to do another water area but this one I am going to do better. I found a photo of what I want to do as to the water............Paul
Attachments
Images (1)

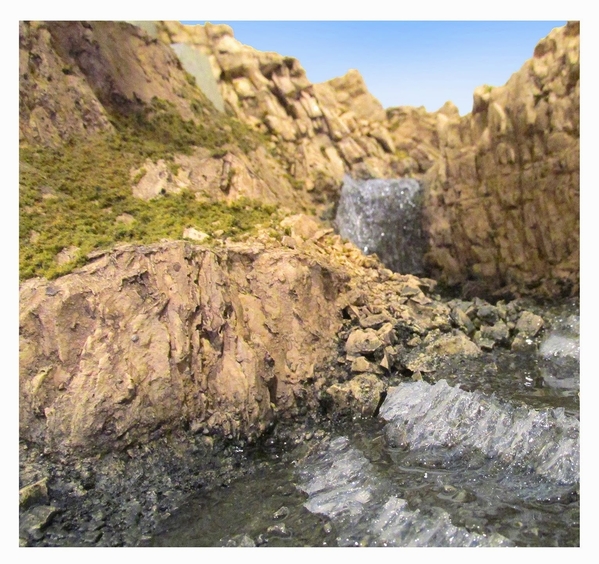
nmp's...
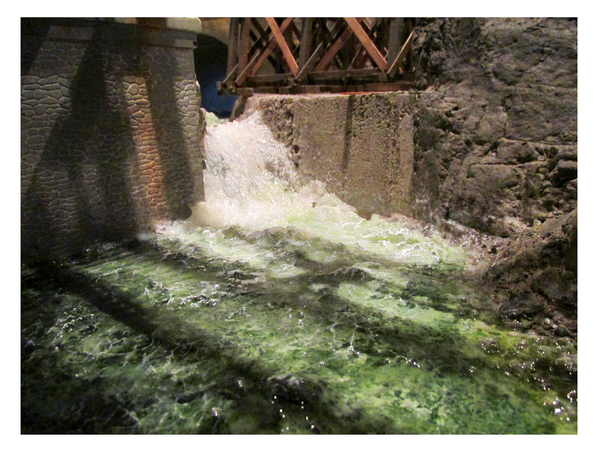
a couple more water shots Paul, with rough water flowing...
Attachments
Images (2)


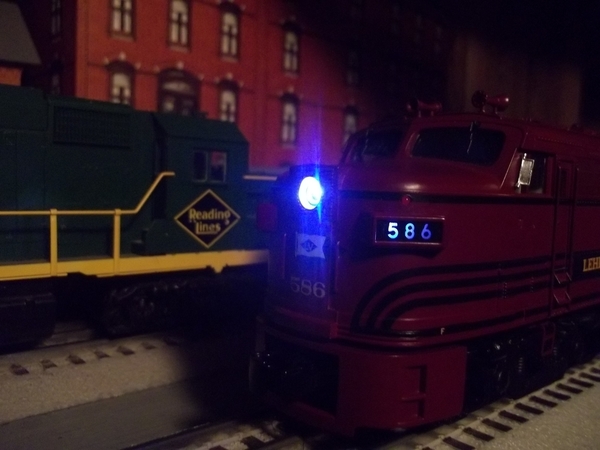
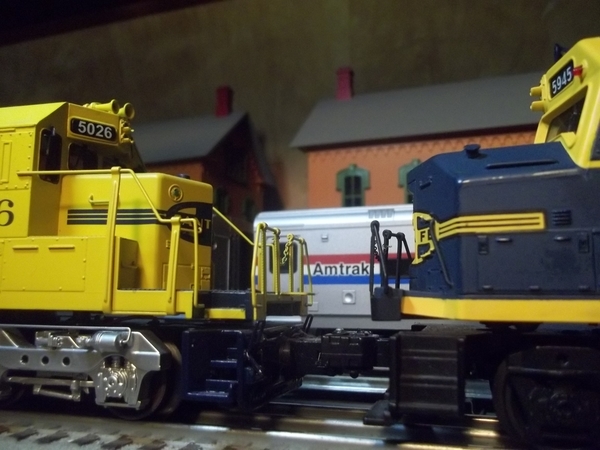
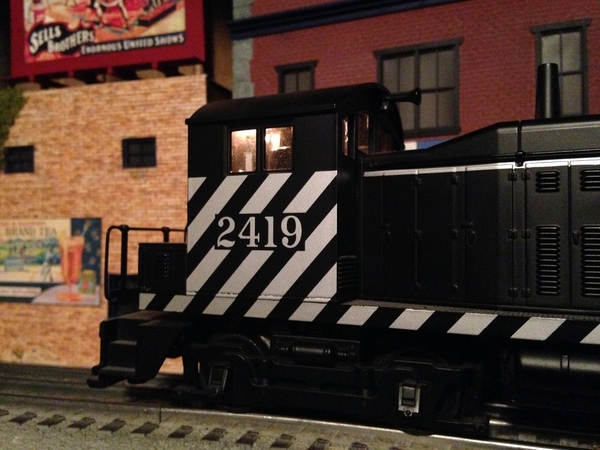
# 2419 on it's way to rescue a down subway train...

coupled up and ready to haul it back for repairs...
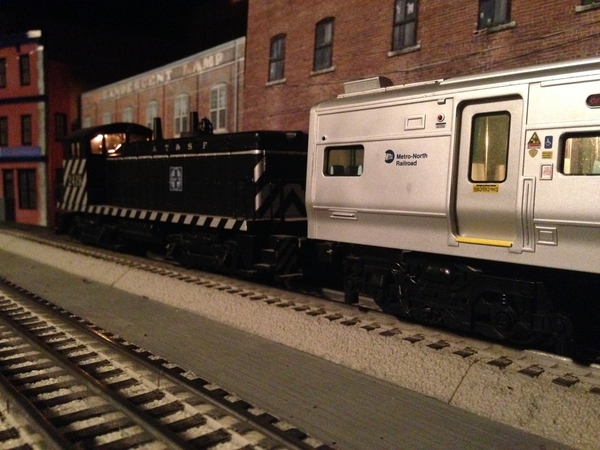


Attachments
Images (9)


briansilvermustang posted:
nmp's...
a couple more water shots Paul, with rough water flowing...
Simply Amazing!!!!

I'm SURE he will Mike !! really like mine... ![]()
paul 2 posted:Lee, goes to show you can always improve something. Nice job. Does make a big difference. Last night I started applying ground turf to areas around the bridge abutments and streams. Still have more to add. Pics.....Paul
Paul, maybe a little bit of rubbish along the stream banks... ![]()

nmp...
Attachments
Images (1)

Brian, that sure looks realistic, but the EPA is going to get after you! LOL
Lee, goes to show you can always improve something. Nice job.
Thanks, Paul. I love the work on the stream you worked on, it's looking great!
Lee, That is the great thing, a layout and existing fleet is never done!! Great idea to add the shroud!
Thanks, Mark! I'm at a stage where I'm going back and looking over the small details. I'm really having fun with this part!
Lee, you see details most would miss. The improvements you make sure make a difference of not only what your change, but in the whole layout ! Nicely done!
Thanks much, Mike! This is the part I was always looking forward to, getting to the little details like this.
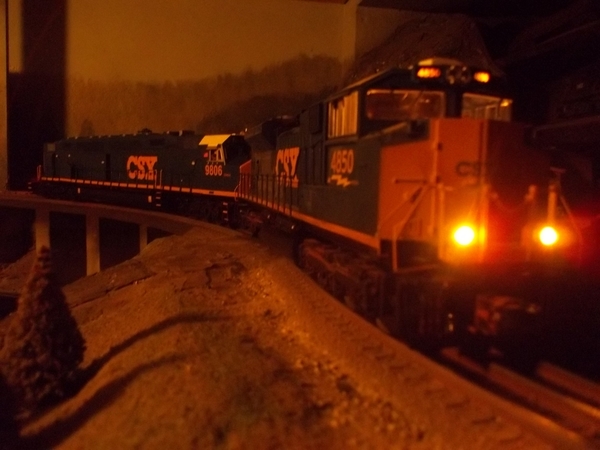
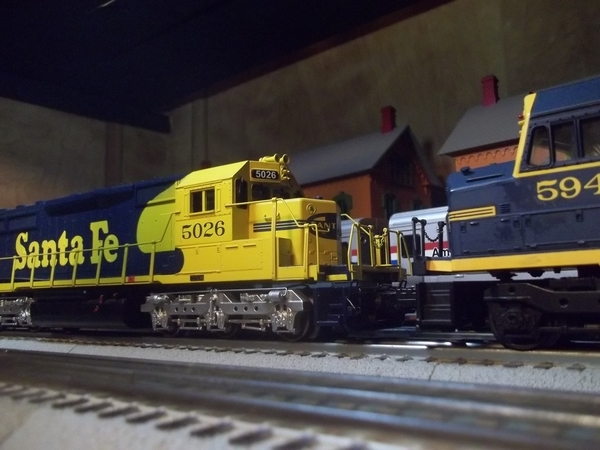
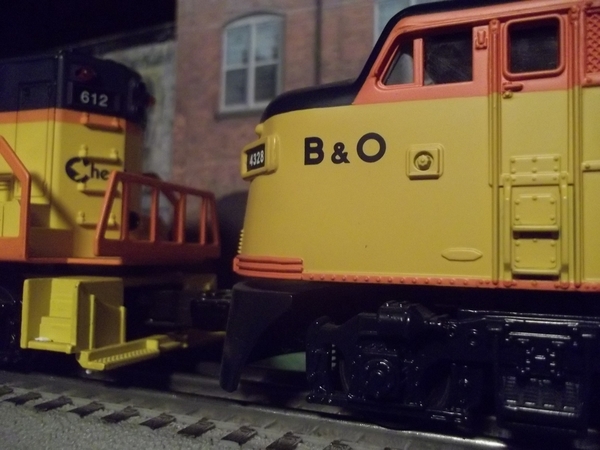
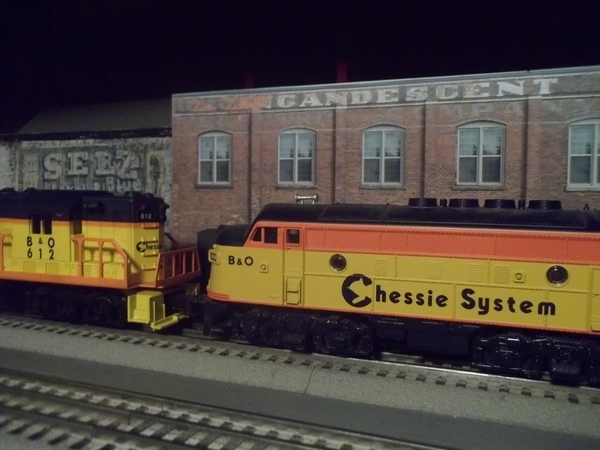
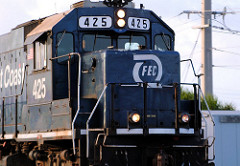
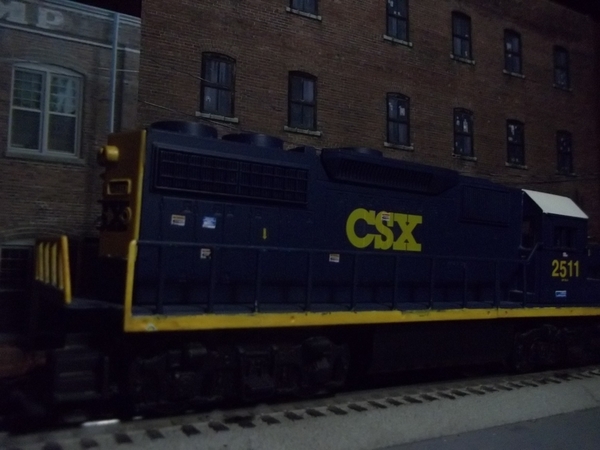
a couple CSX running light at day break back to the yard...

Attachments
Images (2)


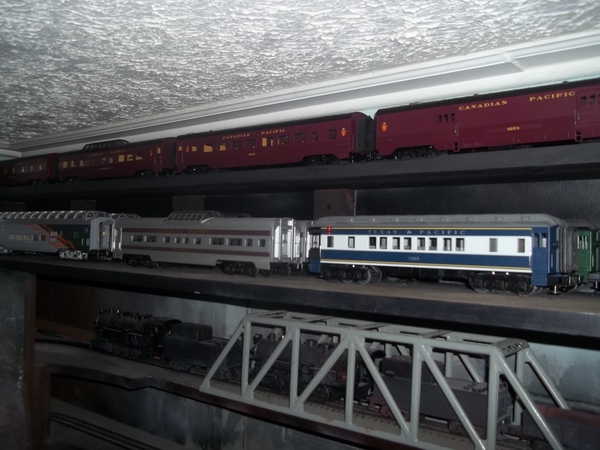
Waiting for the dryer to stop I started adding some bushes and small evergreens to one side. Not sure how much more I will be doing. I have to run a few errands and start getting ready to head for York on Wednesday. Few pics.....Paul


Attachments
Images (3)

looking great Paul ! who makes them auto racks, pretty neat, like them...
Attachments
Images (1)

Brian, those auto racks are from Menards................Paul
thanks Paul...
paul 2 posted:Lee, goes to show you can always improve something. Nice job. Does make a big difference. Last night I started applying ground turf to areas around the bridge abutments and streams. Still have more to add. Pics.....Paul
Very nice Paul. Time to look for terrain floor tile and a camouflaged vacuum cleaner & tool box.
Brian, great night pictures!![]()
Paul, the trees and ground cover it bring your layout to life! Wonderful work and have a great time at York!![]()
Matt, you have the eagle eye! And Mark said I was good at picking things out! LOL![]()
Hello All;
Attached are photos of our layout which we have just started. Much of the fundamental benchwork is in place and we have started to lay track. Our layout is 40'x50' and will be a walk through style with the lowest level of track being on the floor and working its way up. Our plan is to be able to run 50 to 75 trains at one time as this will be accomplished with computer control. I will post more pictures as we make progress.
Thanks;
idea-thinker


Attachments
Images (3)
Wow, Idea-thinker! That is massive!! Yes I’ll look forward to seeing more!
Great start on a huge layout! But I have to ask when you say we, is that you and your kids or is going to be a club layout?![]()
Looks like Elliot has competition.
I was not clear when I stated "we". That is my My Wife and me. I am getting close to retirement and want to get a head start on retiring.
Thanks;
idea-thinker
idea-thinker posted:Hello All;
Attached are photos of our layout which we have just started. Much of the fundamental benchwork is in place and we have started to lay track. Our layout is 40'x50' and will be a walk through style with the lowest level of track being on the floor and working its way up. Our plan is to be able to run 50 to 75 trains at one time as this will be accomplished with computer control. I will post more pictures as we make progress.
Thanks;
idea-thinker
Holy cow...!
Mike![]()
I’m getting close to retirement too, but my room is only 11’ 6” x 11’ 4”. The rate I am going, you will be fully operational before me! LOL. You can see it in the link in my signature line.
I forgot to mention, as my dad used to say when he was still active; I have two helpers, The Holy Spirit and Ben Gay!
idea-thinker posted:I was not clear when I stated "we". That is my My Wife and me. I am getting close to retirement and want to get a head start on retiring.
Thanks;
idea-thinker
That's quite the undertaking you and your wife are doing! More Power to you and I cant wait to see more!![]()
Wow, IDEA-THINKER, Great idea, Great Layout Beginning, looks like this will be a fantastic empire, fun to watch, even more fun to run. You and your wife make a great team. Thank you.
My little 4x8 fold-up, post-war basement layout is going modular to be displayed at Metca's (TCA) semi-annual swap meet, so yesterday I (oh-so-painfully) sawed it into four sections. Although the original panels' track plans will remain the same, I will be able to insert additional modules between them for the shows. I just wish I had a bigger basement (sigh). My next step is to replace the old tubular track with a bunch of K-Line's "Super K" shadow rail I've been acquiring.
LoadMaster posted:idea-thinker posted:Hello All;
Attached are photos of our layout which we have just started. Much of the fundamental benchwork is in place and we have started to lay track. Our layout is 40'x50' and will be a walk through style with the lowest level of track being on the floor and working its way up. Our plan is to be able to run 50 to 75 trains at one time as this will be accomplished with computer control. I will post more pictures as we make progress.
Thanks;
idea-thinker
Holy cow...!
Mike
THAT'S AN UNDERSTATEMENT!!!!! ![]()
idea-thinker posted:Our layout is 40'x50' and will be a walk through style with the lowest level of track being on the floor and working its way up. Our plan is to be able to run 50 to 75 trains at one time as this will be accomplished with computer control.

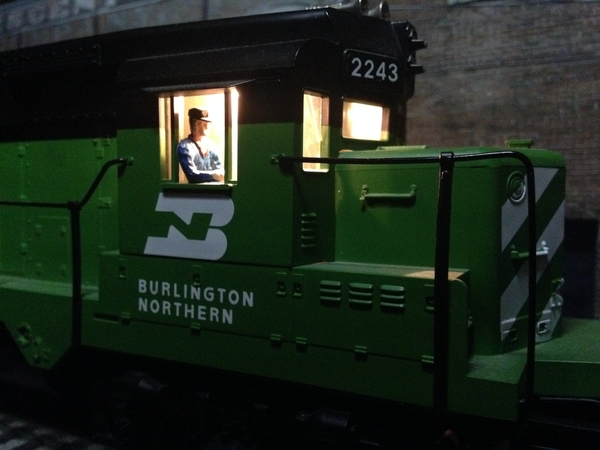
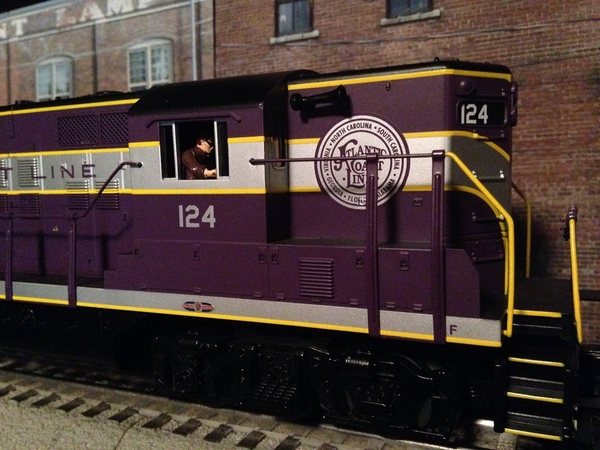
Briansilvermustang I don't think the engineer would want to be "Trading Places" with the motorman.
I have started rebuilding and refurbishing an Athearn sd50 to a weathered (kind of) SD40E. It will be NS 6330 when completed. Final work includes: finish rewiring the locomotive, add LEDs, Finish decals, grease it, and get a decoder for it. If it is a successful rebuild, I may build a few more in the future as I cannot find the real SD40Es from athearn for decent prices where as I can get SD50s for Okay prices.

cleaned some track...

and ran some trains... ![]()


Attachments
Images (15)


Great pictures Brian! It sure looks like you had more fun running trains then cleaning track! I am sure glad that door opens out or it would be a PIA to rig something up to swing the track in with the door!![]()
yep, Dad helped me turn the door around for that reason... ![]()
me and Izzy ran trains till about midnight last night... ![]()
![]()
briansilvermustang posted:yep, Dad helped me turn the door around for that reason...
me and Izzy ran trains till about midnight last night...
And let me guess, Izzy is still sleeping! Tank woke me up at 2 this morning and now he is sleeping in my chair! LOL![]()
![]()

she was a little tired last night, I'm sure she's sleeping right now,
I'll check on her at lunch time... ![]()
Attachments
Images (1)

Stage 1
Started with cardboard & tunnel openings


Finished stage 2 today. Built this corner mountain today. I used cardboard and aluminum , spray painted for ground cover base.
Basic outline

Materials

Glued and painted in separate sections

Stage 2 done

Next step adding turf rock...etc
Attachments
Images (6)
Jushavnfun posted:Stage 1
Started with cardboard & tunnel openings
Finished stage 2 today. Built this corner mountain today. I used cardboard and aluminum , spray painted for ground cover base.
Basic outline
Materials
Glued and painted in separate sections
Stage 2 done
Next step adding turf rock...etc
looking just GREAT! Cant wait to see whats next!![]()
Nice job on the tunnel. I noticed from your first picture that you have a switch in the tunnel. This should usually be avoided but if you want a switch in the tunnel make sure you have easy access to it. You should also make sure you have access to reach a train if it derails in the tunnel. Murphy's law says it will.
I managed to get a little more done today but that is it till I get back from York. Added some more bushes, evergreens and clump foliage. Pics.............Paul


Attachments
Images (4)
Looks great Paul! Have fun at York and save some money! LOL![]()
Looks great Paul!!
Pat
Been there done that. The switch goes to back siding for magnetic crane, scrap yard, manual throw on switch.
Back is open for access.
Inspired by Buster Keaton in "The Railrodder":
I rolled my own Buster Keaton-style porkpie hat today:

Now all I gotta do is get a track speeder! ![]()
Mitch
Attachments
Images (1)
Former Member
i gots to get me one of those
Very neat hat Mitch! I just looked at the first few minutes of the video. I’ll go back when I have more time! Yes a speeder would be nice!


Attachments
Images (19)


Former Member
A company named General Models made an o gauge speeder in the 50's. If you look up General Models speeder
in ebay completed listings you will see a few. Also I came across a youtube video of one. These were unusual
in that the front wheels were actually the commutator so to get them to run you needed to push start them.
Attachments
Images (1)
beardog posted:A company named General Models made an o gauge speeder in the 50's. If you look up General Models speeder
in ebay completed listings you will see a few. Also I came across a youtube video of one. These were unusual
in that the front wheels were actually the commutator so to get them to run you needed to push start them.
Yep! And they had a trolley using the same mechanism: https://ogrforum.ogaugerr.com/topic/birney-comparison


Attachments
Images (16)


Only a couple of posts in 24 hours. I guess everyone is at York- except us ![]()
I guess. I am an hour away from York but spent my $$ putting up a layout. Maybe in the fall.
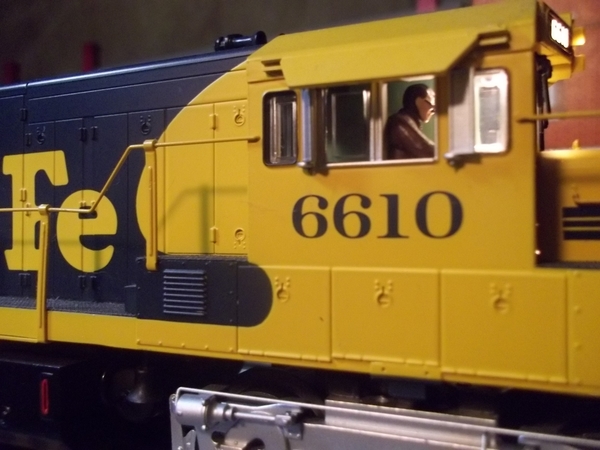
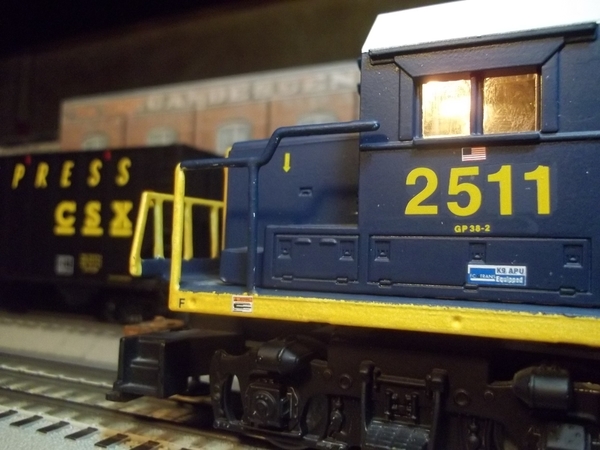
Brian - Just a suggestion, but could you add to your frequent posts what you have done to your layout? I see so many posts with just pictures and I want to compliment you on what did on your layout, but I'm not sure what it was. Like the warehouse that is in so many of your pictures, did you just build that? Is it a paper building front? It looks really good and I have wanted to comment on it, but was hoping in one of your posts you would tell us about it. Then I thought maybe you did and I missed it.
You must have an enormous engine collection too as I have seen hundreds on this thread since I have been watching. Do you have room to run them all or do you have to store so many of them like most of us do?
Thanks, Art
RSJB18 posted:Only a couple of posts in 24 hours. I guess everyone is at York- except us
Yeah, guess so. Someday, maybe…

Attachments
Images (1)
I'm also just an hour away, NE of York, and not going. Have to finish my layout first I think. Jim Pastorius, you an hour which direction from York? Is your layout conventional, DCS or Legacy?
TedW posted:RSJB18 posted:Only a couple of posts in 24 hours. I guess everyone is at York- except us
Yeah, guess so. Someday, maybe…
Yea....sigh.....

Attachments
Images (1)


Too bad it is not more centrally located.
Art
mike g. posted:I don't think I will ever make it there!
Me neither, for the same reason.
I would say, "Road trip!" as we live in the same general area, but I've crossed the country on the ground from that part of the country to here twice (by road, alone, in 1998 and by Amtrak's Capitol Limited and Empire Builder in 2015) and it's a long haul!
Mike & TedW, you can pick up Brian and myself up when passing through Ohio!
Thaddeus posted:Mike & TedW, you can pick up Brian and myself up when passing through Ohio!
![]() We’ll let ya know what exit to be waiting...
We’ll let ya know what exit to be waiting... ![]()
p51 posted:mike g. posted:I don't think I will ever make it there!
Me neither, for the same reason.
I would say, "Road trip!" as we live in the same general area, but I've crossed the country on the ground from that part of the country to here twice (by road, alone, in 1998 and by Amtrak's Capitol Limited and Empire Builder in 2015) and it's a long haul!
Lee, I made that trip once when I got out of the Corps! From Quantico, Va. to Seattle in 3 days! Long enough trip for me and wouldn't want to do it again!![]()
mike g. posted:Lee, I made that trip once when I got out of the Corps! From Quantico, Va. to Seattle in 3 days! Long enough trip for me and wouldn't want to do it again!
I did it from Aberdeen proving Ground to Ft Lewis in October of 1998. I was single then, so I took a week's leave, took two days to visit my brother going through CGSC on TDY at Leavenworth, and hit every museum and tourist thing that was open along the way. I think I did the trip in almost 2 weeks, and loved it. The only disappointment was at Little Bighorn, where I got to the battlefield 20 minutes after it closed for the day, but with plenty of light left. I got to see the site of Custer's defeat, through the fence, but that was it. Oher than that (and some tourist RRs that I wished would have bene running but I knew would be done for the season by then), it was a great trip.
Successfully repaired the overhead lighting in every one of my MTH Amfleet cars. One by one the original bulbs had burnt out leaving me with two or three lights on on the entire train. I replaced the MTH bulbs with simple LEDS. I elected to go with "cool white" LEDS which have a slightly bluish-white light. I like the way they look. I attempted to take a low-light photo in order to show them off but of course, this triggers the camera's flash but I think you can see that they're on.


Attachments
Images (2)


Chugman posted:Brian - Just a suggestion, but could you add to your frequent posts what you have done to your layout? I see so many posts with just pictures and I want to compliment you on what did on your layout, but I'm not sure what it was. Like the warehouse that is in so many of your pictures, did you just build that? Is it a paper building front? It looks really good and I have wanted to comment on it, but was hoping in one of your posts you would tell us about it. Then I thought maybe you did and I missed it.
You must have an enormous engine collection too as I have seen hundreds on this thread since I have been watching. Do you have room to run them all or do you have to store so many of them like most of us do?
Thanks, Art
hello Art, yes them are paper building fronts, do not know who made them...


working on a new multi-deck layout 24'x48' that will have two additions someday...

storage and work shop...

and yes, a lot of trains on shelves throughout the house...
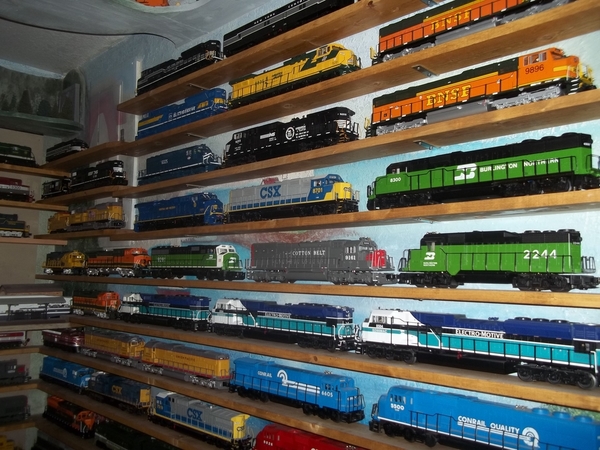
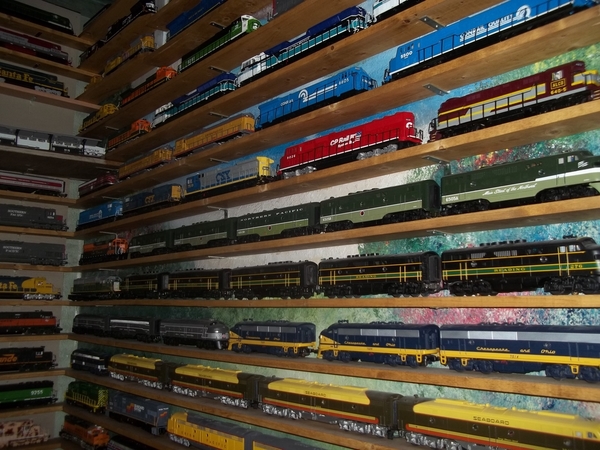


and a 12'x35' room that will be all Alaska themed...
Attachments
Images (13)


As I have said before Brian, Very IMPRESSIVE! Wish I could come and see in person one day!![]()
RSJB18 posted:Only a couple of posts in 24 hours. I guess everyone is at York- except us
I am at York. I still have $$
I am not surprised at your space, Brian!! It takes a warehouse to house all those trains!
Mark Boyce posted:RSJB18 posted:Only a couple of posts in 24 hours. I guess everyone is at York- except us
I am at York. I still have $$
Then you must not be doing it right 🤣
First day at York I only bought one car so far. I must have a fever LOL
paul 2 posted:First day at York I only bought one car so far. I must have a fever LOL
Paul, I am sure you will get over it tomorrow! You will think to yourself, I didn't come this far just to meet dad! So tomorrow break out the big cash and get your dream stuff!![]()
Did you get a chance to meet Bob yet?![]()
RSJB18 posted:Mark Boyce posted:RSJB18 posted:Only a couple of posts in 24 hours. I guess everyone is at York- except us
I am at York. I still have $$
Then you must not be doing it right 🤣
The trouble was I was only there about 3 hours and more than half of that was gabbing with OGR Forumites! I have all day Friday
Mike, did not meet Bob (dad). I do not think he is at York. I have got to roll up my sleeves tomorrow and part with some money and buy something tomorrow.....Paul


Attachments
Images (5)


I haven't been spending much time on the forum lately, partly due to dull content, but mostly because I've been working on the layout. Unfortunately, I'm feeling a bit burnt out. Six months without a day off will do that to a person.
My guy is coming back Tuesday to take pictures for the convention. This time, I think I'm ready, but it hasn't been easy.
Yesterday was the first day in a little over a month that I didn't work on the Hoffman scene. Instead, I went back over to aisle 1, and worked on my girder viaduct, which has left the CP main out of service for more than two months, ever since I cut the roadbed away, leaving the track hanging in mid air, unsupported.
I grabbed my cheap can of flat black spray paint, and blasted all the bridge parts.

I glued the piers down to the plywood, then I took my support segments and glued them to the bottom of the ties.


That left a 1-1/8" gap between the top of the pier and the bottom of the segment, so I cut a piece of 2x4 down to that dimension, and made blocks which I painted black.

I applied glue to the tops and bottoms of the blocks, and placed all the nearest heavy objects on it to dry. I also repainted the piers with my own concrete color.


This is how it is sitting right now. I'm anxious to remove the weights, and give it a little load test, throw the Challenger on it. That's by far my heaviest piece.

I spent two days this week organizing all of my used foam chunks, first sorting by color, then by size. This box is actually for sifting Legos, but it worked great for the foam.

I got a bunch more glued onto the rock face. Not seeing any hot glue threads, what a pain.


This was a test project. It seems that the vinyl letters don't like to stick to the semigloss paint.

My wife just happened to have a bottle of Mod Podge, which I appropriated. One coat, and the letters were fixed in place. Now I just have to go around and do the rest. A few are already messed up and will need to be fixed.

Finally, while I had the concrete paint out, I started doing sidewalks and grade crossings. This street is far from finished, but you get the idea.

Attachments
Images (14)
RSJB18 posted:Only a couple of posts in 24 hours. I guess everyone is at York- except us
I for one, was nowhere near York. Too far, and I really don't need anything.
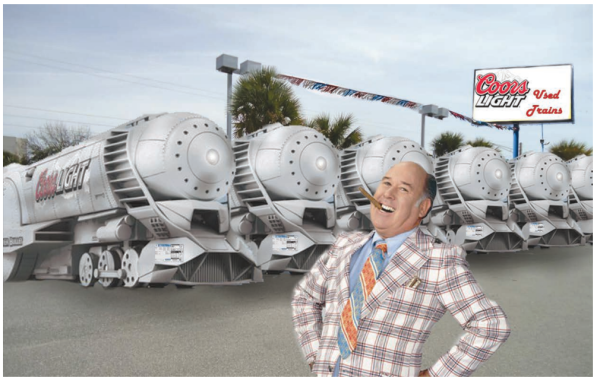
Elliot- I think you have enough inventory to be your own bandit meet. ![]()
briansilvermustang posted:
briansilvermustang posted:

Brian, you sure have a lot of cars! Just wondering if you have one from every RR out there! They all look great on your layout! Next you will be shooting full length videos!![]()
Elliot, the piers turned out great looking! It doesn't hurt to take a day here and there from trains! Its called ANTI- Burnout! LOL Everyone needs to do it here and there! I think most would agree with me that you have accomplished feats that none of us would ever take on! In my mind you are truly and Layout Master! I always love seeing what your doing and thank you so very much for taking the time to share it with the rest of us!![]()
![]()
I sure hope all you people that think it.s too far to drive appreciate truck drivers,,,lol ,,,,5,000,000 miles in my rear view mirror hauling flammables and lived to tell about it.... now be working on my 10' x 16' O gauge layout as y retirement present to myself
Continued my RDC to Silverliner conversion project by puttying up the horn holes in the trailers:

Incidentally, if anyone wants to swap some 2332P-14 Pantograph Contact Rivets for some 3-chime K-Line RDC horns, let me know! ;-)
Mitch
Attachments
Images (1)
Thanks Mike, and you're welcome. I probably wouldn't be working like a mad man if it wasn't for this convention. I just want it to be looking its best for this national and even international audience.
The piers are not scratch built. They are made by Chooch, and I got them from Scenic Express. I did have to do some modification though. They were way too tall for this viaduct, so I ran them through the table saw to get them to the height I wanted. Then after laying out the bridge, I saw that I was short two piers, so I took the cut off pieces and made a couple more. The only problem was they didn't have the caps like the originals, so I made those from some scrap wood. Now that they are painted, you can't tell which are which.
Big_Boy_4005 posted:Thanks Mike, and you're welcome. I probably wouldn't be working like a mad man if it wasn't for this convention. I just want it to be looking its best for this national and even international audience.
The piers are not scratch built. They are made by Chooch, and I got them from Scenic Express. I did have to do some modification though. They were way too tall for this viaduct, so I ran them through the table saw to get them to the height I wanted. Then after laying out the bridge, I saw that I was short two piers, so I took the cut off pieces and made a couple more. The only problem was they didn't have the caps like the originals, so I made those from some scrap wood. Now that they are painted, you can't tell which are which.
Hey Elliot
When is the National Convention is it Sept 5-8? just wondering cause Haydays is on Sept 8-9 might have to take another road trip eh
Yup Chad, Sept 5-8 for the convention. Are you coming to the Menards show in Eau Claire, July 7 & 8. I'm hosting a get together for forum members on Saturday the 7th at 6:30.
Here's the invitation, open to all forum members.
Elliot Prolly wont make that show if im coming up in Sept eh
Dang, I was hoping you'd come over for the picnic. Do the show, stay in Hudson, and meet the guys. Think about it.
I bought this MTH F40PH while ago to make it into a dummy. I think it originally had Loco Sound or something,. Anyways, after years of running this and my powered F40PH as an A-A pair, it suddenly dawned on me to try it at the end of train in push-pull configuration. I knew I needed a red light to run that way and I remedied that with a quick LED install. I was pleased to find when I opened it up that MTH had provided a red lens and all I needed was an ordinary LED behind it.
I'm liking it, ![]()


Attachments
Images (2)


Cold rainy day here, so a great time to open up some boxes and rediscover what I have ! Good thing I put an exhaust fan in the trainroom, that Alco is smoky !
Attachments
Images (1)

Big_Boy_4005 posted:Dang, I was hoping you'd come over for the picnic. Do the show, stay in Hudson, and meet the guys. Think about it.
I would like to If but I can't make it in Sept Ill prolly come in July eh
Planted some vegetation.
Attachments
Images (4)


")
")
trestleking posted:Cold rainy day here, so a great time to open up some boxes and rediscover what I have ! Good thing I put an exhaust fan in the trainroom, that Alco is smoky !
Dang Alcos are always smoky! Looks great tho...![]()
Mike ![]()
luvindemtrains posted:Planted some vegetation.
WOW the coal plant and area turned out looking just Great! Wonderful work!![]()
mike g. posted:luvindemtrains posted:Planted some vegetation.
WOW the coal plant and area turned out looking just Great! Wonderful work!
Thanks a million Mike! I'm proud of myself with the regular progress I am making. This site is a real motivator.
Dave
Mitch, I'm looking forward to following the conversion.
Ended up having a great York between buying and catching up with friends. At York I got coal loads from Don Kane and they are nice, I picked up another Weaver trailer on flat car, at Trainworld I ended up with the last MTH 44 tonner he had, and at Joe G I picked up a Pacific Fruit Express 2 pack trailer set and ordered another two sets.Also a few more Gar Graves uncoupling tracks. When I got home my engine from the Canadian club was waiting for me. All and all it was a great time. But now I have to spend the next few days cleaning up the layouts because I will be hosting my Tuesday night crew Here are some pics of my buys..........Paul


Attachments
Images (6)
Not train related but I'm sure everyone can relate....
That moment when the lawn mower starts on the first pull after sitting all winter!

Attachments
Images (1)

Nice haul Paul! The 44 tonner looks sharp.
Bob
RSJB18 posted:Not train related but I'm sure everyone can relate....
That moment when the lawn mower starts on the first pull after sitting all winter!
been awhile since I heard that one... ![]()
Ralph M posted:I bought this MTH F40PH while ago to make it into a dummy. I think it originally had Loco Sound or something,. Anyways, after years of running this and my powered F40PH as an A-A pair, it suddenly dawned on me to try it at the end of train in push-pull configuration. I knew I needed a red light to run that way and I remedied that with a quick LED install. I was pleased to find when I opened it up that MTH had provided a red lens and all I needed was an ordinary LED behind it.
I'm liking it,


Attachments
Images (3)


Videos (1)

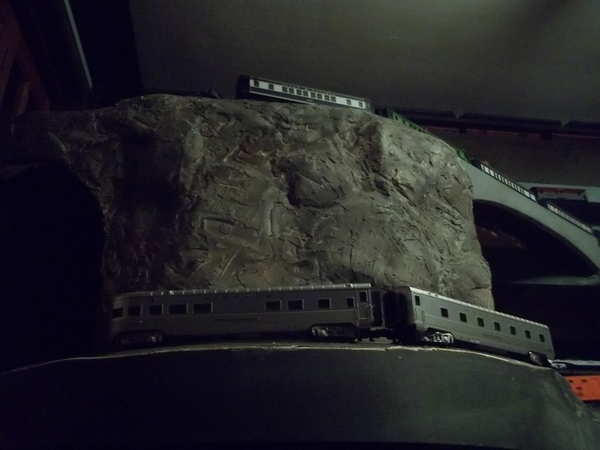
Nice score Paul!![]()
Bob, I am not looking forward to trying to start my mower, its always a PIA!![]()
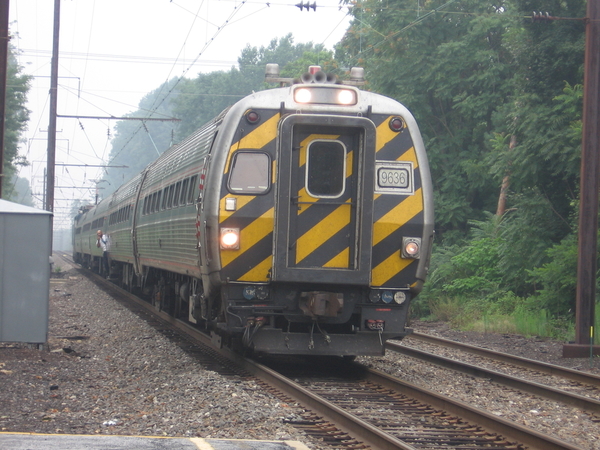
Brian, can you explain the lights on top of the last passenger car? Is that normal as I have never seen one like that!![]()
mike g. posted:Brian, can you explain the lights on top of the last passenger car? Is that normal as I have never seen one like that!
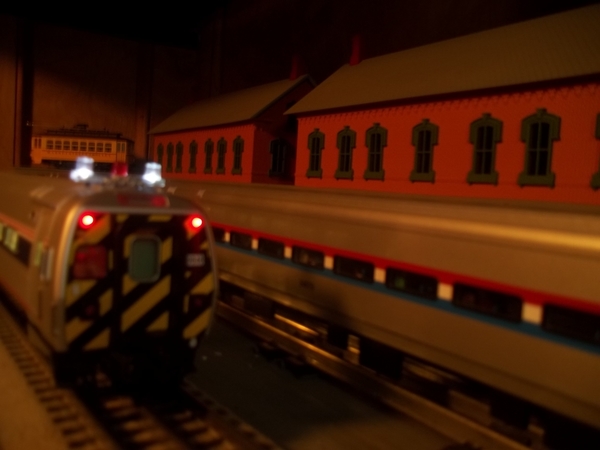
Metroliner Cab Car...

 https://youtu.be/7kLIoWS3dwE https://youtu.be/-zA-JrYGb2s
Attachments
Images (4)


Attachments
Images (2)


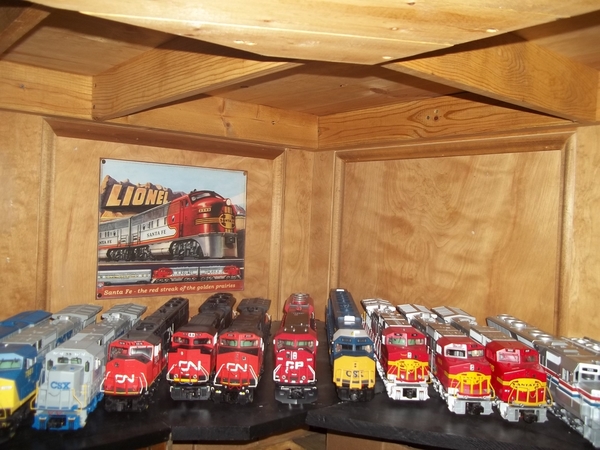
Running big trains with my little girl. Sorry if the camera gets a little shaky.
That’s every caboose I could find that runs - just because it’s fun! The only three not in this mix are at the office on display, an original 817 that doesn’t get along with gargraves switches, and a Marx unit that just showed up that I don’t have a way to couple to yet.
Attachments
Videos (1)

Former Member
jhz563 posted:Running big trains with my little girl. Sorry if the camera gets a little shaky.
That’s every caboose I could find that runs - just because it’s fun! The only three not in this mix are at the office on display, an original 817 that doesn’t get along with gargraves switches, and a Marx unit that just showed up that I don’t have a way to couple to yet.
just fyi, there is a little kit on ebay right now to make marx and lionel knuckles compatible. I think it is under marx
It took me a few years. I finally purchased the last ride for my amusement park at York! Next s the scenery.....
I may be able to fit an o-scale free fall ride!
beardog posted:just fyi, there is a little kit on ebay right now to make marx and lionel knuckles compatible. I think it is under marx


 Kinda small to call it a layout, but it's all I have room for... started cutting and glueing foam today... cars and engines are there for some weight...
Attachments
Images (1)
Panther97 posted:It took me a few years. I finally purchased the last ride for my amusement park at York! Next s the scenery.....
I may be able to fit an o-scale free fall ride!
Outstanding, Panther97. When children visit your layout, they must think they have found a little bit of heaven. Congratulations on your success with your amusement park. I am much looking forward to your sharing your next creative scenery efforts with it, as you indicated.
FrankM
Steaming Jon posted:
Kinda small to call it a layout, but it's all I have room for... started cutting and glueing foam today... cars and engines are there for some weight...
Hey, if you build it, it's a layout! That's my problem right now, trying to figure out enough room for a mid size layout that I can keep permanent.
Mike ![]()
LoadMaster posted:Steaming Jon posted:
Hey, if you build it, it's a layout! That's my problem right now, trying to figure out enough room for a mid size layout that I can keep permanent.
Mike
I guess I see this as a big diorama with a loop of track, so I can run trains up off the carpet... I plan on having a nice mountain in the middle, focusing on making the scenery as nice as I can...
Former Member
Here is the coupler adaptor I am talking about. The directions show attaching it to a
hook and slot coupler, but I believe the marx scissor coupler also has a slot so it
might work
Attachments
Images (1)
Well it should be "what did I do to my layout this past week". I've never been happy with how the downtown are of my layout turned out. That and my passenger terminal only had 2 tracks. So over this past week I removed the entire downtown section and mountain. I also added another track to my passenger terminal, for a total of 3. I'm still in the process of redoing everything but it's going along. There will be no more mountain, instead the trains will run under the downtown area. Once I finish adding some details to the retaining wall it's time for paint, scenery repair, and rebuilding the downtown area. I'm hoping to get it done by June but we'll see.


Attachments
Images (8)
Add Reply
Sign In To Reply
