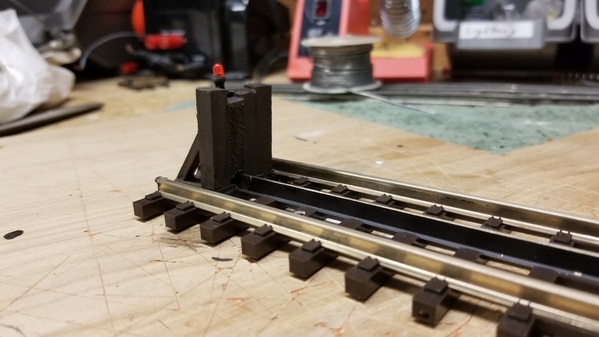
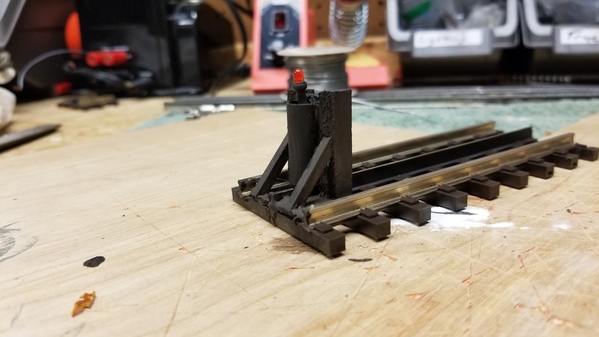
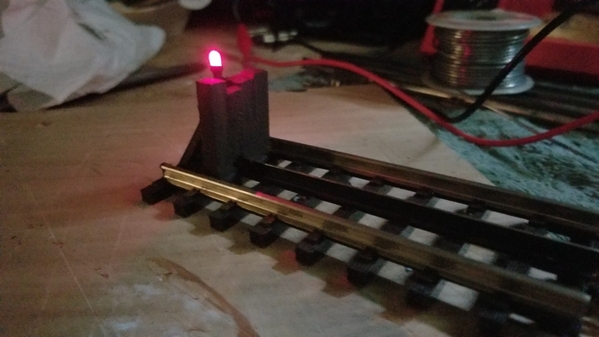
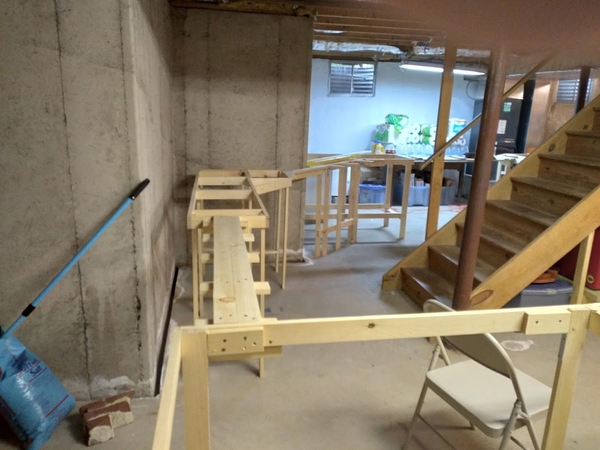
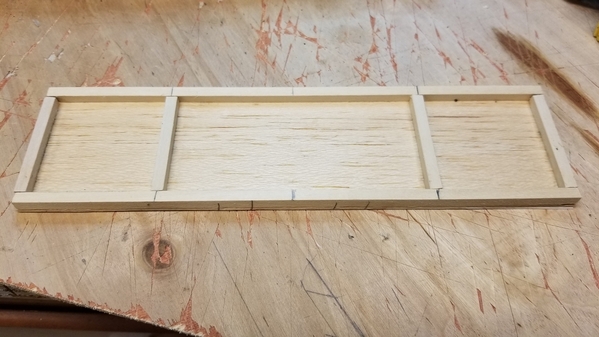
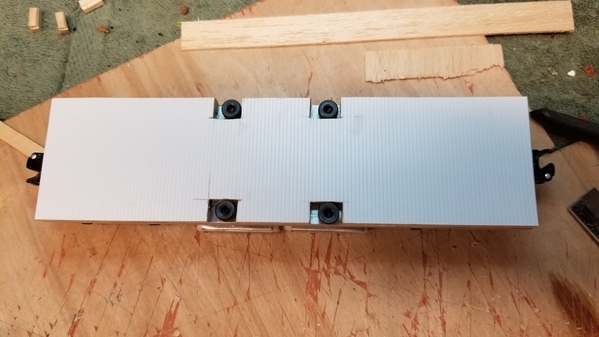
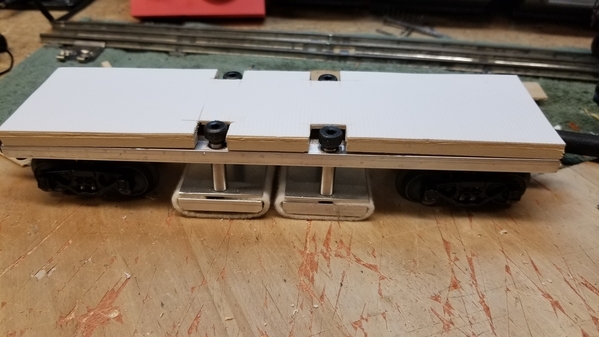
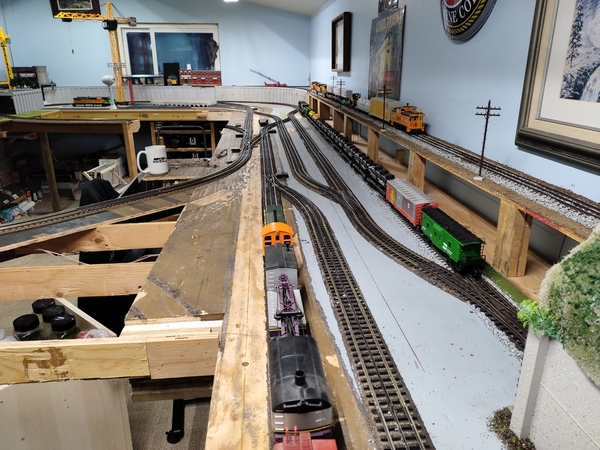
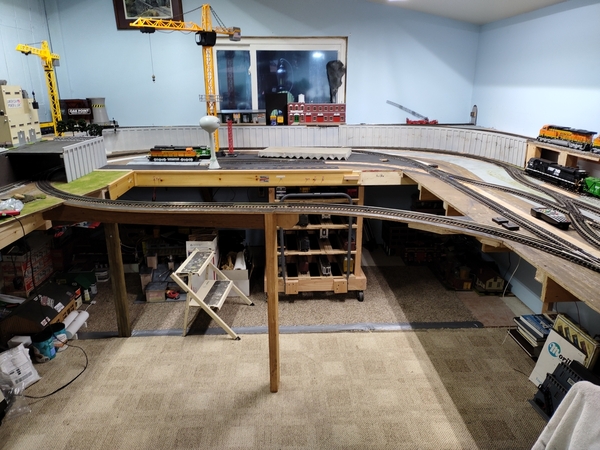
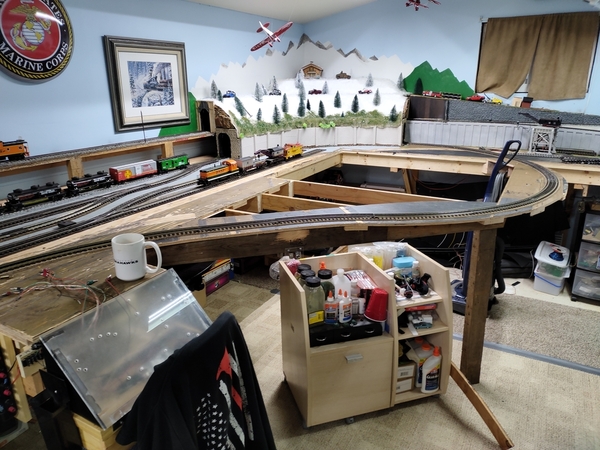
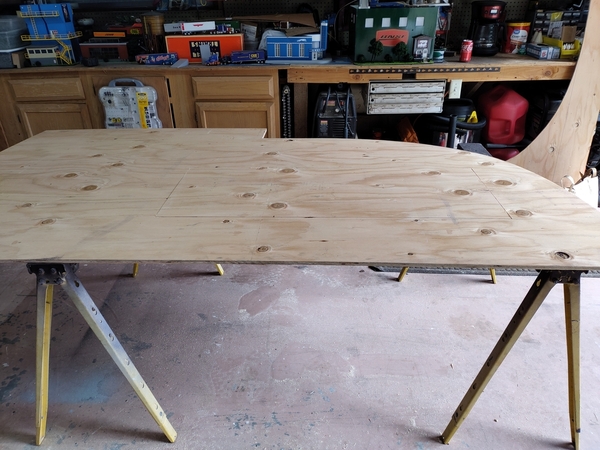
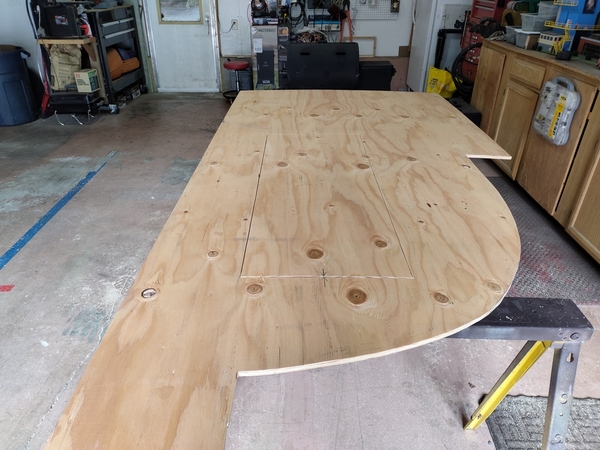
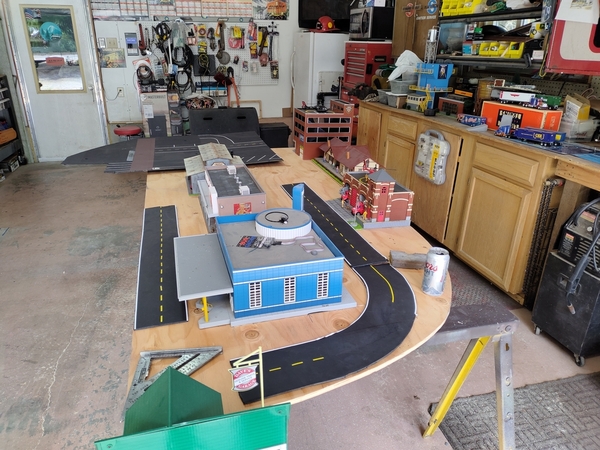
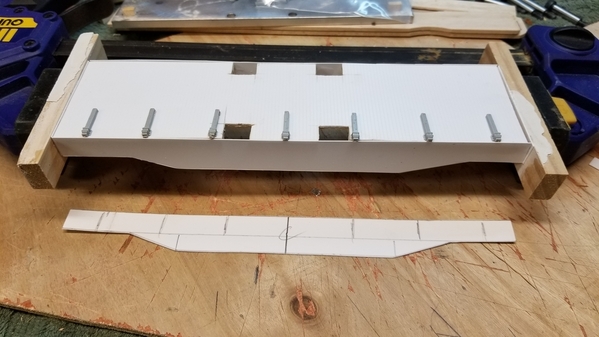
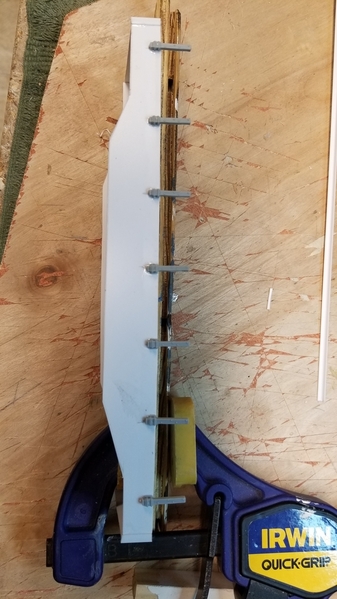
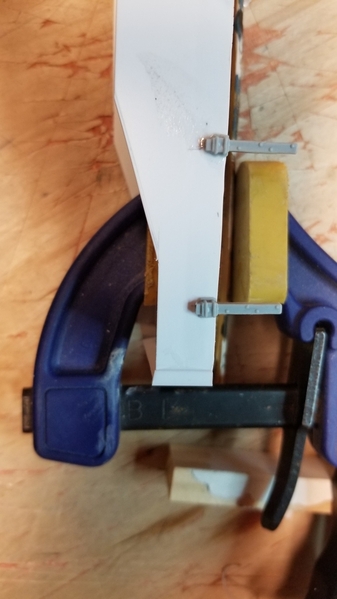
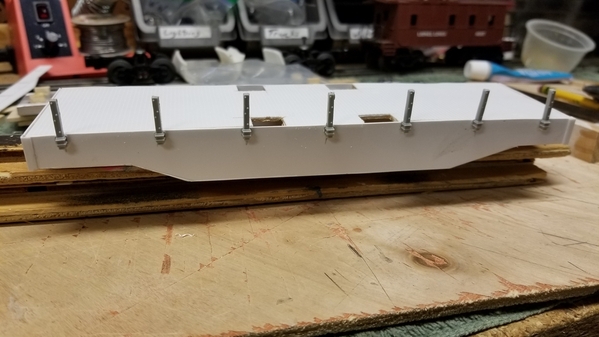
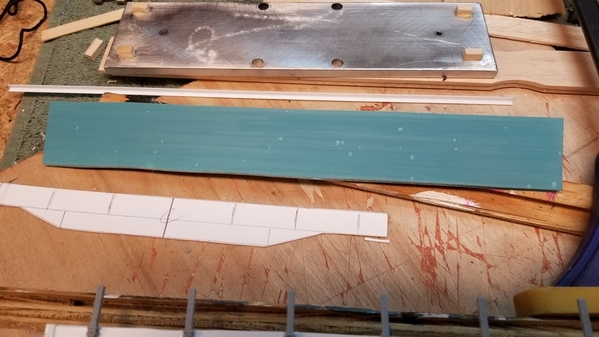
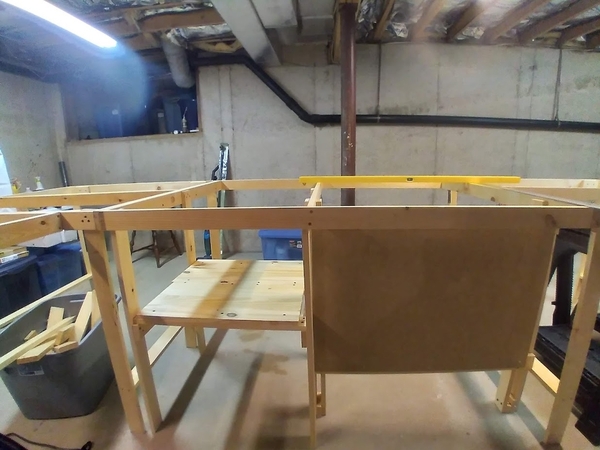
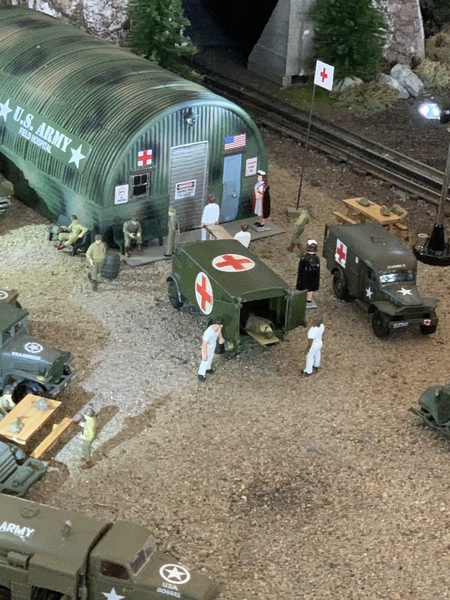
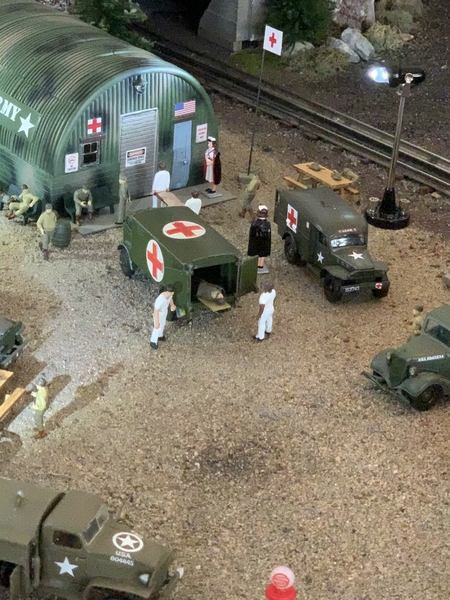
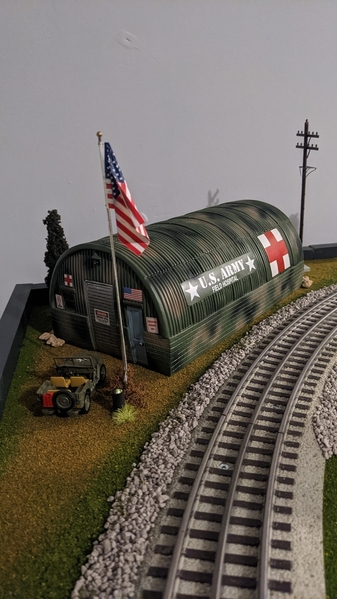
I added an Ambulance to my military section of the layout.
@Tranquil Hollow RR posted:Looking good Bob. How often have you been cleaning your track?
I had not done it in a while Jay. With all the projects going on it was not worth the time to clean the track when I wasn't running anyway. Prior to that I used to clean it regularly with 90% IPA. As previously stated, I grabbed the wrong bottle (70%) and it left a rusty film on the rails. You can see the brown residue on the wheels of the cleaning car. I also realized that I didn't run the trains after cleaning (got a different assignment from the CEO), and didn't get to dry the rails.
I also picked up some purple scotchbrite pads, as recommended by GunrunnerJohn, which I will use on the next pass.
Bob
This past Saturday, I had a young, able-bodied helper come over to help me on the layout. We got a bout 1/2 of the road bed laid and some of the track screwed in place around my city scene.
Bob, that is a nice run the Menards F3 made on your layout!
Mikey, the military scene looks great!
Randy, that's great you got help on Saturday!
I lowered my lift up bridges the other evening for the first time in a while. I built for a slightly too tight fit. The wood swelled just enough that the lower bridge wood support just hit the table top and the motor kept going without the bridge hitting the limit switch until I threw the switch. I'll have to shave some off and recheck alignment. That evening, I just raised the bridges, turned on power to my Ceiling Central RR in the adjacent room, and ran a mixed freight flawlessly for a while. I have finally hit the sweet spot where if something doesn't work, and I don't feel like doing something with it right then, I can run another train. Yay!!
@Mark Boyce, may I suggest that you consider a moderately priced dehumidifier for your train area.
They certainly are not an economical mechanism but I’ve found they are necessary sometimes.
And this time one may have saved an expansion issue in your case …
take care!
@Seth Thomas posted:@Mark Boyce, may I suggest that you consider a moderately priced dehumidifier for your train area.
They certainly are not an economical mechanism but I’ve found they are necessary sometimes.
And this time one may have saved an expansion issue in your case …take care!
Seth, You are right on the dehumidifier. We have one in the finished section of the small basement. I thought it was enough, but this is the first that I have had the layout to a point where humidity would be a factor. Our older daughter never complained when the train room was her art studio, but we have had a lot of rain this summer. I am thinking a second one is in order.
Well Mark you are way ahead of me.
I just dislike taking things apart which once worked well. Are there not two bridges?
And we’re also experiencing lots of extra rain this year. 2021 is our year of extremes thus far.
@Seth Thomas posted:Well Mark you are way ahead of me.
I just dislike taking things apart which once worked well. Are there not two bridges?And we’re also experiencing lots of extra rain this year. 2021 is our year of extremes thus far.
Yes there are two. I built the wooden frame underneath the lower bridge to attach the linear actuator to and support the stress. The upper bridge doesn’t have any wooden support since an arm from underneath the lower bridge catches the upper bridge to lift it. 
Attachments
Great engineering Mark.
I followed you and Mike last winter during the construction but here in July I wasn’t certain if both had wood in their design.
I hope the correction on the length doesn’t cause you any major issues with the three rails.
Mark your area of the state has had more than its share of moisture. Not knowing how your train room is heated and air conditioned, you might consider a mini-split for the area. One unit would provide heat and ac. When you put the unit on dry it eliminates the humidity.
Bob, I 'm also thinking about getting one of those track cleaners, thanks for posting updates, looks like they work really good. Jorge
@Seth Thomas posted:Great engineering Mark.
I followed you and Mike last winter during the construction but here in July I wasn’t certain if both had wood in their design.
I hope the correction on the length doesn’t cause you any major issues with the three rails.
Mike built two. On one he used thick plexiglass he had on hand. That would be the ticket. The other he used premium plywood. I only had access to 7-ply poplar, and 1x2 poplar.
Im not sure about the rails. As soon as I saw what was happening, I stopped the bridges and reversed them to the up position. It was about 2am, and I couldn’t sleep because of my sciatic nerve hurting too much. I didn’t feel like fooling with it then, nor today. I was really dragging. 😄
@Tranquil Hollow RR posted:Mark your area of the state has had more than its share of moisture. Not knowing how your train room is heated and air conditioned, you might consider a mini-split for the area. One unit would provide heat and ac. When you put the unit on dry it eliminates the humidity.
Jay, you hit the nail on the head!! The 11x11 train room is an addition on the rear of the house my in-laws had built mainly to support the sunroom above. It had baseboard heat I disconnected and no air conditioning. I took the window out between that room and the laundry and there is a door also. The temperature feels okay, but it must be too damp. Those mini-split units are nice, but I never priced them. I don’t know if I will be able to justify it, since we don’t plan to live here too many more years.
I'm certainly sorry about your continuing pain Mark. I was wondering how the physical therapy has been going for you.
If there’s so much pain hopefully your dr. Supplies some relief.
I use the home remedy of a pillow between my legs.
And I agree about a media for your bridge which doesn’t expand nor contracts. Plexiglass could be your answer which means re engineering.
and I’m not joking about this, over the years I’ve found many times what supplies I needed in local dumpsters. I have salvaged signage from stores doing promotions which was made from thick plastic or plexiglass
Take care, hopefully the pain isn’t as bad this night.
Mark hope you recover quickly from your current pain. It is awful when our physical conditions interfere with our hobbies.
Just spent a small fortune replacing a water heater and two furnaces and remodeling the master bath - all for the next owners - whenever that may be. Probably another year out - so we may get to enjoy the new stuff for a little while. So I understand your dilemma regarding the train space. Sounds to me you will have to do something for the sale, might as well do it now so you can at least enjoy your layout in comfort. Best ...
Thank you, Seth and Jeff! Yes the pillow is a must. Our older daughter could have minored in 'dumpster diving' when she was in college. It would be a fairly simple job to substitute something like plexiglass under the bridge. I saw someone else made a similar installation with linear actuators on parallel bridges at different levels. He did a great job using separate linear actuators for each bridge instead of using Mike's idea of only using one,
Jeff, you do have a great thought about making improvements now and enjoy them now instead off adding it right before selling, I just paid off the furnace and air conditioner we had installed in April a year ago. Maybe an improvement instead of just maintenance is in order.
Mark, get a free estimate for the mini-split; especially since you don’t have a precise time line for moving. The cost outlay could be recouped in the sale of the house. Plus, you’ll want something warm for your bones when you’re enjoying an operating session during the western PA winters.
@Tranquil Hollow RR posted:Mark, get a free estimate for the mini-split; especially since you don’t have a precise time line for moving. The cost outlay could be recouped in the sale of the house. Plus, you’ll want something warm for your bones when you’re enjoying an operating session during the western PA winters.
👍🏻 One other thing about that addition, it has three exterior walls with a sliding glass door on the east side of the train room. I wouldn’t have put it in, but my in-laws wanted to reuse it from the original 1960s house when heating and cooling was inexpensive.
Back to the WDYDOYLT -
Ran a new (decades old) K-Line Interurban on the Twin Pines Railroad and did some urban remodeling of the town of Twin Pines. Posted more photos on TPRR.
Attachments
That looks really sweet Jeff. What is the road name on these beauties?
Jay - the road name is Pacific Electric. Looks to have been built in 1999 K-2708.
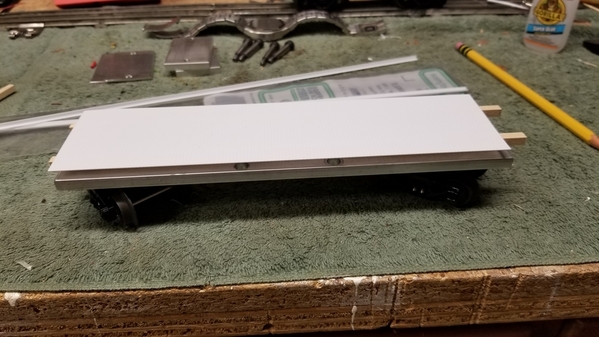
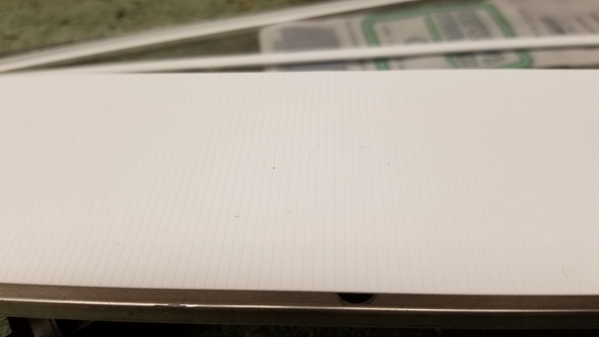
Started noodling around with the load for my track cleaning car. I purchased some woodside boxcar material from Evergreen for the deck. I want to make the load removable so I can change the pads easily. Now that the basic concept is in my head I can order some additional shapes and details. The juices are flowing. ![]()
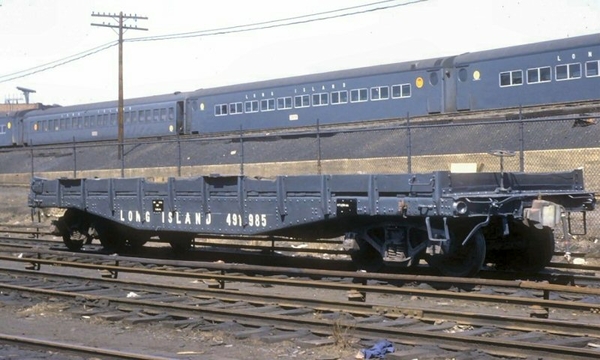
I'm going for this.....
Attachments
I’m looking forward to seeing the finished product.
Well, things may have slowed down a bit, my situation is honey do projects, the yard, and other must do’s this time of year activities… however next week I get to visit a new friends layout, in Nashville. RSJB18, Bob, that a very interesting project you’ve taken on, the Long Island flat car is neat, this would make a great track cleaning car, cool idea., Happy Railroading Everyone 
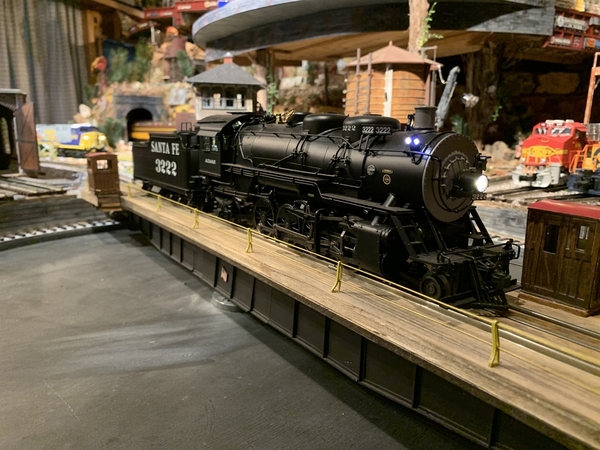

Attachments
Morning everyone, just got back from our trip and have only had time to get into the train room long enough to drop off my hail from Menards. After seeing what I left I know I need to get in there and clean it before I move forward! LOL.
I hope you all have a great week and find time to have fun with your layout and trains!
Mike, welcome back! I’m sure everyone agrees with me that we missed you. We are waiting to see what you got from Menards on the Buy Anything New topic!!
While recovering from some fairly major abdominal surgery, I received my latest order from Ross Custom Switches, and am now laying my second, inner loop. There are 6 power drops, and 8 switches involved, all with non-derailing being installed, so a lot of wiring and extensions to be made and placed. There is also and a lot of Ross Bed to be addressed for fit up, and stone painting.
Track Pics
Wiring Pics
Non-Derailing
Power Drop
Switch Actuator Wiring at Panel (Extensions)
Attachments
I installed a line of paper model facades along 1 side of the layout where space was tight. They are perfect for my Halloween theme. I downloaded them from Haunted Dimensions by Ray Keim. They were fun and pretty easy to construct. I then added some pre-wired LED lighting that I ordered from Amazon.
Attachments
RWL, I am glad you have recovered enough from your abdominal surgery to get back to the layout. That is very neat looking wiring on the switches and a switch control panel in progress. I'm recovering from lumbar fusion surgery and was away from the layout a couple months myself.
Dad's Train Room, those paper facades look great as does your lighting! That will certainly be an eye catcher for Halloween!
As mentioned I just got back to the layout a week or so ago. I had noticed some expansion on the lower of my two lift up bridges. I shaved just a smidgeon of wood off the bridge. The rails already extended past the wood, so now everything seats well again. I did take the advice to get a second dehumidifier for the basement yesterday. I need to get it out of the box and set it up. It was an easy sell for my wife as she didn't want any of my engines to oxidize. Though I didn't meet her until I was 27, I have been very blessed for 37 years married to her!!
As RWL received his switches while recovering from surgery, I just received 2 AIUs for my switches, uncouplers, and whatever in the future. All I have done so far is daisy chain them to the TIU and see that the TIU recognizes them via the remote. I still need to pull some wire before I hook any up, so I have some incentive to do my exercises and get my back and hamstring muscles stronger to handle leaning under the layout. I'm so glad I made the layout high enough and the wiring close to the edge so that I can sit on a stool and lean under instead of other more painful alternatives. ![]()
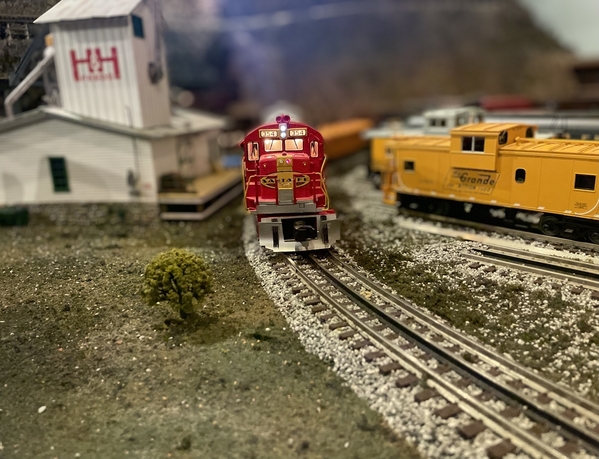
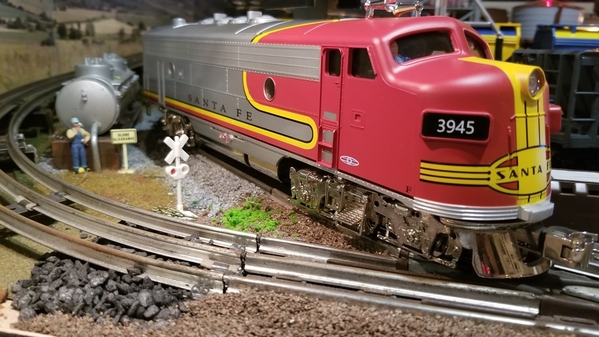
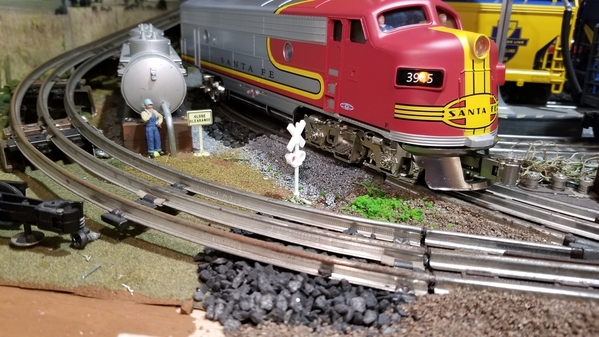
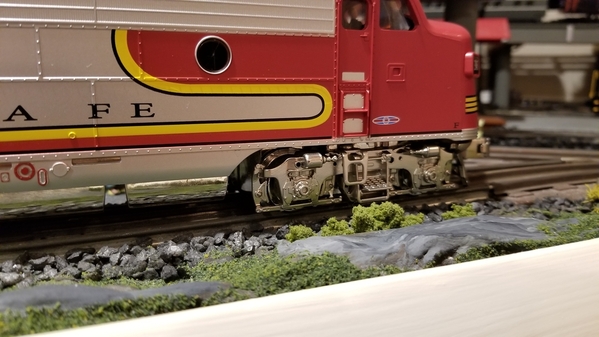
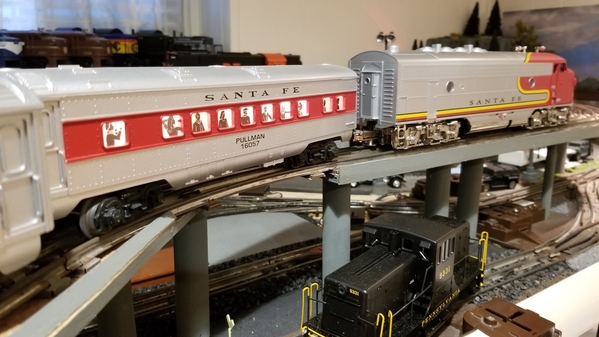
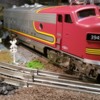
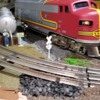
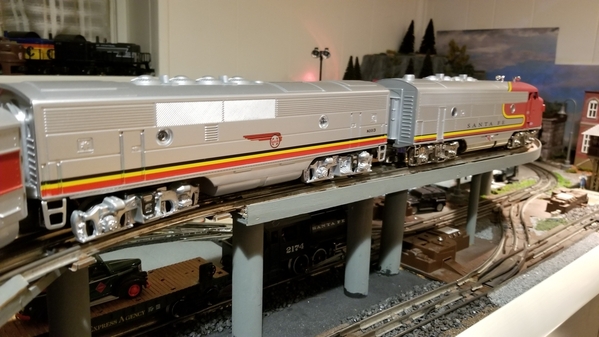
Been running my Menards F7. Switching out the other power and rolling stock to ATSF theme for a while.
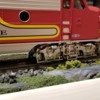
I sprayed the shiny trucks with Rustoleum Matte. They look much better now. The side frames are screwed to the trucks and are actually rather heavy, comparable to Lionel or MTH frames. They even used lock-tite on the screws for some reason.
Before
After
Attachments
@RSJB18 posted:
Bob these look much better. I hadn’t noticed until now how detailed the trucks actually are on some of the unboxing and review videos.
@Rich Wiemann posted:Bob these look much better. I hadn’t noticed until now how detailed the trucks actually are on some of the unboxing and review videos.
I've been impressed with the level of detail at the price point as well. I'm looking forward to their future offerings.
Bob
That really enhanced the look Bob. I never would have thought to do that.
Haven't made much progress on the Razorback Traction Co., but I am getting my required dose of Lionel at the Arkansas and Missouri railroad museum...
Mitch
Attachments
Mitch sure has smooth running trains!
I have spent the last couple of weeks doing wiring. There are three main power feeds for: track, switches, and signals/lighting and uncoupling/unloading (UCS) tracks. A fourth main wire serves as a ground. The track is fed about every three feet or so and each siding has its own power supply. The 15 switches use the independent voltage plug to supply a constant voltage. The 6 semaphores use insulated track sections to indicate occupied tracks and the block signals are connected to the switches to show turnout position. Separate power is used for the operating barrel loader, coal loader and log loader. There will be two ZW transformers.
I have five insulated rail sections for operation of the road crossing devices like flashing cross bucks, crossing gates. banjo signal, and gateman house.
A couple more days will be needed to finish most of the wiring.
Attachments
Thanks, Romillet49...l previously mentioned in a post it was for #90, if ever produced, and #90, decapod on the Strasburg, IS going to be produced, in current and original roadname. As for the Menard's bash, the addition was a thin plastic kit made in Denmark, and l think the Menard's deserves an extension from a better matched and maybe stronger single stall kit. Weaver made one..still mulling that over.
@Dad's Train Room posted:I installed a line of paper model facades along 1 side of the layout where space was tight. They are perfect for my Halloween theme. I downloaded them from Haunted Dimensions by Ray Keim. They were fun and pretty easy to construct. I then added some pre-wired LED lighting that I ordered from Amazon.
Again WOW! Thanks
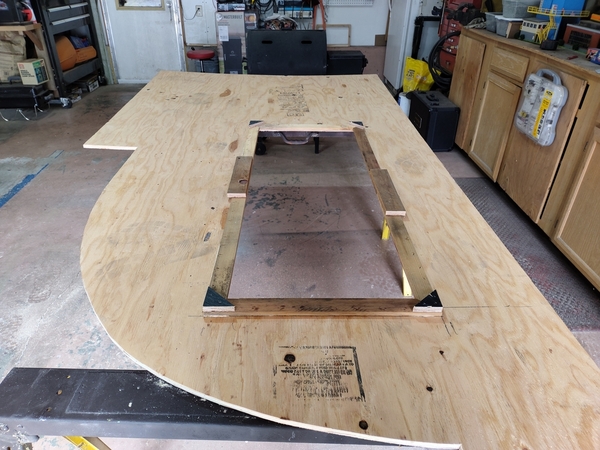
Cutting plywood for the bed of the upper loop.
Attachments
@jrstengel posted:Cutting plywood for the bed of the upper loop.
Your layout looks great!. You are doing a nice job cutting the curves of the plywood. I just have a hand held saber saw, and I have trouble controlling it, so my cuts really need covered by scenery. ![]()
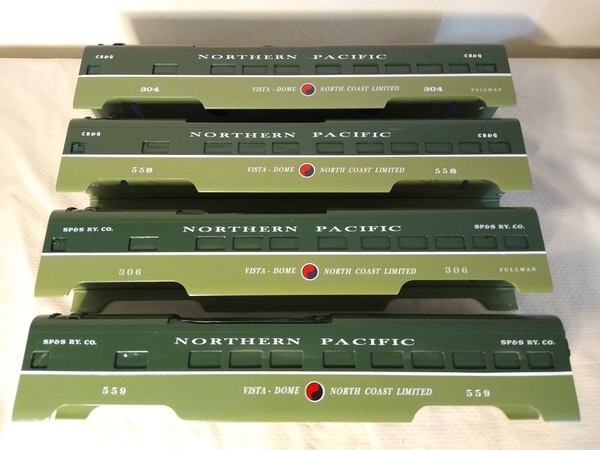
Finished decaling 4 LIONEL 15" aluminum offset vista dome cars. (These are prototypically numbered and shown as being owned by CB&Q and SP&S Ry. who provided their cars for use on the NP North Coast Limited.) Next step is to reassemble the cars with their ends, then apply clear coat finish, probably tomorrow.
Attachments
Very nice work!
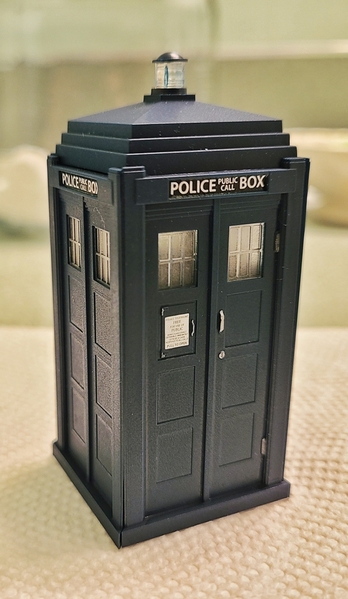
P51 - I got excess glue on the windows, so mine are no where near as nice as yours. Mine is dark blue - I have not added the decals as yet nor the top light. I am toying with the idea of getting a flashing LED from Evans for the top lamp and inside as well. Now its finding a Tom Baker Dr. Who for the outside. You know he travels in time so he can show up any place and time. Who knows maybe your outpost is being readied for an invasion by the Daleks or the Master?
FIRST TIMER -- Replaced the knuckle/hand on a LIONEL passenger truck with the benefit of this trembling hands demonstration video from YouTube. Seriously, I'm 73 and I experience my right, dominant hand trembles sometimes and it's completely unpredictable. Well, the fella doing the video has trembling hands and was able to show how to replace a spring/knuckle on a LIONEL postwar coupler. (My hands were steady for this job, thankfully.)
KEY TIP/TRICK--TH applied a small amount of a gel lubricant to the spring and pin to hold them while inserting the knuckle/hand. I used Red n Tacky. Hardest part of the job was removing the pin.
Also, I was glad I had my Greenberg's Repair Manual and a portable vise for this job. It was important for me to orient my coupler as TH did during his video; and, I had a couple of screenshots of the video on my smart phone for reference shown below:
Attachments
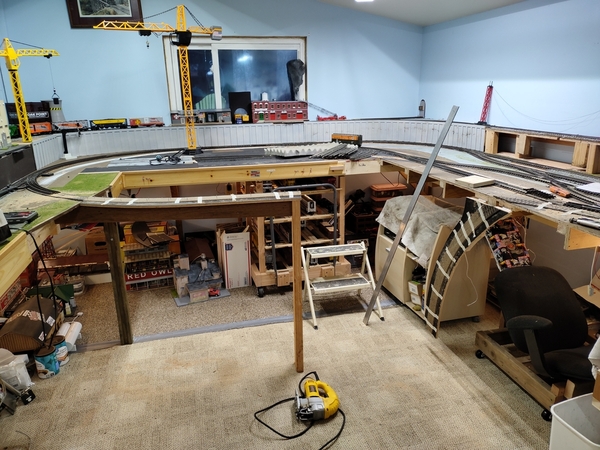
Hi guys sorry I haven't been on for awhile, I hope to change that buts really all up to the CEO! I did get out to the train room for a little while today. Did some cleaning and got one lower loop wood cut and road bed down.
I hope everyone is having a great weekend!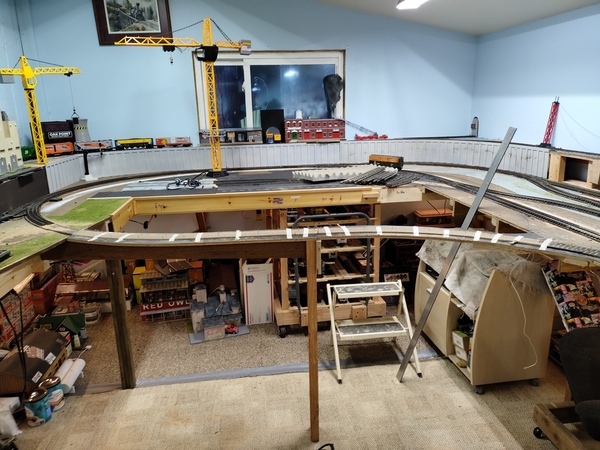
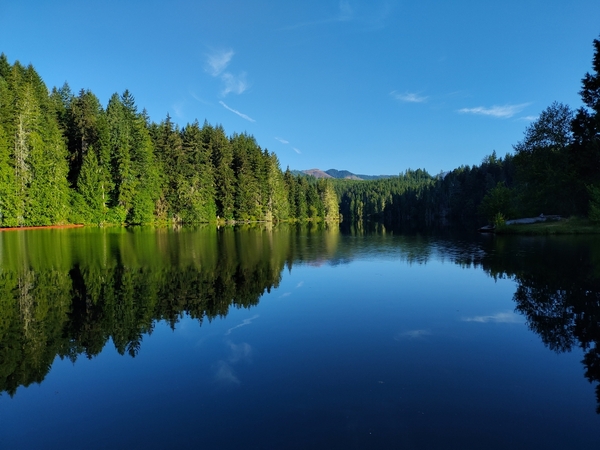
 the last photo is when the wife and I went fishing Thursday, sorry no fish but a great morning!
Attachments
@ScoutingDad posted:P51 - I got excess glue on the windows, so mine are no where near as nice as yours. Mine is dark blue - I have not added the decals as yet nor the top light. I am toying with the idea of getting a flashing LED from Evans for the top lamp and inside as well.
I have a Woodland Scenics plug and play flashing light that I plan on running right up to the base of the light. As for the windows, I placed the walls face down and used liquid glue from the inside and let capillary action do the rest. I used the molded color as it was very close to real British Police Boxes, just used dull coat both inside and out to make the windows translucent. As in the Tom Baker era, you couldn't see in the windows anyway, I'll probably paint the insides of the windows anyway.
The phone door markings are accurate for the modern series, not the one from the 70s and 80s, but I went with it anyway. Maybe someday I'll make me own more accurate markings.
As for details, I highlighted with testors silver, but the matching blue paint I had wasn't thick enough to complete the reinforcements for the windows and the top light supports.
I'm a Tom Baker fan (though I did get to meet Peter Davidson once in the 80s), and would LOVE to find a 1/43 or scale figure of him and/or K9. I've seen figures on eBay that might be good for O scale, but none of the listings are specific on the scale.
Mike, the reverse curve looks like good progress
@Mark Boyce posted:Your layout looks great!. You are doing a nice job cutting the curves of the plywood. I just have a hand held saber saw, and I have trouble controlling it, so my cuts really need covered by scenery.
Mark, check it out!
Gonna use this method, cut with jigsaw and clean up with belt sander.
Attachments
Joe, that’s really great!!
Lot's of nice projects gents.
@Pingman- the NP cars look great. Been following your ups and downs as you worked on them. Neat tips for replacing springs too.
@p51- Nice model Lee. Not a big fan of the shows but well done.
@mike g.- looks like another lift bridge is in order......![]() . Have you considered even a simple lift out section? Nice fishing hole too
. Have you considered even a simple lift out section? Nice fishing hole too ![]()
@jrstengel- nice work. Nice train room too.
@Victor Bertolina- been following your progress. Very neat and clean work.
I found and fixed a problem with one of my BEEPS. It was stalling over my switches, always at the rear pickup. I found this when I opened it up. Simple fix and we are back in business. I'm going to attempt my first ERR upgrade on one of these soon. Now that I have a Cab-1L, I want to start converting several of my conventional locos to command.
Bob
Attachments
I have been busy doing my summer activities. But I have been tooling around with my switching layout in my down time. I have added some Atlas structures, ground cover/ ballast, moved a shed over to the scrap yard. Having a nice relaxing Sunday “switching” in the a/c. Have a great Sunday everyone!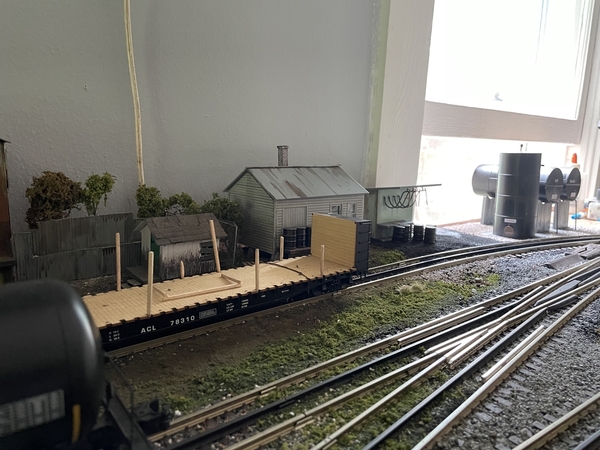
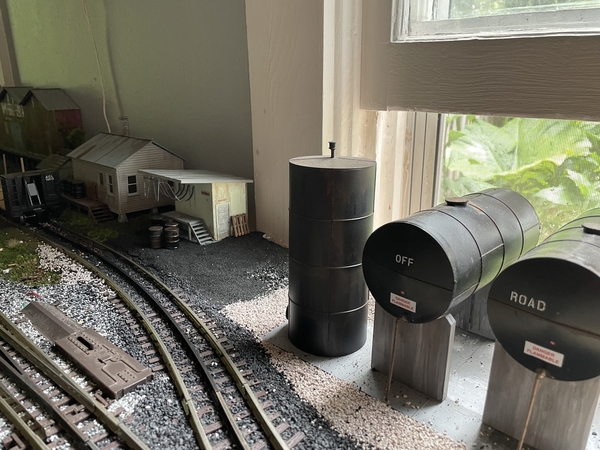
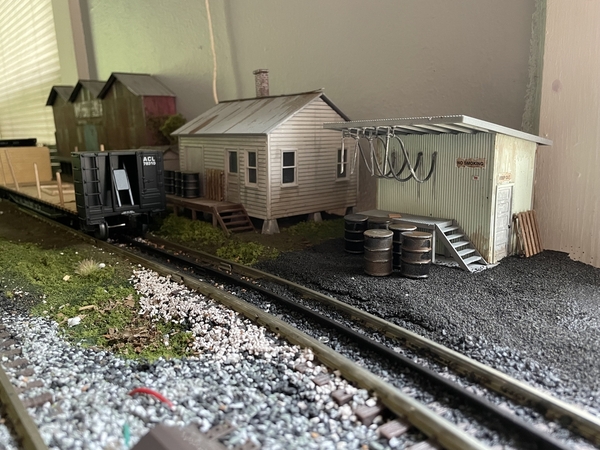
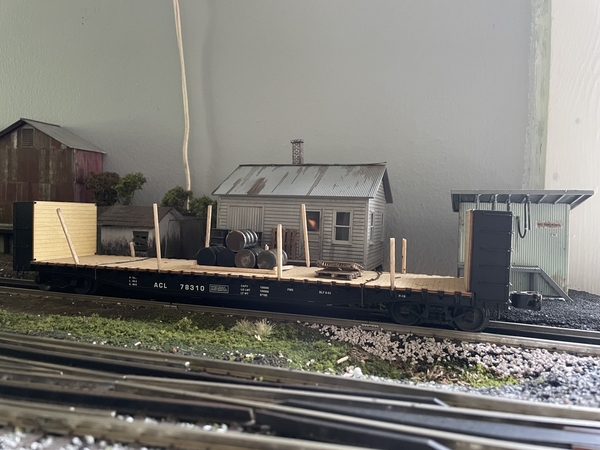
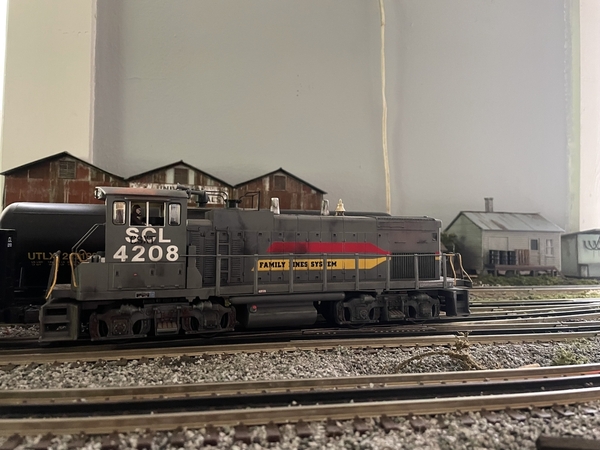
Attachments
I hooked up the CD player to the speakers under the train table. I downloaded some New York City subway sounds and burned them to a CD. Good background audio when I run the MTH subway trains.
Took 3 locomotives, a caboose, and passenger car to Engine House Hobbies in Gaithersburg for repair. One loco, caboose, and passenger car were repaired on the spot by Louie, the repairman. The other two locos, both postwar steamers from 1947 will require a little more of Louie's tender loving care. They will be finished during the coming week.![]()
@Mark Boyce posted:Your layout looks great!. You are doing a nice job cutting the curves of the plywood. I just have a hand held saber saw, and I have trouble controlling it, so my cuts really need covered by scenery.
Thanks Mark. I am also using a hand held saber saw. Doing my best to control it, so scenery is definitely the answer.
Hi guys, I know I have been a little slow lately staying up to speed and I am sorry about that!
Joe, that's a great idea!
Bob, I sure am glad it was an easy fix! Things sure are looking good on your layout!
Jesse, great looking switching layout! I love all the detail!
Patrick, I cant wait to see your newly painted supply for your layout! I bet the guys will be happy to be getting new engines and so forth!
Well as for me I was able to work a little on the other end of the layout for my lower loop. I had to change somethings up as I don't have enough 072 for the lower track and top track sections. So I made the lower loop 080 so it wouldn't be hidden under the upper section all the time. I am still working on using up my old plywood scraps before I cut into my $54 sheet of 1/2" plywood! Here is where I am as of today.
I hope you all have a great week and find time to have fun with your layout and trains!
Attachments
@jrstengel posted:Thanks Mark. I am also using a hand held saber saw. Doing my best to control it, so scenery is definitely the answer.
👍🏻👍🏻
Mike, I would really have a hard time getting the nerve to cut a $54 sheet of plywood! I would Measure thrice, and still goof it up! LOL
@mike g. posted:
Mike: Remember - Fishing is always great! Catching on the other hand, is incidental and does not always correlate or define a great day of fishing! I have never had a bad day fishing but, I have had several bad days catching. Wonderful picture and I am sure it was a great outing on the water!
Cheers, Dave
Good Evening Everyone,
I have been doing several things on the layout over the last few months and I have described them on my latest layout progress page. Just click on the layout progress link below. Additionally, all projects will be documented on my YouTube page.
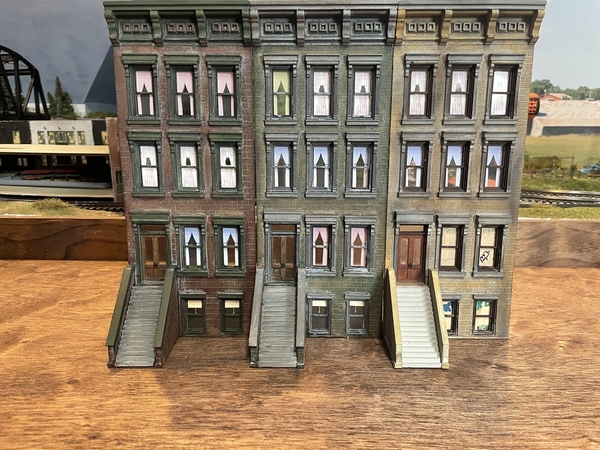
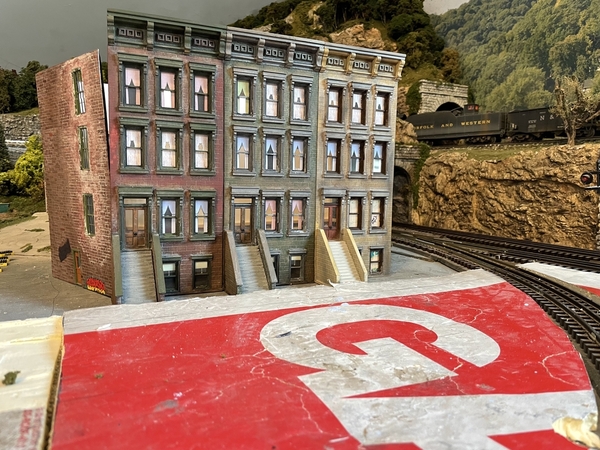
Today I continued work on 3 dsl shops row house fronts that I am kit-bashing into a full structure. The photos show the fronts attached to one another, the bracing between the back and right sides, and me test fitting the building. I still need to install interior and exterior details and lighting then I can put the building completely together.
Dave
Attachments
Ha love it - p51
@p51 posted:Got my scale TARDIS flashing light to flash...
It's only on the layout for this, otherwise it stays in a case on the wall.
I hope you plan on posting pictures of the inside, Lee ![]()
![]()
![]()
Craftech thanks a bunch!
Dave
An easy fix ...
When my two great-grandsons visit my home layout, their SOP is to walk around my L-shaped layout and push every control button on the fascia boards to trigger each accessory. It's fun for them, and it's an "operational test" of the action accessories for me.
One of the accessories (the Lionel REFRESHMENT STAND) was sluggish in operation, so I removed it from the layout and opened it up at my workbench today. Years ago, I lubed that accessories with White Lithium Grease. At the time, I thought that was a good idea; but with time, the grease dried to a sludge and gummed-up the gears. I used 91% Isopropyl Alcohol to clean the gears (especially in the teeth of the gears) and wipe its drive belt. After cleaning the accessory, it now works like it should; the characters move and the ice cream cone twirls.
Not rocket science, but a tip to remember ...
Mike Mottler LCCA 12394
@Pingman posted:FIRST TIMER -- Replaced the knuckle/hand on a LIONEL passenger truck with the benefit of this trembling hands demonstration video from YouTube. Seriously, I'm 73 and I experience my right, dominant hand trembles sometimes and it's completely unpredictable. Well, the fella doing the video has trembling hands and was able to show how to replace a spring/knuckle on a LIONEL postwar coupler. (My hands were steady for this job, thankfully.)
KEY TIP/TRICK--TH applied a small amount of a gel lubricant to the spring and pin to hold them while inserting the knuckle/hand. I used Red n Tacky. Hardest part of the job was removing the pin.
Also, I was glad I had my Greenberg's Repair Manual and a portable vise for this job. It was important for me to orient my coupler as TH did during his video; and, I had a couple of screenshots of the video on my smart phone for reference shown below:
Congrats! Replacing knuckles and coupler springs is one of the hardest repair jobs the first time you do it. My dad does it several times a week so he's got it under his belt but I still take about 5-10 minutes and use a couple of rivets lol
Morning guys, looks like there has been some nice projects getting done!
Mark, the wife told me to measure 4 time before cutting, thats why its still a whole sheet! LOL
Dave, you are so right, never a bad day fishing! We just take out our 12' Aluminum with a electric trolling motor and everything stays nice and quite!
Dave @luvindemtrains your kit bashing is looking great! I hope you post more photos as you go along.
Lee, the police box with the flashing light is outstanding! Sorry I had to look it up as I had never heard of one before! Then again we never really lived in the city.
Well Monday the wife let me work in the train room and I was able to get all the road bed and track laid for my lower level. Now I have to wire and fix all the isolation cuts I made in the tracks! LOL Which means I have to move everything either from one end them back or just mover everything out from under the layout into the garage to a couple days or maybe weeks depending on the CEO! LOL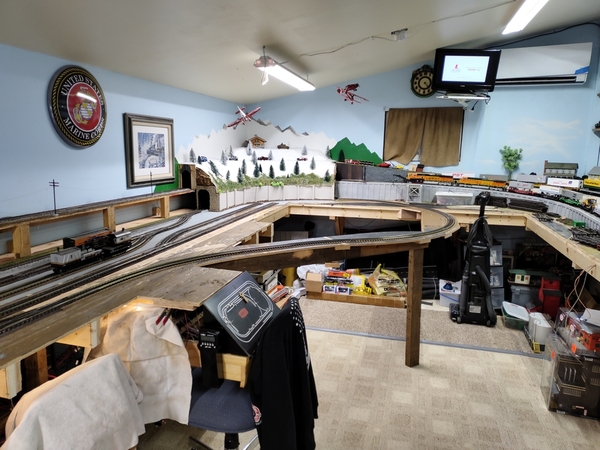
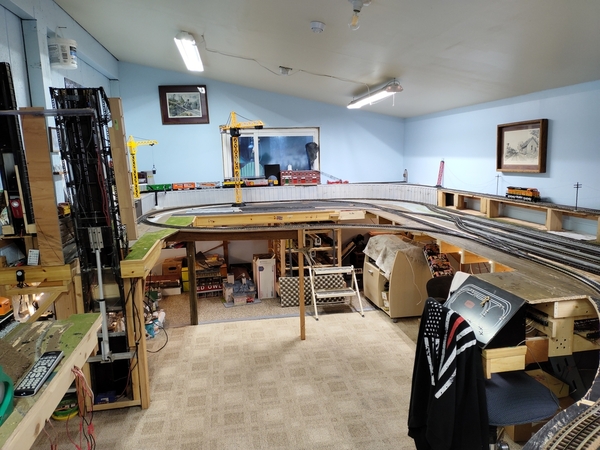
While I was working on that, a good friend I have had some of his friends moving and brought over a train that they were going to get rid of for me to have! Enjoy!
Attachments
Today I installed a 50's Lionel 362 Barrel Loader. I've owned it for two years and never took it out of it's box. I power it with a Lionel VW transformer. The operation is smooth and a little noisy. Now I need a 3562 barrel unloading car and more barrels too. I've already unloaded my six barrels about 20 times just for fun.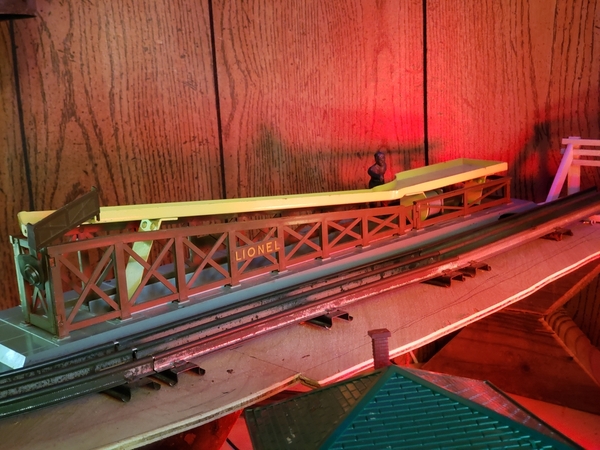
Attachments
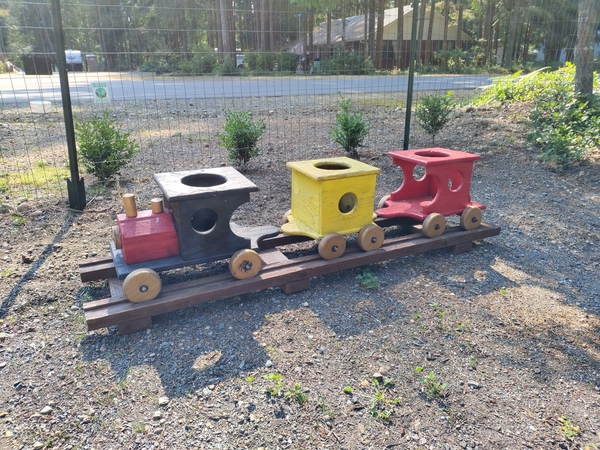
Mike G - love the wooden train cars - looks like kids could sit in them.
Ogdenville Bill - I've always liked the barrel loader, but it sure takes up a lot of room on the layout. All the vibrating accessories remind me of the old vibrating football games. Enjoy the new toy and good luck finding the unloader.
Mike, the turnback loops on the lower level look great, as does the little wooden train! Measure 4 times before cutting sounds good to me; on second thought maybe you should sleep on it after measuring, then measure all over again! ![]() I only know what a Tardis is because that is what Dr. Who uses to travel through time. I never heard of it until our older daughter and son-in-law started watching it when they were in college or maybe even high school. Then I found out recently that Dr. Who has been around since 1963! Who knew!!!
I only know what a Tardis is because that is what Dr. Who uses to travel through time. I never heard of it until our older daughter and son-in-law started watching it when they were in college or maybe even high school. Then I found out recently that Dr. Who has been around since 1963! Who knew!!!
Very nice job on yours, Lee!!!
Bill, nice barrel loader. I had HO trains growing up, so I was unfamiliar with Lionel operating accessories. I have bought a few since moving to O gauge about 10 years ago.
Jeff, I agree the accessories do remind me of the electric football game. My aunt and uncle bought one for my brother and me for Christmas one year. We got frustrated that you had to line up all the players with the little plastic tabs just right underneath for them to go where you wanted them to. We reverted to the table hockey game with the long metal rods you moved to control each player. We literally wore that thing out over the years.
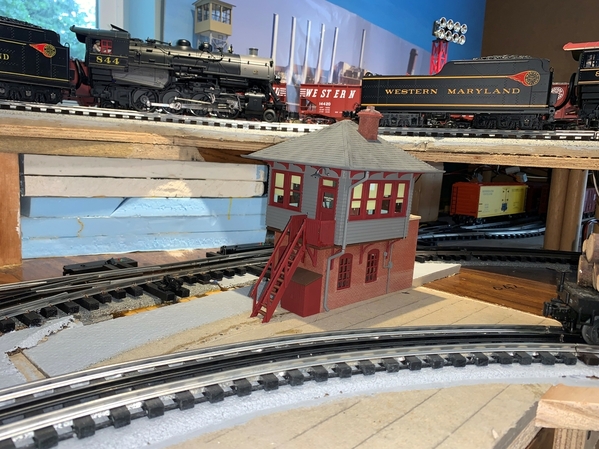
Here is a photograph of my Atlas switch tower I built recently while recovering from back surgery. I may place it elsewhere on the layout, but off hand it seems at the entrance to the little yard is the place. That's about all I have accomplished on the layout since May 24th, surgery day.
Attachments
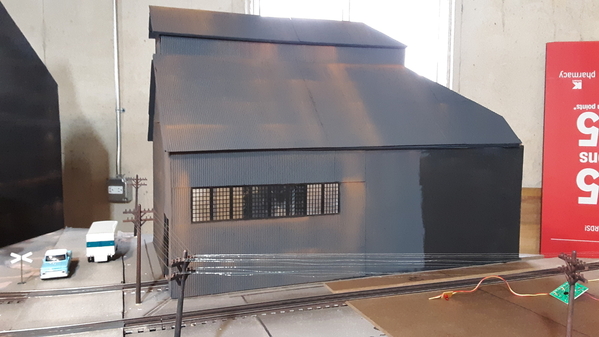
I finished working on another steel mill building. This one will be a slab mill. My ingot buggies will come in and slabs of steel will exit . I painted it a dark shade of gray instead of black, to make it look like it is further away from the others. Weathered with rust colored powder. If you notice the corrugated material doesn't go all the way to the end of the building. That's because another building will be in front, a hot rolling mill, next on the workbench.
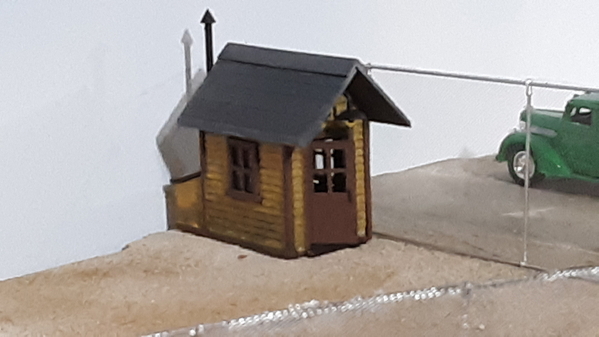
Also did some painting of a lionel shed and switch tower. I didn't like the stock colors so I brought out the acrylics and went to work. Added windows and floors to it in hope that some day I will put an interior with a desk and pot belly stove. Also a tool rack in the lower floor.
I wired the tower for lights, using yellow bulbs instead of white for a more subtle look.
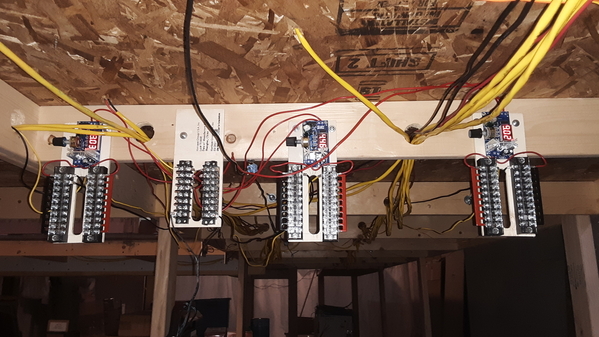
Then I spent an afternoon making a power supply distribution for the lighting on my layout. I took 3 buck converters and added terminal strips. Each unit is set to a different voltage, 3v,4.5v, for LEDS and 9v for bulbs.
Here they are under my layout. Power is from an old AT&T Uverse 12v battery supply and backup unit. 10 to 30 3 and 4.5v LEDS are in the mill buildings, scrounged from battery operated Christmas light sets.
Attachments
Odenville Bill
Luv the barrel loader. It's a favorite with the great nephews. I guess the kids like the noise and the "invisible hand" moving the barrels.
Bill T., The slab mill looks great! Just like mill buildings in Western Pennsylvania in the heyday. I have one of those little Lionel sheds that is in need of a paint job, nice work. To top it off, I like your power supply distribution for the lighting on your layout. Looks like a very neat job in the works!
@Mark Boyce posted:Bill T., The slab mill looks great! Just like mill buildings in Western Pennsylvania in the heyday. I have one of those little Lionel sheds that is in need of a paint job, nice work. To top it off, I like your power supply distribution for the lighting on your layout. Looks like a very neat job in the works!
Thank you Mark, I first started with a homemade terminal strip for 12 volts then added terminals for 3, 4.5 ,and 9 volts. I use 3 and 4.5 volt for the LEDS in the mill buildings, 9 volts for bulbs in the switch tower and 12 volts for the Seuthe smoke generator in the ore boat. I can run 19 different accessories from each terminal strip.
Hi guys, wonderful work!
Bill, the barrel loader is going to be a hit on your layout!
Jeff, I like the little wooded train also, but its ment to be a pot holder for plants! LOL at the rate the wife is going I can see down the road I am going to have to figure out how to build some more! LOL
Mark, the tower is great looking! I can see it found its proper home!
Bill T, The Steel Mill building looks outstanding! I really like how you put all your buck convertors together in the same area. Mine are all over the layout and now I am going to have to change that! LOL
Well today I got out and did a little wiring and will do a little tomorrow. But man there are a lot of gaps to fill from my previous track plan and isolation gaps! LOL Guess I have just have to bite the bullet and make it happen!
I hope everyone had a great day and fun with there layout and trains!
@mike g. posted:
I think a motor and battery from a Little Tykes car would fit in that 0-4-0 (or 2-0-2?) Mike. The track system looks easily repeatable too.
Just sayin' ![]()
![]()
![]()
@RSJB18 posted:I think a motor and battery from a Little Tykes car would fit in that 0-4-0 (or 2-0-2?) Mike. The track system looks easily repeatable too.
Just sayin'


Thanks for the idea Bob, but I think I will pass as it would take away from my already limited O gauge time! LOL![]()
I cleaned up and lubricated some railcars from an Ebay purchase. These have the usual issues like loose wires, dirty wheels and a surprise, two coupler shanks that were detached from the base plate. These are the cast metal type shanks with the integral rivet (480-31) and access to placing a substitute rivet requires removing the armature rivet (480-19) and spring (480-38). Rather than do that, I decided to try using Gorilla glue. After a thorough cleaning, I applied the glue and clamped the coupler in the vise overnight. This morning the coupler appears to be very firmly attached to the frame! I put in a new coupler spring and reinstalled the truck. Seems to be a good solution.
Attachments
@mike g. posted:Hi guys, wonderful work!
Bill T, The Steel Mill building looks outstanding! I really like how you put all your buck convertors together in the same area. Mine are all over the layout and now I am going to have to change that! LOL
I hope everyone had a great day and fun with there layout and trains!
Thanks for the compliment Mike. Here's a frontal view of the mill building. To the left is the electric arc furnace building and annex.
I spent a day stringing fishing line through little holes I drilled in each insulator on the telephone poles. 12 poles times 10 insulators each. Either 5 or 10 pound test monofilament that was 20+ years old. Wish I had some of my old spiderwire. Gave up fishing long time ago back in the 90's since I never caught anything.
Power goes from my terminals to a rocker switch at the facia then back to the building lights. I try to get things organized, but it's starting to look like a rat's nest under the layout.
Attachments
Hey Bill,
What did you use to drill the holes in the insulators? This may be a project I will do soon.
Dave
Good evening everyone! I recently got back from a trip to Dallas and work has once again continued on the layout. Thankfully, my health has made turn for the better and seems to be under control once again. Back to the layout, work has turned away from the mountain for a bit. Currently, I finally decided to paint my unpainted Lionel Rico Station in red, white, and black. Below are some photos of the progress so far. Thanks for reading, and happy railroading!
Attachments
John, your river is going to be great!!
Thanks Mark. These big projects just take a lot of time. Hope to post some pics of the river installed late next week.
@luvindemtrains posted:Hey Bill,
What did you use to drill the holes in the insulators? This may be a project I will do soon.
Dave
I believe that I used a 0.5 or 1mm drill in a pin vise.
Attachments
Bill, Great looking mill building! Man that sure is alot of holes to drill and very small. If I want something like that I might have to sub it out! LOL
TrainMaster, The new paint job is just wonderful! Really makes a statement!
John, That is going to be one amazing river!
Dave, the fire escape looks good. I sure hope you will post more photos when you have it mounted!
Well guys, no photos from me today, but I did get all the track laid for the lower level and got 99% wired yesterday and today. I still have to work on the wiring for the drop down section. I hope to have that figured out tomorrow, then I can move onto wiring the switch motors!
I hope you all have a great week and find time for fun with your layouts and trains!
Good evening everyone! Well, progress continued on the station for the past two days and I am happy to say I was able to finish it this evening. I may add a few thing here and their to it, but it first real transformation has been completed. Thanks for reading and happy railroading!
P.S. I am sorry for two of the photos being side ways. I think my phone decided to take a siesta and didn’t turn them around.
Attachments
Handsome station, Trainmaster!
Great looking platforms for the fire escape, Dave!
Attachments
FECRailroaddog,
Very creative idea!
Dave
Thanks Luvindentrains, buddy came over to run some trains yesterday and he gave me the idea..lol
FECRailroaddog,
Also, thanks for subscribing to my YouTube channel.
@FECRailroaddog posted:
Im with Dave, Great idea!
I blew the dust off the track and bridges on my outdoor covered shelf layout. This takes a considerable amount of time! I also cleaned the track, and ran some trains for our 2 yr. old grand daughter.
I put a duplex receptacle in the wall where the transformer goes for track power, and used two pieces of old cord with plug ends on one side, and stripped ends on the transformer side. I keep them attached to the transformer, so all I have to do is plug the other ends into the outlet supplying track power. I plan to attach a shelf that folds down when not in use for the transformer.
Attachments
I hate to be a wet blanket, but IMO using standard 120V receptacles for low voltage is a bad idea. I'd pick some sort of connector that it NOT commonly used for high voltage power.
My new 10-track yard extension is taking shape, ready to put the base layer of fascia on and paint the top to get ready for lots of track! ![]() I'll finally have some room to stage some freight cars.
I'll finally have some room to stage some freight cars. ![]()


That’s a great use of the space John. The wall is perfect for an industrial backdrop.
@Tranquil Hollow RR posted:That’s a great use of the space John. The wall is perfect for an industrial backdrop.
Well, the wall may just get more shelves for display, but we'll see how things shake out. ![]()
Ran the Corgi Brill converted with a Bowser motor. Really, the kit left a lot to be desired but thanks to Corgi it looks great IMHO. The vid is a little long; sorry. Also, I agree with GRJ on NOT using those receptacles for track power. To a point it is a violation of the National Electrical Code to do what was done.
Jim K
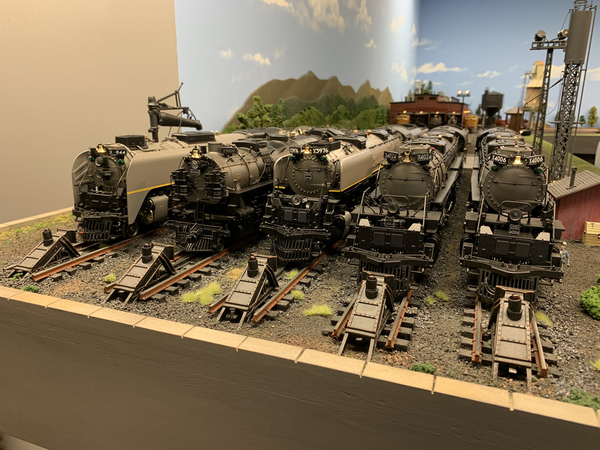
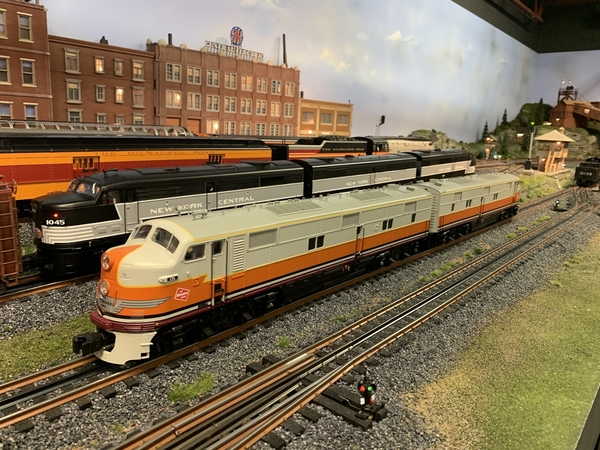
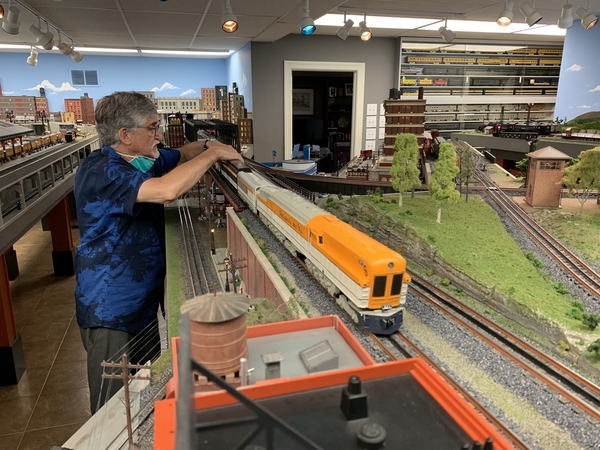
Farmerjohn, Wow, your river area is coming together very nicely and as always, your layouts a great work in progress. The pictures are beautiful. Mike g. I’m like you, , I haven’t had time to work on my layout do to honey do projects, however I visited my friend Dr. Jack Fisher last week, here’s some pictures of his fine workmanship. Happy Railroading 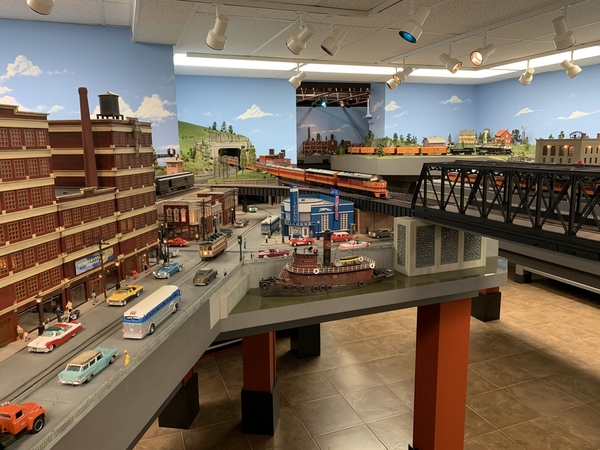







Attachments
WOW Larry, your friend Dr. Fisher has an incredible layout. What an effort, real artistry. Thanks for sharing.
Don
I agree with Don, Dr. Fisher's work is just great.
I resumed work on the K-Line 2320 S2 switcher by prime painting the body and exposed parts of the chassis. This was the NorthWestern loco in green and yellow. I will use grimy black finish to match the other switchers on the Lost Creek RR.
Attachments
@rail posted:
I blew the dust off the track and bridges on my outdoor covered shelf layout. This takes a considerable amount of time! I also cleaned the track, and ran some trains for our 2 yr. old grand daughter.
I put a duplex receptacle in the wall where the transformer goes for track power, and used two pieces of old cord with plug ends on one side, and stripped ends on the transformer side. I keep them attached to the transformer, so all I have to do is plug the other ends into the outlet supplying track power. I plan to attach a shelf that folds down when not in use for the transformer.
I agree. This is a code violation.
To correct, I'd recommend a two pin twist lock connector and matching receptacle.
The 120v source should be on a gfci receptacle as well since you mentioned that this is outdoors.
Bob
@leapinlarry posted:Farmerjohn, Wow, your river area is coming together very nicely and as always, your layouts a great work in progress. The pictures are beautiful. Mike g. I’m like you, , I haven’t had time to work on my layout do to honey do projects, however I visited my friend Dr. Jack Fisher last week, here’s some pictures of his fine workmanship. Happy Railroading
This is a beautiful layout. I watched Dakman's video on it and was amazing by the size and detail. Thanks for sharing.
That layout is breathtaking.
John
@gunrunnerjohn posted:My new 10-track yard extension is taking shape, ready to put the base layer of fascia on and paint the top to get ready for lots of track!
I'll finally have some room to stage some freight cars.
That will make room for a lot of cars, for sure.
I lot of track to lay as well.
Have fun, and enjoy.............
@RSJB18 posted:I agree. This is a code violation.
To correct, I'd recommend a two pin twist lock connector and matching receptacle.
The 120v source should be on a gfci receptacle as well since you mentioned that this is outdoors.
Bob
The outside outlets on each side of the door to the shop are wired to a ground fault circuit breaker, as is the outlet for the pond filter.
Going for the toy train look. I had bought 6 rolls of grass paper and 2 rolls of cork from Micheal's. I cut the cork into strips for the roadbed. Installed it all onto my layout, had to repair 2 of my K-line 072 switches, but all is up and running again!
Attachments
@Darrell posted:
I like that layout Darrell. How did you attach the Fastrack bumpers to the K-line track?
@Darrell posted:Going for the toy train look. I had bought 6 rolls of grass paper and 2 rolls of cork from Micheal's. I cut the cork into strips for the roadbed. Installed it all onto my layout, had to repair 2 of my K-line 072 switches, but all is up and running again!
Nicely done. I also used cork from Michaels for road bed. Worked well for me.
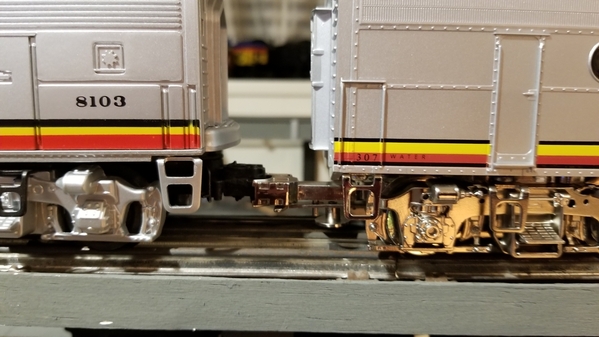
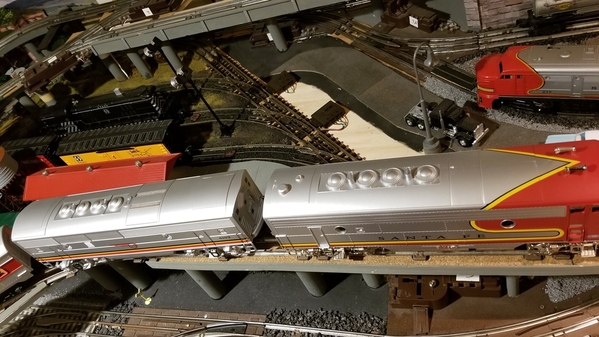
Put my ATSF B unit on the rails last night. Looks good overall behind the Menards engine- the car body heights are comparable, but the coupler heights are slightly off and the stripes along the bottom don't match. Not a deal breaker on my railroad. ![]()
@Steve "Papa" Eastman- had mentioned on one of his videos that the Williams B looks better. Guess I will need to get one of those one day.
Bob
Attachments
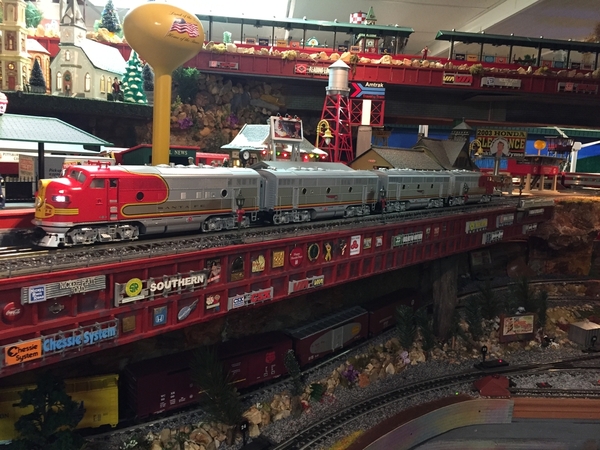
RSJB18 Bob, I think the Lionel B unit is actually a very close match to your Menards nicely made F unit and at a glance, the three stripes at the bottom of the shells are the same colors, although the Lionels are a little wider. The set looks like it’s ready for duty on your pike. Even on real railroads some units in an ABBA consist don’t match. Yours looks just fine and your layout is very nice. @idea-thinker has one of the Menards units that I can see in person one day. Trains are fun. Happy Railroading Everyone 
Attachments
Those units look great Bob. They’ll be pulling their consists so fast no one will notice any differences.
After over a year torn apart for track renovations… adding DCS with its associated wiring, block, and soldering recommendations, which amazingly worked first time thanks to this forum & Barry’s book…
I finally was able to run trains last night.
Want to annoy the wife less than two minutes after applying power? Do this…
Tom
Attachments
@FlyPlanes-PlayTrains posted:After over a year torn apart for track renovations… adding DCS with its associated wiring, block, and soldering recommendations, which amazingly worked first time thanks to this forum & Barry’s book…
I finally was able to run trains last night.
Want to annoy the wife less than two minutes after applying power? Do this…
Tom
Looks great Tom. You forgot to blow the horns too. ![]()
SJB18 : Those units look great Bob. You could even run an AABA if you wanted, RR in later years put the A units wherever they needed extra power.
Don
Tom, the layout is running smoothly!
Bob, the Santa Fe units look great together!
Darrell, Nice looking layout!
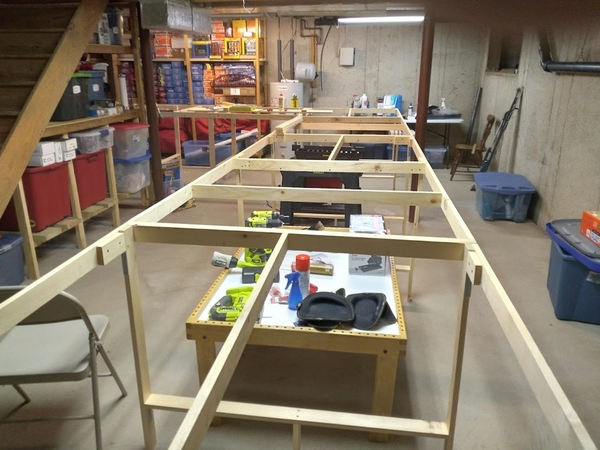
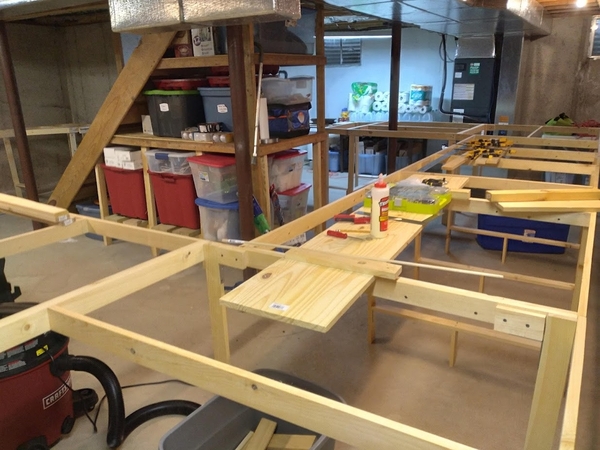
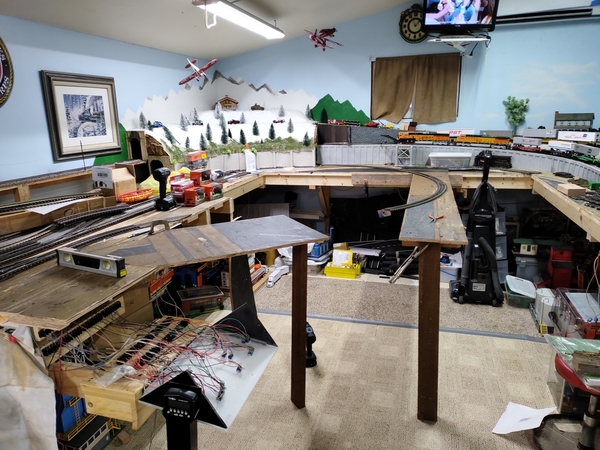
Finally got the bench work done. 2" foam will be on the top since it's an around the room layout with everything in reach. The only place you can't access comfortably from both sides is the section at the bottom of the stairs.
-Greg
Attachments
Hi Greg
That's some serious length of benchwork. What height did you select?
Thanks Victor - it's 38" off the floor so 40" with the foam. It will be 2 full loops around the perimeter and a 3rd branch line covering 2 1/2 of the 4 sides. The far side and length in front of the stairs will be narrower due to the offset basement walls. It's roughly 20' long on each side and 4' wide everywhere else.
Credit to Jim Barrett as I followed his advice from his book almost exclusively. Can't believe everything is level all the way around because my basement floor sure isn't...lol.
-Greg
Excellent job Greg, getting it all level
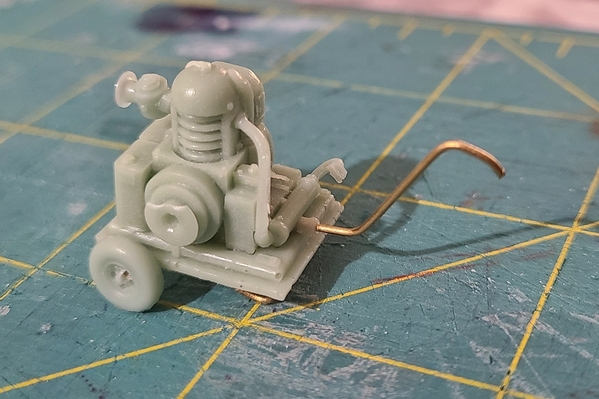
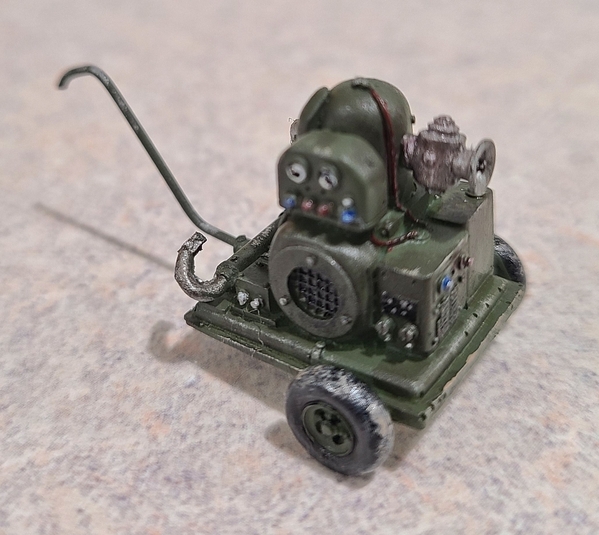
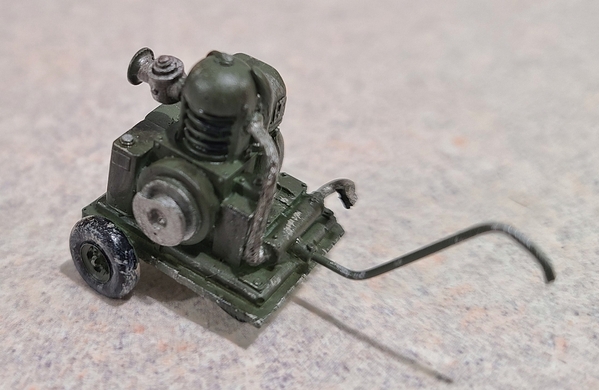
Just finished this, a WW2 US portable generator.
Painting it is going to be a real project I'll have to do carefully as the details are so fine on this thing.
You can tell how tiny this thing is, even in O scale.
Yeah, I'm aware of the broken flywheel on the casting. I probably won't repair it, and instead either will sit that away from the viewer or perhaps it'll represent something in need of repair. It's way too small for me to fix it correctly.
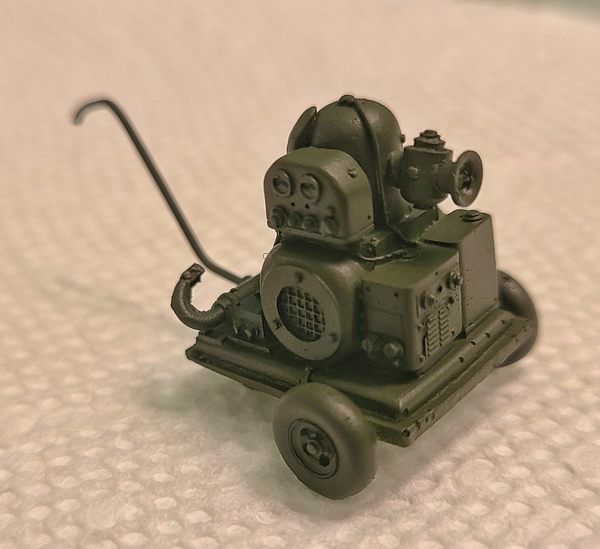
Later, I blasted it with some Tamiya USAAF OD green
Looking good, I'll paint all the highlights, light weathering and maybe fuel drips after work tonight
I'd been sitting on this kit for a long time, just decided to do it now as I hadn't done much for layout projects lately
Attachments
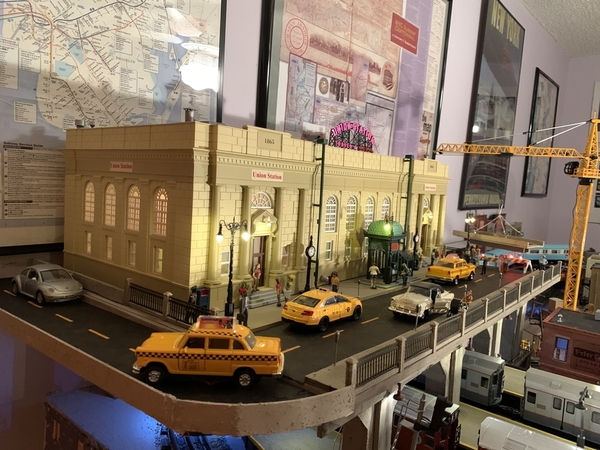
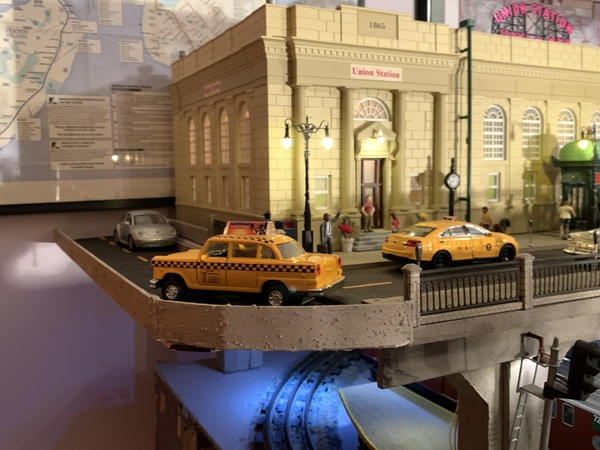
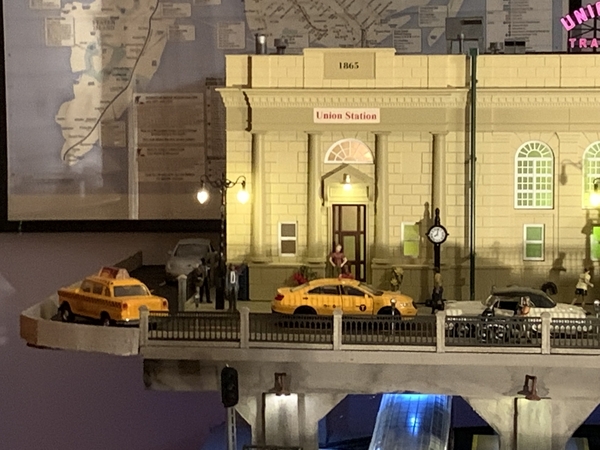
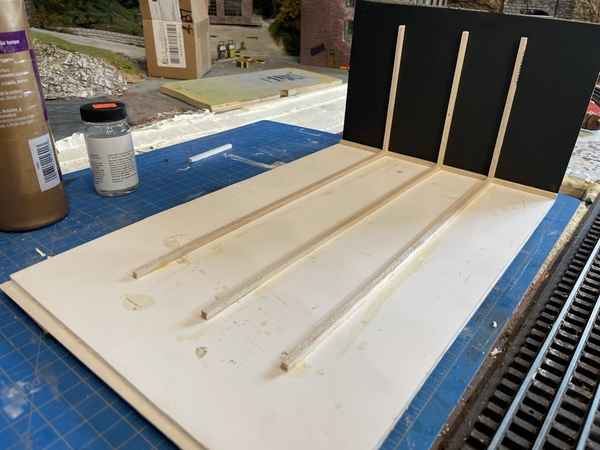
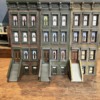
Finally had a chance to build my attachable side ramp. I made it easily removable so I can detach the station when needed. Next up I need to install some girder support beams to give it a Long Island city elevated look.
Attachments
Greg,
This looks like it's going to be a wonderful layout! Can't wait to see more progress. Congrats, one milestone down.
Dave
@luvindemtrains posted:Greg,
This looks like it's going to be a wonderful layout! Can't wait to see more progress. Congrats, one milestone down.
Dave
Thank-you Dave. I went to Home Depot earlier today for a MDF board for the electrical panel. I will start stringing the star wiring over the weekend ahead of placing the foam boards on the top. I already have those ready to go in my garage.
-Greg
Got a little work done on the farm and the bluff today. With all the wok being done trains on the Ozark Midland & Southern Rwy. are getting pretty backed up!
Time to upgrade, it’s free!
Simply click on the top left of the extension and register to get access to 10 shortcuts. Your email will remain secure, but we might get in touch for your feedback!Attachments
Looks awesome Strap Hanger!
railhead, has your wife seen that mess yet?
beardog49, yep, she was down in the Train Room this evening and was happy with the progress. We've been together for 47 years now so she has gotten pretty accustomed to the Train Room and the messes I make. LOL
Time to upgrade, it’s free!
Simply click on the top left of the extension and register to get access to 10 shortcuts. Your email will remain secure, but we might get in touch for your feedback!Time to upgrade, it’s free!
Simply click on the top left of the extension and register to get access to 10 shortcuts. Your email will remain secure, but we might get in touch for your feedback!it only takes 47 years??
beardog49, Yes, I can pretty much assure you that if you can hold out for 47 years, you will have won that battle. LOL
Time to upgrade, it’s free!
Simply click on the top left of the extension and register to get access to 10 shortcuts. Your email will remain secure, but we might get in touch for your feedback!Great work, guys!
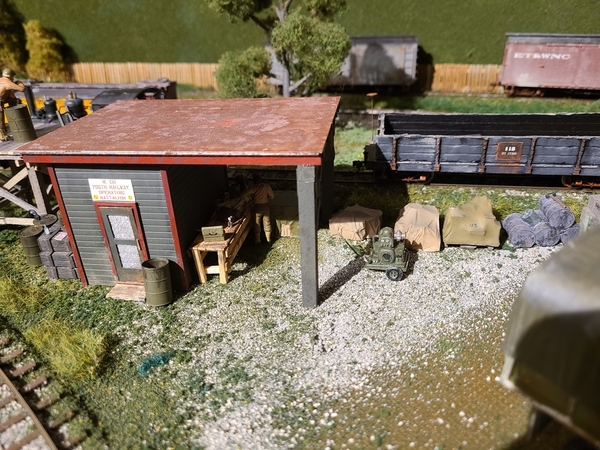
Just finished the smallest non figure project I've put this much detail into, the generator is done.
A lot of detail in one square inch!
I'm not sure where it'll sit, but here it stays for now:
I made this because I wanna string lights to the new Quonset hut that's coming and a generator is the only thing that'd make sense.
Attachments
congrats..... to both of you
Bearhead, Very nice looking progress! Congratulations as well!
Lee, the compressor looks great!
beardog49 and Mark Boyce, thank you fellas!
Great job guys, forward progress on a layout even if it is just one square inch, is still progress.
Neat little generator.
Impressive bench work.
I like the rock face scenery.
Great station scene.
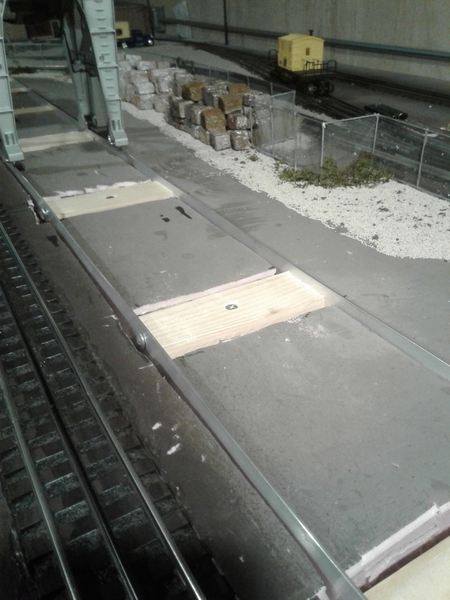
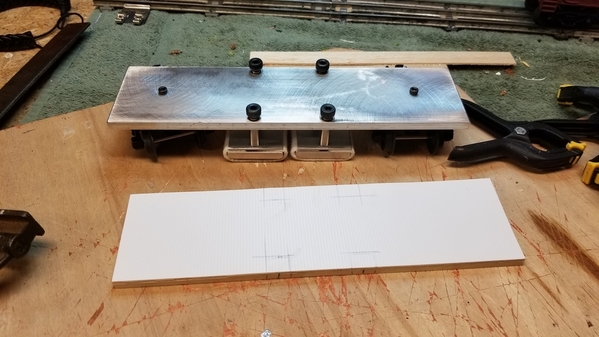
I have a TMCC gantry crane for my scrap yard. I didn't want the crane to straddle the spur track, so I made my own crane way from 2 pieces of aluminum bar stock and wood 1x2's for spacers.
Next comes a plaster skim coat for the driveway and final scenicking.
Attachments
Bill, that crane way is a neat idea! It will look great when done.
@Mark Boyce posted:Bill, that crane way is a neat idea! It will look great when done.
Thanks Mark.
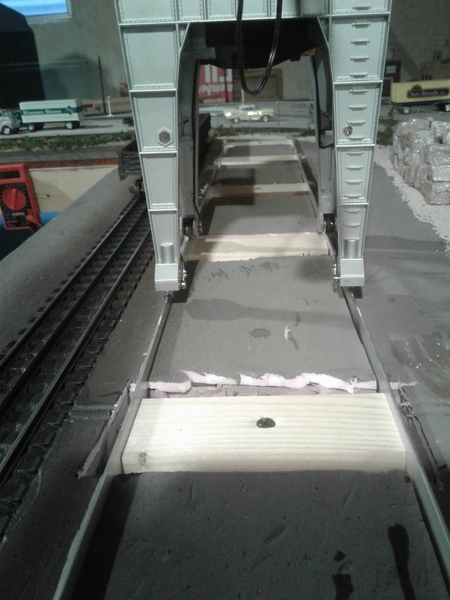
I used 2 pieces of aluminum cut to 5 feet long to custom fit it into the space available.
Had to chew up a bunch of Styrofoam bench top to make way for it. The tops sit even with the rail heads.
Attachments
Bill, that head on view shows better what you have done so far! Great idea!
Bill,
That's an excellent crane and pathway for it.
Not quite "on' the layout....but soon. Finished installing and wiring 10 LEDs in a 1/38 Ghostbusters Hearse. I will to put it in front of the layout's Hotel, and I'm working on "acceptable" O scale Ghostbuster figures to ad. That's going to be a challenge. Can't find any small figures so I think I'll use soldiers "kitted out" appropriately to catch ghosts.... It was a fun project but very challenging to install the LEDs. I used an EVANS Designs police car flashing light kit which include LEDs with resistor and bridge rectifier (I think that's what it is) attached and they are big when trying to stuff them in this Hearse. Drilling to add the tail lights was a challenge. In the end, the result was what I had hoped.
Attachments
Made some progress on my track cleaning car detailing. More to come.
I'm hoping the finished car looks somewhat like this. I will be placing a pipe load on the car for added weight.
Bob
Attachments
Shout out to all the recent posts...lot's of nice projects gents.
@Greg Houser, @p51, @third rail, @ToledoEd, @railhead53, @Strap Hanger
Bob
RSJB18 Thank you Bob for the shout out!
Bill B.
I doubt this is the right place to ask this question, but since this where I have been posting of late, I would like to know how do I respond to this:
Time to upgrade, it’s free!
Simply click on the top left of the extension and register to get access to 10 shortcuts. Your email will remain secure, but we might get in touch for your feedback!I noticed the same announcement. Ignored it but am concerned if we have been somehow "hacked"
Don
I have only seen it on railheads posts, not sure what it was but I cannot believe ogr hasn't stepped in
I had seen the "time to upgrade" notice on my profile page. I just went back there and deleted the one that was in my signature block and now it has disappeared. There are a number of the same notice on my profile page. I'm not sure whether to ignore or delete them. I thought it was a actual notice from the forum????
Attachments
You know Bob, you should consider publishing this effort. It’s something that we all need to attend to and you make it look so easy.
@Tranquil Hollow RR posted:You know Bob, you should consider publishing this effort. It’s something that we all need to attend to and you make it look so easy.
Thanks for the compliment Jay. Looking at the work of some of the expert modelers on this forum, I don't think I can say that I was in their league. ![]()
Bob
That is not an accurate assessment.
The car is really turning out great, Bob!!
Hi guys, I can see while I have bee playing under the train room table the rest of you have been working your rears off!
Greg Great looking bench work and I hope to see more as you go along!
Lee, wonderful detail on the WW2 generator! Turned out wonderful
Bill what a great idea, when I get back to mine if its ok with you I might barrow that idea!
Railhead, great looking landscaping! I hate the mess that is made when you have shave that pink dirt! LOL
Bob, the track car is coming along great! I hope it works as good as its going to look!![]()
I know I probably forgot someone and for that I am sorry! I hope after a trip to town this morning I will be able to get back to the train room and wiring up the last few switches on the lower loop. If I get that done I might run a train and maybe ever take a few photos!
I hope your all having a great weekend and finding fun with your layout and trains!
@mike g. posted:Hi guys, I can see while I have bee playing under the train room table the rest of you have been working your rears off!
Greg Great looking bench work and I hope to see more as you go along!
Lee, wonderful detail on the WW2 generator! Turned out wonderful
Bill what a great idea, when I get back to mine if its ok with you I might barrow that idea!
Railhead, great looking landscaping! I hate the mess that is made when you have shave that pink dirt! LOL
Bob, the track car is coming along great! I hope it works as good as its going to look!
I know I probably forgot someone and for that I am sorry! I hope after a trip to town this morning I will be able to get back to the train room and wiring up the last few switches on the lower loop. If I get that done I might run a train and maybe ever take a few photos!
I hope your all having a great weekend and finding fun with your layout and trains!
Thanks Mike. Haven't seen you post anything this week, good to see you are still lurking around 😂😂
@ToledoEd posted:Not quite "on' the layout....but soon. Finished installing and wiring 10 LEDs in a 1/38 Ghostbusters Hearse. I will to put it in front of the layout's Hotel, and I'm working on "acceptable" O scale Ghostbuster figures to ad. That's going to be a challenge. Can't find any small figures so I think I'll use soldiers "kitted out" appropriately to catch ghosts.... It was a fun project but very challenging to install the LEDs. I used an EVANS Designs police car flashing light kit which include LEDs with resistor and bridge rectifier (I think that's what it is) attached and they are big when trying to stuff them in this Hearse. Drilling to add the tail lights was a challenge. In the end, the result was what I had hoped.
![]() 👻 Wow Ed that is quite the project'... I like the lights and the sound.. is that a sound chip from a greeting card? Maybe you can explain how you got the sound to operate...
👻 Wow Ed that is quite the project'... I like the lights and the sound.. is that a sound chip from a greeting card? Maybe you can explain how you got the sound to operate...
Hi Bob, things have been a little busy around here. But I did get all the switches on the lower level wired in and working. Just not pretty as I. Waiting for the new print out of my new layout.
Sorry no photos, but I promise to take so tomorrow.
Hi guys and Bob! LOL
Here are a couple photos as promised!
And my control panel waiting for the new layout printing for my control panel.
After taking photos this morning and helping the CEO most of the day I had time to measure my $55 sheet of plywood 5 times, and some cardboard templets I was able to get it cut for the corner by the mountain! I am going to need another sheet! LOL
It fits the curve great!
I hope you all had a great day and found time to have fun with your layout and trains!
Attachments
Looks great, Mike! Maybe the second sheet of plywood will cost less than $55. I heard prices are going down here in Western Pennsylvania, I hope everywhere as well.
Looking really good, Mike! Can’t wait to see the control panel after you attach the print out.
Thanks guys. I really need to paint the lower level and track before I move up. I just wanted to get it cut and see what more I was going to need.
Mike - depending on the upper structure, you may want to build in the ability to take the top section off (or a part of it) so you can get at the lower section. My section above the terminal is sitting on posts fixed in place by just three screws. Easily removed if needed - and I have done so a couple of times already. Jeff
Nice progress on the revised layout.
Mike g - your layout is taking good shape! Looks great!! ![]()
Thanks Jeff and Pat, I think I am really going to like the new change. As for removing the top section, sounds like a good idea over the track. I plan on a pop up access hole so I can reach the track in the corner.
Mike, I agree to try to make the top level there fairly easy to remove. I didn’t do my wye and engine house area as well as I would have liked. I need to get a better plan of where to cut it near where the wye leaves the mainline and rebuild it so I can get into the yard easier when not if I need to repair a switch or something else. Right now it is pretty well attached. I put the cart before the horse on that one.
@mike g. posted:Thanks Jeff and Pat, I think I am really going to like the new change. As for removing the top section, sounds like a good idea over the track. I plan on a pop up access hole so I can reach the track in the corner.
Nice to see I've spurred you into action Mike! ![]() I was in our local Home Depot about a month ago and 3/4" ply was $80.00 a sheet. It has come down since.
I was in our local Home Depot about a month ago and 3/4" ply was $80.00 a sheet. It has come down since.
The layout is looking good. Can't wait to see trains running again.
Bob
Looking good, Mike and that car is coming along nicely, Bob.
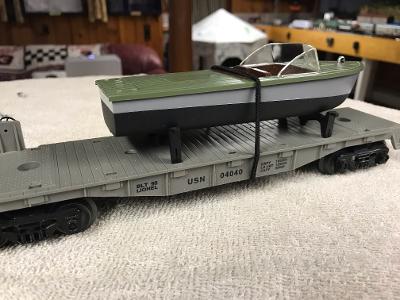
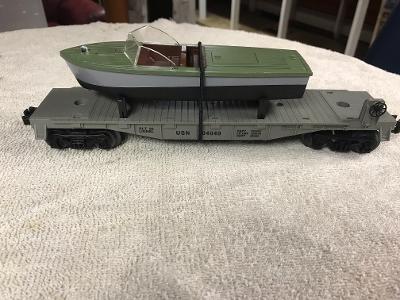
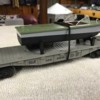
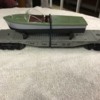
Picked up a Lionel USN boat flatcar a few months ago. The flatcar was painted grey and the boat was the same grey on the entire deck with a flat red hull (sorry, no pic). It looked a little too toy-like to me, plus I'm not sure the Navy ever used any boats with red hulls, so I decide to re-paint it in more subdued tones.
I separated the deck from the hull and then the windshield from the deck and then painted the deck in a military green color with a brown interior. I painted the hull a lighter grey and added black "anti-fouling" paint on the hull bottom. After re-assembly, I added a few silver/chrome accents (hard to make out in the pics).
Attachments
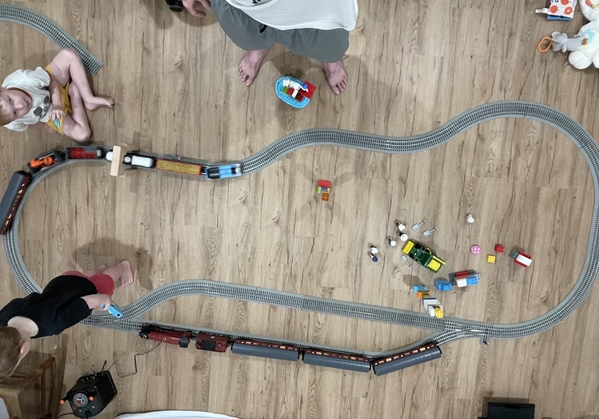
We built a hardwood express after picking up two manual switches. Big layout is at my parents house but this kids love running trains at home too. Lots of fun. Legos and wooden blocks welcome on this layout as well!
Attachments
For Mike G
what thickness are you using for the control panel?
Does the plexiglass offer a big advantage over tempered hardboard? Like maybe no warping? I ask because I need to make two small panels to show the yard tracks
thanks
Afternoon guys I hope your all having a great day!
Thanks Mark and Bob, I working on trying to get the trains back up and running. But I dont want to get ahead of myself!
Richie, great looking boat on the flatcar! Look vintage style kinda like a ChrisCraft.
SuperChief, looks like alot of fun! Soak it all in while you can!
Victor, I like using Plexiglass as there is no sag, hasn't warping. My plexiglass is 1/4" thick and held together Super Glue.
Well guys I got out and cut my access hole and while I was at it I played around with building placement! Hope you all enjoy!
Being on a tight budget, I plan to try and reuse everything I can!
I hope you all had fun with your layout and trains today!
Attachments
The buildings look great Mike!
After a busy few days I was able to get back to the bench last night and continue on my track cleaning car / flat car project. I added side frames down one side of the car and left it to dry overnight. To be continued......
Happy Hump-Day!
Attachments
@RSJB18 posted:
Bob, that is looking great, and your Idea to make it a flat car was ingenious because you can now weigh it down with some pipe loads for better traction/cleaning action. Have you found the right paint to match that LIRR light blue/grey?
@Strap Hanger posted:Bob, that is looking great, and your Idea to make it a flat car was ingenious because you can now weigh it down with some pipe loads for better traction/cleaning action. Have you found the right paint to match that LIRR light blue/grey?
I think I did. I found a rattle can at Michaels that based on the cap, should be OK. I need to try it an see.

Bob
Mike, the cutout for the access hatch looks easy and functional. IT's nice to plan the town on the sawhorses.
Bob, the track cleaning flat car is looking very nice. Those side frames really add to the car.
Fitting the bridge section to my yard, cutting the fascia to mate up with the main platform and the new freight yard.
Attachments
@gunrunnerjohn posted:
John:
I assume that the section will be a hinged lift-up section? I like the trapezoidal shape of the sides to afford Fitting into place with no drag resistance upon closure.
Your layout is coming along beautifully. Bravo!
It was going to be a lift-out, but I'm thinking more along the lines of a hinged section now, it got bigger than I had initially planned for. That's a good thing as it allowed me to move all the switching back on the bridge or before the bridge and greatly expand the capacity of the yard itself.
That is looking good Bob. We can’t wait to see the gleaming rails left in its wake.
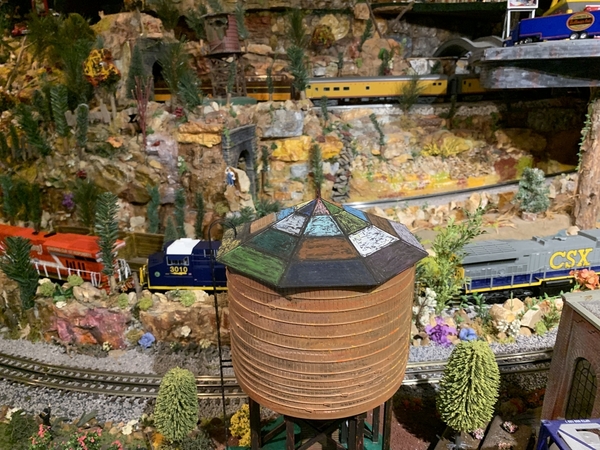
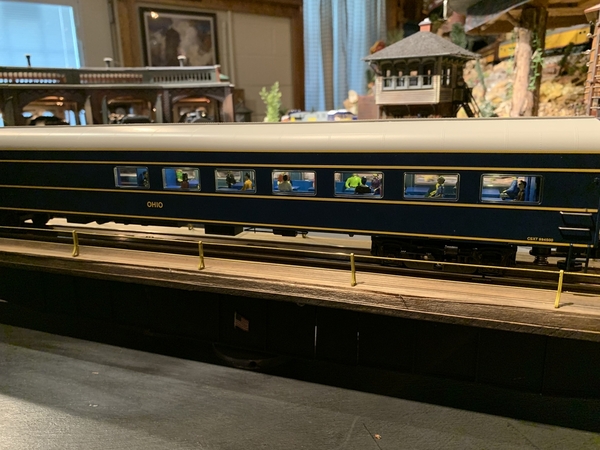
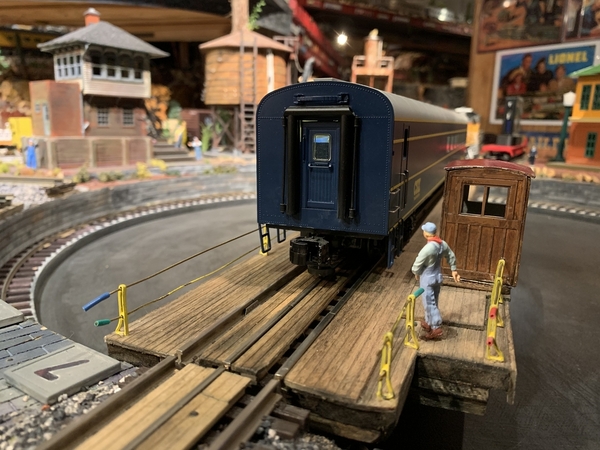
Mike g., wow, it’s great to see you working on your railroad, it’s looking really good, I always like seeing the giant cranes in the background, your going to have a cool layout when all of your thoughts and labor come together. RSJB18 Bob, wow, very neat track cleaning car, well designed, Gunrunner John, your wood working is fantastic, also, I like the way you keep everything clean, it’s going to be a very nice layout. I haven’t had time to work on the layout lately do honey do projects. Happy Railroading Everyone 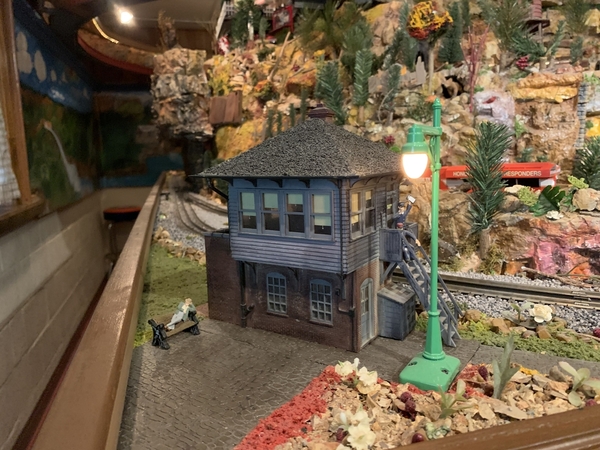


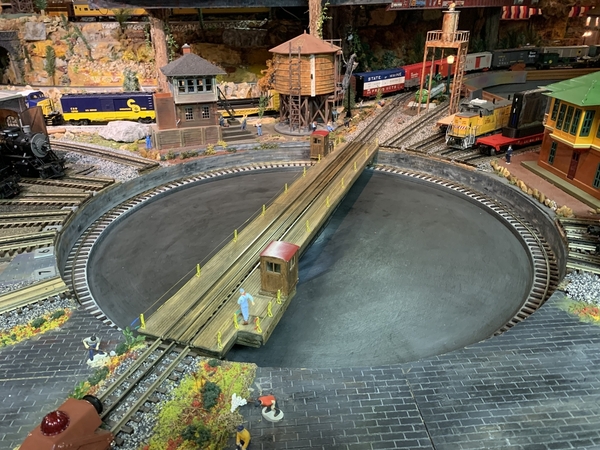
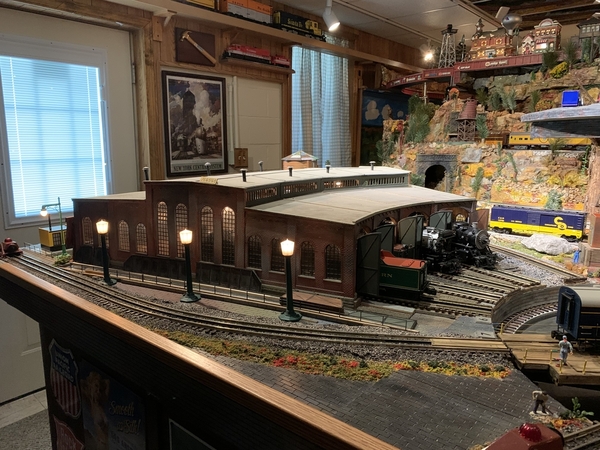
Attachments
Leapinlarry, thanks for sharing these fantastic images of your layout.
All I gotta say is "Is it real or is it Clarol?" HOW do you guys do it?
Love it
RSJB18,
That track cleaner in flatcar clothing is a great idea. Can't wait to see the finished product.
Maybe some tanks marked "Track Cleaning Fluid" for a load?
I love watching the progress Mike.
AND, yes, re-use what ever you can. I toss nothing and, sooner or later, find a use for wood scraps, etc
My kind of project Richie C.
Looks great
Keep the progress updates coming Mike G.
That $55 sheet of plywood was about $24 a couple years ago, but don't feel bad, until recently it was $83 (7/16 thick) in my local Lowes.
I don't need wood at this point, but I love walking through the lumber section to smell the wood - reminds me of layout building (Yes, I know, I'm weird!)
Hi guys, what great work going on here!
Bob, the flat car cleaning car is looking great!
John, your facia work is looking outstanding! Your a great student and Tom is a wonderful teacher!
Larry thank you for the kind words. It really means alot, but it will never be as amazing as yours!
Well today I jumped to the other end of the table to add 2 switches and some track to be able to keep my BNSF service building. Sofar I got the area cleaned and cork laid!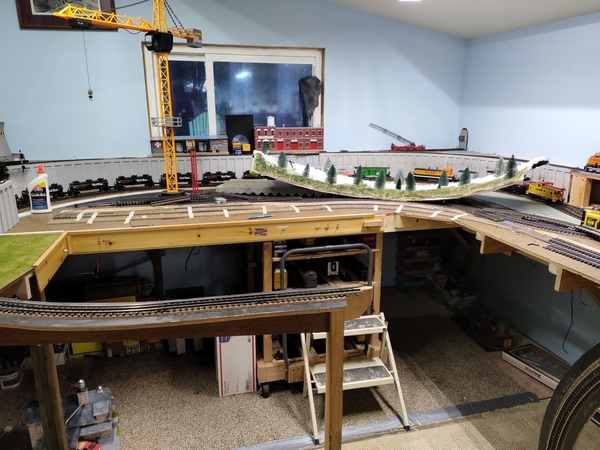
Attachments
Looks nice, Mike!
Larry, I always enjoy seeing your photographs!
John, you have learned well from Tom!
@Lionelski posted:RSJB18,
That track cleaner in flatcar clothing is a great idea. Can't wait to see the finished product.
Maybe some tanks marked "Track Cleaning Fluid" for a load?
I plan on using this pipe load John. I could paint and letter them to make that work. Stay tuned ![]()
Attachments
"Second verse, same as the first" ![]()
I also did a sample of the spray paint I bought. Not too bad, maybe a little light but the prototype doesn't exist any more so I get to do what I want. ![]()
(It drizzled right after I sprayed it so disregard the water spots).
Attachments
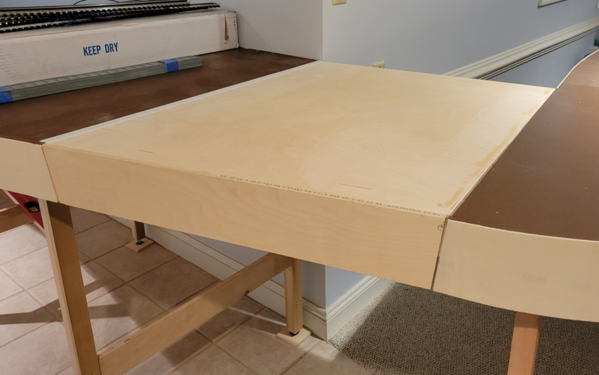
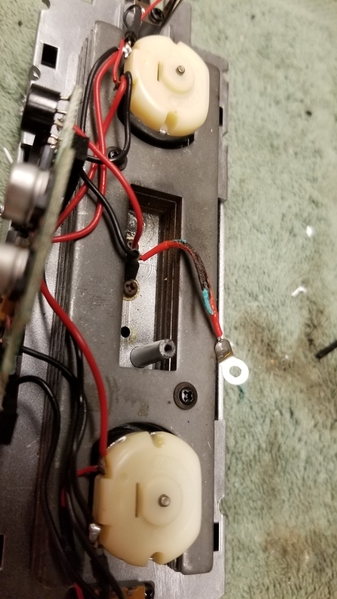
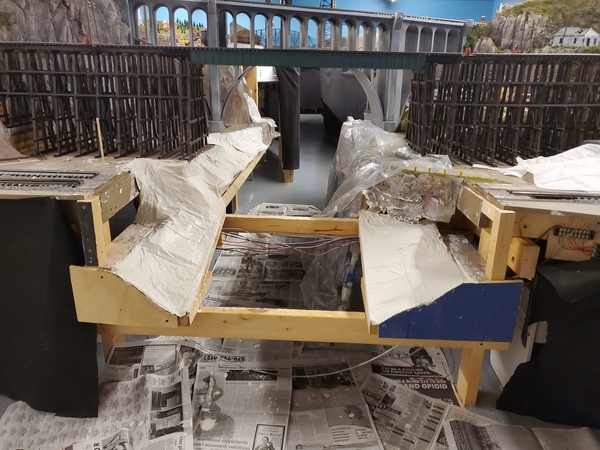
It was a slower than anticipated week due to the Edison Greenberg show, a family gathering and work but I managed to get the shelf built for the ZW and bricks and the mdf board framed and mounted for the TIU, AIU, and various terminal blocks. I plan to start the wiring this weekend.
-Greg














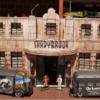
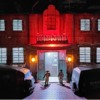

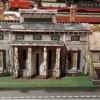
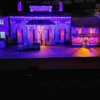






























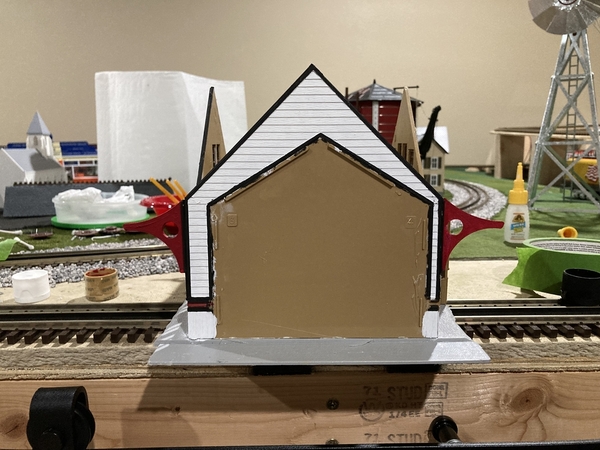














![IMG_20210811_125445785[1] IMG_20210811_125445785[1]](https://ogrforum.ogaugerr.com/fileSendAction/fcType/0/fcOid/12129987997660671/filePointer/156842928526195605/fodoid/156842928526195601/imageType/MEDIUM/inlineImage/true/IMG_20210811_125445785%255B1%255D.jpg)
![IMG_20210811_125445785[1] IMG_20210811_125445785[1]](https://ogrforum.ogaugerr.com/fileSendAction/fcType/0/fcOid/12129987997660671/filePointer/156842928526195605/fodoid/156842928526195601/imageType/SQUARE_THUMBNAIL/inlineImage/true/IMG_20210811_125445785%5B1%5D.jpg)
