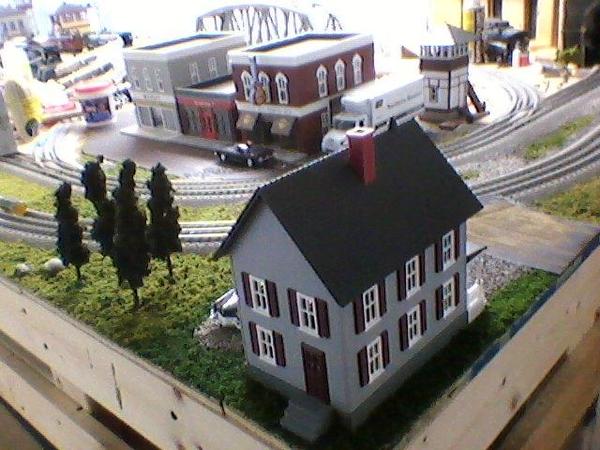
I finally finished wiring up all buildings that can be lighted and/or are easily accessible. I do have one large station that needs to be lighted but seeing it is permanently embedded in the scenery and surrounding platform, I'm really in no rush to get that out to wire it. I'll do it eventually but not for a few months. Probably sometime over the summer. 


I also planted some more trees, a few more to put back out. I also worked on my freight station area, I'm hoping to get the station placed, wired, and scenery finished tomorrow. 


Got everything off the floor and vacuumed 

I added Kadee couplers to one of my Legacy 0-8-0.  A forum member made me some a bracket for the front coupler and it was very easy to install.  The hard part was removing the stock coil coupler.  I had to remove the smoke unit, the legacy  boards, and the bottom part of the shell from the chassie just to be able to remove the coupler.  

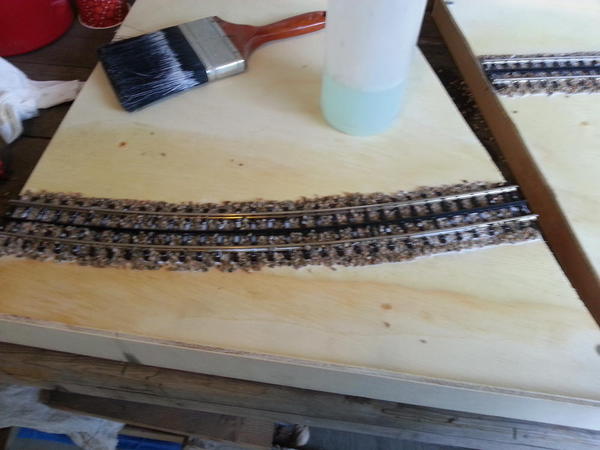
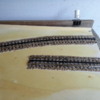
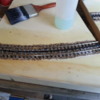
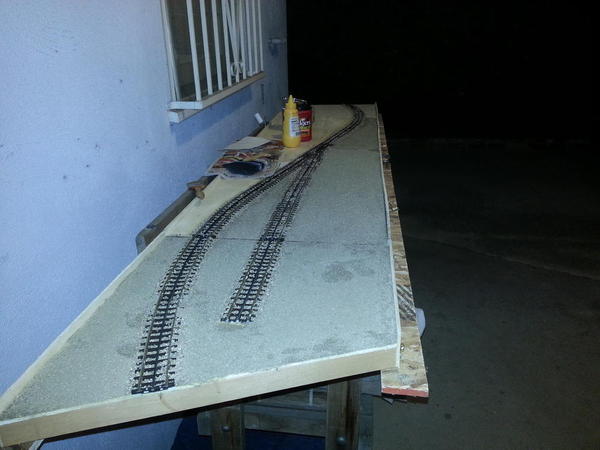
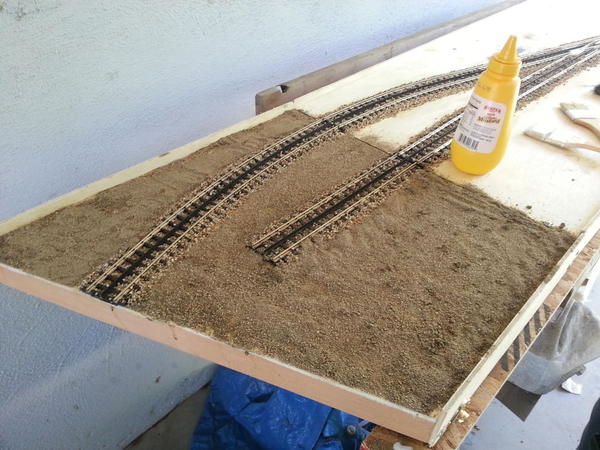
Put down some ballast onto the end sections of the micro-layout. Put in a reinforcement on the side frame of the main section so I can install a carrying handle.


2013-03-17 17.59.38

2013-03-17 17.59.43 


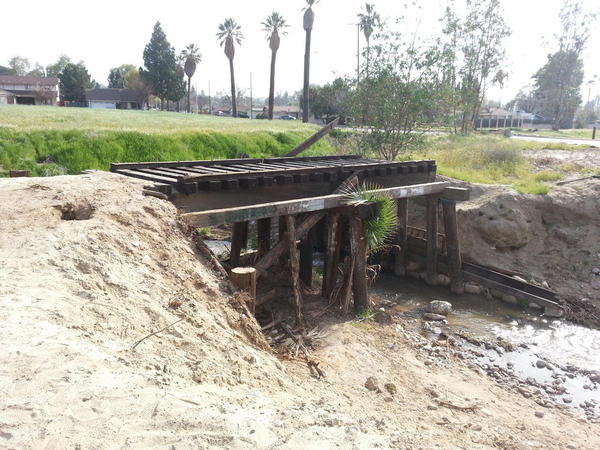
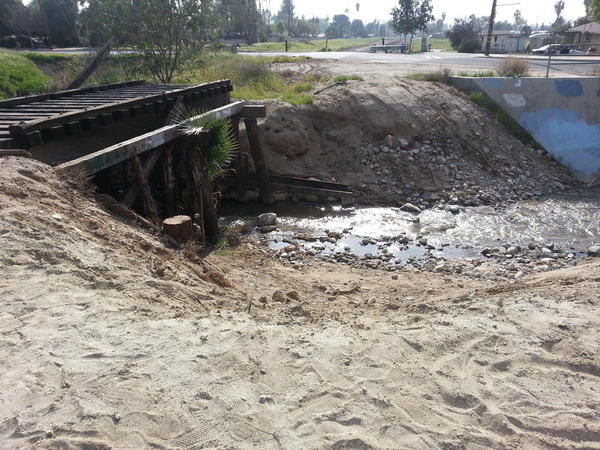
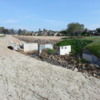
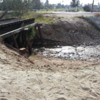
Also went out onto the remnants of the Redlands Loop to get some "official" Redlands Loop dirt for ground cover. Noticed that one of the trestles over a creek was still standing (the tracks were pulled out some time ago.)


2013-03-17 16.12.00


This is a shot of the bridge footings for the SP Redlands/Crafton branch that ran parallel to the ATSF Redlands Loop.

2013-03-17 16.12.16


After all these years, the creek's still flowing.

2013-03-17 16.15.31

Attachments

Images (5)
  • 2013-03-17 16.12.00
  • 2013-03-17 16.12.16
  • 2013-03-17 16.15.31
  • 2013-03-17 17.59.38
  • 2013-03-17 17.59.43

After Friday and Saturday in Chicago at the O Scale Show, I decided on, built, and installed a two course water wheel for this mill, installed the chimney acquired in Chicago, and am well along on a two course flume.  I won't build a spillway for this mill until/if it is set in place.  Now building the trestle for the flume so there is light at the end of the tunnel, and this should soon be finished.  This will no longer be "your father's MTH grainery".

Matt, pretty cool.  Are they building a new highway?  looks like new culvers and earthwork there.  cool that the old bridge is still there.  We have alot of areas in western PA with abandoned train lines from the coal mining days.  we turn them into rail trails.
ChrisOriginally Posted by AGHRMatt:

Put down some ballast onto the end sections of the micro-layout. Put in a reinforcement on the side frame of the main section so I can install a carrying handle.


2013-03-17 17.59.38

2013-03-17 17.59.43 


Also went out onto the remnants of the Redlands Loop to get some "official" Redlands Loop dirt for ground cover. Noticed that one of the trestles over a creek was still standing (the tracks were pulled out some time ago.)


2013-03-17 16.12.00


This is a shot of the bridge footings for the SP Redlands/Crafton branch that ran parallel to the ATSF Redlands Loop.

2013-03-17 16.12.16


After all these years, the creek's still flowing.

2013-03-17 16.15.31


It looks like old flood control. There's a lot of snow runoff down the Santa Ana River out by Mentone, and some runoff down the Cajon Wash by I-15. It all collects near Colton. There was a bridge north of Mentone that got washed away in a river flood. This one here looks like it has held up well considering it's probably close to 100 years old (gotta love Creosote.)
 
The rest of "The Loop" has pretty much been buried in housing and commercial development with a few spots open.
 
Originally Posted by Chris D:
Matt, pretty cool.  Are they building a new highway?  looks like new culvers and earthwork there.  cool that the old bridge is still there.  We have alot of areas in western PA with abandoned train lines from the coal mining days.  we turn them into rail trails.
ChrisOriginally Posted by AGHRMatt:
... Also went out onto the remnants of the Redlands Loop to get some "official" Redlands Loop dirt for ground cover. Noticed that one of the trestles over a creek was still standing (the tracks were pulled out some time ago.)


2013-03-17 16.12.00


I added 8 toggle switches to cut power to engines that I don't want powered up all the time. Also rewired some areas with 14 gauge stranded wire, should have done it right the first time. I now have solid 10's on my MTH signal on about 98% of my layout. A few spots dip to to 8's and 9's but that is fine with me.

I have been taking some time away from actual work on the layout and been adding Kadee's to all my rolling stock.  I have already converted one locomotive, a legacy 0-8-0 and started on a Lionel caboose today.  I need to head to P&D tomorrow and get a few more couplers to finish up the caboose.  By next week I should have 90% of my rolling stock converted and another locomotive.  


I will be back to work on the layout itself next week.  I need to do more plaster cloth and I want to start wiring my buildings.  

Yesterday, after reworking the water wheel to correct an omission, I finished kitbashing the MTH "grainery" into a water mill with annex, double course wheel and flume.  When I get the photos on here, you can tell me if it is an improvement or not.

Today I photographed the mill, and have now begun going through material stock to see what I would need to scratchbuild that creosote plant forumites have been good enough to provide prototype photos of.  I was hoping I'd have enough Korber brick walls left over from other kitbashes to begin with a boiler house, but it does not look like it.  Because of the track work, I think I will have to build this on a plywood

sheet or something, as a module,  to keep it all together as a unit, and then finish it with scenery and groundcover.  That Altoona kitbuilder was showing a really nice cast "brick"smoke stack at the Chicago O scale show, but it is $75,  so I will have to work something up, probably a  "steel" stack from plastic tubing.

Originally Posted by hojack:

Gave the layout a good vacuuming.  Seem to be a lot of dead house flies this time of year.  They're pretty much scale blackbirds, or crows, or something.  Whatever they are, they're dropping like flies.


 I should make a zoo for my stinkbug collection! I get 3 a day.  I could train them to stay in pens or you could have a herd in the meadows!! lol

Chris

Installed a roadway and a parking lot in what had been a bare corner of the layout.  Used what they call "cove molding" which is the mop rail for vinyl floors.  I cut off the curved area and used the flat gray surface for the road.  Looks OK but it would be nice to have some curves and bends in the road.


Next, I've got to make a road crossing over the RR track.  Planning on using stick lumber for that. 


Also, I built and installed a "charging shelf" right near the circuit breaker box in the basement.  Finally, I can put all of my rechargeable tools on charge in one place, which is now, where I can find them without wasting a lot of time.


Paul Fischer

I have done nothing for over a week. I haven't even run any trains. I injured my knee last Friday at work.  It hurts pretty bad. I have a torn lateral meniscus on my left knee. I haven't been able to get down my basement stairs because I am on crutches. And, I live in a spilt level home with four levels. There are SO MANY stairs when you can't do them!! I can't stand for very long due to the pain , even with crutches. I will find out this Tuesday, the 26th, what my options are as far as surgery, etc. I can't work either due to the fact that I drive a truck for a food service company and I need to be on my feet. We wheel up and down our ramps, into customer delivery areas and up and down stairs, ARRGHH!! Hopefully I will be able to make a full and speedy recovery.

Cobrabob.

One by one, I installed trout in my trout stream (really ) - about a dozen scale 10 to 18 inch fish swimming in the deep part of the stream that I had to insert and positio one by one as I poured the "water."  When the Woodland Scenics water hardens (it's foggy when first poured) I'll post pictures - I think it is going to be very cool to actually see the fish in the stream swimming about a scale foot below the surface!

I've heard the difference between the 91% and the 99% alcohol is the 91% contains some oil which leaves a residue ....
 
Originally Posted by Jeff Metz:

Added some "porch lights" to a few buildings. Bought first can of denatured alcohol and cleaned track. I had been using 91% alcohol before. No problems with the 91%, just wanted to try it due to so many posts about denatured.  

Originally Posted by Gregg Laiben:

Started converting from claws to Kadee couplers (rolling stock only) - 4 down - a bunch more to go.

Doing the same, but also doing locomotives.


Tonight I plan to do some more plaster cloth in my river area and then will be laying a nice earth colored brown over the entire right hand side of my layout, getting it ready for ground cover.  

Renovation project is well under way. I am working now on fine tuning the engine service area (roundhouse and turntable portion of my layout) and I relocated all of the accessories and re-wired them. Fortunately they all worked on the first try. Next step is to re-ballast they area with new material and put the engines back into service. I would like to get this part of the renovation done by mid week.


Then it is on to the new siding yard.

My grandson discovered that the beige MTH Christmas passenger cars look like Clarabelle, and Annie, so we pulled them from the shelf and ran them with Thomas, James, and Percy so he had passanger cars that lit up. Once running, he noticed that unlike the regular passanger cars, these had no passangers. He is five and misses nothing, runs DCS remote better than many adults! He disappeared for a minute, and popped up from under the layout with a package of 48 seated figures, and beamed, "Hey, Poppy. We need to put these people in the cars! So, yesterday, we populated the cars. Sharp kid. I guess I'll need to find better hiding spots for Christmas and birthday presents!  

In the home stretch for the Micro-Layout contest. Test fit the buildings, then pretended I was a politician and started throwing dirt around. By the way, given this is influenced by East Highland on the Redlands Loop, I used genuine Redlands Loop dirt. I'll have the rest of the dirt on it tomorrow night and should have it finished Saturday evening or Sunday in time for the deadline.

2013-03-26 19.54.18


2013-03-23 14.06.01

Attachments

Images (2)
  • 2013-03-26 19.54.18
  • 2013-03-23 14.06.01
been there.  straight leg wrap I had.  took 6 weeks to isolate, then the pain really began with bending and going up stairs. tears! No pushing in the clutch on that mustang I see!  youll be in the chair with the dcs remote for awhile! that sucks.   Originally Posted by Cobrabob:

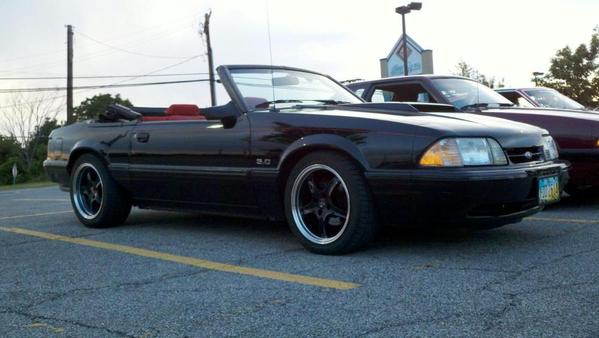
Not only am I unable to work, Car Show and Cruise-in Season are about here!

Cobrabob.

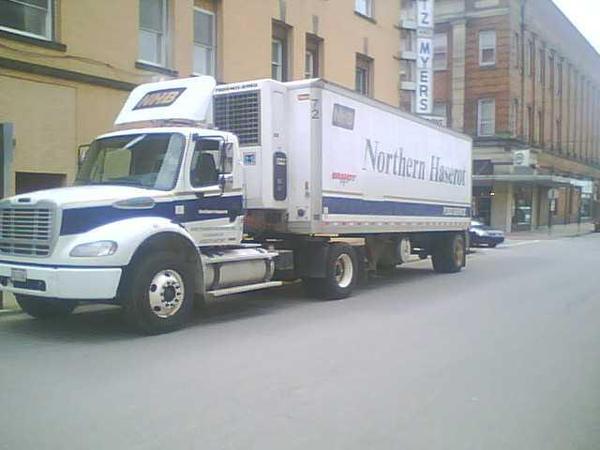
Norhtern Haserot Trk. 72

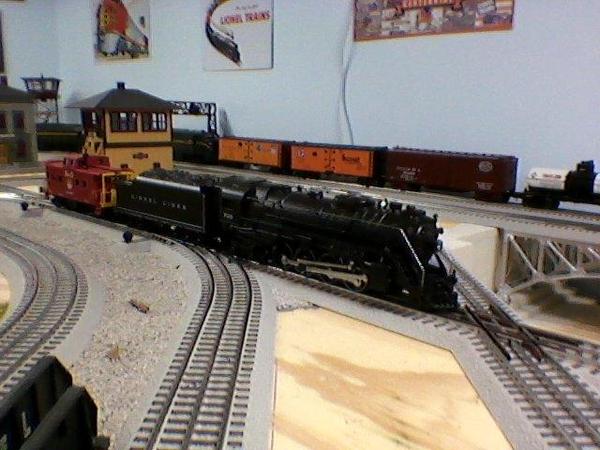
Bob's LX 62312


Toady was dedicated to working on the relocated refinery. There is much more room for it in it's new home. I installed a roadway to this area which will connect to other areas of the layout. It was one of those days when all went very smoothly with the installation of the roads. I hope this continues with the rest of the renovation work which is fairly extensive.

the guy tonight was worried about our hobby, but a thing my generation in the our 30's loves trains and we were the MPC generation 4-5 year olds of the late 70's. I always loved them.  when I rode the PAT train loco, I was only 10 filmed for a show due to my intererest then.  the kids now need to know they have a part, and they need us to keep this hobby alive.  take the kids to see real ones and layouts!  I think we can keep it going!  Originally Posted by Chris D:

well, I ran some trains. attached the new BNSF sd-70 mac to the dash 9 premier to see how she ran.  big engines and I need 072 for those  I have o54 now.  watched tin plate legends on I love toys trains!  love that show.  also trains and locomotives!!


Finished sanding all the homaboard joints, vacuumed the whole area, filled the joints with White Lightening, sat back and pondered the track plan and possible mods to it before laying it down.

Next is painting the base coat.  I'm thinking a dark ash grey for the "steam part" and a more brownish dirt color for the electric and diesel area.

Installed 4 Gargraves O42 DZ-2500 switches.  I am replacing my Lionel O42 6-65168 and 9 switches, all 38 of them.  I am so amazed at these Gargrave switches.  Zero dead spots, excellent remote movement and every engine and car, postwar and modern move effortlessly over them.  I found the best price at www.wholesaletrains.com $55.95 per unit. 


I originally started with O27 track and remote switches 1122E with auto derailing, moved to the O42 switch and curves and am now switching to the Gargraves switch.  From a cost, reliability and appearance point of view I like the O27 track.  But, I really want to replace all the track with Gargraves and put down a roadbed.  It is a question of $$$$ and time.  So I am going one step at a time.  When it is all done I will probably spend 2x the amount of money then if I had done this in one whack...

Gargraves switch

Attachments

Images (1)
  • Gargraves switch

Good morning

Last two days all the scenery blue board, painted and textured and put back on the layout

did all the painting and texturing in the garage then let it dry outside. Have to blend the edges of each section and prep for ballast. Made some test sections of ballast to see if my three year old ballast cement is still good. Have four gallons of this stuff the first gallon was still good. TWENTY MORE DAYS TILL OPEN HOUSE at Blissfield Railroad Days.

Clem   

Thanks to the great photos put up on here by forumites, I have my creosote plant

planned.  I found lighter tubing with thinner walls than PVC for the retorts. But I found

Plasttruct has a minimun order which my retort doors and supports won't reach, so that is on hold.  So only have the base and the retorts cut to shape.  Will have to build a  LARGE corrugated building for the retorts, and find that none of the structure kits I

have is suitable for the separate office building.  It looks like a lot of scale wood will be needed for the piles of before and after ties and poles.  Also will have to track down at least four captive flat cars to run into the retorts...so....this won't happen fast.  And the company is in a tizzy, for the loggers are cashing their checks, the sawyers have been cutting ties,  loaded log cars are clogging up the sidings, money is going out, and none is coming in.


I made some Truss supports for my elevated track I will soon be adding (I hope).  I used basswood for some of the supports, but then later switched to birchwood which I cut with a jigsaw.  I then glued pieces of styrene for the beams and details, spray painted them flat black, and then added rust and weathering.


Truss_1

Truss_2

Truss_3

Truss_4

Truss_5

Truss_6

Attachments

Images (6)
  • Truss_1
  • Truss_2
  • Truss_3
  • Truss_4
  • Truss_5
  • Truss_6

Well I just ordered $160.00  from brennan's model railroading. I ordered some better ballast. I got some gray and rail yard black. And I ordered 2 bags of  each of there scenic supplys . I know that I'll get every thing I need  it will just take time and warmer weather. I'm just not used to being on a fixed income like I'm on. Plush things have got a little bit harder for me to do since I lost my right leg.So just give me some time and I will get this layout up and running.


Good Morning

Yesterday did more ballast and scenery,I do some scenery and ballast at the same time while I'm spraying glue over everything, some places are hard to reach. Today will be more of the same. Still have an industrial area to build and a town expansion. 17 days until Blissfield Railroad Days.

Over the past month, I've finished the bench work for the first level of the Milwaukee Beer Line and put down some track to make sure my track plan actually worked. After a few tweaks, it does. I have two bridges (bascule and lift) that cross the Milwaukee River, but before I could permanently mount and wire them up, I've had to do the river scenery first. I'm pretty much done with that and hope to pour the "water" today and then start on the wiring. With a little bit of luck, I'll have some trains running by the weekend: I've got some thirsty customers. 

I don't have the end caps and other parts I need for the retorts, so the creosote plant
is on hold.  Yesterday and today I have reverted to working on the previously  started ghost town kit.  I have cut walls for the general store out of milled clapboard, installed
Grandtline windows and some doors, and a bent and sagging ridgepole. With the four walls assembled, I am now starting to install broken rafters where they will show through the holes in the roof.  Have done the porch floor with its holes and sag.  Have been thinking up names to put on the barely hanging sign, and think I will just put in the foundation of the station, with a vestige of a platform that flagged trains can stop at, the building just the pit full of scrap lumber.  A very decrepit saloon and roofless blacksmith shop should complete the scene and indicate that residents have left for the next bonanza.

Very frustrating day. I worked on two switches to get the controllers to function properly. It did not happen, but after some time, I did narrowed the problem down to the wire that connects the switch to the controller. I hope to fix the issue today so that I can get on to finishing the wiring of the yard and the rest of the switches.


It is a good thing that most trains days are better than this one.

Originally Posted by Big_Boy_4005:

Well, the helix is finally topped out, and the first 3 sections of bookshelf benchwork are in place. Tomorrow I hope to finish the track all the way up, and perhaps put in the bridge over the aisle.


IMG_1144

IMG_1147

IMG_1148


Elliot- With all the great work you're doing on that layout, I'm curious, are you going to finish off the basement with drywall on the last foot of wall and ceiling?

Mike, the missing strip of sheetrock near the ceiling will get filled in, but in the end it won't be visible. Backdrop will cover it.


The plan has always been to install a suspended ceiling. I suppose it would have been easier to do it before the benchwork was in, but by standing on the layout, it shouldn't be too hard. I always worried about damaging the ceiling during construction. Unfortunately, back before the benchwork was installed, the duct work hadn't been boxed in yet. Now the portion above the layout is done, but there is still some left to finish in one corner. I've had the materials for years, but when I got sick, all progress stopped.


The truth is the room has never been empty. Even during the construction of the house, there was always stuff in the space. It isn't as if there was ever a good time to deal with this. But now that things are moving along again, it will have to be dealt with soon.


I'm also thinking of re-doing the lighting.

Put down the outer loop and ran some trains over it. Boy, what a difference from the FasTrack I used last time. The O27 tubular is so much quieter. And I'm sure that once I add Flexxbed under the track, it will be a little quieter, still. So nice not to hear anything but the motor of the locomotive and the clickety-clack of the rails.

I'm new to the Forum.  This is a GREAT idea ... sharing with everyone our progress on our respective railroads.  My railroad's name is The Freestate Junction Railroad " a conduit line for all of Maryland's class 1 and short line railroads" during the transition era.


This week I wired all the track on the new Mountain Division ( The actual mountain is yet to be completed... and will be in the next few months hopefully ) which hosts a Bollman Truss Bridge.  I tested trains running on the  Mountain division.  All track work is fine.... no problems with derailments.  Two freinds helped wire my lower division mainline and also helped with the progress of my elevated trolly line.


Today I did a foam moch up of the mountain... just to get an idea of how it might look.

I put the last two pieces of track in place to complete the elevated trolly line. Still lacking the final screws for piers.... but it all looks good!  I went to Home Depot to buy more pink two inch foam.  Also bought some single roof shingles for making roads ... at $2.02 per shingle I can get lots of mileage out of a single shingle ... and they come in various colors too!


I'm looking forward to working on my layout tomorrow.  Actually "working" is not exactly what it is .... it's really creative play. :-)


Patrick W


Welcome to the forum Patrick!  Post some photos of your progress!
 
 
Originally Posted by trumptrain:

I'm new to the Forum.  This is a GREAT idea ... sharing with everyone our progress on our respective railroads.  My railroad's name is The Freestate Junction Railroad " a conduit line for all of Maryland's class 1 and short line railroads" during the transition era.

Ran some trains this morning


Started to design my staging yard that will go though the 2nd wall into a spare bedroom we have.  Since the bedroom sits empty most of the time it shouldnt be an issue but when the inlaws come to stay with us I will design the track to fold up into the wall.  As of right now it will be able to hold 2 trains. 


I plan to hit the hobby shop today also to get some more cork roadbed to fix a small section of track that isn't level and causes all kinds of derailments.   

Starting with a large empty basement we were able to have the drop deiling and carpeting installed, and the tracklighting, before starting the framework construction.
Got lucky.
 
Originally Posted by Big_Boy_4005:

Mike, the missing strip of sheetrock near the ceiling will get filled in, but in the end it won't be visible. Backdrop will cover it.


The plan has always been to install a suspended ceiling. I suppose it would have been easier to do it before the benchwork was in, but by standing on the layout, it shouldn't be too hard. I always worried about damaging the ceiling during construction. Unfortunately, back before the benchwork was installed, the duct work hadn't been boxed in yet. Now the portion above the layout is done, but there is still some left to finish in one corner. I've had the materials for years, but when I got sick, all progress stopped.


The truth is the room has never been empty. Even during the construction of the house, there was always stuff in the space. It isn't as if there was ever a good time to deal with this. But now that things are moving along again, it will have to be dealt with soon.


I'm also thinking of re-doing the lighting.

Originally Posted by MichMikeM:
Originally Posted by Jeff B. Haertlein:

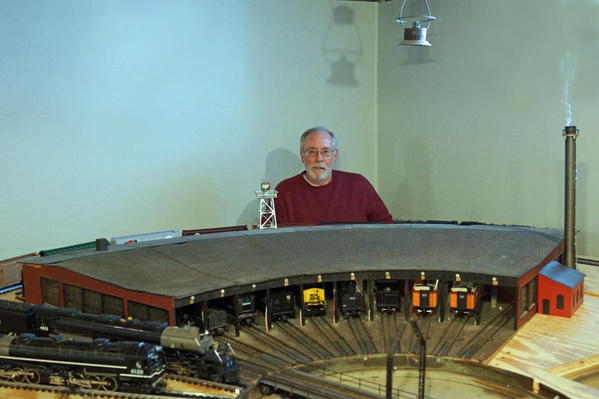
Worked on my roundhouse for a little while.

Layout Jeff and Roundhouse

Roundhouse at Milwaukee O Scale Club


Wow.  I think that roundhouse is as big as my entire layout.  What's the story behind the second, and I assume older, picture?

It looks as though I goofed up on my story line and captions. The roundhouse in the B&W picture, is the same roundhouse and turntable. It was built before 1940, for a 2-rail Club in Milwaukee Wisconsin, known as the Model Railroad Club of Milwaukee. The started at their present location in 1937, and still is active to this day!! I have not done a lot to the structure as I wish to keep it more as an artifact! We spiked down HO rail to act as my center rail. I ran a piece of stiff wire onto the table to do the same thing. When this roundhouse was first used, the layout was running on outside third rail.I originally bought the roundhouse and table back on March 2, 1970 from the Club, and is now finally installed on my new layout I am building, and is now totally operational. The table services a total of 26 tracks.


Hope this is found interesting.


Jeff

Originally Posted by scale rail:
Jeff the b/w picture is outside third rail. I would like to know more about it's history. Thanks don

Don: I think I goofed up on my comments/captions, so here it goes. The roundhouse and table in the B&W photo, is an old picture of the same. I have done very little to it, as I wish to keep it more as an artifact from a very old 2-rail O scale Club. The Club is located in Milwaukee Wisconsin, known as the Model Railroad Club of Milwaukee, and they officially opened up in 1937, and they are still an active Club and layout to this day. When the Club first operated, you are right, they ran as outside third rail. My roundhouse still has the "pegs" inside to carry the old third rail. At some point the Club was able to convert to 2-rail operation. Thus, the roundhouse and table were built before 1940, and I know this because of an early (1940) Kalmbach publication showing my structure on the Club layout, within it's pages. I purchased the house and table on March 2, 1970. I have now left Milwaukee, and after many more years, the house and table are finally installed, and operational on the layout I am building. I might also mention that it was this Club, that started to formulate "Standards" model railroading, and after a while, it became what we know as the NMRA. Thus, in 1935, the first NMRA Convention was held on Labor Day in Milwaukee Wiscosnin. All thanks to Club members such as A.C. Kalmbach, Wm. K. Walthers to name a couple. I hope this helps, but ask me more if you need anything at all, I'll try and answer as best as I can.  I would really like to know more myself about the house and table, but that history seems to be lost within the current Club as I still visit about once a year!! Would like more photos of it as well.   Jeff


Originally Posted by Kerrigan:
Starting with a large empty basement we were able to have the drop deiling and carpeting installed, and the tracklighting, before starting the framework construction.
Got lucky.


Yes, you were lucky. I can't count the number of times I've had materials bump into the rafters over the years. And carpet would have been destroyed by now, and there's still all the scenery left to do. I just spilled glue the other day. Actually, we just finished the last section of raised floor a couple months ago.


Funny story about the carpet that is in the trainroom. Back when the house was under construction, there was a dumpster in the driveway. One morning I found that some unscrupulous person had dumped a huge load of crappy used carpet on my lot. Instead of filling my dumpster, I adopted it for the trainroom. It was much better than bare concrete.


When life gives you lemons...

I didn't work on the new layout today but it's coming along. I did work on one of my little box cab electrics and almost finished. This is for my mining electric short line. The cab is brass and the running gear and frame are from a K-line S-2 switcher. The cab was a mess when I bought it. I replaced most of the hand rails, added snow plow and many more details. I still have to install windows, windshield wipers, paint the end of the air hoses red, interior cab and a few other details. The pantographs are the Milwaukee type made by Lionel. I will have two more small electrics for this line. Don't think I am going to need all three though. The others are the Westinghouse steeple cab type. The track in this photo is just sitting with no ballast and the overhead wire will be done in this section by next week.

The line in the background is the Milwaukee mainline. This little line will keep dropping down into a canyon to two or three mines. These electrics will pull stings of ore cars up to the mainline. Don

electric loco

Attachments

Images (1)
  • electric loco
Last edited by scale rail

Paul, good call. I have no idea what it is. To me it looks like one the many electrics that ran on the open pit copper mines. I think we are saying the same thing. Yes, that's how I got the idea for a mining short line. The BA&P was as your know the deciding factor to electrify the Milwaukee.

The body was a old brass shell made in Japan I think in the 50's or 60's. This short line is not part of the Milwaukee Road either. It will just feed ore to the line. There's a story here that will be in OGR later. The road is called the V&M line. Another part of the story. Don

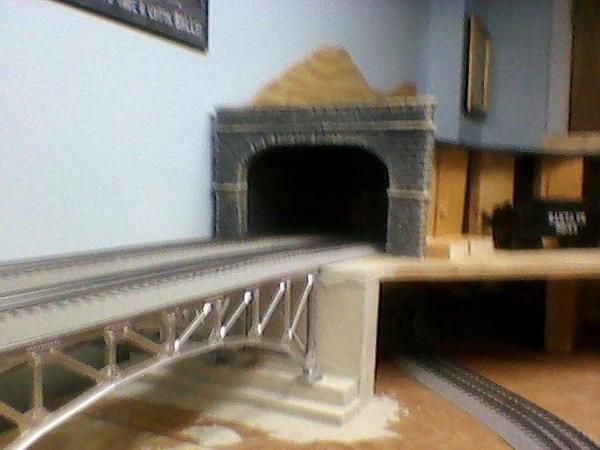
Recently I have been working on the scenery at the right hand end of my layout. I built a tunnel first and plan on building the mountain over it next. I am putting down the ground cover, streets and some trees. I am actually starting to really enjoy this new aspect of model railroading. My first two Lionel layouts were bare plywood.

Cobrabob.

NEW LAYOUT 161

NEW LAYOUT 163

NEW LAYOUT 162

Attachments

Images (3)
  • NEW LAYOUT 161
  • NEW LAYOUT 163
  • NEW LAYOUT 162

Today I ran through a train show...and picked up four Lionel flatcars to use at my

creosote plant, specifically to run into the retorts (which is on hold).  Cars had poles on them, 3, and one was a crane car to unload the others. Also found a power chassis for a planned steam coach or inspection engine (whichever I do first), and other items. 

Yesterday I made progress on the ghost town's crumbling general store...about ready to put trim on, paint it, and then roof it (partially, as there are holes).  I'd be afraid

to walk in that building...the roof looksl like a swaybacked horse...

Lots of maintenance work this weekend.  Pulled out the postwar engines 773, 736 and 2026 and lubed them up, replaced burnt out light bulbs, rewired several light pickups on the 2500 series passenger car trucks, replaced a spring in the 164 log loader and installed two new Yard lights.  As of this moment every engine, bulb, accessory and switch is working properly on the layout.  Three of the grandchildren stopped by and didn't break a thing....  LOL...


P1070142


P1070154


P1070156

Attachments

Images (3)
  • P1070142
  • P1070154
  • P1070156
Originally Posted by Wood:

Lots of maintenance work this weekend.  Pulled out the postwar engines 773, 736 and 2026 and lubed them up, replaced burnt out light bulbs, rewired several light pickups on the 2500 series passenger car trucks, replaced a spring in the 164 log loader and installed two new Yard lights.  As of this moment every engine, bulb, accessory and switch is working properly on the layout.  Three of the grandchildren stopped by and didn't break a thing....  LOL...


P1070142


P1070154


P1070156

Hi Mr. Wood (real name?): Very much like the looks of your layout. I see you've repainted some stuff in less toylike colors, such as the #352 Icing Station, etc. Like your use of the light towers also. Nice to see your layout.
Been lazy/burnt out the last couple days. Finally dragged myself downstairs tonight. The last sections of track on the helix and their wires are prepped. Gonna gather my tools and materials, and first thing tomorrow morning, I'm going in, and I'm not coming out til it's done!


Down comes the compass and into retirement it goes.

Hi Mr. Wood (real name?): Very much like the looks of your layout. I see you've repainted some stuff in less toylike colors, such as the #352 Icing Station, etc. Like your use of the light towers also. Nice to see your layout.


Thank you Virginian65....  I am not a long term member of this forum and I am amazed at the level of involvement and quality of information provided here.  I am trying to post some of my own efforts and am thankful for your feedback.  Yes, my given name is "Wood". 

While I am a car and train nut, with almost no interest in spectator sports, I did some

graduate work at last night's NCAA Champion U of L, so actually watched Petino hoist

the trophy, after applauding Michigan's previous win, because of a recent tour of the

Upper Peninsula.  And I did get paint on, and half the roof shingled (except for the holes) as miniscule progress on the ghost town store. 

I know some guys on here use that method.  do a search for roadways in scenery section. good luck.  Im about to tear mine down! Posted by trumptrain:

I'm new to the Forum.  This is a GREAT idea ... sharing with everyone our progress on our respective railroads.  My railroad's name is The Freestate Junction Railroad " a conduit line for all of Maryland's class 1 and short line railroads" during the transition era.


This week I wired all the track on the new Mountain Division ( The actual mountain is yet to be completed... and will be in the next few months hopefully ) which hosts a Bollman Truss Bridge.  I tested trains running on the  Mountain division.  All track work is fine.... no problems with derailments.  Two freinds helped wire my lower division mainline and also helped with the progress of my elevated trolly line.


Today I did a foam moch up of the mountain... just to get an idea of how it might look.

I put the last two pieces of track in place to complete the elevated trolly line. Still lacking the final screws for piers.... but it all looks good!  I went to Home Depot to buy more pink two inch foam.  Also bought some single roof shingles for making roads ... at $2.02 per shingle I can get lots of mileage out of a single shingle ... and they come in various colors too!


I'm looking forward to working on my layout tomorrow.  Actually "working" is not exactly what it is .... it's really creative play. :-)


Patrick W


Originally Posted by chester7:
Very impressive nice work! one question What is the pourpose for the long flex ply along the tracks?


Thanks Chad, nobody has ever asked about that before. That is a technique that I came up with many years ago, for use in areas that will be hidden. It serves as a bending form for Gargraves, and also provides for perfect and consistent spacing of multiple tracks. It is made up of two layers of Luan plywood and locks the track in place without screws. It is a little labor intensive to do all that kerf cutting for the curves, but the material isn't that expensive.

The ghost town store is done, and I am pleased...the fallen porch, swaybacked roof,

and general decline came out better than hoped.  This from a box of sticks kit for

which I substituted milled clapboard walls and used just modified plans and some stripwood. Think the complex will also get a saloon, hotel, or blacksmith shop, and station ruins, and hope to get photos up on here when done.

I did more benchwork.  And more of a "for my layout" vs "to my layout" I went to a large train show in Springfield OH. Approx 350 vendor tables. (they claim, i didn't count) I bought my first three cars. The New Haven to join other New Havens I have. The other two just because I like them. They are MTH Premier.

P4078488

P4078489

P4078490

Attachments

Images (3)
  • P4078488
  • P4078489
  • P4078490

Cleaned all the track today so I can test run tonight, started hanging skirting around the perimeter, all the ballast is done and 90% of the scenery. Still have to add to my town and build a temporary small village up on the mountain and temporary industrial area.....only 8 more days to go before Blissfield Railroad Days and open house.

clem

Finally was ready to start placing structures in the new business district. We designated the location of 11 pieces and now I have to wire them for lighting.


Also extended the waterway to accommodate the new grain mill. The Alex M. creation will look sensational in it's new home.


Installed the Flat Iron Building in my City area of the layout.


Finally did a drawing for the new pipeline that will run from the refinery to the loading station.


Pretty good day considering most of it I was away visiting client sites.

Today was planning and sketching...the nice thing about freelancing is that you can go

where your imagination takes you...deciding what buildings to go with...to complement

the completed ghost town country store...think hotel is out..too much real estate demanded for a credible building...blacksmith is out, as an abandoned gas station is appealing (and I have seen a few of those), and the theme is immediate Post-Depression.  But have started on the saloon...looking at milled siding,....clapboard on the store...so board and bat on the saloon?  Tarpaper rolls on the store roof, so rusty

corrugated metal on saloon?  Will have to use real metal to get it to look rolled up and

stripped by the wind.....Inselbrick was roofing shingle material stamped with mortar lines, colored red with white lines,  to look? like brick when put on the sides of buildings in the 1930's...(not found in the upscale parts of town)  Don't think any

of the brick papers or roofing shingles will accurately convey that effect.....Don't want

it to look like brick..want it to look like Inselbrick...which preceded aluminum siding

which preceded vinyl siding...


Today, I tore out and completely rebuilt the eastbound grade up and out of my lower level staging yard. It now has larger curves, better vertical transitions and a more even rise over the total run.


I learned a lot on the first attempt and decided that it would totally be worth the time to apply what I learned on a rebuild.


It's a vital part of the layout's operation and now it works brilliantly!

- RICH

Charlie will be happy to know the switchback is operational, not pretty but operational.  Just need to lay a little more track and do a little electrical and then clean clean and clean.  Will be ready one way or another for the meet at my house Saturday night.  17 have RSVP'd and a few more will probably come.

Dan

Just climbed out from a 4-hour stint under the layout putting together wires, figuring out where they used to go and doing upgrades as going along like dumping extra wires, installing barrier strips, labeling, labeling and more labeling ... getting closer!
Made a 8' umbilical cord today so I can pull the transformer cart out from under the layout - that took a LOT of new wire!
I feel your pain, Greg.
Seems like it goes on forever!
 
Originally Posted by NYCGreg68:

Kerrigan,

I recently added a small extension the front of my layout and had to do some panel work and move my ZW and CW80.  Panel re-work sucks.  I also moved terminal strips and had to move my 4 bricks.  not fun

Only put in an hour and a half today, but in that time, I managed to cut in that switch I mentioned a couple days ago. This was a long dreaded project, but once I got into it, it was rather fun and easy. Also got the two legs of the wye bent and ready to install.


Patrick is coming over tomorrow. I think we'll be working on bracing a couple sections of the upper deck, finishing the top of the bookshelf, and hanging more backdrop. I'll get back to trackwork on Saturday.

Back under the layout for another wiring session.

Hope to get power back to at least the two main lines today so I can finally run something!

Layout has been down since November for the dreaded turnout control panel relocation from the engine servicing facility expansion work.

And that has totally sucked; not being able to "play!"

I have been working on this for 3 weeks off and on this is for a lift out for a logging line that will allow me to walk into my layout no more duck under for this old boy.


my first attempt at making anything like this may not be dimensionally accurate but looks pretty good to me for my first attempt.


$oo


New Deck Girder Bridges 001

New Deck Girder Bridges 002

New Deck Girder Bridges 003

New Deck Girder Bridges 004

Add Reply

Post

OGR Publishing, Inc., 1310 Eastside Centre Ct, Suite 6, Mountain Home, AR 72653
800-980-OGRR (6477)
www.ogaugerr.com

×
×
×
×
Link copied to your clipboard.
×
×