...and thus is begins.
Happy for you, Mike!


|
|
...and thus is begins.
Happy for you, Mike!
p51 posted:...and thus is begins.
Happy for you, Mike!
Thanks Lee! It's going to be a slow go, but that's ok as long as it keeps moving forward!![]()
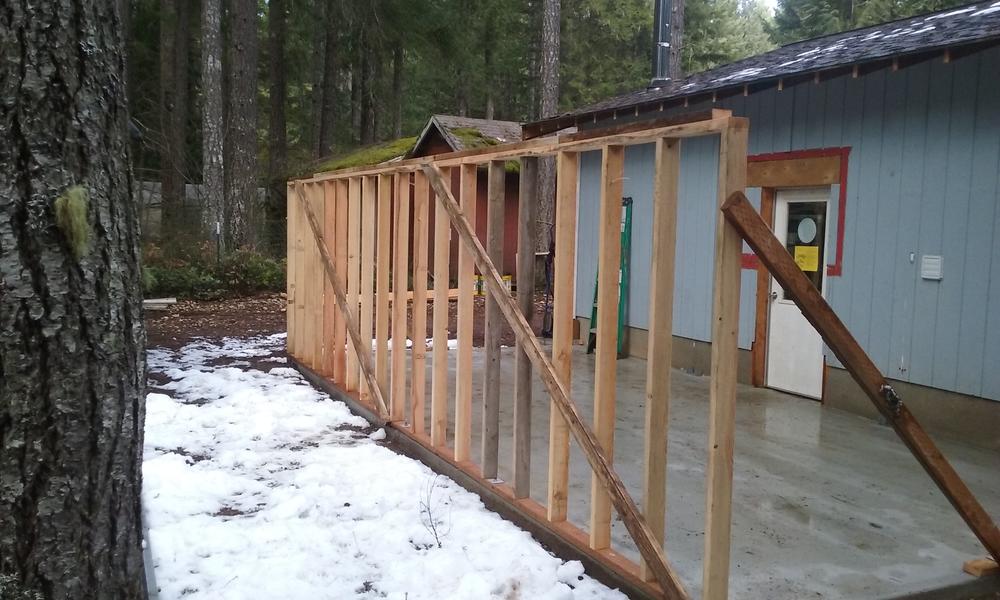
WOOO HOOOO MIKE!!! Awesome start! That's the long wall! Are you going to put a door in the addition? Or a window as a rear escape? I'd tie right into that roof and continue it at the same pitch!!! Look GREAT!!!
Jim
The Mike Room!! I can see the trains running! Congratulations!
Jim, I am going to tie into the roof, but have to change the pitch to 3/12. But I will make it work.
Thanks Mark!
Great start Mike. Glad the weather broke so you could start. You got the longest wall up first now the other two should go up in no time at all. Tonight I got two coats of sand color on the building front and one coat so far on the window and door By the time I finish this post I should be able to put a second coat of green on. The sign is going slow one cross bar at a time. Got three more to put on then I have to add the center support. Pics......Paul


mike g. posted:Nice work everyone! So the rain stopped for a little bit. So here is what I got done Bob, Mark, Jim and Paul2. You too Dad! LOL
It not much, but it is a start!
Awesome Mike!! Ooh-rah!
mike g. posted:Jim, I am going to tie into the roof, but have to change the pitch to 3/12. But I will make it work.
Thanks Mark!
COOL! and oh. Is that a woodstove chimney I see on the garage??? I may have asked before.
Jim
I cleaned. Will drill the holes for the switch controllers tomorrow and then we're done until I get the bug to do/add more. Will be nice to just run trains with the boys for awhile.
Got to admit, the Lionel Truck and Passenger Depots look too big against the truck and bus. Not sure what I will do about that. Maybe just go Plasticville with their smaller sized buildings.

Well I had to call it quits for the night. I got the window inserts glued in and got all the plastic for windows cut. Second coat of green on the windows. I was starting to glue the last of the cross bars on the sign and as I was looking at it something did not seem right. Well at least I found out before I finished. I was gluing the crossbars on the wrong side of the sign. I luck out and got the ones off without damaging the uprights. Tomorrow will be a new day and hopefully I will be more alert. Pics.....................Paul


briansilvermustang posted:Jushavnfun posted:This was on a layout a few hours ago, going to build new one
WOW !! you were busy today !
We will be glad to see what you build now!!
paul 2 posted:Well I had to call it quits for the night. I got the window inserts glued in and got all the plastic for windows cut. Second coat of green on the windows. I was starting to glue the last of the cross bars on the sign and as I was looking at it something did not seem right. Well at least I found out before I finished. I was gluing the crossbars on the wrong side of the sign. I luck out and got the ones off without damaging the uprights. Tomorrow will be a new day and hopefully I will be more alert. Pics.....................Paul
Looks good, Paul!! That was a close one, but I'm glad you caught the mistake before the glue set hard!
mike g. posted:It's going to be a slow go, but that's ok as long as it keeps moving forward!
Well, your timing is good. You must have noticed the birds are coming back and spring is right around the corner.
Your picked a great time to start, I think.
Worked on painting our cliff. T helped me put a coat of primer on the cliff face (wish I would have done two coats) and then started painting. Seems to look not too bad from a distance. Up close more work is needed, but its a work in progress! Waiting for more photos to download from my phone of the painting I did after work tonight.


Thaddeus posted:Worked on painting our cliff. T helped me put a coat of primer on the cliff face (wish I would have done two coats) and then started painting. Seems to look not too bad from a distance. Up close more work is needed, but its a work in progress! Waiting for more photos to download from my phone of the painting I did after work tonight.
The intensity with which T is working, to have a good result and to please you, is giving him memories of working with you, there, that will be a part of him for his entire life. The results of what you two accomplish together with the project will please you both, no doubt. We surely are looking at a "work in progress," one that will be on-going and last a very long time, sir. The results of such a co-effort are priceless.
I am sure you already know all that. However, I just could not resist offering you my applause and respect.
FrankM
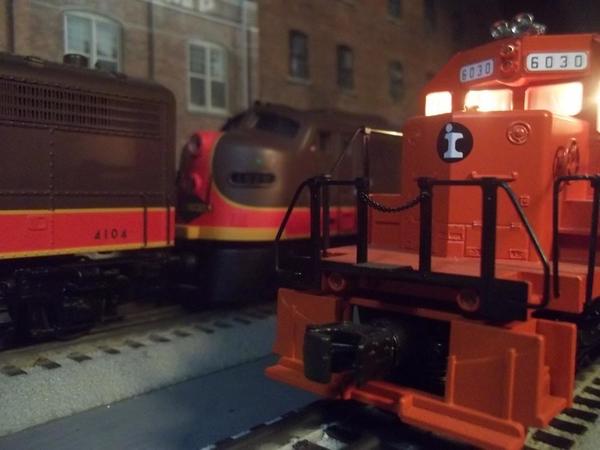
mike g. posted:

comin'round the bend...
getting closer Mike !!


Justhavnfun, WOW that sure is quite the undertaking! Good luck and cant wait to see what you come up with!![]()
Brian, another round of great pictures! Is the weather warming up back there yet?![]()
Jim, The stove pipe use to be for a wood stove, then my neighbor gave me a propane furnace so that's what it is for now. The wife want me to go back to wood to save money, I told here were saving money by me not getting injured moving, splitting, and stacking fire wood! LOL![]()
deuce, sound like a great plan! Kids and Trains, way to step up to the plate and be a great dad!![]()
Paul, your building is looing just wonderful! I am glad you were able to fix the sign in time!![]()
Last but not least, I would like to thank everyone for there encouragement on my single wall! It was nice to see something getting done and the funny part the wife was almost a excited as I was! LOL Thanks again!![]()
THADDEUS, your pics rekindle memories and the old ads from Lionel of father and son, or daughter building a railroad empire and enjoying quality time together. ................Paul
Lee,, thank you! I think your right about Spring, but I needs at least a week of dry weather so I can cut into the roof and tie in the new roof section!![]()
Thaddeus, the cliff is looking very nice is that the final color and do you plan on having something on top of it like a campers?![]()
FrankM, Well said, a lesson for everyone!![]()
LOL, thanks Brian! The only trains I hear right now are on here and in my dreams!![]()
Its funny, the wife says to me last night while laying in bed. Sure hope you get that train room done before you loose intrest in trains! I just laughed !![]()
![]()
Mike G it's gonna be great when your done! There comes a time in life when wood stoves, while inexpensive to fuel, with a renewable resource, just become impractical. Wood pellets may be easier to handle but probably aren't as cheap as cord wood.
mike g. posted:Its funny, the wife says to me last night while laying in bed. Sure hope you get that train room done before you loose intrest in trains! I just laughed !


YAA HOO!!!!!!!!!!
Great start Mike. You will be running trains before you know it.
Bob
Deuce posted:I cleaned. Will drill the holes for the switch controllers tomorrow and then we're done until I get the bug to do/add more. Will be nice to just run trains with the boys for awhile.
Got to admit, the Lionel Truck and Passenger Depots look too big against the truck and bus. Not sure what I will do about that. Maybe just go Plasticville with their smaller sized buildings.
Deuce. If I were to guess (purely speculation) the new looking trucks and bus may be 1/64th ... Kind of hard to judge in the picture. If you have any O scale folks, stand one up next to them. You really have it looking good!
Jim
mike g. posted:Justhavnfun, WOW that sure is quite the undertaking! Good luck and cant wait to see what you come up with!
Brian, another round of great pictures! Is the weather warming up back there yet?
Jim, The stove pipe use to be for a wood stove, then my neighbor gave me a propane furnace so that's what it is for now. The wife want me to go back to wood to save money, I told here were saving money by me not getting injured moving, splitting, and stacking fire wood! LOL
deuce, sound like a great plan! Kids and Trains, way to step up to the plate and be a great dad!
Paul, your building is looing just wonderful! I am glad you were able to fix the sign in time!
Last but not least, I would like to thank everyone for there encouragement on my single wall! It was nice to see something getting done and the funny part the wife was almost a excited as I was! LOL Thanks again!
Yeah propane is expensive. We switched from propane to natural gas here at work and cut out heating cost from 600-800 a month in the winter to 150-200. I use a stove at home to curb the cost of a heat pump. Had a nice fire stoked up in it last night! Like feeding a steam engine!
Jim
RSJB18 posted:
YAA HOO!!!!!!!!!!
Great start Mike. You will be running trains before you know it.
Bob
Thanks Bob, I have the truss boards, just need it to be dry so I can cut into the roof! Soon I hope! LOL![]()
carsntrains posted:mike g. posted:Justhavnfun, WOW that sure is quite the undertaking! Good luck and cant wait to see what you come up with!
Brian, another round of great pictures! Is the weather warming up back there yet?
Jim, The stove pipe use to be for a wood stove, then my neighbor gave me a propane furnace so that's what it is for now. The wife want me to go back to wood to save money, I told here were saving money by me not getting injured moving, splitting, and stacking fire wood! LOL
deuce, sound like a great plan! Kids and Trains, way to step up to the plate and be a great dad!
Paul, your building is looing just wonderful! I am glad you were able to fix the sign in time!
Last but not least, I would like to thank everyone for there encouragement on my single wall! It was nice to see something getting done and the funny part the wife was almost a excited as I was! LOL Thanks again!
Yeah propane is expensive. We switched from propane to natural gas here at work and cut out heating cost from 600-800 a month in the winter to 150-200. I use a stove at home to curb the cost of a heat pump. Had a nice fire stoked up in it last night! Like feeding a steam engine!
Jim
A friend of mine put in a pellet stove with an auto-feeder a couple of years ago. He swears by it. I've got nat gas hot-water heat in my house. Nothing to do but turn the thermostat on. ![]()
mike g. posted:RSJB18 posted:
YAA HOO!!!!!!!!!!
Great start Mike. You will be running trains before you know it.
Bob
Thanks Bob, I have the truss boards, just need it to be dry so I can cut into the roof! Soon I hope! LOL
Now,thats what I call a train room !! Looking great Mike..
carsntrains posted:mike g. posted:Justhavnfun, WOW that sure is quite the undertaking! Good luck and cant wait to see what you come up with!
Brian, another round of great pictures! Is the weather warming up back there yet?
Jim, The stove pipe use to be for a wood stove, then my neighbor gave me a propane furnace so that's what it is for now. The wife want me to go back to wood to save money, I told here were saving money by me not getting injured moving, splitting, and stacking fire wood! LOL
deuce, sound like a great plan! Kids and Trains, way to step up to the plate and be a great dad!
Paul, your building is looing just wonderful! I am glad you were able to fix the sign in time!
Last but not least, I would like to thank everyone for there encouragement on my single wall! It was nice to see something getting done and the funny part the wife was almost a excited as I was! LOL Thanks again!
Yeah propane is expensive. We switched from propane to natural gas here at work and cut out heating cost from 600-800 a month in the winter to 150-200. I use a stove at home to curb the cost of a heat pump. Had a nice fire stoked up in it last night! Like feeding a steam engine!
Jim
I know what you mean Jim, the problem we have here is there is no natural gas. Plus it only cost me $150 to run it during the winter. Might be less if I had a bigger tank, but I don't know.![]()
carsntrains posted:Deuce posted:I cleaned. Will drill the holes for the switch controllers tomorrow and then we're done until I get the bug to do/add more. Will be nice to just run trains with the boys for awhile.
Got to admit, the Lionel Truck and Passenger Depots look too big against the truck and bus. Not sure what I will do about that. Maybe just go Plasticville with their smaller sized buildings.
Deuce. If I were to guess (purely speculation) the new looking trucks and bus may be 1/64th ... Kind of hard to judge in the picture. If you have any O scale folks, stand one up next to them. You really have it looking good!
Jim
Jim,
Thanks. As a first for everything, I'm pretty happy with the way it looks. As for the scale stuff ... the truck is Lionel and the bus is Corgi. Both say 1:50 scale on their respective boxes. I dunno. Something is either too big or too small. I have a Plasticville Union Station that I might break out to replace the Lionel passenger station. I have some extra Just Plug LED's, so if I line the inside of the Union Station with some tin foil, I could light it up and I think it might look better on that side of the layout. Of course, the Marx railroad sign is out of proportion too ... but I like it, so it stays. And with an HO tower at the far end, I guess it doesn't really matter much ... I just need to keep certain things separate from others I suppose. I doubt my son will care. My goal is to build a small platform where the remotes are right now. That will be for the boxes and barrels for loading/unloading gondolas. He does like to do that, so giving him a corner where he can handle all of that will be good and should keep him happy.
I have some O scale folks on the way. It'll be interesting to see how they line up with everything too. Honestly, I don't know if I'll ever get around to detailing my layout like a few of the members here ... who are way more gifted than I ... so I should probably just throw stuff on the layout and just call it a day. LOL.
cabinet Bob posted:mike g. posted:RSJB18 posted:
YAA HOO!!!!!!!!!!
Great start Mike. You will be running trains before you know it.
Bob
Thanks Bob, I have the truss boards, just need it to be dry so I can cut into the roof! Soon I hope! LOL
Now,thats what I call a train room !! Looking great Mike..
LOL Bob, I have to keep reminding the wife that! She said I should put a roll up door on one end so I can get big things in there easier. I told her all the train stuff I have will fit threw the walk threw door from the garage! ![]()
mike g. posted:Justhavnfun, WOW that sure is quite the undertaking! Good luck and cant wait to see what you come up with!
Brian, another round of great pictures! Is the weather warming up back there yet?
Jim, The stove pipe use to be for a wood stove, then my neighbor gave me a propane furnace so that's what it is for now. The wife want me to go back to wood to save money, I told here were saving money by me not getting injured moving, splitting, and stacking fire wood! LOL
deuce, sound like a great plan! Kids and Trains, way to step up to the plate and be a great dad!
Paul, your building is looing just wonderful! I am glad you were able to fix the sign in time!
Last but not least, I would like to thank everyone for there encouragement on my single wall! It was nice to see something getting done and the funny part the wife was almost a excited as I was! LOL Thanks again!
Mike, yes forget the wood! even my die hard brother-in-law, who is 7 years younger than me, so he is 54 now, decided it was healthier to stop using wood to heat with and put in a heat pump last year!
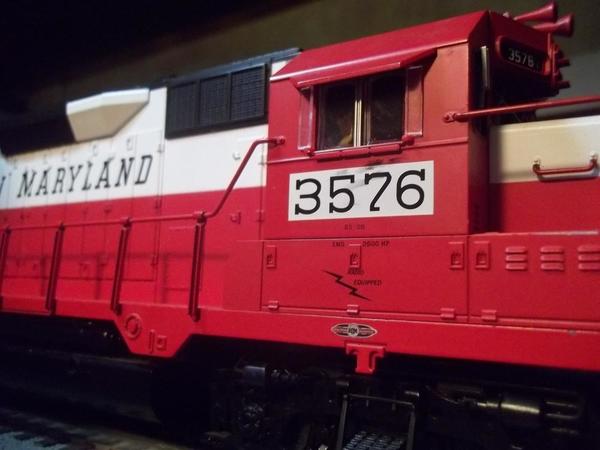
Continued servicing and cleaning my new to me GP-9. The commutator on the motor was so bad that the motor hardy turned at all. Runs good now just gotta fine tune the tension on the springs for the brushes a little.
Bob

Planted about 2 dozen trees on my mountain. Now I have to order more.


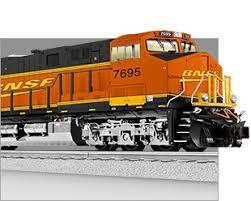
Nice Brian, but I have to ask. Don't you have any BNSF stuff?![]()
![]()
Looks great Brother Mike , I envy you! One question though, where will my room be in the addition when I come to visit for 2 or 3 months at a time? LOL
here is some of them Mike...![]()
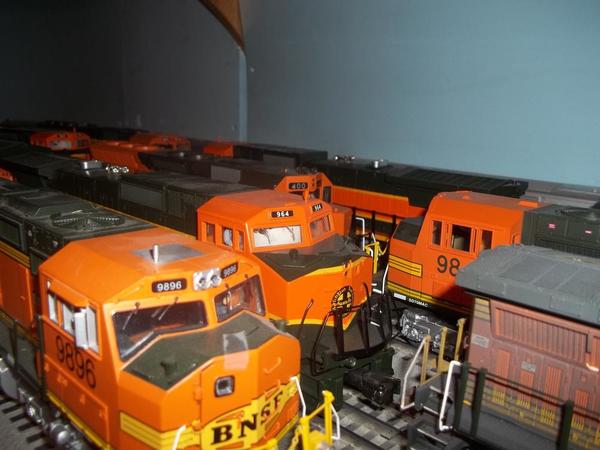
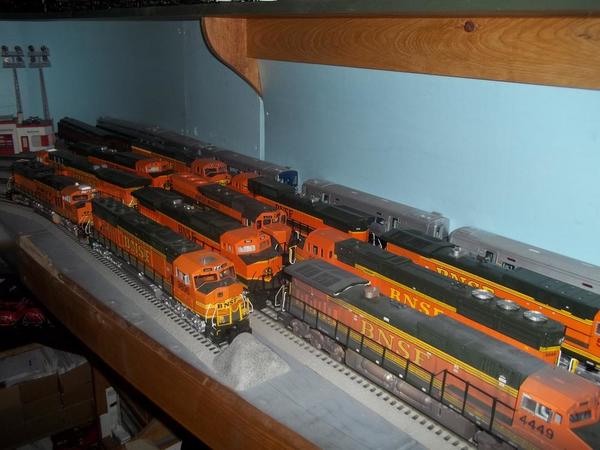

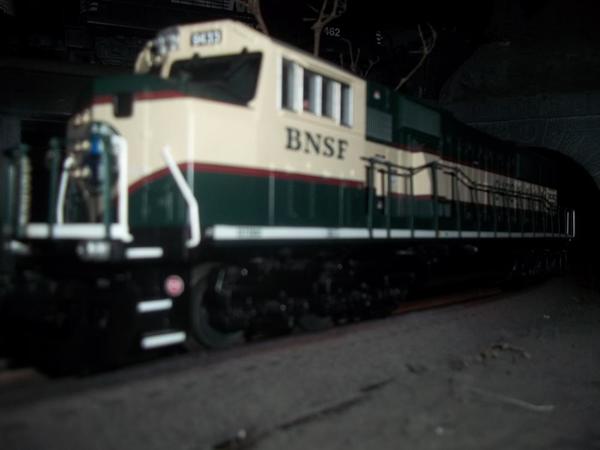


Well I guess that answers that question! LOL![]()
Mike, I think the oldest brother ( me ) should stay first with you. And because I am a frugal person. I don't need a room. That just takes away from the train money. I can sleep under the train table. LOL My package came from Scenic Express. I ordered a few things but the door was the most important part. Well it did not match up with the opening. It was a bit short for the opening. So rather then go shopping to Grandt for a door I took some balsa wood and cut it down to make a header over the door. Glued it in placed and got a first coat on it. Got the window and door glass glued into place too. Then with a little hesitation in my walk I went over and started re doing the frame for the sign. Made totally sure I was doing the correct side this time. It will just probably take the rest of the afternoon to do it. I have to let each cross bar dry before attempting the next one. But while down there I got a load of Laundry done. Pics............Paul


Deuce posted:Deuce posted:I cleaned. Will drill the holes for the switch controllers tomorrow and then we're done until I get the bug to do/add more. Will be nice to just run trains with the boys for awhile.
Got to admit, the Lionel Truck and Passenger Depots look too big against the truck and bus. Not sure what I will do about that. Maybe just go Plasticville with their smaller sized buildings.
As for the scale stuff ... the truck is Lionel and the bus is Corgi. Both say 1:50 scale on their respective boxes. I dunno. Something is either too big or too small.
Deuce;
I have a pair of those Lionel passenger platforms as well as several scale ones from Crescent Locomotive Works... the Lionel are definitely not to scale!!!
mike g. posted:Well I guess that answers that question! LOL
Ask a silly question...
Playtrains and Paul, if you look at the picture you will see a door right in the middle, There is plenty of room threw that door for both of you! Its a nice 24' X 24' room. It has heat, TV, a small fridge full of beer, a coffee maker for in the AM, a microwave to heat food up and most of all it has a bathroom! Of course you will have to share it with the wife's car!![]()
First come, first served. Does anyone want this AF station for kitbashing or repainting.
Great shape except for all the flaking paint. I just want it out of the way. Just pay shipping,
Should be about 15 bucks priority.
John
mike g. posted:Playtrains and Paul, if you look at the picture you will see a door right in the middle, There is plenty of room threw that door for both of you! Its a nice 24' X 24' room. It has heat, TV, a small fridge full of beer, a coffee maker for in the AM, a microwave to heat food up and most of all it has a bathroom! Of course you will have to share it with the wife's car!


I'm ready to go. ![]()


I like the beer, coffee carrier ![]()

Apples55 posted:Deuce posted:Deuce posted:I cleaned. Will drill the holes for the switch controllers tomorrow and then we're done until I get the bug to do/add more. Will be nice to just run trains with the boys for awhile.
Got to admit, the Lionel Truck and Passenger Depots look too big against the truck and bus. Not sure what I will do about that. Maybe just go Plasticville with their smaller sized buildings.
As for the scale stuff ... the truck is Lionel and the bus is Corgi. Both say 1:50 scale on their respective boxes. I dunno. Something is either too big or too small.
Deuce;
I have a pair of those Lionel passenger platforms as well as several scale ones from Crescent Locomotive Works... the Lionel are definitely not to scale!!!
Yeah but look at the difference in size between the bus, trucks, and say the caboose?? A six foot tall person in O scale is 1.5 inches tall. The photo could be misleading. But after seeing a standard semi trailer is about 14 feet tall. The answer is in the measuring tape. The trailer should be about 3.5 inches tall in 1:48 right?
Jim
Thought I was done with getting packages for the day but I was wrong but that is good. My stuff came from Waytek Electrical. Wish my switches would of come today. During the day of posting I took time to take the plunge and I ordered the Niagara. So before I unloaded the dryer I got the window and door glued into place. First coat of green on the back door and I managed to get two crossbars on. I'll let them dry real good before attempting to do more. Pics.............Paul


carsntrains posted:Apples55 posted:Deuce posted:Deuce posted:I cleaned. Will drill the holes for the switch controllers tomorrow and then we're done until I get the bug to do/add more. Will be nice to just run trains with the boys for awhile.
Got to admit, the Lionel Truck and Passenger Depots look too big against the truck and bus. Not sure what I will do about that. Maybe just go Plasticville with their smaller sized buildings.
As for the scale stuff ... the truck is Lionel and the bus is Corgi. Both say 1:50 scale on their respective boxes. I dunno. Something is either too big or too small.
Deuce;
I have a pair of those Lionel passenger platforms as well as several scale ones from Crescent Locomotive Works... the Lionel are definitely not to scale!!!
Yeah but look at the difference in size between the bus, trucks, and say the caboose?? A six foot tall person in O scale is 1.5 inches tall. The photo could be misleading. But after seeing a standard semi trailer is about 14 feet tall. The answer is in the measuring tape. The trailer should be about 3.5 inches tall in 1:48 right?
Jim
https://ogrforum.ogaugerr.com/...-andamp-mth-trailers
General consensus is that they're too small. I thought the box said 1:50, I'll check when I get home. I know the Corgi's are marketed as being 1:50. I have a couple of 1:43 scale trucks and they appear too big ... too big to put on the layout. I guess I'll just live with the 1:50-not-1:50 scale trucks and buses I've acquired.
ETA: Seems the K-Line's are larger. I'm on the hunt for a few on eBay. Will see if they are, and if so ... will throw the Lionel's on the bay to break even.
Paul,
If you move the washer and dryer out to the garage, you'd have more room for trains!
Deuce posted:carsntrains posted:Apples55 posted:Deuce posted:Deuce posted:I cleaned. Will drill the holes for the switch controllers tomorrow and then we're done until I get the bug to do/add more. Will be nice to just run trains with the boys for awhile.
Got to admit, the Lionel Truck and Passenger Depots look too big against the truck and bus. Not sure what I will do about that. Maybe just go Plasticville with their smaller sized buildings.
As for the scale stuff ... the truck is Lionel and the bus is Corgi. Both say 1:50 scale on their respective boxes. I dunno. Something is either too big or too small.
Deuce;
I have a pair of those Lionel passenger platforms as well as several scale ones from Crescent Locomotive Works... the Lionel are definitely not to scale!!!
Yeah but look at the difference in size between the bus, trucks, and say the caboose?? A six foot tall person in O scale is 1.5 inches tall. The photo could be misleading. But after seeing a standard semi trailer is about 14 feet tall. The answer is in the measuring tape. The trailer should be about 3.5 inches tall in 1:48 right?
Jim
https://ogrforum.ogaugerr.com/...-andamp-mth-trailers
General consensus is that they're too small. I thought the box said 1:50, I'll check when I get home. I know the Corgi's are marketed as being 1:50. I have a couple of 1:43 scale trucks and they appear too big ... too big to put on the layout. I guess I'll just live with the 1:50-not-1:50 scale trucks and buses I've acquired.
ETA: Seems the K-Line's are larger. I'm on the hunt for a few on eBay. Will see if they are, and if so ... will throw the Lionel's on the bay to break even.
Deuce if you would please let me know how tall those trailers are. To see if my eyes are wrong lol. I'm not scale crazy at all.. I use 1:43 cars and my O gauge people fit in them perfectly! And I have some 1:48 army jeeps that look fine with them.
Jim
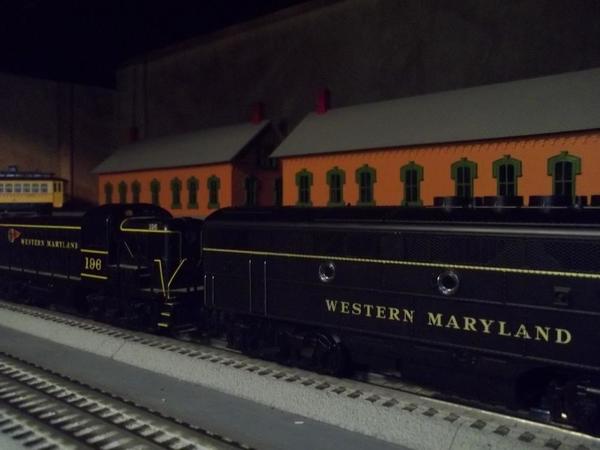
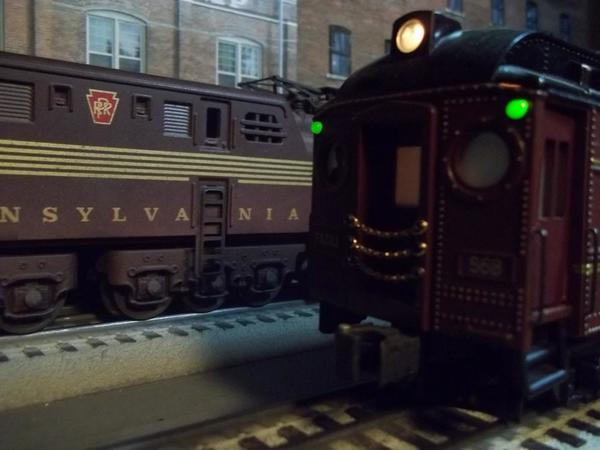
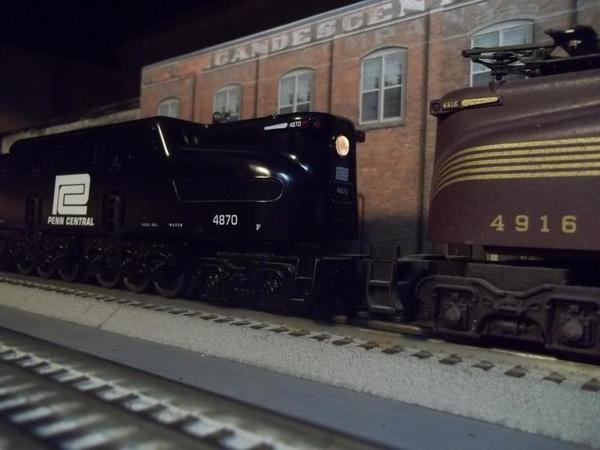
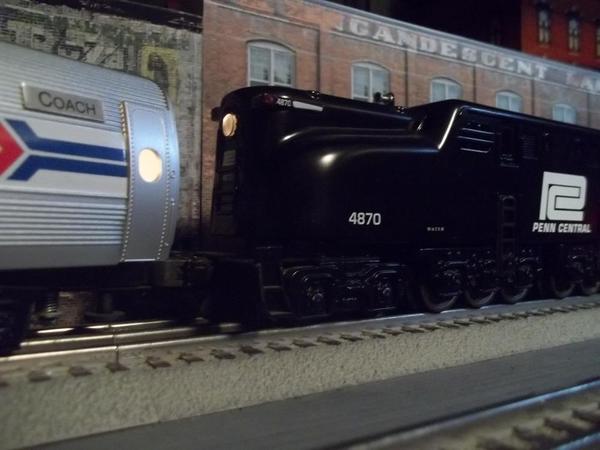
briansilvermustang posted:mike g. posted:
comin'round the bend...
getting closer Mike !!
It's the Orange Blossom Special
Bringin' my baby back....
Not the Orange Blossom Special Bro, I 'm flying in! LOL
COOL JHZ... Is that orange and black engine a Halloween train??
Jim
beardog posted:First come, first served. Does anyone want this AF station for kitbashing or repainting.
Great shape except for all the flaking paint. I just want it out of the way. Just pay shipping,
Should be about 15 bucks priority.
John
Where's the pantograph go? ![]()
jhz563 posted:Ran some trains with the kids tonight- always an adventure 😀
D'awww! ![]()
Mitch
is that a yes mitch? gi raff pen???
might have some flamingo poop in it
JD,
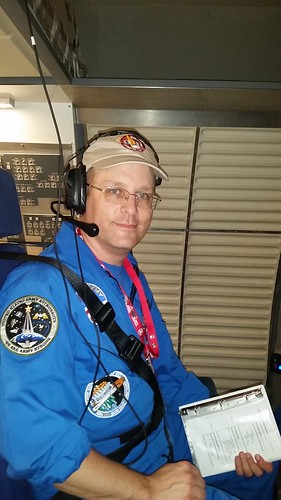
Installed a Display Shelf for my SF and NASA Switchers on the Front of the Fire Place Mantle, in the Pine Creek Train Room.
PCRR/Dave


I spent an hour putting a new rubber band in my Lionel submarine lol UGGGGGGGG LOL
Jim
beardog posted:is that a yes mitch? gi raff pen???
beardog posted:might have some flamingo poop in it
Why not? I'm a sucker for strays... ![]()
Drop me an email note! ![]()
Mitch
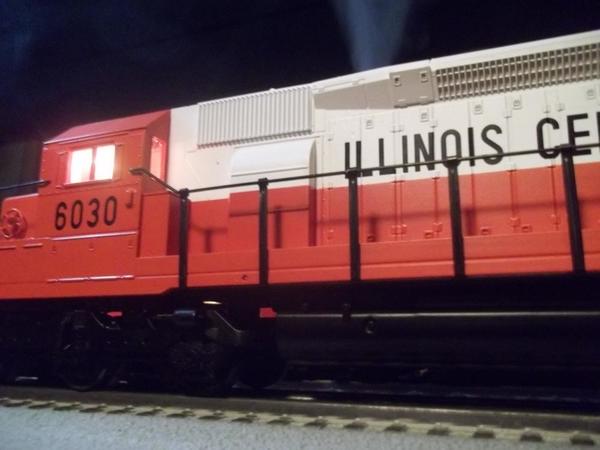
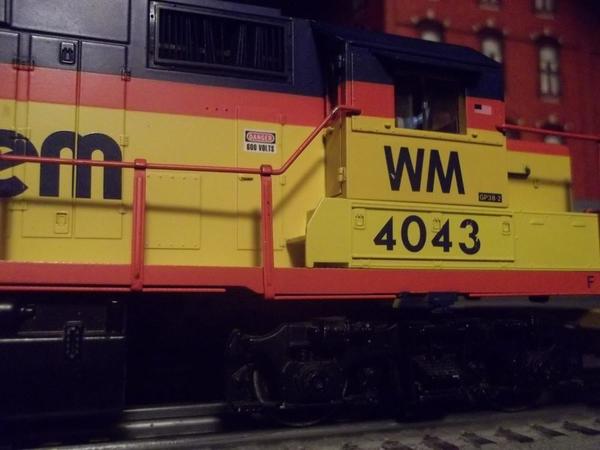
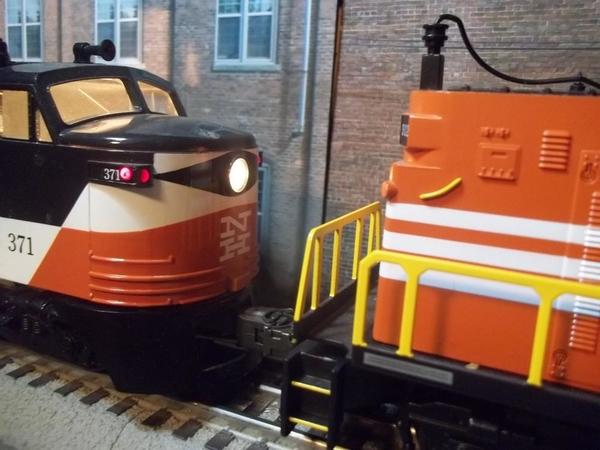
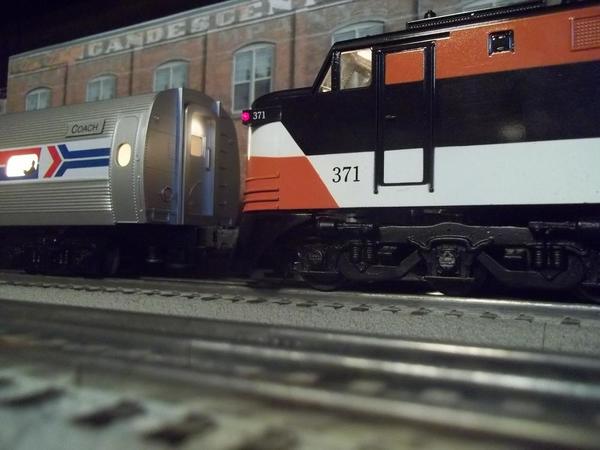
carsntrains posted:COOL JHZ... Is that orange and black engine a Halloween train??
Jim
Yes it is. It’s the LC+ mikado from last year. I built a small Halloween display layout last year with that engine as one of the initial inspirations. I am pretty happy a matching caboose was cataloged this year.
Ran some more trains and added trim to the basement/train room.
M. Mitchell Marmel posted:beardog posted:is that a yes mitch? gi raff pen???
beardog posted:might have some flamingo poop in it
Why not? I'm a sucker for strays...

Drop me an email note!
Mitch
I'd check with Fortesque and Norma B first, Mitch. They will probably want to check with OSHA to insure that the flaking paint doesn't contain lead which would place the staff in harm's way ![]()
![]()
![]()
carsntrains posted:Deuce posted:carsntrains posted:Apples55 posted:Deuce posted:Deuce posted:I cleaned. Will drill the holes for the switch controllers tomorrow and then we're done until I get the bug to do/add more. Will be nice to just run trains with the boys for awhile.
Got to admit, the Lionel Truck and Passenger Depots look too big against the truck and bus. Not sure what I will do about that. Maybe just go Plasticville with their smaller sized buildings.
As for the scale stuff ... the truck is Lionel and the bus is Corgi. Both say 1:50 scale on their respective boxes. I dunno. Something is either too big or too small.
Deuce;
I have a pair of those Lionel passenger platforms as well as several scale ones from Crescent Locomotive Works... the Lionel are definitely not to scale!!!
Yeah but look at the difference in size between the bus, trucks, and say the caboose?? A six foot tall person in O scale is 1.5 inches tall. The photo could be misleading. But after seeing a standard semi trailer is about 14 feet tall. The answer is in the measuring tape. The trailer should be about 3.5 inches tall in 1:48 right?
Jim
https://ogrforum.ogaugerr.com/...-andamp-mth-trailers
General consensus is that they're too small. I thought the box said 1:50, I'll check when I get home. I know the Corgi's are marketed as being 1:50. I have a couple of 1:43 scale trucks and they appear too big ... too big to put on the layout. I guess I'll just live with the 1:50-not-1:50 scale trucks and buses I've acquired.
ETA: Seems the K-Line's are larger. I'm on the hunt for a few on eBay. Will see if they are, and if so ... will throw the Lionel's on the bay to break even.
Deuce if you would please let me know how tall those trailers are. To see if my eyes are wrong lol. I'm not scale crazy at all.. I use 1:43 cars and my O gauge people fit in them perfectly! And I have some 1:48 army jeeps that look fine with them.
Jim
Jim,
The top of the cab comes in at 1.75". Top of the trailer is under 3".

I wired the switches and also made and painted markers for each. Will do the same for the uncoupler.

Pine Creek Railroad posted:
You're combining two loves of mine, locomotives and NASA!
I got the first color painted on the brewery brick. It still needs to be darkened up and aged yet and the loading dock doors and windows still need to get painted before glass and Duratran print/ light box gets installed behind it.

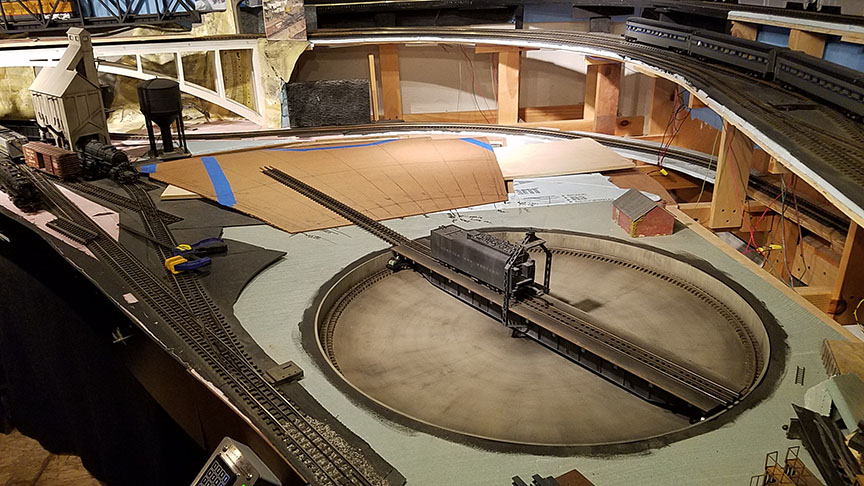
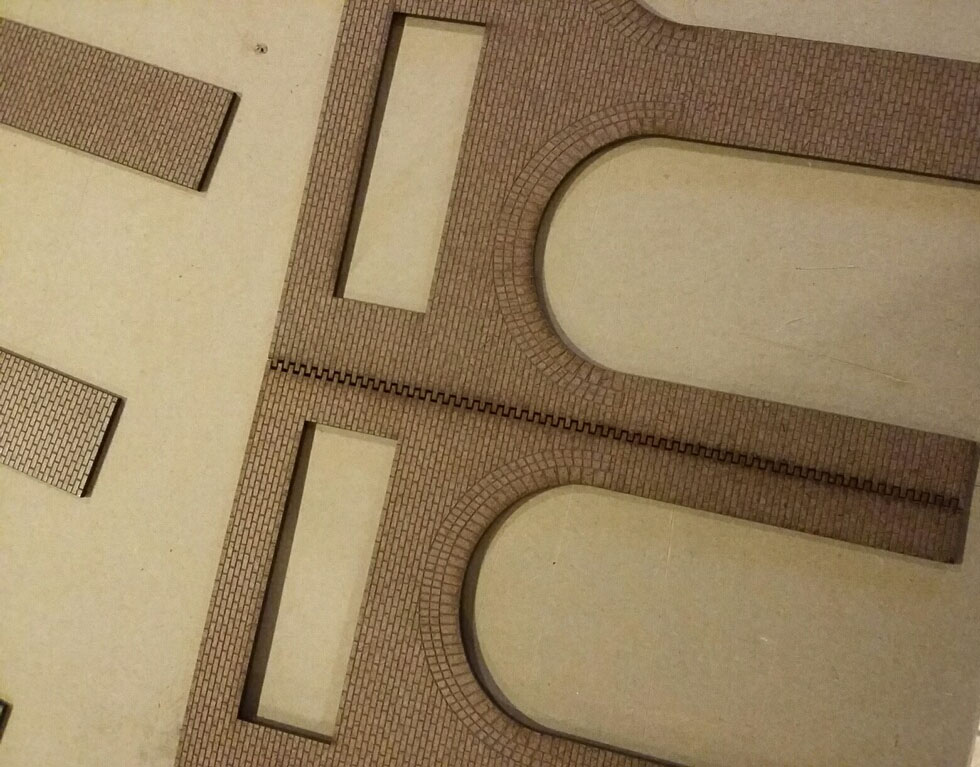
Tonight I also routed out the rail groves in my roundhouse base. One oops to start out, due to the fixture I was using to set straight edge wasn't correct spacing
as I was told. Anyway a little wood filler and paint and nobody will ever know ( except for the entire forum![]() ) The Mianne lift to go under the RH base will be arriving in a couple of days, Hooray! So making progress.
) The Mianne lift to go under the RH base will be arriving in a couple of days, Hooray! So making progress.
Al, Brewery is coming out great. The Iroquois sign nailed it. What color did you use for the brick..........Paul
Lee,
Glad you liked the NASA Space Shuttle Simulator, and had a good time. I have a very nice NASA Train, I hope to have running as I complete the new Train Room. I will make sure you get to see some of the NASA O Gauge Train here on the OGR.
PCRR/Dave

Lee each of us Sr NASA Engineers received a Presidential 1st Shuttle Flight Award with Young and Crippens personal thanks, a piece of the actual Columbia Space Shuttle, made into a NASA Coin affixed to it. The award is one of my prize possessions, shown here with my 263E Tin Plate Train, I thought you might like to see it, because of your interest in both NASA and Trains.

paul 2 posted:Al, Brewery is coming out great. The Iroquois sign nailed it. What color did you use for the brick..........Paul
Thanks Paul. I used a cheap acrylic called Light brown which is close in color to the other paint which was red iron oxide which looked more orange.
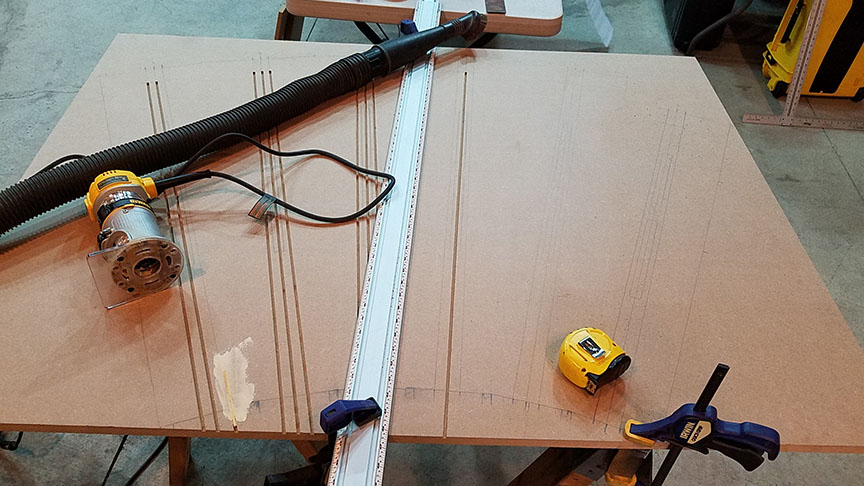
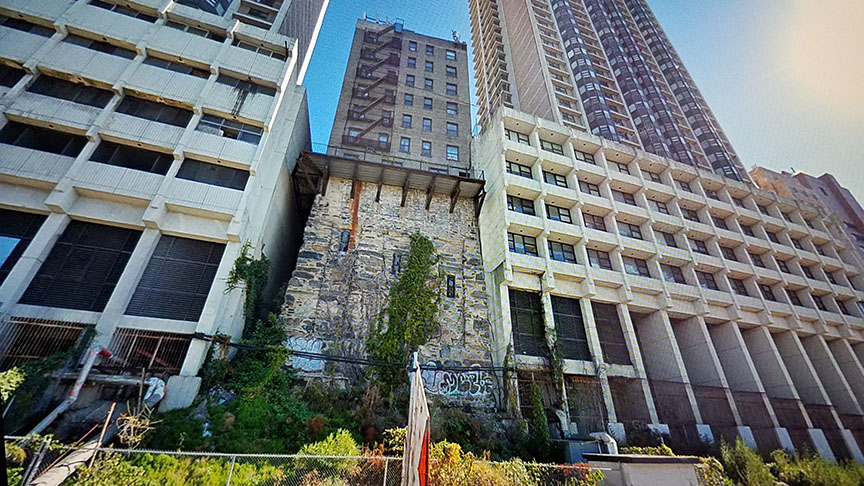
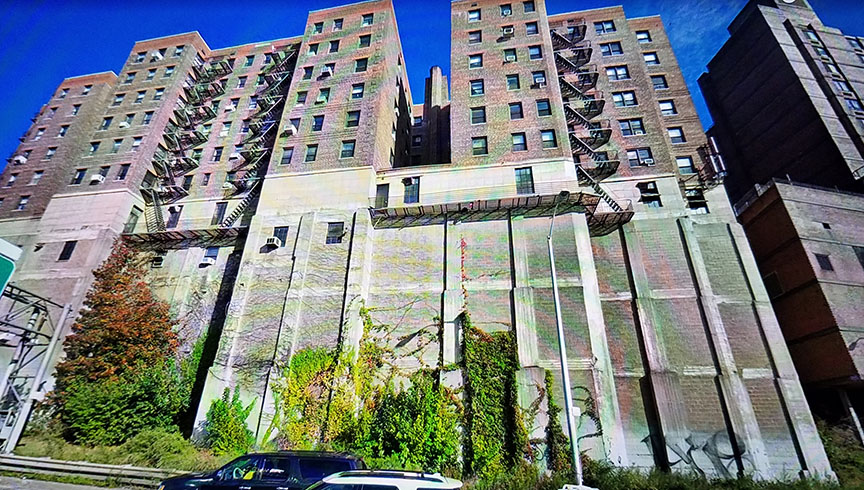
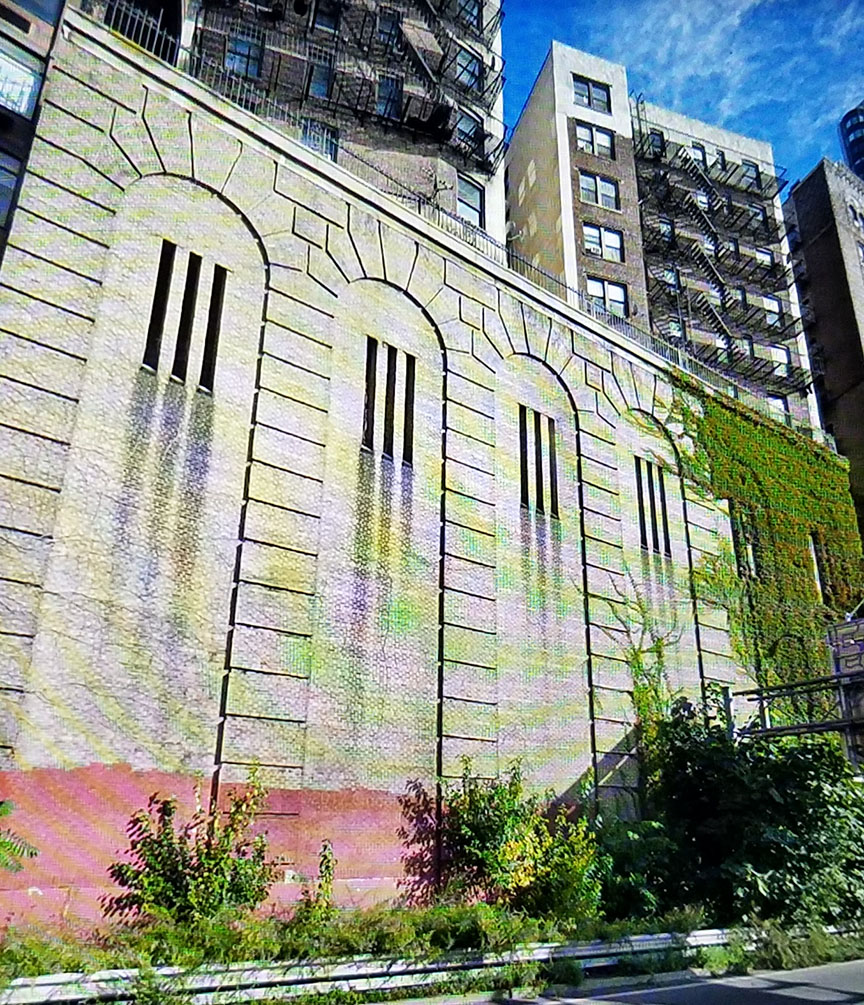
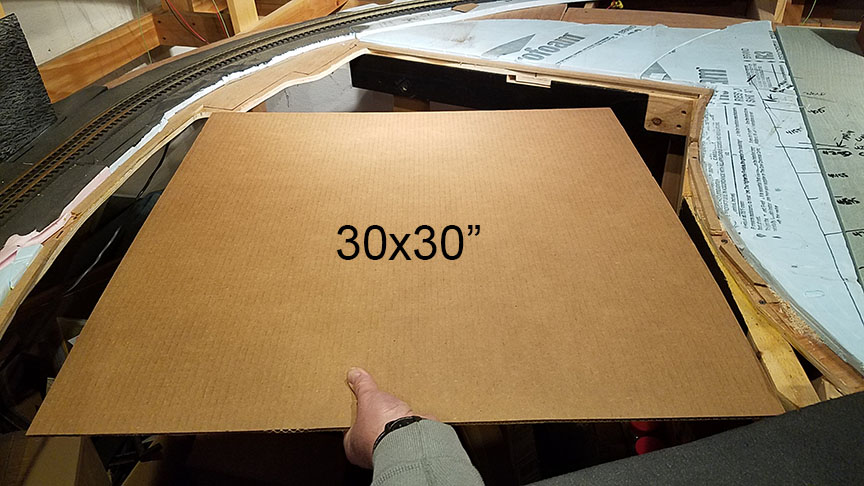
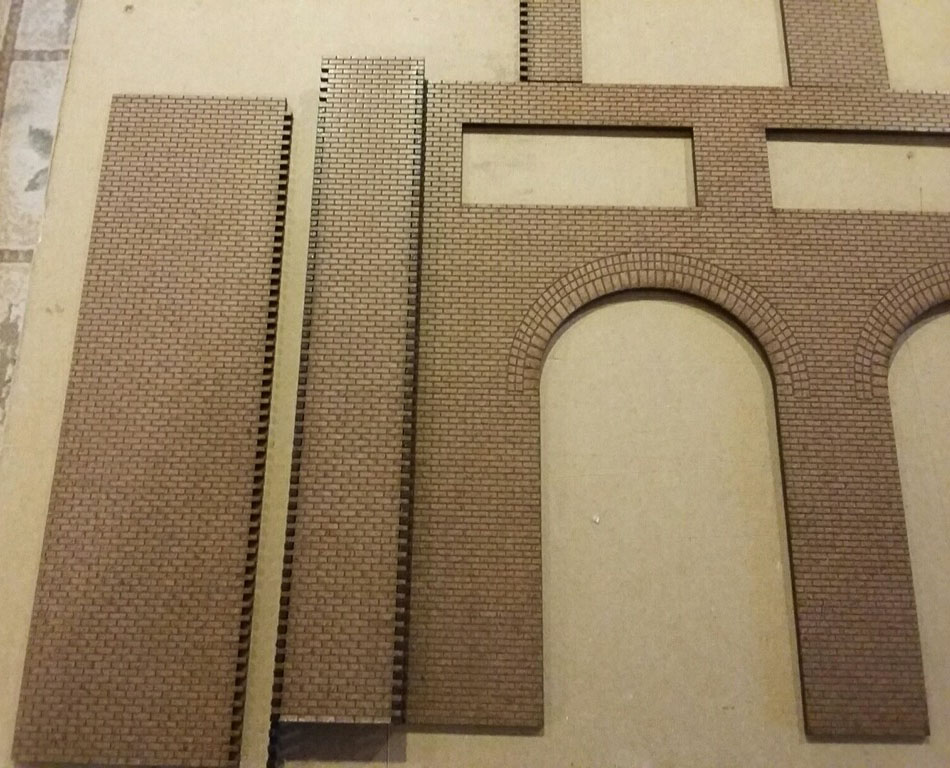
As to the photos I posted over the weekend of the city level plywood. Here are some photos to give you guys an idea of how I am handling the edges.
In this photo, I have my 2nd level yard storage under the city
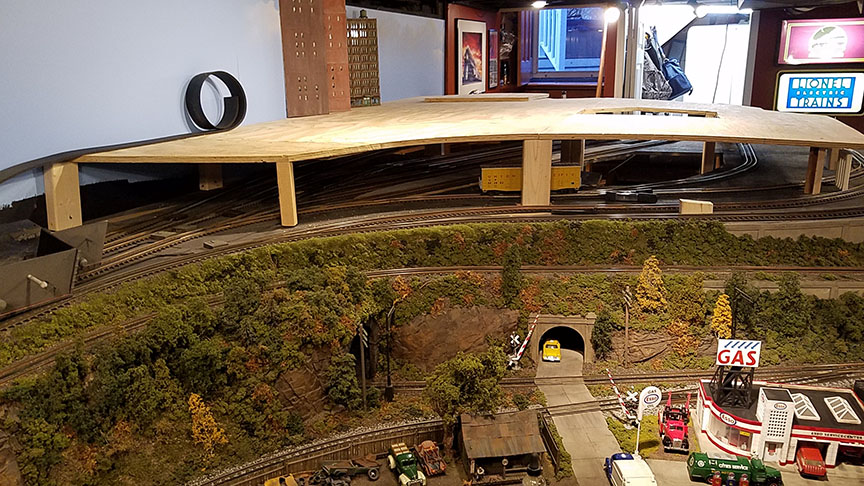
In order to hide it from view but still see the trains from this view. I am adding this kind of arched wall, but with some open arches to see though.
This will run from 2x2 support post on left side for 5 feet to about where the Lionel sign is in the photo. I think the wall will be a grayish brick.

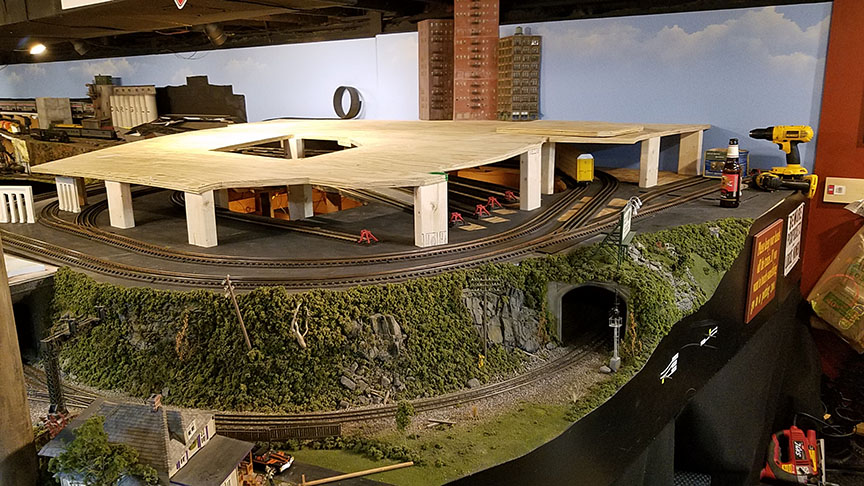
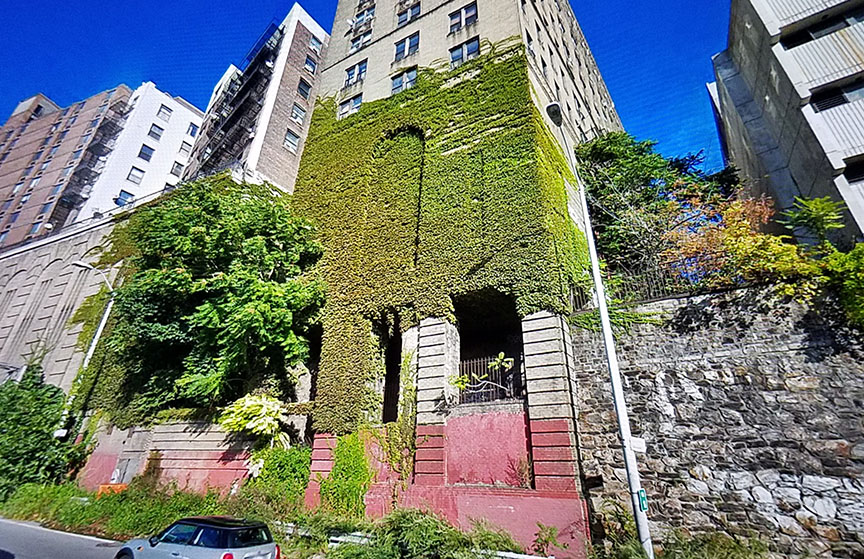
In this photo I plan to have about three different buildings on 3rd level 2 of them will get foundation like the reference photos here . Where the yellow auto rack car is on the track under the 3rd level there is going to be a double tunnel portal.


Al since you're routing out grooves for the rails are you laying rail in the grooves or will the roundhouse be a static display where grooves allow flanges?
CSX Al posted:paul 2 posted:Al, Brewery is coming out great. The Iroquois sign nailed it. What color did you use for the brick..........Paul
Thanks Paul. I used a cheap acrylic called Light brown which is close in color to the other paint which was red iron oxide which looked more orange.
As to the photos I posted over the weekend of the city level plywood. Here are some photos to give you guys an idea of how I am handling the edges.
In this photo, I have my 2nd level yard storage under the city
In order to hide it from view but still see the trains from this view. I am adding this kind of arched wall, but with some open arches to see though.
This will run from 2x2 support post on left side for 5 feet to about where the Lionel sign is in the photo. I think the wall will be a grayish brick.
Al- the brewery looks great. I like the third level too. When you can't go out, go up, I always say.
Bob
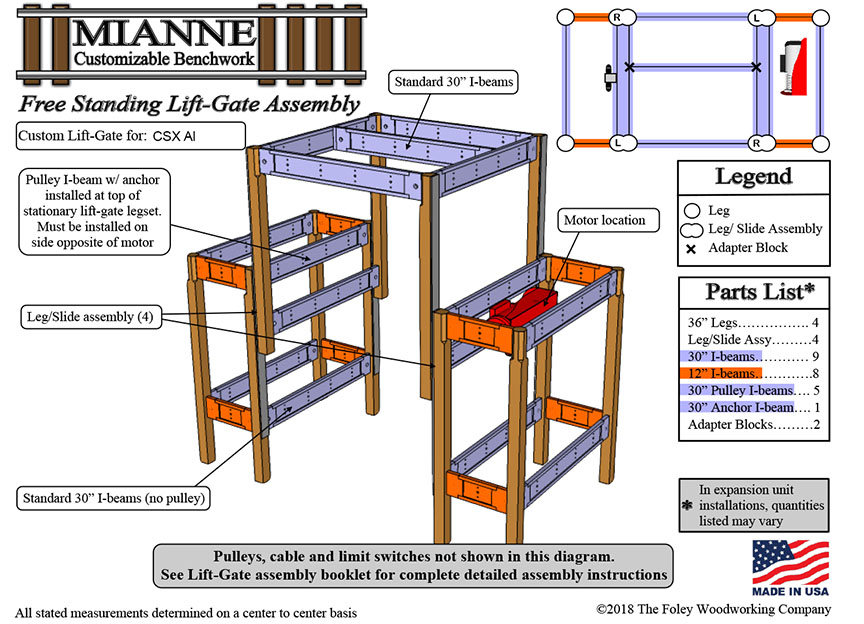
Joe, since I have tons of Atlas black center rails laying around from all the pit rails I do I am going to install those in the grooves. This will be an active roundhouse/ turntable. ![]() Here is the lift that is being installed under the roundhouse and where it is going. It will make it easy for me to access the 3 levels of track that run around this corner of the layout.
Here is the lift that is being installed under the roundhouse and where it is going. It will make it easy for me to access the 3 levels of track that run around this corner of the layout.
Pine Creek Railroad posted:Lee,
Glad you liked the NASA Space Shuttle Simulator, and had a good time. I have a very nice NASA Train, I hope to have running as I complete the new Train Room. I will make sure you get to see some of the NASA O Gauge Train here on the OGR.
PCRR/Dave
Lee each of us Sr NASA Engineers received a Presidential 1st Shuttle Flight Award with Young and Crippens personal thanks, a piece of the actual Columbia Space Shuttle, made into a NASA Coin affixed to it. The award is one of my prize possessions, shown here with my 263E Tin Plate Train, I thought you might like to see it, because of your interest in both NASA and Trains.
Very cool stuff, thanks for sharing, Dave!
Maybe I missed it, but it sounds like you have more plans for the train room. What else are you planning to do? Do you have a separate thread on it?


Paul, nice delivery. Where did you order your electrical part from? Also your building is looks wonderful!
Televue, I think you did a wonderful job on the building! Looks great!![]()
JHZ563, It sure is great to see kids having a blast with the trains! Keep up the work and play time with the kids!![]()
Dave, way to put a nice display up! Shows your love of NASA and trains!![]()
Al, I love your Brewery it sure is turning out to be a wonderful building! Mine would have to say Coors on it. But I still like your work! You layout is coming along wonderful, thanks for sharing your ideas on how its going to look. I cant wait to see more of your post down the road!![]()
Brian, as always thanks for all the wonderful pictures from your layout! I hope you get a chance to get back out to the big shop soon!![]()
You know guys, your all doing such great work, it takes me awhile to respond to all the great work when I am just gone off the form for half a day! But it sure make for a nice morning to see all the wonderful stuff!![]()
Mike, back a number of years ago I emailed Steve at Ross Switches asking the question where did he get his wiring. He stated at the time he got it from WAYTEK. They are in Wisconsin or Minnesota. The reason I went with them was they had 18 gauge wire the same colors as the Z switch machines had plus they had numerous colors of 14 gauge wire so I could re wire my mainlines so a problem could be found easier. Also I got all my terminal blocks from them. To me their prices are reasonable to me..............Paul
paul 2 posted:Mike, back a number of years ago I emailed Steve at Ross Switches asking the question where did he get his wiring. He stated at the time he got it from WAYTEK. They are in Wisconsin or Minnesota. The reason I went with them was they had 18 gauge wire the same colors as the Z switch machines had plus they had numerous colors of 14 gauge wire so I could re wire my mainlines so a problem could be found easier. Also I got all my terminal blocks from them. To me their prices are reasonable to me..............Paul
Thanks for the information Paul! I hope I will need it sooner then later! LOL![]()
mike g. posted:paul 2 posted:Mike, back a number of years ago I emailed Steve at Ross Switches asking the question where did he get his wiring. He stated at the time he got it from WAYTEK. They are in Wisconsin or Minnesota. The reason I went with them was they had 18 gauge wire the same colors as the Z switch machines had plus they had numerous colors of 14 gauge wire so I could re wire my mainlines so a problem could be found easier. Also I got all my terminal blocks from them. To me their prices are reasonable to me..............Paul
Thanks for the information Paul! I hope I will need it sooner then later! LOL
That is good information, Paul!! Thank you!
Deuce posted:carsntrains posted:Deuce posted:carsntrains posted:Apples55 posted:Deuce posted:Deuce posted:I cleaned. Will drill the holes for the switch controllers tomorrow and then we're done until I get the bug to do/add more. Will be nice to just run trains with the boys for awhile.
Got to admit, the Lionel Truck and Passenger Depots look too big against the truck and bus. Not sure what I will do about that. Maybe just go Plasticville with their smaller sized buildings.
As for the scale stuff ... the truck is Lionel and the bus is Corgi. Both say 1:50 scale on their respective boxes. I dunno. Something is either too big or too small.
Deuce;
I have a pair of those Lionel passenger platforms as well as several scale ones from Crescent Locomotive Works... the Lionel are definitely not to scale!!!
Yeah but look at the difference in size between the bus, trucks, and say the caboose?? A six foot tall person in O scale is 1.5 inches tall. The photo could be misleading. But after seeing a standard semi trailer is about 14 feet tall. The answer is in the measuring tape. The trailer should be about 3.5 inches tall in 1:48 right?
Jim
https://ogrforum.ogaugerr.com/...-andamp-mth-trailers
General consensus is that they're too small. I thought the box said 1:50, I'll check when I get home. I know the Corgi's are marketed as being 1:50. I have a couple of 1:43 scale trucks and they appear too big ... too big to put on the layout. I guess I'll just live with the 1:50-not-1:50 scale trucks and buses I've acquired.
ETA: Seems the K-Line's are larger. I'm on the hunt for a few on eBay. Will see if they are, and if so ... will throw the Lionel's on the bay to break even.
Deuce if you would please let me know how tall those trailers are. To see if my eyes are wrong lol. I'm not scale crazy at all.. I use 1:43 cars and my O gauge people fit in them perfectly! And I have some 1:48 army jeeps that look fine with them.
Jim
Jim,
The top of the cab comes in at 1.75". Top of the trailer is under 3".
I wired the switches and also made and painted markers for each. Will do the same for the uncoupler.
Deuce yep those are quite a bit on the small side! Some companies "scale size" aint what others are! 1:50 is a touch small anyway. I think my Menards 1:48 jeeps are on the small side also. Aint no way a 1.250 or 1.5 inch tall person will fit into them! LOL Thanks for measuring those!!!
Folks if you want a new rubber band put into your Lionel sub. Just take it apart to start with. Mine doesnt spin via the rubber band. Dont know if it ever did. I just put one in it to hold the nose on. : )
Jim
Pine Creek Railroad posted:Lee,
Glad you liked the NASA Space Shuttle Simulator, and had a good time.
each of us Sr NASA Engineers received a Presidential 1st Shuttle Flight Award with Young and Crippens personal thanks, a piece of the actual Columbia Space Shuttle, made into a NASA Coin affixed to it. The award is one of my prize possessions, shown here with my 263E Tin Plate Train, I thought you might like to see it, because of your interest in both NASA and Trains.
Most cool!
FYI, that's the Orion capsule sim at Huntsville, not a STS one (though it's tough to tell from my photo). If you can tell, I'm wearing a NASA-issued cap for the EFT-1 test flight launch, which took place about a month after that photo was taken (and I'd just come back from KSC, seeing it on the pad, getting ready to go).
I cleaned a dried hairball off the front of my Marx 666 locomotive. I interrogated all of our cats, but none would confess to the crime. I have an outstanding warrant out for First-Degree Felonious Puking.
Balshis posted:I cleaned a dried hairball off the front of my Marx 666 locomotive. I interrogated all of our cats, but none would confess to the crime. I have an outstanding warrant out for First-Degree Felonious Puking.
I'm so glad my cat has no interest in my layout. ![]()
Didn't get to the basement till this afternoon. Calling for rain here later. A few days ago we had a pretty heavy rain and up until then I thought I had the water seepage fixed. I had used Hydraulic cement to pact along the wall but this time I decided to try the Flex-seal liquid. Darn stuff is not cheap but if it works I will be happy. So that being done I added another cross bar to the sign and applied the second coat of paint to the back door of the Pawn Shop. Yesterday I stopped at Michael's and got some wire to make some supports for the awning and the hanging sign. I know the wire probably came with the kit but they are now more then likely with the lost directions LOL. Now back down and work on something.....................Paul
Balshis posted:I cleaned a dried hairball off the front of my Marx 666 locomotive. I interrogated all of our cats, but none would confess to the crime. I have an outstanding warrant out for First-Degree Felonious Puking.
If you have tunnels, check in there. They are favorite sites for covert hairball preparation and spreading, as well as lurking, unnoticed by those of us on the cat's staff.
FrankM
Moonson posted:Balshis posted:I cleaned a dried hairball off the front of my Marx 666 locomotive. I interrogated all of our cats, but none would confess to the crime. I have an outstanding warrant out for First-Degree Felonious Puking.
If you have tunnels, check in there. They are favorite sites for covert hairball preparation and spreading, as well as lurking, unnoticed by those of us on the cat's staff.
FrankM
Spoken like a true servant (aka- cat owner) ![]()
![]()
![]()
Well I finalized my layout design using AnyRails (attached if anyone is interested) and figured out how much more lumber I need to build the tables. The hard one, telling my wife how much room it'll take up is still under consideration. Maybe I'll just make it in the garage and move it to the basement covertly.

RSJB18 posted:Moonson posted:Balshis posted:I cleaned a dried hairball off the front of my Marx 666 locomotive. I interrogated all of our cats, but none would confess to the crime. I have an outstanding warrant out for First-Degree Felonious Puking.
If you have tunnels, check in there. They are favorite sites for covert hairball preparation and spreading, as well as lurking, unnoticed by those of us on the cat's staff.
FrankM
Spoken like a true servant (aka- cat owner)


Oh yes, I was the servant, all right; actually the entire staff of one. But I can't say I figured it out on my own. I think it was a test. I didn't know Noel (all-white; blue eyes) had ever been up on the layout, let alone in the tunnels, until I saw the first clue: tufts of white fur clinging to the utility-poles, along a main roadway.
I followed the white tuft path until I saw a pair of blue eyes peering out at me, crouched down and laughing - I'm sure of the laughing part.
It was then I tried moving the litter-hut from under the layout, to a new location, but that never received approval from the white mistress.![]()
FrankM
Kirk R posted:Well I finalized my layout design using AnyRails (attached if anyone is interested) and figured out how much more lumber I need to build the tables. The hard one, telling my wife how much room it'll take up is still under consideration. Maybe I'll just make it in the garage and move it to the basement covertly.
Looks really cool! How big is the closet the tunnel goes into? Are you going to use it like a staging yard? I ask because this is where I screwed up. Even on a 17 foot straight I only have one siding long enough to park a 6 car passenger train. Other two longer trains I have to leave on the two mains.
Jim
Moonson posted:RSJB18 posted:Moonson posted:Balshis posted:I cleaned a dried hairball off the front of my Marx 666 locomotive. I interrogated all of our cats, but none would confess to the crime. I have an outstanding warrant out for First-Degree Felonious Puking.
If you have tunnels, check in there. They are favorite sites for covert hairball preparation and spreading, as well as lurking, unnoticed by those of us on the cat's staff.
FrankM
Spoken like a true servant (aka- cat owner)
Oh yes, I was the servant, all right; actually the entire staff of one. But I can't say I figured it out on my own. I think it was a test. I didn't know Noel (all-white; blue eyes) had ever been up on the layout, let alone in the tunnels, until I saw the first clue: tufts of white fur clinging to the utility-poles, along a main roadway.
I followed the white tuft path until I saw a pair of blue eyes peering out at me, crouched down and laughing - I'm sure of the laughing part.
It was then I tried moving the litter-hut from under the layout, to a new location, but that never received approval from the white mistress.
FrankM
WOW I see 3 campers in that mountain of a display!!! Awesome!
Jim
carsntrains posted:Kirk R posted:Well I finalized my layout design using AnyRails (attached if anyone is interested) and figured out how much more lumber I need to build the tables. The hard one, telling my wife how much room it'll take up is still under consideration. Maybe I'll just make it in the garage and move it to the basement covertly.
Looks really cool! How big is the closet the tunnel goes into? Are you going to use it like a staging yard? I ask because this is where I screwed up. Even on a 17 foot straight I only have one siding long enough to park a 6 car passenger train. Other two longer trains I have to leave on the two mains.
Jim
Jim, the closet is something like 7' wide with two full size double doors. My thought would be to use it to stage trains to go out on the two outer loops. Will put shelves along the back of the closet for some of my other inventory.
cmscanuck posted:Ran some more trains and added trim to the basement/train room.
Although I tend to prefer the down and dirty look for a layout, I really liked the clean a and green look of yours, Chris, with your gleaming 022 switches and O Gauge track. Trains looked and ran beautifully as well.
Frank, it's nice to see a panoramic shot of your magnificent layout in the above photo.
carsntrains posted:Moonson posted:RSJB18 posted:Moonson posted:Balshis posted:I cleaned a dried hairball off the front of my Marx 666 locomotive. I interrogated all of our cats, but none would confess to the crime. I have an outstanding warrant out for First-Degree Felonious Puking.
If you have tunnels, check in there. They are favorite sites for covert hairball preparation and spreading, as well as lurking, unnoticed by those of us on the cat's staff.
FrankM
Spoken like a true servant (aka- cat owner)
Oh yes, I was the servant, all right; actually the entire staff of one. But I can't say I figured it out on my own. I think it was a test. I didn't know Noel (all-white; blue eyes) had ever been up on the layout, let alone in the tunnels, until I saw the first clue: tufts of white fur clinging to the utility-poles, along a main roadway.
I followed the white tuft path until I saw a pair of blue eyes peering out at me, crouched down and laughing - I'm sure of the laughing part.
It was then I tried moving the litter-hut from under the layout, to a new location, but that never received approval from the white mistress.
FrankM
WOW I see 3 campers in that mountain of a display!!! Awesome!
Jim
Ahh the things we do for our little furry friends.
Balshis posted:I cleaned a dried hairball off the front of my Marx 666 locomotive. I interrogated all of our cats, but none would confess to the crime. I have an outstanding warrant out for First-Degree Felonious Puking.

Mitch
carsntrains posted
Folks if you want a new rubber band put into your Lionel sub. Just take it apart to start with. Mine doesnt spin via the rubber band. Dont know if it ever did. I just put one in it to hold the nose on. : )
Jim
Getting me to take a bath wasn't an issue as a kid. I got in more trouble taking too many. The subs where an all time fav of mine. In my top #3 really. I still have my US Marines flat, but no sub. I wore one out, and don't know what happen to #2. It took more than one rubber band and they were pretty thick, wide, and strong as well. Winding was done till they knotted up beyond belief, more than say a wood airplane (these and bass/ balsa gliders, popular cheap fun in my era) . I used Vasoline as a grease somewhere on it, but don't recall what pieces it was applied to. Vasoline because there weren't better light greases readily available.
Get it spinning and go fill the tub ![]()
As to the photos I posted over the weekend of the city level plywood. Here are some photos to give you guys an idea of how I am handling the edges.
In this photo, I have my 2nd level yard storage under the city
In order to hide it from view but still see the trains from this view. I am adding this kind of arched wall, but with some open arches to see though.
This will run from 2x2 support post on left side for 5 feet to about where the Lionel sign is in the photo. I think the wall will be a grayish brick.

Some switching operations. Relocated two box cars and two gondolas to different didings.
Arnold D. Cribari posted:Frank, it's nice to see a panoramic shot of your magnificent layout in the above photo.
Thank you, Arnold. Here's another angle on that same area, but a little more to the west, featuring those tunnels where the cat was temporarily ensconced...

 FrankM
With the flexseal paint I glued the back door to the Pawn shop on, got the last two crossbars on the sign, And just in case my switches might come shortly I started putting down cork on the grain elevator table. Still have to do the other track. I'll get to that after dinner. My package of sidewalks was suppose to come yesterday and as of right now they haven't shown up today. Maybe, hopefully tomorrow and I can get them painted and start placing them on the lower street. Pics......................Paul


Adriatic posted:carsntrains posted
Folks if you want a new rubber band put into your Lionel sub. Just take it apart to start with. Mine doesnt spin via the rubber band. Dont know if it ever did. I just put one in it to hold the nose on. : )
Jim
Getting me to take a bath wasn't an issue as a kid. I got in more trouble taking too many. The subs where an all time fav of mine. In my top #3 really. I still have my US Marines flat, but no sub. I wore one out, and don't know what happen to #2. It took more than one rubber band and they were pretty thick, wide, and strong as well. Winding was done till they knotted up beyond belief, more than say a wood airplane (these and bass/ balsa gliders, popular cheap fun in my era) . I used Vasoline as a grease somewhere on it, but don't recall what pieces it was applied to. Vasoline because there weren't better light greases readily available.
Get it spinning and go fill the tub
It takes 3 thick rubber bands
Moonson posted:Arnold D. Cribari posted:Frank, it's nice to see a panoramic shot of your magnificent layout in the above photo.
Thank you, Arnold. Here's another angle on that same area, but a little more to the west, featuring those tunnels where the cat was temporarily ensconced...
FrankM
Frank your layout is fantastic!
gandydancer1950 posted:Adriatic posted:carsntrains posted
Folks if you want a new rubber band put into your Lionel sub. Just take it apart to start with. Mine doesnt spin via the rubber band. Dont know if it ever did. I just put one in it to hold the nose on. : )
Jim
Getting me to take a bath wasn't an issue as a kid. I got in more trouble taking too many. The subs where an all time fav of mine. In my top #3 really. I still have my US Marines flat, but no sub. I wore one out, and don't know what happen to #2. It took more than one rubber band and they were pretty thick, wide, and strong as well. Winding was done till they knotted up beyond belief, more than say a wood airplane (these and bass/ balsa gliders, popular cheap fun in my era) . I used Vasoline as a grease somewhere on it, but don't recall what pieces it was applied to. Vasoline because there weren't better light greases readily available.
Get it spinning and go fill the tub
It takes 3 thick rubber bands
3 thick rubber bands? I think it only had one in it from Lionel. Cant remember because it was in many many pieces lol
Jim
Thank you, Gandydancer!
FrankM
Last night I spent an enjoyable hour switching box cars and reefers in the city. Manuvers are a little easier to plan after a few dry runs. Tonight, I plan to run 3 or 4 road trains. A 4 passenger train, a 5 car mail train, a 9 tanker train and a 9 car of mixed freights.
carsntrains posted:gandydancer1950 posted:Adriatic posted:carsntrains posted
Folks if you want a new rubber band put into your Lionel sub. Just take it apart to start with. Mine doesnt spin via the rubber band. Dont know if it ever did. I just put one in it to hold the nose on. : )
Jim
Getting me to take a bath wasn't an issue as a kid. I got in more trouble taking too many. The subs where an all time fav of mine. In my top #3 really. I still have my US Marines flat, but no sub. I wore one out, and don't know what happen to #2. It took more than one rubber band and they were pretty thick, wide, and strong as well. Winding was done till they knotted up beyond belief, more than say a wood airplane (these and bass/ balsa gliders, popular cheap fun in my era) . I used Vasoline as a grease somewhere on it, but don't recall what pieces it was applied to. Vasoline because there weren't better light greases readily available.
Get it spinning and go fill the tub
It takes 3 thick rubber bands
3 thick rubber bands? I think it only had one in it from Lionel. Cant remember because it was in many many pieces lol
Jim
Jim, Lionel operating instructions called for three rubber bands to operate the submarine.
Do rubber bands have a size number or similar identification system? I never actually bought any myself. Had tons of free ones left from delivering news papers as a kid, and they just recently began failing from dry rot so I tossed them.
I thought it was three, but couldn't recall. I don't think 4 worked better either, too tight. You might have to search for a balance with modern ones, seems everything else has changed at least slightly, why not those?
Adriatic posted:Do rubber bands have a size number or similar identification system? I never actually bought any myself. Had tons of free ones left from delivering news papers as a kid, and they just recently began failing from dry rot so I tossed them.
I thought it was three, but couldn't recall. I don't think 4 worked better either, too tight. You might have to search for a balance with modern ones, seems everything else has changed at least slightly, why not those?
Jeff at The Train Tender has the correct ones.
Frank, those pictures and the way you get it all to look so good. You got a gift for scenery along with great perspective. So real. You could be standing on hill looking out over the view. I got the other cork laid down for the other track so tomorrow morning I can paint them. At the corner where the track goes off the table I have to make up a corner to fit in between the two tables there. The plan is to put a Menards double track bridge in there at a 45 degree angle to go to the future tables along the back of the basement. My awning is ready to be attached to the pawn shop. I made up some wires that will hold up the hanging sign and the awning. Also tomorrow I can put in the last part of the sign frame. A wrap for tonight.................Paul
It wouldn't surprise me if the NEW subs had only one, just so nobody gets a propeller boo-boo ![]()
This and a fire car thread had me looking back to the better days of my youth, and I thought of something that answers why my 175 rocket launcher hits the ceiling. And not just hits, but hits pretty hard. It was from a Mercury X-set and the original rocket had the capsule and parachute, it weighed a tad more, and didnt fly straight very well either (made in Korea? ![]() ), so it must have needed the extra boost for the extra weight.
), so it must have needed the extra boost for the extra weight.
The platform icbm launch car was strong too and would tip the car over or.bounce it off the rails. Gramps put a different spring in that one to tame it.
Once the Mercury capsule was lost, the standard ICBM was all that I could get to replace it.
Moonson posted:Arnold D. Cribari posted:Frank, it's nice to see a panoramic shot of your magnificent layout in the above photo.
Thank you, Arnold. Here's another angle on that same area, but a little more to the west, featuring those tunnels where the cat was temporarily ensconced...
Stunning.
Frank, I think you're as good at scenery as God is! LOL
Your scenery is as beautiful as nature's beautiful views.
paul 2 posted:Didn't get to the basement till this afternoon. Calling for rain here later. A few days ago we had a pretty heavy rain and up until then I thought I had the water seepage fixed. I had used Hydraulic cement to pact along the wall but this time I decided to try the Flex-seal liquid. Darn stuff is not cheap but if it works I will be happy. So that being done I added another cross bar to the sign and applied the second coat of paint to the back door of the Pawn Shop. Yesterday I stopped at Michael's and got some wire to make some supports for the awning and the hanging sign. I know the wire probably came with the kit but they are now more then likely with the lost directions LOL. Now back down and work on something.....................Paul
Flex -Seal is good stuff. I've not used it on cement but........
I had a kitchen sink trap pipe let loose from a man-kid dumping Coke leftovers out of the can into the sink's side where we put the dirty dishes instead of the open one(who knows why not the open side) but never running water to flush it from the trap. That side doesn't see water except for about once a week. The Coke baths were a few times a day for 3-4 years.
The Coke's acid ate away at the old pipe quick and left a quarter size hole on the bottom of the U. Tight on cash and nothing to loose, I took a hint from the commercials and taped some aluminum screen 1" x1" tight to the pipe and sprayed clear FlexSeal on it. (A pal had a can handy. He used it to seal alarm wiring holes and said it was great stuff.) The first coat held the screen in place, and the tape was taken off. More coats sealed it all up.
I forgot all about it. That was two years ago. It is still holding fast.
There is Seal-all as well. Seal-all is automotive stuff. A gasoline proof goo in a tube. If you ever tried to seal a hole an old cars metal gas tank, you likely found the gas tank leak epoxy putty to leak after a very short bit.
And seal all wasn't strong enough to hold back the pressure from a hole on the bottom if you filled to near a full tank. But we found by applying the epoxy first that stayed fast. Then Seal-all spred on top sealed up the epoxy weeping. Another thin layer of epoxy kept the seal all from pealing at the edges or being torn off, etc. These repairs lasted a few years each at least; even through the Michigan winters.
Frank, great looking layout! I am sorry about the cat, I think if it was me I would have just ran a train threw the tunnel! LOL![]()
Paul, the building is looking nice! Sure is great to see more road bed going down again!![]()
Spose to be nice this weekend, so I hope to get some more framing done on the future train room!![]()
paul 2 posted:Frank, those pictures and the way you get it all to look so good. You got a gift for scenery along with great perspective. So real. You could be standing on hill looking out over the view...........Paul
Thank you, so very much, Paul, for that exceptional review. There are so many hobbyist-modelers on this forum whose layouts I admire, that to get such enthusiastic approval from you is very, very pleasant to experience. Thank you, again.
FrankM
Arnold D. Cribari posted:Frank, it's nice to see a panoramic shot of your magnificent layout in the above photo.
Thank you, Arnold. I appreciate and enjoy your continued interest in and approval (even the hyperbole ![]() !!!
!!! ![]() of my layout efforts. I must admit, it is fun hearing from you via your "Likes" and written replies.
of my layout efforts. I must admit, it is fun hearing from you via your "Likes" and written replies.
I don't know where it all comes from in me, but I have often found myself really looking closely while driving (sometimes drifting a bit too close to the rumble-strips or shoulders) or hiking and devouring what I have seen and felt in the scenic world around me. Then, afterward, as the modeling of a vignette is taking form in front of me, I just apply a heavy dose of imagination and work until the result feels truthful.
FrankM
mike g. posted:Frank, great looking layout! I am sorry about the cat, I think if it was me I would have just ran a train threw the tunnel! LOL
Hi Mike G. Thank you!
And regarding the cat, she was great company. All I needed was a little masking-tape to remove the clumps of fur and all was well.
FrankM
Frank- your layout is spectacular. One of the best I've ever seen.
Bob
RSJB18 posted:Frank- your layout is spectacular. One of the best I've ever seen.
Bob
Thank you, Bob. That's very nice to hear. Considering the wonderful layouts we have all seen shared in OGR's Forum and magazine, it's great to have you say you consider me among such excellent company! Thanks, again.
FrankM
Finished repairing my new ATSF GP-9. The motor needed a serious cleaning and the springs for the brushes had to be tightened up a bit. Runs great now. The engine is in great shape otherwise.
Love the MPC Growl!


Hi Jim/carsntrains, Yes, those campers are on their way to a camp, down the road, for the holiday, and since every day is a holiday in Moon Township, USA, campers are out and about.
 However, somehow , they never seem to get very far. The rest of the journeys are left up to the imagination.
![]()
![]()

FrankM
mike g. posted:Frank, great looking layout! I am sorry about the cat, I think if it was me I would have just ran a train threw the tunnel! LOL
That doesn't always work...
Mitch
Bob, I am glad you got the engine running! Sure looks nice~!![]()
Frank, I am with everyone else Great looking layout! I could see myself camping there!![]()
Mitch, that is just too FUNNY!![]()
M. Mitchell Marmel posted:mike g. posted:Frank, great looking layout! I am sorry about the cat, I think if it was me I would have just ran a train threw the tunnel! LOL
That doesn't always work...
Mitch
Just watched parts 2 and 3. ![]()
![]()
![]()
M. Mitchell Marmel posted:mike g. posted:Frank, great looking layout! I am sorry about the cat, I think if it was me I would have just ran a train threw the tunnel! LOL
That doesn't always work...
Mitch
That's some confident kitty right there! She probably has such trust of you that she knows what you're up to and doesn't get intimidated by any shenanigans via a little train honking and awaiting. Very enjoyable vignette.
FrankM
.
Moonson posted:That's some confident kitty right there! She probably has such trust of you that she knows what you're up to and doesn't get intimidated by any shenanigans via a little train honking and awaiting. Very enjoyable vignette.
Thankee! Yeah, Norma is a sweetie, and she loves the trains so much that a little honk or bump doesn't really bother her all that much...
Mitch
Frank those campers are awesome!! My wife wants me to find some for our layout. Seems I can only find new looking ones.
As for the submarine. Mine is newer and by what rotten band I got out of it seems to be just one.
At this point (happily) my cat hasnt taken an interest in trains! And I hope she never does! LOL
Hopefully I can get out to Hobby Town this weekend and get me some more 036 switches. I still dont understand why Lionel doesnt make manual switches for 060 or 072. I dont want remote switches. Ive watched many many videos on switching and it interests me. Unless you put the switch remote in front of the switch it seems to me they would be useless in switching sessions.
PENNSYNUT it seems you are big into switching. What is your opinion?
Jim
M. Mitchell Marmel posted:Moonson posted:That's some confident kitty right there! She probably has such trust of you that she knows what you're up to and doesn't get intimidated by any shenanigans via a little train honking and awaiting. Very enjoyable vignette.
Thankee! Yeah, Norma is a sweetie, and she loves the trains so much that a little honk or bump doesn't really bother her all that much...
Mitch
Me-thinks the Razorback RR needs to invest in a couple of steamers with sharpened cow catchers, or a good railroad snow plow (the rotery variety should evoke an interesting response) ![]()
![]()
![]()
Apples55 posted:Me-thinks the Razorback RR needs to invest in a couple of steamers with sharpened cow catchers, or a good railroad snow plow (the rotery variety should evoke an interesting response)

Better yet, get the kittehs their own train!

Mitch
Had to hit the grocery store this morning before the heavy rains set in before that changes to snow. When I got home my crane cars from the Canadian Train Club were there waiting for me. Layout wise I got the third support glued so when that is dry I can paint the frame black. Then I pulled up the nails on the cork I glued down last night and painted it. Next area for the time being is where I put the oil depot. I'll lay down some plaster wrap. Pics.....Paul


KC scale! ![]()
(kitty cat)
M. Mitchell Marmel posted:Apples55 posted:Me-thinks the Razorback RR needs to invest in a couple of steamers with sharpened cow catchers, or a good railroad snow plow (the rotery variety should evoke an interesting response)
Better yet, get the kittehs their own train!
Mitch
I have a play date with my son to run trains this evening. That will probably be it (though I'm getting ready to add blinking yellow lights to a Plasticville signal bridge, as well as build the Plasticville Union Station).
Also, I didn't like how the Sharpie bled into the balsa wood that makes the front plate of my uncoupler box, so I'll probably paint it with a dark acrylic paint and hunt for some 1/2" vinyl letters.
Well the size of Carpet Central doubled, added regular LC RS-3 diesel. I know this is not much but what I can get away with in the living room, I think. Also upgraded the last passenger car to led, but think I need one more in the middle, the other cars are 14 volt lamps running on 18v,MTH cars.
Old Mike


Old Mike,
Very nice double Loop FasTrack layout for your room. Another Passenger Car would be nice for the inside loop! Good job with the LED's!
PCRR/Dave
Thanks Dave: I have the mail car without lights I can add from the set, they are all Pennsylvania cars. These are both lionchief RTR sets,the lighted caboose is also MTH.
Old Mike
All set now. My switches came today. The wife has a game tonight so I can do whatever I want to. The sign stand is ready for paint. The plaster wrap is done in the oil depot when that dries I can add plaster. And I placed a couple of switches by the grain elevator. I probably should spend a bit a time on the Pawn Shop to wrap that up. Pics.......Paul


paul 2 posted:All set now. My switches came today. The wife has a game tonight so I can do whatever I want to. The sign stand is ready for paint. The plaster wrap is done in the oil depot when that dries I can add plaster. And I placed a couple of switches by the grain elevator. I probably should spend a bit a time on the Pawn Shop to wrap that up. Pics.......Paul
Looking great son !!
Ah shucks dad ( blushing ) thanks.....Got to get back to work......Paul
Deuce posted:I have a play date with my son to run trains this evening. That will probably be it (though I'm getting ready to add blinking yellow lights to a Plasticville signal bridge, as well as build the Plasticville Union Station).
Also, I didn't like how the Sharpie bled into the balsa wood that makes the front plate of my uncoupler box, so I'll probably paint it with a dark acrylic paint and hunt for some 1/2" vinyl letters.


Little more done with the little things. Glued down cork. The 0-42 switch off the mainline was just the thing. Got the stand for the sign painted. Then I got the awning glued in place. To help hold it in place I put in the awning supports. Haven't glued them yet I still have to cut them down. I'll let everything dry real good tonight and get an early start tomorrow. Pics..............Paul


Received a lot of help from a D3R member, He beefed up the relay system he built earlier. I guess I push the limits a little. The relays where giving up, but now all is right in the basement. Ran trains for 4 hours had a derailment, and the system worked, failure in one block shut down entire main line all 4 blocks, so no train ran into another.
Thank you Dennis ![]()
Clem
paul 2 posted:All set now. My switches came today. The wife has a game tonight so I can do whatever I want to. The sign stand is ready for paint. The plaster wrap is done in the oil depot when that dries I can add plaster. And I placed a couple of switches by the grain elevator. I probably should spend a bit a time on the Pawn Shop to wrap that up. Pics.......Paul
Paul, sure sounds like you had a nice night! Things are looking really nice, next thing you know you will be running trains downstairs!![]()
Paul- Put a bunch of little jobs together and suddenly you accomplished quite a bit.
Bob
Your right Bob. It has been good to be able to jump around working on different things. Hope to get some more little things done today. Mike, that is where I have been procrastinating .....wiring. After all this time of building this layout I haven't run one train. I have pushed cars around by hand. I know sooner then later I am going to have to start wiring...............Paul
paul 2 posted:Your right Bob. It has been good to be able to jump around working on different things. Hope to get some more little things done today. Mike, that is where I have been procrastinating .....wiring. After all this time of building this layout I haven't run one train. I have pushed cars around by hand. I know sooner then later I am going to have to start wiring...............Paul
Don't feel bad Paul, I hate wiring. Mainly cause I don't know a lot about it. I am always second guessing myself. When I get to that point I will be asking a lot of questions!![]()
mike g. posted:paul 2 posted:Your right Bob. It has been good to be able to jump around working on different things. Hope to get some more little things done today. Mike, that is where I have been procrastinating .....wiring. After all this time of building this layout I haven't run one train. I have pushed cars around by hand. I know sooner then later I am going to have to start wiring...............Paul
Don't feel bad Paul, I hate wiring. Mainly cause I don't know a lot about it. I am always second guessing myself. When I get to that point I will be asking a lot of questions!
Wiring is easy guys!! Well I reckon that depends on how you are setting up. I just use two transformers. One hot from each to each loop. Will do a bull buss wire around the loops . Inside red, outside green, accessories white, single black common ground (phased transformers). Of course I dont have my new track wired correctly yet. Will do that after I get finished moving stuff around.
Paul things are looking awesome!
Mike G.... Get another wall done yet??
Jim
Jim, I did that when I rewired my attic layout a number of years back. Was able to get enough colors of wire so that everything was actually color coded except for ground. That is all white wire. Like you I have the transformers phased and all the grounds from the transformers go to one terminal block and then out from there to the layout. I know I have to do it Jim. Guess I am just lazy or not wanting to put my body in a pretzel position again because it doesn't do it as good as years ago...............Paul


Paul. I feel what you are saying. With my last table layout (which was my first) I put off wiring for months! I just didn't think it would be as easy as it was and doubted my ability. After doing that one I think Ive developed a plan not to do the pretzel imitation lol
Jim
Wiring? Piece of cake ![]()
Don't know what you guys are worrying about. ![]()
Try working around 13,000 volts and then we can talk.
RSJB18 posted:Wiring? Piece of cake
Don't know what you guys are worrying about.
Try working around 13,000 volts and then we can talk.
lol Bob, 120 & 240 is enough for me! LOL![]()
mike g. posted:RSJB18 posted:Wiring? Piece of cake
Don't know what you guys are worrying about.
Try working around 13,000 volts and then we can talk.
lol Bob, 120 & 240 is enough for me! LOL
Well that can kill you too. 13KV brings a whole different level of respect. ![]()
RSJB18 posted:mike g. posted:RSJB18 posted:Wiring? Piece of cake
Don't know what you guys are worrying about.
Try working around 13,000 volts and then we can talk.
lol Bob, 120 & 240 is enough for me! LOL
Well that can kill you too. 13KV brings a whole different level of respect.
Shocking...
RSJB18 posted:mike g. posted:RSJB18 posted:Wiring? Piece of cake
Don't know what you guys are worrying about.
Try working around 13,000 volts and then we can talk.
lol Bob, 120 & 240 is enough for me! LOL
Well that can kill you too. 13KV brings a whole different level of respect.
I'll pass. I don't like to do ANY electrical work. Although I do when I have to!
Jim
carsntrains posted:RSJB18 posted:mike g. posted:RSJB18 posted:Wiring? Piece of cake
Don't know what you guys are worrying about.
Try working around 13,000 volts and then we can talk.
lol Bob, 120 & 240 is enough for me! LOL
Well that can kill you too. 13KV brings a whole different level of respect.
I'll pass. I don't like to do ANY electrical work. Although I do when I have to!
Jim
People think I'm crazy but ... I'd rather do electrical than plumbing.
Deuce posted:carsntrains posted:RSJB18 posted:mike g. posted:RSJB18 posted:Wiring? Piece of cake
Don't know what you guys are worrying about.
Try working around 13,000 volts and then we can talk.
lol Bob, 120 & 240 is enough for me! LOL
Well that can kill you too. 13KV brings a whole different level of respect.
I'll pass. I don't like to do ANY electrical work. Although I do when I have to!
Jim
People think I'm crazy but ... I'd rather do electrical than plumbing.
I've been an electrician for over 30 years. I wouldn't switch to plumbing for twice the money.
Still just little things. I needed to take up some cork because I didn't draw a center line through the grain elevator so when I measured for that I found that I had to take up cork and move it over, I spent the next twenty minutes or so looking for my Chisel. I finally found it but to my surprise in looking for it I found the assembly directions to the Pawn Shop under a pile of stuff. But still thanks to those that help me. And it is a short day. I have to get my stuff ready for the train show at the Independence High School Fieldhouse tomorrow 6001 Archwood rd Independence OH. It is from 10 AM to 3 PM Saturday March 3rd. But I am heading up there tonight to set up so I don't have to get up early and do it tomorrow. I got the lettering cut out for the sign, that's a slow process. And then I glued them to the sign frame. After it dried a bit I placed it on the roof. Then I went back to laying cork. All the cork is down. It probably won't be till Sunday that I can work on the layout again. Pics.......................Paul


RSJB18 posted:Deuce posted:carsntrains posted:RSJB18 posted:mike g. posted:RSJB18 posted:Wiring? Piece of cake
Don't know what you guys are worrying about.
Try working around 13,000 volts and then we can talk.
lol Bob, 120 & 240 is enough for me! LOL
Well that can kill you too. 13KV brings a whole different level of respect.
I'll pass. I don't like to do ANY electrical work. Although I do when I have to!
Jim
People think I'm crazy but ... I'd rather do electrical than plumbing.
I've been an electrician for over 30 years. I wouldn't switch to plumbing for twice the money.
Now mind you ... my electrical work typically extends to swapping out light fixtures, switches, and receptacles for the most part ... but I figure the worst that would typically happen is I kill myself. With plumbing, I could potentially ruin my entire house ... and honestly, I'm worth more dead than alive ... and I'm not sure if self-inflicted water damage is covered by insurance (is it?).
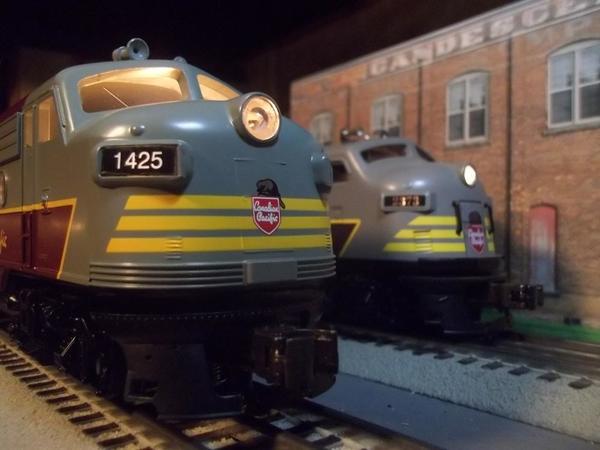

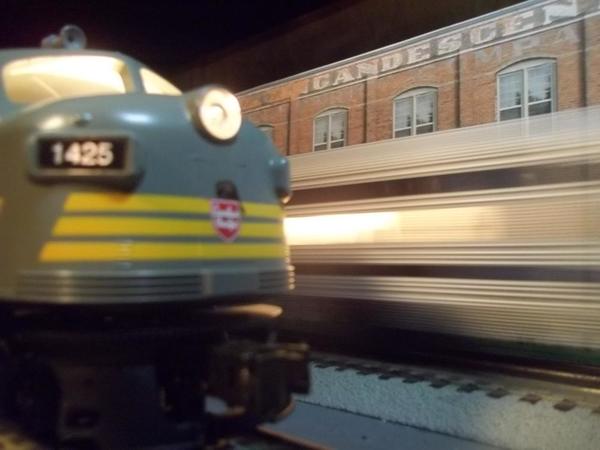


briansilvermustang posted:
Nice Brian. Do you take requests? Lol How about some Illinois Central?
Ordered my track and switches.


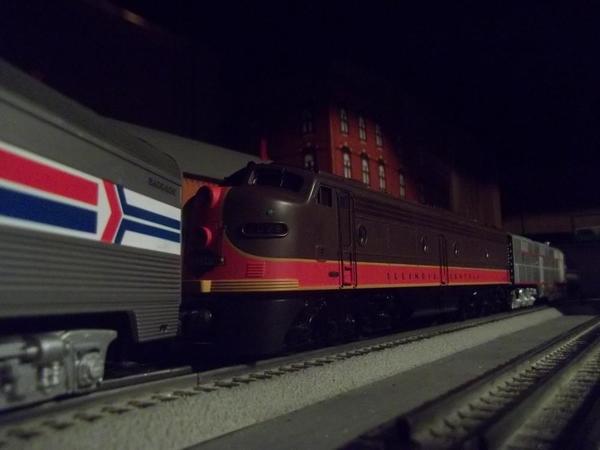
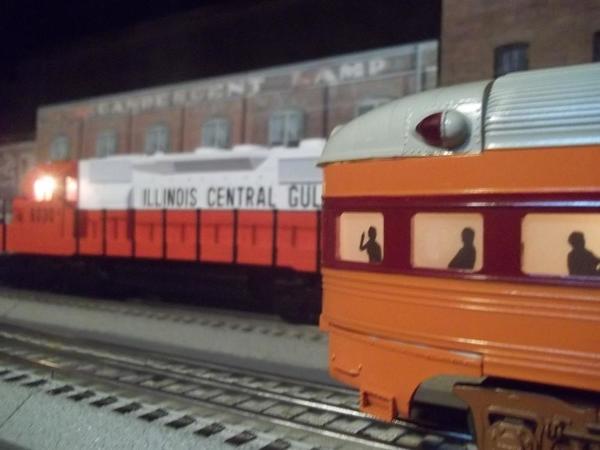


Worked on a team track area. Laid down 3/16" foamcore that I had as scrap pieces, these were placed between outer mainline and siding tracks, and siding track to table edge. The wooded ramp was something I scratched together for my old Fastrack layout so had to factor in height difference for Atlas.

Picked up another piece of 3/16" foamcore from Hobby Lobby, cut and glued onto first layer to bring to top of rails on siding, which is a bit lower than mainline rails as no trackbed.

I beveled the foamcore edges that butted against track to get a better fit. Here's a test piece for example.

I'll "pave" over top of the foamcore with some joint compound, then paint to get an aged concrete look.
briansilvermustang posted:
Well, I'm impressed ![]()
I just looked through the last two days worth of activity! Wow, what a person can miss when not online a couple of days! I put a bunch of likes in, so for those that got them, I really do like your work or comments. I do have a couple comments.
Brian, could you run that CP passenger train a little faster please, I was still able to glimpse a bit of color there in the blurr! ![]()
Paul2, I like the Fast Loans sign a lot! Miller Engineering signs are wonderful, but I think your sign is of a much more common sight for days gone by!
As far as electrical goes, the place I have had to be most cautious was in the 500KV substations tuning the LC circuit at the base of the wave trap out in the yard. We would do our testing hot. Usually I was in the control house or a cabinet, and the voltages were 125VDC up to 60A, and 240VAC and I forget what they were fused. However, the annual test of the transmission lines included testing and tuning the LC circuit. We were only a few feet below the tap off the transmission line; 115KV, 230KV, and 500KV. You had to disconnect a tap and test. If you stood too tall, you could risk getting into 500KV, fortunately the current was stepped down, but still... Anywhere in the 500KV switchyard, you could hear the crackling of static, especially if it was humid. The static wouldn't hurt you, but it would let you know it if you opened a cabinet door without wearing gloves. ![]() It's been over 20 years since I did that kind of work. I prefer the lower voltages in telecom where I have been the last 21 year, and even better engineering sitting at the desk now near the end of my employment days!!
It's been over 20 years since I did that kind of work. I prefer the lower voltages in telecom where I have been the last 21 year, and even better engineering sitting at the desk now near the end of my employment days!! ![]()
I was going to start cutting my Homasote for my roadbed, but it is extremely windy today, so I started working on the shelf part of my layout instead. I had to move the 18" metal wall brackets up 4 inches to get a match for the height of the roll around. Then I put stringers on the two I did and a fascia board on matched to the roll around. I could clamp the roll around to the stationary part, but it is fine for now with the brakes set. I think it is going to work pretty slick. Here are two photographs. My carpentry skills aren't very pretty nor is my used wood, but it all seems solid enough. I still need to put an 8 inch section between the wall and the tabletop, but that material is out in my shed, and I was afraid I may blow away. I thought the dog may fly like a kite at the end of her cable when I put her out. LOL


RSJB18 posted:Wiring? Piece of cake
Don't know what you guys are worrying about.
Try working around 13,000 volts and then we can talk.
Not to worry here. You don’t get shocked with this, you disintegrate.
Mark Boyce posted:I was going to start cutting my Homasote for my roadbed, but it is extremely windy today, so I started working on the shelf part of my layout instead. I had to move the 18" metal wall brackets up 4 inches to get a match for the height of the roll around. Then I put stringers on the two I did and a fascia board on matched to the roll around. I could clamp the roll around to the stationary part, but it is fine for now with the brakes set. I think it is going to work pretty slick. Here are two photographs. My carpentry skills aren't very pretty nor is my used wood, but it all seems solid enough. I still need to put an 8 inch section between the wall and the tabletop, but that material is out in my shed, and I was afraid I may blow away. I thought the dog may fly like a kite at the end of her cable when I put her out. LOL
Looks good Mark! You should take the "carsntrains" building course. Build it. Then make a plan lol Its fun!!! : )
Jim
Let's take these three in reverse order.
Tears
For the most part I'm done with tears. I left those behind a long time ago. When I was about 8, my prize piece of Lionel was the O gauge milk car, the one with the brown roof. My layout, on an old ping pong table, had a graduated trestle set climbing a long straightaway and an 027 curve at the bottom, on the far side from the controls. Somehow the milk car got away. It didn't fly so much as plummet. To this day, it still has a broken door from that incident.
The last time I cried over trains was 25 years ago, when I had to close enterTRAINment.
Sweat
That's just standard. I'm sure I've given gallons of it over the years.
Blood
Unfortunately, there has been more of that than I care to give. Most recently was on Tuesday. I needed to get back into this corner and pop up in my access hole, so I could finish painting the rail. I had finished painting and went to get out. I ended up sliding out on my left side. Big mistake. See the blood on the floor?

I showed it who was the boss yesterday, and lopped off the offending corner. Then covered the edge with a scrap of carpet.

It is almost a joy getting in and out of there now.

I went back in there three times, and finished ballasting

Work day again tomorrow. Got some goodies from Scenic Express today, including the rest of the pieces for my viaduct. I do need to finish ballasting the Northtown bowl tracks though.

Deuce posted:Hot glue and flashing amber lights for the win. Since this will sit over a siding, I figured a flashing yellow would suffice. I sure as heck am not properly wiring up signals on this layout. I like my sanity.
Love your candor it works doesn't i!!
Deuce posted:Hot glue and flashing amber lights for the win. Since this will sit over a siding, I figured a flashing yellow would suffice. I sure as heck am not properly wiring up signals on this layout. I like my sanity.
Sanity is overrated ![]()
![]()
![]()

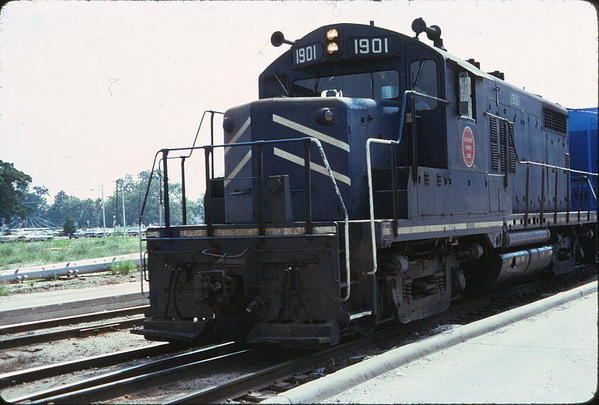

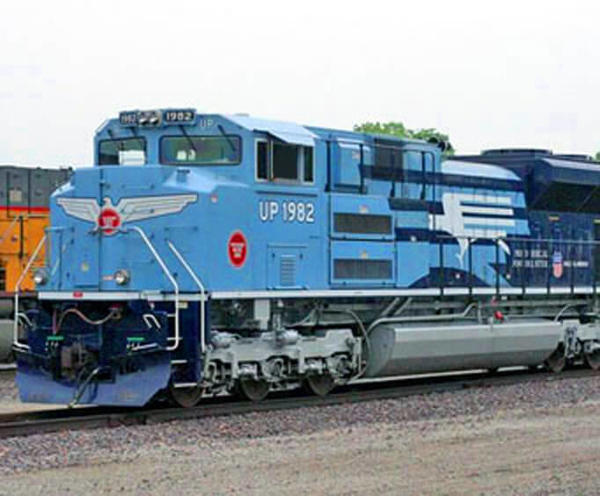


Mark, started to take shape. Nice job...................Paul;
paul 2 posted:Still just little things. I needed to take up some cork because I didn't draw a center line through the grain elevator so when I measured for that I found that I had to take up cork and move it over, I spent the next twenty minutes or so looking for my Chisel. I finally found it but to my surprise in looking for it I found the assembly directions to the Pawn Shop under a pile of stuff. But still thanks to those that help me. And it is a short day. I have to get my stuff ready for the train show at the Independence High School Fieldhouse tomorrow 6001 Archwood rd Independence OH. It is from 10 AM to 3 PM Saturday March 3rd. But I am heading up there tonight to set up so I don't have to get up early and do it tomorrow. I got the lettering cut out for the sign, that's a slow process. And then I glued them to the sign frame. After it dried a bit I placed it on the roof. Then I went back to laying cork. All the cork is down. It probably won't be till Sunday that I can work on the layout again. Pics.......................Paul
Looks good Paul! I hope you have fun at the train show! Buy something nice! LOL![]()
Mark, things are looking nice! What the wood looks like doesn't matter, FREE is always good!
Elliot, your track painting looks wonderful along with the ballast! Sorry you got cut, but I am glad you took care of that no good corner! I hope today is going to be a better day and you have fun with what ever you have planned for the layout!![]()
Deuce, I don't see anything wrong, remember its your layout, make it as you want it! There are to many things building a layout that can test your sanity! So just have fun!![]()
Mark- the wood will all get covered up with scenery so as long as its solid its good. I never did any sub-station work but that crackle is a sound you never forget. Seen my share of transformer failures though.
Elliot- we have all bled for our railroads at one time (or more than once)
Deuce- flashing lights are the best. No worries that they are not realistic to the train movements. Plenty of time for that when your kids are older and you build a more serious layout.
Paul- Have fun at the show today.
Hey Mike- You framin' or surfin'????
Big storm blew up the east coast yesterday. Hope everyone made it through OK.
Bob
Hi Bob, I framed some yesterday and will do some more today! Its kinda slow when your by yourself, Plus some of its heavy for a old guy so I have to work around that also.![]()
I will post some more pictures later today!![]()
Sounds good Mike. Love to help if I wasn't 3,000 miles away.
ditto !!
To be honest, sometimes it's self gratifying to look back and say I did that by myself, other times it sure would be nice to have another set of hands!![]()
Bob, side question, since you know electrical, how many outlets can I put on 1 20 amp breaker?![]()
mike g. posted:To be honest, sometimes it's self gratifying to look back and say I did that by myself, other times it sure would be nice to have another set of hands!


briansilvermustang posted:mike g. posted:To be honest, sometimes it's self gratifying to look back and say I did that by myself, other times it sure would be nice to have another set of hands!
Nice try Brian, that would work for beer drinking, but not to have someone at the other end of a beam! LOL![]()

got 'em ready... ![]()


mike g. posted:Bob, side question, since you know electrical, how many outlets can I put on 1 20 amp breaker?
Mike- no maximum by code. when I used to wire houses I would average 8-10 receptacles on 15 amp circuits. For 20 amp circuits that would be fine. Really depends on what you plan to plug in. I would recommend one or two dedicated 20 amp circuits for the trains and then a separate circuit for convenience outlets around the room. Lighting can have it's own 15 amp circuit too.
Bob
RSJB18 posted:mike g. posted:Bob, side question, since you know electrical, how many outlets can I put on 1 20 amp breaker?
Mike- no maximum by code. when I used to wire houses I would average 8-10 receptacles on 15 amp circuits. For 20 amp circuits that would be fine. Really depends on what you plan to plug in. I would recommend one or two dedicated 20 amp circuits for the trains and then a separate circuit for convenience outlets around the room. Lighting can have it's own 15 amp circuit too.
Bob
Thanks Bob, I sent you an Email as not to hijack the topic here! The only thing goin to be plugged in is Z4000 and some other train stuff. and that it. This new room is for Trains stuff only!![]()
Thanks Mike and Bob. Gonna try to have a safe day today. Gotta finish ballasting and gluing Northtown.
Balshis posted:I cleaned a dried hairball off the front of my Marx 666 locomotive. I interrogated all of our cats, but none would confess to the crime. I have an outstanding warrant out for First-Degree Felonious Puking.
http://couchkitties.comicgenesis.com/d/20180303.html

Mitch
briansilvermustang posted:
I think the nicest by far are the ones that are down and dirty.
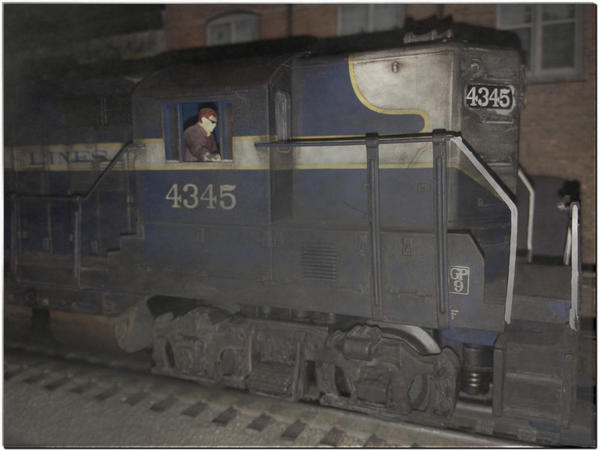

paul 2 posted:Mark, started to take shape. Nice job...................Paul;
Paul, Thank you!!
Mike and Bob,
Thank you for the vote of confidence!! Yes, I could stand on it, but I would fall getting up there!! ![]() While 165 pounds isn't much of a load, I won't have near that much in one spot anyway!
While 165 pounds isn't much of a load, I won't have near that much in one spot anyway!
Deuce posted:The littlest came out to watch today. I could see the wife taking a mental tally of everything on the table. Good thing she didn't look underneath! Ha ha ha.
Deuce... my office is the 2nd floor of a barn we used to live in until we finished building the house. As long as my wife doesn't snoop around a closet up there I think I'm okay for the time being! And she's out for 4 days with my daughter at the end of this month so that'll be my time to add 60 more square feet of tables for my layout with my 5 year old son. If my track arrives then we'll lay some rail too!
Mike I think it looks great! You have done a wonderful job by yourself. Although, that inspector looks like a tough one! I would say he won't let even the smallest infraction slide!! ![]()
looks GREAT Mike ![]() bet your ready for them 4 beers now...
bet your ready for them 4 beers now... ![]()
oops, make that 5... 1 for the inspector... ![]()
getting CLOSER !!! pull out a chair, and grab a cold one !!

I can see one of these parked on the siding by the brewery...

Mike, wow, you have made headway. Great job.....Paul
Access to this requires an OGR Forum Supporting Membership


