The fencing and weeds look great Bill. Well done!
What does the 8-2 chip brush look like?
Mick60,
Not sure what you are doing here but it looks very interesting. Looking forward to progress photos.
Dave
@ScoutingDad posted:Bob - I feel your pain. I was about to solder a jumper from an outer (switch) rail to an inner common rail when I realized it needed to be electrically neutral. If I had done what I planned the pick up rollers would have shorted as it rolled through the switch. Ended up just connecting the inner and outer rails and isolate the (inner) rail later - if I ever get around to wiring signals.
In certain ways 2 rail is much simpler than 3 rail. My nightmare with 2 rail HO was on the reversing loops where I need a DPDT switch to change polarity once inside the reversing loop. Never could figure out how to do that automatically. Of course I was 13 and it was the 60s - that may have had something to do with it.
Funny you mention this. I had the exact same thought as I was troubleshooting the issues. ![]()
![]() I had my first HO layout in 1970. No reversing loops but endless fun for a 8 year old.
I had my first HO layout in 1970. No reversing loops but endless fun for a 8 year old.
Bob
Mick, The base for the water feature looks great!!
@RSJB18 posted:Thanks Mark. Yea, going to take some time but I will see what I can do.
On to your problem- a three way toggle switch may do the trick. Wire power to the common terminal and up and down on the two traveler terminals.
Enjoy your nap!
Bob, That method would be better than my DPDT center-off switch I have now. I was connecting the limit switches to a 12-volt 1 Amp DC wall wart I had using the DPDT switch, and lost sight of what I was doing. I wired in the limit switches and forgot the linear adaptor. When I threw the switch one way, I shorted out the wall-wart and blew the bridge inside. It made a nice paperweight. The other 1-Amp wall wart I have is only rated at 7.5 volts. IT works, just slower. I'll look for something else so I can free up the Lionel Type 0100 variable DC transformer I bought long ago for my HO trains.
Jeff, I never installed reversing loops on any of my HO or N layouts for the very reason you cited. You and Bob may now guess why they put me out to pasture after 43 years in electronics. I'm surprised I lasted as long as I did! ![]()
Bill, That fencing scene with the high grass really looks great! Your ore ship is looking great!!
Great work everyone, I don't have a lot to say just a couple comments then its time to rest the remaining part of the day! LOL
Bob, have you thought about turning one of your pick up rollers 180 so there will always be a pick up roller on center rail.
Mark, I just use an old on-off-on toggle switch and the limit switches kill the power. flick it up and the bridge goes up, flick it down and down it goes. If you want I will take a photo for you tomorrow.
I didn't do much today, just finished my painting! I can tell you from my point for view. Its for the birds! LOL
Mike, I think why that didn’t work for me was because I was using the transformer that reversed polarity with a center off. I would appreciate seeing what you did again.
@Mark Boyce posted:Mike, I think why that didn’t work for me was because I was using the transformer that reversed polarity with a center off. I would appreciate seeing what you did again.
Ok Mark, I will run out and get a photo for you.
@Mark Boyce posted:Mike, I think why that didn’t work for me was because I was using the transformer that reversed polarity with a center off. I would appreciate seeing what you did again.
Hi Mark, here are a couple photos for you. The first photo is of the power source I use Its and old HO Transformer.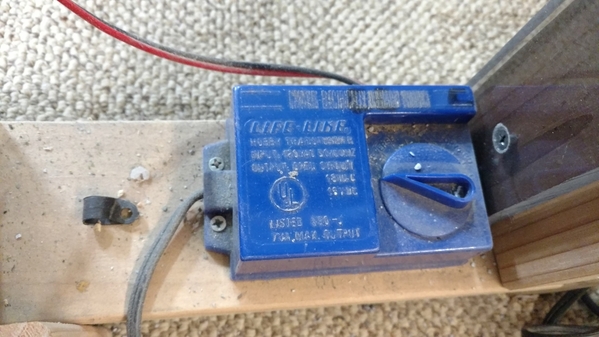
Second it a side view of the switch I am using, the center post go to the actuator.
The last photo is of one end. these wires go to the limit switch and are crossed over like an X on the back, one of the electrical guys can explain it better, all I know is it works! LOL
Good Luck Buddy!
Attachments
Mike, that’s what I was trying to do, but I confused myself, and got the power supply wires in the wrong place. Then my brain shut down. I told you before the neurologist didn’t find anything. It shows. The crossed wires reversed the polarity, so the bridge goes the other way. Thank you very much!!!!!!
@Tranquil Hollow RR posted:The fencing and weeds look great Bill. Well done!
What does the 8-2 chip brush look like?
I used 8 chip brushes, each are 2 inches wide. Chip brushes are used for painting on rough surfaces.
@RSJB18 posted:The problem is going over two switches at the same time. Since I had to shorten them I've lost some of the center rail that would have bridged these gaps. The gap is about 6-8" overall and rollers are hitting both at the same time. Going in and out of the curve seems to be OK but I need more track to run completely through them.
Obviously, Bob, you need to get some larger engines with wider spaced rollers ![]()
![]()
![]()
Mark and Mike that switch is what I used years ago to switch polarity on my HO track. I assume you are using dc motors which is why flipping polarity will run different directions.
What I never understood about 2 rail (holds for both HO and O) is if you had two engines running on a single track and one was going into a reversing loop, when you flip polarity doesn't it cause the direction of the remaining engine to reverse? I think you would need all kinds of blocks and keeping them straight while operating would be a full time job - does not sound like fun.
1005 screens? Holy Smoke! Well? Did nothing on layout today. How many here have been afraid or reluctant to start on a piece or certain task for fear of failure or not coming out the way you invisioned it?
Joe Gozzo
@ScoutingDad posted:Mark and Mike that switch is what I used years ago to switch polarity on my HO track. I assume you are using dc motors which is why flipping polarity will run different directions.
What I never understood about 2 rail (holds for both HO and O) is if you had two engines running on a single track and one was going into a reversing loop, when you flip polarity doesn't it cause the direction of the remaining engine to reverse? I think you would need all kinds of blocks and keeping them straight while operating would be a full time job - does not sound like fun.
Jess, you are right you needed lots of blocks to run two trains. It was a pain on a small layout constantly flipping toggle switches back and forth. Maybe that is why I took to running trains real slow. Command control is relatively expensive in comparison, but oh so much more fun!!!!
@Trainlover160 posted:1005 screens? Holy Smoke! Well? Did nothing on layout today. How many here have been afraid or reluctant to start on a piece or certain task for fear of failure or not coming out the way you invisioned it?
Joe Gozzo
Joe, I'll be the first in line to admit it!!
@Trainlover160 posted:How many here have been afraid or reluctant to start on a piece or certain task for fear of failure or not coming out the way you envisioned it?
I tend to be more of a "**** the torpedos, full speed ahead!" kinda guy. Now, mind you, I do have a few half-finished projects waiting for inspiration to strike, but getting started? No problem! ![]()
Mitch
@Apples55 posted:Obviously, Bob, you need to get some larger engines with wider spaced rollers


Yes Paul- and a bigger layout too. I tried a Lionel GP-9 too. Same result. ![]() I'm not beaten yet, I'll figure something out.
I'm not beaten yet, I'll figure something out. ![]()
Bob
@ScoutingDad posted:After a great deal of frustration, I think I am finally getting the hang of applying static grass. And making it look decent. The piece on the front left was the best I had been able to get - I was ready to give up. The green strip in the background is 4mm grass. Found out I had to apply and shake off 3 or 4 times to get the density I was looking for. The front right is an attempt to make grass tufts which I could put between the tracks. I am really looking for something 4 to 6 scale feet tall. These are about 2 feet using 12 mm static grass. I will try layering, but I think using natural rope hemp will get me the height I want easier than static grass.
This is an example of using furnace filter fiber glued to natural twigs and dusted with Scenic Express leaf. The base is foam covered with cotton batting painted brown, covered with ground foam. This piece is going in my tank farm grounds. I sprinkled leaves on the ground for a little more detail. I used spray adhesive to fix the leaves - this creates a bit of a problem in that when you try to open up the tree structure, I ended up compressing stuff together. A light touch with tweezers is the best way to separate the fibers. The left side of the left tree looks ok in person, but the photo shows it could use a little tweezing.
I also found out after completely rebuilding a switch section, I had a gap in ground connectivity. I could not figure out why some engines would blow their horn in that area. Going slow enough, smaller engines would stall.
I had intentionally wired my layout with the inner rail electrically isolated, (for future block signals) with only the outer rail to ground/common and had made sure I had wired power to all the center rails particularly in my Ross switches. I was very surprised to see a continuity gap at that section of the switch. Time to pull up the track once again and solder some jumpers on the common side. Thought I was done there.
NOTE: Twin Pines Rail Road took official delivery of two Illinois Central Gulf engines - a GP38 and GP40 - waiting assignment. See the TPRR thread.
ScoutingDad!! Now I got to thinking that I have fond memories of that camp site. Are you modeling it after Rum River Scout Camp or perhaps Camp MANYPOINT?
(Rum River was a very cold experience, as opposed to Camp Manypoint which was alot of bathing in the lake with FELS NAPTHA Soap. Yup Yup, Poison ivy, or and ground nesting bees....)
Very Kewl Find and I thank you for sharing it. I have never done that much detail, yet. (Smile)
@RSJB18 posted:Yes Paul- and a bigger layout too. I tried a Lionel GP-9 too. Same result.
I'm not beaten yet, I'll figure something out.
Bob
But seriously, Bob... can you either replace the two single rollers with two doubles, or possibly reverse the direction of the existing singles so that the distance between the rollers is less than 2 inches???
@Apples55 posted:But seriously, Bob... can you either replace the two single rollers with two doubles, or possibly reverse the direction of the existing singles so that the distance between the rollers is less than 2 inches???
I tried 5 different locos of various sizes, both single and double rollers. Same issues arose in different spots. It seems that the biggest area of concern is between switches 2 and 3. Switch 1 coming off of the tubular track seems to run through OK.
I'm not planning on changing my entire fleet for this. If in the end it doesn't work then I will chalk it up to experience and move on. ![]()
This is a before surgery photo. As you can see there used to be enough center rail between the switches to allow for proper power to the rollers.
Ironically it would be the first mistake I've ever made on my layout ![]()
![]()
![]()
Attachments
Bob, there goes your streak. At least you get your only mistake out of the way while you’re still young.😄
@RSJB18 posted:Yes Paul- and a bigger layout too. I tried a Lionel GP-9 too. Same result.
I'm not beaten yet, I'll figure something out.
Bob
Well, you can always go "Down in Scale", ?
I want to Stay in one scale, myself. '622 Lionel Switcher looks big ' my 027 milk car looks small, Ogauge 981 looks small, 675 must be traditional cause it looks like the 2025 engine, and the Beautiful Canada Rail King is HUGE! (get ride of the rail king stuff to fit smaller layout Miggy)
lol Salute
p.s. anyone trade a 622 Switcher for a smaller "Traditional" Switcher?? boy this hobby got to be master class session in a hurry! ![]()
@mike g. posted:Hi Mark, here are a couple photos for you. The first photo is of the power source I use Its and old HO Transformer.
Second it a side view of the switch I am using, the center post go to the actuator.
The last photo is of one end. these wires go to the limit switch and are crossed over like an X on the back, one of the electrical guys can explain it better, all I know is it works! LOL
Good Luck Buddy!
Mike, Looking at this again after a good night sleep (sort of) I see where the actuator wires and the two limit switch wires connect. Last evening, I didn't notice there wasn't a connection for the power supply. It seems to me the power supply wires must connect in series with each limit switch for this arrangement. Is that correct? (I removed the photographs you sent from this quote so as to not repeat them).
I do not know why I am having a time with this. It should be something I could have done in my first college electronics course back in '74. No wonder Consolidated Communications decided to put me out to pasture. ![]()
Miggy, agree with the "master class" comment. So many details to understand. Some RailKings are now 1:48 while others are still semi-scale, Lionel is all over the board and a real challenge for me to figure out their scale and "traditional scale"; scale offerings from different manufacturers are different sizes and visually apparent (check out the variations in stack containers); semi-scale in these are even worse - Lionel traditional look more like "S" scale to me. For now I have decided the Atlas steam era classics look fine with RK semi-scale steamers and can toss in a couple of other RK 027 size cars. All my diesels are 1:48 - at least supposedly. For the stacks I mostly have K-Line with some scale Lionel containers.
The trees are just for the entrance to my oil depot. I was not modeling a camping scene. But I'll have a spot in the next layout for one and include a crackling campfire. I am not familiar with the camps you noted. Aside from the High Adventure camps, we stayed within a few hours of the Chicago area - preferring summer camp at Owassippi in Western Michigan and weekend camping in Wisconsin, Iowa, Illinois and Indiana. I wonder if I can model young scouts chasing each other with burning sticks?
Attachments
I agree Scott and Jeff! I was not expecting this scale versus traditional issue when I switched from HO to O gauge back in 2012. It confused me for some time. I decided after most of a lifetime running scale (or supposed scale) HO, I would focus on scale O gauge. One exception are my RailKing passenger cars that I can pull with a RailKing Pacific. IT doesn't look bad next to other scale cars and engines. I just can't afford the room for scale passenger cars.
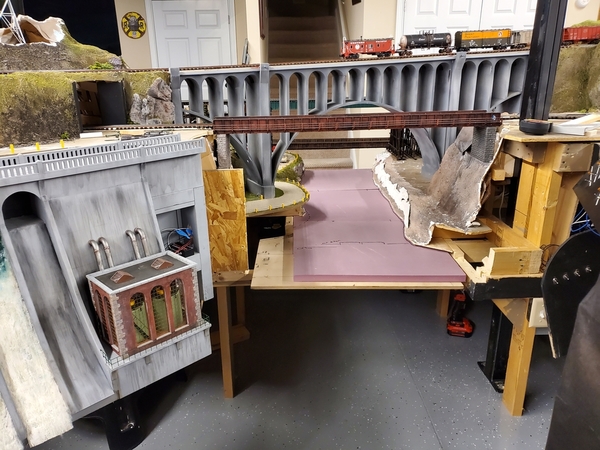
John, you and your friend are doing a nice job on the River. The dam looks great! Have you done the area above the dam, I may have missed if you posted anything about it.
Mark. Haven't posted those pics yet but will do when it's all installed. Thanks for asking. We placed the foam in river area to see if it would fit. We have taken it out now to carve it out. Next will be to get scenery to match everything else especially my little camping area which I've posted pics before. .A lot of work but so much fun. Thanks for asking.
Mark, you are correct about the limit switches, I split the power from the transformer and have one go to each limit switch, then from the limit switch to the toggle and then finely back to the actuator I believe. I would have to go out and check it again. It's almost 4am so I will be heading out there soon and will check then.
John the dam and river are going to look amazing on your layout! But then again what else is different your whole layout looks amazing! I cant wait to see the finished product!
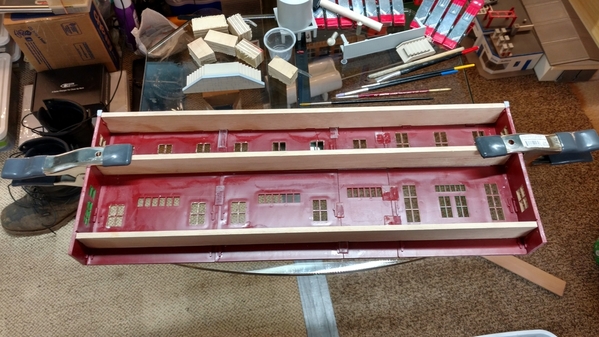
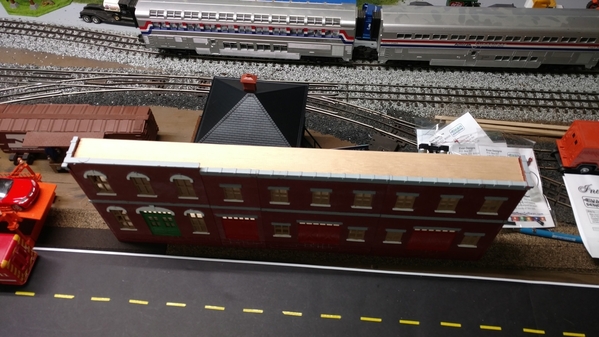
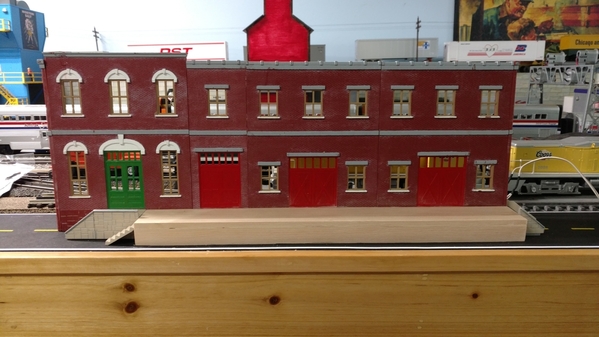
Well as for me yesterday I was able to get to the train room and work on my kit bash flat building. I was able to get all the walls glued together. Man I love that spray Kick for CA! That stuff works great! I also got all the floors and roof installed, today I plan on working on indoor lighting and maybe the loading dock!! Here is what I have so far! Enjoy.
Question, anyone have files for office and warehouse backgrounds?
I hope you all have a great day and find time to have fun with your layout and trains!
Attachments
I finished cutting out the foam board roof and installed my Union Station sign. I know, on a NYC subway layout, it should be grand central, but what the heck. It’s such a beautiful sign, particularly when illuminated. Next I need to re letter the building, finish the fencing, add the roof details, and build the car ramps. What a fun little project that wasn’t too difficult. I might even buy a few more mth banks while I can for another, more ornate, municipal building project down the road.
Attachments
That dam and water way are going to look amazing; as does the rest of your project.
Great work gents!
Jon- The dam, and power plant are going to look great. I'm with Mike G on the whole layout thing too. ![]()
Strap Hanger- Your RR, your rules- Union Station is fine. Looks great also.
Mike G- you are putting a winner together too!
Nothing for me on the switches. My father-in-law is in the hospital so we have been otherwise occupied. Looks like he should be OK but waiting for tests.
Bob
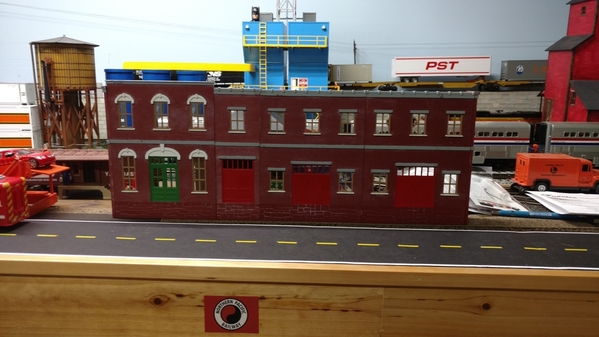
Mike, The building flat looks great!! I'm hoping to get back on the wiring for the actuator and limit switches later. I have loads of leaves to clean up before mowing starts. They blow in from the neighbor's trees which get caught under his giant shrubs in the fall, then blow into our yard over the winter. He's my age, but battling cancer right now, though the prognosis looks good.
Ray, Your Union Station looks great! Excellent use of kit parts.
Bob, I'll pray your father-in-law's tests show what they need to treat him and get him home.
Attachments
Thanks guys! Bob, sorry to hear about your father-in-law. Hopefully it's nothing too serious.
@Strap Hanger posted:I finished cutting out the foam board roof and installed my Union Station sign. I know, on a NYC subway layout, it should be grand central, but what the heck. It’s such a beautiful sign, particularly when illuminated. Next I need to re letter the building, finish the fencing, add the roof details, and build the car ramps. What a fun little project that wasn’t too difficult. I might even buy a few more mth banks while I can for another, more ornate, municipal building project down the road.
That is one creative and majestic looking station. Love it!
U B Da Man!
This is all I have been doing for the last three weekends.
Under the layout where all the drops come together and several sidings.
This is where the right leg crosses the floor to get the above photo. It was easier than running wire 40 ft one way and the 40 ft back the other way as the layout is U Shaped. Down one leg across the floor and back up the other leg.
Attachments
@Lionelski posted:That is one creative and majestic looking station. Love it!
U B Da Man!
Thanks John. Love the Warrenville layout, particularly that subway expansion.
Spent some time trying to figure out why my GP38 would not power up. MTH tech suggested I make sure the DCS/DCC switch was in DCS. It was and I got a return authorization for repair as it was likely a blown board. Well after flipping the switch a couple of times to no avail, saw the 3rail/2rail switch was in the 2rail position. A quick flip and whaddayaknow? engine started up just fine. I must had switched it when putting it back or taking it out of the box.
Anyway the lead GP40 and following GP38 have gotten move orders - they are on their way. Pretty cool how DCS allows lashing the engines together.
Attachments
Strap Hanger, Looking outstanding! IMOP anyone here would love to have that on there layout!
Bob, Praying for your Father-In-Law!
Mark, Thank you Sir!
Mitch, he Steeplecab sure is looking good!
Rick, Looks nice and neat! As long as it works is all that matters!
As for me I was able to get the inside lights wired, the stairs installed and a scratch built loading dock. I have some touch up painting t do, some weathering, and outside lights. I am still hoping someone has a file they can share with me of Office and Warehouse backgrounds. Here is a photo for your enjoyment! LOL


:max_bytes(150000):strip_icc()/anatomy-of-a-three-way-switch-1152436-final-ddc55160d5cb47929688406fda972301.png)


