
Hi Guys I hope your all doing well!

Jeff, yes it is all in fun, but then again like my dad use to say its all in fun till someone gets hurt! I did not mean to hurt anyone's feelings!

Mark, it says it has freight yard PA's so I don't know how that would work out, but I do like the idea. At the cost of the heavyweights it might take awhile, but then again I really only need to buy 3 or 4!

Well guys I was out in the train room again at 3 am this morning. I was able to finish up another set of little people, I think that will be it for awhile. I know I need some railroad workers, but I think I will buy them pre painted! LOL Here is a photo just for the fun of it!IMG_20210604_143136_1CS

I was hoping my new to me engine would be here today. But I checked the tracking and it is now due Wednesday next week, not today!

I hope you are all well and taking care of yourselves ! But most of all I hope you all have time to have fun on your layout and with your trains! Please have a great weekend!

Attachments

Images (1)
  • IMG_20210604_143136_1CS

Got a shipment from Cabin Fever yesterday and got around to opening up an MTH E94 Swiss Crocodile Production Sample. It has protocouplers, but the MTH manual said it should have sets of European couplers instead - Lenz-style coupler and Fine Scale European coupler. Hoping I will be able to get the drop ins from MTH so I can run the Brit passengers and European freight cars. It is 3rail engine.

Since there was no box or part number listed - I was not sure if it was a PS3 version. Took off the cab and found a loose wire. I think it should go into the grey colored wire nut along with two other red wires. See photos. I'll then power it up and see if anything happens. It is a PS3. I was surprised to see a mild amount of corrosion on the mild steel parts. I've never seen that in MTH engines or rolling stock unless they had been sitting in water.

If anyone knows if my guess is correct please let me know. Any help or cautions is appreciated.

I think the wires are to the pantograph power pick ups. These pantographs are far more delicate than the ones I have on my box cab electrics. Also the pantograph mechanism looks different with a white slider operated by a black colored cam. These are seen in the second photo at the top - a little blurry.


IMG_2737IMG_2738

Attachments

Images (2)
  • IMG_2737
  • IMG_2738
Last edited by ScoutingDad

Thanks GRJ  - I should have run a resistance test to confirm now that I think about it. Made the lead a little longer and attached to the grey wire nut. Long story short - the engine started up and ran fine in conventional mode. Headlights work, marker lights no, but may be turned off I'll have to check with my DCS and also check switch positions on the top of the unit. This one is a bit of a challenge getting apart - I had to loosen the screws connecting the trucks to the motors on both sides to get enough clearance to put the center section back on. 

Will post a short video later - start-up and whistle sounds are fun IMO. 

BTW - there was a question a while back regarding releasing the pantographs prior to operation. These are the first pantographs I've seen which have a little hook which clips under the springs. Pretty obvious to me that these need to be freed for the pantograph to raise. When down they do not re-engage to lock. 

@ScoutingDad posted:
BTW - there was a question a while back regarding releasing the pantographs prior to operation. These are the first pantographs I've seen which have a little hook which clips under the springs. Pretty obvious to me that these need to be freed for the pantograph to raise. When down they do not re-engage to lock.

With the motorized operating pans, they don't lock under the hooks when down, that's by design.  Also, you can lock them both down and then even though the motors run, the pans will stay down.

@ScoutingDad posted:

This one is a bit of a challenge getting apart - I had to loosen the screws connecting the trucks to the motors on both sides to get enough clearance to put the center section back on.

Looks at the bright side, I worked on the Lionel 3-Truck Shay yesterday, you want something that's a PITA to take apart and put back together, look no farther!

GRJ - want to work on my MTH PS1 Shay? This can't be worse than the Lionel.

I had it apart to put in a BCR and got it back together with no problems.  However it looks like every available space is taken. I've been told these are a PITA to service due to the lack of space. The engine runs for a while and then sputters like it is losing power. I guess a board is going bad. I have a PS3 steam upgrade kit for it, but decided this was beyond what I was willing to tackle. Jeff

@RSJB18 posted:

Hooked up my Cab 1L system on my bench and programmed 2 locos in no time. I have to set it up on the layout later.

Within 2 weeks I added a DCS Commander and a Cab 1L- I can safely say that there is no turning back now!

@gunrunnerjohn- time to upgrade my Beeps to Mini- commanders Any tips or tricks before I dive in?

Bob

Wow, Bob, no slippery slope for you... just jump headlong off the cliff

Welcome to the light!!!

@RSJB18 posted:
@gunrunnerjohn- time to upgrade my Beeps to Mini- commanders Any tips or tricks before I dive in?

Well, they're fairly straight forward if you don't go crazy like I did with the one I added the CC-Lite and full sound to.

Cruise Commander Lite Beta Test, Part Deux

Now that the CC-Lite is no longer available, you may not be able to get cruise into these, the CC-Lite barely fit.  So, you'll be looking at the MiniCommander II.  I would use the one with Smoke & front lamp.  Since all of them have LED light outputs, the smoke (feature) output allows you to have an additional control output for a strobe, cab lights, etc.  The MC-II also has serial data output for a sound board, which is a must-have when I do these.

As you can see from my wiring diagram in the above linked thread, I went Whole Hog as far as lighting features, number boards, directional markers, beacon, cab light control, etc.  The BEEP shell is kinda' neat in that you can actually light the number boards, markers, headlights, etc.

@Apples55 posted:

Wow, Bob, no slippery slope for you... just jump headlong off the cliff

Welcome to the light!!!

Yes Paul- go big or go home I always say!

Well, they're fairly straight forward if you don't go crazy like I did with the one I added the CC-Lite and full sound to.

Cruise Commander Lite Beta Test, Part Deux

Now that the CC-Lite is no longer available, you may not be able to get cruise into these, the CC-Lite barely fit.  So, you'll be looking at the MiniCommander II.  I would use the one with Smoke & front lamp.  Since all of them have LED light outputs, the smoke (feature) output allows you to have an additional control output for a strobe, cab lights, etc.  The MC-II also has serial data output for a sound board, which is a must-have when I do these.

As you can see from my wiring diagram in the above linked thread, I went Whole Hog as far as lighting features, number boards, directional markers, beacon, cab light control, etc.  The BEEP shell is kinda' neat in that you can actually light the number boards, markers, headlights, etc.

Thanks John- I looked at the prototype thread the other day. Looks pretty simple. The MC II was what I was looking at. I like the strobe you did on yours. If I get stuck I will reach out.

Bob

@RSJB18 posted:

Gee Paul- I thought I bought a lot of locos......

You do, Bob... but to quote a line I heard recently, “go big or go home”   And since you like the PRR, you should know that the manual says these E7’s will run on O-36 curves   I have the second engine I picked up which I haven’t unpacked yet, and one more on order (a NH version of the Mohawk) - that will most likely be the last engines I buy (and I will vehemently deny ever saying that when the next catalog comes out). I even plan on selling (the horror!!!) two CC II engines that I have replaced with Legacy versions... really need the room

@ScoutingDad posted:

As promised - a short video of the E 94 Crocodile.  Can anyone tell me what the conductor is saying? It sounds like German to me.

I think I'll have to upload the new sound files.


Definitely sounds like German... I believe he is saying “we are being held here by the dispatcher due to unplanned track work ahead”… sorry - couldn’t resist   Very nice engine, and I really like the sound of the whistle. If you do upload new sounds, I hope you keep the whistle.

Didn't do much with the layout, but I DID make the papers...  ;-)

https://www.nwaonline.com/news...s-140th-anniversary/

Mitch Marmel with Arkansas & Missouri Railroad welcomes passengers aboard a train Saturday during the Founder's Day celebration, honoring the 140th birthday of the city of Rogers. The city was founded along the Frisco Railroad line in 1881. Go to nwaonline.com/210606Daily/ to see more photos. (NWA Democrat-Gazette/Flip Putthoff)

Great job, Mitch... almost didn’t recognize you without your official Grand Pooh-bah chapeau

Morning guy, some wonderful work here! I am glad your all staying busy. I think it keeps some of you out of trouble!

Man you make a little comment about a PRR and people want to break out the torches and pitchforks! LOL I do apologize to any hurt feelings! Bob, I think you just might have to step up the pace and get a few more engines to keep up with Paul.

Jeff, nice little video and the engine sounds really great. I cant help you with what he is saying, but do have a question. How does that work with one pantograph up and one down on the layout. If I remember correctly you have some low areas that go under part of your city!

Geno, looks like some great track work there! I Really hope you had a great day yesterday cause if today goes like wiring goes for me today is really going to suck! LOL Really I hope you have a great day today also!

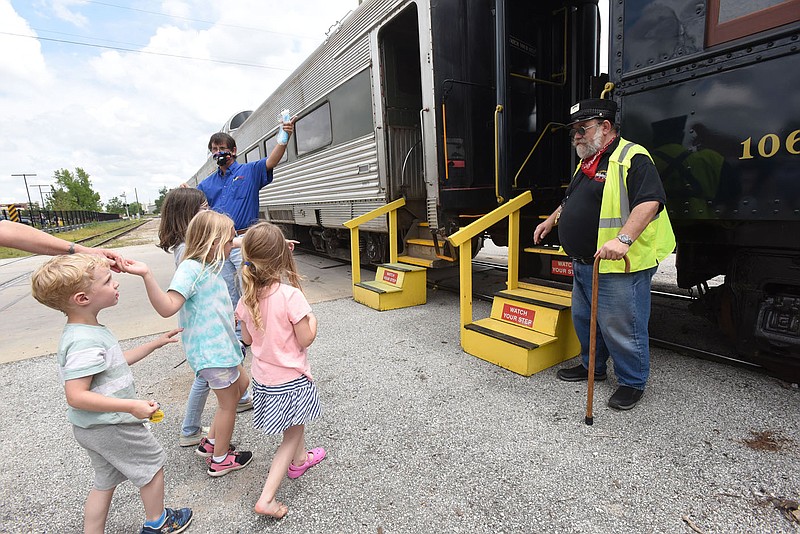
Mitch, What a great honor to be able to welcome younger generations to trains. Teach them well and work on there parents to buy them starter sets!

Nothing new from me as I spent yesterday cleaning the train room, hung some new prints and just checked every battery in every engine I have. I got scared when I asked about my new to me Steam Engine and everyone gave me advice about PS2 boards and old batteries. But if it wasn't for all the great folks here things could have been alot worse.

P.S. The engine that I was to be delivered Friday was a no show. I checked the tracking again and they changed it to Wednesday next week! LOL Oh well.

I hope your all having a great weekend!

MikeG  - Wow thanks for asking. Turns out these pantographs are taller than my other ones. Because of the pan twist they need 6 inches of clearance, other need 5 1/2. I have a couple of spots no more than 5 1/2. That would have been a mess.  Funny almost had a mess already when I was taking the video. I left my hinged bridge in an open position thinking I would not take any moving videos. Well I did and about a foot from a disaster I remembered and stopped the engine. Whew. I get so focused doing things I forget to remember what I needed to remember. Doesn't help it was behind me when I was setting up the shot.

Here is a photo of a Woodland Scenics building kit in partial completion. Its almost ready for a coat of dulcoat. I find the acrylic paints tend to flake off if I don't put a sealing coat over it. Anyway it will help with the decals. I ended up mixing 7 different colors to get the brick color I was looking for. Of course I did not write anything down so I'll never get this color again. My first attempt at adding brick color variation to add more interest. Mostly happy, but there are a few spots where there was a touch too much paint so it bled over into surrounding brick. Nice thing about acrylics is you need several layers to develop the color. In this case one coat is enough to add interest. 

I am going to have to fire the mason. Until I enlarged this photo I did not see the brick walls do not align properly, offset by a 1/2 brick front wall to side wall. When I glued the walls together I was focused on getting the corner seams tight and making sure the base was flat. Never considered the mold would have an offset. I'll have to take a look and see if the others are aligned. Never would have seen this without enlarging the photo.


20210606_124458

Attachments

Images (1)
  • 20210606_124458
@ScoutingDad posted:

MikeG  - Wow thanks for asking. Turns out these pantographs are taller than my other ones. Because of the pan twist they need 6 inches of clearance, other need 5 1/2. I have a couple of spots no more than 5 1/2. That would have been a mess.  Funny almost had a mess already when I was taking the video. I left my hinged bridge in an open position thinking I would not take any moving videos. Well I did and about a foot from a disaster I remembered and stopped the engine. Whew. I get so focused doing things I forget to remember what I needed to remember. Doesn't help it was behind me when I was setting up the shot.

Here is a photo of a Woodland Scenics building kit in partial completion. Its almost ready for a coat of dulcoat. I find the acrylic paints tend to flake off if I don't put a sealing coat over it. Anyway it will help with the decals. I ended up mixing 7 different colors to get the brick color I was looking for. Of course I did not write anything down so I'll never get this color again. My first attempt at adding brick color variation to add more interest. Mostly happy, but there are a few spots where there was a touch too much paint so it bled over into surrounding brick. Nice thing about acrylics is you need several layers to develop the color. In this case one coat is enough to add interest.

I am going to have to fire the mason. Until I enlarged this photo I did not see the brick walls do not align properly, offset by a 1/2 brick front wall to side wall. When I glued the walls together I was focused on getting the corner seams tight and making sure the base was flat. Never considered the mold would have an offset. I'll have to take a look and see if the others are aligned. Never would have seen this without enlarging the photo.


20210606_124458

Jeff, I guess the big question is what are your plans to gain that extra 1/2" that you need?

I am glad you didn't have an accident with the bridge up. I cut all power to the approach near my open bridge by about 2 feet and it is powered from the other side when the bridge is down just for that reason!

I think your building looks great and even with the pictures I cant see the brick pattern. IMOP I think your fine! The color really looks great. I might have to try something like that with my next building. It just happens to be an engine house that my new to me steamer should look good in!

@ScoutingDad posted:

offset by a 1/2 brick front wall to side wall. When I glued the walls together I was focused on getting the corner seams tight and making sure the base was flat. Never considered the mold would have an offset. I'll have to take a look and see if the others are aligned. Never would have seen this without enlarging the photo.


20210606_124458

When this situation has occurred with my kits I have added painted solid styrene  rods from Evergreen Scale Models.

This illusion looks like drainage pipes from the roof and covers the brick seams at the same time.  Not an original idea but at I have varied them to look better....

Your building and colors used are great. And Always enjoy your work an conversations with Mike🤣

Seth - thanks for the comments. As it turns out, the back bricks line up perfectly with the side walls, so it is only the front which is off. I have to look really closely to even tell there is any misalignment. This kit comes with all sorts of adds including downspouts and electrical boxes. By the time I get all the other details painted and added on, no one will even see it.  The kit is Woodland Scenics PF5890 O Lubener’s General Store and might look similar to this when I get it done. I am going to get micro flat LEDs and glue them into the goose neck lamps. I'll use the painting with latex trick to hide the tiny wires along the tubing.

Woodland Scenics PF5890 O Lubener’s General Store Building Kit

Yes of course,

I should recognize the store front.  The store is a great kit and yours will be a wonderful addition to your layout scenes.

My General store is converted to my dad’s family’s businesses. Now King’s 5 cent to 25 cent Dime Store with the son’s Louie King Insurance Agency on the second floor....

I enjoy personalizing the businesses...

My signage is not as good. As Woodlands

Maybe someone can advise me on how to develop better signage.

Yes, I’ve seen conversation on OGR about  what great kits Woodlands Scenic makes available at such good prices...

Have a good week!

I ran my O and HO Gauge train layout for my stepfather's sister, Helen, just recently. It was great fun running all three trains around their loops, that is. But then, I got triggered when my two HO Gauge trains derailed, and that wasn't really fun. It's the fact that I don't have enough elevated risers for my upper loop. I'll send you a photo in a while.

@ScoutingDad

I appreciate the heads up on your lighting method with the micro LED.

My thought has been to wire a wheat light under the existing WS pretend lamp which hang over the store front signs.  Wheat lights from Cir kit Concepts,  with long leads. I believe the ones I have are 18”.   And I believe the gluing the very small leads to the WS fixture and then paint the wires will work just as you plan.

Evergreen has very small tubing for lighting with the wheat lights that I have seen used by Alan Graziano.

Please share your sources for the micro LED that you plan to use...

Thanks

@mike g. posted:

Morning guy, some wonderful work here! I am glad your all staying busy. I think it keeps some of you out of trouble!

Man you make a little comment about a PRR and people want to break out the torches and pitchforks! LOL I do apologize to any hurt feelings! Bob, I think you just might have to step up the pace and get a few more engines to keep up with Paul.

Well, Mike... good thing you didn’t take a shot at the D&H or NH - for that, we pull out the voodoo dolls and extra long pins. You don’t want to know what we do to anyone maligning the NYC... suffice to say, we know a couple of guyz

@Apples55 posted:

Well, Mike... good thing you didn’t take a shot at the D&H or NH - for that, we pull out the voodoo dolls and extra long pins. You don’t want to know what we do to anyone maligning the NYC... suffice to say, we know a couple of guyz

Well I sure am glad I am in good blessing with you guys! If I was raised back there I would think the same thing!

Add Reply

Post

OGR Publishing, Inc., 1310 Eastside Centre Ct, Suite 6, Mountain Home, AR 72653
800-980-OGRR (6477)
www.ogaugerr.com

×
×
×
×
Link copied to your clipboard.
×
×