
Mark Boyce posted:
RSJB18 posted:
Mark Boyce posted:

Oh now I get it!  I had no idea what that thing was hanging from the cat's neck in the photograph Bob first posted!  Still, it seems an odd shape for a camera to me.  Shows I don't keep up with the latest items, or maybe this thing isn't the latest, and I'm a couple decades behind.

Kinda lost some of the meaning with the post falling on the top of a new page. Just havin' fun with Mitch.

No it wasn't that, I was following along message by message.  I just never saw one of those (cameras?) before.  What is it called?

Not sure Mark but I've seen videos of people putting them on their cats to see what they are up to outdoors. Some pretty funny stuff on Youtube.

Big_Boy_4005 posted:

Thanks Mike and Mark.

I spent a couple hours downstairs after that post. I got the other two (1 & 2) backdrop supports in, and finished securing the other two (3 & 4). They had just been hanging there with only their top ends screwed to the upper benchwork. 5 & 6 have been in place since I rebuilt the helix supports more than a year ago. Clearance is going to be tight for the front track. I took out a couple track screws and realigned the track slightly, and that's why I wasn't in a hurry to ballast that section.

IMG_7739a

In all honesty, my health has been more of a motivating factor than a hindrance. I want to see this thing more or less finished and have a chance to host operating sessions.

I agree Elliot!  I have seen too many men with physical jobs retire, then sit in a rocking chair, and before long they couldn't do anything.  My dad has been an excellent example of keeping going at a moderate pace, and it was only this year at age 86 that he couldn't keep up.  Mum did too, but osteoarthritis has beaten her down through her 80s. 

I'm looking forward to seeing your reports here of operating sessions in Minneapolis area!!! 

RSJB18 posted:
Mark Boyce posted:
RSJB18 posted:
Mark Boyce posted:

Oh now I get it!  I had no idea what that thing was hanging from the cat's neck in the photograph Bob first posted!  Still, it seems an odd shape for a camera to me.  Shows I don't keep up with the latest items, or maybe this thing isn't the latest, and I'm a couple decades behind.

Kinda lost some of the meaning with the post falling on the top of a new page. Just havin' fun with Mitch.

No it wasn't that, I was following along message by message.  I just never saw one of those (cameras?) before.  What is it called?

Not sure Mark but I've seen videos of people putting them on their cats to see what they are up to outdoors. Some pretty funny stuff on Youtube.

Yes, I'll bet those videos would be funny!!  

Last night I rewired four 022c controllers. This was my first time soldering anything, and it went much better than expected.  I did slightly burn my index finger if that gives you any idea on my initial expectations

When I was finished, I tested them. Three worked perfectly, but on one controller I had a little excess solder on one of the wire contacts that was causing both light indicators to light at the same time. I was able to quickly heat up the area and remove the excess solder.

Small win in the big scheme of things, but it was satisfying to resurrect the controllers. Hope to post some pictures of the layout and progress soon. 

JD

Last edited by JD2035RR
Adriatic posted:


Even with a go pro I think you'll need the stability of a car and at least one more truck. A Schnabel? 


Ectually, without the camera, the little goober is quite stable when pushed around the layout.  I suspect one of those featherweight micro spy cameras will work quite nicely!  One thing I do plan to do is get a replacement for the positioning handle.  The big one is fine for a big camera (when, for example, I'm using the trainpod for taking still pics), but for action shots,  I wanna get a metric screw to replace it so it doesn't interfere with the locomotive when being pushed about...  

Mitch 

Mike Webb, a local HO dealer, had an American Flyer 4-4-0 whose owner had had it sitting on a mud floor for 30 years...  

GEDC0502

The motor and gears had fused together into a solid lump of rust. 

Frankly, the most valuable part of the thing was the mud dauber nest on the inside of the boiler.  

GEDC0503

I decided to clean it up as best I could, wire brushing the rusty metal bits and scrubbing the mud off the shells.  Here, I'm installing a bracket for a replacement pilot I had on hand. 

GEDC0504

The pilot installed...

GEDC0505GEDC0506

...and after painting.  

GEDC0507

While this particular loco will never operate again,  it is slated for a nice retirement as a static display at the J. Reilly McCarren Museum in Springdale, AR at the Arkansas and Missouri depot!   

Mitch 

Attachments

Images (6)
  • GEDC0502
  • GEDC0503
  • GEDC0504
  • GEDC0505
  • GEDC0506
  • GEDC0507
M. Mitchell Marmel posted:

Mike Webb, a local HO dealer, had an American Flyer 4-4-0 whose owner had had it sitting on a mud floor for 30 years...  


The motor and gears had fused together into a solid lump of rust. 

Frankly, the most valuable part of the thing was the mud dauber nest on the inside of the boiler.  

I decided to clean it up as best I could, wire brushing the rusty metal bits and scrubbing the mud off the shells.  Here, I'm installing a bracket for a replacement pilot I had on hand. 

The pilot installed...

...and after painting.  

GEDC0507

While this particular loco will never operate again,  it is slated for a nice retirement as a static display at the J. Reilly McCarren Museum in Springdale, AR at the Arkansas and Missouri depot!   

Mitch 

Nice work Mitch, lots of people will enjoy seeing it in the museum.   

Last edited by TedW

Today I got the second coat of earth color on. Once that sort of dried I started laying down the ground turf and ballast. I did the same around the Morton Salt building but no ballast. And this afternoon while doing that FED EX dropped off a package from Marios Trains. I decided to start buying some backup units. Now I can go back to the table under the stairs and with the gluing all done I can start to make up the frame for the table that will go in front of that one. Pics....................Paul

DSCN0965DSCN0967DSCN0966DSCN0968DSCN0969DSCN0970

Attachments

Images (6)
  • DSCN0965
  • DSCN0967
  • DSCN0966
  • DSCN0968
  • DSCN0969
  • DSCN0970
Big_Boy_4005 posted:

Thanks Mike and Mark.

I spent a couple hours downstairs after that post. I got the other two (1 & 2) backdrop supports in, and finished securing the other two (3 & 4). They had just been hanging there with only their top ends screwed to the upper benchwork. 5 & 6 have been in place since I rebuilt the helix supports more than a year ago. Clearance is going to be tight for the front track. I took out a couple track screws and realigned the track slightly, and that's why I wasn't in a hurry to ballast that section.

IMG_7739a

In all honesty, my health has been more of a motivating factor than a hindrance. I want to see this thing more or less finished and have a chance to host operating sessions.

Tweaking the details is something we all hope to avoid through thorough planning and prior experience.  It never works out that way.  No matter how much room is given there's always a need for another 6" here and 3" there.  I actually notched out a section of rafter wall just to accommodate a broad curve.  I will shortly be returning to that section of layout to rework the curve and eliminate the notch.  It became apparent early on in the build that constructing in a manner that allows easy re-positioning of the track plan sure helps when final tweaking is involved

By no means is my layout as complex as yours, Elliot.  During the planning stages the biggest obstacle I had was thinking in 3D.  I would have had many sleepless nights tackling a multi-layered, prototypical layout like yours.  As always, the immensity of the project is literally mind blowing.

Bruce 

Thanks Bruce. I'm not sure that any amount of planning would have caught that one. There was never a well drawn out plan of the upper deck anyway. I'm a firm believer in "seat of the pants engineering". There may need to be an even further fudge when I get around to hanging the Masonite. What I'll do is add a support block to the bottom of that raised roadbed, which will pull the backdrop a bit out of plumb, but give a little more room for the lowest track.

More progress today. I started by entering all of my paperwork from yesterday into the computer. I named all the signals on the lower level. Tomorrow, I'll do the same for the upper level.

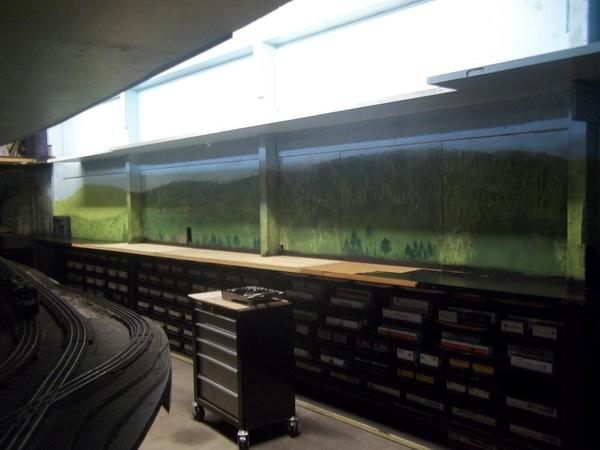
Back to work on the south wall lower deck, Hastings and Prescott. I filled in the narrow strip next to the backdrop, and more of the river bottom. My goal here is to get everything filled in so I can paint the rails.

IMG_7743


IMG_7741

This is an interesting angle. The two tracks near the backdrop are Prescott, Wisconsin (ex CB&Q). The area with the fresh plywood is the not so mighty Mississippi River. The next track is the CP (ex Milwaukee Road) main at Hastings, Minnesota, and the tracks in the front are the ConAgra Mill.

IMG_7744

I got tired of kicking that piece of fascia which has been on the floor for more than a year, so I just tacked it in place. In the process, I learned that I needed to let it out on the inside curve, because the 89' cars were hanging over and rubbing.

IMG_7740IMG_7745

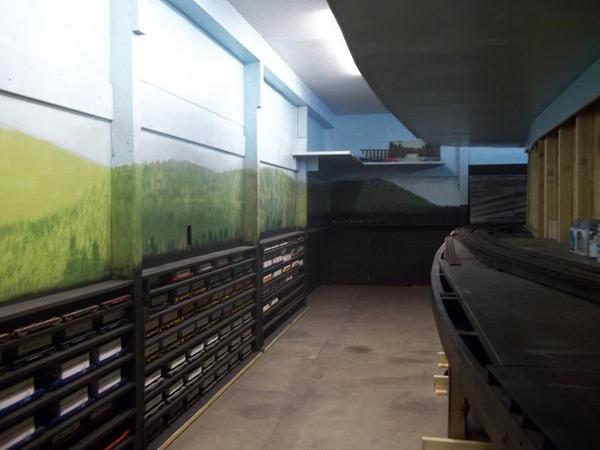
I broke out the pink foam to create the river banks. By the way, this is going to be a winter scene in the whole aisle.

IMG_7742

Last week, I mounted my signals to the signal bridges. These still need to have their wires run over the bridge and down the legs.

IMG_7748

This one has had its wires run, and just needs to have plugs soldered on and the brass tubes painted silver.

IMG_7749

Here's a Plasticville bridge. Its name is Oakland, after a real station on the joint BNSF - CP. each of the four signal heads has a name, O1E, O2E, O1W and O2W.

IMG_7746IMG_7747

Attachments

Images (10)
  • IMG_7743
  • IMG_7741
  • IMG_7744
  • IMG_7740
  • IMG_7745
  • IMG_7742
  • IMG_7748
  • IMG_7749
  • IMG_7746
  • IMG_7747

Elliot, That is quite a bit of work accomplished.  Yes, I guess the Mississippi isn't so mighty in Minnesota; I'll look forward to seeing how you approach the winter scene.  I recall walking across the bridge over the Allegheny River in the winter to go to college in the mid '70s.  The wind blew right through you, and looking down at all the jagged hunks of ice that covered the still moving river made me feel about 50 degrees colder than what it was.  I am glad to be sitting in a warm house writing this on a blustery Pennsylvania day.

Yesterday I ran trains for a while. I found out I should probably add more power since running 3 engines with smoke plus 8 passenger cars seems to trip my Z-1000 breaker. I may end up doing the Auxiliary power on my TIU, so I am not running my TIU and my engines from the same power source. I am not sure if that will really help on my layout.

Then maybe after the Holiday's I can work on the construction again.

Elliot wrote:

" I'm not sure that any amount of planning would have caught that one. There was never a well drawn out plan of the upper deck anyway. I'm a firm believer in "seat of the pants engineering". "

Same beliefs also.  That's the reason they make and we use flexible track.  Hey, if freelancing is good enough for governmental accounting, it's good enough for me. 

Bruce


Thanks guys!

Mark - The Mississippi is quite mighty in Minnesota. By the time it gets to the Twin Cities it is huge. I just don't have room to model it as such, especially in that scene.

Last year my wife and I went up north to Lake Itasca to see the fall leaves and the headwaters. I had been there many times, but she had never been. A selfie with the monument.

20161004_094825

You can see the monument at the far left, and the river as it flows out of the lake. Humble beginnings.

IMG_6961

Here it is at Hastings. The Minnesota River has already dumped into it 20 miles up stream, and the St Croix will join it a couple miles down, where it forms the border with Wisconsin at Prescott.

261_0915

Dave - That's a bummer that you guys are in a hurry. Hopefully next time.

Attachments

Images (3)
  • 20161004_094825
  • IMG_6961
  • 261_0915

I was out rail fanning today on a CSX branch line and scrounged some black plastic foam strips that must have blown off a rail car. It is black, 7/8" thick and the long strips are 8 ft. long and 5" wide. It feels stiffer and stronger than what you find in Lowe's and HD. Any ideas??  I have enough to put it under my Standard gauge track but no enough for the O gauge-I think. I would like to use it in place of what I am using now-cardboard and indoor carpet.  Is anyone familiar with this  ??  I think it is industrial  grade insulation.

paul 2 posted:

I had to take a step back today. The more I stared at the steps the more I knew I had to cover them up a bit. So I cut a bit a Masonite to cover them a bit. I got a coat of white on and once that is dry I can apply my blue paint. In the meantime it is back to cutting and measuring for the front table. Pics............PaulDSCN0971DSCN0972

Yes Paul, I would have done the same thing!!

For the first time in 6 months, I finally got something done on our layout! The last opportunity I had to work on the layout, my son Chris removed 3 Lionel O-22 remote control switches that had been in place for many years so they could be taken to a repairman for servicing and cleaning in that they were malfunctioning. One of them, my son Chris had to extract from under a  tunnel. It operated one side of a dog-bone reverse loop. It was screwed in place. Chris had to remove the screw by feel.

The switches have been back in good working order for quite a few months. I feared that we would never be able to re-install the switch under the tunnel, so, I put off the installation until today. I finally got up on the platform (which is no small task at my age and in my physical condition) , performed major surgery on the side of the mountain under which the tunnel runs, positioned a flood light to illuminate the tunnel's interior and managed to replace the switch. I was even able to screw it back in place.

I feel very satisfied with my accomplishment and hope to do more in the very near future. For now, I think I will go eat a bottle of Motrin and relax a bit.

briansilvermustang posted:


                           now just need a motorized mouse to run down the rails.....

One evening about 5 years ago, I and several of my friends were the guest of Howard Zane to see his legendary HO layout in the basement of his house plus the two other basement extensions that he added. The layout is incredible. Howard's scenery and handcrafted buildings are breathtaking.

Anyway, to get back to the mouse topic, at one far end of the layout on a mountainous terrain, I saw a live mouse coming out of an HO tunnel portal climbing the mountain and entering another, repeatedly. The mouse was putting on quite a show. I call several others to come and see it. Howard came over with them. I asked Howard if the mouse was motorized and if he were operating it remotely. Howard briefly smiled one of his rare smiles. I am sure he was thinking of how he could actually accomplish this until one of his cats positioned himself to jump to platform level and end the show. Before kitty could do this, Howard grabbed the cat and took it upstairs. In Howard's layout, the mouse did way less damage than the cat would have catching the mouse.

Thanks for that info MODELTRAINPARTS. It cam at the right time and I sealed the whole bottom. I just finished painting the blues on so I think this is where I am stopping for the night. With it all painted I can now put the whole table in and in the corner where the stairs come down I have pink foam to cut and put in for the hill/cliff I am putting in that corner. Pics.............Paul

DSCN0973DSCN0974

Attachments

Images (2)
  • DSCN0973
  • DSCN0974
Mark Boyce posted:

Elliot,

Thank you for the information and photographs!  Now we see who the wonderful woman is who lets you do all this stuff in the train room!  She's a keeper for sure!

You're welcome Mark, and yes she is a keeper, but not necessarily because she puts up with my train habit. She knew all about that shortly after she met me. It was hard to keep it a secret. On the other hand, the fact that she frequently comes with me to dialysis, then puts pressure on my punctures while I clot at the end of my session... Now that's love!

P.S. She approved this post.

Last edited by Big_Boy_4005
Big_Boy_4005 posted:
Mark Boyce posted:

Elliot,

Thank you for the information and photographs!  Now we see who the wonderful woman is who lets you do all this stuff in the train room!  She's a keeper for sure!

You're welcome Mark, and yes she is a keeper, but not necessarily because she puts up with my train habit. She knew all about that shortly after she met me. It was hard to keep it a secret. On the other hand, the fact that she frequently comes with me to dialysis, then puts pressure on my punctures while I clot at the end of my session... Now that's love!

P.S. She approved this post.

I agree!!  I can picture Mrs. B. doing the same if I had to go on dialysis!  She sure did keep the nurses hopping when her father was on dialysis!


                                                            i wanna help....

                                          like hand prints in the new cement.....

                           O K, let's get this done and go have some pizza........

                                                             short work night....

Attachments

Images (6)
  • mceclip0
  • mceclip0
  • mceclip0
  • mceclip1
  • mceclip2
  • mceclip3
Last edited by briansilvermustang

Been working on this scratch built Ice and Cold Storage building for about a month... Finally got the LED lighting, and sign completed and got DSCN3722 [2)DSCN3724 [2)it back on the layout today.   I had purchased the Icing Platform some years ago and decided it was perfect for the fleet of PFE and ATSF Reefers that I have accumulated.   Ended up sizing the storage building to fit the platform.   It's built so that the West Bound Arrival/Departure track goes underneath it in the back corner, needed to start filling this corner and wanted to hide the 90 degree 096 turn back there. 

Attachments

Images (6)
  • DSCN3722 (2)
  • DSCN3723 (2)
  • DSCN3724 (2)
  • DSCN3725 (2)
  • DSCN3717 (2)
  • DSCN3718 (2)

I was supposed to go to an NMRA meeting this morning, but when I woke up at 9:15 for a 9:30 event, it was obvious that I wasn't going. I had been going back and forth about it all week. What I really wanted to do was work on the layout, so I got downstairs by 10:00.

I spent the first two hours transcribing my work from Friday into the computer. What this is, is a list of all the signal heads that will be on the layout, 169 of them. They are broken down by masts, and each mast one, two or three heads. Each head has a long name in the first column and a short set of initials for JMRI. This is all about staying organized.

IMG_7755

I did a little more work on my river banks.

IMG_7750

There was no way around having to use the saber saw to cut that angle in the plywood. What a mess! Most of the sawdust stayed up top, but a bunch rained down on the trains. I spent about an hour cleaning that up.

IMG_7751

I added some lights to the hidden yard. Unfortunately, they didn't have the desired effect. They don't throw off enough light to keep the cameras in color mode when the room is dark. I still like them, and have two more strings to hang.

IMG_7752

While I was at it, I tied up all the wires. There are only a few wires for the signals left to add. Those will be easy because they will be Cat5's.

IMG_7753

Now I just have to put all the trains back together down there.

IMG_7754

Attachments

Images (6)
  • IMG_7755
  • IMG_7750
  • IMG_7751
  • IMG_7752
  • IMG_7753
  • IMG_7754
Last edited by Big_Boy_4005
Randy Harrison posted:

For the first time in 6 months, I finally got something done on our layout! The last opportunity I had to work on the layout, my son Chris removed 3 Lionel O-22 remote control switches that had been in place for many years so they could be taken to a repairman for servicing and cleaning in that they were malfunctioning. One of them, my son Chris had to extract from under a  tunnel. It operated one side of a dog-bone reverse loop. It was screwed in place. Chris had to remove the screw by feel.

The switches have been back in good working order for quite a few months. I feared that we would never be able to re-install the switch under the tunnel, so, I put off the installation until today. I finally got up on the platform (which is no small task at my age and in my physical condition) , performed major surgery on the side of the mountain under which the tunnel runs, positioned a flood light to illuminate the tunnel's interior and managed to replace the switch. I was even able to screw it back in place.

I feel very satisfied with my accomplishment and hope to do more in the very near future. For now, I think I will go eat a bottle of Motrin and relax a bit.

Randy I'm just down the street if you need any help. if nothing but moral support


Add Reply

Post

OGR Publishing, Inc., 1310 Eastside Centre Ct, Suite 6, Mountain Home, AR 72653
800-980-OGRR (6477)
www.ogaugerr.com

×
×
×
×
Link copied to your clipboard.
×
×