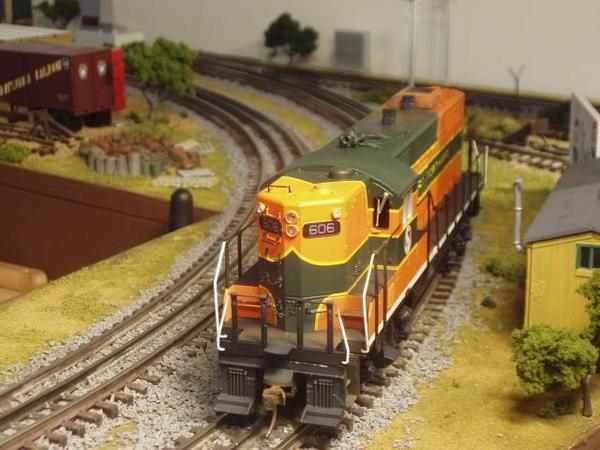
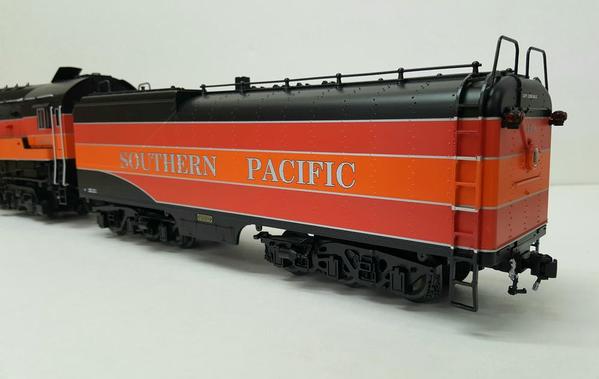
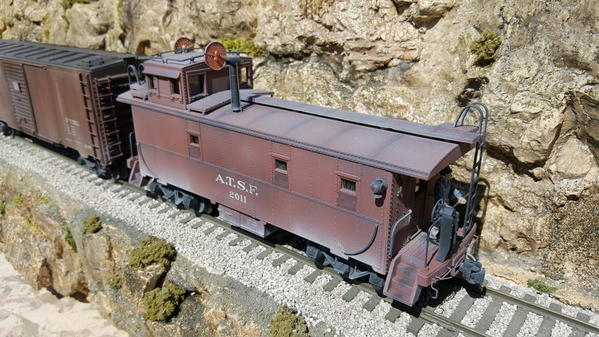
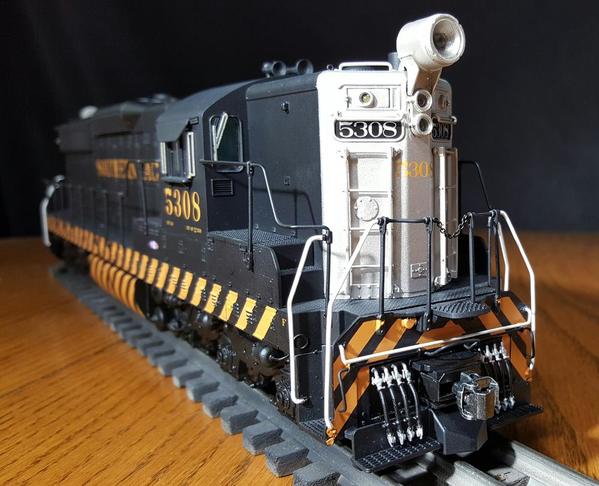
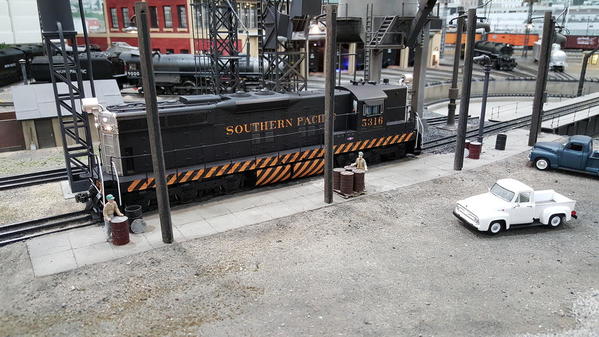
My interest and involvement in the "3-rail scale" aspect of O-gauge model railroading has really grown as I've spent more time here on the OGR "3RS" sub-forum.  I've been very inspired by the innovative work of others in the "3RS" arena...and have been learning a lot along the way.  I always look forward to seeing new threads!

Along those same lines, I recently had a thought:  Wouldn't it be nice to have one thread that displays the work of anyone/everyone who wants to contribute?  Similar to "What did you do on your layout today?", or "Buy anything cool lately", I'd love to see an ongoing (and hopefully long-running) thread of "everything 3RS"!

By no means would I want this to take away from, or replace, individual detailed "How I did it" topic threads posted by OGR Forum members...let's keep those coming, please!  I just thought it would be cool to have ONE thread that captures examples of a wide array of great 3RS work in ONE place...sort of a "one-stop shop", catch-all thread.

Please contribute to this thread with some photos and descriptions of your 3RS work...or with any 3RS questions!!

So, to get things started, here are some before and after photos of a Jersey Central "plywood-sheathed" caboose (scratch-built for me last year by fellow Forum member "Brother Love") that I recently 3-rail scaled by replacing the standard 3-rail "claw" couplers with Kadee scale couplers and adding brake line hoses & glad hands.  Of course I had to weather it, too!

Malcolm was kind enough to supply Kadee-compatible mounting pads to the underframe, so installing the coupler boxes was very easy.  All I needed was a few Kadee shims (from Micro-Mark) to get the correct coupler height.

I made use of the air hose/glad hands from the 3-rail Atlas caboose trucks that Malcolm included on the car.  I made "mounting pads" for each end of the car from scrap styrene, and then trimmed and glued the brake lines/air hoses/glad hands in place.  A little bit of detail painting of the hoses and mounting pads, and they were ready for weathering!

Before:

DSC_0043DSC_0035

After:

DSC_0004DSC_0010DSC_0012DSC_0014DSC_0018

Attachments

Images (7)
  • DSC_0043
  • DSC_0035
  • DSC_0004
  • DSC_0010
  • DSC_0012
  • DSC_0014
  • DSC_0018
Last edited by CNJ #1601
Original Post

Replies sorted oldest to newest

Hot Water posted:
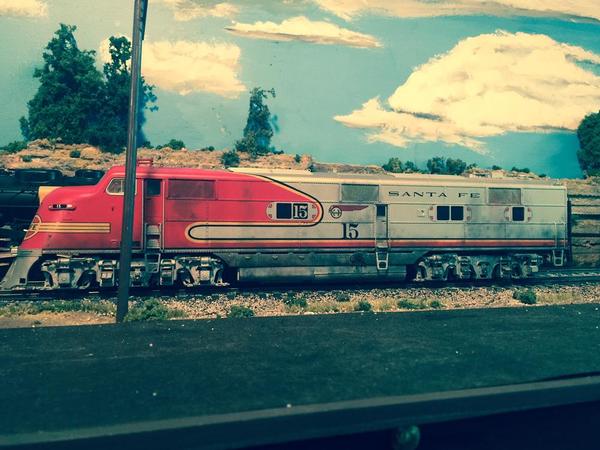
Very nice. But, how do you get those wheels with the big flanges to work on that beautiful 2-Rail SCALE track?

HW, that 2-rail scale track is part of a diorama that I built for photography purposes only...so no trains will be "running" on it.  I haven't taken the full-blown plunge into 2-rail waters...not yet anyway!

Last edited by CNJ #1601

Just not practical for me. Too time consuming, costly plus you still have the look of 3R thick toy HI rails.

I don’t notice couplers on operating trains anyway. Besides, you still have a more noticeable middle rail, thin axles no cut coupler bars and large incorrect wheel flanges. I don’t see the point.

 All model O trains should have always been 2 rail from the beginning.           

Sorry Joey, I just can't go with it.  

Last edited by SIRT
SIRT posted:

Just not practice for me. Too time consuming, costly plus you still have the look of 3R thick toy HI rails.

I don’t notice couplers on operating trains anyway. Besides, you still have a more noticeable middle rail, thin axles no cut coupler bars and large incorrect wheel flanges. I don’t see the point.

 All model O trains should have always been 2 rail from the beginning.           

Sorry Joey, I just can't go with it.  

Hey Steve, I understand!  This niche within a niche definitely isn't for everyone.  I'm not even sure where I'm headed with it.  But I am sure of two things: 1.) I like the looks of the smaller couplers a heck of a LOT better, especially on locomotives, and 2.) I won't have to worry about surprise coupler openings and having my locomotives ram into the back of their own train anymore...which only seems to happen when I walk away for a few seconds (like to grab a cold beer)...LOL!

Last edited by CNJ #1601

Guys, I'm all for individual choice in how each of us enjoys this great hobby...and I appreciate and accept each person's opinion.  However, seeing how I started this thread on the "3-rail Scale" sub-Forum, I was (respectfully) hoping to create a thread to showcase members' 3RS work, not a place to debate the merits of 3RS.  We can start a separate thread to do that, either here on the 3RS sub-Forum or over on the 3-rail/Traditional/High-rail Forum!

Last edited by CNJ #1601

Not quite finished yet but here's my current project. MTH SD50. I took some ideas from others as far as a "plate" to fill the pilot gap, but my own idea for the end sheets. I grind off all molded details then put thin plastic sheet over the face and add all the details such as the coupler pocket and rivets. Then add PSC MU hoses. I also redid the main electrical jumper from wire as the factory piece was just too small and this was a prominent feature on these. The rear is finished, the front just needs the 2 railings redone, then for a light weathering as these units were very new in the Chessie era. 

IMG_1752IMG_1753

Attachments

Images (2)
  • IMG_1752
  • IMG_1753

Well I could say the same thing to SIRT... why do you weather those cars with that big *ss coupler on them. You can’t see that there's 8' between cars ? Kind of defeats the point too  we all have our niche within a niche.

You have a point L.O.S but as long as people keep buying 3R, I will weather them. If I offered scale couplers, I’d be out of business. No one would buy cars that way. Like my collection, most of us are too deep into 3R to start over again. I’ve been into 3R trains since 1963. It is what it is.

I don’t believe the suppliers ever visioned how detailed toy trains would become. All you guys do great work and it looks nice but I’ll just have to just keep on truck-in as it is.

"Lately?" It's been a while since I've done any big projects. Here are a few examples of mine, though:

IMG_7363

I fixed the pilots, added roof top details, re numbered, and weathered. Same for this SD 40, now SD40U:

IMG_7288

IMG_7364

I started doing this about eight years ago, starting with my Superfleet Dash 8-40BWs, and GP60Ms:

IMG_6560

IMG_6435

GP60:

IMG_7278

I've done some MTH stuff too. In the lead is an FP45, converted to fixed pilots, full handrails and added details:

IMG_7205

Rolling stock too, of course. Here's a Lionel scale auto rack:

IMG_7354

If I were to start over, it might well be two-rail. At any rate my attitude is that an unrealistic third rail doesn't mean I can't come closer to realism in what rides on it. These conversions have been fun and satisfying and that's what a hobby is supposed to be about. 

RM

Attachments

Images (8)
  • IMG_7363
  • IMG_7288
  • IMG_7364
  • IMG_6560
  • IMG_6435
  • IMG_7278
  • IMG_7205
  • IMG_7354

I really hope this topic catches on.  There's much more the 3-Rail Scale than just achieving the most true-to-prototype realism possible with locomotives and rolling stock.  When I look at a layout I'm not looking at scale couplers or how a loco or car is weathered; I'm looking at how well the structures and scenery are detailed and if the track plan has purpose and not how much track and switches one can fit into a given space,  That's where the real talent shines.  So for time being I'll just be following this thread for inspiration as I begin my new and final layout.  Thanks for starting this thread Joe.  

Last edited by wild mary
Dave_C posted:

 Venturing into Diesels. Lot of trial and error making pilot spacers but well worth it. 2 MTH RS1's.


IMG_0043

Now this is an excellent 3 Rail Scale scene.  There's good attention to ballasting, a well placed small structure, nice rock formation and well done shrubs and trees.  All this attention to detail compliments a well done locomotive.  Nicely done Dave.   

Ben Snyder posted:

Not quite finished yet but here's my current project. MTH SD50. I took some ideas from others as far as a "plate" to fill the pilot gap, but my own idea for the end sheets. I grind off all molded details then put thin plastic sheet over the face and add all the details such as the coupler pocket and rivets. Then add PSC MU hoses. I also redid the main electrical jumper from wire as the factory piece was just too small and this was a prominent feature on these. The rear is finished, the front just needs the 2 railings redone, then for a light weathering as these units were very new in the Chessie era. 

IMG_1752IMG_1753

Can we get more pictures of this unit please? I am curious about the end handrail mods. One of the reasons I stay away from MTH products is the hand rails. But this looks to be nicely done and would love to see more. I am also a closet Chessie fan so can never go wrong with more pictures

TJ, I'll post some more pics when I finish this unit, and I'll include a few more detailed shots. I remove the short handrails at the last stanchion and cut the existing portion back into stanchion half way so I have a small hole to insert the new extended railing. I use the piece I cut off to get the bends correct at the top and then I bend the rest to shape by eye and pictures. They are super glued in at the stanchion but not at the bottom to ease disassembly. They're close to correct in most instances but I have learned not to sweat extreme perfection or things won't get done. I'm happy with this unit so far. Just need to weather it a bit when time allows later this week. 

Thanks for the compliments!

One of my favorite F units, these Atlas GM&Os come with a scale pilot and coupler that can be added. I also used the spacers given to me by Mario to lower the fuel tanks that really gave these a nice look.

Next project will be some K-Line NP F3s that will receive a new scale pilot to get rid of that Lionel PW look.

IMG_0643IMG_3942AA%20iDSCN3309IMG_5192 [1)

Attachments

Images (4)
  • IMG_0643
  • IMG_3942
  • AA%20iDSCN3309
  • IMG_5192 (1)
Ben Snyder posted:

As requested a few detailed shots of the new railings, now complete. You can also see that I mounted the snow plow as close as possible. I should be able to weather this unit in a few days. 

IMG_1754

Thanks for posting the handrail photos, Ben.  What type/size of wire did you use?  I'm assuming the pilots/steps are metal.  What type of drill (and what size bit) did you use to make the new holes for the extended railings?

Sorry for all the questions!  I haven't attempted to make/install full-length handrails yet, but looking forward to trying it.

Last edited by CNJ #1601

Joe, I use Tichy #1103 .020 phosphor bronze wire, it bends easy and takes brushed paint well. As for the drill I don't know what size, but it is slightly larger than the wire so that once the holes and the rails are painted there is some resistance to keep them in place. The pilot/steps are the original swinging piece from the model, with a spacer plate in between. Bending the new rails is challenging and tedious but to me worth the effort. I'll try to take more detailed photos of the next one I do like this. I need to order some more MU sets from PSC then I think my red/white WM SD35 will be the next one. Aside from that I do have a U30C that has the front end done and just prepped for the back end. image

Attachments

Images (1)
  • image

I've started a new 3RS project this week.  Although I've 3RS'd several freight cars so far, this will only be my 2nd locomotive.

I've been searching for a Lehigh Valley switcher for a while and came across an MTH Premier PS3 Baldwin VO-1000 at the "Big E" train show in Springfield, MA last month.  Needless to say, I brought it home!

MTH included Kadee mounting pads with this loco, but I want to give it the "full 3RS treatment", not just scale couplers.  It will receive fixed pilots, full-length handrails (my first try at those!), pilot grab irons, brake hoses, etc.

Oh yeah, it was missing one of the coupler cut levers, so I hand made a replacement and the 4 mounting "brackets" out of .032" diameter piano wire...an exact match to the size wire used by MTH.

Here are a few photos as the project gets underway...

As it looked BEFORE work began...

IMG_2080IMG_2082IMG_2079

Missing coupler cut lever on rear pilot and hand-made replacement and brackets, primed and ready for paint...

IMG_2078IMG_2083

Pilot shims made from .125" styrene sheet.  The one on the left is the final version, the one one the right is a "practice" piece...

IMG_2084IMG_2085

That's it for now.  I'll post some more photos as progress is made!

Attachments

Images (7)
  • IMG_2080
  • IMG_2082
  • IMG_2079
  • IMG_2078
  • IMG_2083
  • IMG_2084
  • IMG_2085
Last edited by CNJ #1601

 Joe, going to follow this project. Looking at the new FM H10 NYC that's due to ship soon. These smaller MTH diesels are really nice runners. Love the fact they feature 4 pickup rollers. The method of fixing the pilots and adding Kadee's should be somewhat similar. The aluminum spacers I made for the RS1's were tedious to make. I have my share of practice pieces still sitting on the bench.

Big Jim posted:
CentralFan1976 posted:

IMG_7665IMG_7652

Looking at the two above photos, the first thing that I noticed was the lack of the hand brake bell crank and chain, the addition of which would vastly improve the car's scale appearance. This type of hand brake can't work without it.

Box Car

I've been monitoring the lack of this detail for a while, do you know who makes these bell crank and part number?

I haven't had much train time since before the holidays but my last few conversions only made it through the coupler process. Haven't weathered a thing but it's been cold and raining here, yes even in sunny southern California.

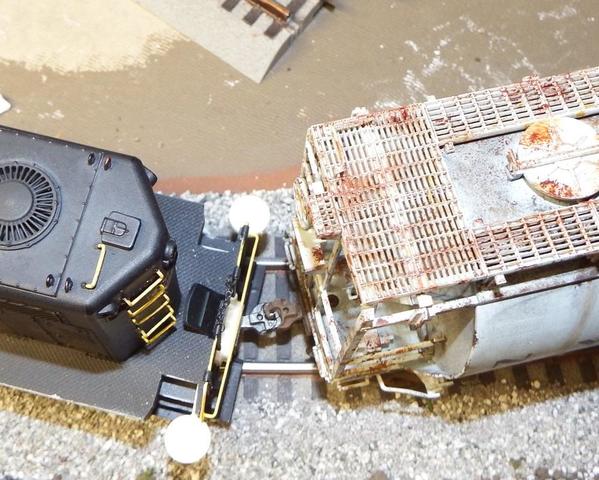
Lionel Legacy got the fixed pilot Kadee conversion

20161123_174641

Atlas Geeps

20161109_184225

Atlas GP60M & Bs, ABBA..... prolly wont do all the handrails unless I can buy them from Atlas

20161116_12374220161116_131814

Legacy GS4 got Kadees front and rear, along with some steam & air lines, a lot of detail painting

20161020_10542720161020_11272020161020_162953

Full custom MTH caboose rebuilt from the frame up

20160907_145253

Sunset 3rd Rail's SD7 Tigers, these just need weathered now

20161125_13265820161222_170102

Attachments

Images (10)
  • 20161123_174641
  • 20161109_184225
  • 20161116_123742
  • 20161116_131814
  • 20161020_105427
  • 20161020_112720
  • 20161020_162953
  • 20160907_145253
  • 20161125_132658
  • 20161222_170102
CentralFan1976 posted:
Big Jim posted:
CentralFan1976 posted:

IMG_7665IMG_7652

Looking at the two above photos, the first thing that I noticed was the lack of the hand brake bell crank and chain, the addition of which would vastly improve the car's scale appearance. This type of hand brake can't work without it.

Box Car

I've been monitoring the lack of this detail for a while, do you know who makes these bell crank and part number?

http://www.choochenterprises.com/Oparts.html

http://www.choochenterprises.com/211.html

http://www.grandtline.com/prod...isc_car_details.html

http://www.grandtline.com/prod...es/quarter_inch/3000's/3049.jpg


Trying to help out an anemic Williams E7 that I upgraded to ERR TMCC, cruise and Railsounds. Took a cue from installing the fixed pilot that came with my Atlas F7's. Cut the pilot off the truck and used it as a pattern to make up a spacer. Attached the spacer to the chassis  and then the KD to the spacer. Also closed down the coupler pocket with thin styrene. I also removed the cab steps from the front truck and mounted them to the chassis (no swing). Lastly, I ground down the inside of the truck side frames and slotted the mounting holes. This closed up the large gap between the face of the wheels and the sideframe thus narrowing the overall width of the truck assembly. The rear KD was bolted to the boss that originally held the lobster claw. The rear KD swings with the truck.IMG_0845IMG_0846IMG_0847IMG_0848

Attachments

Images (4)
  • IMG_0845
  • IMG_0846
  • IMG_0847
  • IMG_0848

Made some more progress this weekend on my Lehigh Valley Baldwin VO-1000 3RS project.  Pilot shims and Kadees are now installed.  I also replaced the missing rear coupler cut lever and brackets with the scratch-built ones I showed in my earlier post (above).

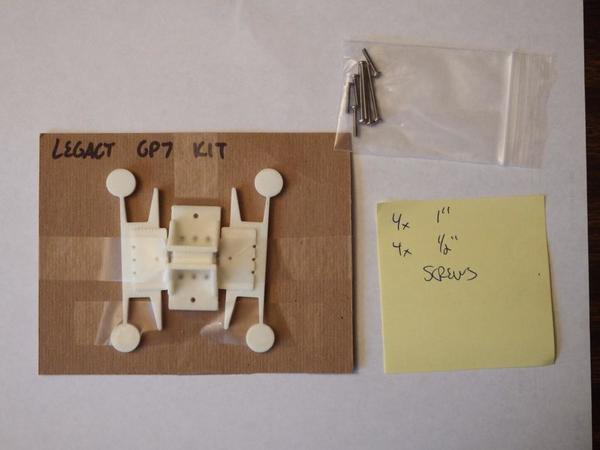
I got really lucky on the coupler pockets.  Something told me to try one of Mario's GP7/9 pockets (ordered from Shapeways a while back for a future project) just to see if it would be close to the right size.  I was thinking maybe it would work with some modifications.  As it turned out, it fit like a glove in the existing pilot opening...not a bit of filing or filling needed!!

I also added pilot grab irons and a lantern-hanging bracket on the front grill per the prototype.

Next up will be my first attempt at making and installing full-length handrails, and installing pilot brake lines/air hoses/glad hands.

Here are some progress photos.  It looks like crap right now with all the green putty and bare metal, but she'll clean up nicely with some LV Cornell red!!

IMG_2090IMG_2091IMG_2086IMG_2089IMG_2088IMG_2092

Attachments

Images (6)
  • IMG_2090
  • IMG_2091
  • IMG_2086
  • IMG_2089
  • IMG_2088
  • IMG_2092
Last edited by CNJ #1601
suzukovich posted:
CNJ #1601 posted


Nice work. I have used Lionel gp 7/9 mounts on several different MTH engines with little or no mods and all at the correct height.  His revamped mounts are a perfect fit on The MTH SD24, GP30, GP35 and the SD40 mount with a shim worked great on the Lionel U30C. Used an Atlas GP35 mount in a Atlas SD40 and was also a perfect fit.

Suzukovich, I've been following all your threads and posts on this subject, and that's what gave me the idea to try the GP7/9 coupler mount on my VO-1000...so thank you!!

CNJ #1601 posted:
suzukovich posted:
CNJ #1601 posted


Nice work. I have used Lionel gp 7/9 mounts on several different MTH engines with little or no mods and all at the correct height.  His revamped mounts are a perfect fit on The MTH SD24, GP30, GP35 and the SD40 mount with a shim worked great on the Lionel U30C. Used an Atlas GP35 mount in a Atlas SD40 and was also a perfect fit.

Suzukovich, I've been following all your threads and posts on this subject, and that's what gave me the idea to try the GP7/9 coupler mount on my VO-1000...so thank you!!

Thanks. I glad I helped in some way. The reality Mario puts out some great stuff. Which is a good place to start.   Kadee just put out an Long draft gear box. Looks very similar to what Mario did a while back. Finally started on my back log today and finished up my Atlas CB&Q GP35s. I will finish up the RS11s after installs on CB&Q GP7/9s and GN GP30s. That what happens when you take a break from things. I might have some pics tomorrow.

Thanks for sharing, Suzukovich.  I've noticed that you don't add pilot spacers to most (or all) of your 3RS conversions to give the appearance of "fixed" pilots.  Any particular reason, or just personal preference?  I'm guessing it has something to do with maintaining the ability of your locomotives to negotiate tighter curves.

Last edited by CNJ #1601

Well, after many "practice" attempts and quite a bit of music wire (good thing it's inexpensive!), I've managed to make a complete set of full-length handrails for my project loco.  This was my first try at forming/bending handrails.  I even made the tiny "brackets" to mount the railings to the front of the pilots.  Here are some photos of the results...

IMG_2095IMG_2093IMG_2096IMG_2098

Attachments

Images (4)
  • IMG_2095
  • IMG_2093
  • IMG_2096
  • IMG_2098
Last edited by CNJ #1601

Nice, piano wire. Out of box solution.

  To answer your other question, Originally I was running Atlas 081 curves. Swapped them out for 090. The issue was the curves especially into the sidings of the yard and only so much room to work with. So that's why I went the route I did and didn't fix all the pilots.  New planed layout will give me more room to work with and allow for trains to run into the yard rather then now they are backed in. Current plan is to start fixing the pilots on the GPs , U25/30  and SD24. When I did the install, I did it in a way that all I have left to do is put the inserts in and the pilots are fixed. When engines are on flat surface the gaps are hardly noticeable. I don't like the look of the long shank couplers. Its just about working within my limitations.  It sucks but it is what it is.  Layout buld has been pushed back due to my truck restoration. 6500.00 and counting. Hopefully when it come out of the shop all that will be left is cosmetics. Front end rebuild/Drivetrain and wiring issues have been costly.

DSC_0007

Though not entirely sold on Kadees due to remote uncoupling issues related to freight operations, I thought that my recent conversion of an MTH camelback to Kadees might be of interest to someone else out there in O-Gaugeland.  Not having found any posts regarding the subject, I had to invent my own method and would be happy to share the particulars with anyone interested.

DSC_0008

The conversion is quite simple, if you don’t have to invent it.  Only basic hand tools are required, plus a Moto Tool, one or two Dremel cutting bits and a bench type drill press to act a milling machine.

Note to SIRT: Intent on modelling the Staten Island Rapid Transit of 1945, freight and passenger, I will remain loyal to “The Claw” for good and valid reasons.  However, upon learning that SIRT steam era passenger equipment (pre-1925) used Janney narrow gauge couplers, I decided that “The Claw” is just too crude for use on period equipment.  This particularly since I am putting considerable effort into replicating some of it, thanks to the Ed Bommer's terrific article in OST #43.  With this inspiration, I’m even considering butchery of a Labelle kit.  Prayers requested, in advance.

Note to MTH: Ppppuhleeeze, Mike, give us another camelback… electro-couplers, fore and aft, would be a nice touch.  The tooling for this CNJ knockoff must be plumb wore out, by now, and there are those of us out here who yearn for other wheel arrangements and road prototypes.  The success of the CNJ version, evidenced by it's many reissues over the years, proves that there is a camelback market.

Attachments

Images (2)
  • DSC_0007
  • DSC_0008

K-line F3s: new Lionel fixed pilot, Kadees, and walthers diaphragms.

imageimage

Atlas Milwaukee Road Erie Builts: (before and after) remove lobster claw and install fixed pilot with coupler door and body mounted ladder steps.

image

Lionel scale GLA Hoppers: (before and after)  Kadee couplers

imageimage

Video on how I installed Kadees on the GLA Hoppers.

Bob

Attachments

Images (5)
  • image
  • image
  • image
  • image
  • image

It's been over two weeks since I've had time to work on my VO-1000 switcher project; however, with a brutal cold snap reminding us that it's still winter here in New England, I stayed inside last evening and all day today and got back to work.

Last evening I installed the pilot brake lines & hoses and primed everything for final painting.  Today I did some final sanding and then painted the pilots, steps, handrails, couplers and hoses.  About all that's left to do is to apply one more coat of Safety Yellow to the handrails...and weathering, of course!

Here are the latest progress photos...

 Primed for final painting:IMG_0014IMG_0016IMG_0021IMG_0019

After final painting:IMG_2171IMG_2168IMG_2165IMG_2167

Attachments

Images (9)
  • IMG_0014
  • IMG_0016
  • IMG_0021
  • IMG_0019
  • IMG_2171
  • IMG_2168
  • IMG_2165
  • IMG_2167
  • IMG_2169

Another brutally cold weekend up here in New England so I had time to weather the MTH Lehigh Valley Baldwin switcher that I recently 3RS'd.  The project is now completed.  

It was only my 2nd try at building fixed pilots.  A lot of trial & error, quite a bit of time and a little bit of frustration...but a LOT learned along the way!  Hope it gets easier (and I get better!!) with a few more under my belt.

So here we go.  LV #135 went from this...

IMG_2082IMG_2079IMG_2078

To this...

IMG_2186IMG_2190IMG_2191IMG_2194

Attachments

Images (7)
  • IMG_2082
  • IMG_2079
  • IMG_2078
  • IMG_2186
  • IMG_2190
  • IMG_2191
  • IMG_2194

 Joe that came out great. Modifying the handrails really makes a difference as well as the more pronounced added grab irons. Your right about making the spacer. Lot's of trial and error. I have one more engine to do. I just picked up another RS1. A NYC. Almost thinking of bringing a master to a local CNC machine shop and seeing what it would cost to make a batch of them out of aluminum. My earlier efforts are good enough to get the job done. But could have been better around the step area. The other thing is. The NYC has stripes applied to the chassis and the pilot. When the spacer is placed between them. Not sure how it's going to look or how to fix it just yet.

Dave C. & Malcolm, thanks for the compliments!

Dave, I like your aluminum idea...at least until Mario gets around to designing pilot spacers for EVERY engine on the market...LOL!!  Making them out of plastic stock would be fairly simple if it weren't for those dreaded (and very delicate!) fingers or wings that form the top of the steps!

I can see where the pilot stripes on your NYC RS1 will present a challenge.  How are your masking/painting skills?  Re-painting/re-striping the entire pilot may be the best way to go.

Malcolm, I have that LV book too!  A matching LV caboose to go with my "new" engine is next up on my 3-rail scale "to-do" list.  In fact I already started on it yesterday.

 Joe, with the spacer in place. I'd probably have to paint the spacer white. Then add the black. The thing is. I'm not even sure the stripes on the chassis and the pilot would even form a continuous straight line. I'm thinking of painting over the white lines on the chassis and just going with the stripes on the pilot. Thinking that may look better than a sloppy paint job or a break in the lines. The only other option is decals. If they make them for that application.

 Yes the aluminum is some work. One mistake and an hours work goes in the trash. A friend who is into model planes had a large aluminum sheet in one of his kits with parts cut into it. You just broke them free and cleaned them up with a file. The same format I think would work doing this. The aluminum works great at least on the RS1. Drill 4 holes and tap 2 of them. Do these correctly and at least it will work. All the filing and trimming is basically to make it look good and access the body mount screws. It's a fairly popular engine and there may be some interest in doing a small run. I found a local shop that does the design work as well as the machining. Looking at a dummy now that I hope can be bought cheap. For nothing else than to present the idea to them with a blank chassis so they can see the end result of the work.

Next up for 3RS'ing is an MTH Premier Lehigh Valley "Northeast-style" caboose to match my recently-completed Baldwin VO-1000 switcher.  I started this project yesterday, and as you can see in the photos below, have made some good progress already.

The car has been completely disassembled, the underside has been painted (Rust-Oleum Camo Brown), the "claw" couplers have been removed from the truck assemblies and the Kadees have been installed. 

This is a fairly recent MTH offering, so it came with Kadee mounting "studs" molded into the underside of the car body and end platform/step assemblies.  All I had to do is add the appropriate number of spacers (I use the ones from MicroMark) to achieve the correct coupler height.  Next up is installation of some brake line hoses, and then weathering of course!

12

Attachments

Images (2)
  • 1
  • 2
Last edited by CNJ #1601

Joe nice work on the LV VO1000. Love the weathering job. Looks like most of the pics in my LV books. Great work!

 Here's my latest contribution, just weathered this MTH Chessie gon, went light with it because of the shop date of 10/79. I base my weathering off of those numbers for the most part tho it doesn't always hold true. The load is handmade concrete wire remesh rolls. Just used some window screen material and banded them with 2 single strands of copper wire. I'm pretty thrilled with how it came out. 

IMG_0049IMG_0050


Attachments

Images (2)
  • IMG_0049
  • IMG_0050
Ben Snyder posted:

Knocked out another one today, this time my first try at a tank car.

IMG_0051IMG_0052

Nice, Ben!  How difficult was it to mount the Kadees onto the tank car's frame?  Maybe you can take a photo of the underside so we can see how you mounted them?

Thanks for the complements on my Baldwin switcher project.  Much appreciated!  And nice job on the Chessie gon and wire remesh rolls, too!  Glad that you're contributing to this thread.

Thanks for the compliments Joe. The tank cars aren't too hard. I actually think the newer ones with the mounts are more difficult if that makes sense. Here's what I did to these cars, I have 7 MTH tankers done this way. Only one has broken so far but in all fairness I was being a bit rough with the train.

IMG_0053

I made a shim from sheet plastic that was as big as the area in the frame that is hollow. Scrape the paint from the frame and cement the shim to the frame, don't forget to angle the edges of the shim at the end to match the frame.  Thick epoxy or gel super glue works too. 

IMG_0054

After the glue is dry I just drilled and tapped the shim itself as it's plenty thick. Then paint the assembly to match. Later weathering hides all this anyway. Here's another view of the weathered ELCOR car.

IMG_0055

When you have the whole car dissambled it's also a good time to paint the ridiculous silver railings, they look so much better black. 

I'll keep posting in this thread as long as it's here as it's a much more focused thread for those of us who model this way. I'm glad you started it.


Attachments

Images (3)
  • IMG_0053
  • IMG_0054
  • IMG_0055
Engineer-Joe posted:

Could you share how you did this? I run 2 rail and skipped this engine because it didn't look easy to convert.

It wasn't easy.  I originally had the stock MTH drive axles machined to accept NWSL 33" wheels. When I pressed the wheels on to the MTH axles, the insulator in the middle of the axle collapsed. I ordered 3/16" axle stock from NWSL  and had the machinist  make completely new axles.  The idler outboard axles and bearings were removed, The  bearings were replaced with NWSL 361-6 epoxied in place, and 8277-4 wheelsets. Approximately .220" was machined off of each sideframe mounting flange,  .120" was milled off of each sideframe, new holes were drilled and tapped to mount the sideframe on the truck block.

The pilots were a little easier, MTH provided a threaded blind hole in each corner (2.6mm). I just cut the center section out, drilled a hole and mounted them without a spacer as that made the steps line up per the prototype.

Steve

IMG_5355My first one...

Lionel GP30

still fiddling with it, but I've ground off enough material to get it running. 

Used mario's 3D printed stuff to fix the pilots, works pretty well, just wish the finish on the 3D prints was a bit smoother.  

Have to clean up and paint what I messed with, then lengthen the handrails.  I'll probably Penn Centralize it a little, it's too clean. 

Attachments

Images (1)
  • IMG_5355

Sorry I haven't posted in awhile, been enjoying the nice weather and spending some much needed time on my other hobby. Anyway took the wife to York this weekend and scored this C&O 2-8-2 from Mr. Muffins. Great people. After a few test runs on the layout she received her Kadee's front and rear. I was also surprised by how very close it is to the prototype. This was a class of 10 former Pere Marquette engines on the C&O hence why they have none of the C&O traits. I like it, nice size, clean look, and pulls the entire Chessie Steam Special train without issue. 

IMG_0084

Posed with the rest of the C&O fleet. 

IMG_0085

Attachments

Images (2)
  • IMG_0084
  • IMG_0085

 Finally started work on my Legacy 0-8-0. It came delivered as a Wabash. Turning it into a Boston & Albany. The middle part of the original 4 digit Rd. No. is 52. A correct number for a B&A. In the past I just made a T bracket from brass stock and shimmed the hell out of it to get it at the correct height. There is a lot of clearance there for the stock coil coupler. On this one. I trimmed it out with brass square stock. The T bracket is soldered. The trim pieces are held in place with JB Weld. The square stock is glued to the tender shell. Allowing the chassis to separate. The T bracket is secured to the chassis using the tapped mounting holes that secure the speaker. A portion of the stock coupler mount was removed for clearance. I added a small piece of square stock and cleaned up a Atlas air hose for a press in snug fit. It's now off to the paint shop.

IMG_0006

IMG_0009

IMG_0014

Attachments

Images (3)
  • IMG_0006
  • IMG_0009
  • IMG_0014

Dave nice work on the tender.    Mario finishing his GP35 inspired me and finally finished my SP RS11 using Mario's spacer and kadee mounts. What a pain but at this point 99% complete. I thought I had finished it a week ago but didn't like the fit so I redid it Now just to do a little more sanding and touch up paint.  

Since I was planning to make this one a dummy I pulled the electronics Trimed of half inch on both sides of the frame and sanded down the tabs on the trucks to lower the engine

DSCF6815DSCF6816

Next i trimed the pilot and installed the spacer and the kadeee mount using Loctite 60 universal glue. This is rated at 1800 lbs per square once once dried. Drilled out the holes and then mounted the draft box and screwed them in.  Next Using the Loctite glued them to the shell and then used 5 sec fix( same as Bondic) to fill in the gaps and then sanded to hide the seams .  DSCF6821

DSCF6817DSCF6818

Reinstalled the shell onto the frame 

DSCF6825DSCF6826DSCF6828DSCF6830DSCF6831DSCF6832DSCF6833

Final check not perfect but works

DSCF6822DSCF6823


This is from the test run last week before final adjustments. 


Attachments

Images (14)
  • DSCF6815
  • DSCF6816
  • DSCF6821
  • DSCF6817
  • DSCF6818
  • DSCF6825
  • DSCF6826
  • DSCF6828
  • DSCF6830
  • DSCF6831
  • DSCF6832
  • DSCF6833
  • DSCF6822
  • DSCF6823
Videos (1)
1-DSCF58821

Great thread.  Unfortunately (or fortunately for me depending on your point of view) I gave up on 3 rail scale and simply run 3 rail for all my roads that aren't affiliated with my ever in the planning stages NY&LB.  I've gone completely 2 rail there.  No judgement on anyone here, I just find that 2 rail is really appealing for modeling, but my operating club layout is three rail and not to Kadee coupler standards when it comes to track alignment.

Finally got my 2 Chessie auxiliary tenders from MTH. Very nicely detailed but a bit pricey in my opinion. 

IMG_0122IMG_0123

MTH includes stamped steel mounting plates and hardware for converting to Kadee's. 

IMG_0120

However using these mounts the coupler too low. Simple solution was to use Kadee 747 underset shank couplers. Now they're spot on with no shimming. 

IMG_0121

One of these days I'll get to modifying my spare 614 tender shell to accurately represent her extended coal bunker and change the lettering to Chessie System Railroads. 

IMG_0124

Attachments

Images (5)
  • IMG_0122
  • IMG_0123
  • IMG_0120
  • IMG_0121
  • IMG_0124

Add Reply

Post

OGR Publishing, Inc., 1310 Eastside Centre Ct, Suite 6, Mountain Home, AR 72653
800-980-OGRR (6477)
www.ogaugerr.com

×
×
×
×
Link copied to your clipboard.
×
×