
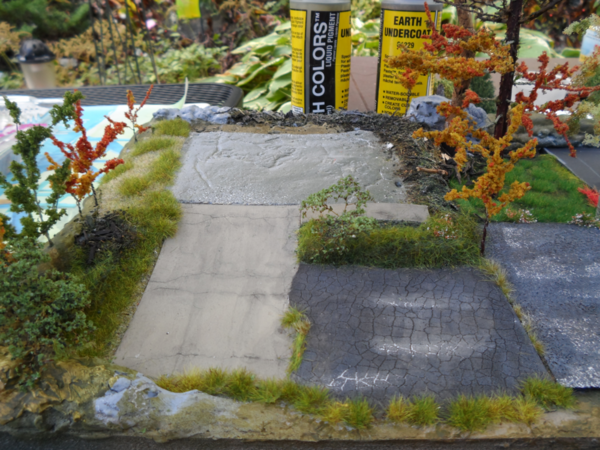
I'm at the point on the new layout where highway construction is on the horizon.  On my former layout, I used the Scenic Express product...mixed the paste and applied it, and when dry, applied the black overcoat.  It looked quite realistic.  I'd like to try another method this time.

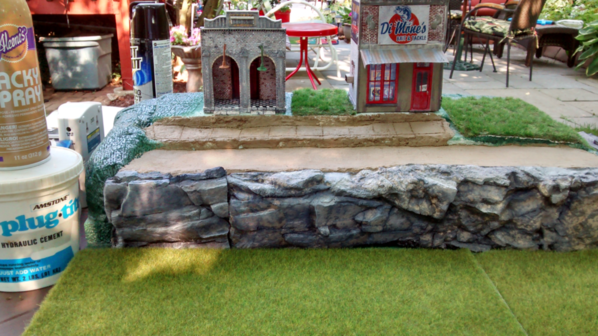
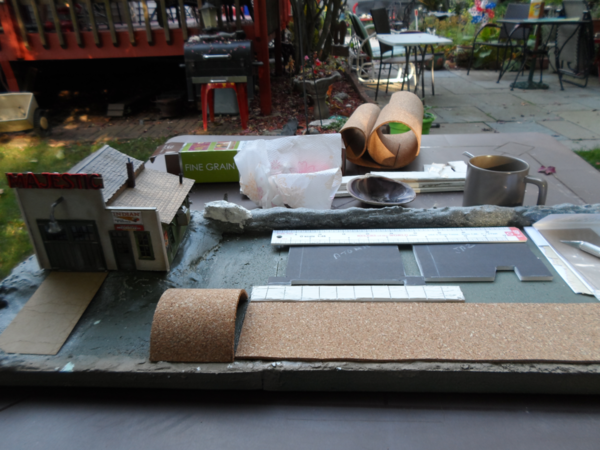
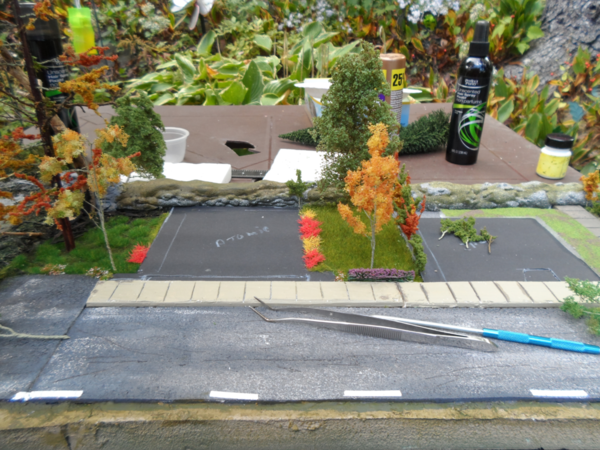
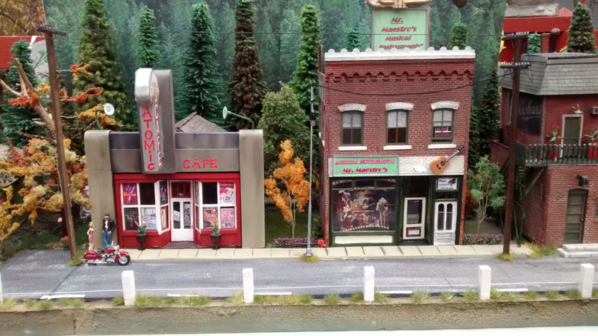
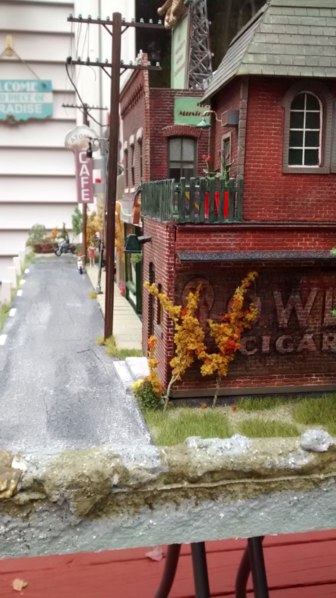
For this layout, I'd like to build up the roadbed a 1/4" or so starting on Main St. to make the curbing height more realistic abutting the MTH buildings.  I can envision using a 1/4" sheet product, cutting it to size to the dimension of the road, and coating it or painting it flat back...maybe using the Scenic Express product for black coating.

Any thoughts?  Your opinions / options much appreciated.


Original Post

Replies sorted oldest to newest

I have adopted the "Durham's Water Putty" method described in Dennis Brennan's scenery book--applying it over foam core.  Attached is a build sequence.


Start by cutting out the road in foam core:

FAKRAgreen 2

Add a skim coat of Durham's putty with black paint added:

FAKRAgreen 3

Fit the road into the environs:

FAKRAgreen 4

Add railings:

FAKRAgreen 5

Weather with chalks:

FAKRAgreen 6

FAKRAgreen 7


Attachments

Images (7)
  • FAKRAgreen 7
  • FAKRAgreen 1
  • FAKRAgreen 2
  • FAKRAgreen 3
  • FAKRAgreen 4
  • FAKRAgreen 5
  • FAKRAgreen 6
Last edited by Avanti

I also use the roofing material, it gives a realistic look, can be custom cut to the contour of layout and the time, cost and effort are well spent. I use either a yellow or white marker picked up at Michael's, Hobby Lobby or a craft store for about $3 to do the center stripe to complete the look.

It has helped the kid's layouts tremendously, having roads and parking lots.

Capetrainman, I have used (and am very fond of) 3M Stairway Tread, which comes 3M stair tread road material3M tape siteIMG_0553IMG_4396IMG_4709IMG_5913b - Copyin rolls, with plenty of length on them. They come in different textures. These examples show you its use in situ as a variety of "pavements," as roadways and parking lots, etc. This photo...portal road ...shows you an unfinished area where the 3M Tape has been put into place as a rural roadway, leading out from the tunnel portal. I'm including the photo to give you an idea of the thickness of the tape as roadway. It is atop a strip of Masonite used as a base for the tape.

These is, of course, paper backing on the tape, but once you have removed it and emplaced the tape, it is very unforgiving and will not be peeled off too readily - it's pretty much permanent. So, when I have used it, I do all the configuring and scissor-cutting before I remove the backing to press the tape into place.

FrankM

Attachments

Images (7)
  • 3M stair tread road material
  • 3M tape site
  • IMG_0553
  • IMG_4396
  • IMG_4709
  • IMG_5913b - Copy
  • portal road
Last edited by Moonson
AGHRMatt posted:

We use asphalt roofing paper (underlayment). The roll size from Home Depot (about $38) is so big you can do all the roads and parking lots on your layout, your friend's layout, and several others. You can cut it using the "score and snap" method or scissors. Here's what it looks like:

2013-03-31 10.07.27

All my friends that have used any type of foam product ended up with divots where their vehicle sit. How is the surface texture Matt? 


Last edited by BobbyD

I used black "Darice Foam Sheets" (available from craft stores such as Joann Fabrics) which is available in various thicknesses, cut to size and glued down (I used white glue).

Cracks were made with a sail sewing needle, roads were sprayed lightly with Rustoleum "aged iron".  1/8" car pinstriping was used for the striping.  Weather with chalk powders and/or paint washes.  Tire tracks can be made with a pencil eraser.

When finished, spray with dull cote or matte finish.IMG_1975IMG_1975IMG_1976IMG_1977IMG_1980IMG_1981IMG_1982IMG_1983IMG_1984IMG_1985

Attachments

Images (8)
  • IMG_1975
  • IMG_1976
  • IMG_1977
  • IMG_1981
  • IMG_1982
  • IMG_1983
  • IMG_1984
  • IMG_1985

I use to use cardboard rather than Masonite or MDF because it's far easier to cut. Once painted and striped they look the same.

Now that I have a laser cutter I am using an MDF-like material. Can cut perfect intersections and curved roadways that match-up with scored or engraved control/construction jts as well as using a thicker material for curbing again prefect curved curbs with cutouts for curb gutters and manholes. 

Street crossing the tracks are made with cork HO switch pads. They are the same width as a two lane road in O scale and have beveled edges. I painted the cork with a diluted wash of Woodland Scenics Asphalt paint. I have done 3 separate modules now with grade crossings. I built them up using layers of cork glued down underneath.

In the first pic you also see a module behind that is painted with black textured rustoluem spray paint. My city is never setup quite the same way so I have not put down traffic lines yet.

Down by the depot 2 Austin Taylor Show 2019

In the back is a piece of cork just laid do to match the grade crossing. Notice it is not painted yet.

Grade crossing on D2 with road behind

3751 hits the same grade crossing and in the background I just used black poster board cut the same width to made the road go beyond. I used the pinstripe tape for road stripes but it peeled up eventually. The paint pens from WS don't like my cork either so still working on a solution.

ATSF going over grade crossing on D2

T&P 610 blowing threw a crossing.

610 at Great Texas Train Show 2 in Lewisville 2019


Attachments

Images (4)
  • Down by the depot 2 Austin Taylor Show 2019
  • Grade crossing on D2 with road behind
  • ATSF going over grade crossing on D2
  • 610 at Great Texas Train Show 2 in Lewisville 2019

I have used a variety of methods.  Most of them for mentioned.  Here is a project where I used Hydraulic cement, It was still wet when this pic was snapped.  When dry it looks just like aged concrete.  You mentioned curbs, similar to Durhams and spackle, this stuff is great for building up depth.

Not a great deal of work involved either.  Mix with water and apply.  A good method for stripes, is the white out roller wheels used for correcting documents.

Attachments

Images (2)
  • mceclip0
  • mceclip1

Hi Ron,  I tried a concrete product from "Arizona Rock & Mineral " .  The results were pretty much the same as using spackle  or water putty. ALso I tried one time, "Quickret" cement in a tube for patching cracks.  It would not spread  correctly and did not work.   But was does work is the Quickret' in the container.  It has vinyl in it and smooths very easy.  It can also be thinned and still gives very good results.  Lowes, Home Depot have theses products.  

You need to build 1/4" curb in the  chosen length with balsa or basswood and fill  with product.. Make sure you build a crown in the middle.  No road especially concrete if flat.  

There are so many methods and different materials used in model roads. I have tried just about all of them..  Here is a pic of  Blacktop, concrete, and cement...  I found that 1/8" cork also is very realistic and is the long portion of these samples...

This is all 1/8th" Fine cork.  A very lite coating, in spots of vinyl spackle. Raw umber, "Pan Pastels, for weathering.  Base coat of apple barrel "Blacktop" thinned out.  That's it...

Finished product'

mceclip0mceclip1mceclip2mceclip3mceclip4

mceclip5mceclip6

Attachments

Images (7)
  • mceclip0
  • mceclip1
  • mceclip2
  • mceclip3
  • mceclip4
  • mceclip5
  • mceclip6

Add Reply

Post

OGR Publishing, Inc., 1310 Eastside Centre Ct, Suite 6, Mountain Home, AR 72653
800-980-OGRR (6477)
www.ogaugerr.com

×
×
×
×
Link copied to your clipboard.
×
×