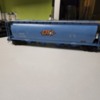
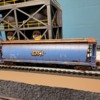
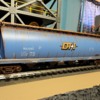
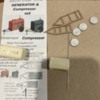
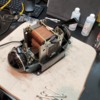
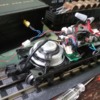
Not a really big project but did save an interesting animated car. The Lionel 6201 . gondola was purchased in a box about 5 years ago. I wanted the K-Line loco and a bunch of freight cars were included. I did clean up the car and purchased the rubber bands that drive the capstans but the mechanism was really worn out with the capstans leaning inward toward each other so much that the film strip kept falling off. I thought I would give "rebushing" the chassis a try using brass washers glued in. It actually worked and the car now operates. I attached a few pictures and a video link.

https://youtu.be/MoSX_0AvSn4

Victor , I'm not sure what the " animated car " is supposed to do but its good to see you are one of the people that are willing to do the work to get it working.   Nice.

dallas.joseph Hi Dallas

The cop and hobo car was an inexpensive (cheap) follow-up to the 3444 post war car. The cop chases the hobo around the set of packing crates. The figures are attached to a "filmstrip" mounted to two vertical capstans. The capstan shafts extend thru the car body thru the truck mounting rivet. Each metal capstan has a plastic pulley pushed onto the shaft. The pulley lines up close to the plane of axle centerline. The rubber band goes around one of the pulleys and around both axles of one truck. The rotation of the axles drives the pully and the capstan which makes the filmstrip move like the aquarium car. The cop and hobo are attached to lugs mounted to the filmstrip.

Attachments

Files (1)
instruction sheet for 6-6201

dallas.joseph Hi Dallas

The cop and hobo car was an inexpensive (cheap) follow-up to the 3444 post war car. The cop chases the hobo around the set of packing crates. The figures are attached to a "filmstrip" mounted to two vertical capstans. The capstan shafts extend thru the car body thru the truck mounting rivet. Each metal capstan has a plastic pulley pushed onto the shaft. The pulley lines up close to the plane of axle centerline. The rubber band goes around one of the pulleys and around both axles of one truck. The rotation of the axles drives the pully and the capstan which makes the filmstrip move like the aquarium car. The cop and hobo are attached to lugs mounted to the filmstrip.

Thanks Victor.         This sounds like one fun car when it's operating properly.

I seem to learn something new every once in awhile. 

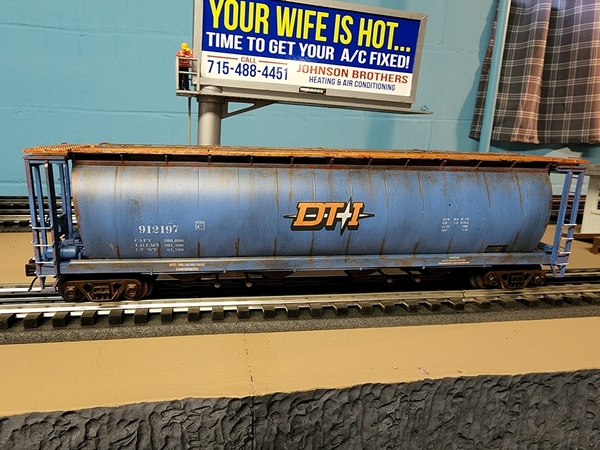
I've been working on this club car from another forum. I kept a few of the decals, removed a few and added the DT&I decal's. The decal's were for a HO scale GP35. I think the fit is pretty good. I'm thinking about a light weathering on it.

I will be spraying a clear matte on it this weekend.20220324_064039

Attachments

Images (1)
  • 20220324_064039

This might be considered heresy, but just having fun with the hobby.  I had this nice Lionel GP20 chassis, and stumbled onto a Lionel 8808 SD18 shell.  They fit nicely.  But, had to get the correct lamps and holders, the fuel tank since it was missing, and the wire side rails from the Jeff theTraintender.  A little extra bending on the wire railings, drill two holes below the windows for the rail to pass through, odd that the  smaller windows already had an opening for a rail, but the front ones did not.  Two more holes for the front handrails to fit onto the step, put it all together and wallah (Southern for voila'), I have a, well, not sure, a 4 axle SD18 at the least, but it says ACL on the side and works fine and did not cost much to boot.

Attachments

Images (1)
  • IMG_6149[1]

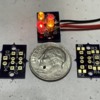
There was a recent post about firebox flicker modifications; GRJ once again posted a gerber file of a tiny pcb he designed using 3mm flicker leds and some 0805 220ohm smt resistors.  Ordered some boards and put one together to see how it works.  Didn’t have an orange led so used 2 yellow and 2 red.  Not bad really, those resistors are dang tiny tho, I have to admit.  Works pretty well powered by 5vdc.  It will also work at 3vdc, just a little dimmer.  Try them out if you have need for the application.

32AA7427-E7ED-4D12-A09F-374B30573CEB

F43FE95A-795E-4E9D-8BC4-EE1D746DEDC3

FC70A7A6-B5D8-4803-B8C6-3C1E45FC6387

Attachments

Images (3)
  • 32AA7427-E7ED-4D12-A09F-374B30573CEB
  • FC70A7A6-B5D8-4803-B8C6-3C1E45FC6387
  • F43FE95A-795E-4E9D-8BC4-EE1D746DEDC3
Videos (1)
IMG_9653
Last edited by TedW
@TedW posted:

There was a recent post about firebox flicker modifications; GRJ once again posted a gerber file of a tiny pcb he designed using 3mm flicker leds and some 0805 220ohm smt resistors.  Ordered some boards and put one together to see how it works.  Didn’t have an orange led so used 2 yellow and 2 red.  Not bad really, those resistors are dang tiny tho, I have to admit.  Works pretty well powered by 5vdc.  Try them out if you have need for the application.


Definitely makes one heck of a good fire glow representtion Ted.

Last edited by Dallas Joseph

Using a PC Power Supply to build a Power Supply for DC Voltage testing, using fuse protection on each line of -12, +3.3, +5 & +12 to ground, or if you combine those voltage like the -12 and +5 for example you can get 17 Volts. Had an issue with the sheathed panel banana jacks being too deeply recessed for electrical contact for the sheathed banana plugs on the test leads so sent them back for refund. Second time with 2 different electrical suppliers. So this time going old school to what will work, ordered standard panel banana jacks and plugs, when they arrive, I will cut off the sheathed banana plugs on the test leads, and replace them with the standard banana plugs. Unfortunately you can't order test leads with standard banana plugs anymore. Not like I'm testing 120 or 240 Volts AC. Also going to use a CW-80 spare from a Lionel Starter Set for Track and Accessory Power for AC Power jacks on my power supply panel for testing and have a test track on the bench. Both will receive their power from a Switched Duplex Receptacle on the bench protected by a GFIR on wall. I will post pictures when it is done. If interested see my post in the Electrical Forum for pictures:

https://ogrforum.ogaugerr.com/...pply-for-dc-voltages

Last edited by Gary P

Another parallel bench project with the other 5 running at the same time, been trying to go inexpensive  on a 6819 helo car with no helo.  There is a repro helo out there at a price I thought might be high, and it is not, when compared to other helos, both toy and models.  It seems  at 1:43 or 1:48 scale if you find a model and run the numbers off the full size helo, just about everything dwarfs the flat car.  I did find one 1:48 German helo that gave its model dimension on the box, and it would fill the flat car, but not extend over the ends.  It appears models in the 1:72 range are the equivalent size to the original helicopter on the 6819.  Except for a couple die cast 1:72 sizes, all the other options make that somewhat high price 6819 helicopter look like a good deal.

This is the repro available:

Image 1 - LIONEL 3419 3409 3410 NAVY HELICOPTER SINGLE BLADE - NEW


This would fit if the main rotor was modeled in a shipping mode of all blades folded back, or totally removed and on the car as an extra item, and is 12 bucks cheaper.  A 1970 German helo on a 1950/60's era Lionel flat car might be a bit of a stretch, but maybe an eccentric millionaire bought it and is having it shipped to his mansion.

Image 1 - Fujimi MBB BO-105M Messerschmitt Bolkow Blohm 1/48 Scale Helicopter Model Kit

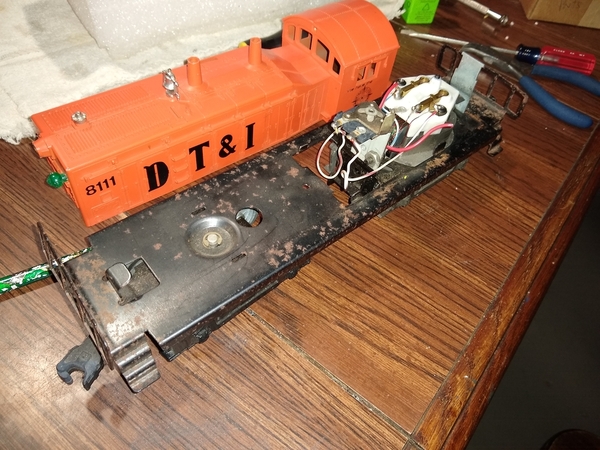
Right now I'm tinkering with this old MPC diesel switcher that I picked up for $20 at a TCA show a couple weekends ago. I'm tuning it up as a donor chassis for the next 3D printed custom locomotive I develop.

DTnI donor chassis

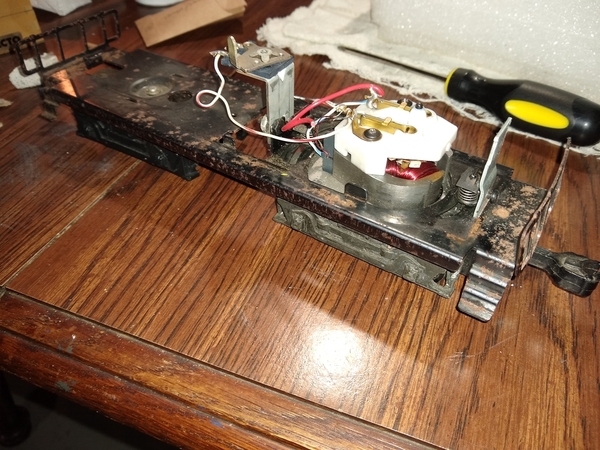
This particular Pullmor is double-wound-- the field has 2 sets of coils. This requires an unusual wiring scheme but also allows for a simplified manual reverse unit with no E-unit beekeeping required. I noticed that it had traction tires, a worm drive and a very heavy diecast power truck so I thought it could make a good runner. I stripped the motor down, cleaned the contact surfaces, replaced the motor brushes, repacked the drivetrain with fresh grease and oil and adjusted the thrust screw just right.

MPC era double wound Pullmor

I have to admit that I have in the past given the venerable old Pullmor a bad shake. When properly cleaned, adjusted and lubricated even this cheapo one can crawl along at near-scale speeds. I have PS3 MTH locomotives that don't run as smoothly as this!

Attachments

Images (2)
  • DTnI donor chassis
  • MPC era double wound Pullmor

Right now I'm tinkering with this old MPC diesel switcher that I picked up for $20 at a TCA show a couple weekends ago. I'm tuning it up as a donor chassis for the next 3D printed custom locomotive I develop.

I have to admit that I have in the past given the venerable old Pullmor a bad shake. When properly cleaned, adjusted and lubricated even this cheapo one can crawl along at near-scale speeds. I have PS3 MTH locomotives that don't run as smoothly as this!


I liked mine so much I got two! I definitely wasn't settling for the switch, so for a VERY quiet experience, I replaced the switch with an electronic e-unit - quiet and smooth. I added LED lighting for the headlamp and two green LEDS inside the Green class lights, all with a quick disconnect for easy shell removal. (Tape was removed after spot gluing wires in place )

IMG_5328

Looks like yours is running quite nicely also! So what kind of shell will you be creating?

George

Attachments

Images (1)
  • IMG_5328
@GeoPeg posted:

I liked mine so much I got two! I definitely wasn't settling for the switch, so for a VERY quiet experience, I replaced the switch with an electronic e-unit - quiet and smooth. I added LED lighting for the headlamp and two green LEDS inside the Green class lights, all with a quick disconnect for easy shell removal. (Tape was removed after spot gluing wires in place )

IMG_5328

Looks like yours is running quite nicely also! So what kind of shell will you be creating?

George

That's a really nice LED wiring job you did there George. I have to admit that although I am IPC-certified to inspect cable harnesses, my own are never as nice looking as this!

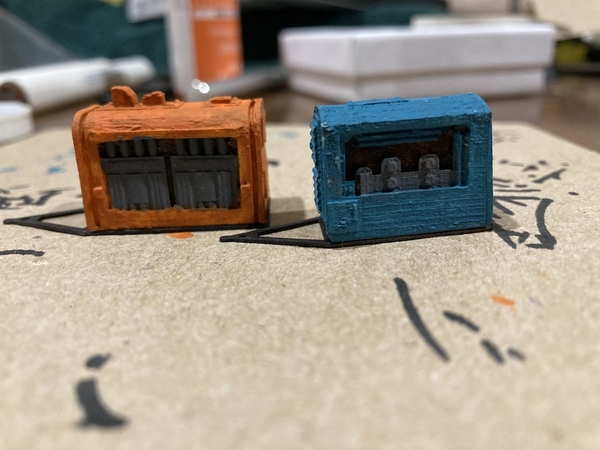
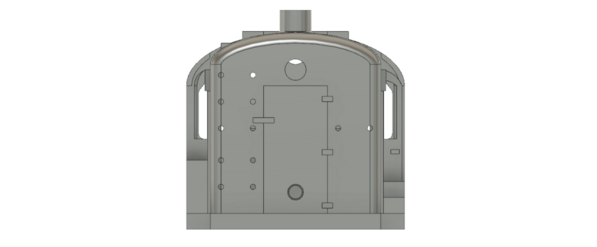
To answer your question, I am designing a 3D printed body of an early diesel locomotive that has rarely if ever been made in O Scale. The conversion kit won't be ready for some weeks but I am intending to make it fit this MPC Pullmor chassis with as few modifications as possible.

I will be holding off a formal release until I've constructed a satisfactory prototype, but here's a sneak peek of the new locomotive's front fresh from my VIRTUAL workbench!

Kens Kustoms Early ALCO Locomotive

Attachments

Images (1)
  • Kens Kustoms Mystery Diesel Locomotive for MPC Pullmor Chassis
@GeoPeg posted:

I liked mine so much I got two! I definitely wasn't settling for the switch, so for a VERY quiet experience, I replaced the switch with an electronic e-unit - quiet and smooth. I added LED lighting for the headlamp and two green LEDS inside the Green class lights, all with a quick disconnect for easy shell removal. (Tape was removed after spot gluing wires in place )

IMG_5328

Looks like yours is running quite nicely also! So what kind of shell will you be creating?

George

Try a hot glue gun next time George. Quick easy and effective for holding wires in place.

20220327_212925

Attachments

Images (2)
  • 20220327_202345
  • 20220327_212925

I replaced the rollers on my Dad's ZW Transformer he gave me with his trains.  I use it for accessories and my postwar O27 loops.  This was the first time did this repair and it wasn't quite as easy as I thought.  I still need to go in and replace the power cord and update the circuit breaker.  One of the handles is not moving the roller completing, seems like it is loose or something.  I might bring the whole thing in to be fully serviced.

20220330_16134920220330_165613

Attachments

Images (2)
  • 20220330_161349
  • 20220330_165613
@GeoPeg posted:

I liked mine so much I got two! I definitely wasn't settling for the switch, so for a VERY quiet experience, I replaced the switch with an electronic e-unit - quiet and smooth. I added LED lighting for the headlamp and two green LEDS inside the Green class lights, all with a quick disconnect for easy shell removal. (Tape was removed after spot gluing wires in place )

IMG_5328

Looks like yours is running quite nicely also! So what kind of shell will you be creating?

George

George, I just saw this and I'm a little worried you installed that electronic E unit without the proper matching heatsink that also doubles as a mount to the frame. Here's my fear, it might work fine for bench testing, but when you throw some actual load on that engine then those TRIACs are going to heat up fast, They are right next to the body shell and I've seen more than one example of someone distorting a body shell from heat from a nearby E-unit getting hot.

Right now, my work bench is a hopper car hospital.  I had collected some 1930's die cast O scale aluminum and zamack cars in the past and tucked them away. I'm 84 now and a few of them are older than I am. Then back in 2009 I bought three Intermountain plastic kit-built B&O hoppers needing some repairs, rather than building them from kits I already had.  They can be quite tedious to do!

Well, their day arrived a few weeks ago and one-by-one they went through the shop, and most are ready for paint and lettering.

First, this completed Lehigh Valley two-bay USRA hopper, from a cast aluminum Scale Craft kit of 1936. Bought used and rebuilt. An Intermountain coal load for their plastic USRA hoppers is a perfect fit!

188b

Three Intermountain B&O N-17 class hoppers. Built by someone other than me from kits, these notoriously fragile cars with fine detail needed varying levels of repair work. Anything that is not black is a replacement part I made.  These cars will be touch-up painted to keep the original pre-WWII B&O lettering. Intermountain produced their kits in the 2000's.

IMH09

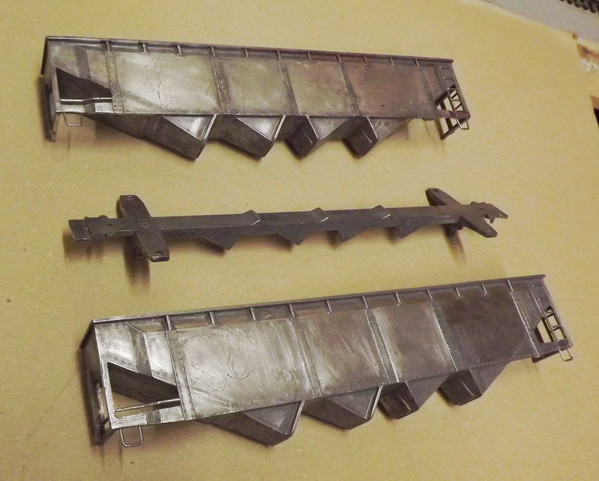
Below is a Min-I-Scale diecast zamack four-bay hopper, in 17/64" to the foot scale. It was a mid-1930's effort to get accurately scaled cars for 2 1/2" O gauge track.  Maybe the ultimate in kit simplicity, it was three castings assembled with four screws, had pre-assembled trucks and used Model Die Casting working couplers.  While detail on it is rather heavy (and when assembled the car weighs and impressive 2 1/4 lbs.!), it is an accurately done B&O Class W-2a car of the late 1920's. B&O fielded a fleet of over 5,000 of these 70-ton capacity cars from 1926-1929, the only major railroad using this design at the time.  Min-I Scale was a 1930's producer.  The two body halves are assembled with two steel alignment pins. Modern day epoxies make assembly and sealing the seam between the body halves much easier.   The underframe ends were milled to receive 700 series Kadee metal couplers in plastic coupler boxes.
AQH12

This one below is a sand cast aluminum kit by an unknown maker. Maybe Scale Craft, but I'm not sure.  It is relatively light in weight, a shade over 1 lb.  It is also 17/64 to the foot scale and is made up of five castings assembled with 20 2-56 x 1/8" flat head screws and four 3-48 x 1/4" flat head screws. All the screw heads need to be covered.  Here the body has been given a coat of primer with Micro-Mark rivet decals added.  The model is fitted for Intermountain trucks and Kadee couplers.

Trihop19

Now for an all-steel two bay hopper expertly soldered together.  The steel used is .015" thick, which is heavier than the tinplated steel Henry Beeson used for his O scale Rail Craft kits of the late 1930's - early 1940's.  This model is also 17/64" to the foot scale, and dates from that period. It rides on Scale Craft (?) sprung trucks and I fitted it with Kadee couplers and a few added details.

STLh04

Last, this K-Line die cast zamack hopper, which is a clone of the famous Lionel 1941 semi-scale die cast hopper. It accurately models a B&O Class W-2b, in having a power hand brake and five-rung corner ladders in place of individual grab irons. Modifications were made to the end frame castings for 2-railing it and installing Kadee couplers, along with added under-fame and air brake line details on the body.   

KL07

Now, a lot of Scale Coat 1 satin finish engine black will be air-brushed to get them ready for final lettering.  That will be done out-doors after this uncertain Spring weather breaks with some warm, still, dry days in NE Oklahoma.

S. Islander

Attachments

Images (6)
  • 188b
  • IMH09
  • AQH12
  • Trihop19
  • STLh04
  • KL07
Last edited by S. Islander

Just finished the repairs on the Lionel 3444 Cop and Hobo car. The car needed to be rewired, was missing a coupler and was missing the Cop. I ordered the parts from a couple of reliable vendors to restore the car. The car body, crate load and trucks cleaned up well. The coupler was relatively easy to rivet on to the metal frame once the armature rivet was removed. These style coupler heads have the integral rivet and the only way to access the rivet head is to disassemble the uncouple frame by removing its rivet.  I had the coupler knuckle and springs from prior projects so I only had to order a bare coupler shank. The insulation on the wires to the trucks on these postwar cars are usually brittle and require replacement. The #22 superflex wire is good for these applications. The Cop figure comes unpainted and I painted the hands and face using "earth" color. The finished car works well and is a good car for kids to play with.

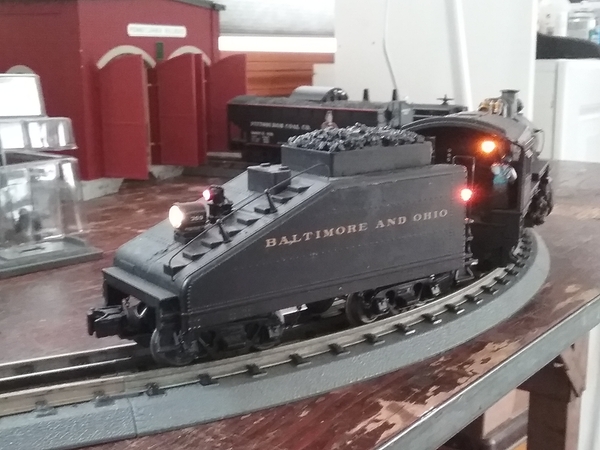
20220402_173535The backup light on the B6 was originally misaligned and I was determined to make it inline with the rest of the tender.

While I had the tender open I found another extra connector like I had on another MTH ps3  Railking tender.   I didn't have any small LEDs so I went to the 'boneyard ' and requisitioned a UP style single red lense rear light stand and installed an LED .
( the real story was that the UP wasn't sure what duties this little engine would be used for  and sold it off to the B&O with the standard UP rear light )

Have a good rest of the weekend gang .

Attachments

Images (2)
  • 20220402_181023
  • 20220402_173535
Videos (1)
20220402_184918
Last edited by Dallas Joseph
@RJ Shier posted:

Took @Rapid Transit Holmes advice and added some grime to my hopper project. Not sure if I'll be doing any more weathering but I think this one came out ok.

20220402_183704

I'd say this hopper's weathering  "came out ( better than )  OK "  RJ.       Nicely done. 

  From the looks of this one , I  would say you had fun with it and it would be a shame if you won't be doing any more weathering.

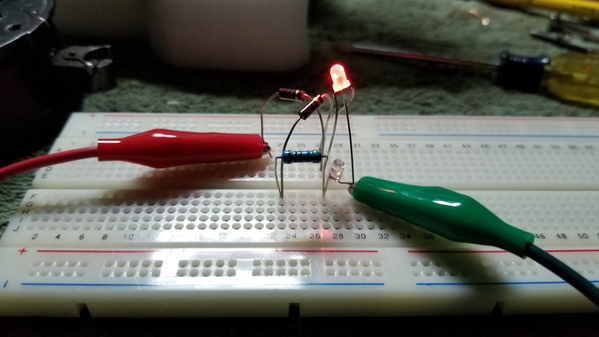
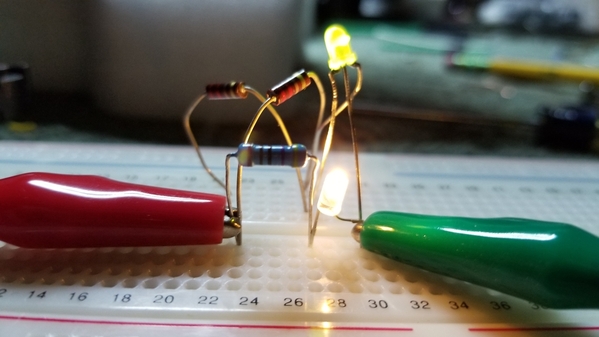
You electrical engineers really baffle me Bob.

I'd hardly consider myself an engineer (except for the toy train type) Dallas. This one had me scratching my head, especially since I was following GRJ's wiring schematic. Turned out I had to drop the size of the resistors to get the bi-color to fire.

Looks like you are selling yourself short too. Nice work on adding the rear marker to your B6.

Thanks- Bob

@RSJB18 posted:

I'd hardly consider myself an engineer (except for the toy train type) Dallas. This one had me scratching my head, especially since I was following GRJ's wiring schematic. Turned out I had to drop the size of the resistors to get the bi-color to fire.

Looks like you are selling yourself short too. Nice work on adding the rear marker to your B6.

Thanks- Bob

.......and thank you very much Bob. 

No big deal about scratching your head on GRJ' s schematic.      I sense that there have been occasions where  John has been just a little impatient while trying to re -convey info to me .   My previous EE was like the joke about the three fellas and the light bulb.

Add Reply

Post

OGR Publishing, Inc., 1310 Eastside Centre Ct, Suite 6, Mountain Home, AR 72653
800-980-OGRR (6477)
www.ogaugerr.com

×
×
×
×
Link copied to your clipboard.
×
×