Hello all,
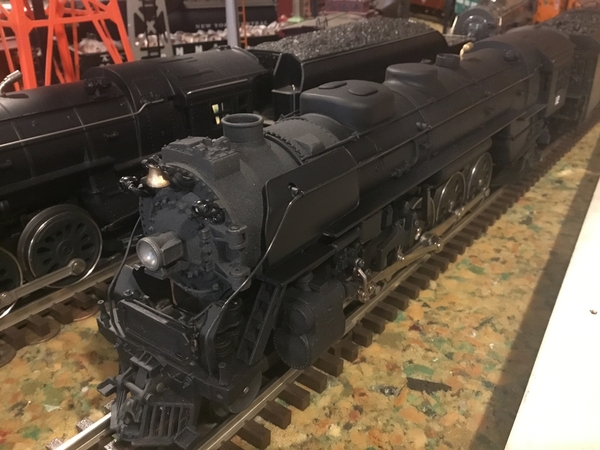
Haven’t posted in a while , just wanted to say hello and figured I’d show you what’s currently being worked on.
LET'S SEE WHAT'S ON YOUR'S !
Thanks, Alex
|


|
Hello all,
Haven’t posted in a while , just wanted to say hello and figured I’d show you what’s currently being worked on.
LET'S SEE WHAT'S ON YOUR'S !
Thanks, Alex
Replies sorted oldest to newest
Working on rewiring American Flyer wide gauge motors. The biggest problem are the wheels especially when removing without distorting them.
Now those are rod bolts. Nice.
Did you do all that; or aftermarket?
Somewhat of bit larger scale, these are from the 0-4-0 Vulcan steam lokie our preservation society in Ashley acquired a little over a week ago. Not sure where these parts go, but I'm sure we'll figure it out when we begin our restoration assessment. Not too bad for 105 years old!
Hi Guys I haven't posted in awhile because I am so busy Just wanted to post a picture of what I am working on
@bluelinec4 posted:
LOL! Same here! Our local craft brewery burned down the day after Memorial Day. They are still brewing and selling their beers at a weekly farmer’s market. Saturday morning I wake up and go to market to support they’re rebuilding efforts. This gets repeated every Saturday!
Have missed your lay-out updates!
Redball342
Lou, the screws are M2.5 x .45 allen flathead stainless. I got mine from McMaster Carr but any industrial supplier should have them. Lionel used 10mm (4), 14mm (2), and 17mm (2) long screws. I got 10mm and 16mm and cut the 16 to get 14mm.
Pete
@Norton posted:Lou, the screws are M2.5 x .45 allen flathead stainless. I got mine from McMaster Carr but any industrial supplier should have them. Lionel used 10mm (4), 14mm (2), and 17mm (2) long screws. I got 10mm and 16mm and cut the 16 to get 14mm.
Pete
Thanks. Are those the same size as MTH Premier side rod screws?
Here is what is currently on my bench getting its decoder tweaked: SS 3rd Rail T3. It just got a TCS WOW501, 4X Tang Band spkrs, extra weight and warm white LED,s.
Great topic! Good to see the old steamers renewed and upgraded!
@gunrunnerjohn posted:This Williams Pacific is getting a TMCC upgrade, cruise, sound, Super-Chuffer, Chuff-Generator, coupler, all LED lighting, etc.
Wow, I just bought 5 Weaver Boston & Maine Pullman Bradley coaches and was looking for something to pull them with. j
Well, you'll have to negotiate with my customer as this one isn't mine. ![]()
I'm working up my gumption to strip one of my MTH Southern PS4s. Some of the B&M P class had an Elesco feedwater heater and bear some resemblence to the Southern PS4. j
Suck it up John, get out the paint remover. ![]()
Finally got around to repairing some stuff I've had for a loooooong time. Many years ago I drove a box truck for Goodwill thru the city streets of Madison, WI, to pick up donations on house calls. Much to my pleasure, folks would often donate a box full of Lionel trains! So I loaded them in to the truck, then when back at the plant, I made my way with an armload of trains to the pricing dep't and took home some more goodies!
So that's my way of saying I just unpacked a box with two 2046W tenders, a 234W tender, a 2026, 671, 229 and a 2020 steamer, plus a couple of tank cars that look especially nice. These were the pick o' the crop in this box - got quite a few more boxes that I'm looking forward to going through! I'm in heaven!
Sadly these just hit my workbench. The wife recently decided we needed new dining room furniture. Now there is no hutch/buffet, so these 4 buildings have no place to be displayed anymore. Guess they'll just get boxed and packed away.
![]()
Alex, good to see you posting again, we missed you! ![]()
Rod
A prototype signal board for Atlas.
Lou N
Ran into the first time I couldn't fit my Chuff-Generator on the motor in the standard mounting. The clearance around the motor in this Williams brass Pacific is just too close to allow it to fit. Fortunately, last year I was thinking about a situation like this and made a little board that just has the flywheel sensor to make things smaller. I could fit my mini-sensor board under the driveshaft and just mount the Chuff-Generator remotely. First time I've had occasion to use the little board, but now I'm glad I thought of it back then. ![]()
John, that is just amazing. One thing my late uncle used to say before started some jobs, "Let me think about this one for a bit before I start tearing stuff apart." He would see stuff coming a mile a way most times(unless someone mistakenly did something to mess up what he was going to work on).
Lots of good stuff in here, Alex did up my Niagara a while ago, good to see more of the bits that go into it.
Really like the dimples you're putting in the rods Pete.
Can't wait to more of what's in the works.
Lionchief Plus Mikado...smoke unit issues...the fan works, but no smoke, so guessing the heating element is the problem. Think I’ll be ordering a new replacement smoke unit? Anything I should be checking before I do? Ideas are appreciated.
I would take a meter and check to see if the element is getting voltage.
@UKE KAT posted:
No need to buy a complete unit. Its either the resistor or the circuit driving the resistor. Do as Rod suggested and check the resistor. Also turn the sound off and see if you can hear the fan running.
Pete
Continue work on (2) Caboose kits. 
I have several undecorated cars: harriman baggage, 50' cushion underframe boxcars, a tank car, and a wood single sheathed boxcar to paint and letter. I will not be able to get to any of these projects until November, but here is some of the art work that is still in progress.
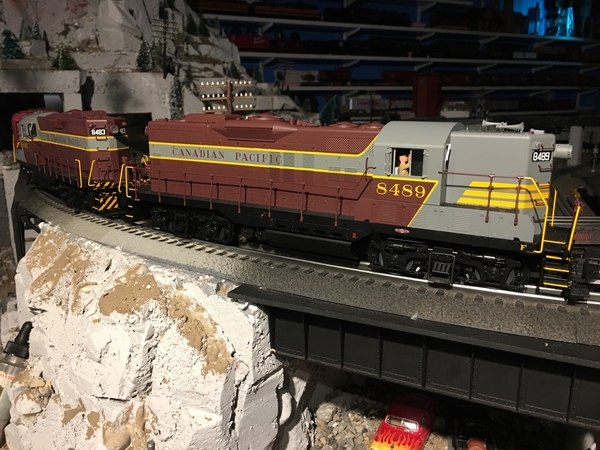 Sure great to see what everyone is up too and the cleanliness of their work spaces.
I have made progress on my work bench area and thought I would share my progress.
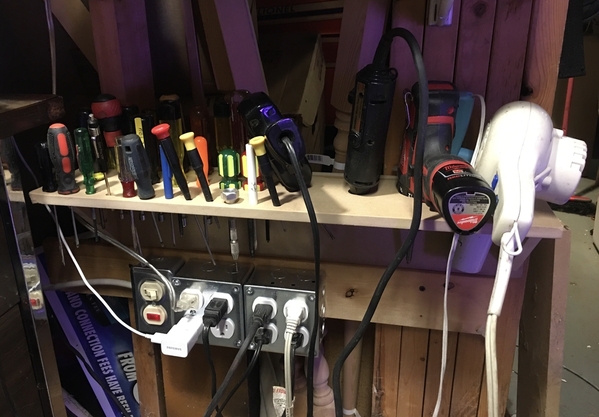
Power cords from all the different tools were a constant problem, so I picked up a couple of electrical boxes from Home Depot and built a useful power bar that was compact and out of the way to compliment the new shelf, which will hold a hair dryer, Dremel tool, soldering gun and cordless 3/8” drill.
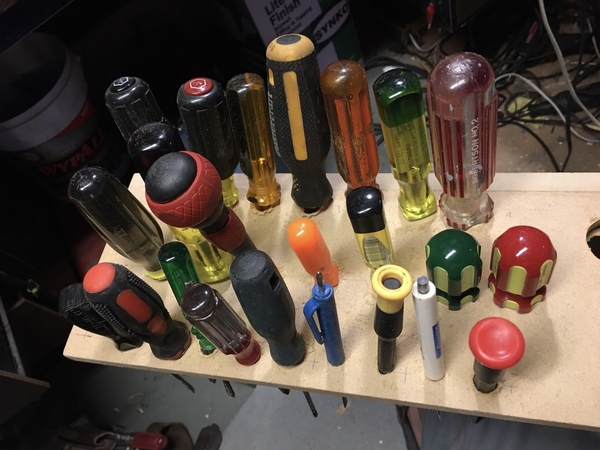
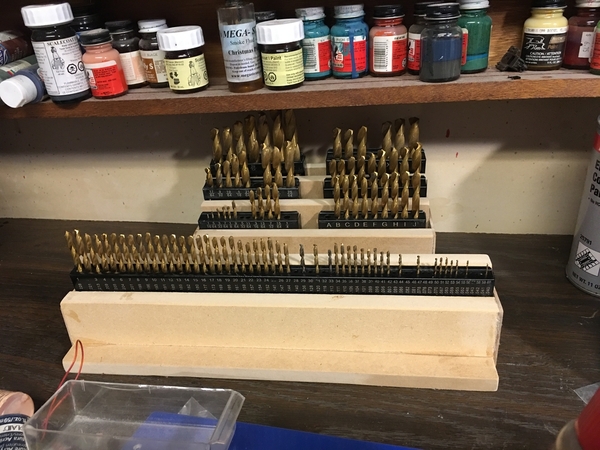
I had some 1/2” MDF board in the garage and made a shelf for screwdrivers/power tools and 2 stands for a drill bits.
Still lots of parts sorting to do with all the misc bits from projects of the past.
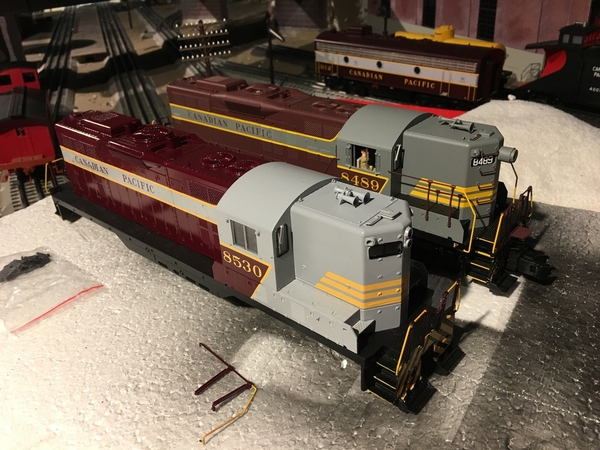
Hopefully, I will soon get back to my GP7 conversions to Kadees/fixed pilot and started on my recently acquired Atlas GP9 s
Al
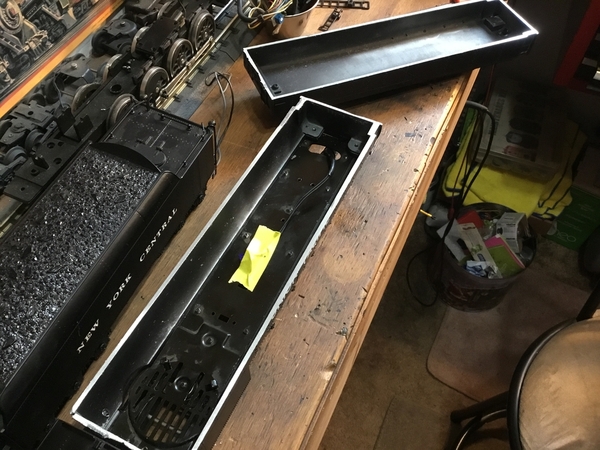
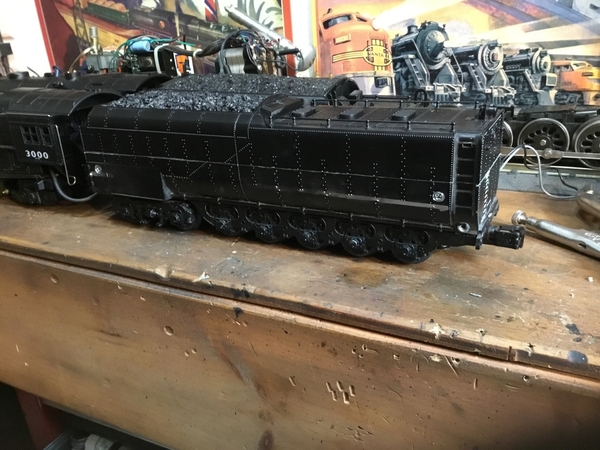
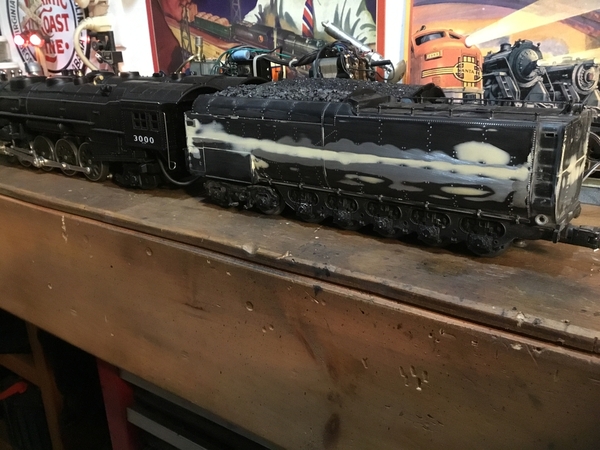
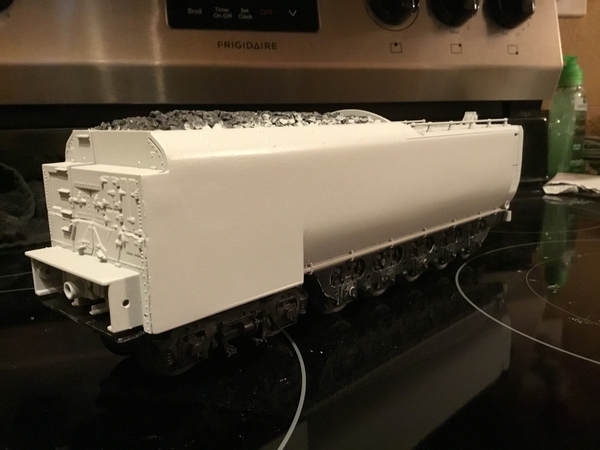
This probably does not deserve to be in this thread as what's going on in my makeshift workspace is just a glorified tire change. But the set of which this unit is part has no fewer than 12 traction tires and getting them all off and on as a practical matter requires removing the body shells:
This is an MTH UP coal turbine 3 unit set (ALCO lead control unit, turbine B unit and tender). In fact this was a conversion of the first conventional Protosound version to PS2, which was done for me by Mike R. and Phil when they were still with TAS. In fact as you might be able to tell from the photo, this conversion put a second sound system in the B unit, which is so much better than the latest and almost certainly last MTH PS3 version that only has sound in the lead unit. I remember it was Phil who suggested installing the extra sound after he took it apart.
4 motors, 10 powered axles and 3 smoke units call for occasional heavy duty maintenance although this engine, known to my family as "Ol' Smoky" for obvious reasons, is generally only run on ceremonial occasions:
In all the years I have had this, I think I have only had both the powered units apart 3 times and the first of these was right after I got it back from the conversion, when the B unit simply would not start up at all. That turned out to be shipping damage as the front mount of the B unit PS2 board had cracked and the main wiring connector was dislodged. My Heath Robinson repair got it running and it has been reliable ever since.
It does rumble around the track like a giant dinosaur and I have no problem with the fact that the prototype was a failure, largely because trying to burn pulverized coal damaged the turbine.
(P.S. All evidence of recreational beverages, bottle(s), glassware etc. was removed from the vicinity before the photo was taken!)
You guys are amazing.
New victim, a TMCC JLC Challenger getting an upgrade. Super-Chuffer, Chuff-Generator, and also the Cruise Commander M. Of course, a smoke unit tune-up to give it decent smoke is also part of the upgrade.
Almost done, just have to get the chip LED into the headlight and then solder all the wires to the Super-Chuffer and we're ready to hit the rails.
Just finished this:
https://ogrforum.ogaugerr.com/...locomotive-from-junk
Going to need a new project at some point, but I'm probably done with stuff till the fall. Weather finally got nice 😀
John, how did the Challenger project work out? All up and running?
Rod
Rod, the challenger is running fine. The only issue I'm having is an age-old issue of how the smoke comes out the stack. It's the same old story, the lousy funnel design of these makes most of the smoke come out one stack, or it comes out at an angle. It's just a lousy design.
I wondered about that when I looked at the funnel in the picture. It's very similar to the Lionmaster Challenger, but without the S shaped lateral displacement segment. It's too bad, the JLC line of engines should really have had a better design. ![]()
Rod
Yep, still mulling over what I can do about it.
My JLC Allegheny does not seem to have this issue, but I have no access to my pictures of the engine at the moment, to see what it's funnel actually looks like.
One solution is a fabricated brass collector-distributor like the one I made recently for the Lionmaster Challenger. It works great, but it is crazy time consuming to make. There is no way you could charge a customer enough to make it worthwhile IMO.
Another option is a 3d printed version like the one Bruk did for an LM Bigboy I think it was. But I dont know if he is prepared to do custom designs for sale to other people. And he would need some key dimensions off the current funnel to do the design.
just some thoughts,
Rod
I like the idea that Bruk had, that stack looked perfect.
GRJ,
How about putting a thread on the forum with video once you finish the JLC TMCC Challenger. Would love to see that SUPER-CHUFFER set to max kicking out the smoke
Erol
Well, the smoke output is actually dependent on the tuning and/or type of smoke unit. The Super-Chuffer is controlling the fan and doing some lighting enhancements, but it's not determining the volume of smoke.
Here's an upgrade that is using the MTH smoke unit and the Super-Chuffer. This is what is possible. ![]()
Really nice work SIRT. That bus looks great. I am just a little worried that your passengers might get sunburnt! ![]()
Really like the led lighting effects earlier of the turnpike toll station too. Very nicely done.
Rod
@gunrunnerjohn posted:Well, the smoke output is actually dependent on the tuning and/or type of smoke unit. The Super-Chuffer is controlling the fan and doing some lighting enhancements, but it's not determining the volume of smoke.
Here's an upgrade that is using the MTH smoke unit and the Super-Chuffer. This is what is possible.
Really nice work John - Love that smoke!
Thanks Sean, that's an MTH smoke unit I used for that upgrade. ![]()
@SIRT posted:
Gorgeous!
@Sean007 posted:Really nice work John - Love that smoke!
Geez, that smoke is awesome. I'd love to have a steamer that smoked like that.
Hey this is some great work everyone is displaying!
Currently on the workbench i have a lionel VL Pennsylvania CC2S 6-11154 , in need of major repair. First photos are the Bulher can motor which needs to be replaced. I will keep updating this repair as i make progress.
Thanks, Alex
That's interesting Alex, those motors and Pittmans are usually really reliable. I've replaced a bunch of the junky Canon motors in newer Legacy, but only one Pittman and no Bulher motors. I have a bunch of Pittman motors, could you use one of those for a replacement?
Hi Alex,
I didn’t realize Lionel used Buhler motors; they are well engineered German products. Depending upon the model of motor, average life expectancy can be from 600 to 4000 hours.
Can you tell if this just wore out near it’s expected lifespan or if it was shorted or otherwise mis-used?
Mack
Go with a Pittman Alex. Check the shaft diameter. If its 4mm it should be a fairly easy swap. Lots of 12V and 15V 9334s and 9344s on the bay.
Pete
John and Mack,
They're very reliable motors, this engine has something funny going on. The DCDS motor driver is shot, and the Buhler is burnt up inside. It even had parts floating around inside, so i will definitely have to replace it.
John, thanks for the offer on the Pittman, customer 100 percent wants all original parts, the way it came from the factory.
Once i replace the motor and motor driver, I'm sure something else will be wrong. Seems someone had their hands inside this engine in the past .
Alex
I see your beverage, Ben (bluelinc4) and raise you something that is German! Whats on my workbench? A bunch of RR signs that I removed
( and will reinstall) from my lil' barn so I could powerwash it yesterday in 100 degree heat!
Also....waiting on cooler temps...my dads old cash register that I'll finish renovating. Then some train mucking about type o' repair...
Alex, that does not look good. I ain't ever heard any motor being beat up like that other than my first car. Hopefully all the bits and such will cooperate and behave so you have an easy time.
I don't have one of these engines; I avoided them when they came out mainly because of cost but I vaguely remember that it turned out they were underpowered - irrespective of having a Buhler motor. Can't track down the old threads on this although CC2S definitely rings a bell in the pulling power issues department.
Have an older weaver rs3 I'm trying to get running without much luck so far. Have to give it 10 volts just to move, runs very rough, and the drive shaft keeps coming off the pittman motor. It appears to have a Dallee board. Anybody have any tips? Would the shell fit on a lionel chassis? I have tried oiling rotating points and use some light grease on the gear tower with no improvement.
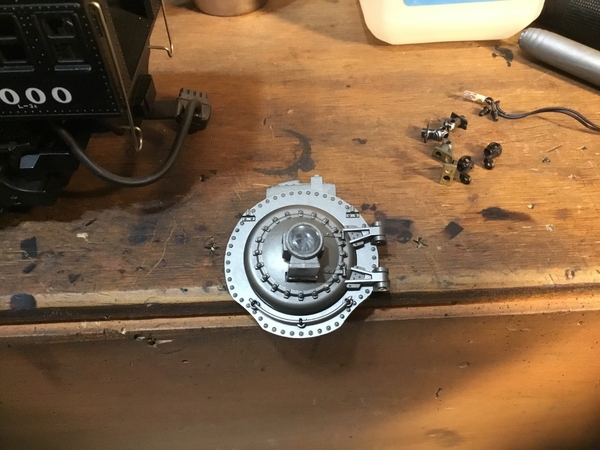
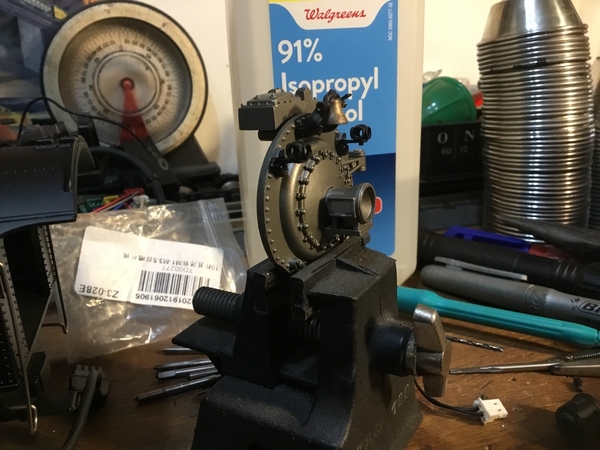
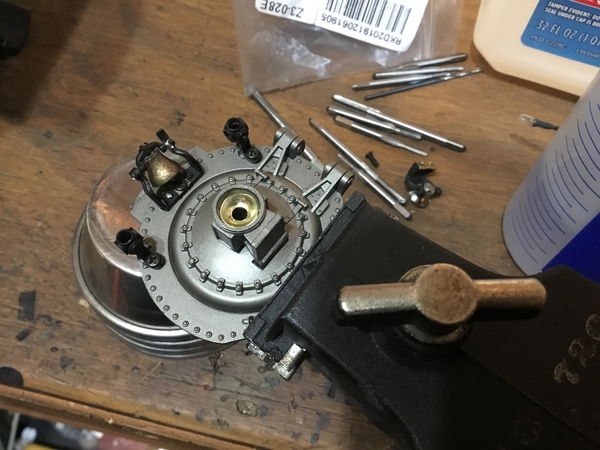
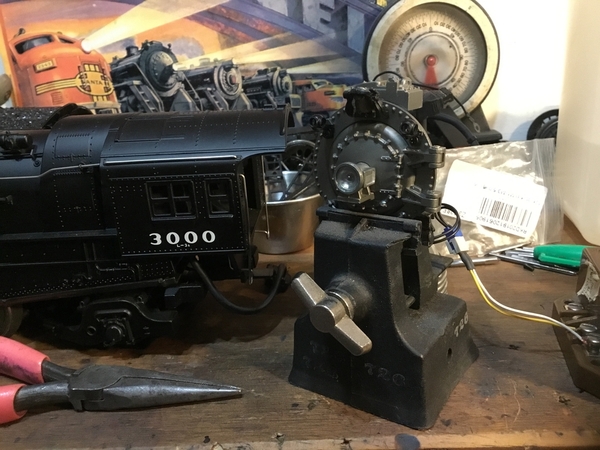
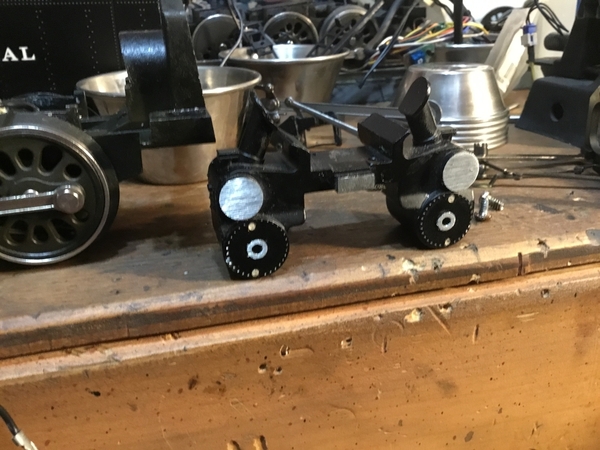
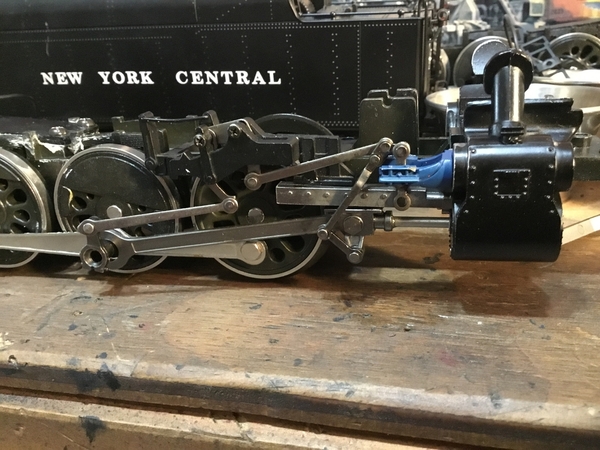
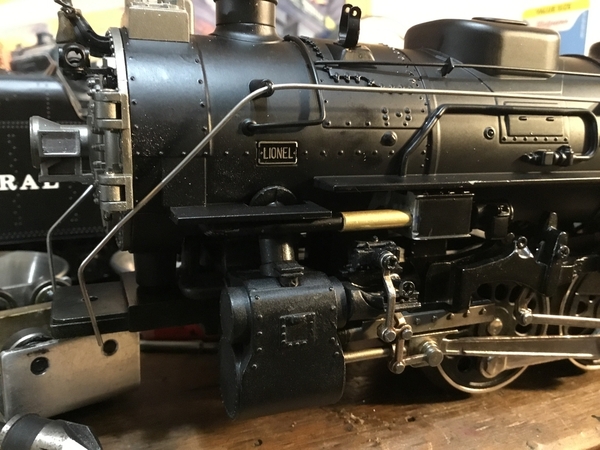
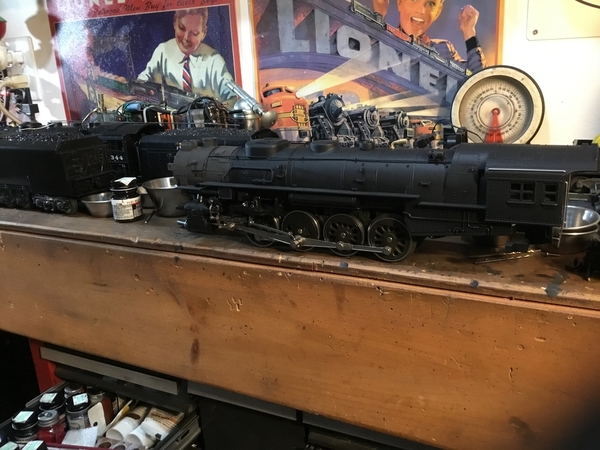
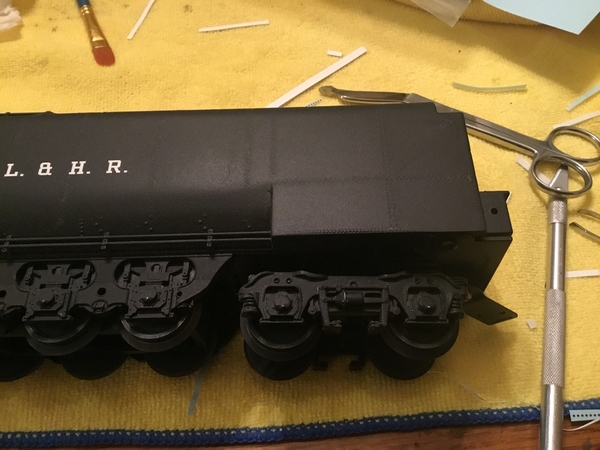
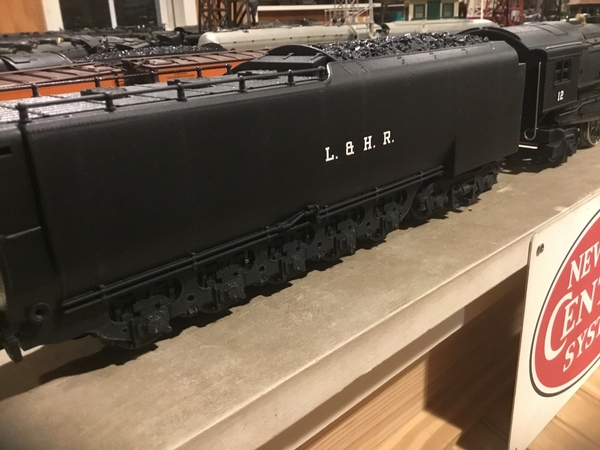
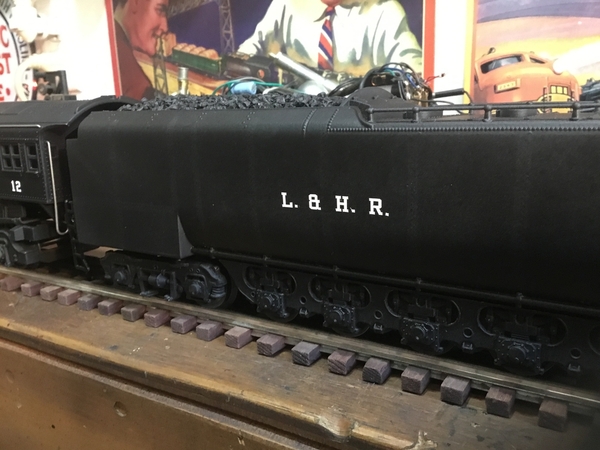
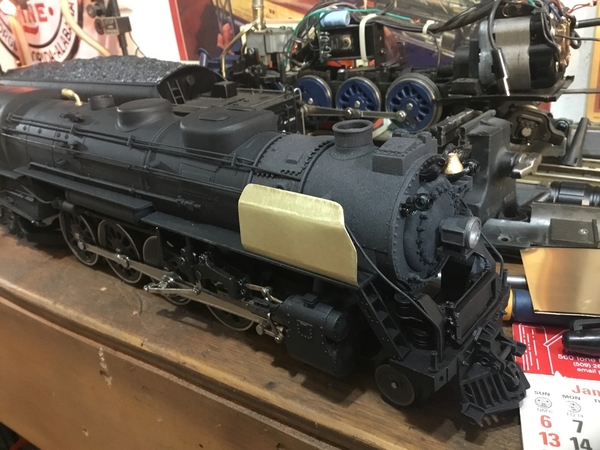
Not offered in diecast that I know of, on the bench is a Lehigh & Hudson River R1 4-8-2 ....this was made from a Lionel Mohawk, lots of leftover MTH parts, some scratch built parts, and some PSC parts....Tender WAS a MTH UP tender that was clearly too tall,..so first order of business was to split it length wise, and graft the two halves back together to get the correct tender height...then had to ditch all the Mohawks crosshead and guides in favor of laird cross heads, and better looking valve linkages courtesy of some spare MTH chassis I have laying around,...next a custom smoke box cover with correct lights, and a much better looking headlight/reflector/lens arrangement....and of course, a big ol’ fat Pittman....😁............Pat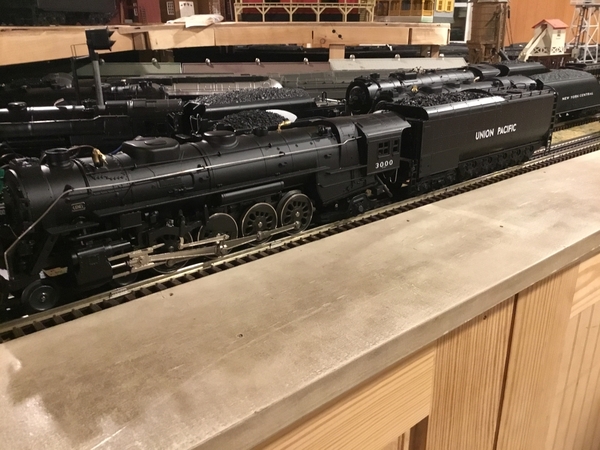

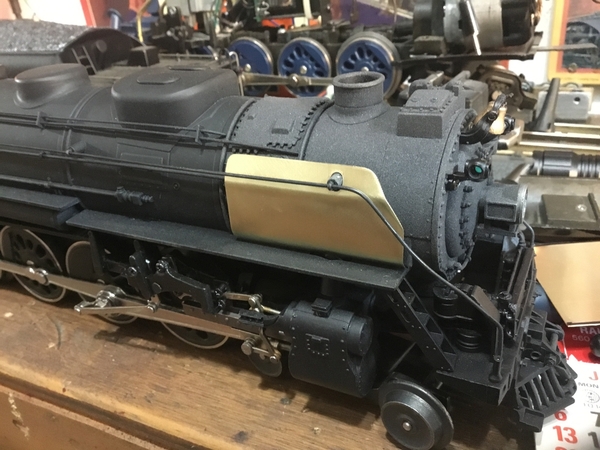
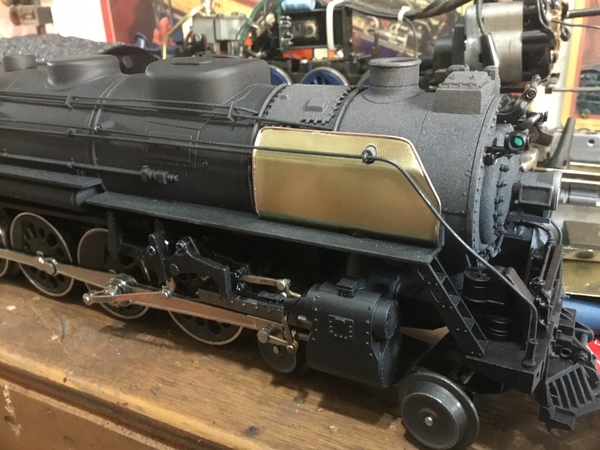
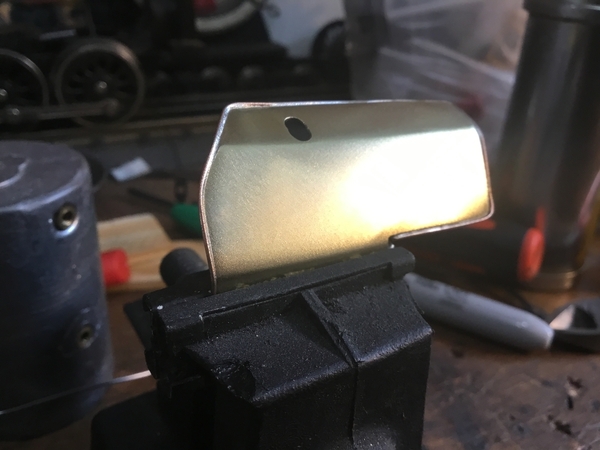
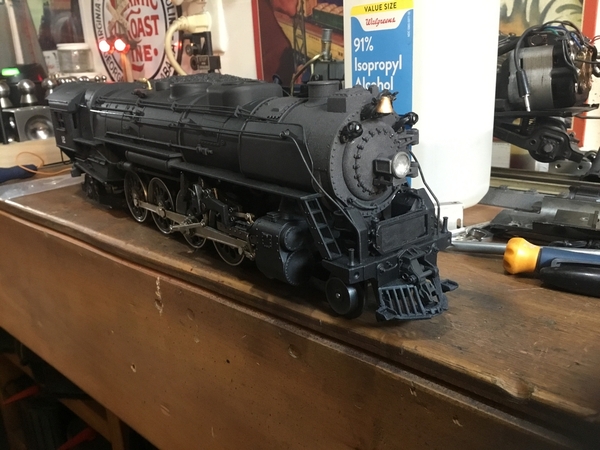
@Darrell the nylon that Weaver used in the drivetrains of those locos was not fully "cured," and it tended to shrink over time, usually splitting on the metal shaft. You may have one or more of the following problems:
(1) The universal joint collar (sometimes called a "helmet") is split, and no longer has a good grip on the motor shaft.
(2) One or both of your chain sprockets is split, so the spacing between the teeth is no longer constant. The motor is straining to overcome the increased resistance, and this causes the main drive shaft collar to spin on the motor shaft.
(3) One or more of your axle gears is split, which may cause increased or uneven friction down in the truck. This causes inordinate resistance in the drivetrain, leading to slipping of the motor shaft.
All of the parts for this drivetrain are probably still available from P&D hobby shop. Even Weaver brought out an improved version of this drivetrain before they were done with it. The updated version had a flywheel on the motor, and white nylon sprockets that were less prone to cracking. The flywheel makes a huge difference, and is a really worthwhile upgrade no matter what. It can be a little tricky to press one on yourself.
Your options are to order a bunch of new parts from P&D, or find a slightly newer Weaver (the black box mk2 version of this drivetrain) as a parts donor. These remain the best-looking RS3's in 3-rail, and will run very smoothly if you have the patience to tweak them and sort them out. But they're not durable or great pullers, not a lot of room to add sound, etc. Since this was made, MTH, Atlas, and Lionel have also offered the Alco RS with speed control, sound, operating couplers, etc. Unless this loco has a ton of sentimental value, I might just save my money for a newer model. My $.02.
You guys are way above my pay grade.
I am just removing my Lionel Southern Pacific AC-12 from its box. 6-38071. After last years taxes were done, it was an expensive purchase and has sat in its box for over a year. Purchased used with very little run time on it, the first operating session revealed why it had so little run time. It runs like cra... um... poorly - jerking and herking, loping along.
Hope I can figure it out.
Thanks @Ted S, gives me things to check. No chain in this loco, the tower has 3 gears leading to the truck gear. I think I will disconnect the drive shaft to the rear truck and see if that narrows down the problem area.
Well just found the problem, the drive tower is cracked almost all the way through. So it either binds the gears or makes them not mesh at all depending on which way you are driving them.
@Darrell wow your original photo wasn't super-clear, I see it now. If yours has gears instead of a chain then it was either modded by a prior owner, or it's a rare early variant (and not too successful.)
If the gear tower is the only thing that's cracked, you're lucky. Check out this link: https://www.finescale360.com/p...?variant=43786730894
This aftermarket gear tower should be a "drop in" replacement for your existing one. The large lower sprocket also increases the gear ratio for excellent slow-speed performance. I would still add a flywheel. You can get one from Northwest Short Line (NWSL), from MTH parts, etc. If you can't find a flywheel with a bored recess that accommodates the U-joint collar, then substitute a dual-shaft motor and put the flywheel on the opposite shaft. It will work just as well. You might need to file a little flat spot(s) onto the motor shaft for the set screw to grip.
EDIT: After looking more closely, I don't think the replacement tower kit includes the upper shaft. You may or may not be able to fit the upper sprocket on yours in place of the gear. If it doesn't fit on yours, you'll have to order a new upper shaft from P&D. You'll have to order some chain from P&D, or directly from the company that makes it, Serv-o-link. You can also get dual-shaft Pittman motors from P&D. Good luck!
Thanks for all the links @Ted S ! This is turning out to be some project! The loco was a custom run for the Gadsden Pacific Division toy train museum in Arizona and it did come in a black box. I'm thinking the drive tower was modified at some point to enhance low speed operation. I have been slowly collecting the yearly museum cars which are mostly lionel custom run ore cars so wanted the matching loco to pull them with.
Work bench cleared off, dropped pool level, all lawn furniture put away and just waiting for our hurricane. Don
Harmonyards, I am totally impressed and speechless!! I knew this level of talent existed but had never seen it before. WOW!!!!
Thanks WinstonB, ....I stumbled across the L&HR looking for a road name to use a for a Decapod I’m putting together....( only to find out they didn’t have any ).........got totally immersed in the L&HR......and had to make an R1 ...figured a Mohawk would be a good candidate for the job....my buddy Lou (Lou1985) looked at the prototype with me, and said it looked like a squashed down big boy tender behind that locomotive....that’s why I had to section that tender shell.....everything else was fairly simple.....I think I wound up taking 11/32” out of the center ....or close to it......Pat
Pat
You are a master craftsman; good to see your recent work.
Just sort of messing around today.
1: Like most of us, my hearing isn't what it used to be: age and been in too many rock n roll bands, I guess. Anyway, I find that the "bell" and "whistle" sounds are at just the right/wrong frequency to be harsh and annoying. I have turned them down as low as I can and still have them work, but it's not pleasant. I wanted to dampen the sound, so I got out some of these:
...just the right size. I simply removed the body, loosened the speaker, tucked one up under said speaker and re-assembled. Still works, but is much more pleasing to these ears. ![]()
2: The very small (I would think S scale) couplers on the front of my TMCC steamers has always troubled me. I just got some Max Gray couplers so I took one and modified it (original on right):
... to more or less match the Lionel (on left):
Before:
After:
Even though it looks large, the Max Gray is (obviously) "correct" O scale. Now to correct my other locos...
Not much I know, but these little projects were fun and easy...and they worked! ![]()
Mark in Oregon
@harmonyards posted:
Wow Pat, and I thought I did something special shoving a smoke unit inside my SS Niagara. Lots of good work here.
I'm still trying to figure out if these two brass looking prods are where I would hook up coil couplers on this Liontech system. I was sent a diagram of a later version of TMCC. this Is like a year before that. this engine is 1995 and the diagram I got matches my 1996 NYC 18563. I do not see
Okay, I have found B it is next to the blue box. But nothing I can read is beyond that going towards the right. Now the two red wires from the board are front light and rear light. So I'm guessing the two metal posts/pins pointing up that kinda brass color in the middle between the headlights and that blue box. does anybody know for sure. I can't see d,c,e,f,
Bill, I'm pretty sure yours has an LCRU in it, the original TMCC board. The newer version LCRU2 has a 6 pin molex connector on the end of the board with the heat sinks, just to make the distinction. The wires to your motor, pickup rollers and ground are all hard-wired to the board. The Front/Rear couplers, the headlight, strobe, and the prog/run switch all connect to the pins as shown below
I think you said yours had a strobe, so it would be this one:
George
@Strummer......thanks Mark, ,....I wasn’t sure what you were up to with the cotton pads....for a second I thought you were going to pack your ears with them!..😆😆😆😆....thanks for the comments!.
@Engineer-Joe.....thanks buddy, ....your work is beautiful too...I’m always in awe of you guys....namely, you, Pete, John, Alex ( who started this thread) Bob2,.. and a whole host of others.......I’m small potatoes...😉
Pat
@GeoPeg posted:Bill, I'm pretty sure yours has an LCRU in it, the original TMCC board. The newer version LCRU2 has a 6 pin molex connector on the end of the board with the heat sinks, just to make the distinction. The wires to your motor, pickup rollers and ground are all hard-wired to the board. The Front/Rear couplers, the headlight, strobe, and the prog/run switch all connect to the pins as shown below
I think you said yours had a strobe, so it would be this one:
George
thanks once talking to you on phone it confirmed what I thought
@harmonyards posted:my buddy Lou (Lou1985) looked at the prototype with me, and said it looked like a squashed down big boy tender behind that locomotive....that’s why I had to section that tender shell.....everything else was fairly simple.....I think I wound up taking 11/32” out of the center ....or close to it......Pat
I mean it also helps when someone has a Big Boy tender shell and chassis sitting around to experiment with ![]() .
.
I just finished my Premier ATSF 2900 class Northern and already have another project. I already have a massive Premier ATSF 5011 class Texas with PS2 3V.
A friend (where I get my projects from) found an earlier PS2 5V 5011 class that had been around the shop a bit. Banged up from kicking around the MTH parts departments as a donor or warranty return it looked worse for wear, missing all electronics, motor, flywheel, and worm shaft. Friend was able to add a worm, flywheel, and a nice big 9234 roller bearing Pittman motor. Also threw in a ATSF Blue Goose tender chassis, and I sourced a Lionel ATSF 20K gallon tender shell. Ended up with this pile of parts.
Now if you're an ATSF guy you might know where this is going. I already have a 5011 class Texas. I don't like to own duplicate models of the same locomotive (ok except the 3 Premier ATSF 3460 class Hudsons I own) so this Texas needed to be different. I got inspiration from this article: https://oscalekings.org/WP/gar...f-2-10-4-class-5001/
No one has made a ATSF 5001 class Texas in 3 rail O, so I'm going to make my own. I've already sourced the major components and an outside bearing pilot truck. The model is sitting like this now.
I'm going for accuracy, but some things won't be perfect, such is 3 rail. The 5011 class Boxpok drivers will remain as there are no equivalent size 3 rail Baldwin disc drivers like the 5001 class used. There will be other changes to match the prototype. The number boards will be relocated to the sand dome like on a 5001 class. The stack is going to be changed to the proper flip stack. No one makes the correct ATSF hand operated flip stack so my friend Pat, @harmonyards, is going to machine the proper stack out of brass, once I get him the correct measurements. I have to knock the incorrect stack out of the boiler first and take measurements. Locomotive will be numbered 5009 and it'll have PS3, so I can double head it with my 5011 class Texas if I want. It will be one of one when it's done. Only 3 rail 5001 class Texas.
Just an update on my 1990 Weaver RS3 GPD TTOM locomotive. Bought replacement drive tower from P&D, lower gear kit from Fine Scale, and Cruise commander from 3rd rail. It's a tight fit in there for sure! Anyway, here is the result, drive by at speed step 5 out of 100.
Great job Darrell, glad you got it running. Very smooth!!
Here’s some of what’s on my bench at the moment
Wow! You are the man Alex, multitasker extraordinaire!
Pete
Alex, that's a WORKBENCH full! I get confused if I get more than a couple on the bench at the same time. ![]()
I’ve found the cure for the common KLine cold.......how about a Conventional Kline scale Hudson, sporting a MTH Premier chassis!?....now the motor is bigger and in the back....where they’re meant to be!,....no more 385 Mubachi in a scale steamer....🤮.....
Cool, how much work to adapt the boiler to that chassis?
@gunrunnerjohn posted:Cool, how much work to adapt the boiler to that chassis?
Not as awful as one would think,....an evening to figure it all out, half a day to make it all fit....the evening was just to say to myself, “ am I really going to do this??” ....😁
Pat
@harmonyards posted:Not as awful as one would think,....an evening to figure it all out, half a day to make it all fit....the evening was just to say to myself, “ am I really going to do this??” ....😁
Pat
Hmmm ... some would agree with you, others like me are fraught with indecision, brought on by years of making wrong ones, plus a lack of experience in soooo many train repairs/upgrades/modifications which quickly leads to the "make every mistake you can" syndrome. The only redeeming factor is that I do enjoy it so!
Totally awesome that you can keep track of so many projects at once! Given my propensity for losing and mixing parts, I have learned to keep each one of my projects in just-right-sized plastic containers, which I stole from my grandson - he mixes his Legos with his Lincoln Logs, and a plethora of Minecraft figures, etc., so his are all now in a very large tote!
To regain the topic, I just wrapped up a 224 repair, a 261 repair, in the middle of a 671 repair, and have a very clean 2020 running around the test track, needing just minor touch-up! Steamer Days!
Just wrapped up a TMCC upgrade of this little jewel. This is the SMR General Haupt, an actual scale model of a General locomotive. The electronics are in the trailing boxcar, no way it fits in either of these pieces!
As an interesting contrast, here's how much larger the MTH RK General is when compared to a true scale model. The General locomotives were really small!
Today it was raining too much to haul my table materials to the house, so I decided to give the old 211 Texas Special another shot. I just cleaned the brushes and everything with rubbing alcohol and connected the rebuilt ZW transformer to the track. Either the cleaning or the high power got it going pretty well. Could have been a combination of the two. Once I had it running, I got to work on making a new horn for the top, from scratch. It turned out pretty well for a rush job. I then ran to the auto parts store and grabbed a couple of bulbs and cleaned and rewired the socket. It has a light again! I also added a lens to the front to make it look more like an actual headlight. Now I've got to come up with a plan for fixing that front apron and hope that will brace the front coupler up enough to keep the truck from derailing in reverse. My other project is to add some semi transparent plastic to the windows to hide the "hollow" look.
I also rewired and cleaned one of my two whistle tenders, bringing it back to life, for the second time in a week.
I also added a new headlight lens to my old 1666.
The last thing I did was add new truck springs to my 2020 Turbine. The front truck was jumping off the track way to often today. The only other thing it needs is a switch to turn the new smoker on and off. It runs you out of the room in just a few minutes as it stands.
I'm really hoping to get the table materials in the house tommorow and get started putting it together.
To think this journey started back in 2015.... It's taken five years just to get to the point where I can start a layout. I don't know how much more time will pass before I can get scenery on the table. I have some goodies coming, Thanks to Tom, which should give me a good start.
Since the San Diego Model RR Museum is closed until further notice, I have had the opportunity to work on my own engines (instead of the club engines). My workbench projects for the last few weeks have been:
1) Finished the TMCC ERR upgrade to the MTH Amtrak Genesis PS1 engine with excellent results.
2) Fixed two of my engines that were "jerky" runners by pressing the wheels (with gears) closer together. Don't know if anyone has had this problem, but somehow the wheels with gears developed too much play and ran erratically.
3) Did some TMCC antenna upgrades on engines that were marginal at the SD3R layout. I was doing one of these upgrades on a Century Club 2 TM-1 Trainmaster when I noticed two traction tires were gone. I had to remove the truck in order to replace the tires and it was a PITA to get the wheels back into the right position.
@Roger L. posted:I was doing one of these upgrades on a Century Club 2 TM-1 Trainmaster when I noticed two traction tires were gone. I had to remove the truck in order to replace the tires and it was a PITA to get the wheels back into the right position.
That's the Lionel truck design that I detest! What in the world were they thinking when they did those?
Access to this requires an OGR Forum Supporting Membership
