Who has OGR Ameri-build buildings on their layout? How do they compare to the Woodland Scenics buildings? Any pictures would be appreciated.
Original Post


|
|
Who has OGR Ameri-build buildings on their layout? How do they compare to the Woodland Scenics buildings? Any pictures would be appreciated.
Replies sorted oldest to newest

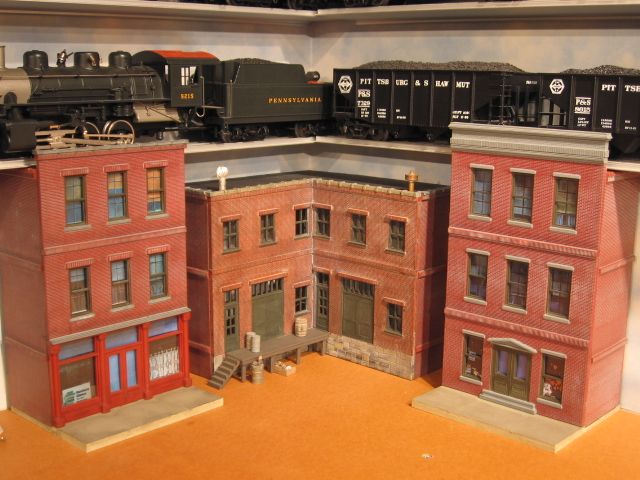
Three Ameri-Towne fronts on one of our layouts.
You cannot compare apples and watermelons. Ameri-Towne components are easily painted, accept a variety of window treatments, allow easy placement of interiors with lights and allows the modeler a great canvas on which to express his/her skills and ideas.
John in Lansing, ILL

Something I found helpful to do with the Ameri-Town buildings, while they were becoming buildings, was to cement a stick into each corner, running from top to bottom of the structure, leaving room, however, for the roof to be somewhat inset. I used Liquid Nails, or Gorilla Glue as the fixative. The reason for the stick and the strong glue, in my experience, was that the walls often were or got easily warped, lengthwise, and the sticks helped insist the walls stayed true and joined at right-angles. Also, I moved my buildings around quiet a bit for quite some time, while first creating the layout, so I did not want to be irritated with the buildings collapsing in my hands. I discovered that not all glues successfully kept the walls together, given the material involved.
Here are a few of the results...


FrankM
I think both depend on a lot of things. Skill level,price, Do you want to do most of the detail yourself or take it out of the box and put it right on the layout? There are many companies who do a great job on pre built and kit form buildings. I think the best way is to see them for yourself at hobby shops or train shows. It’s hard to see what a model will look like from a catalog or internet picture. In my opinion.
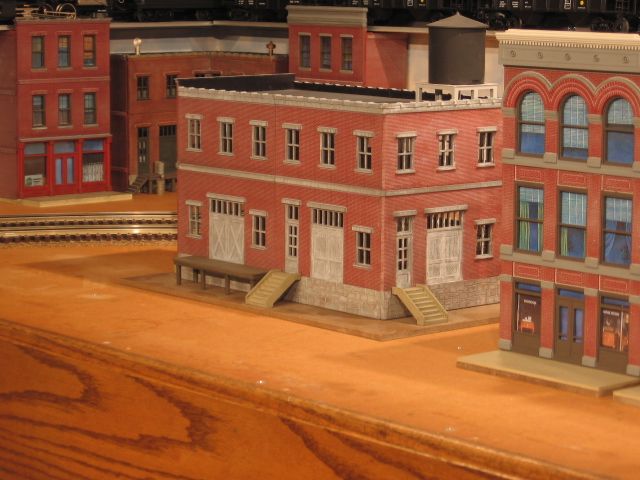
I built one, Barrettsburg Tool and Die. I bought it after seeing it on display at OGR’s booth at York, it is a big manufacturing type building, and it was bigger than anything else I saw from Lionel or MTH.
It was a fun and somewhat challenging project, it required some custom cutting and painting. I added the Heinz neon sign to the roof, and put a welder chip in the back corner, and some lights inside too.
https://ogaugerr.com/shop/941/
I think it came out well.


Nice looking building, like the ketchup sign.
These building kits, (Ameri-Towne), take some time to paint and detail, best done before assembly, flat on the work bench. I added bases/as I do with all my buildings. Slideshow. Click on the underline link.
OGR marketed pre-assembled buildings also. My pictures are the kits. Window detail can be purchased from OGR. There is also a parts list that can be purchased. Check the webstore link, top of page, to the OGR buildings.
Ameri-towne, kits.
Ameri-build, pre-assembled building models.
I only have one building - the Furniture Factory on my layout. I have 3 of their flat store fronts.


I have some flats made for my Christmas Tree Layout...


Hello All,
Where can I get window treatments?
Dave
Dave:
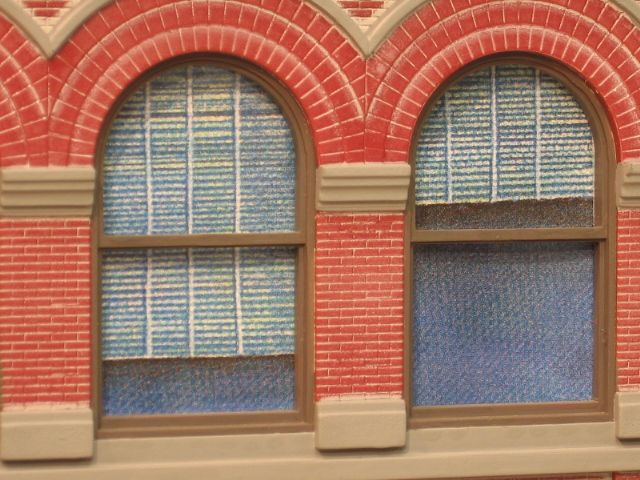
When you buy an OGR kit the window treatments come with the kit. They are printed on heavy card stock so won't transmit much light. You can get all kinds of window treatments by doing a goggle search. To make these transparent print out vellum paper. This way you won't need to apply a clear plastic and the window treatment behind it. If you don't plan on rubbing the printout with your finger or getting it wet you can use as is however I suggest spraying with either Dullcote or a clear cost to protect the ink.

I have also printed window treatments on Avery clear shipping labels. They act like dry transfers. See the green signs below


Dad and I used a ton of them. Kitbashed most of them.
luvindemtrains posted:Hello All,Where can I get window treatments?Dave
I use snippets of ribbons for drapes,")
b") and I cut appropriately sized pictures from magazines to put in the windows as pretend room contents or store announcements/advertisements.
and I cut appropriately sized pictures from magazines to put in the windows as pretend room contents or store announcements/advertisements.")
b")
FrankM
")
b")
")
b")
I have three on my layout. They are great for a beginner modeler (like myself) and are affordable. My only complaint is the walls came warped in all three kits I have. Very frustrating... Next time I will spend a little more on a better quality kit and hopefully avoid that issue.
-Nick
Moonson posted:luvindemtrains posted:Hello All,Where can I get window treatments?Dave
I use snippets of ribbons for drapes,
and I cut appropriately sized pictures from magazines to put in the windows as pretend room contents or store announcements/advertisements.
FrankM
Very creative, thanks Frank!
Model Structures posted:Dave:
When you buy an OGR kit the window treatments come with the kit. They are printed on heavy card stock so won't transmit much light. You can get all kinds of window treatments by doing a goggle search. To make these transparent print out vellum paper. This way you won't need to apply a clear plastic and the window treatment behind it. If you don't plan on rubbing the printout with your finger or getting it wet you can use as is however I suggest spraying with either Dullcote or a clear cost to protect the ink.
I have also printed window treatments on Avery clear shipping labels. They act like dry transfers. See the green signs below
Frank,
Great suggestions with very nice outcomes. Thanks!
NICK_R wrote:
I have three on my layout. They are great for a beginner modeler (like myself) and are affordable. My only complaint is the walls came warped in all three kits I have. Very frustrating... Next time I will spend a little more on a better quality kit and hopefully avoid that issue.
-Nick
Ameritowne buildings are used by beginning and craftsmen modelers alike. They build-up into realistic buildings when painted and decorated. As far as warpage of the walls is concerned, it is usually slight and can easily be overcome as follows.
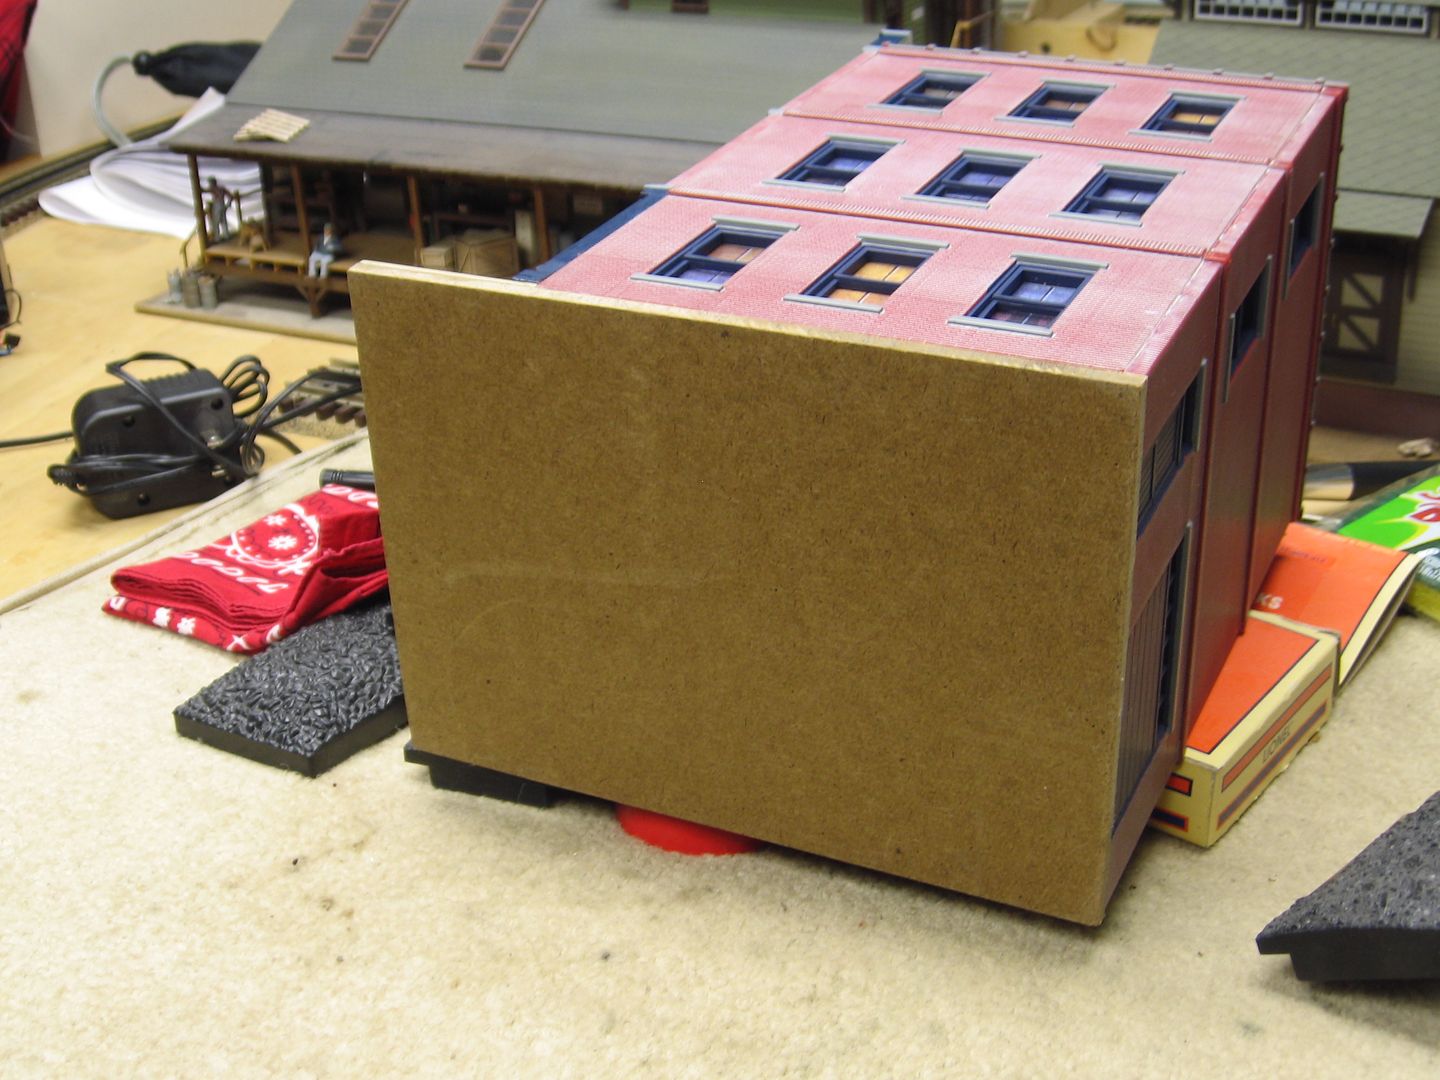
The first picture below shows one of my Ameritowne buildings in which three walls have been assembled. At the intersection of the front and side walls, there are four short vertical strips of 1/8th-inch square basswood which had first been attached to the inside of the front wall with styrene cement. These strips should be applied at both edges of the front and rear walls before assembly of the walls. When the cement is dry, these strips will align the outside corners of the walls during assembly. To assemble, place the four walls together and put rubber bands around the outsides to hold them flat and in position. You can also use pieces of masking tape to hold the edges together. Align the walls to be perpendicular using a small square. Then, glue the walls together on the inside edges. This process makes the assembly process easier and removes any initial warpage which may be present in the plastic walls. I also glue horizontal basswood strips to each of the walls and place a basswood “floor” on each level to serve as a view block so that, when the building is finished, you can’t see through the interior from one floor to another.
MELGAR


MELGAR has shown you the use of the "sticks" I mentioned. He has shown you perfectly how they can be effective and essential to the build staying together.
FrankM
Wow. Those are beautiful!
MELGAR posted:NICK_R wrote:
I have three on my layout. They are great for a beginner modeler (like myself) and are affordable. My only complaint is the walls came warped in all three kits I have. Very frustrating... Next time I will spend a little more on a better quality kit and hopefully avoid that issue.
-Nick
Ameritowne buildings are used by beginning and craftsmen modelers alike. They build-up into realistic buildings when painted and decorated. As far as warpage of the walls is concerned, it is usually slight and can easily be overcome as follows.
The first picture below shows one of my Ameritowne buildings in which three walls have been assembled. At the intersection of the front and side walls, there are four short vertical strips of 1/8th-inch square basswood which had first been attached to the inside of the front wall with styrene cement. These strips should be applied at both edges of the front and rear walls before assembly of the walls. When the cement is dry, these strips will align the outside corners of the walls during assembly. To assemble, place the four walls together and put rubber bands around the outsides to hold them flat and in position. You can also use pieces of masking tape to hold the edges together. Align the walls to be perpendicular using a small square. Then, glue the walls together on the inside edges. This process makes the assembly process easier and removes any initial warpage which may be present in the plastic walls. I also glue horizontal basswood strips to each of the walls and place a basswood “floor” on each level to serve as a view block so that, when the building is finished, you can’t see through the interior from one floor to another.
MELGAR
I love those conservative color choices!
They really bring out the building details
Old picture.....from a scene built 20+ years ago.....


The sign on the diner went up when Lionel announced the move o production to China.


This gives a better view of the station.

Peter


Thanks, MELGAR, for the tips. I wouldnt have thought the wood would stick so well to the plastic. I will definetly try it next time.
Any thoughts on if applying heat with a heat gun would help?
-Nick
Good evening, here is a couple garages that I put together that are Ameri Towne
The one garage I modified the garage door partially open to show the front end of a 1932 Chevrolet convertible.
The lighting is OGRE


Mark, those garages really look great!
-Nick
Barrettsburg Tool and Die is a monster!! I have one still in the box- and might have to rethink and find space. Wow!!
I have several, a Firehouse, and the Apartment building assembled, and a few more still in boxes. The Ameritown Kits are (IMHO) the best for the money on the market. Thicker, stiffer plastic, they fit well, include the window glazing and window shades, etc. AND- Made in USA!!! Boardman, OH!!!
Hello Nick thank you for the compliment.
I seen these garages and thought they would go good with my MTH houses.
Just got to get them planted and place some exterior items around them.
Thanks again !
Not on the layout yet:


Access to this requires an OGR Forum Supporting Membership


