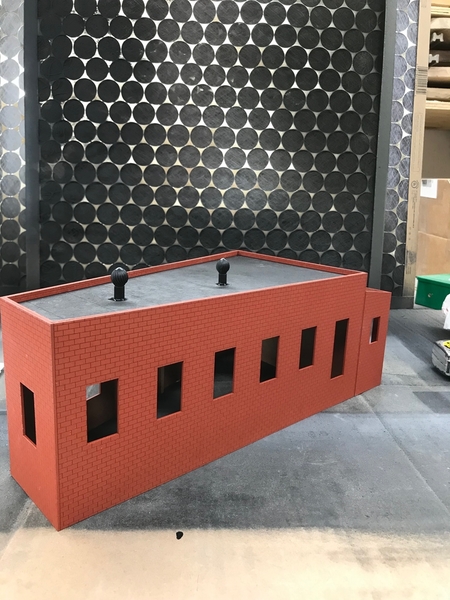
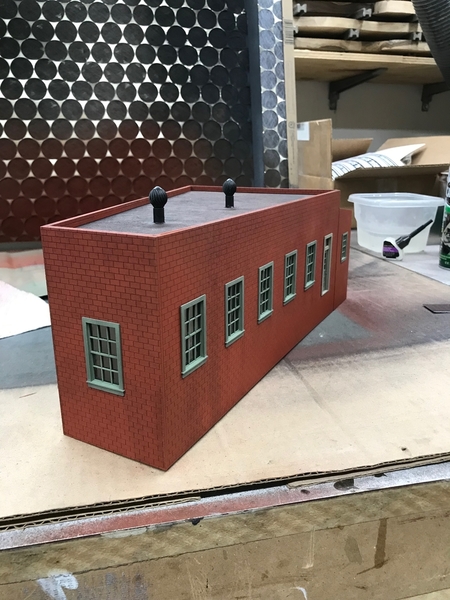
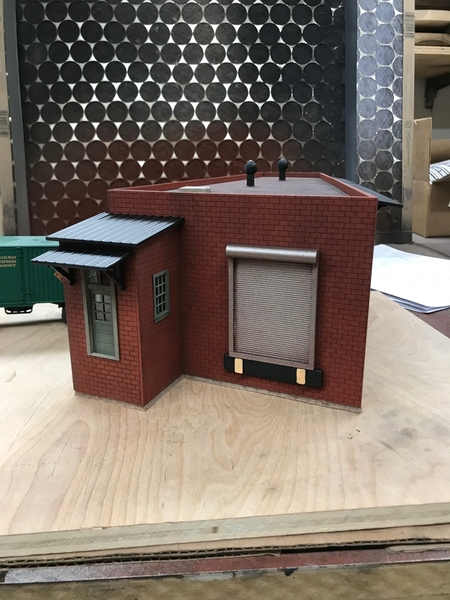
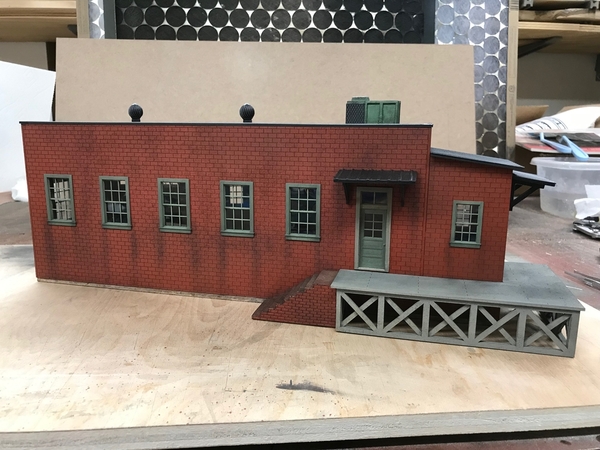
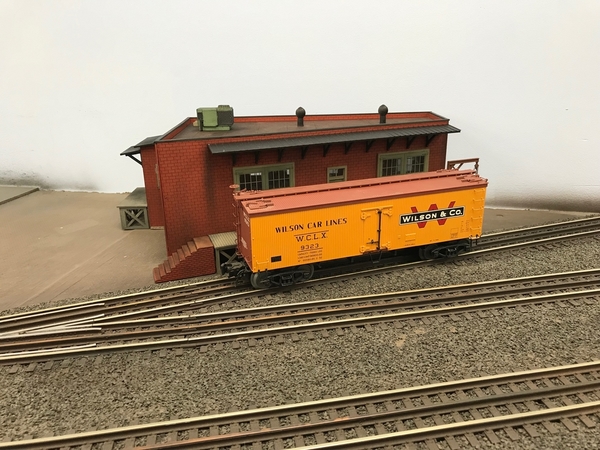
I finished this kit a few days ago, and am expanding on the process a bit. On my layout, this is Wilson & Co., a meat packing facility. Oddly enough, the kit is called Wilson Bros. I didn't but the kit for the name, I bought it because it fit the strange triangle shaped area. I bought the kit from Right On Track Models at: https://www.rightontrackmodels...AN_KIT_O%2FOn30.html

The building is laser cut MDF with wood trim and molded plastic parts for the rest. The kit goes together quickly, and the parts fit well.

First, I glued some wood strips to the back of the walls to keep them flat and add support. Then, I assembled the main walls. The roof is in place at this point to stiffen the structure while the glue dries. After the glue dried I removed the roof, then added the office extension.

IMG_2154

 Almost all paint is from a rattle can. Per the instructions, I painted all of the walls and steps Ace Hardware Red Oxide.  I moved the building to the side and painted the roof flat black. After the black dried, I added the roof vents, then installed the roof permanently. 

IMG_2159

 Before adding the windows and doors, I painted them with a flat gray primer. After the primer dried, I painted the door frames with Rust-Oleum Khaki.  I painted the windows and doors with Army green. Both paints are part of their camouflage series. After everything dried, I lightly brushed the doors with a stiff brush to add a weathered look. I added the loading dock doors to the frames, and then installed the "glass", and added those assemblies to the building. 

IMG_2164

IMG_2165IMG_2166IMG_2167IMG_2168IMG_2169

 I painted the plastic corrugated roof material a flat black. I cut the pieces to size, and glued them to provided sizes of MDF. After they dried, I attached the support brackets to the underside, and painted them black. Then I installed the roof for the loading dock, office, and entryways. 

IMG_2170IMG_2171IMG_2172

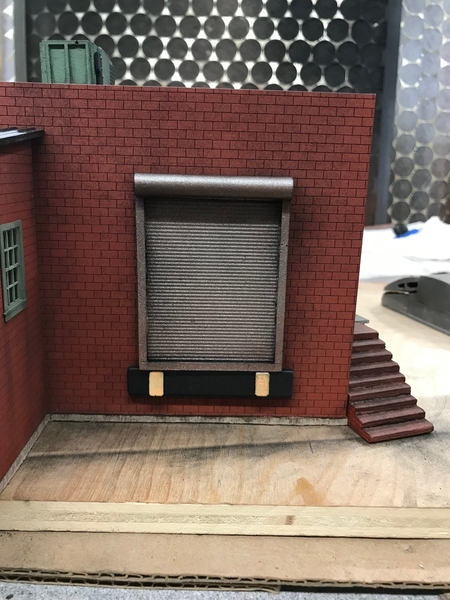
 I painted the roll up door first with a coat of Krylon Ruddy Brown Primer, after that dried I very carefully sprayed on some Rust-Oleum Stainless Steel. I painted the bumper underneath flat black.

IMG_2173IMG_2179

 I painted the loading docks with a gray primer first, let that dry, then very lightly with Rust-Oleum Khaki. I wanted them to look more gray and sooty than wood colored. The steps were painted Ace Hardware Red Oxide like the walls. The barrels were painted black, and the crates an Almond color. 

IMG_2180IMG_2183

 I painted the hatch on the roof a tan color, and I used Model Master Pale Green acrylic on the AC unit, and black for the grill. 

IMG_2182IMG_2183

 I painted the jib crane the Ruddy Brown after assembly. I still can't believe I got those tiny little parts together with my frying pan hands!

IMG_2184IMG_2185

IMG_2190IMG_2191

I made everything a little more grimy by giving the entire structure a black alcohol wash. I went over everything several times until I liked the look. After that I used Pan Pastels to create the streaking from the roof and windows, and added some streaking on the loading dock. I know the weathering looks pretty strong in the pictures, but not as much in person. 

I'm pretty happy with the results. As I get more experience, I'll use more varied techniques. Thanks for looking.

Andy

Attachments

Images (21)
  • IMG_2154
  • IMG_2159
  • IMG_2164
  • IMG_2165
  • IMG_2166
  • IMG_2167
  • IMG_2168
  • IMG_2169
  • IMG_2170
  • IMG_2171
  • IMG_2172
  • IMG_2173
  • IMG_2179
  • IMG_2180
  • IMG_2183
  • IMG_2182
  • IMG_2183
  • IMG_2184
  • IMG_2185
  • IMG_2190
  • IMG_2191
Last edited by Steamfan77
Original Post

Replies sorted oldest to newest

You need a broken ladder, milk basket, one dirty glove, a tree branch, some old rope, a base ball, a doll..maybe a tricycle and some old newpaper. Modern day roofs there will be food garbage & drink cups near the doors.

No roof like that is that clean except for a few days after a new one  . It looks great mind you, but like most is kinda wrong/kinda missing some detail at least, ....and that's sealing the roof edges at the walls and collors of vent fixtures, and or curving up the walls like kick moulding (I've skipped that plenty as well).  The older it is, the more likely every seam and edge at least would be tar (later, maybe "silver sealed"). Likely a few tar repairs even on vulcanized. AC coils are usually light colors, normally of aluminum. Heating with gases exhausts clean. Some black or silver paint, be it gloss or flat, just a different tone, at the edges and or seams of roofing material. And actually sealing along the top edge of awnings, etc. is another tiny detail most folks might not think of.

Oh..an easy one. A rust wash on the wood under and around the dock crane's base. No way it didn't bleed rust. Maybe show it was loved by folks there, at least a little, and paint it some.

It looks great, I'm just pointing to some rivets most folk wont miss, but are there to be counted if you go that way.

Steamfan77 posted:

I finished this kit a few days ago, and am expanding on the process a bit. On my layout, this is Wilson & Co., a meat packing facility. Oddly enough, the kit is called Wilson Bros. I didn't but the kit for the name, I bought it because it fit the strange triangle shaped area. I bought the kit from Right On Track Models at: https://www.rightontrackmodels...AN_KIT_O%2FOn30.html

The building is laser cut MDF with wood trim and molded plastic parts for the rest. The kit goes together quickly, and the parts fit well.

First, I glued some wood strips to the back of the walls to keep them flat and add support. Then, I assembled the main walls. The roof is in place at this point to stiffen the structure while the glue dries. After the glue dried I removed the roof, then added the office extension.

IMG_2154

 Almost all paint is from a rattle can. Per the instructions, I painted all of the walls and steps Ace Hardware Red Oxide.  I moved the building to the side and painted the roof flat black. After the black dried, I added the roof vents, then installed the roof permanently. 

IMG_2159

 Before adding the windows and doors, I painted them with a flat gray primer. After the primer dried, I painted the door frames with Rust-Oleum Khaki.  I painted the windows and doors with Army green. Both paints are part of their camouflage series. After everything dried, I lightly brushed the doors with a stiff brush to add a weathered look. I added the loading dock doors to the frames, and then installed the "glass", and added those assemblies to the building. 

IMG_2164

IMG_2165IMG_2166IMG_2167IMG_2168IMG_2169

 I painted the plastic corrugated roof material a flat black. I cut the pieces to size, and glued them to provided sizes of MDF. After they dried, I attached the support brackets to the underside, and painted them black. Then I installed the roof for the loading dock, office, and entryways. 

IMG_2170IMG_2171IMG_2172

 I painted the roll up door first with a coat of Krylon Ruddy Brown Primer, after that dried I very carefully sprayed on some Rust-Oleum Stainless Steel. I painted the bumper underneath flat black.

IMG_2173IMG_2179

 I painted the loading docks with a gray primer first, let that dry, then very lightly with Rust-Oleum Khaki. I wanted them to look more gray and sooty than wood colored. The steps were painted Ace Hardware Red Oxide like the walls. The barrels were painted black, and the crates an Almond color. 

IMG_2180IMG_2183

 I painted the hatch on the roof a tan color, and I used Model Master Pale Green acrylic on the AC unit, and black for the grill. 

IMG_2182IMG_2183

 I painted the jib crane the Ruddy Brown after assembly. I still can't believe I got those tiny little parts together with my frying pan hands!

IMG_2184IMG_2185

I made everything a little more grimy by giving the entire structure a black alcohol wash. I went over everything several times until I liked the look. After that I used Pan Pastels to create the streaking from the roof and windows, and added some streaking on the loading dock. I know the weathering looks pretty strong in the pictures, but not as much in person. 

I'm pretty happy with the results. As I get more experience, I'll use more varied techniques. Thanks for looking.

Andy

Great job building and providing the step by step photos. That building would look great on any layout.

Thanks Ted, please post pictures of your build too. I’m looking forward to it.

Thanks John (Rattler), I added two more pictures at the end of my original post. I have the Atlas version!

Thank you John H., I wanted to give it a slightly different look from two other brick buildings I have on the layout. Here is the link to my build thread to see the other structures I’ve added.  https://ogrforum.ogaugerr.com/...ad-oyster-bay-branch The buildings are on the last page.

Thanks Sean, I would say about 15 hours or so. That was spread out over the course of a week or two. I’d work on it for a bit and do something else. Sometimes I would only paint, and then let things dry for the day. 

Andy


Add Reply
Post

OGR Publishing, Inc., 1310 Eastside Centre Ct, Suite 6, Mountain Home, AR 72653
800-980-OGRR (6477)
www.ogaugerr.com

×
×
×
×
Link copied to your clipboard.
×
×