You keep moving right along, I enjoy the progresion and wish I have the space.
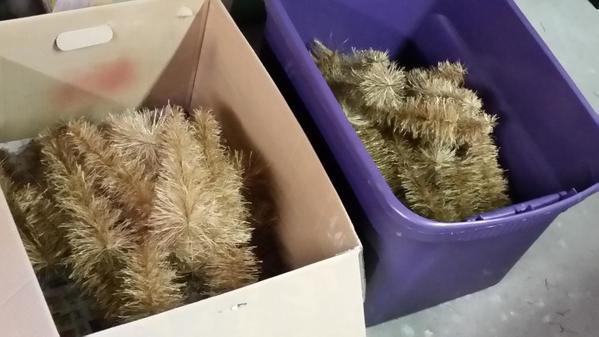
Rather than double post photos of updated progress, I have posted photos on Friday photo thread for 5-15. I may take more detail close ups later from time to time. Since it was raining, I tried my hand at making bottle brush type (wire and twine) evergreen trees. The first experiments have been laughable. Fortunately I have a good sense of humor and can use them in the background. All the comments have been appreciated and helped me maintain enthusiasm for the redo.
katy409: I don't know which beam you are asking about. I have 3 beams because of the design of the house. So I took photos and furnished the data for each.
First beam is the longest and the span between the columns differs because I did not want a beam located by a space we wanted open for rec room purposes. That of course was before I developed my RR OCD. Beam width 12 inches. wall>16 ft.>8.5 ft.>8.5 ft.>wall.
Second beam is 10 in. Wall>12 ft.>12 ft.>wall.
Third beam is 8 in. Wall>8.5 ft.>8.5 ft. wall.
What are you considering?
Attachments
Pennsynutts, Thanks for the fast reply. Mine looks like it will be 40 ft. Hopeing for 8 " beam with two end supports with one in the middle. Only one floor above. At 6.1 - I do not know if my head would clear a 12" beam !!!! Thanks, Art
Katy409: I am certain that there are engineering principles that govern the width, length and position of the columns. There was a Skywalk tragedy in KC many years ago that brought attention to the ever important engineering overview. Hope all goes well for your project.
May 22 update. Installed 34 telephone/utility poles. I observed several situations in urban and rural areas where the height and number of cross members varied. I chose to put poles w/o cross members along rural locations and those with cross members in the city.
Attachments
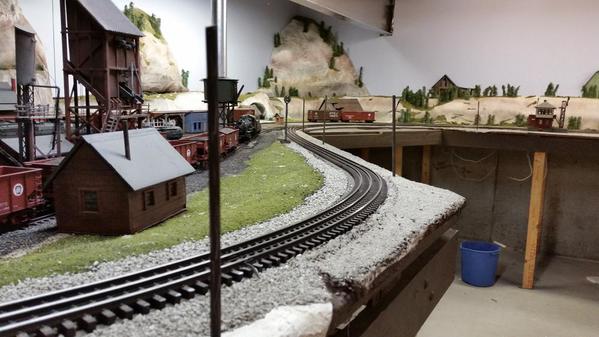
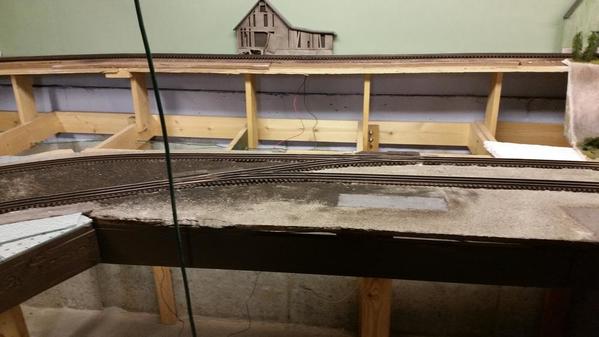
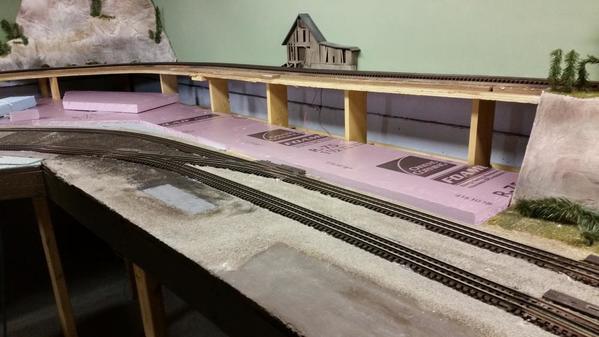
I have been running a few trains now and then on rainy days. But can't use a section of my mainline and have to use the siding tracks. One of the last problem areas is in the rural section of the layout. It is a pocket formed by mountain structures that separate a mainline and two sidings/yard tracks. To get to the mail line as it extends from the bridges to a short tunnel (about 8 feet) I have had to remove the cardboard ground base and pop up through openings in the grid. Not too terribly difficult even for an old guy like me, but inconvenient. (You know the cardinal sins to avoid when building a layout that we sometimes have to compromise to get it done.) Because it has been raining so much, I have had time to work on this area recently.
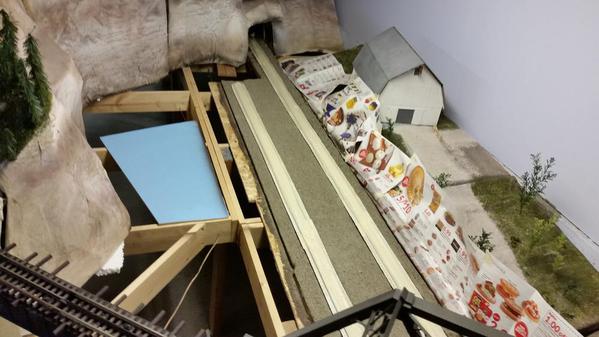
May 26: Removed cardboard ground cover from area. Cut and hot glued some pieces of foam for area between mainline and parallel stub yard track.
May 27: Cut more foam pieces, hot glued in place, masked track, laid plaster cloth over foam.
May 28: Removed track masking, sprayed track and ties with earth brown camo. Later today I might start making a more rigid scenic landscape base. I will cut the former cardboard bases into 3 or 4 separate and less cumbersome pop up templates and make new bases to be enhanced later after some scenic thought.
Tomorrow: I plan to clean top of rails and then start to paint (dark brown latex) and add limestone dust to the area between the tracks and on the outboard sides.
While the paint dries I might continue work on the new scenic bases. Here a couple of pics of the area. More to come.
Attachments
Coming along nicely. I really like the look. going to be some striking scenery.
Looking good pennsynut.
Thanks for the update.
Nice work! What color did you paint your rocks, hills with? Do you have a hand drawn track plan?
Again, it is still too wet to cut the grass, so after the other inside chores I took a half hour and glued down some basic ground cover along side the main line (far right track in photos) and the track immediately to the left. The other 2 tracks to the far left are yard tracks that meet up with the main line on the other side of the tunnel.
Attachments
Glad to see your progress! It's looking good!
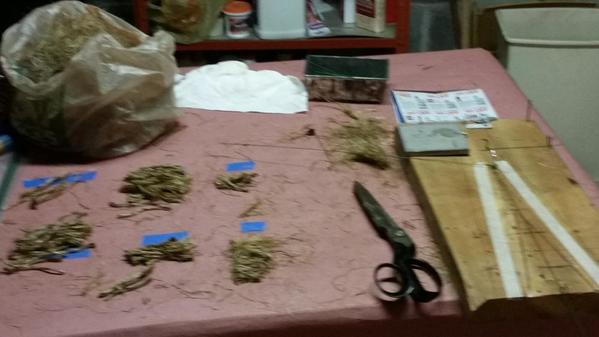
This summer was so hot some days that I decided to make use of the bottle brush conifer tree making materials I bought several years ago. I have made and setup over 100 conifer trees. On my second 8 foot of rope used for branches. I wish I could make somewhat realistic deciduous trees but I don't have that skill. Time consuming, but enjoyable. Here are some pics.


Attachments
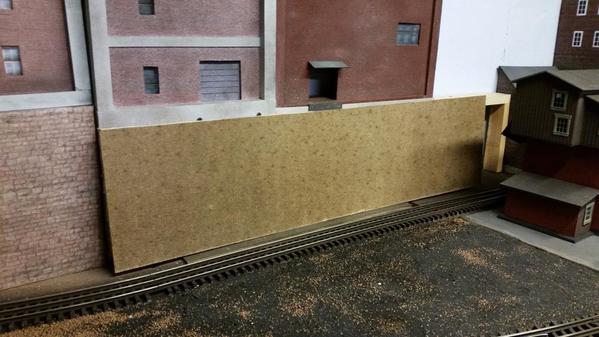
Today I started to build a masonite retaining wall for the city area. These photos are in reverse order.
Progress so far.
I am adding some footing, cap and verical detail and then I will lightly spray with gray and black primers. But I am also considering a green for some variety.
Attachments
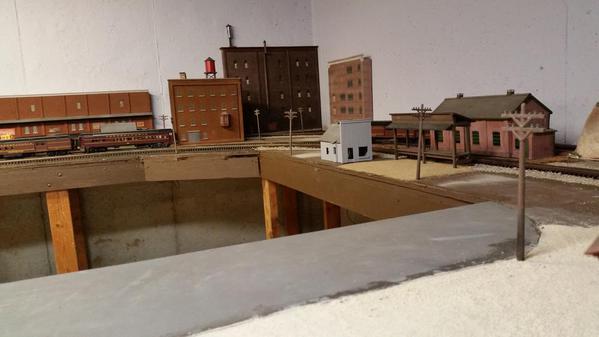
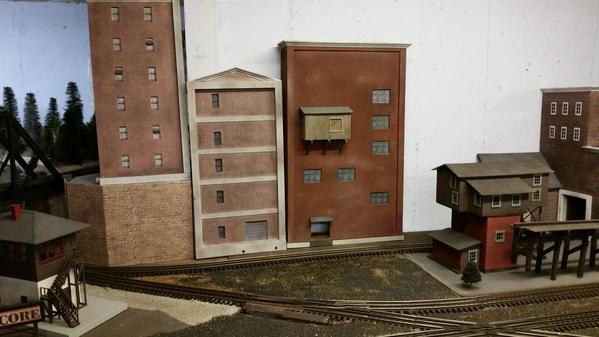
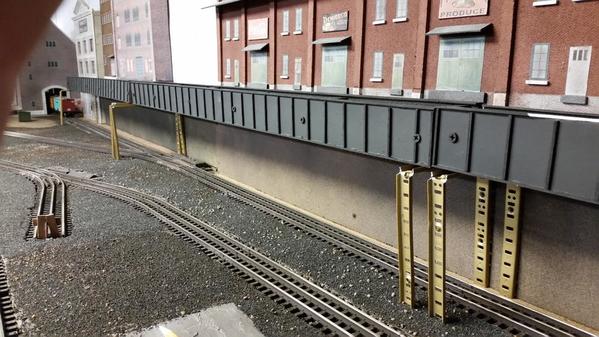
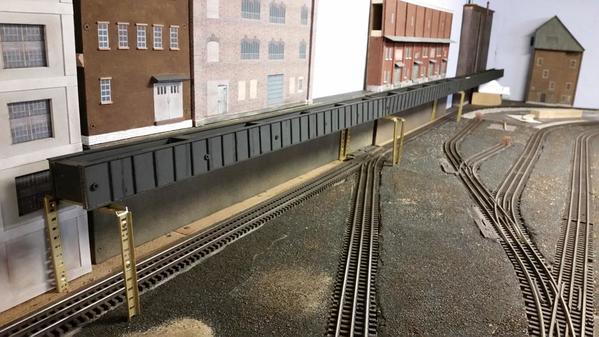
I am a little bored making trees for now, so I have another retaining wall project in the planning. The buildings against the wall from the thin brown building in front of the green water tower extending right to a white structure are going to be elevated 7 inches and rest on a platform with a retaining wall. Those buildings have freight doors on the ground floor and of course they will be elevated 7 inches. In order for the rr cars to have access at those doors, I plan to make a girder bridge structure that will extend from the right wall (not in this photo) at the 7 inch level for the elevated building doors; like a stub siding. The elevated stub track girder structure will extend over track on the lower level. Because the table top and scenery is uneven, I plan to make supports that can be adjusted to level the girder structure with set screws. My explanation might be confusing. I will update progress.
Attachments
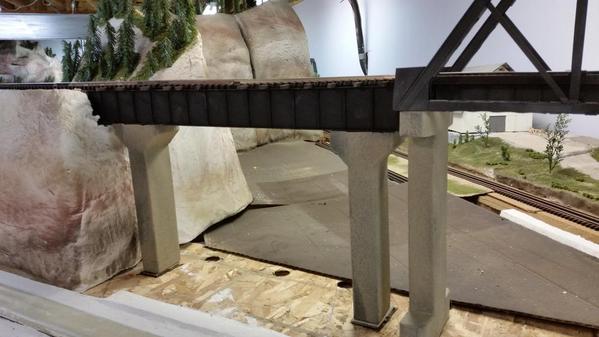
Today I made 2 more retaining wall units. They are 7 inches. I did not detail them yet, but much will be the shadow of the 12 foot series of deck girders or truss decks for track at the door level adjacent to the buildings. I will have to make bridge supports obviously. Any ideas on inexpensive way to make trusses would be appreciated.
Attachments
Making progress on the deck girder segments:
The decks are assembled and painted. I'm making support columns out of cheap shelf strips that I will paint light green.
I'm not sure if the supports are here to stay. For now I plan to add 2 more supports in each of the two 36 inch sections and 3 more in the 48 inch section. The bridge is to allow rail service to the adjacent buildings but also storage for some cars.
Attachments
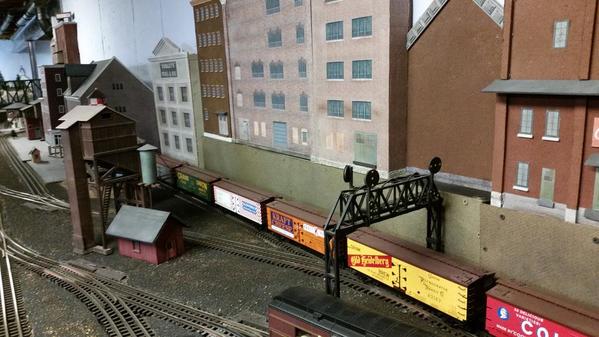
Since my last update I have been posting some progress on "what did I you do today" thread. Thought I would post scenery things here today. I added some color to a black retaining wall for fun. I finally got around to make 6 crude wall flats to fill in empty spaces in the town area and finished (for now) the last one last night. I thought about really detailed plastic kitbashed building flats to get nice brick detail but for size and number I needed too expensive. I have done a few paper on wood models in the past to try for a better look. But these work for me.
Then today I wiped off the track in the town and ran an RPO, a passenger/baggage car and 2 coaches behind a PRR 4-4-2. It looked great with the building flats and steaming under a part of the girder bridge that still needs 10 feet of track to finish. Good to finally run a train now and then. This redo started in Dec 2014!
New bldg 4th on right. New bldg 2nd from left
 3 new bldgs
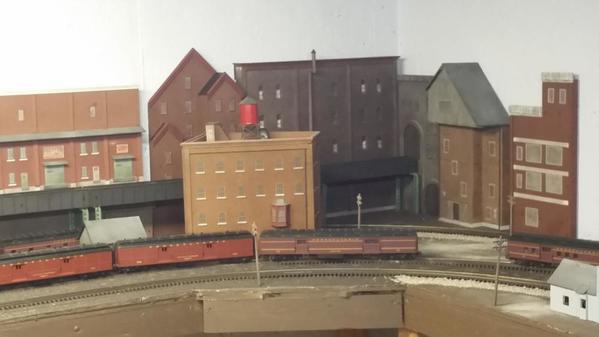 New bldg with peaked roofs
 New gray bldg with arches
 2 new bldgs separated by grade crossing
My next project involves painting hills and some trees on a wall in the country side area but I have to practice techniques before I do that
Attachments
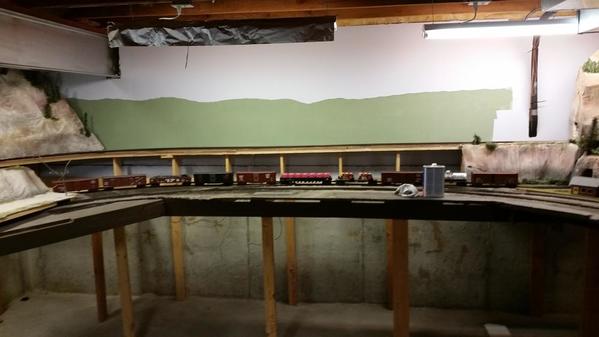
I finally got a little courage to try painting a first background layer on one of the walls in the countryside area. The color was an experiment of leftover beige indoor paint and adding leftover acrylic greens until I got kind of close. It came out better than I thought for a first timer so I painted the other walls since I had enough paint. But in some areas it might be a little too high. My plan is to eventually paint detail to define hills, tree lines and fields whenever I acquire skills to do that. lol. In any case, I can now clean the cobwebs and track in some hard to reach areas and do some other scenic modifications.
Attachments
Good start on the background. I hop mine looks as good when I start mine.
Thanks Mark. I figure I can always paint over the offending experiments and start over. But I am using free card boxes from walmart for canvas to experiment with paint detail techniques and color combinations. I will rewatch youtube backdrop advice. Some pretty talented folks out there indeed.
After trying to refit existing warped cardboard scenery popout modules I have decided to redo corner scenery elements with Styrofoam base modules. I have to study the glues for Styrofoam and plan out the scene where I want to place a small power plant, substation and maybe a few other small buildings.
Removed panels
Attachments
The styrofoam will be better, not warping; and you have enough bracing that it won't sag. My 1-inch foam on the Temporary RR which overhangs the ends of the card table by a foot sagged a bit until I put 2x4 braces under. I think liquid nails works to glue it. I hope you get some other replies.
Mark I think I used a version of that glue before but may have to search for the left over tube. Still thinking about the actual scene. I am thinking about making retaining walls for a few areas in that corner to allow more space for some small trackside buildings. This creative stuff is fun and interesting but it's been difficult for me to envision and think outside of the box for real interesting scenes.
Bought 4 x 8 sheet of 1.5 inch foam insulation for new scenery and cut and fit it for the base. Wondering if hot glue is enough to attach card board latice to foam for plaster hill work or should I use foam glue?
I have decided to try making a retaining wall for a straight 6 ft. stretch to add some interest so it's not just rocks and trees.
Attachments
I previously posted my completion of scenery in my problem corner on "what did you do ..." thread but I wanted to include it on this thread so I can find it easier.
https://ogrforum.ogaugerr.com/t...78#70974704678685178
https://ogrforum.ogaugerr.com/t...14#71397234041450614
pennsynut posted:
Looks great. What are the Pennsy height specs?
Bought 4 x 8 sheet of 1.5 inch foam insulation for new scenery and cut and fit it for the base. Wondering if hot glue is enough to attach card board latice to foam for plaster hill work or should I use foam glue?
I have decided to try making a retaining wall for a straight 6 ft. stretch to add some interest so it's not just rocks and trees.
You could always put a few staples in to help hold it in place. We have not tried to glue anything other than more foam to the base foam, and have used the "Projects" version of the Liquid Nails tube or a water based quart can of contact cement. Looking forward to your work, keep us updated!
Wow! Thank you for the link to the pic of the trees in progress, had to take a tour through the entire thread. Great layout!
Ray
Nice work, Is there a track plan somewhere in this post?
Bobby: Here is a link
https://ogrforum.ogaugerr.com/t...gnal-bridge-question
to a forum thread that might be helpful about prr signal bridges. I think there is a referrence to 23 feet from the ground to underside of bridge that translates to about 6 inches. The other dimensions are contained in
http://prr.railfan.net/signalstandards/standards.cgi
I have made crossing shacks, mail pickup standard, signal faces, and a water tank based on the diagrams. Great place to look up neat stuff.
Seacoast, here is a sketch I made of the bench work outline. I'll fill in the tracks as best I can later.
Sorry the dimensions are fuzzy. Here are some vitals. The main rectangle is 24 x12. The long stretch is 40 ft. The ends of the 40 ft are 7 ft. The width of most benches is 30 plus inches. The track is atlas. All but a few O81 curves are O72 as well as switches. Single main. 5 bridges counting a truss butted up to a 22 inch girder bridge.
2.2 percent grade to the upper track, 11 inches highest elevation, that crosses the lower tracks three times.


