
Hello all.


After talk, I decided to do a step-by-step how to of how I weather my rolling stock and motive power.


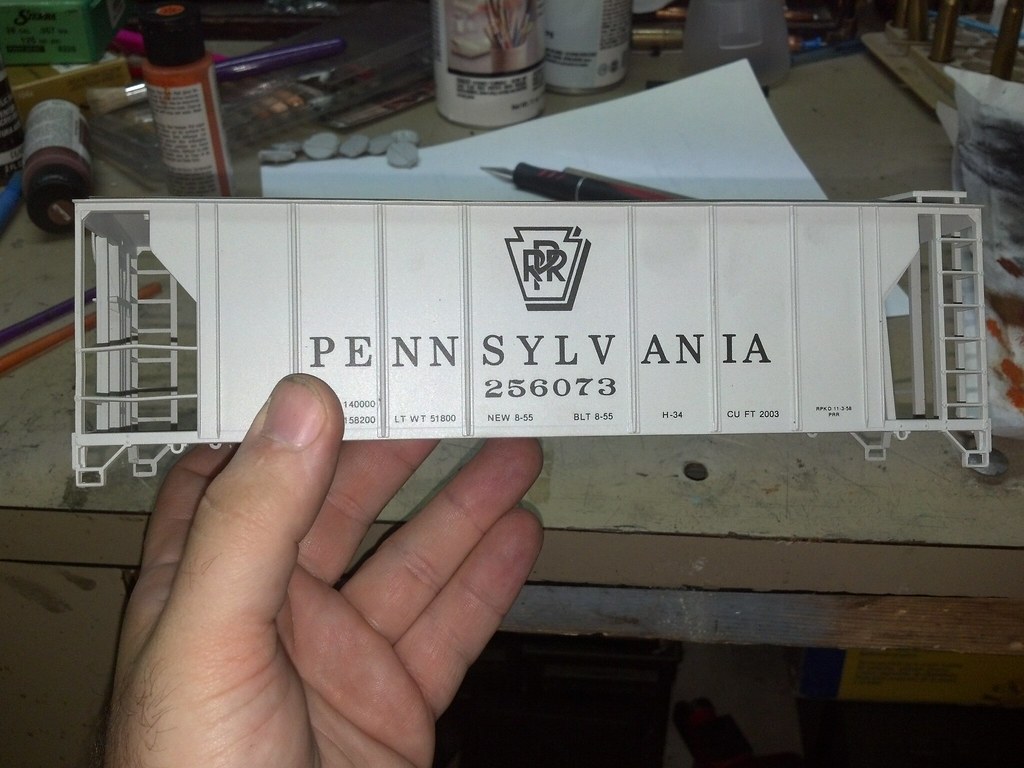
BEFORE: Stock Lionel MDT Michigan Central Reefer.

IMG_0298

IMG_0299


STEP 1: Krylon Camouflage Ultra-Flat Brown: Trucks, roof and under frame.

I use this paint to dirty the under frame and centerline of the roof, and it's "ultra flat", so there is no sheen whatsoever.  I loosely mask off the car sides; I say "loosely" because overspray isn't necessarily a bad thing.

IMG_0300

IMG_0301

IMG_0302

IMG_0304

IMG_0305

IMG_0306

STEP 2: Testor's Dullcote: Entire car.

This is a critical step, as its the dull coat that provides the "tooth" for the pastels to stick.  I've tried others, including acrylics, but they provide a too smooth a surface.

IMG_0310

IMG_0311 


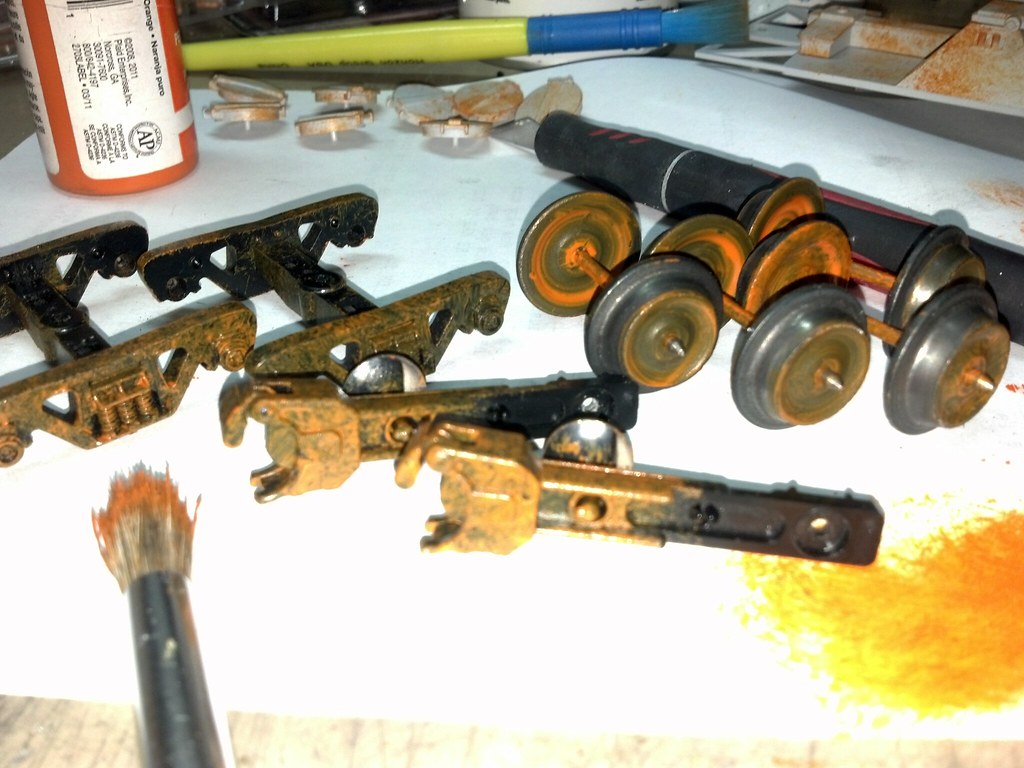
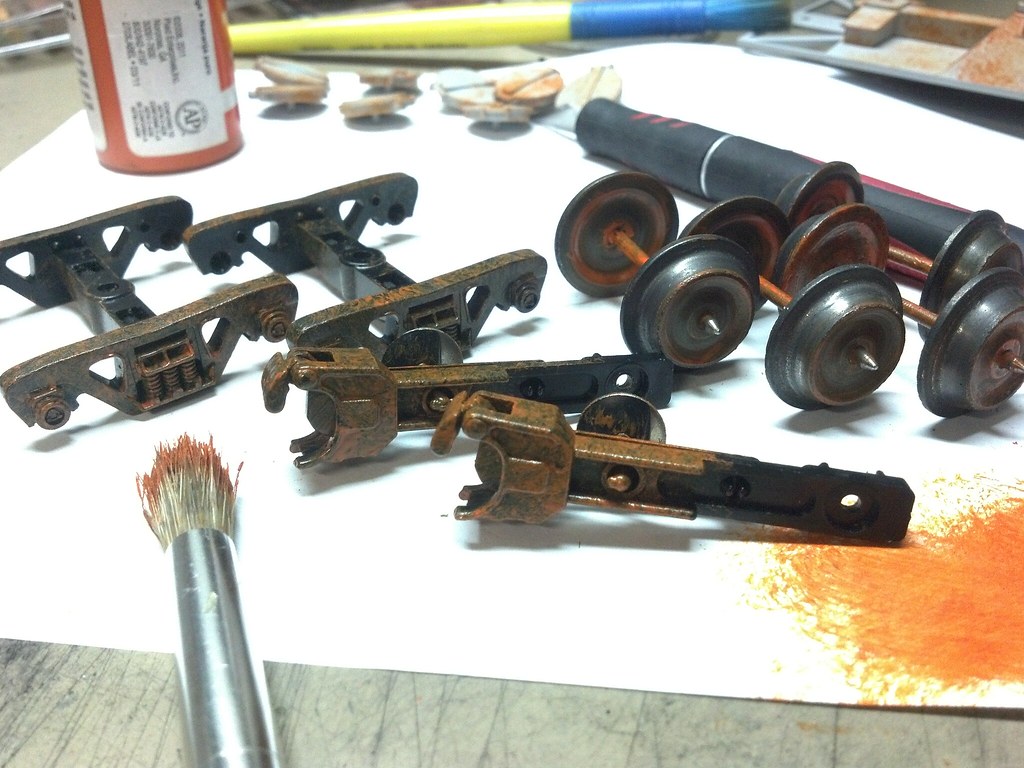
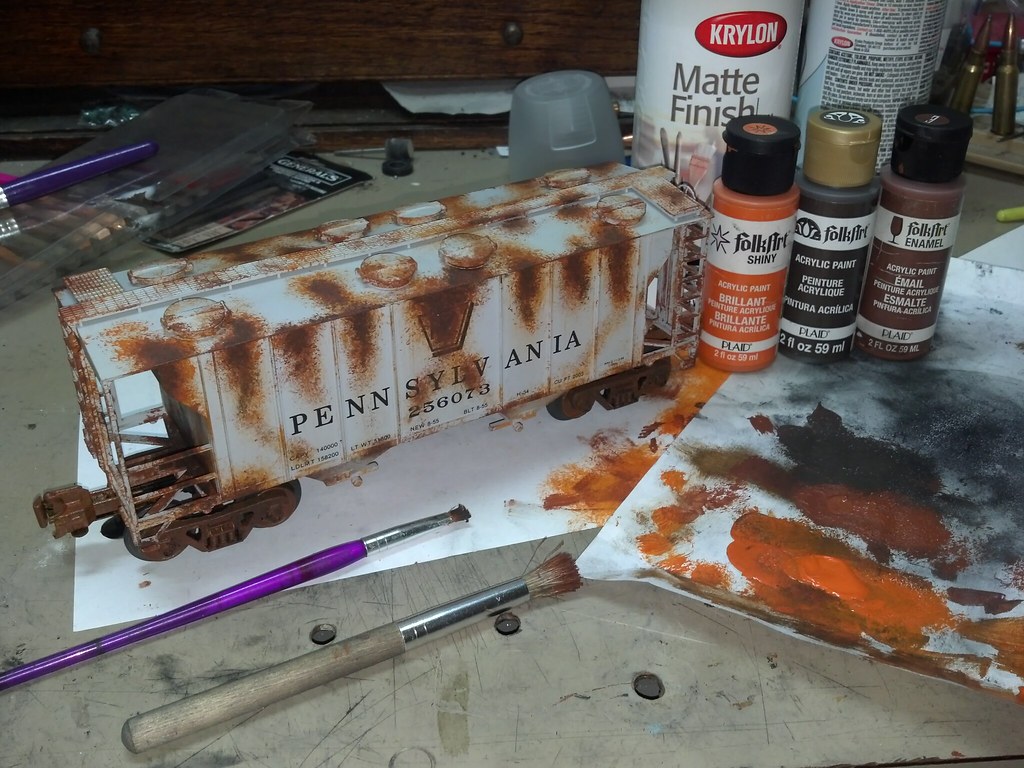
STEP 3: Layout your tools: Brushes, makeup sponges, paints, pastels and small dish of water.

Here we have multiple size brushes for getting the pastels in the tight corners and details, the bottles of paints for dry brushing: PRR Tuscan Red (old rust), Oily Black and Chevy Engine Red (fresh rust), the PanPastels and the most importantly, makeup sponge for covering large areas.

IMG_0312


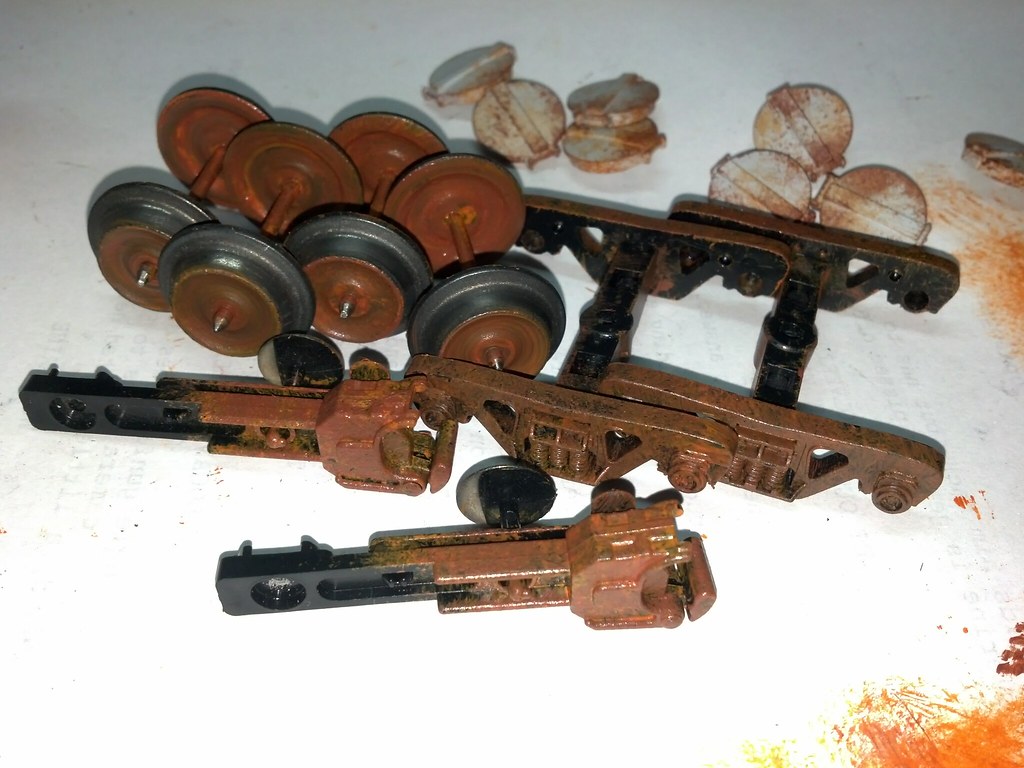
STEP 4: Tuscan Red & Oily Black: Brush paint the wheel, dry brushing and in multiple layers.

Don't forget the couplers...

IMG_0314

IMG_0315

IMG_0316


STEP 5: Body-color pastel: Off white to tone down the lettering.

The first part of putting actual color on the car is easy, and one of my favorite step... using the pastel closest to the body color and cover the sides to fade the lettering.

 IMG_0318

 IMG_0319

 IMG_0320


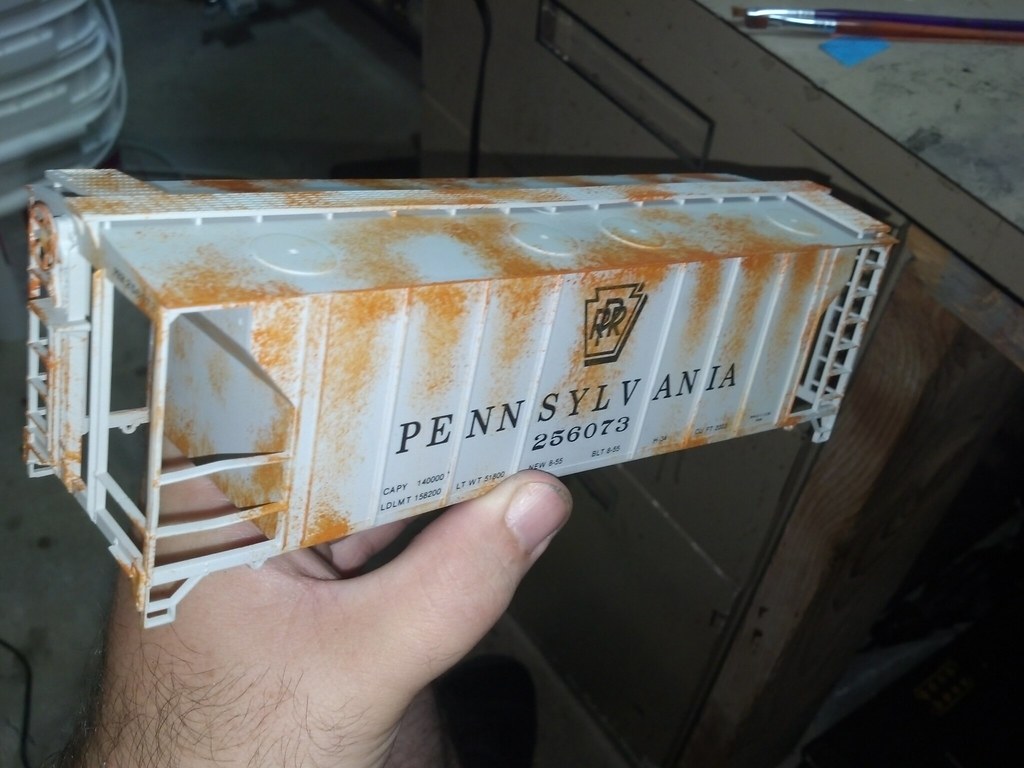
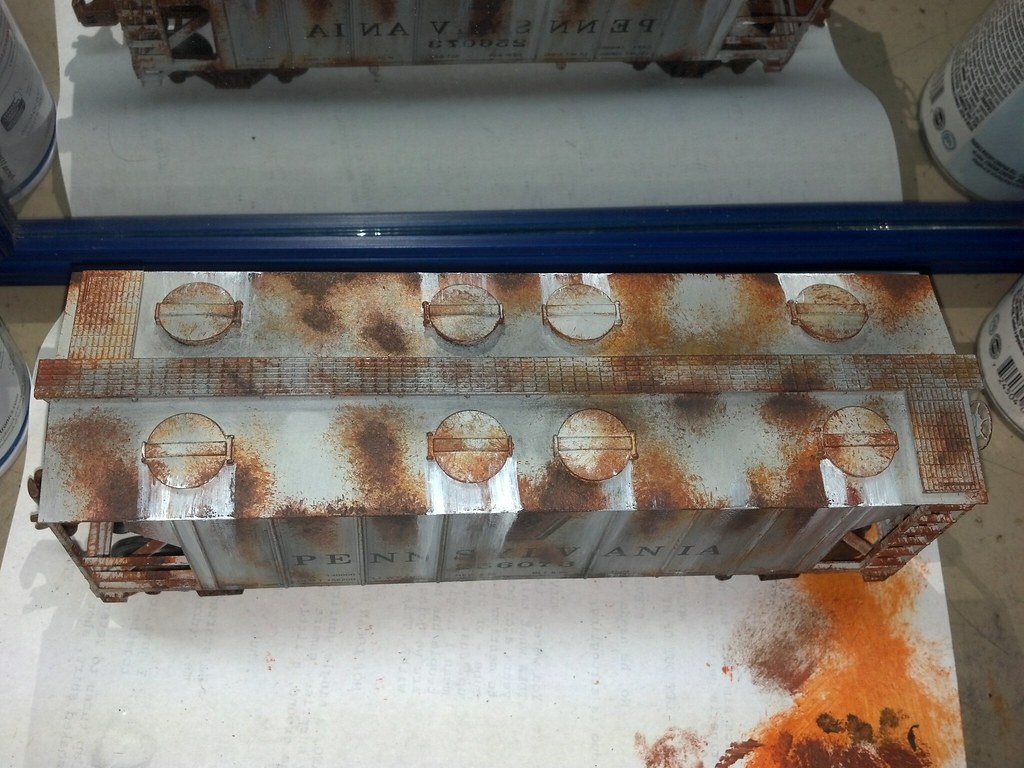
STEP 6: Soot the rook: dark colors on the roof and top of the sides on down.

In the era I model (1947-1957), there was plenty of Mikes, Mohawks and Niagara-class power roaming the Water Level Route, so soot on the roof is a must!  And, with rain, it washes down the sides.  Use a pencil to highlight each individual board (Left side with pencil, right without)

IMG_0323

IMG_0325


STEP 7: Dust, dirt, mug & grime: grays and browns from the bottom up.

I use lots of layers of lighter colored grays, off-whites, and light browns to add dust and mud that kicks up from the wheels, and the sand dust from the engine.  Pencil marks up close... Brush off excess with makeup sponge.

IMG_0327

IMG_0330


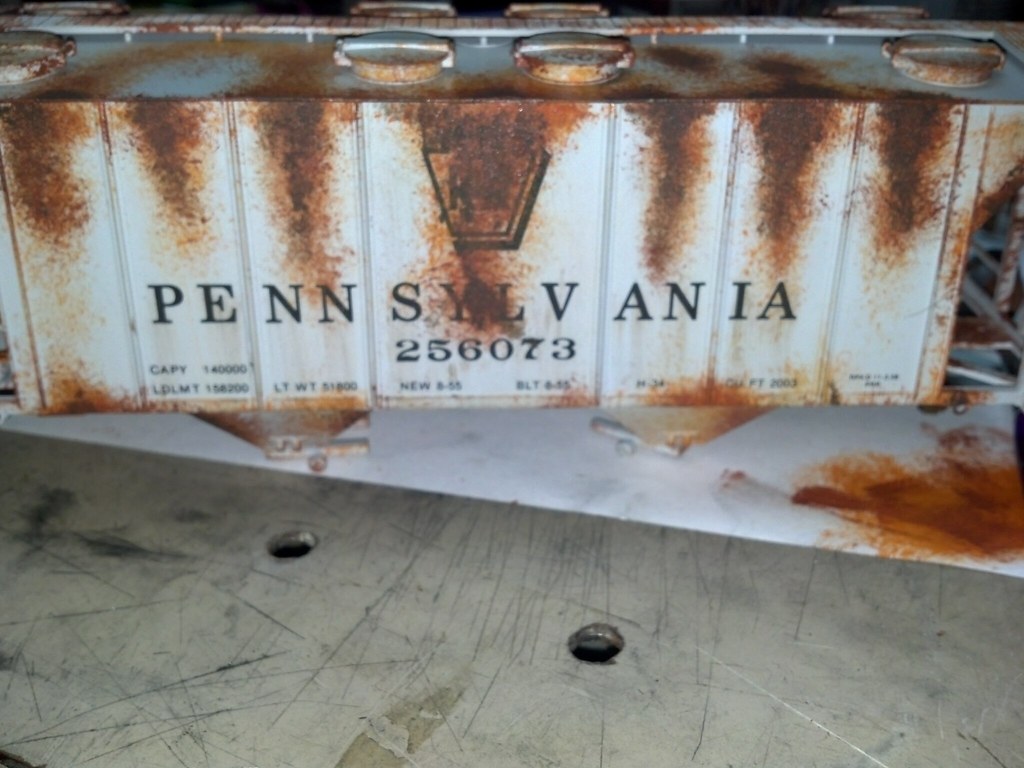
STEP 8: Car ends: Soot down from the top and mud up from the bottom.

One of my favorite weathering details is the mud and dirt spray up from the wheels, adding vertical streaks of light-colored grime the same width as the wheels.  Pencil the vertical boards, as well.


IMG_0322

IMG_0321


STEP 9: Trucks!  Layers of grease, grime, dust, mud, dirt, grease, mud, dirt and yuck!

Trucks are my forte! just pile on layers of grease and grime, I love the green and brown and black pastels for this... then use the khaki to add dust along the bottom.  Really get in there, inside the arches, with some rusty browns and then dry brush the springs with the Chevy Engine Red, and while wet, brush in some dry rust pastel. 

IMG_0326

IMG_0329

IMG_0333 


STEP 10: Rust! Do the same on the couplers!

Adding layers of dry brushed paint / wet pastel / dry pastels really builds up the layers of rust, especially on the couplers.  It look almost three-dimensional.  So cool.
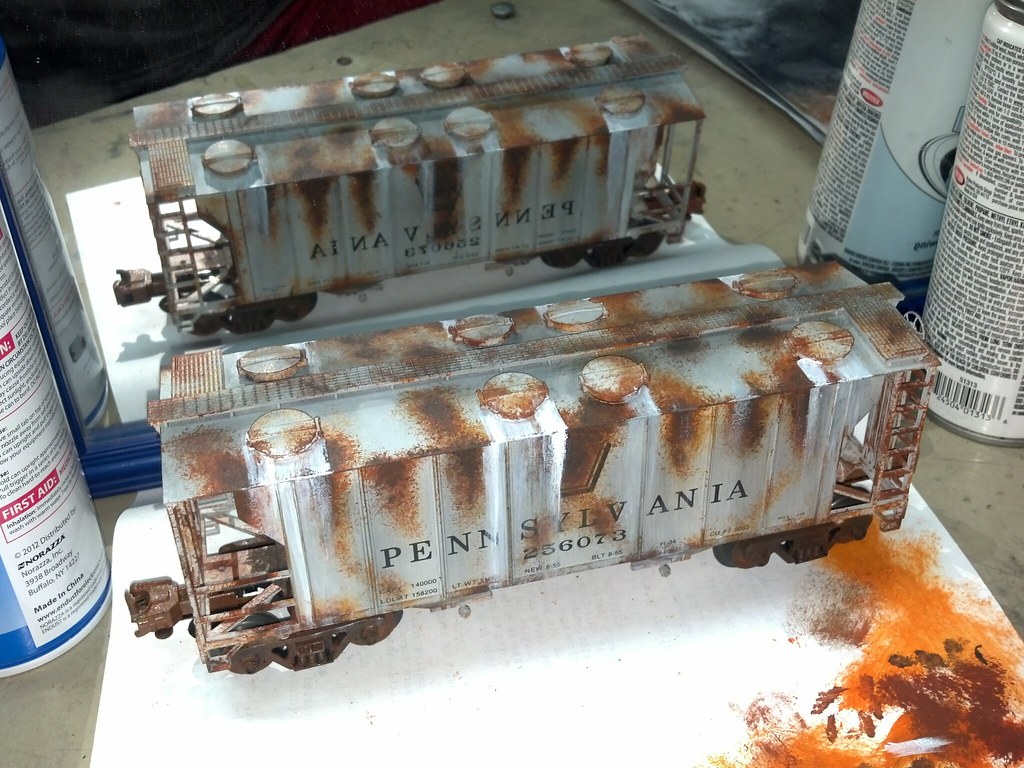
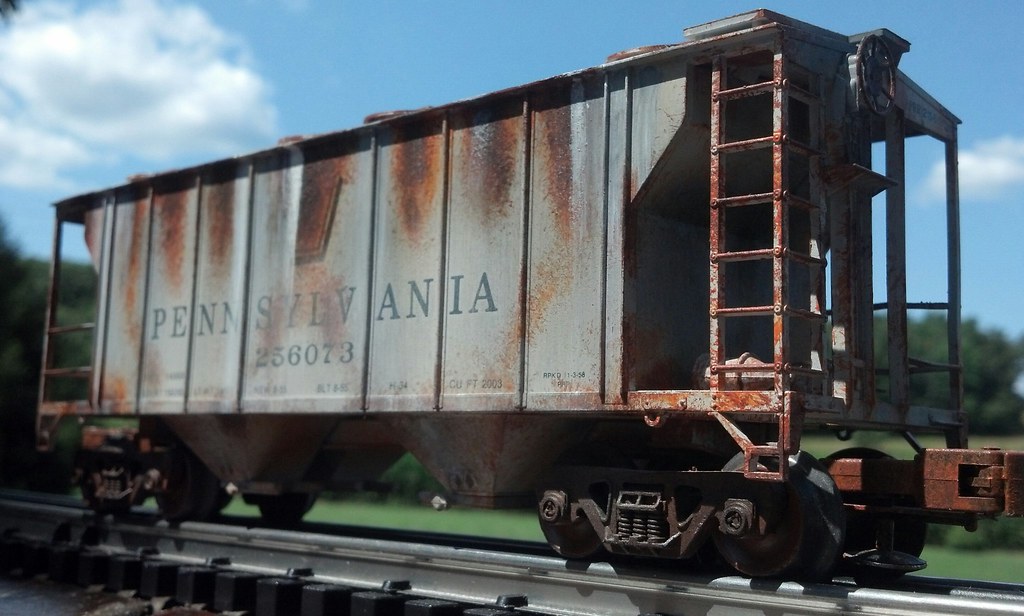
 IMG_0336


STEP 11: Enjoy!

Put it on the layout, take it outside, get up close with "macro" or "super macro" on the camera and get up into that dirt and grime!
IMG_0332


IMG_0334


IMG_0338

IMG_0339


I hope you enjoyed this!  I'm going to try and get some outside pictures a little later on.


Thanks!

- Mario


Attachments

Last edited by CentralFan1976
Original Post

Replies sorted oldest to newest

MArio

I see you are using the Pan Pastels. I bought some from Scenic Express a year ago and they really work nice on rolling stock and buildings


I like your step by step instructions. Anyone looking to dive into the deep end of the hobby this is a good way to start.  Suggestion pick up few old beat up freight cars even so HO cars to practice with before you start on your good stuff

Steve

Originally Posted by L.I.TRAIN:

MArio

I see you are using the Pan Pastels. I bought some from Scenic Express a year ago and they really work nice on rolling stock and buildings


I like your step by step instructions. Anyone looking to dive into the deep end of the hobby this is a good way to start.  Suggestion pick up few old beat up freight cars even so HO cars to practice with before you start on your good stuff

Steve


Steve, They are indeed hard to beat!


These are the "Cheap-Os" .


Thanks,

- Mario

Mario,


When you brush on pastels are they permanent?  I looked at Pan Pastels on-line and it said they could be removed with an eraser.  Is it necessary to spray everything with a clear coat to seal it?  Is there a chance that the weathering will come off via handling the cars if you don't?  Just asking so I understand the media with which you are working.  Would sealing the finished model be necessary when using powders or chalks (I know you weren't using these but thought I would ask).


Thanks

Last edited by WJP

Brian, thanks for the vote of confidence, and if I could make money at it, I sure would go into an assembly line production schedule!


WJP, The powders are semi-permanent.  I didn't spray them with acrylic coating after ward, and even with rubbing they don't come off.  There's enough tooth in the Dullcote to keep the pigment locked in place, and only a wet / oily finger print could smudge it.  They are robust enough to handle several times, and moving them in and out, I try not to touch the sides, but they are stable enough to transport.


Here's some outside shots...


IMG_0340

IMG_0341

IMG_0342

IMG_0343

IMG_0344


Thanks, everyone!


- Mario

Attachments

Images (5)
  • IMG_0340
  • IMG_0341
  • IMG_0342
  • IMG_0343
  • IMG_0344
Last edited by CentralFan1976
Originally Posted by Jdevleerjr:

 I will use this post as a guide.  

I would also suggest other sources on this forum; specifically TrainRoomGary and Wowak, and SIRT (holy cow!)...


Other sources would be Kalmbach's Modeling the 50s, How to Model Railroads of the 1950s, 7-Minute Weathering and lots and lots of practice.  I'm no where as good as Wowak or SIRT, but I'm getting there.


I hoping that EVERYONE else that weathers their trains, either just dullcote or "ruin the paint" posts a step-by-step process... It'll be the go-to site for the web!


Thanks,

- Mario

I start with a coat of matte clear spray.

The first step in the rust is the orange craft acrylic.  It's a dry-stipple brush technique.  


The second step is Burnt Sienna craft acrylic.  It's a little more wet, and it doesn't completely cover the orange.  You want it darker towards the center of the rust spot, or the edge as rust seems to build more on corners.  You want the stipple technique to start building up texture. 


Third step is burnt umbre craft acrylic.  Again it's a little wetter to build texture, but it's only in the center of the rusty spots.  If it gets too dark you can go back and add more burnt sienna on top to get the look you want.


For the trucks, couplers and wheels it's the same order, but you can lay the orange first coat on a little thicker.  

There's the burnt sienna added.  Don't lay it on too thick in the working surfaces of the coupler (although in my experience the acrylic paint will just flake off before it fouls the operation of the coupler.  Obviously you don't want to paint the flanges of the wheels, either.  (A lot of people are squeamish about paint on wheelsets but it's never caused me any problems.)

And there's the burnt umbre.


These are 2R trucks/wheels but you can do the same with 3R trucks/wheels.


Adding texture:


1. Spray paint the entire truck assembly (I leave the wheels in) with flat black or brown depending on the type of truck, friction bearing or roller bearing. I do black for friction and brown for modern roller bearing. My pet peeve on trucks is silver axles... because they stick out like a sore thumb when you watch a cut of cars roll by.


2. Then stipple on some artist oil to the side frames and wheel faces. I normally use a raw umber to somewhat match the flat Camo earth brown. Because this is an oil, it takes a while to dry, and needs to be completely dry before the next step. I normally let them set 24 hours before touching them.


3. Highlight the texture from the stippled oil paint with powder. Your choice here. Dust the entire trucks with the color you choose. I normally use a light grey and I really makes the texture pop. Almost like dry brushing with paint.


4. I go back with different powders for specific details like rust, mud, or more dust only in certain areas of the side frames. Usually some rust (light or dark) on the wheel faces, and don't forget the back of the wheel.


5. Flat finish.... I clear coat all my weathering with an airbrush. 50/50 Dull-Cote and Laquer thinner. Just my choice, been doing it for years.


6. Clean wheel threads.....Dremel and a wire wheel, swab with paint stripper, or if you take some time at the home improvement store, you can find something to slip over the wheel tread to mask if off when you spray paint, but then you have to take the trucks apart....your choice, and some people just leave the paint on the tread, and let it wear off. Then it's all over the track, but most clean their track regularly anyway.


truck

Truck-1

Truck-3

Truckdetail

Attachments

Images (4)
  • truck
  • Truck-1
  • Truck-3
  • Truckdetail
Originally Posted by WJP:

Mario,


When you brush on pastels are they permanent?  I looked at Pan Pastels on-line and it said they could be removed with an eraser.  Is it necessary to spray everything with a clear coat to seal it?  Is there a chance that the weathering will come off via handling the cars if you don't?  Just asking so I understand the media with which you are working.  Would sealing the finished model be necessary when using powders or chalks (I know you weren't using these but thought I would ask).


Thanks

Great questions; always wondered about this.

Add Reply

Post

OGR Publishing, Inc., 1310 Eastside Centre Ct, Suite 6, Mountain Home, AR 72653
800-980-OGRR (6477)
www.ogaugerr.com

×
×
×
×
Link copied to your clipboard.
×
×